In this article, I introduce the basic operations of a highly-functional 3D modelling software, Fusion360, and how to upload a 3D model from Fusion360 to STYLY.
About Fusion360
Fusion360 is the 3D CAD software povided by Autodesk, Inc.
In addition to 3D CAD, it contains the functions for 2D CAD, 3D CAM, rendering, analysis and assebly.
It’s convenient for you to share data with multiple people as it can be stored in the Cloud.
※Fusion360 is free for students, non-commercial use and startups with less than $100,000 in yearly revenue.
How to install Fusion360
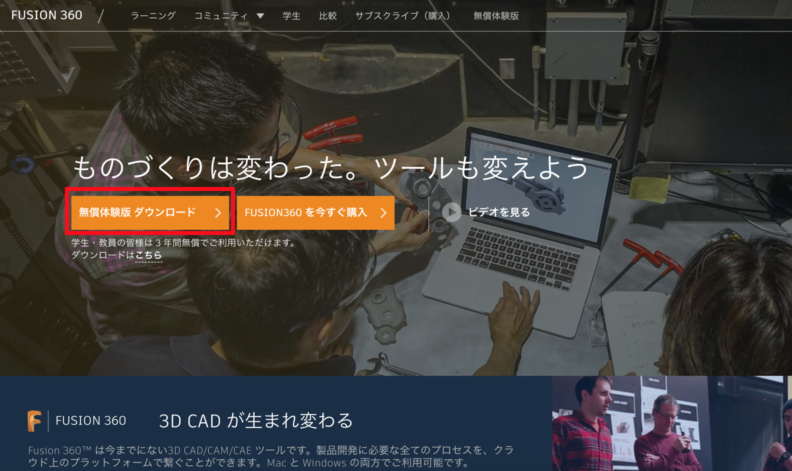
Click “DOWNLOAD FREE TRIAL” on the top page of the offcial website(https://www.autodesk.co.jp/products/fusion-360/overview).
The top page of the official website
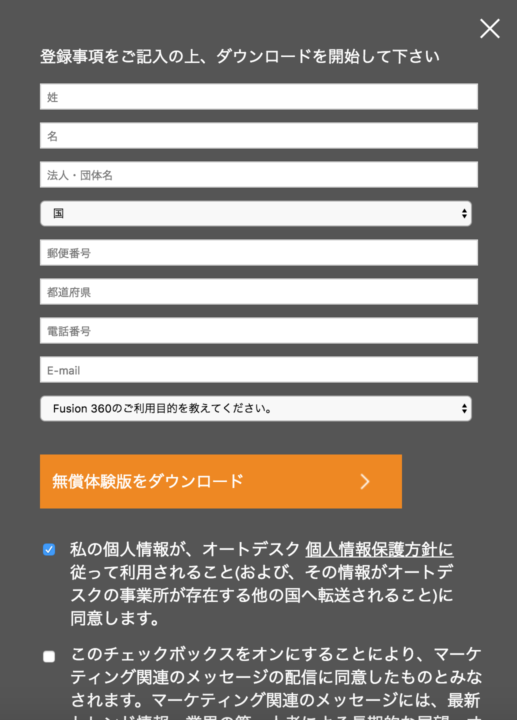
Fill the form shown below and click “DOWNLOAD FREE TRIAL” to start downloading.
The input form
Double click the downloaded file to install.
The screen for set-up
If you have an Autodesk account, enter your e-mail address and password to sign in.
If you don’t, click “CREATE ACCOUNT” and enter your name, e-mail address and password to create your account.
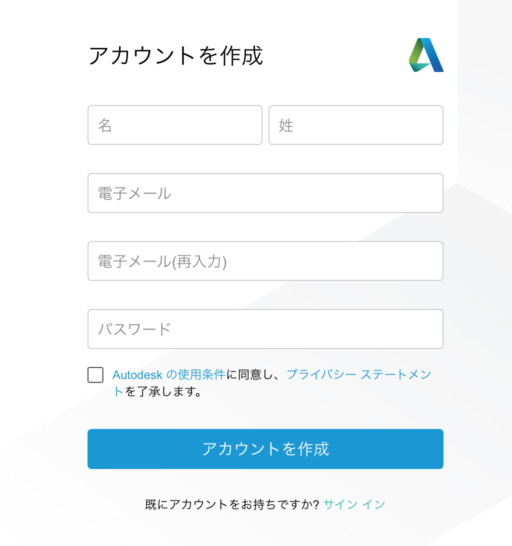
The form to create an account
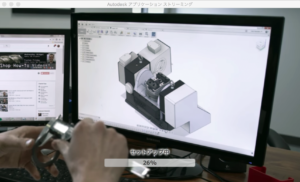
It completes the installation.
User Interface – screen layout and basic operations
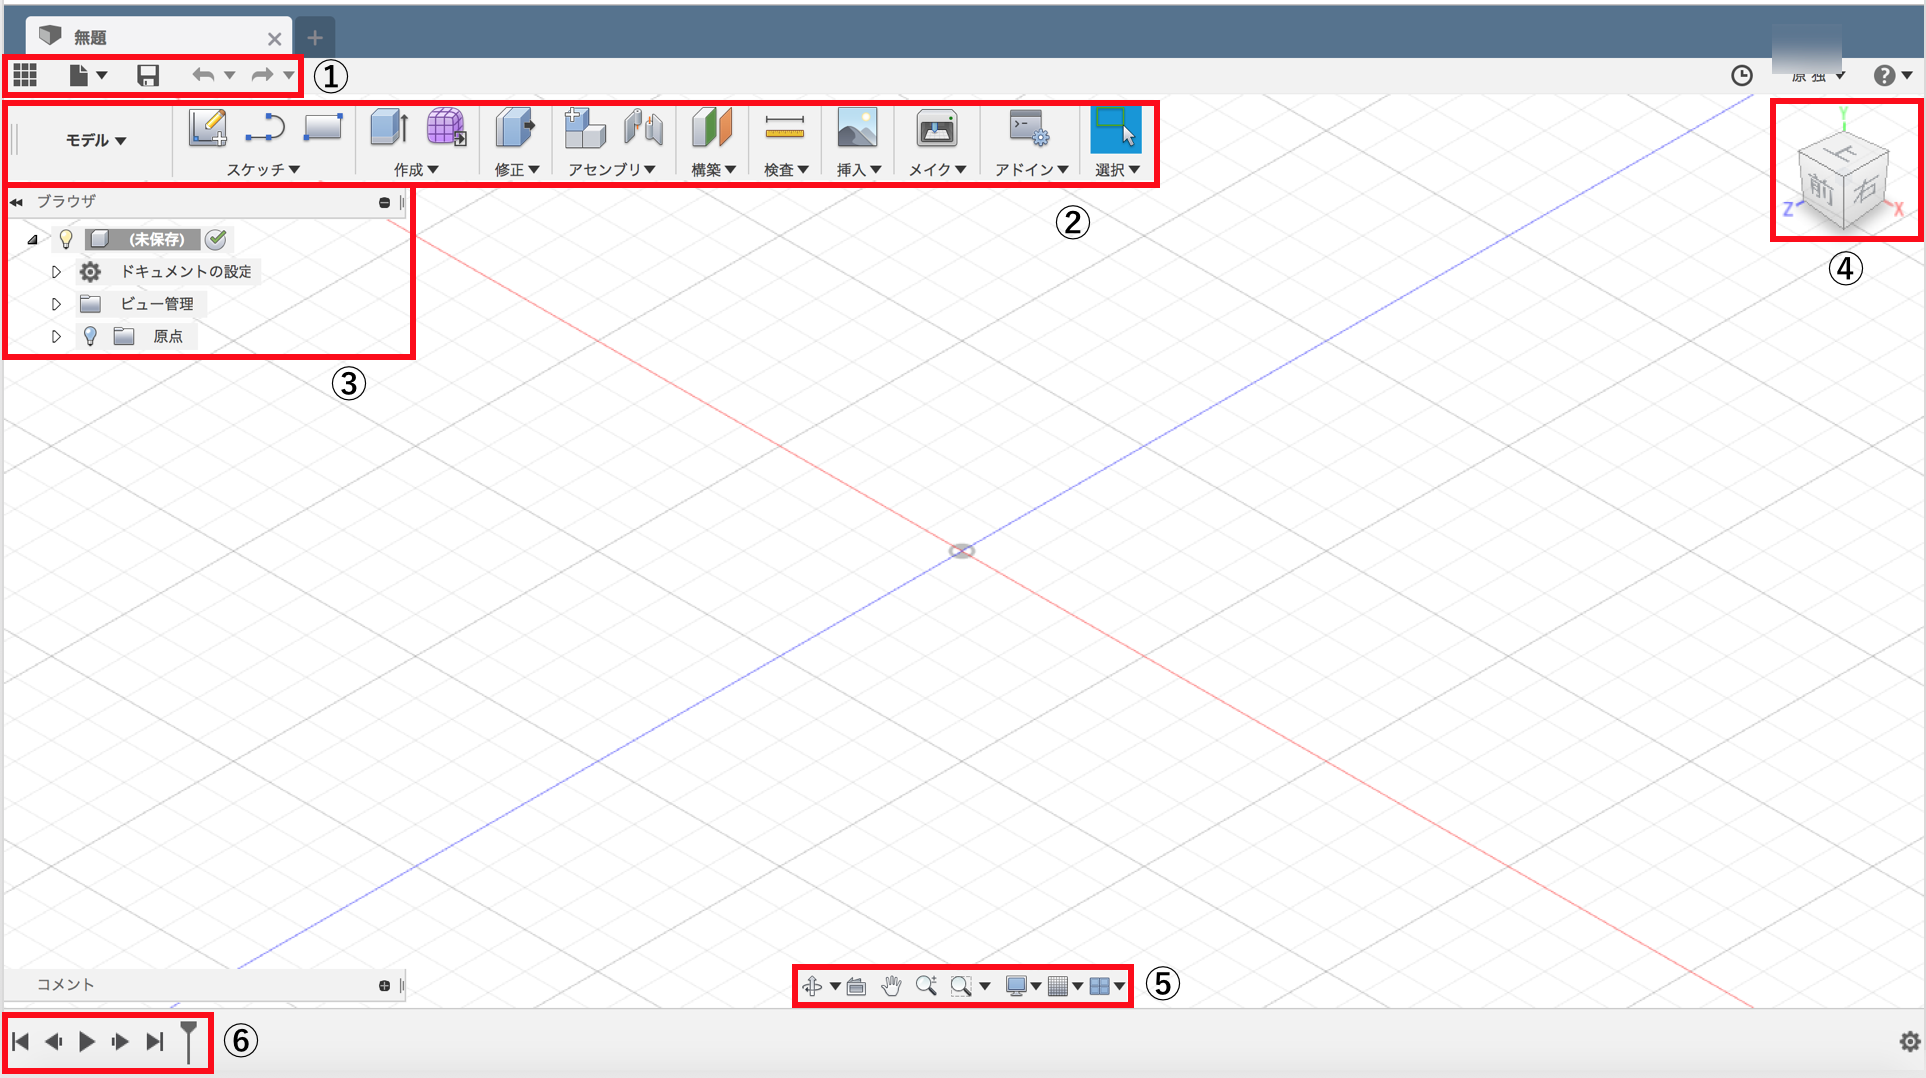
User interface
①Application bar
Use Application bar to create a new design, save, export, undo and etc.
②Toolbar
Toolbar contains main functions such as adding the existing objects and sketching.
③Browser
It displays the list of the objects currently used.
Click the bulb icon to switch visibility of object.
④ViewCube
Use the ViewCube to adjust the viewing direction of object.
⑤Navigation bar
The Navigation bar contains commands to pan, zoom, adjust display setting control and etc.
⑥Timeline
Use Timeline to check the history of modelling.
Create a project and components
As a practice, we make a 3d model of a glass-shape object as shown below.
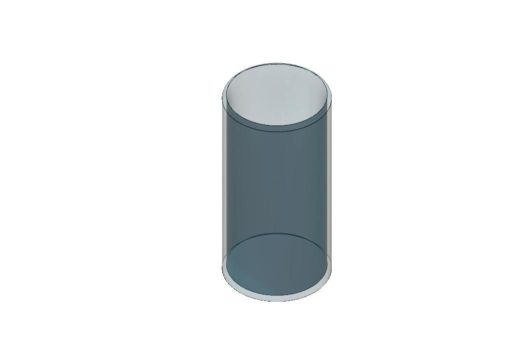
A sample object
Fisrtly, make a project to draw 3D model.
Click “FILE” > “New Design”.
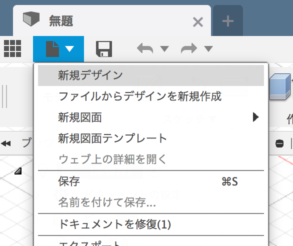
Create a new project – the screen shot #1
Click “Show Data Panel”.
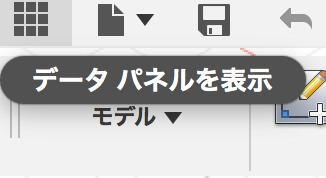
Create a new project – the screen shot #2
Once you clicked the “Save” button, you will be prompted to enter the file name and where to save it.
I named it “Glass Project” in this example.
Next, right-click “Glass Project v1” and select “New Component” .
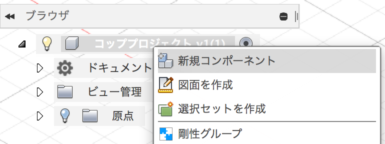
Create a new project – the screen shot #3
Click “Component1:1” you just created to rename.
You may need to click it once more to edit the name.
Rename the component “Glass”.
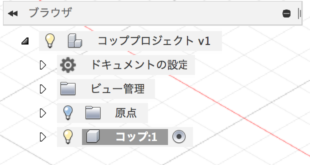
Rename the component.
Then, we make a cylinder to shape a glass.
Make a cylnder
With “Glass:1” selected, click the “Activate Component” button on the right.
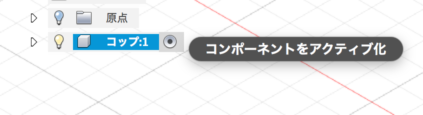
the “Active Component” button
Select “CREATE” > “Cylinder”.
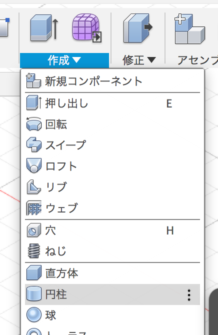
Create a Cylinder.
Select the bottom face of the cylinder.
With the “Select a plane or planer face” mode, click the face shown below.
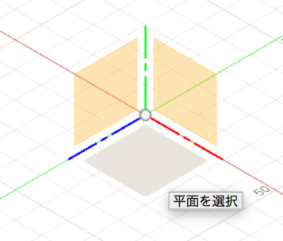
Select a plane.
With the “Place centre point” state, click the origin.
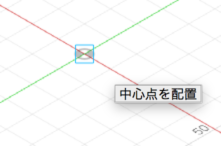
Select a centre point
Once you selected the centre, the cursor is changed into the state, “Specify diameter of cycle”. You may click anywhere as it doesn’t matter where it is.
Then, a window pops up to prompt you to set the size of the cylynder. Set the diameter to 50mm, and the height to 100mm.
Set “Operation” to “New Body” and then click OK.
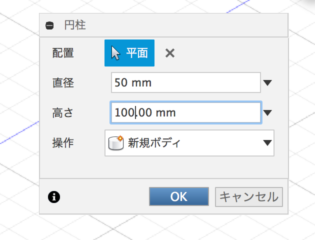
The window to set the parameters for Cylinder
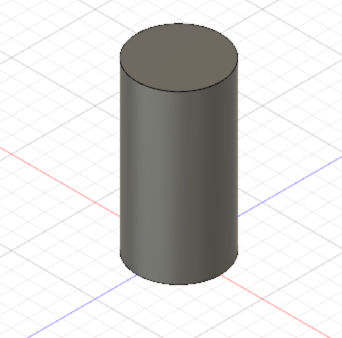
A cylinder
Now you created a cylinder.
Next, hollow out the cylnder to make a shape like a glass.
Select “Modify” > “Shell”.
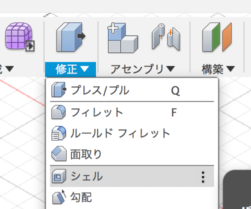
シェル追加画面
Click the top face as “Faces to remove”.
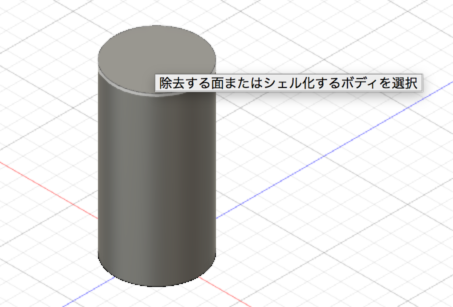
Select the face to remove.
A window pops up to set the parameter of the shell. Set “Inside Thickness” to 2mm as shown below.
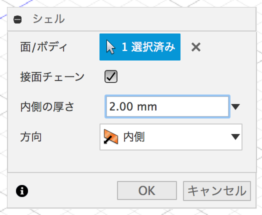
To set the parameter for the shell
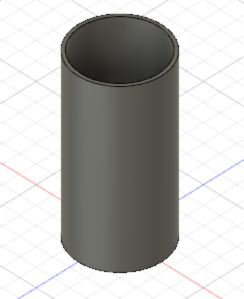
The cylinder – stage 2
Now it became more like a glass by hollowing out the cylinder.
Although the shape is almost complete, let’s round the edge to be more suitable to a drinking glass.
Select MODIFY > Fillet.
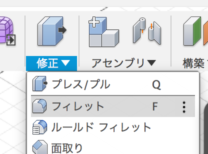
Add a fillet.
Next, select the lip-touching edges to fillet it.
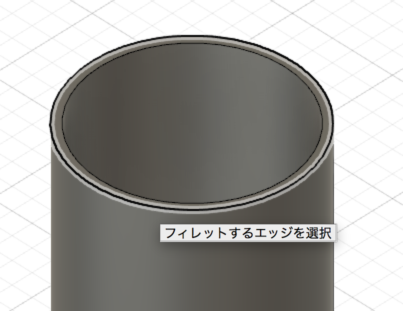
Select the edge
A window pops up to set the parameters for the fillet.
Set the radius to 2mm and leave the others default value.
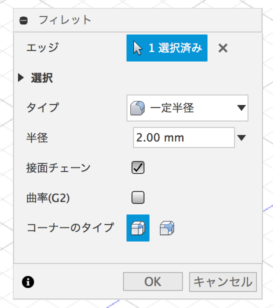
The window to set the parameter of the fillet
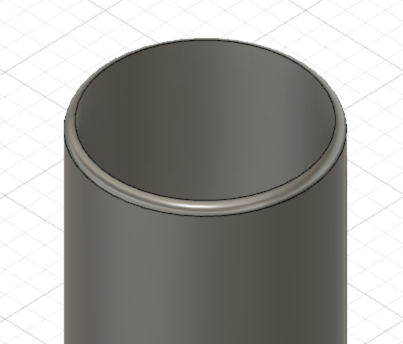
The cylinder – stage3
It has rounded the lip-touching edges.
Export 3D model
※Although you can edit the materials and apperance of the model in Fusion360, I omit it from this article. In case you want to do it, you also need to edit the texture in other software such as Blender, etc.
Export the created 3D model to the local disk.
You can export just by selecting File > Export. However, as there is no file type for STYLY yet, we add a setting to export OBJ file that is compatible with STYLY.
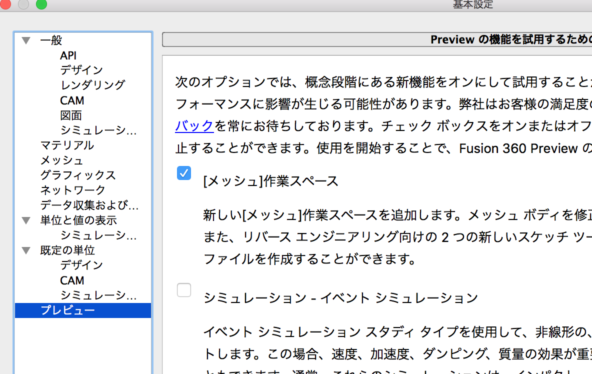
Click Preference > Preview and check the box for “Mesh Workspace”

The setting to export OBJ file #1
The setting to export OBJ file #2
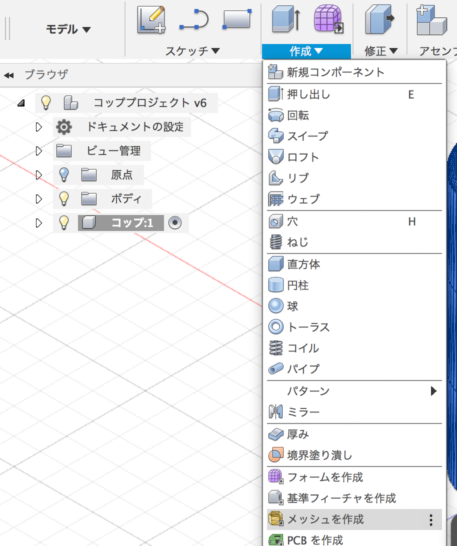
Select CREATE > “Create Mesh”.
The setting to export OBJ file #3
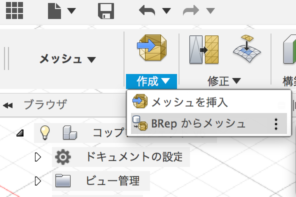
Now the Menu Bar is changed for mesh generation. Click CREATE > “Mesh from BRep”.
The setting to export OBJ file #4
Select ‘Cube” and click OK.
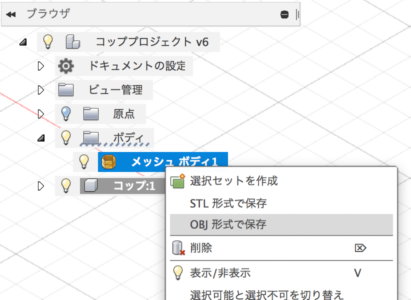
Right-click the mesh body in the Menubar on the left and select “SAVE as OBJ”.
The setting to export OBJ file #5
Now you saved the 3D model created as an obj file.
Upload to STYLY
Open a Scene in STYLY and select the saved obj file by Assets > 3D Model > Upload > Select.
Once it’s uploaded, check that the 3D model is in “My Models” and select it.
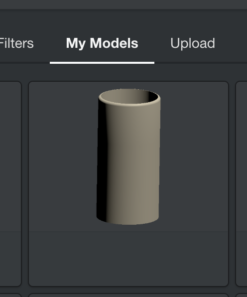
My Models
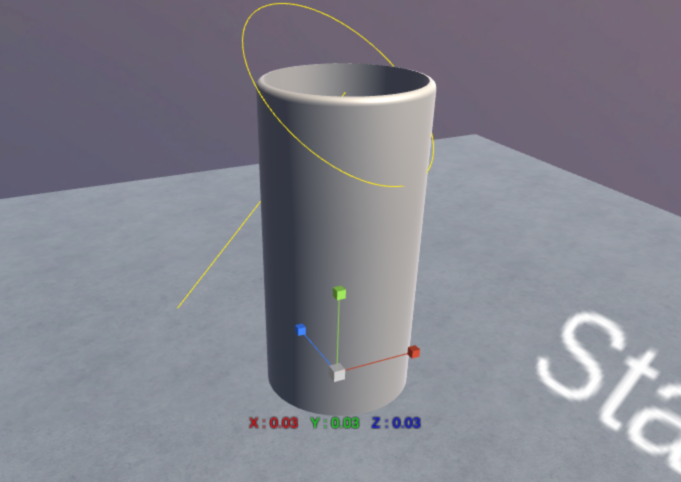
The complete image – a glass
Now you imported it to the Scene.
Congratulations! It completes an introduction to make a 3D model in Fusion360 and upload it to STYLY.
In this article, I introduced only a few functions in Fusion360 so please try other functions by all means.