With the introduction of the LiDAR feature to the iPhone 12Pro and iPadPro, 3D scanning has become more accessible than ever before.
There are a number of 3D scanning apps out there, and it’s hard to know which one to use.
In this article, I will introduce you to one of these apps, Polycam, and show you how to use it.
*Environment used in this article
Model used: iPhone 12 Pro
Version: iOS14.6
What is LiDAR?
LiDAR is an acronym for “Light Detection And Ranging”.
LiDAR is based on the time it takes for a laser beam to reflect and return to the object when it is photographed, and can be used to obtain information on the depth of the subject space and the 3D shape of the object.
Difference between 3D scanning and photogrammetry
Both methods can be used to create CG models, but is there a difference?
Here is a simple comparison between LiDAR and photogrammetry.
| 3D scanning (LiDAR) | Photogrammetry | |
| What you need | iPhone/iPad + app | Camera (normal one is OK) + PC + editing software |
| How to collect Date | Light source | Multiple photos |
| How to take photos | As if you were recording a slow movie | While paying attention to the overlap. |
Detailed comparisons have been covered in past article, so please refer to it for more information.
![[iPad Pro] Easily create 3D models with the 3D Scanner App (LiDAR Scanner)](https://styly.cc/wp-content/uploads/2020/09/EYECATCH-1-160x160.png)
Polycam, a 3D scanning app for iPhone/iPad
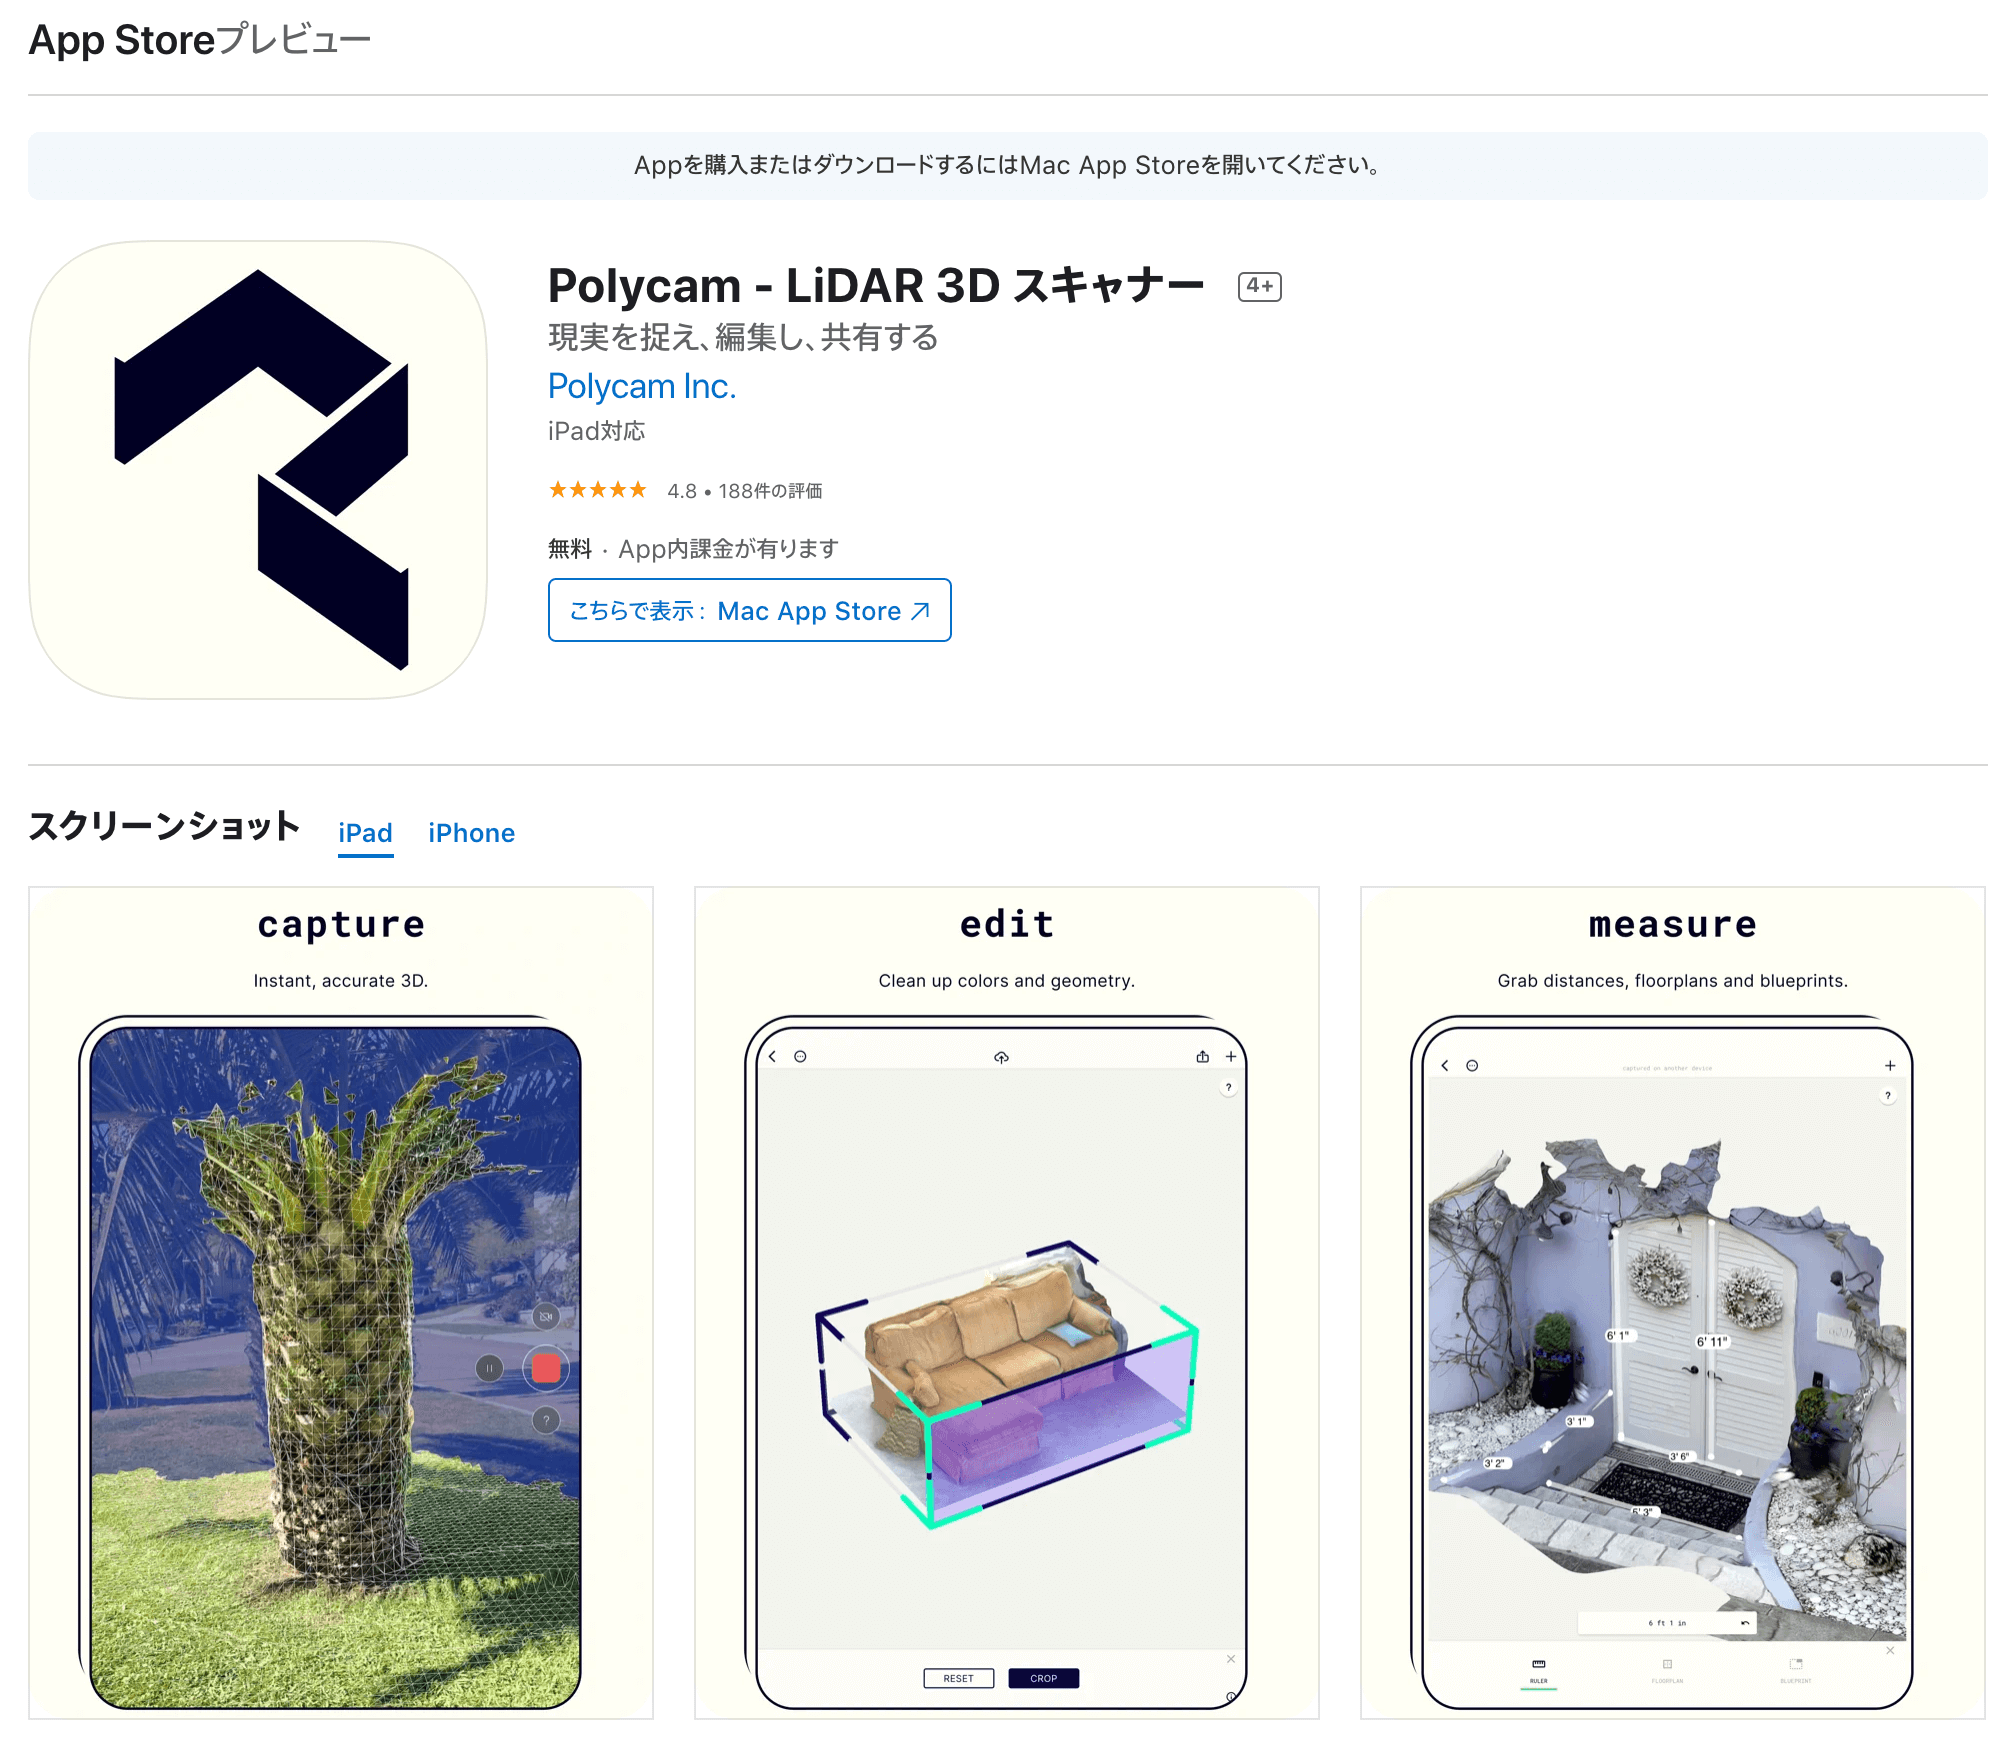
Polycam Preview
Polycam can be used on both iPhone and iPad, but please be aware of the following two points
- Only iPad Pro 12.9″ (4th generation), iPad Pro 11″ (2nd generation), iPhone 12 Pro and iPhone 12 Pro Max models with LiDAR sensor
- iOS14 or higher recommended
The app is basically free to download, but you can pay to increase the number of extensions you can save and improve usability.
| Polycam Pro Yearly | 4,400 yen/year |
| Polycam Pro Monthly | 880 yen/month |
| Polycam Pro | 14,000 yen / full purchase |
The following formats can be saved.
If you save in OBJ or GLTF format, you can also upload to STYLY or Unity.
| Mesh data | .obj, .glb, .usdz, .dae, .stl, upload directly to Sketchfab |
| Point cloud data | Export as .dxf, .ply, .las, .xyz, and .pts |
| Floor plan data | .dae |
Let’s try to use Polycam
Download it from the AppStore.

Search for Polycam
When you open the app after the download is complete, you will see this screen.
If you create a new account, you will be able to share your scanned models on the web and access them from other devices.
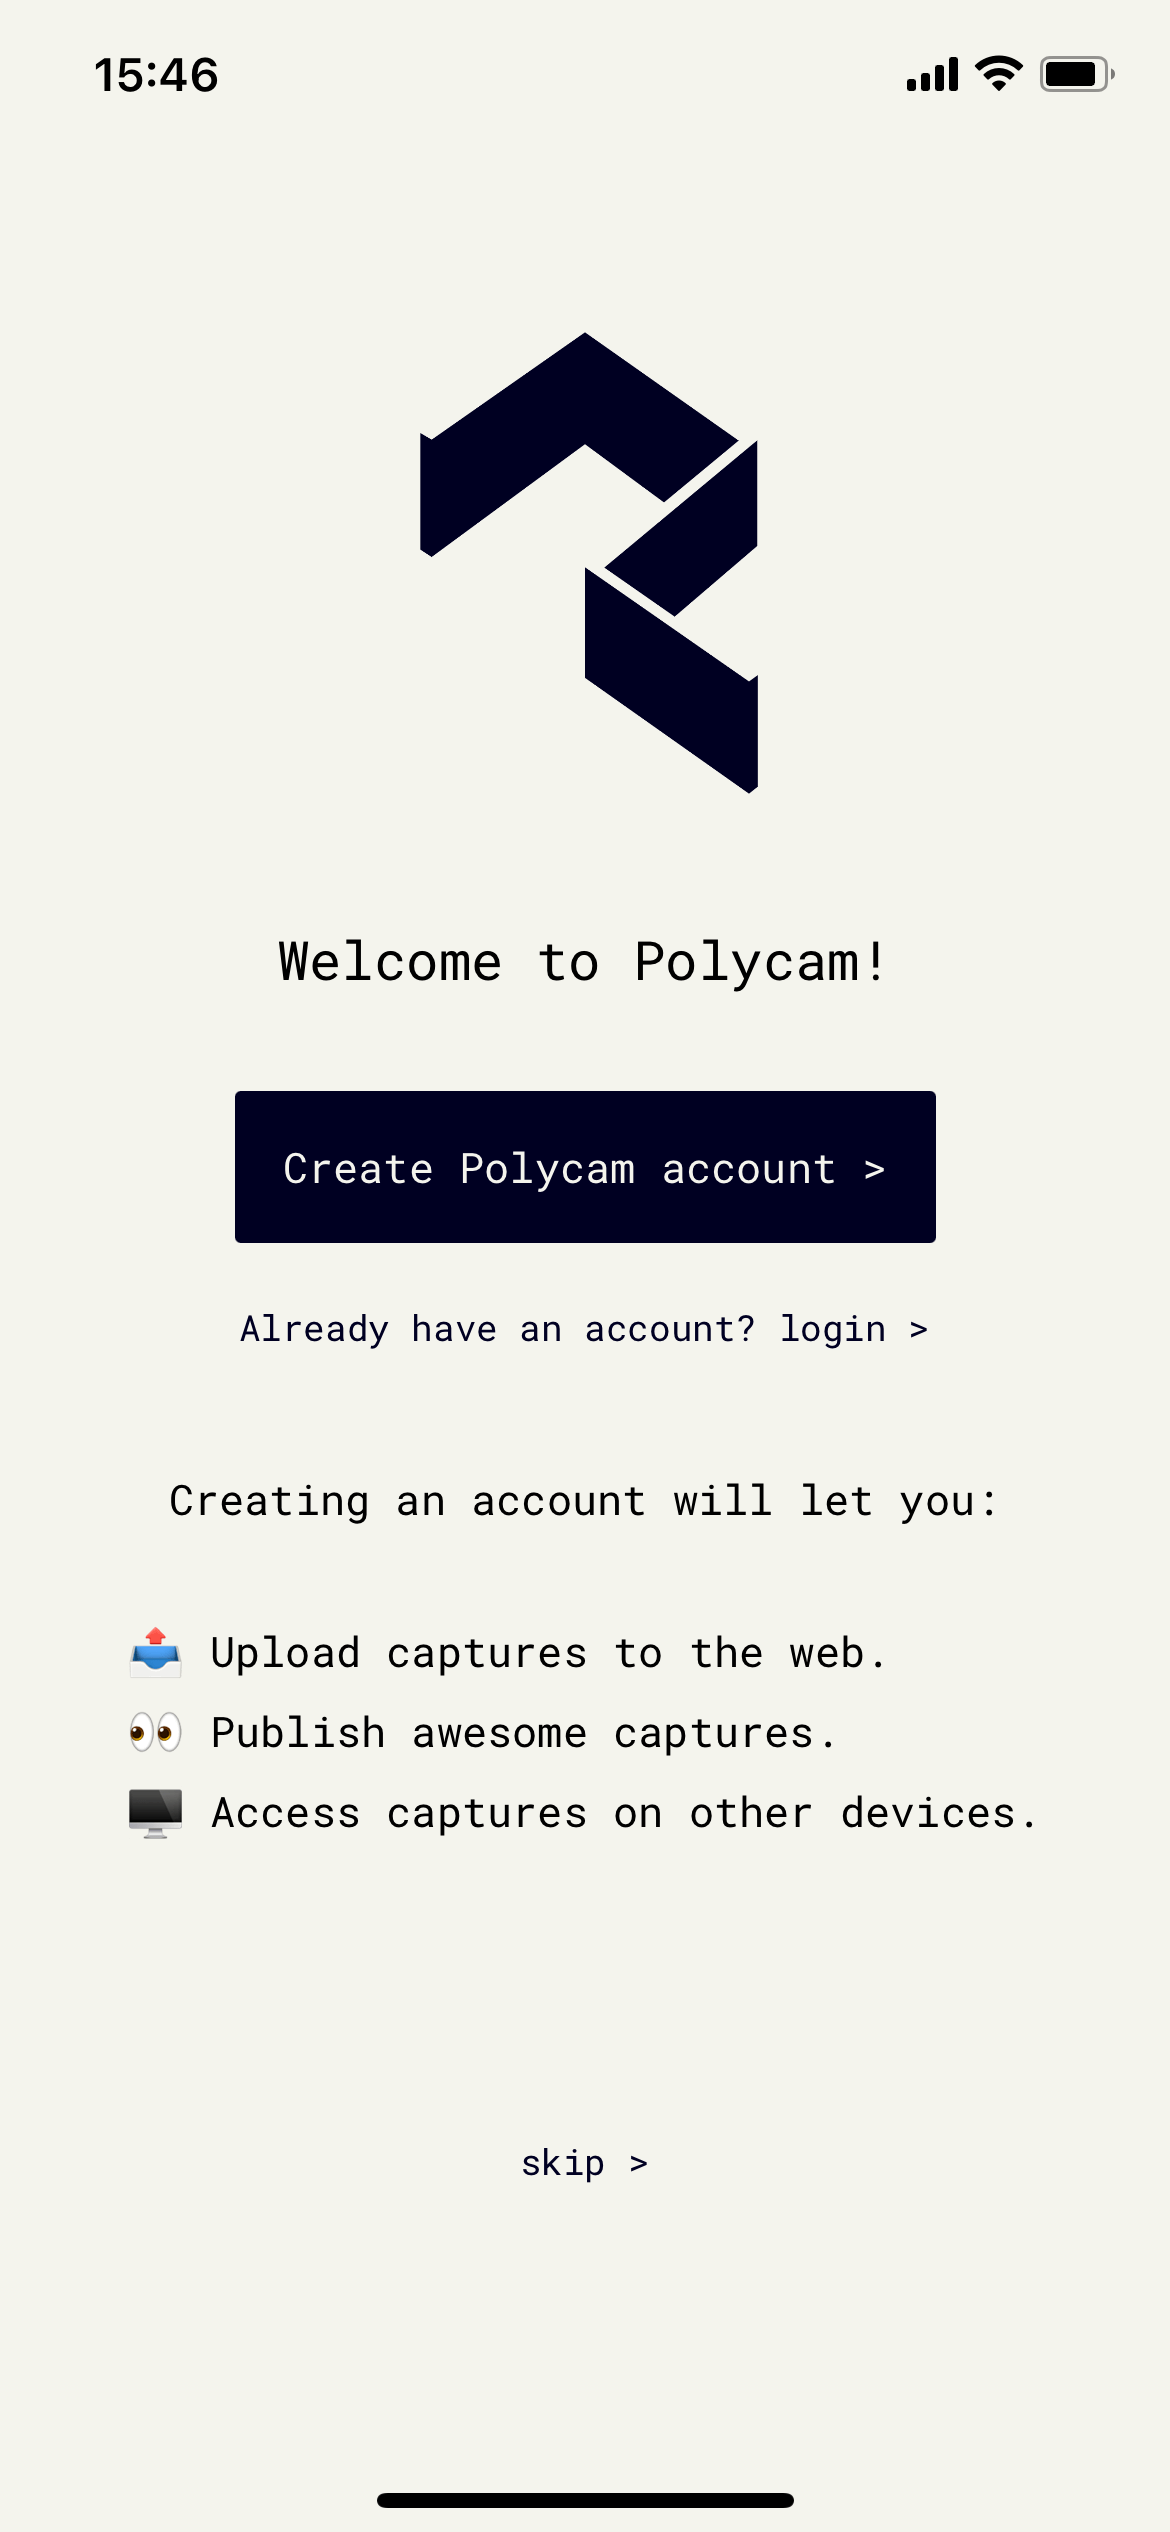
Welcome to Polycam!
captures
The list of models you have scanned will be displayed.
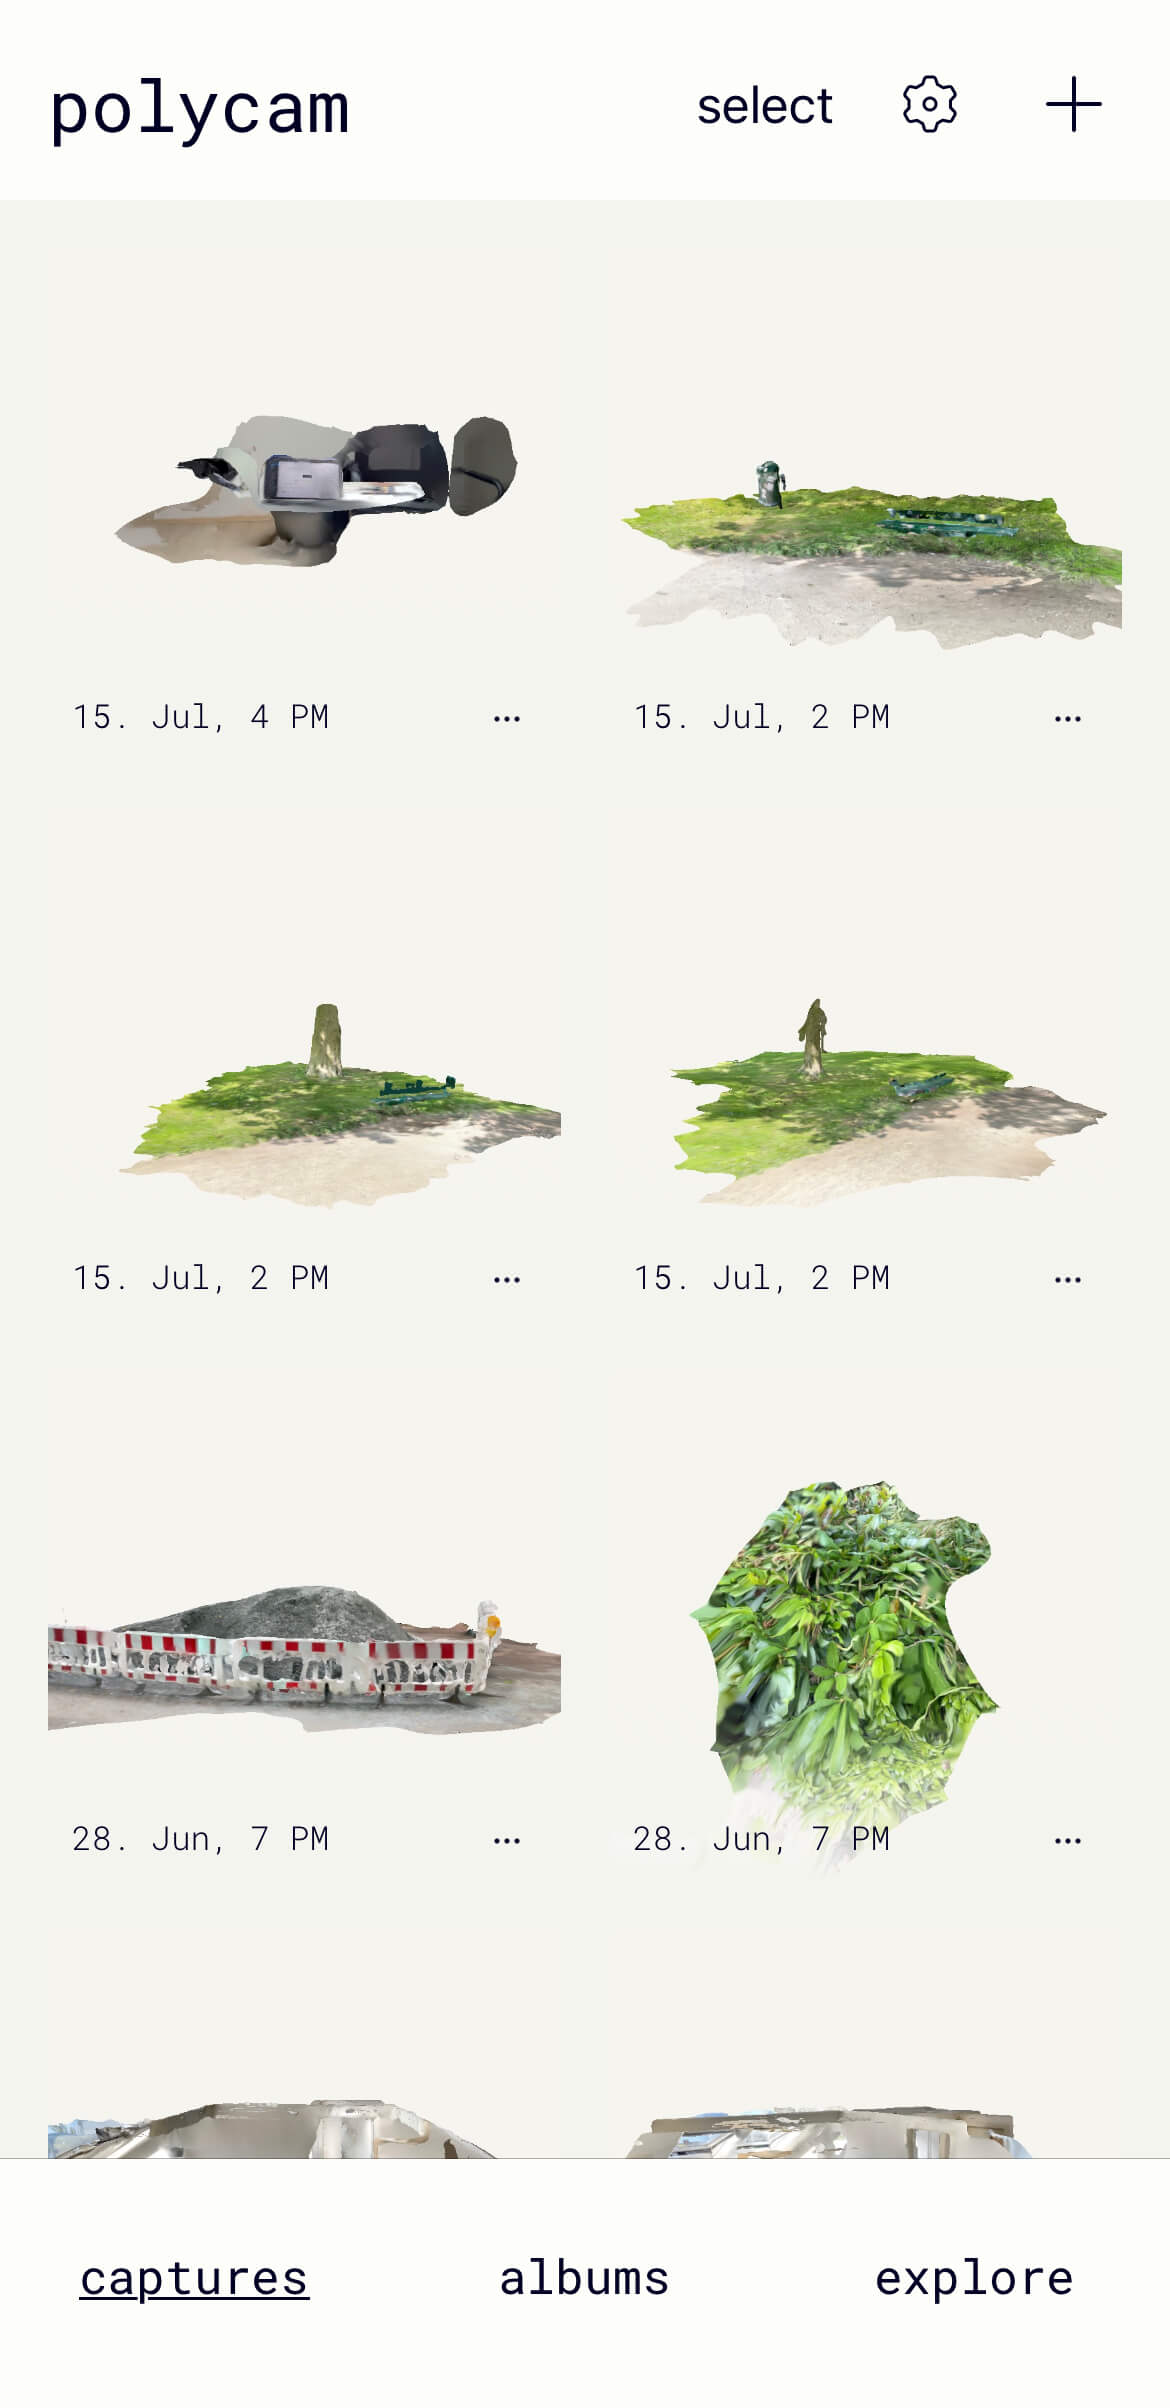
captures
albums
You can create an album from +create new album.
This is useful when you want to organize your scanned models.
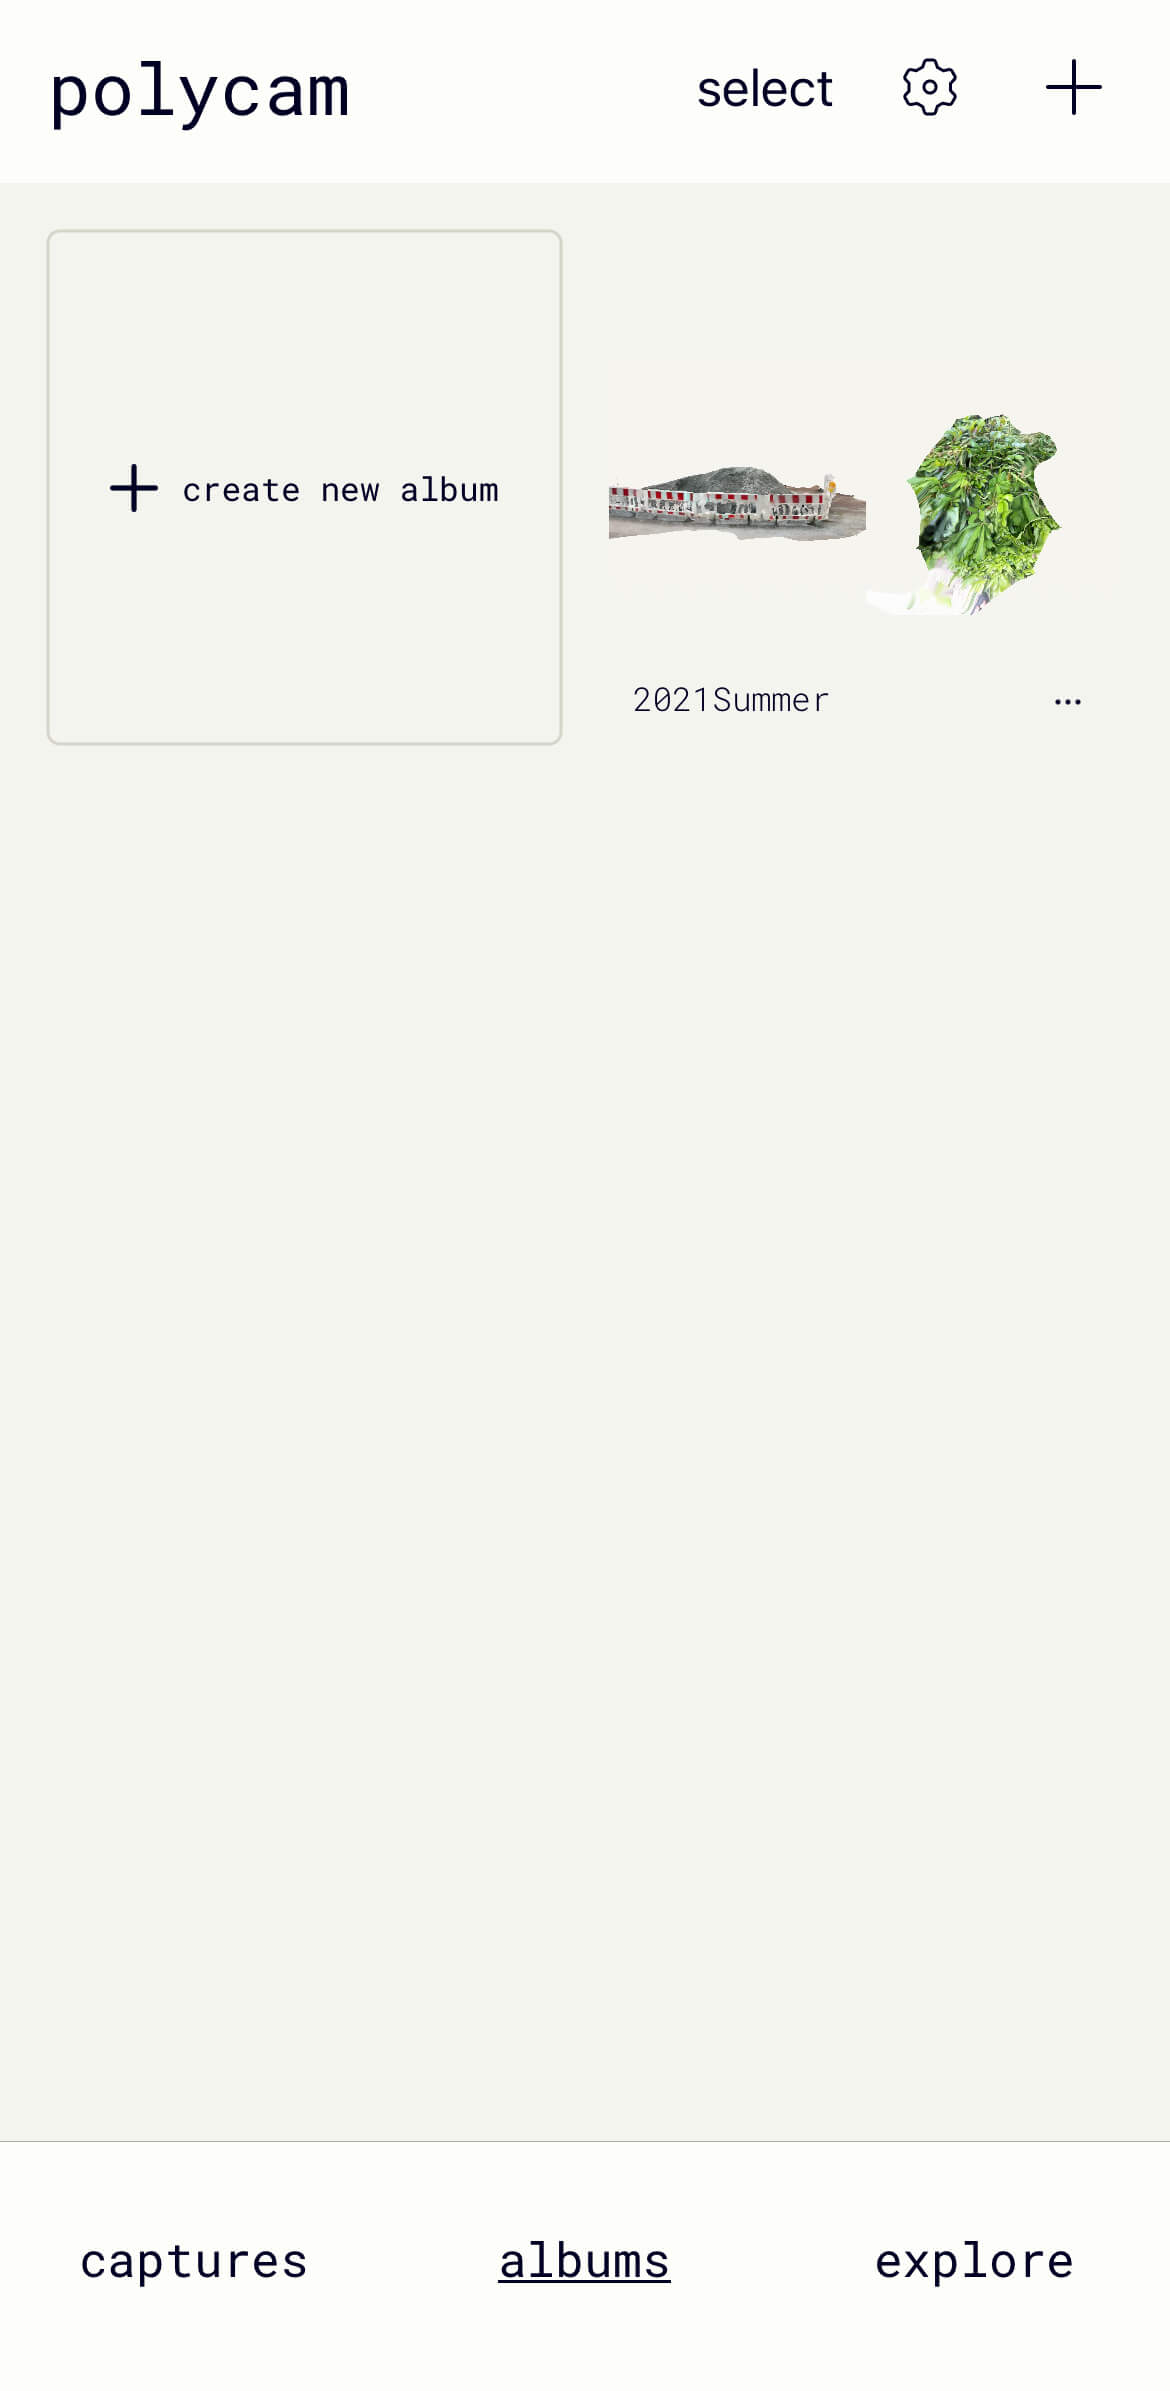
albums
When you create an album for the first time, a screen like this will be displayed.
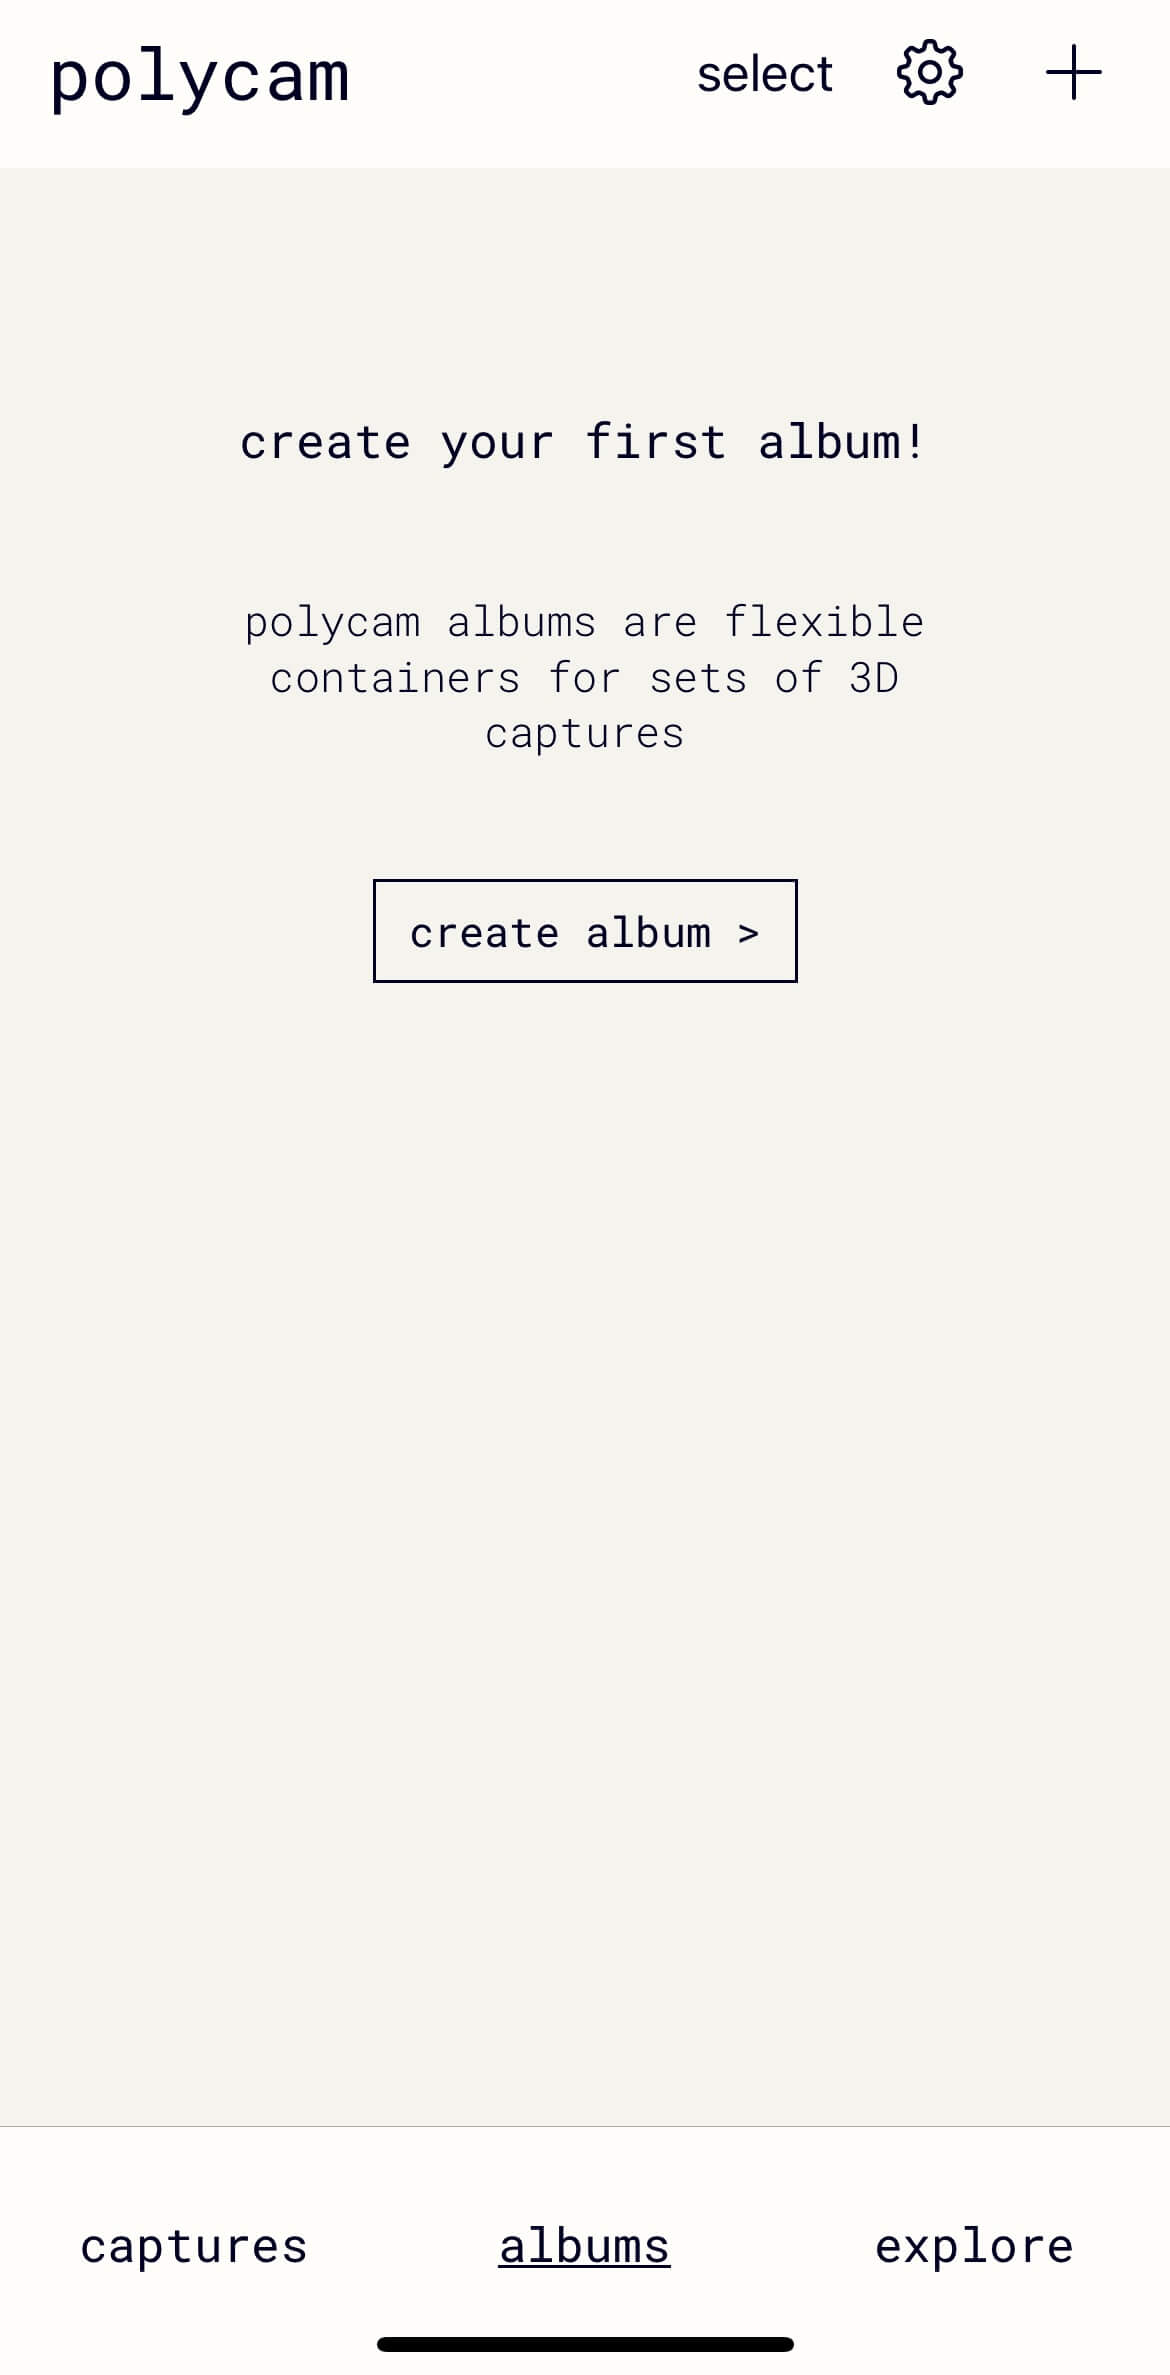
create your first album
Enter a name for the new album and a description of the album (optional), and then tap create.

create new album
explore
You can view the list of models shared by other users.
Click on the earth symbol in the upper left corner to see models shared near you on a map, and you may discover a new aspect of a familiar place.

explore
3D scanning with Polycam
Now let’s try a 3D scan.

Tap the + symbol
Tap the + symbol in the upper right corner of the app screen to launch the camera.
When you’re ready to take a picture, tap the round button.
Then, slowly move the camera while pointing it at the object you want to scan.
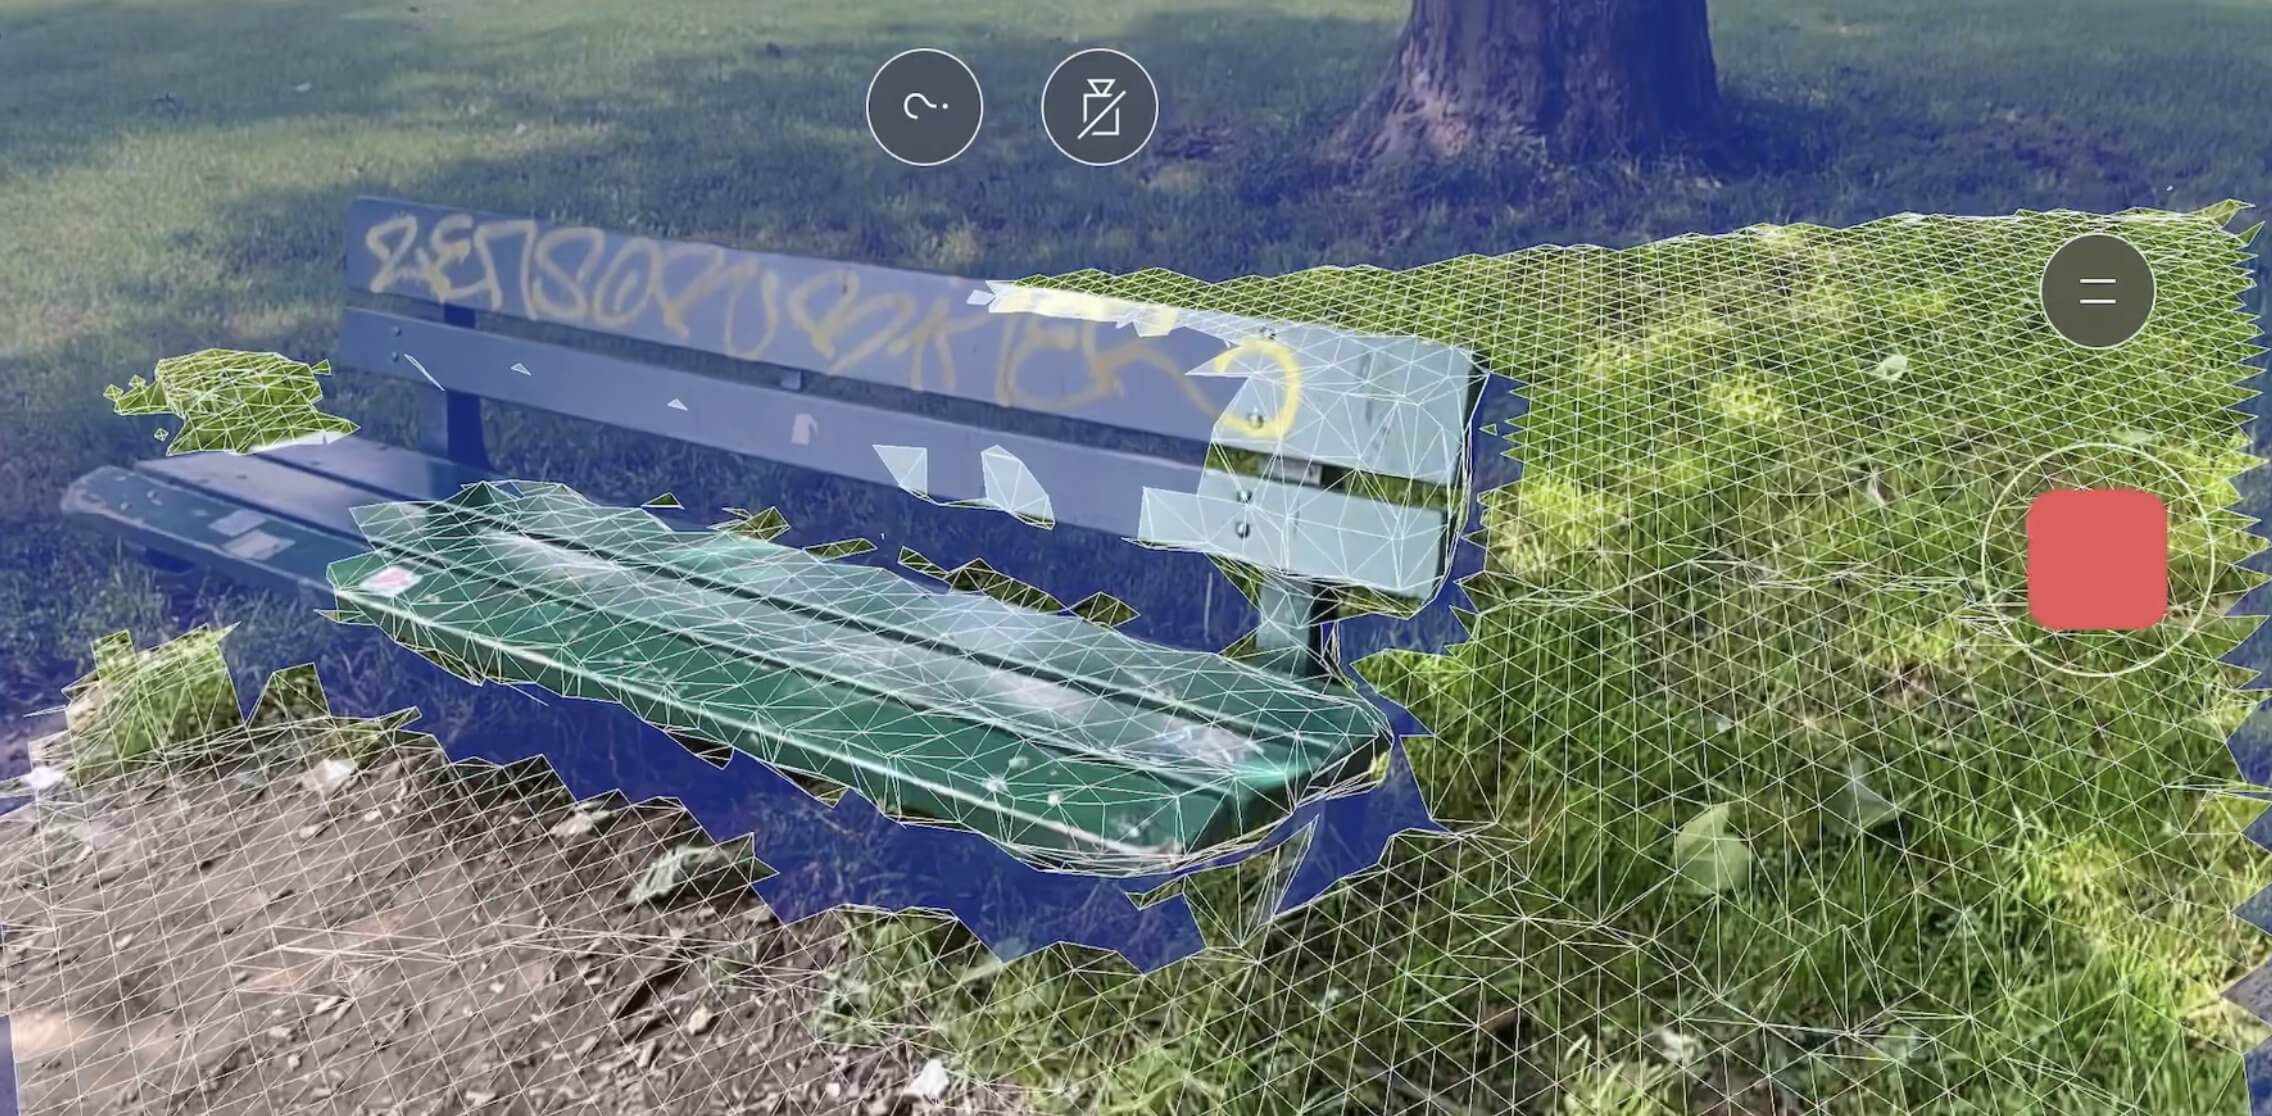
Scan so that the blue area is gone.
When you are done, tap the red square button again to finish, and the scanned model will be displayed.
If the scan area is large, it will take a little longer.
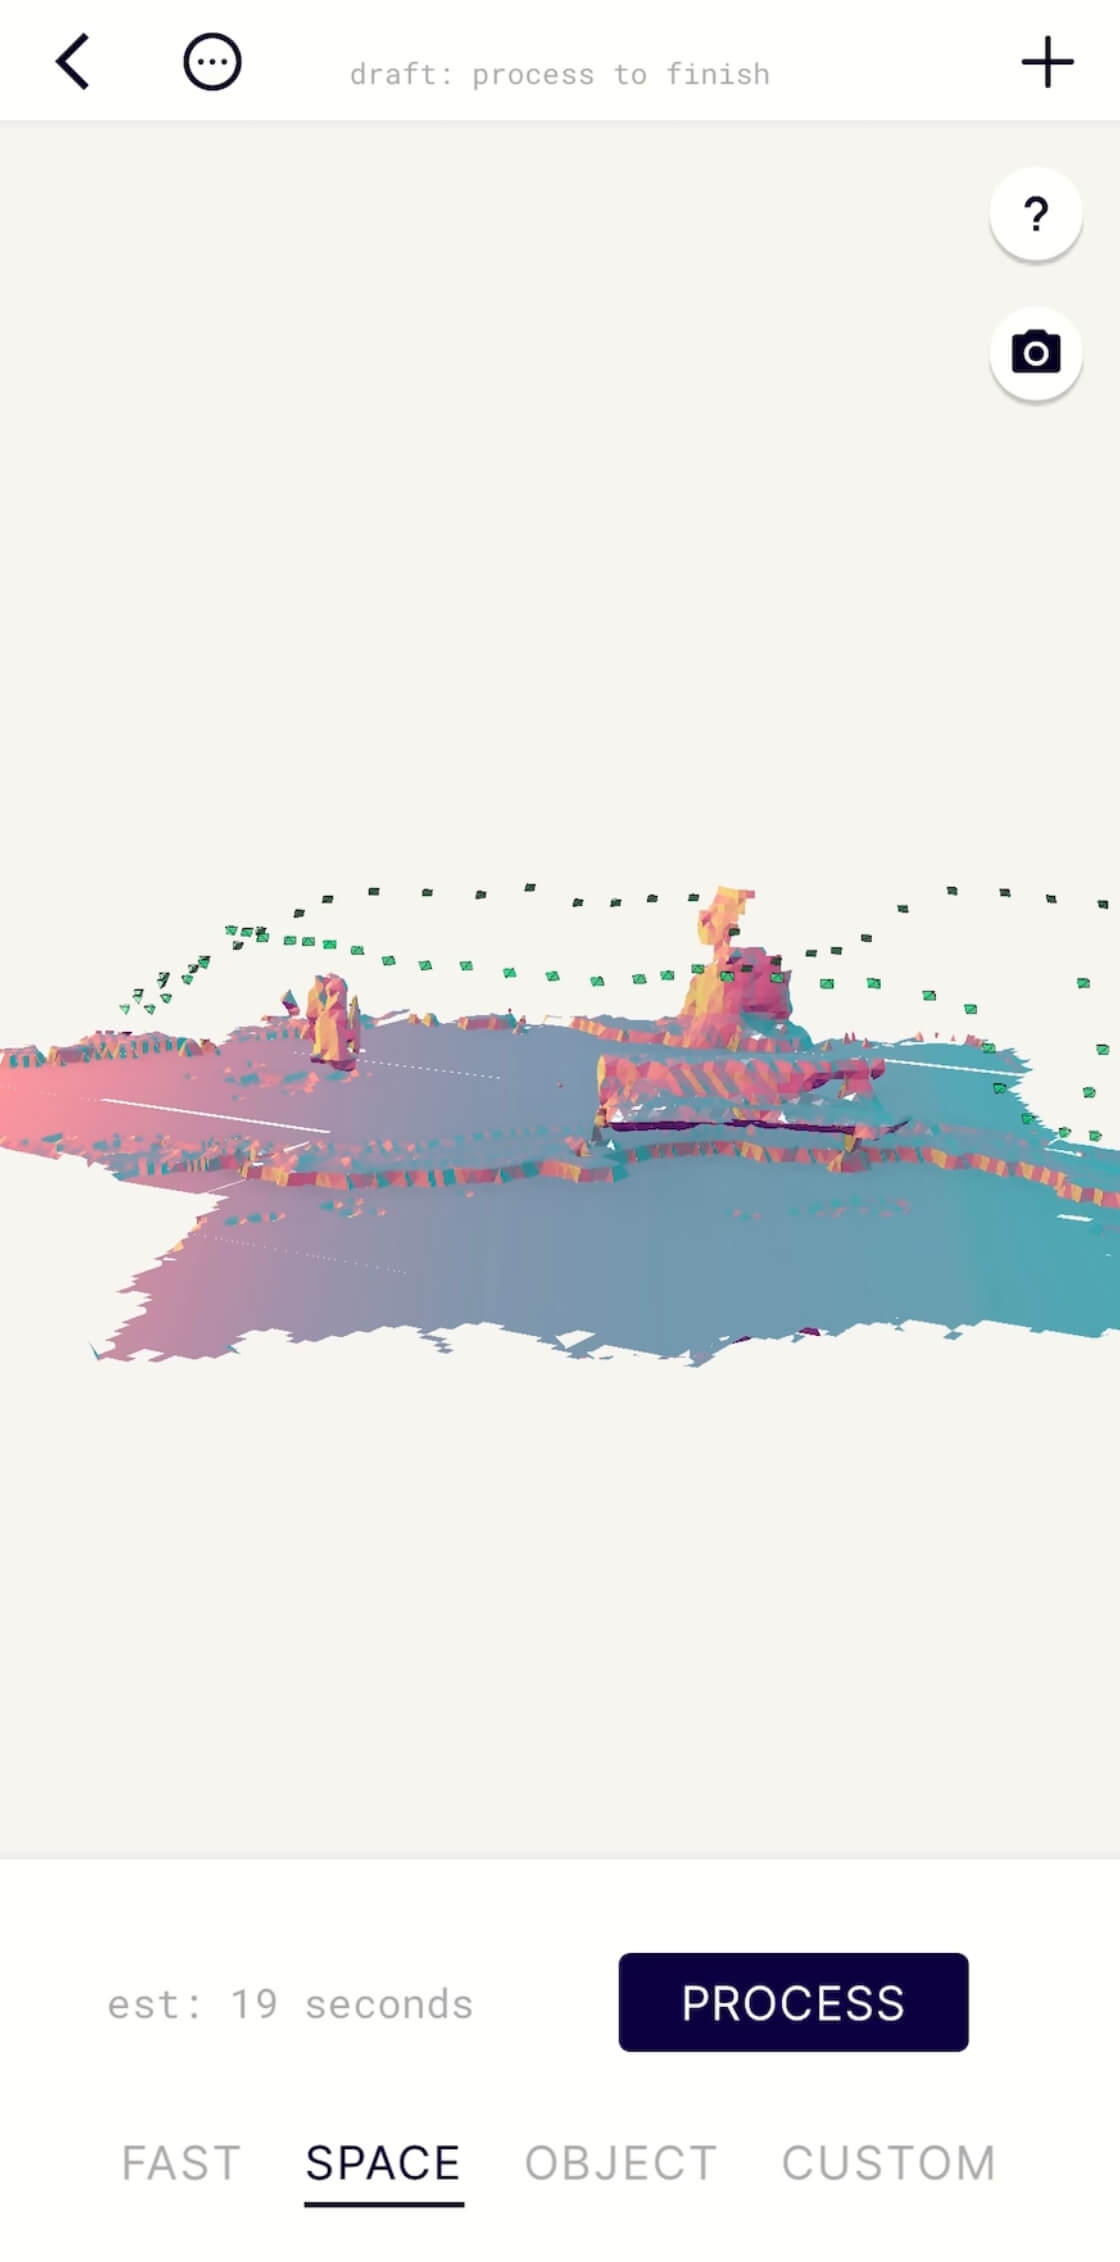
The place where you have moved is shown as a green square.
Tap PROOCESS to process the model and reflect the texture.
The “est: 19seconds” beside it is the approximate time it will take to process, which in this case is 19 seconds.
Change the settings according to your shooting purpose.
| FAST | Processing speed priority |
| SPACE | Space |
| OBJECT | Object |
| CUSTOM | See the table below |
If you specify CUSTOM, you can change the settings during processing by yourself.
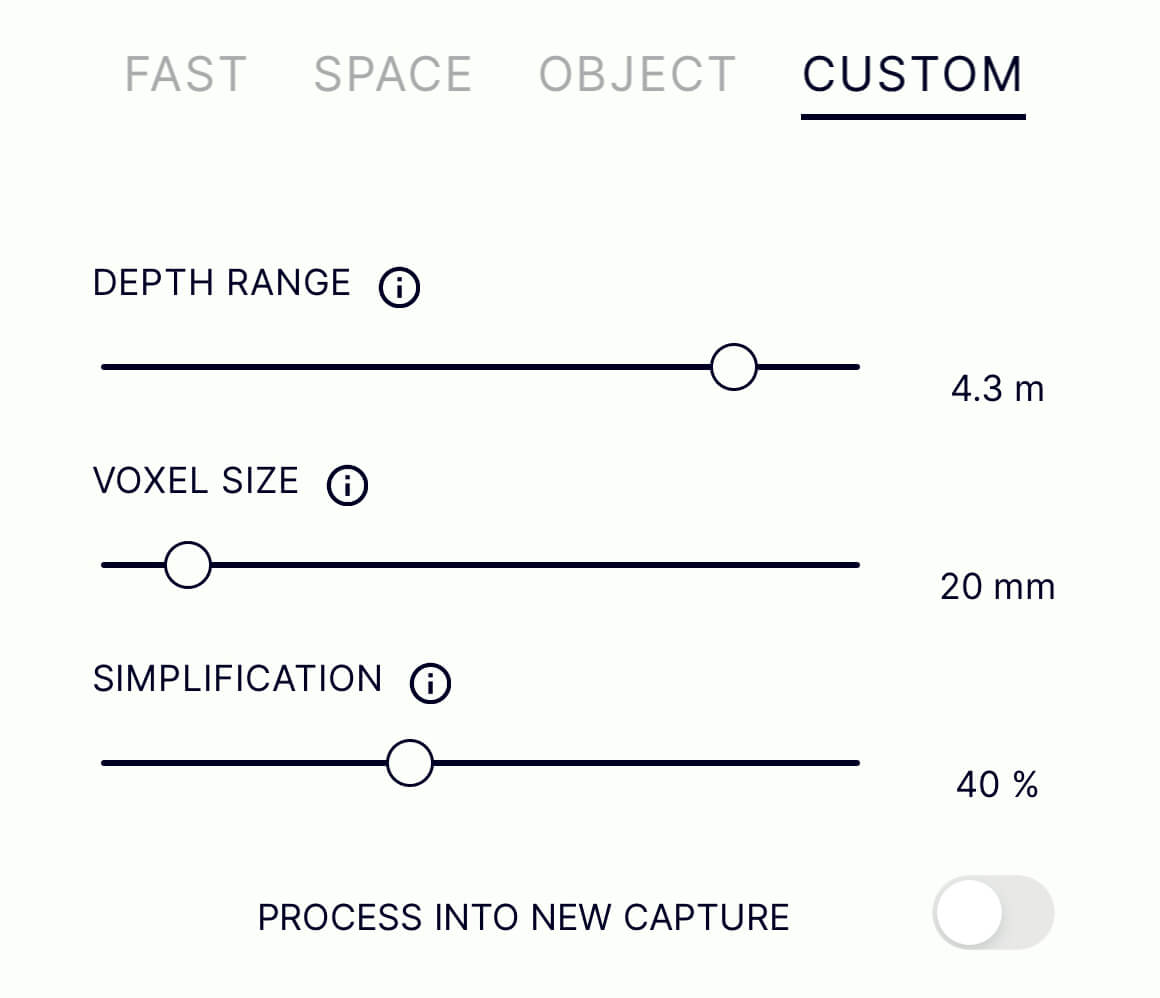
CUSTOM setting contents
| DEPTH RANGE | Sets the depth range to be used when processing each frame of the capture sequence. This is useful for excluding background material when capturing an object. |
| VOXEL SIZE | The minimum voxel size to use when processing this capture. Smaller voxel sizes take longer to process and require more polygons. |
| SIMPLIFICATION | he level of simplification to be applied to the mesh before texturing. For example, a value of 40% will reduce the polygon count by 40% before texturing. The higher the value, the lower the polygon count. |
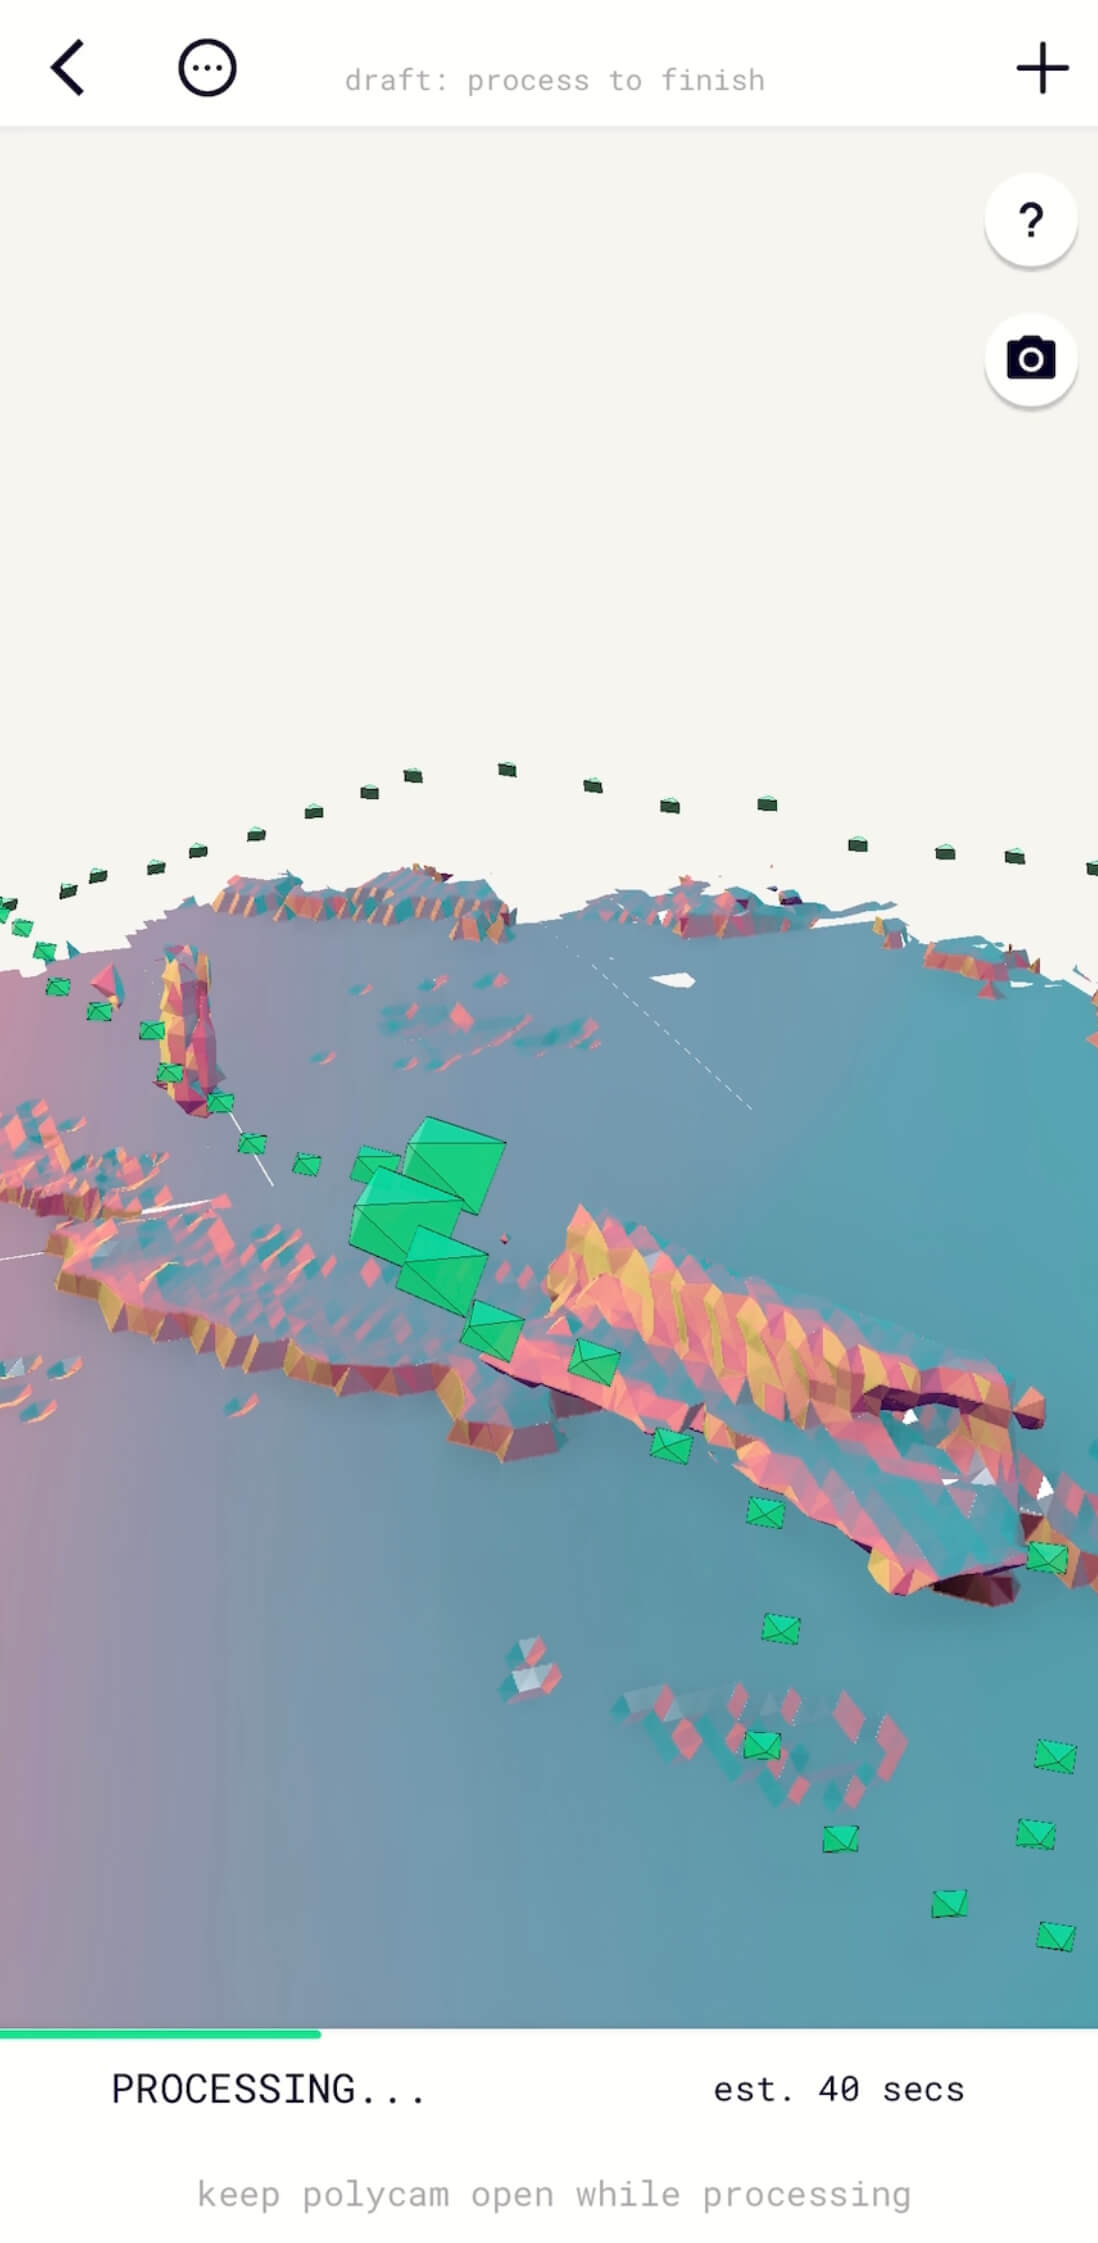
Processing in progress
When processing is complete, the model will appear like this, and you can swipe or pinch out to see the completed model from various angles.
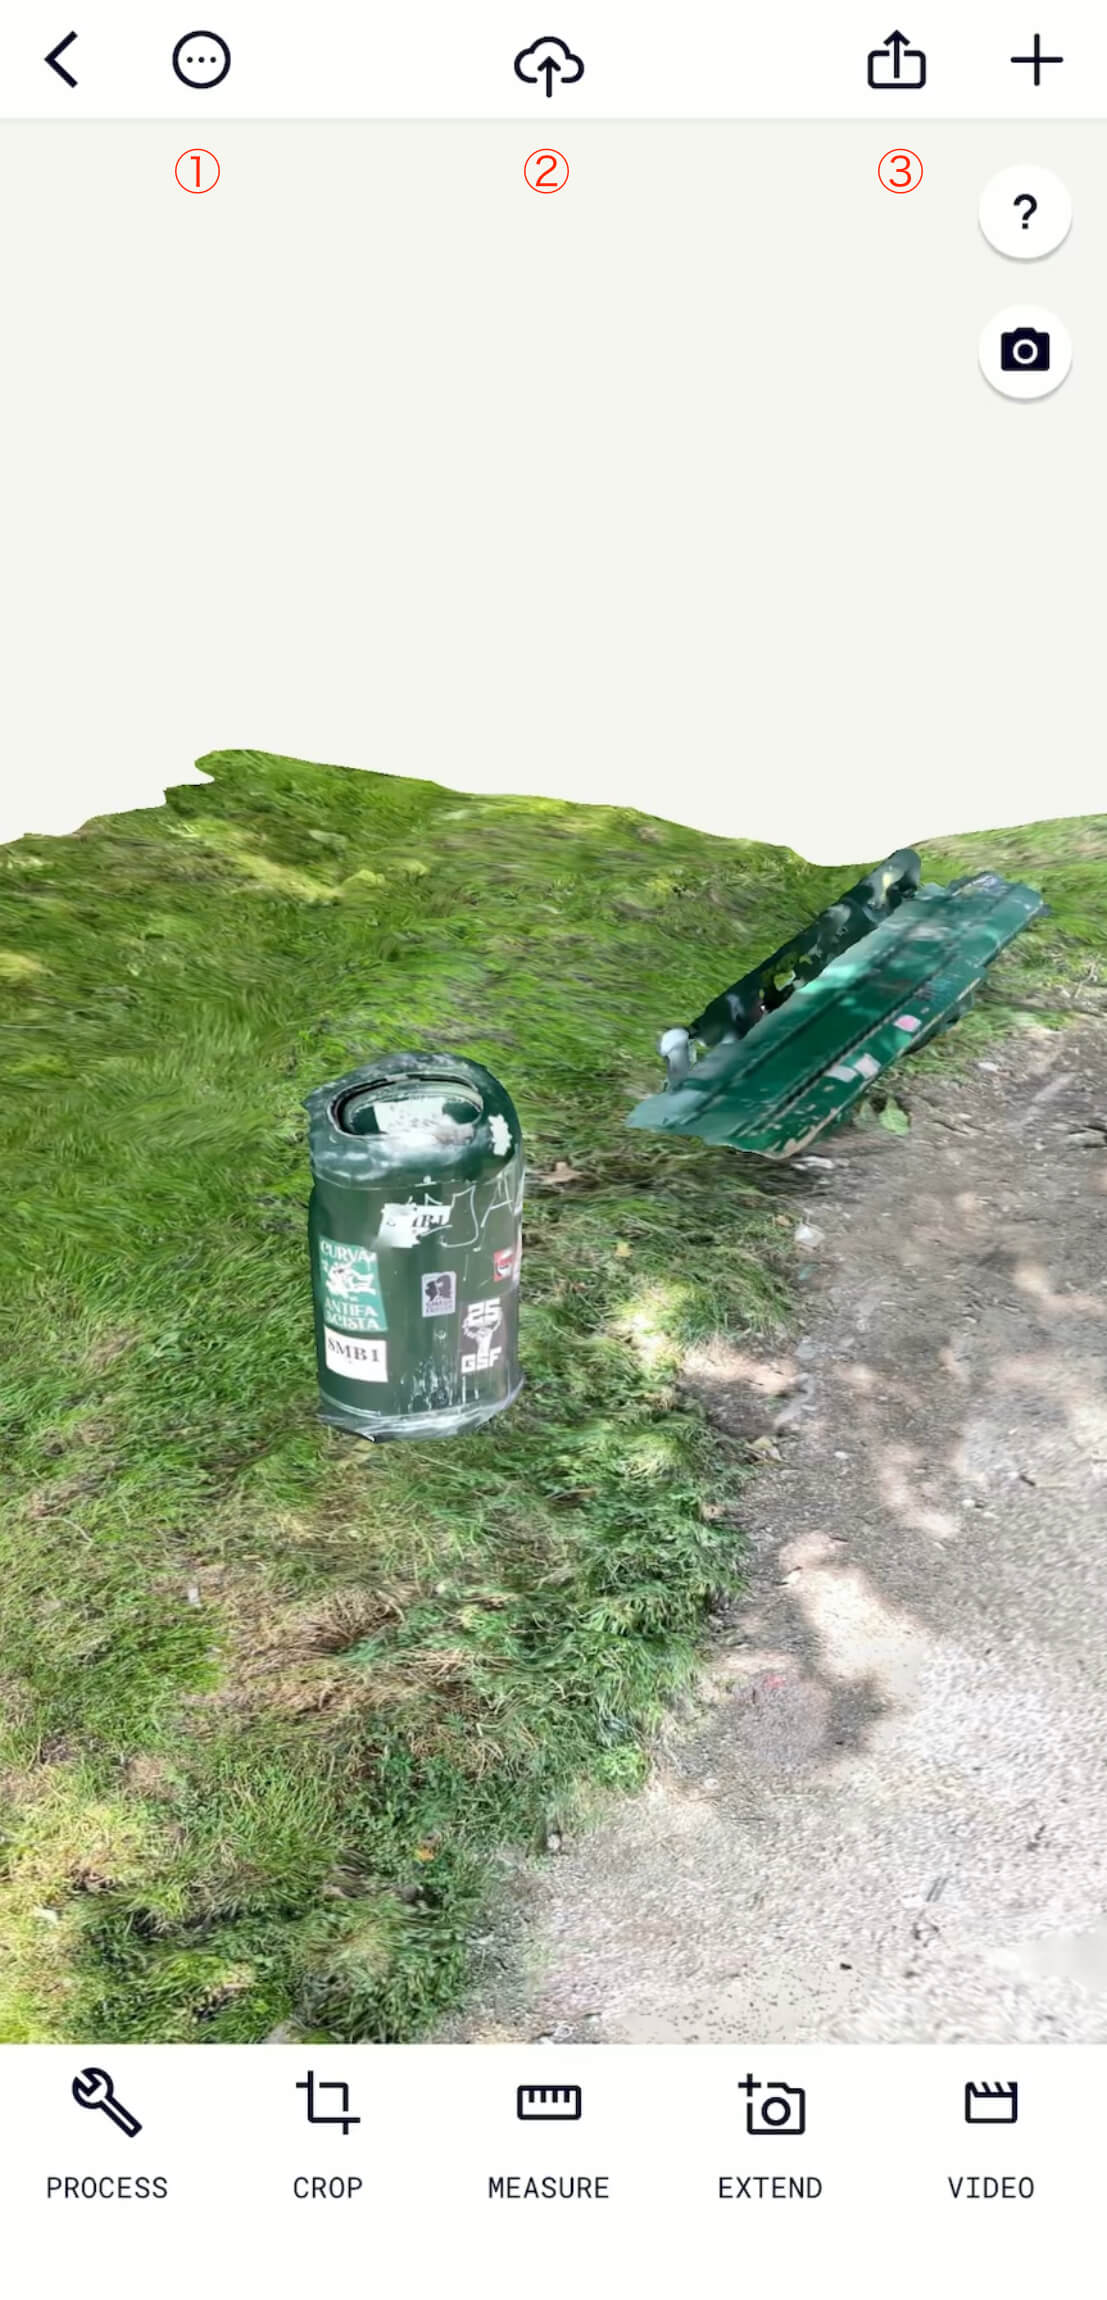
The scanned 3D model
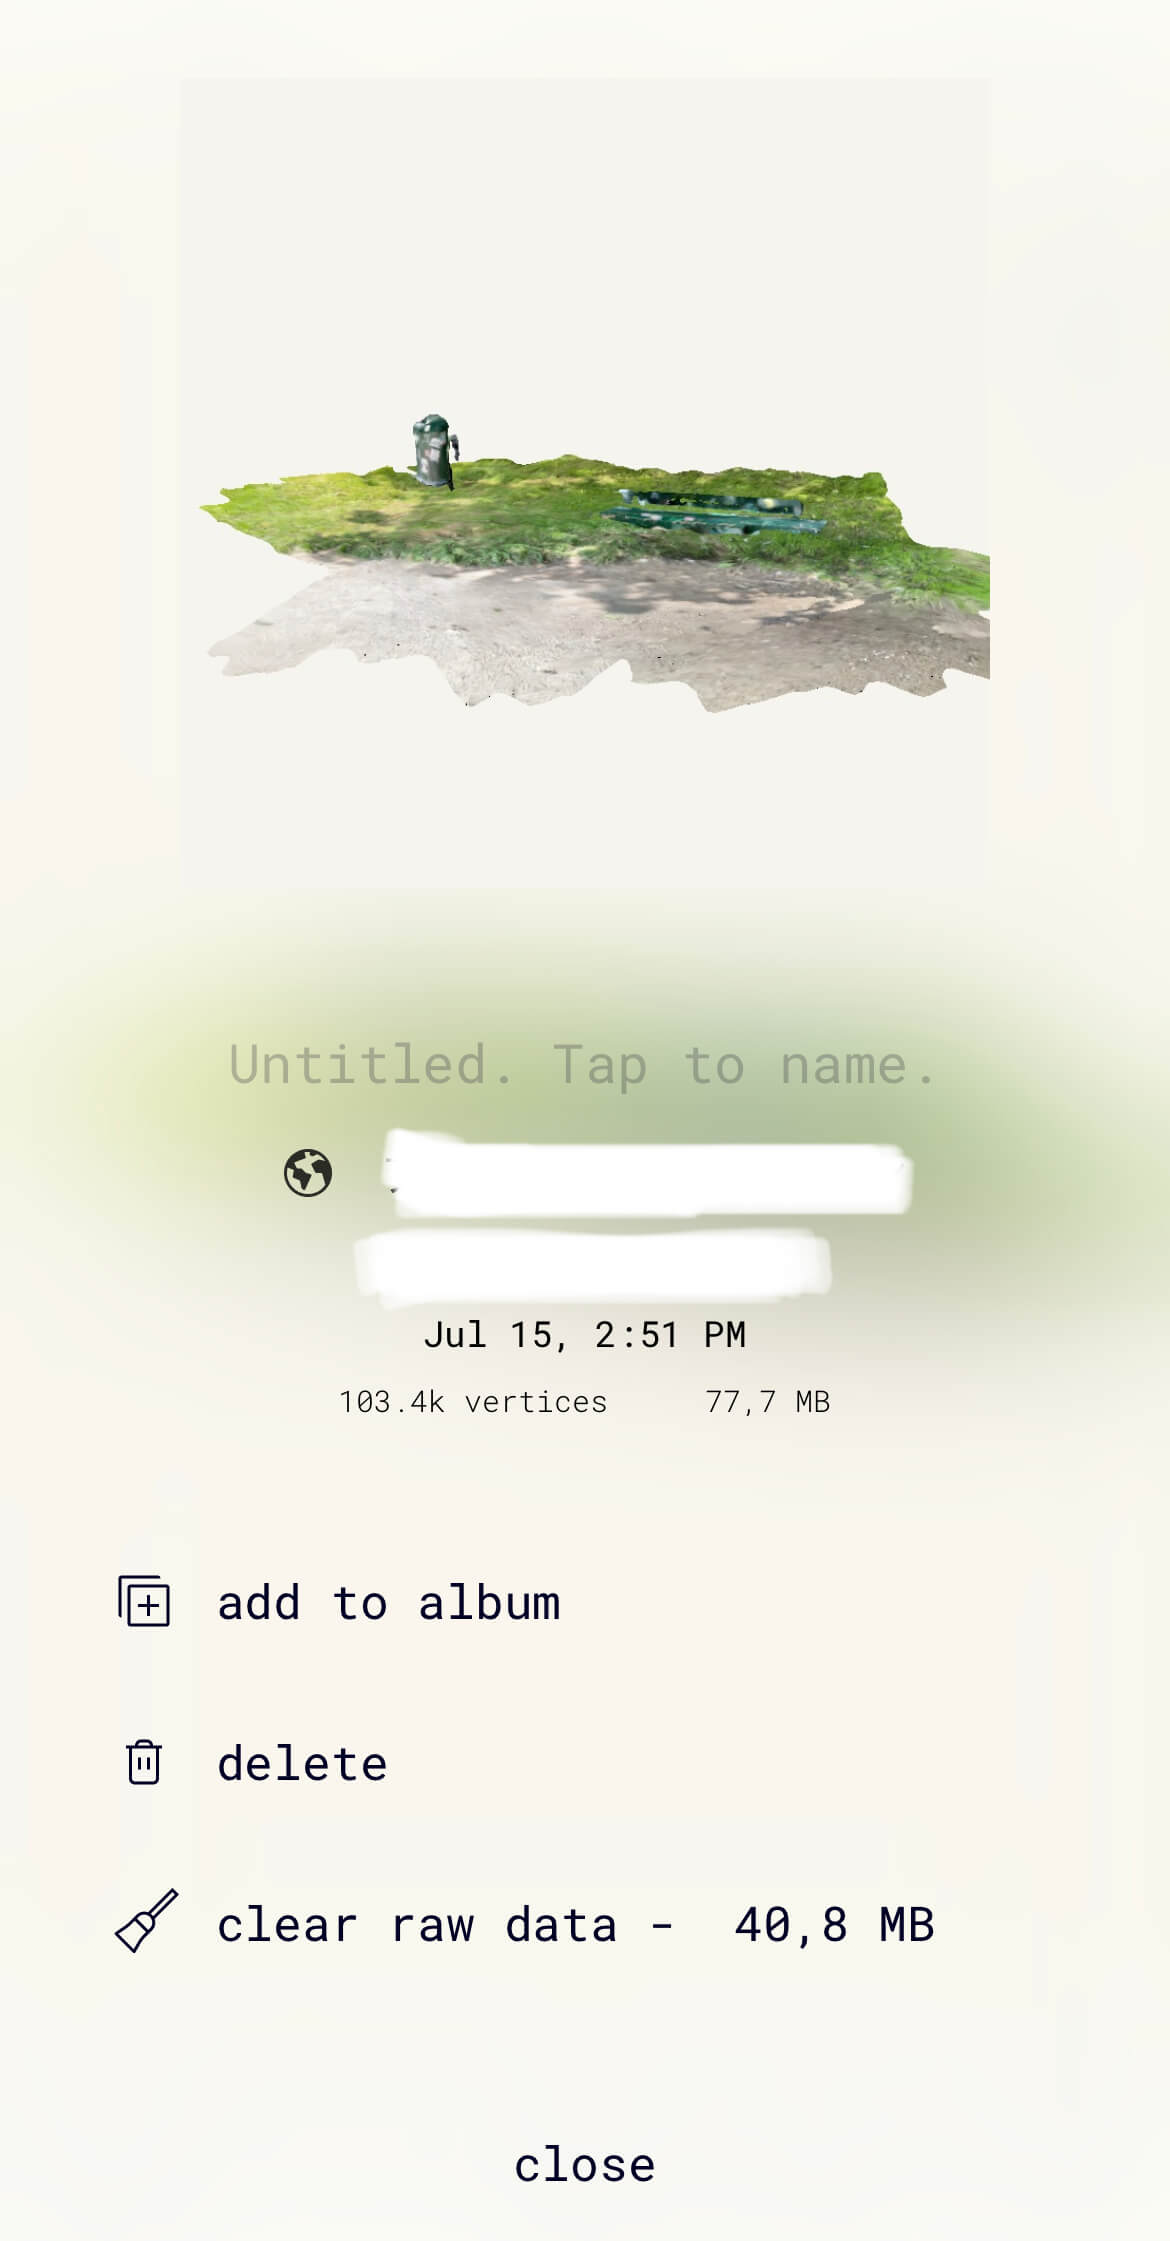
Tapping the ① icon will display the model’s shooting information.
From here, you can enter the model’s name or add it to an album.
Model’s photo information
Tap the ② icon to share the model’s photo to the Polycam explore.
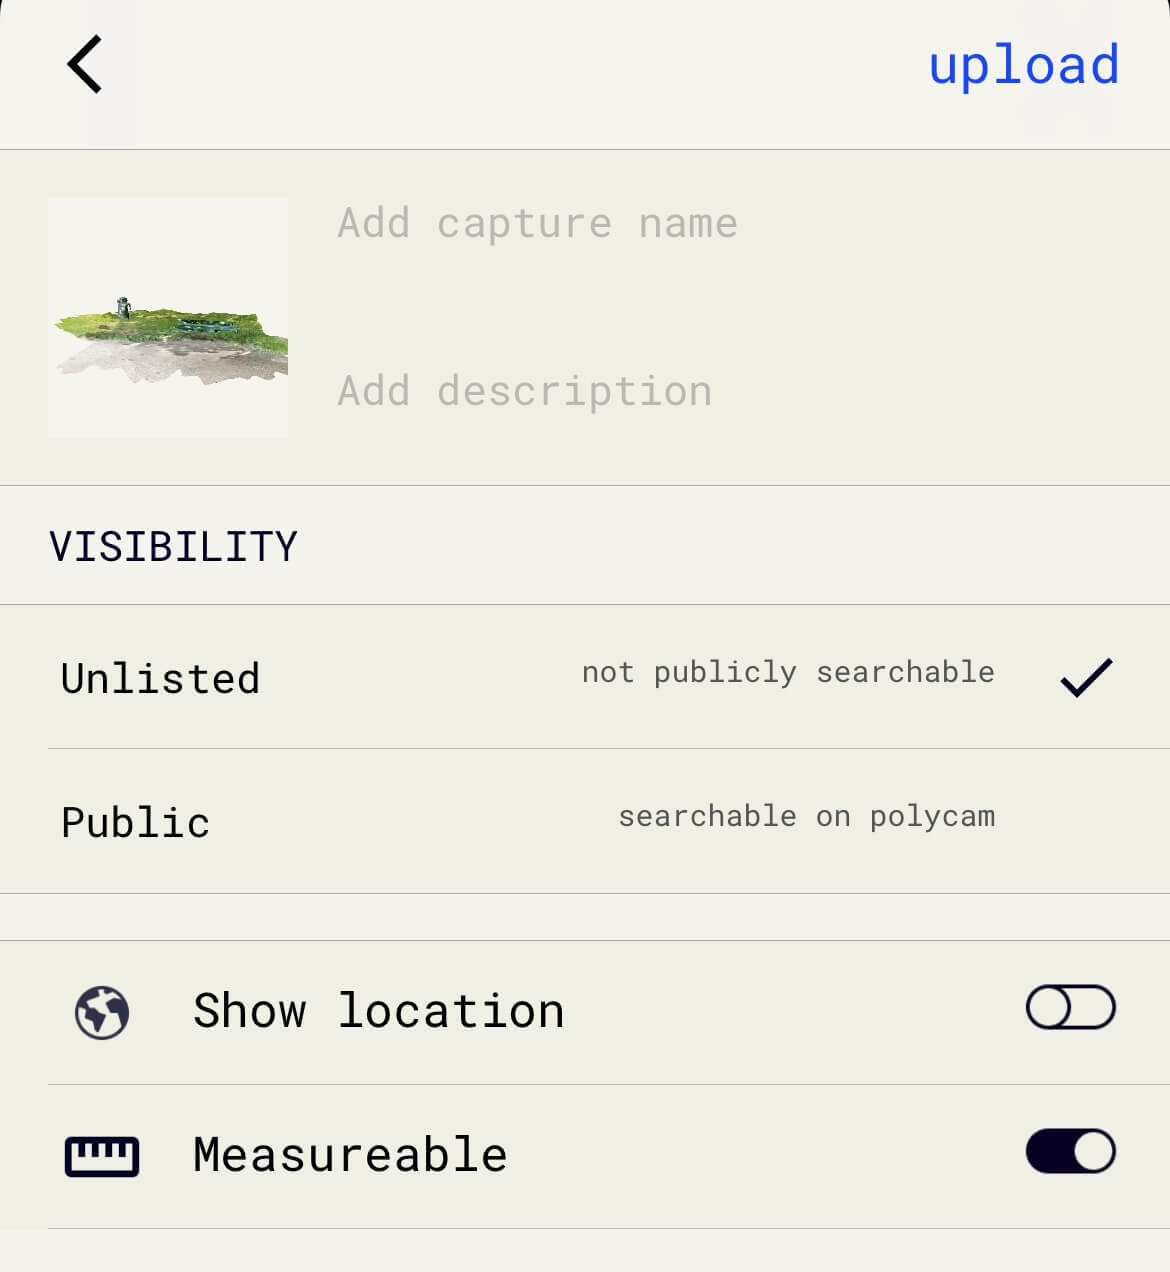
You can also display the model on the map and set it to public or private.
You can also edit the model from the menu below.
| PROCESS | Process the model again。 |
| CROP | Crop the model with a cube-shaped object to remove unnecessary parts. |
| MEASURE | Displays the distance between two specified points in the scanned model. |
| EXTEND | Add another 3D scan of the model. |
| VIDEO | Create and save a video of your scanned model. |
Using a PHOTO mode in Polycam
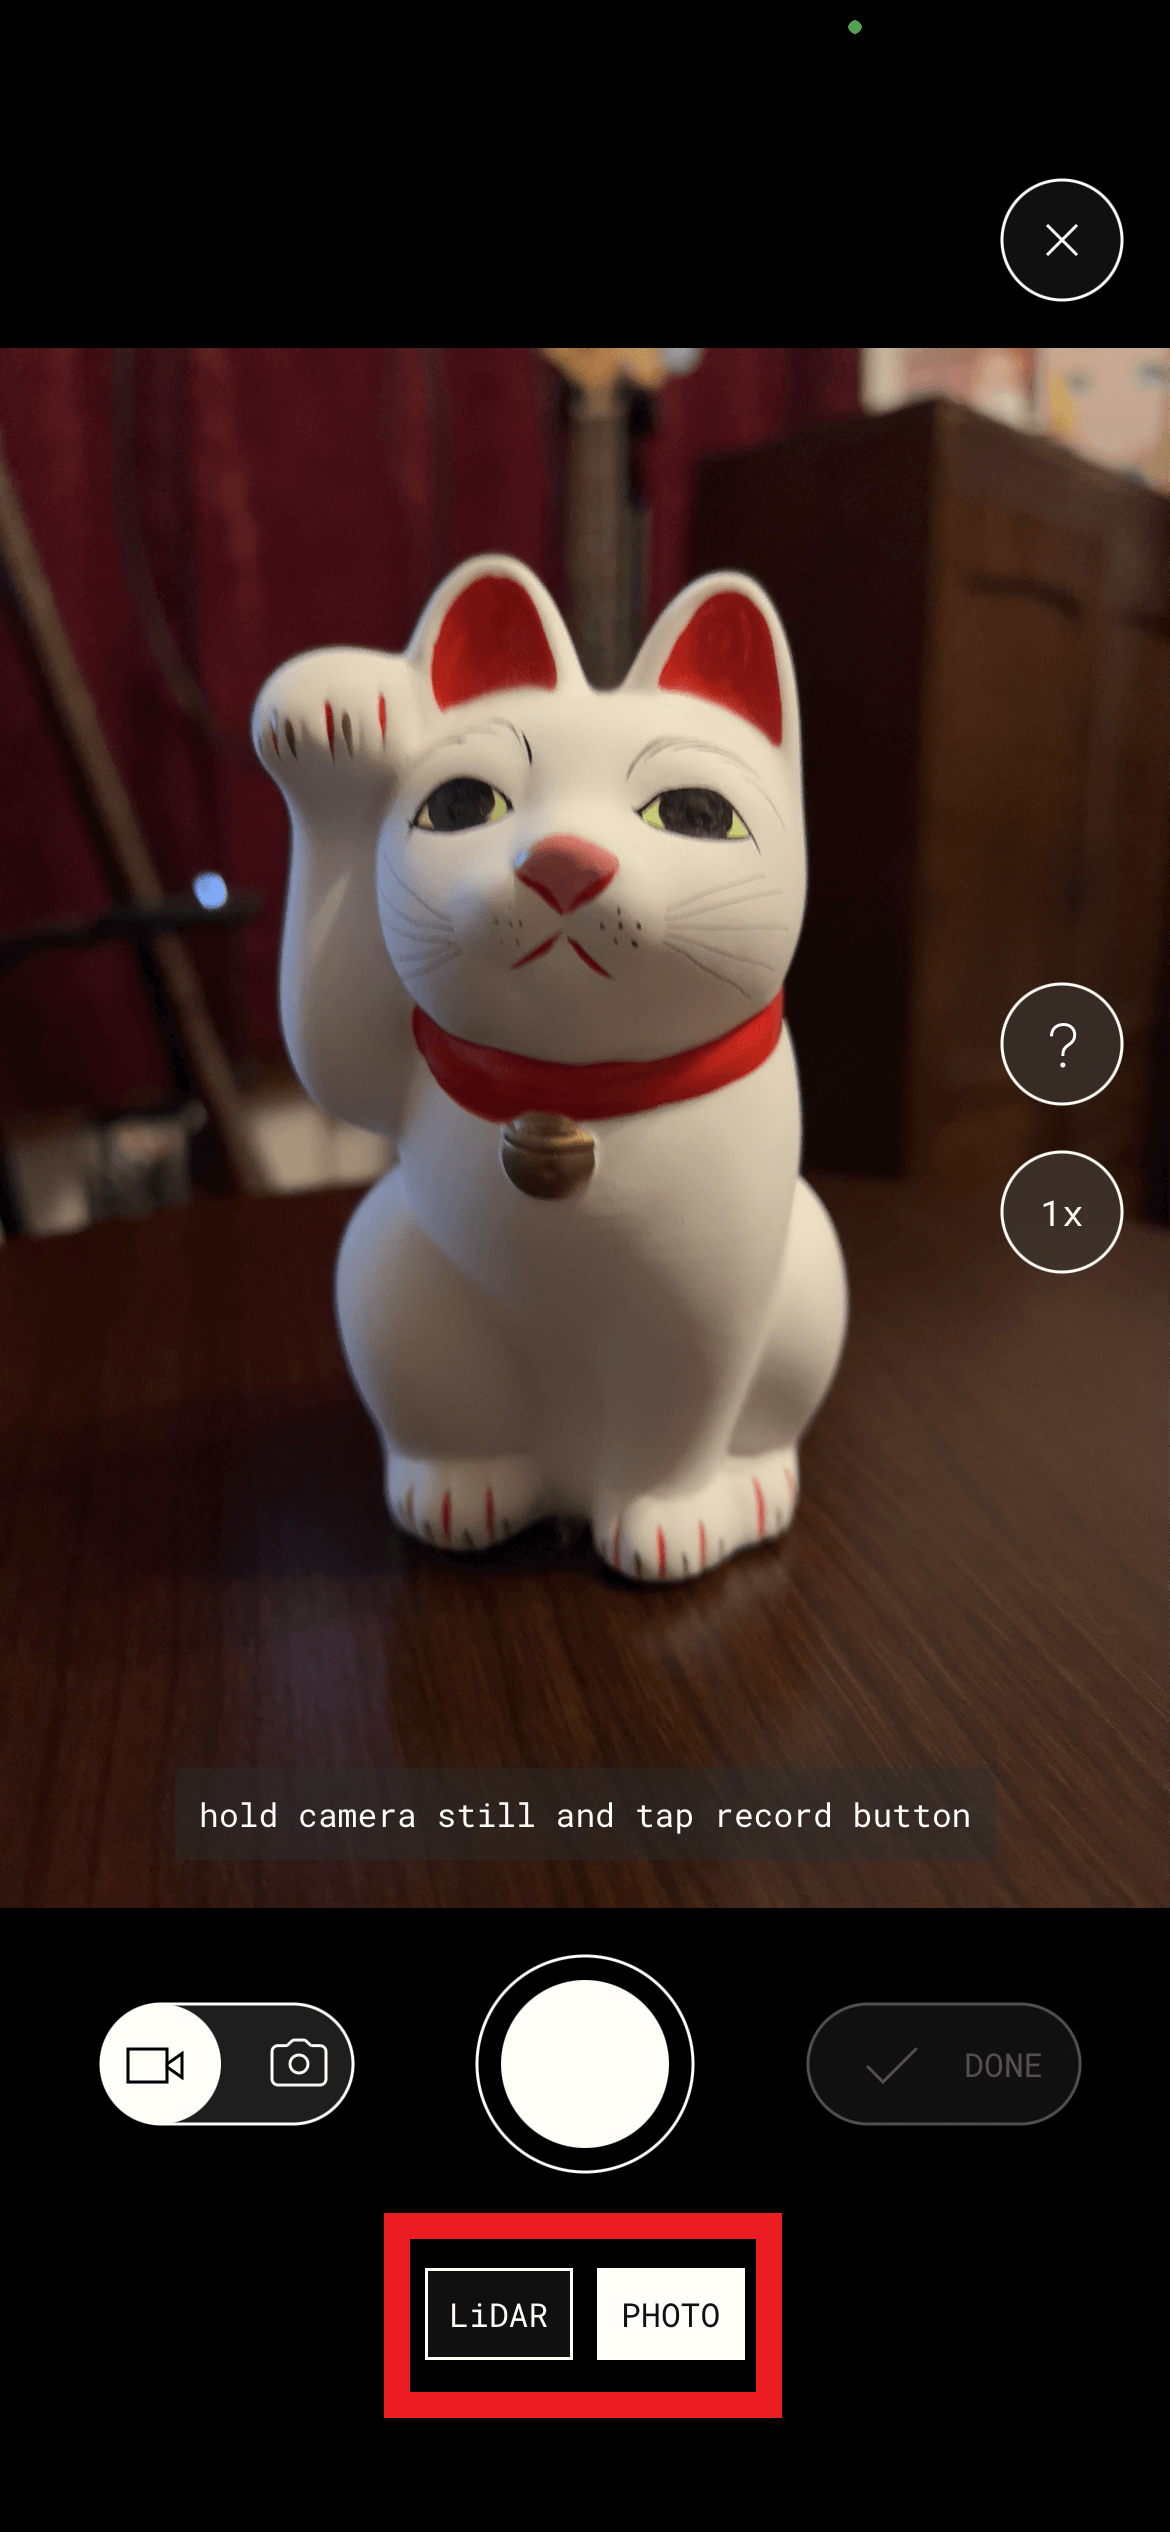
Polycam can also be used in PHOTO mode, which allows you to use photogrammetry to create 3D models from photographic data, rather than 3D scanning using LiDAR. This is recommended when you want to create 3D models of small objects.
Even if you don’t have a Pro license, you can try it up to 5 times.
When you launch the app, you will see “LiDAR” and “PHOTO”, and you can switch between them by tapping on them. Tap “PHOTO” to enter PHOTO mode, and take pictures evenly as you would in LiDAR mode.
Switching between modes
There are two modes in PHOTO mode: one where the app automatically takes a picture as if you were taking a video (video icon), and one where the app automatically takes a picture as if you were taking a photo (camera icon). You can change the mode with one touch by tapping the respective icon.
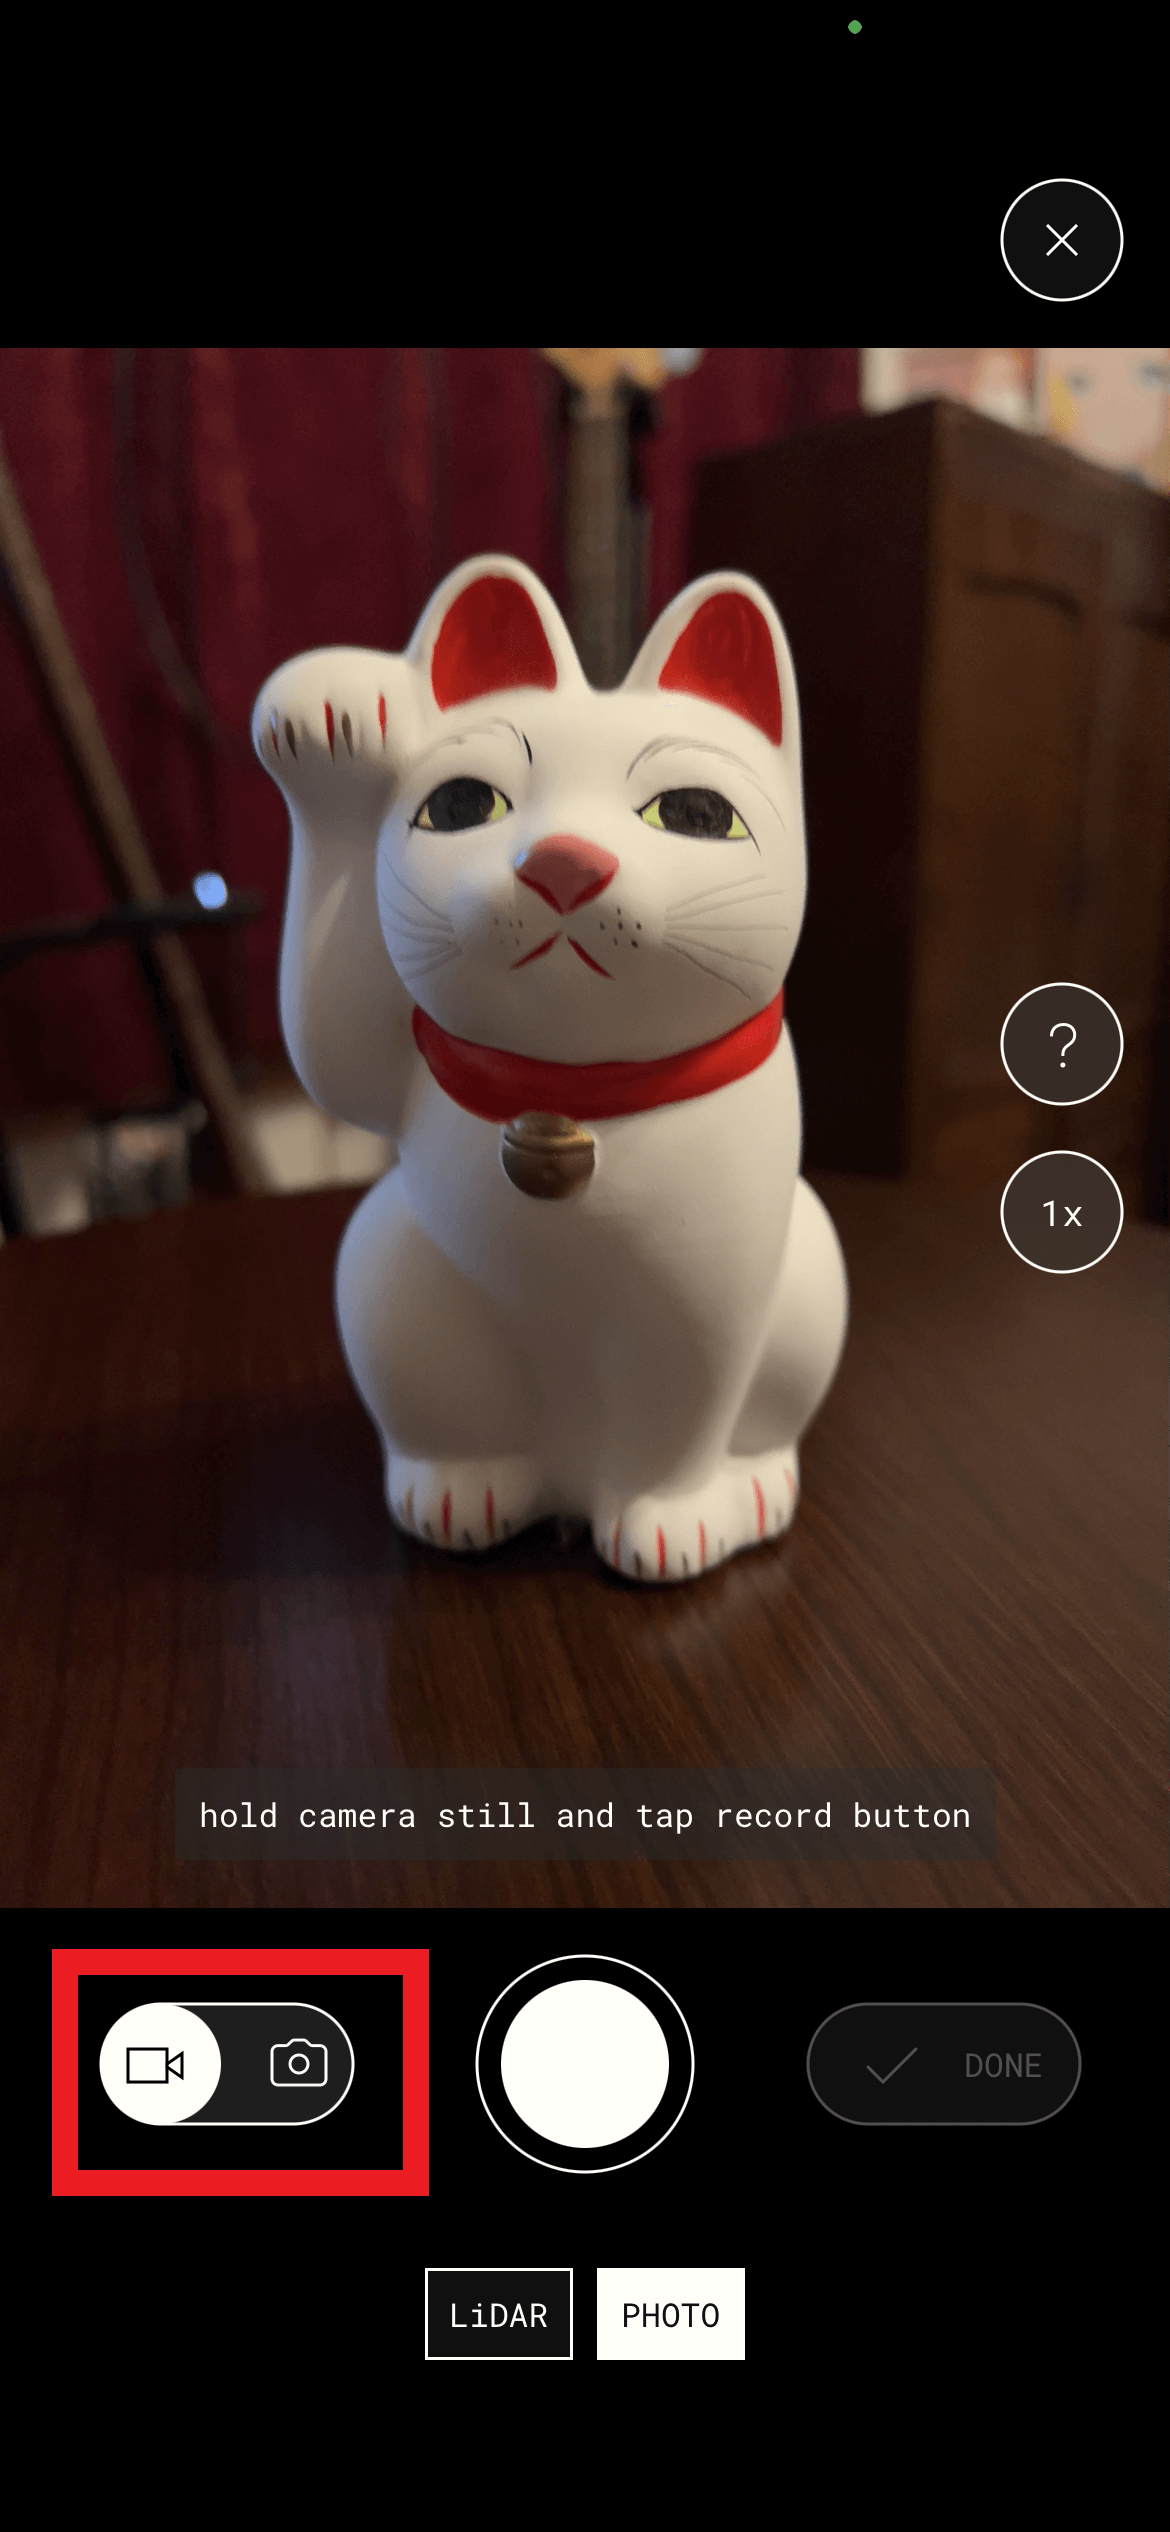
Switching shooting modes
The minimum number of photos required for both modes is 20, and when the number of photos you have taken exceeds 20, the “Done” icon will be activated and you will be able to take 3D photos.
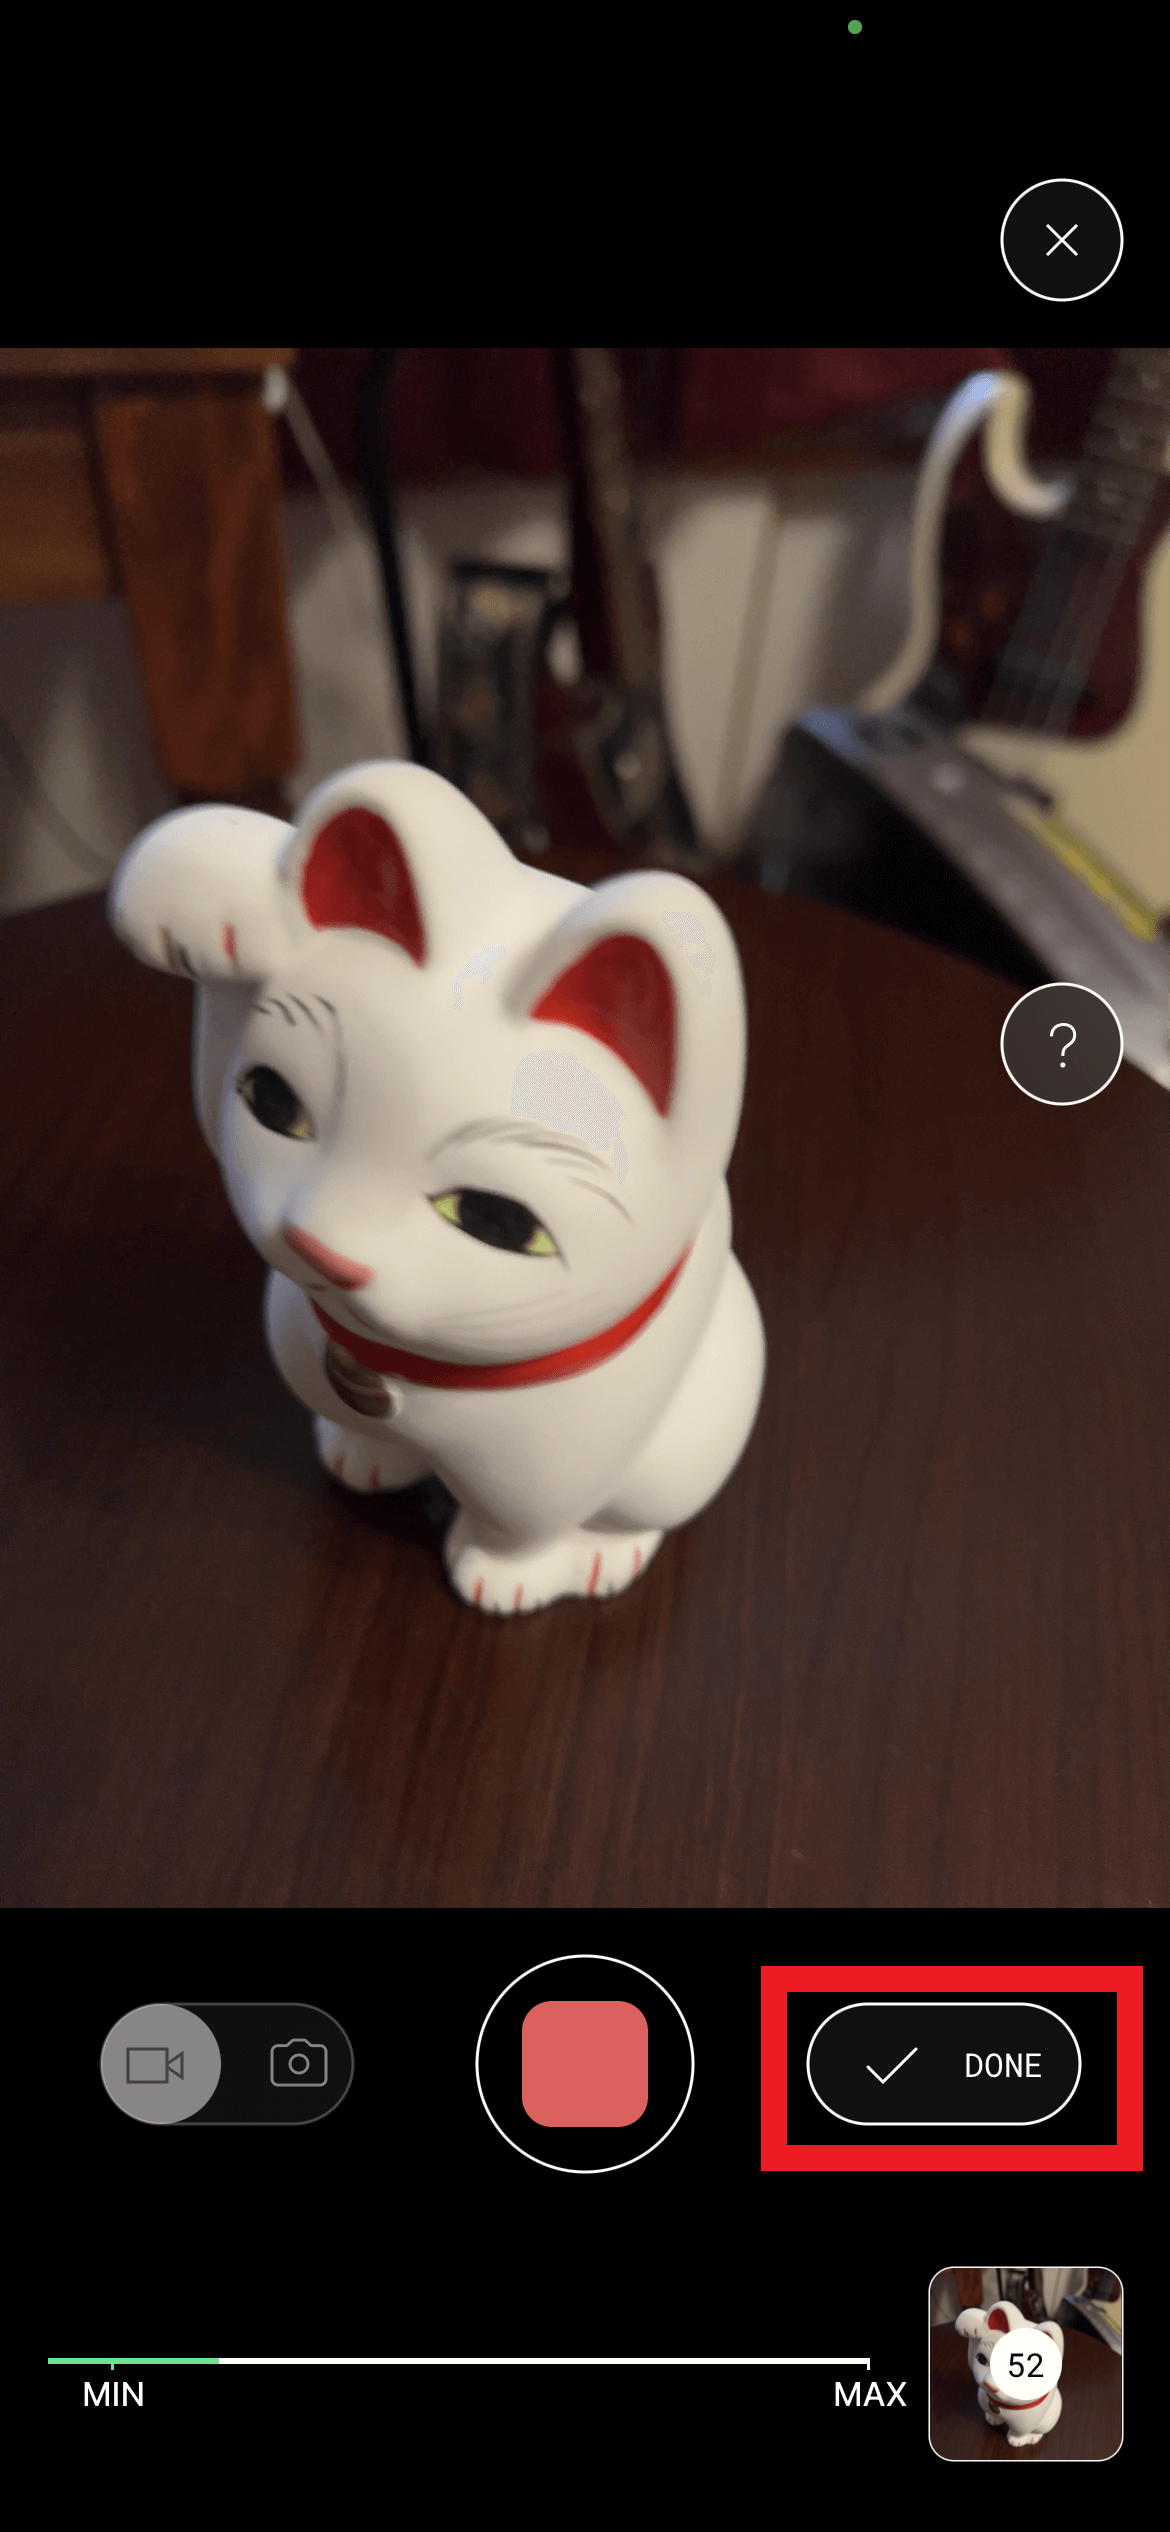
The “Done” icon is activated.
LiDAR mode
In LiDAR mode, tap the recording button in the center of the screen to start taking pictures; if you use the camera to take pictures all around the subject, like when scanning in LiDAR mode, the camera will automatically take pictures when the angle changes. This is convenient because the timing of the shot is automatic, but it also makes a shutter sound, so it is best not to choose this mode if you are concerned about the sound.
Photo mode
In this mode, there is a “+” button in the center of the screen, and tapping this button will start shooting. As in LiDAR mode, you will hear a sound, but you can take pictures at your own pace.
Using a Polycam for Web
Unlike PHOTO mode, Polycam for Web allows you to try out photogrammetry from your own photos in a browser, and you can use the Polycam website to try out photogrammetry from your SLR photos.
Polycam for Web is available with the Pro license, but it is free for 14 days, so if you want to try it out, you can do so during the trial period of the Pro license.
If you want to try it out, you can do so during the trial period of the Pro license. After opening the Polycam website in your browser, click “+ create new” in the upper right corner.
Polycam’s website:https://poly.cam/
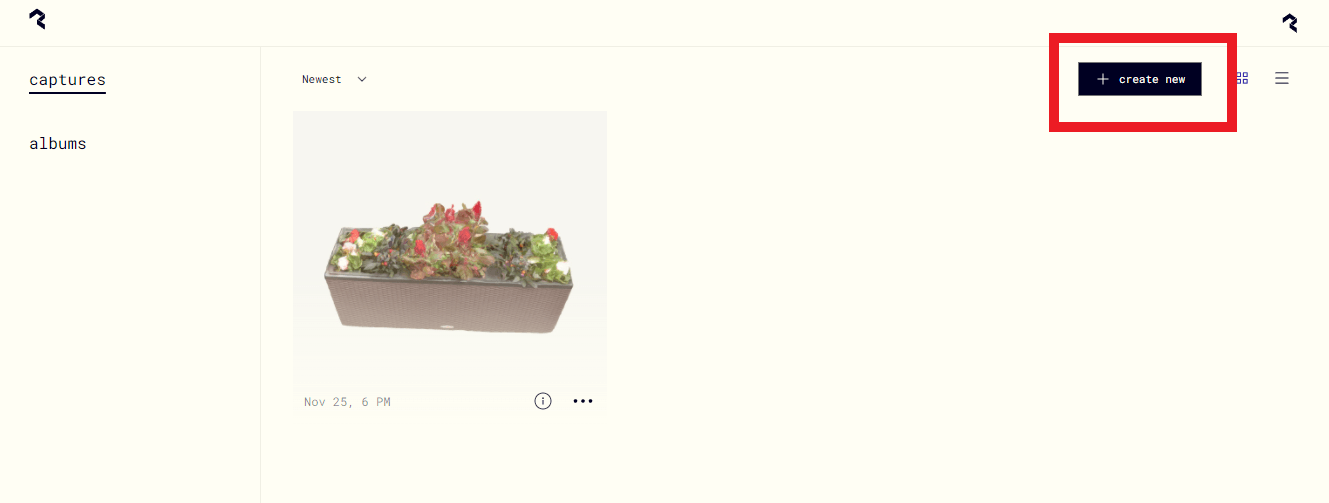
Click “+ create new”.
A dialog box to select photos will open. Drag and drop photos to “DRAG IMAGES HERE” at the top, or click “CHOOSE FROM FILESYSTEM” in the red box below to select photos stored on your PC.
Photo data taken for photogrammetry can be many in number, so it will be easier to open the file this time. You can upload a maximum of 250 photos.
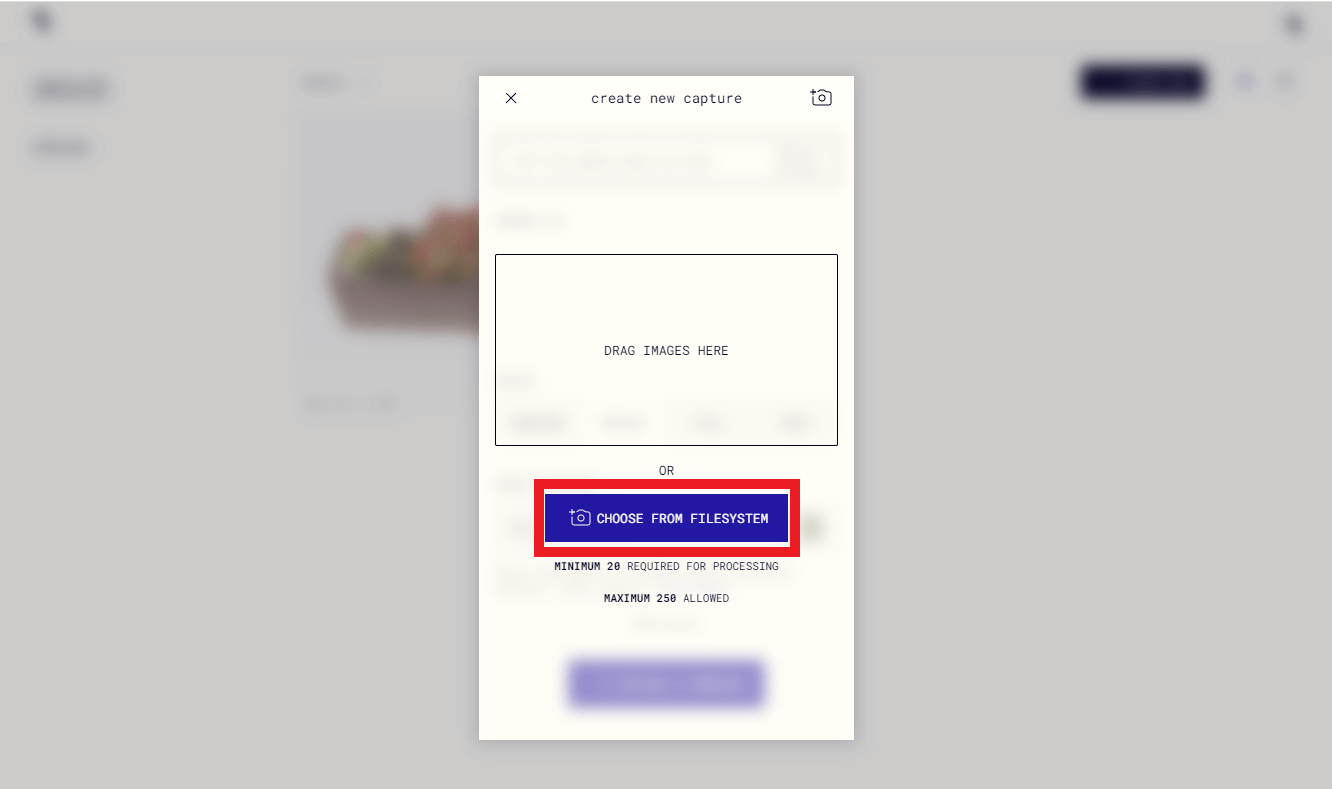
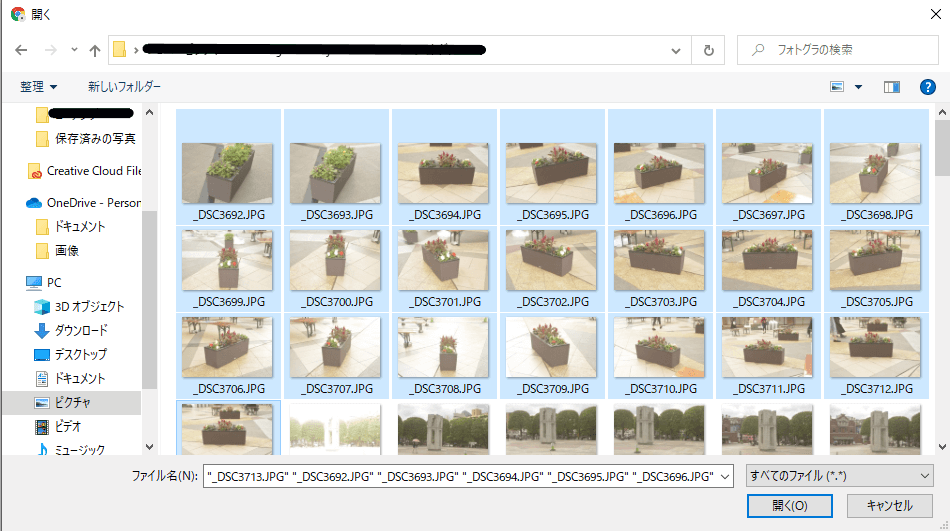
Photo Selection Dialog
After selecting the photos you want to use for photogrammetry, click “Open”.
Selecting photos to use
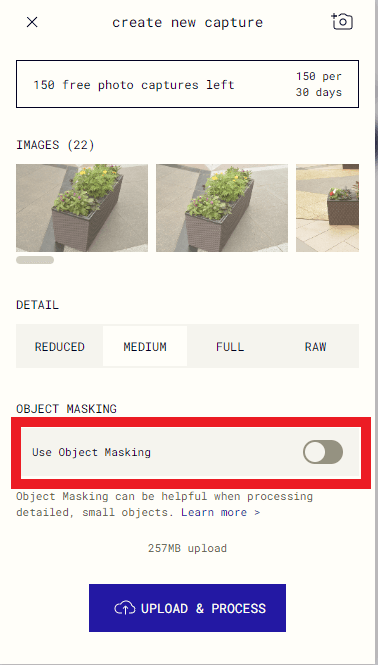
Once the photo selection is complete, you will see buttons for selecting details and toggling whether or not to mask them. The default setting is off, but when it is turned on, everything except the object will be masked automatically. This is useful when shooting small objects, as it allows you to crop out the shooting platform.
Once you have completed the settings, click “UPLOAD & PROCESS” at the bottom. If you have a minimum of about 20 images, it will take a couple of minutes to complete the creation of the 3D model.
Uploading Settings
Uploading with “Use Object Masking” turned on will look like this.
This is a shot of a flower bed in a plaza, but the surrounding scenery and ground are masked.
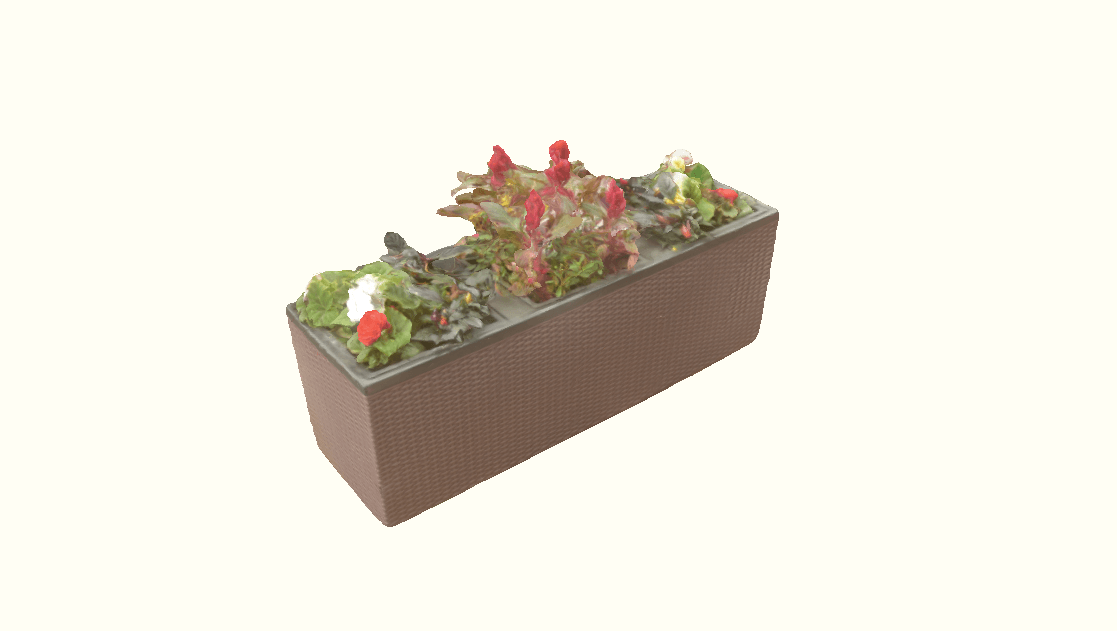
Masking objects
Tap the ③ icon to share to SNS or export to CG or other software.
If you have not paid for the software, there is a limit to the extensions you can export.
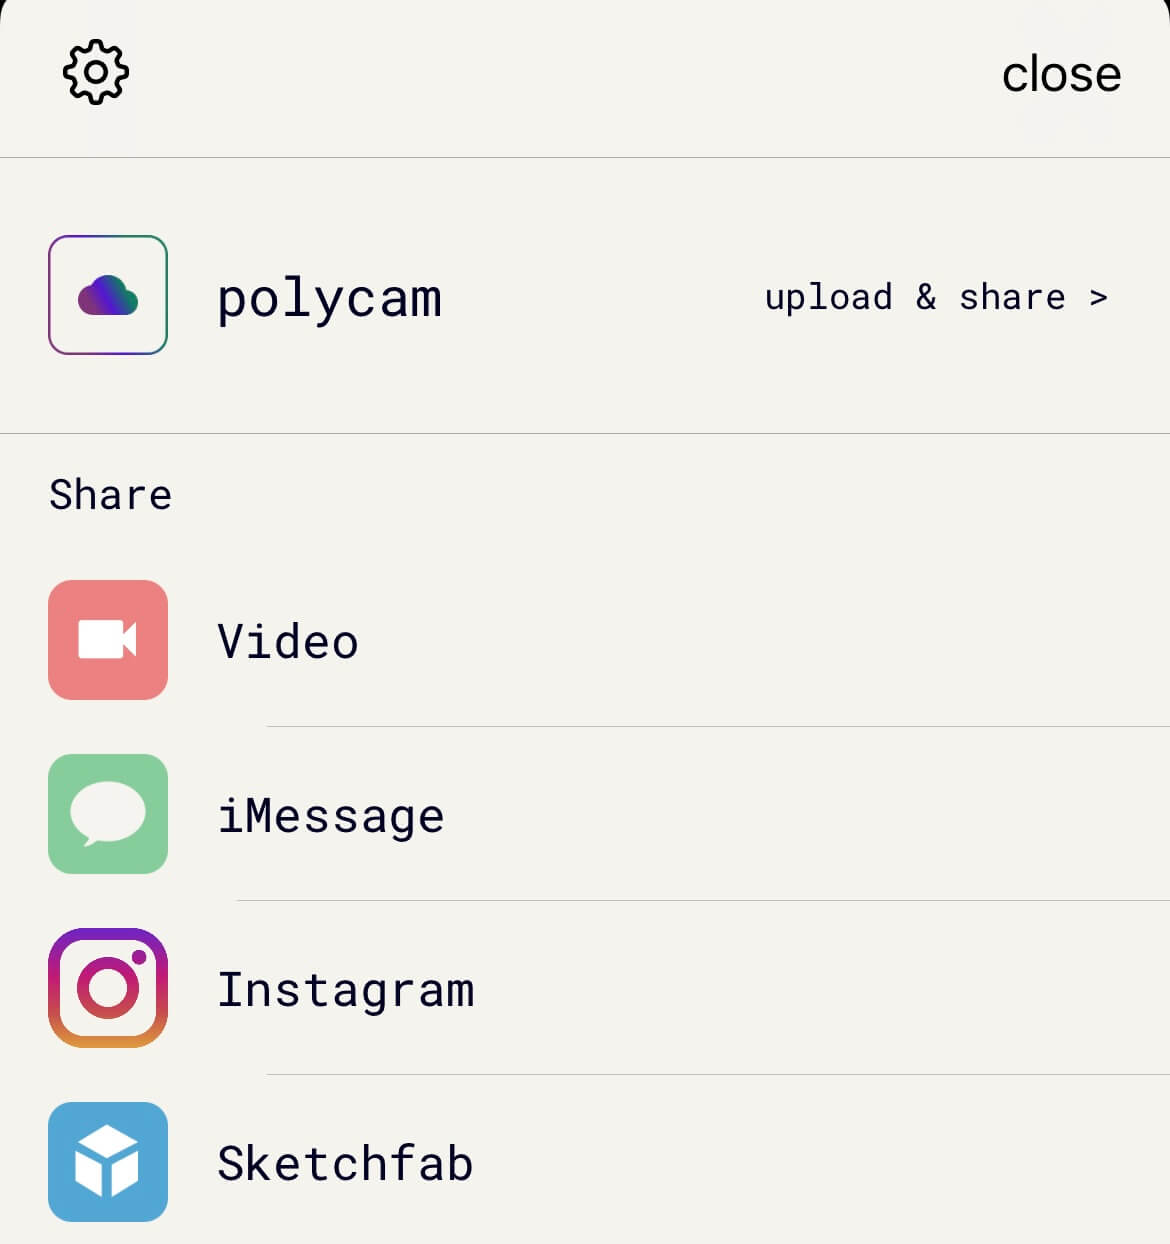
Share

Export
When you use the model in STYLY, there are following two ways to do that.
- Share on Sketchfab
- Select OBJ or GLTF and export to PC
In this article, I will show you how to upload an OBJ model to STYLY.
After selecting the file extension, share it to your computer via AirDrop or Mail.

Tap OBJ.
Select the share method.

Select the export method
The file will be shared to your computer in ZIP format, but you can use it as is without extracting it.
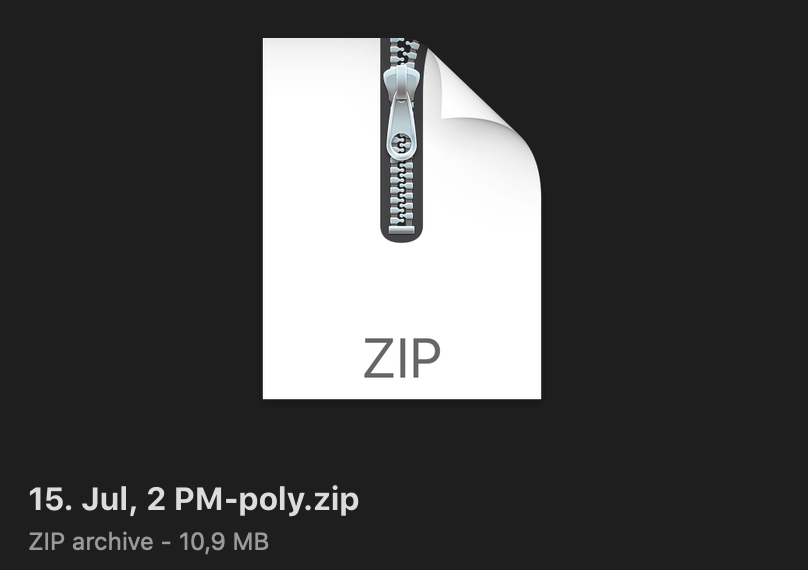
3D scanned model data
How to upload to STYLY
Let’s try to upload your 3D model to STYLY.
Create a STYLY account
How to create an account

How to upload to STYLY

How to upload from Unity to STYLY

Tips for a clean 3D scan
If you scan without following the tips, the 3D model will not be generated properly.
So please pay attention to the following points when scanning.
Scan slowly
If you move too fast, the model and texture will not be scanned correctly.
Scan while checking on the screen that the polygons have been loaded properly.
Be careful where you move.
When scanning a building or space, try to move in a single stroke, not back and forth in the same place.
This will overwrite the model you have already scanned and may cause the polygons to shift or disappear.
Scan from different directions
It is advisable to scan the 3D model from as many 360 degrees as possible so that there is thickness to each of the X, Y, and Z axes.
If the model cannot be scanned, the polygons will not be reflected properly because the model information cannot be obtained, and the texture will be stretched.
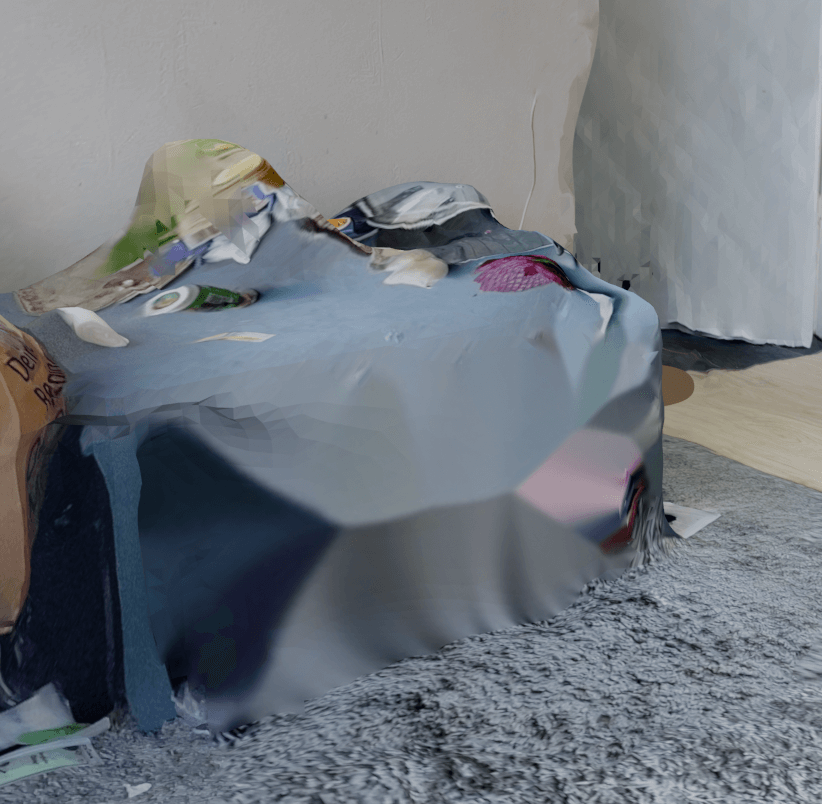
Example of scanning a low table in my room
You will get used to it by repeating the process several times, so have fun with it!