This article describes how to use Trnio, an iPhone app which scans and creates 3D models of people and objects, to create 3D models of the things around you and place them on STYLY.

Trnio
Compatibility: iOS 11.3 or later, compatible with iPhone, iPad, and iPod touch.
Price: $4.99
App Store :
https://apps.apple.com/app/trnio/id683053382
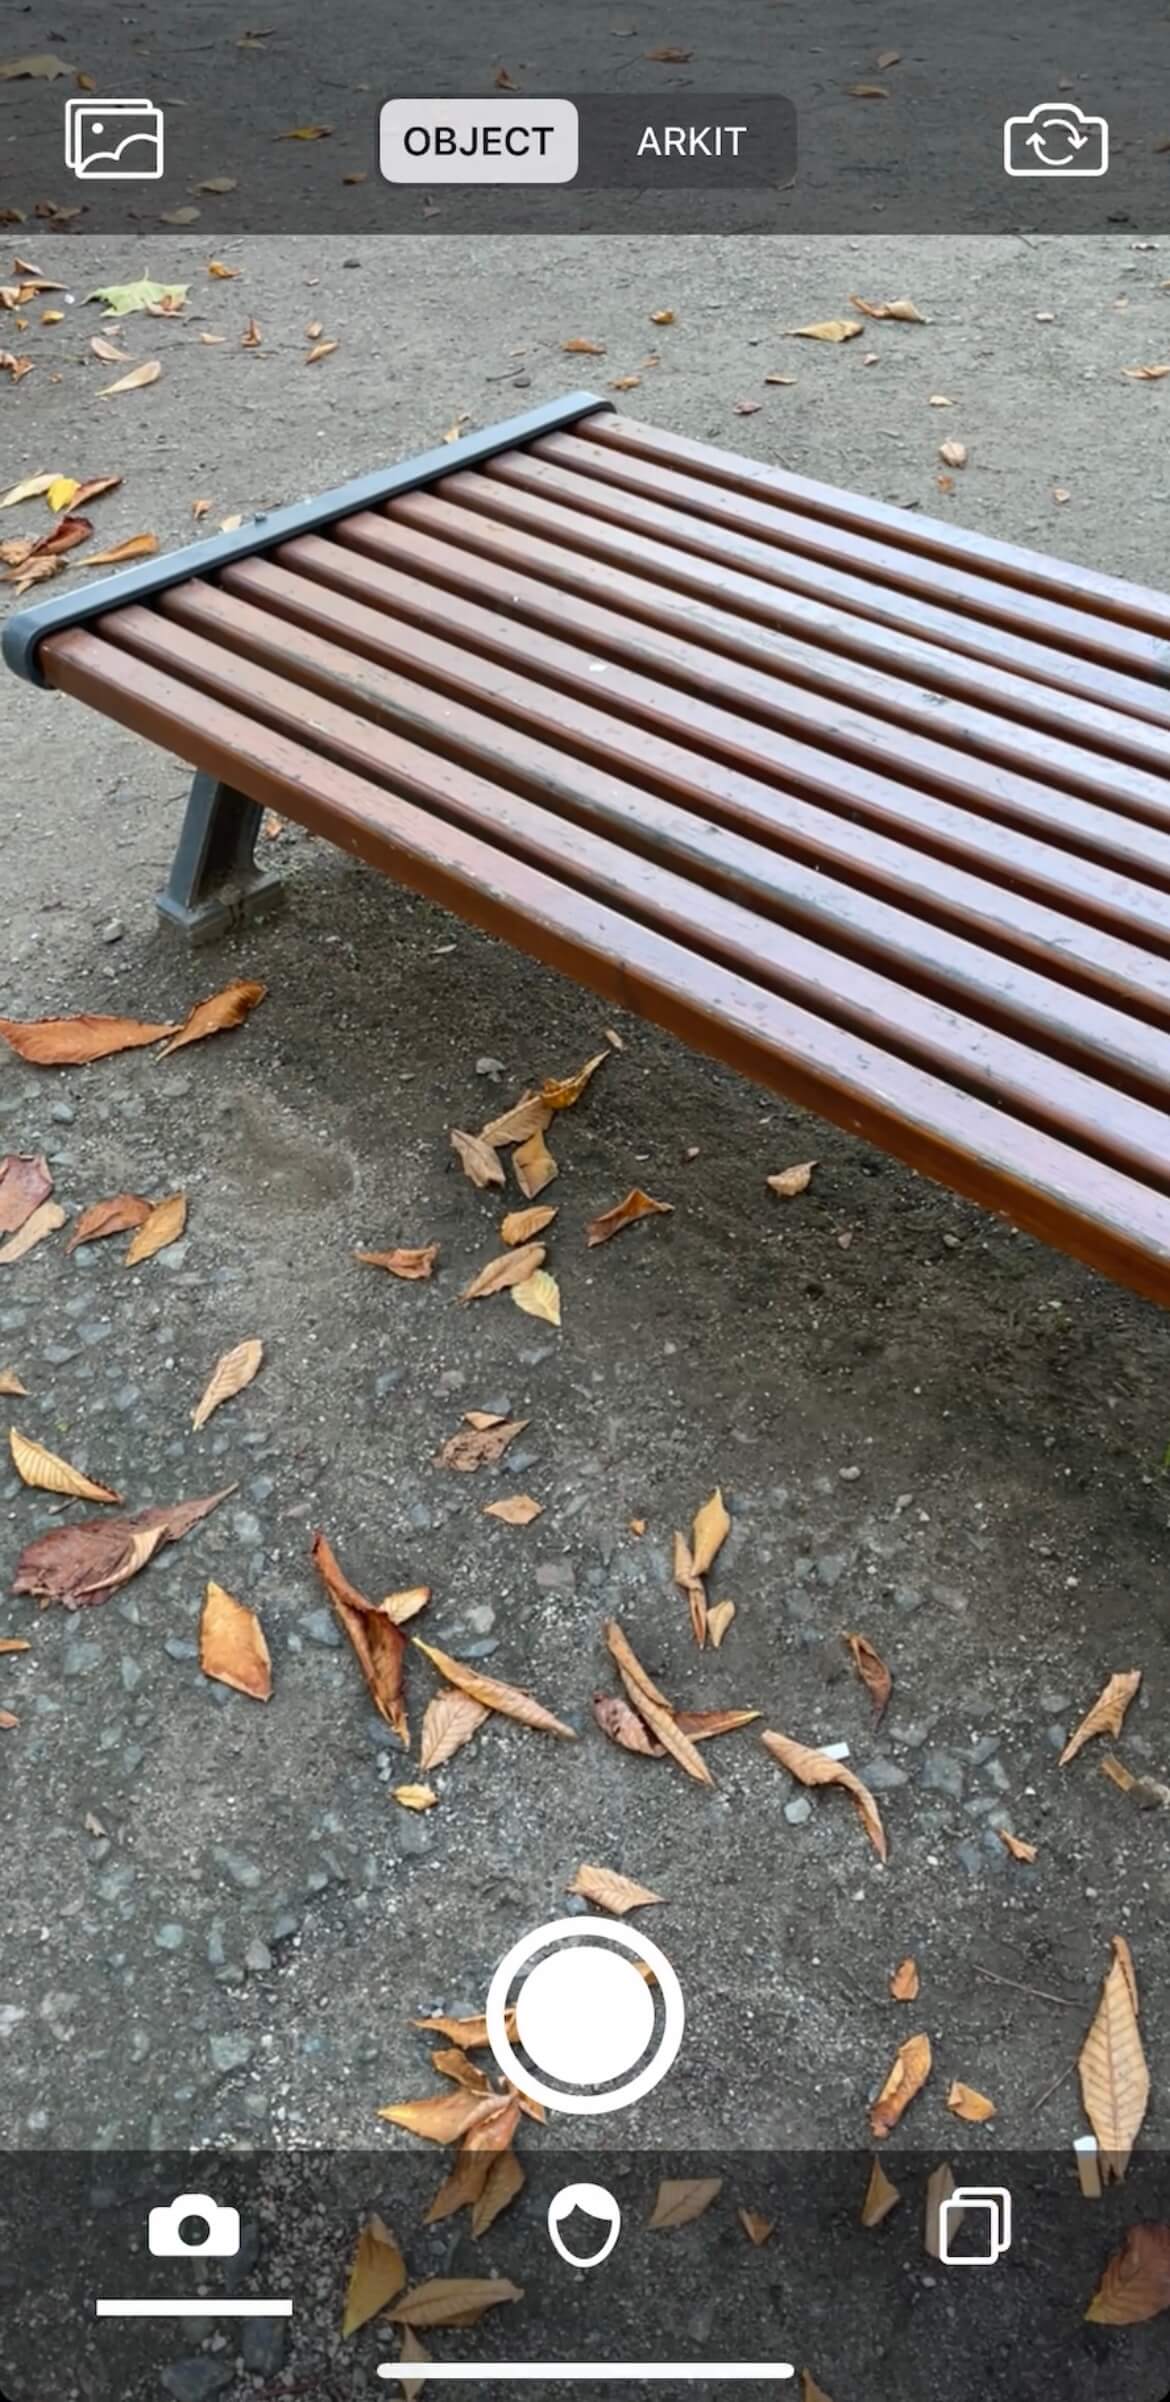
There are two types of shooting: Object mode and ARKit mode.
In Object mode, the user moves in a circular motion around an object while shooting.

Object
ARKit mode is suitable for capturing large objects and scenery that are difficult to capture in Object mode.

ARKit
Object mode
After confirming that the top of the screen is in Object mode, tap the round button at the bottom of the screen to start shooting.
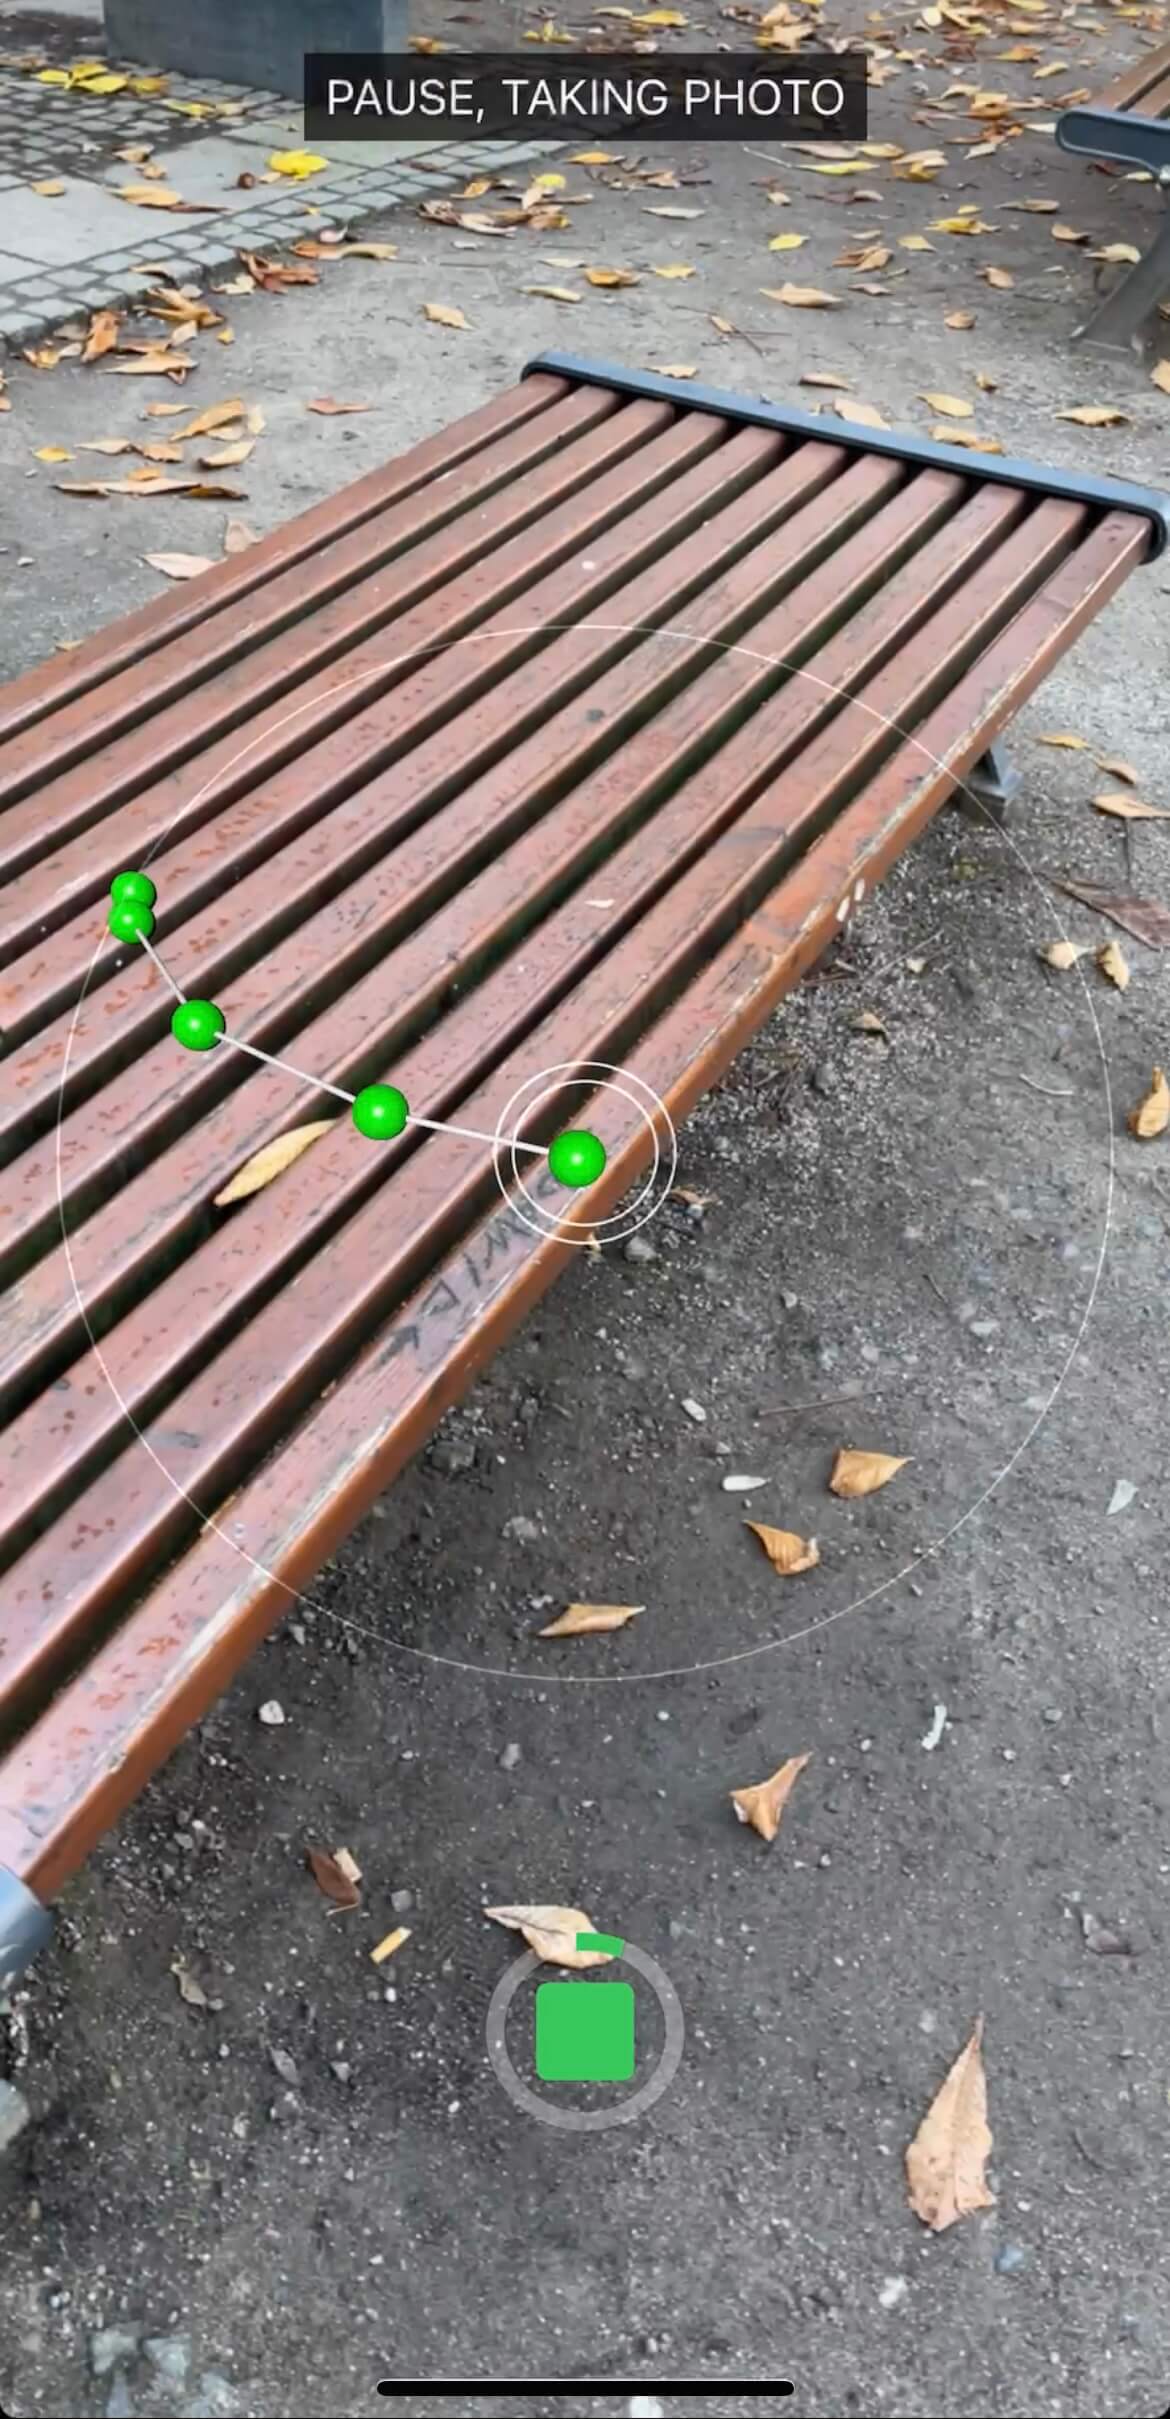
Tap the white circle button at the bottom of the screen to start shooting.
When shooting starts, a green circle connected by a line will appear.
The green circle indicates the location where the picture was taken.
Each time you move, the image is automatically taken, so please keep the camera pointed at the object and move slowly.
The next green circle should be in the center of the white circle.
To get a good scan, shoot from various angles, from directly above the object to directly below it, so that the green circle spirals around the thin white circle.
When you have completed shooting, tap the square button to stop.
Object mode shooting
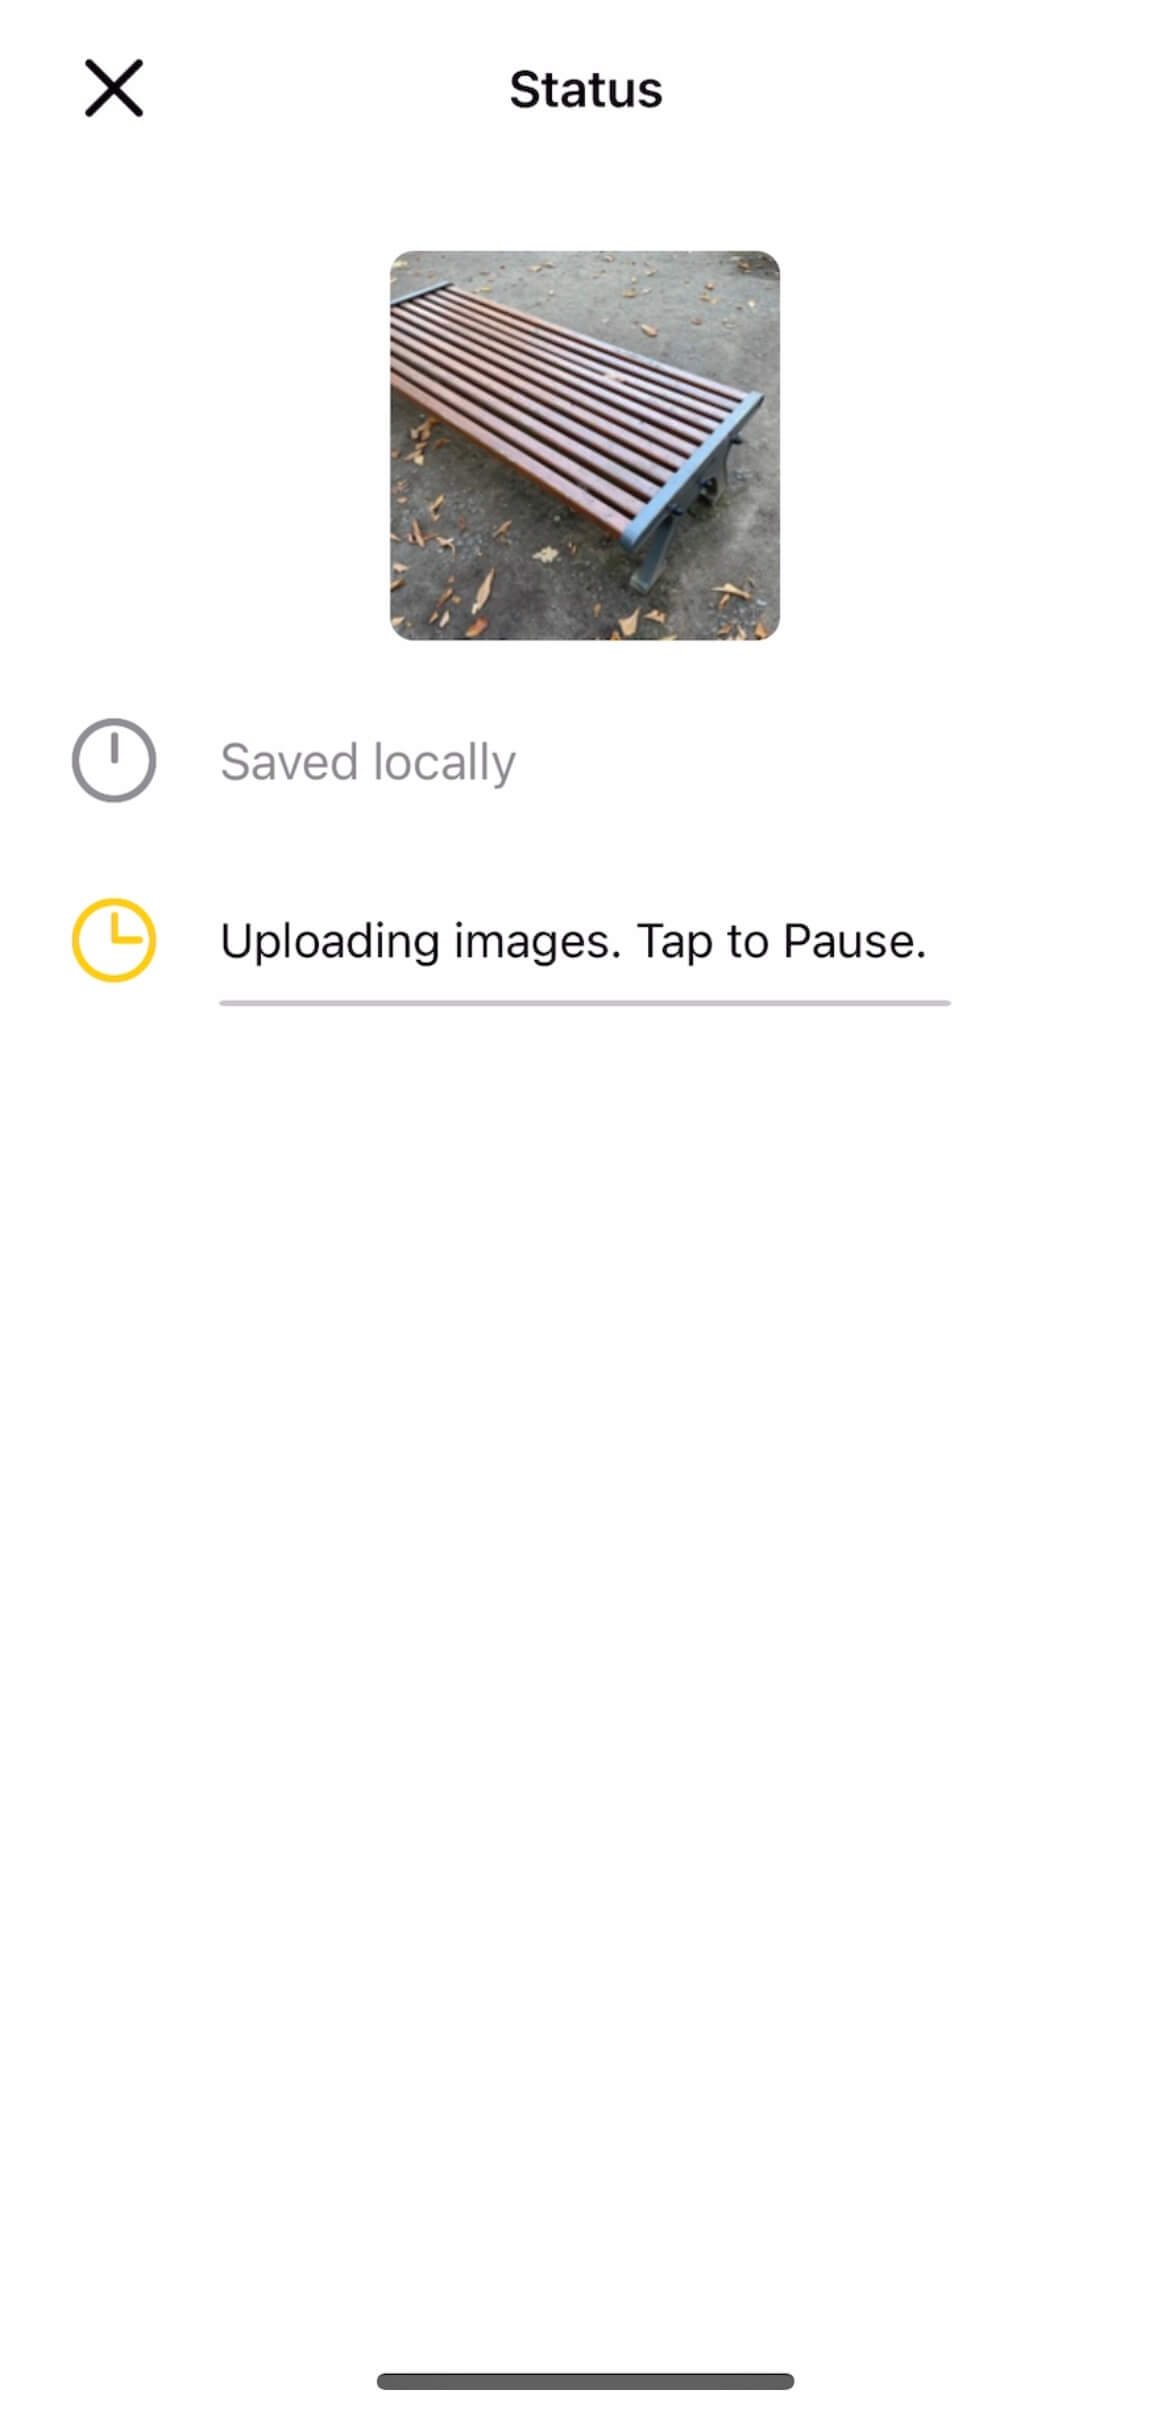
When the scan data is saved, a message will be displayed.
If you are not connected to Wi-Fi, such as when you are shooting outside, a warning message will be displayed if you try to upload the data on the spot.
Tap Upload if you still want to upload the data on the spot, or Cancel if you want to upload the data later.
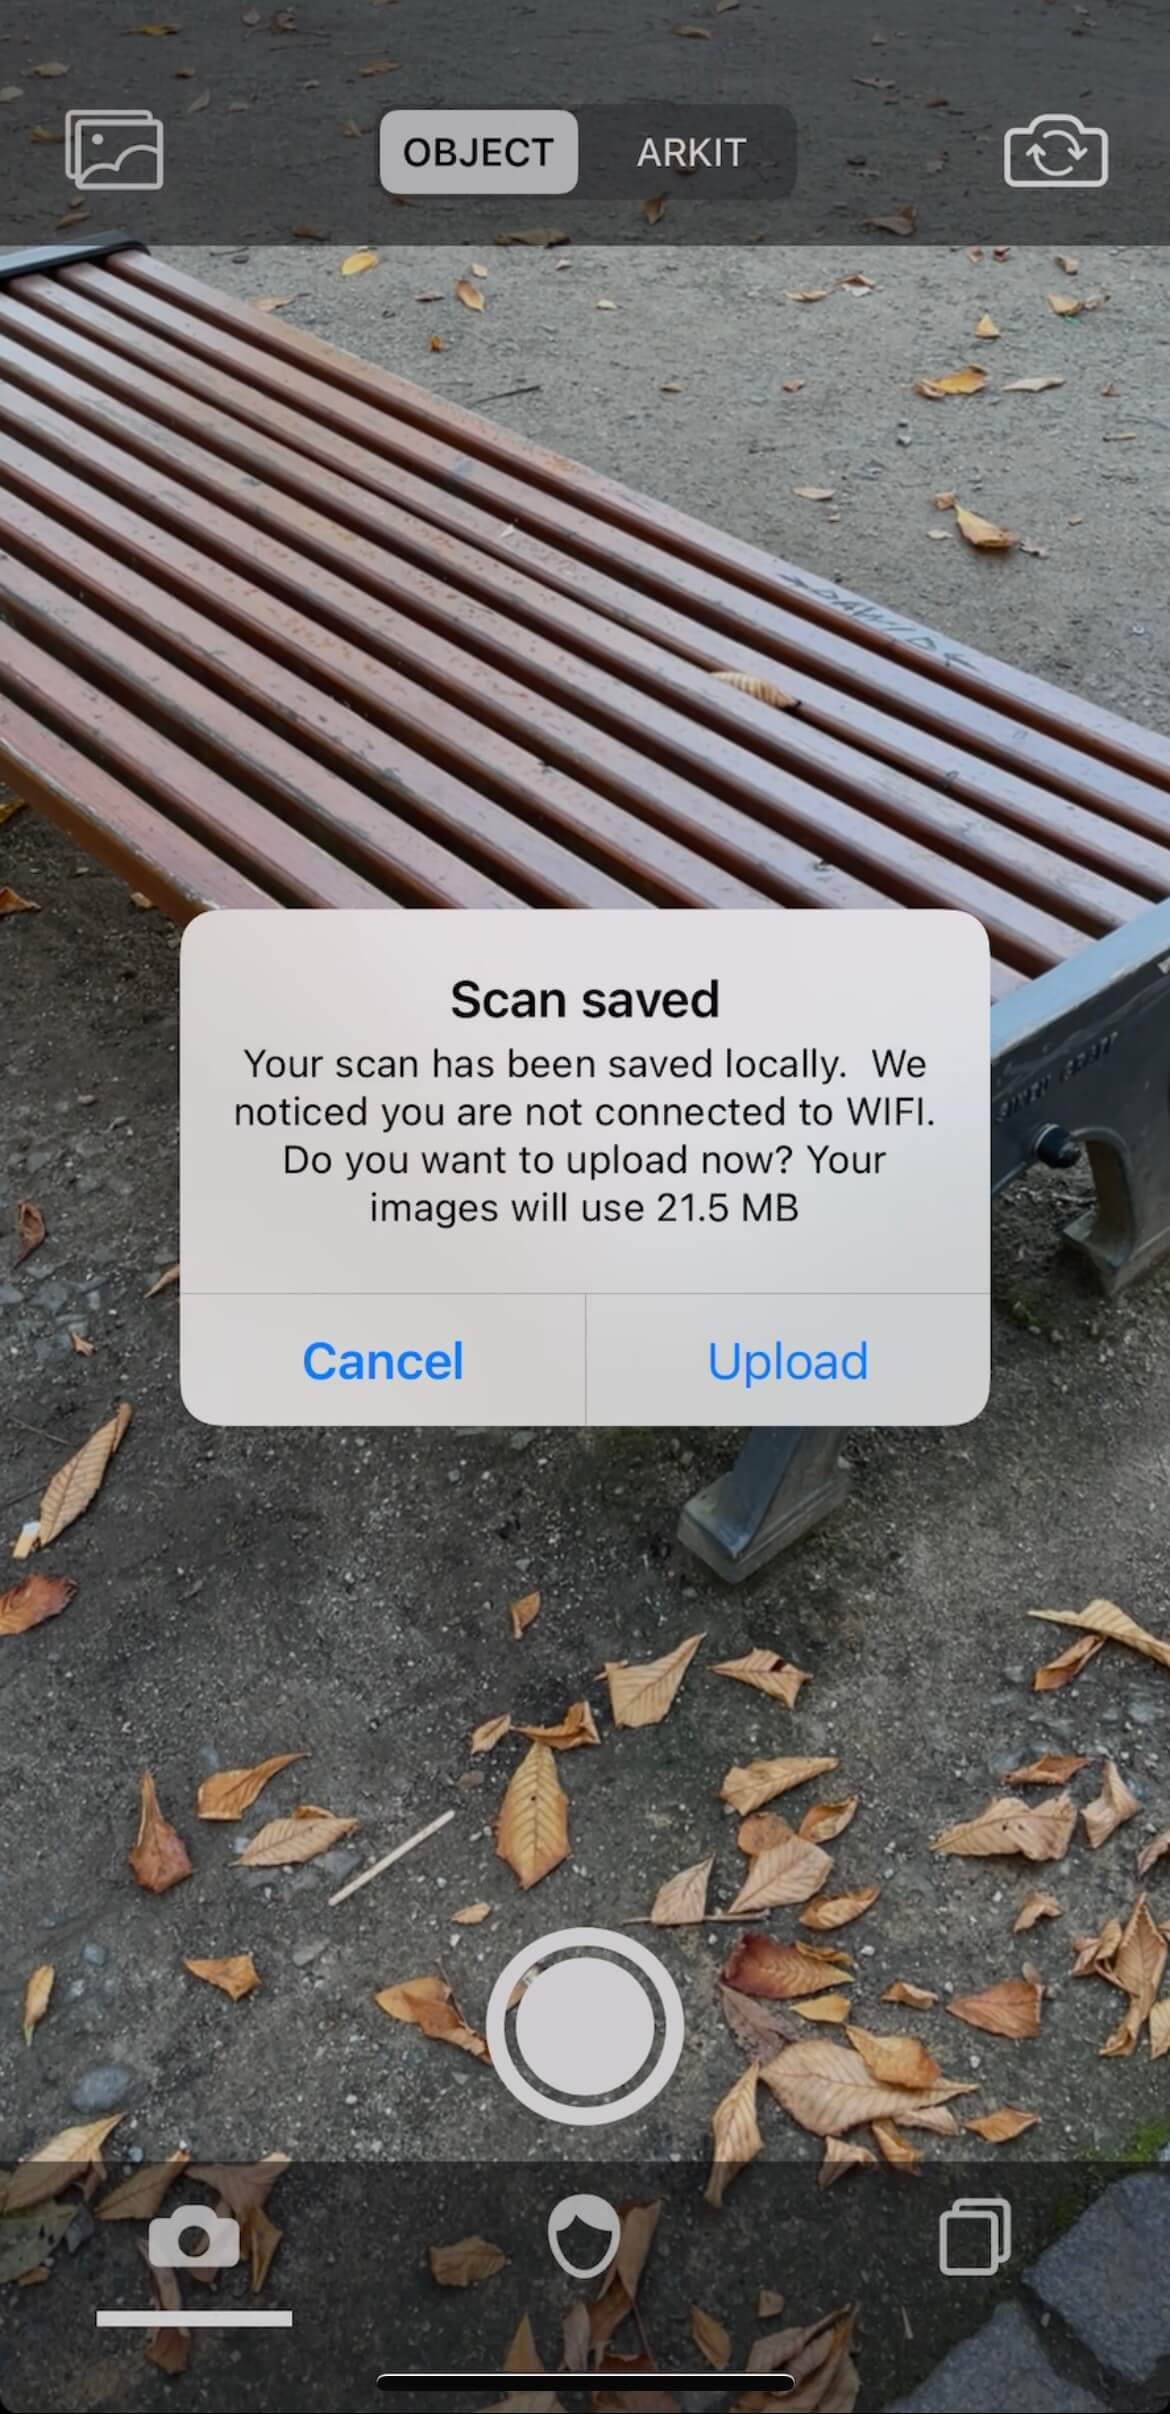
The scanned data has been saved.
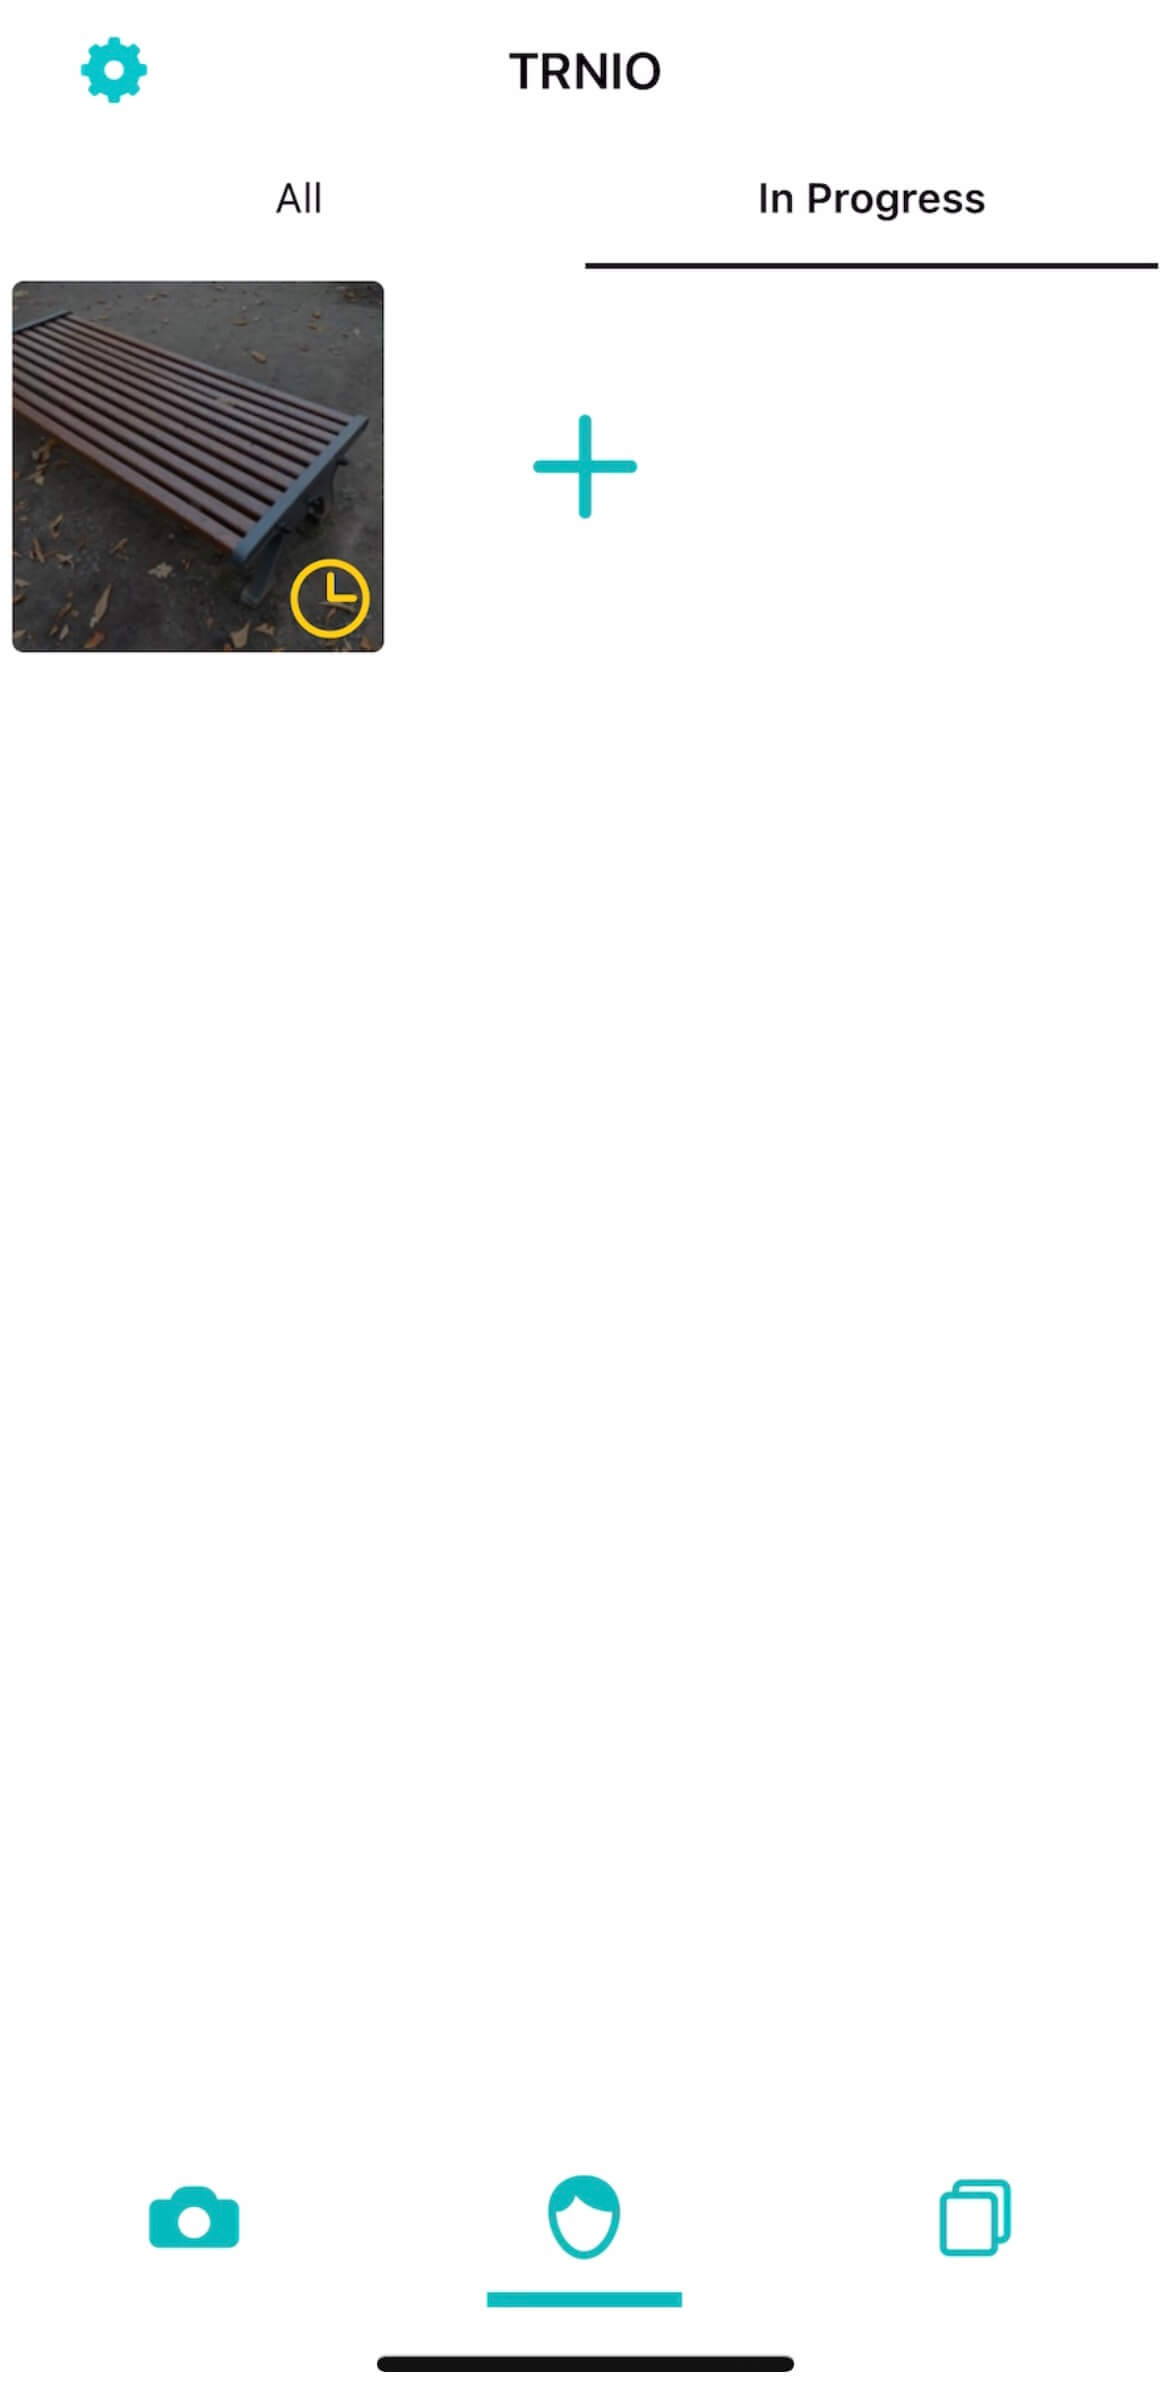
After you tap Upload, the main screen will look like this
If the scanned data has a clock mark on the bottom right corner, it is being uploaded.
The mark will disappear when the upload is complete.
Uploading
Tap the model that is being uploaded to view the upload status.
Uploading an image, but it stops when you tap it.
When “Done” is displayed, the 3D modeling process is complete.
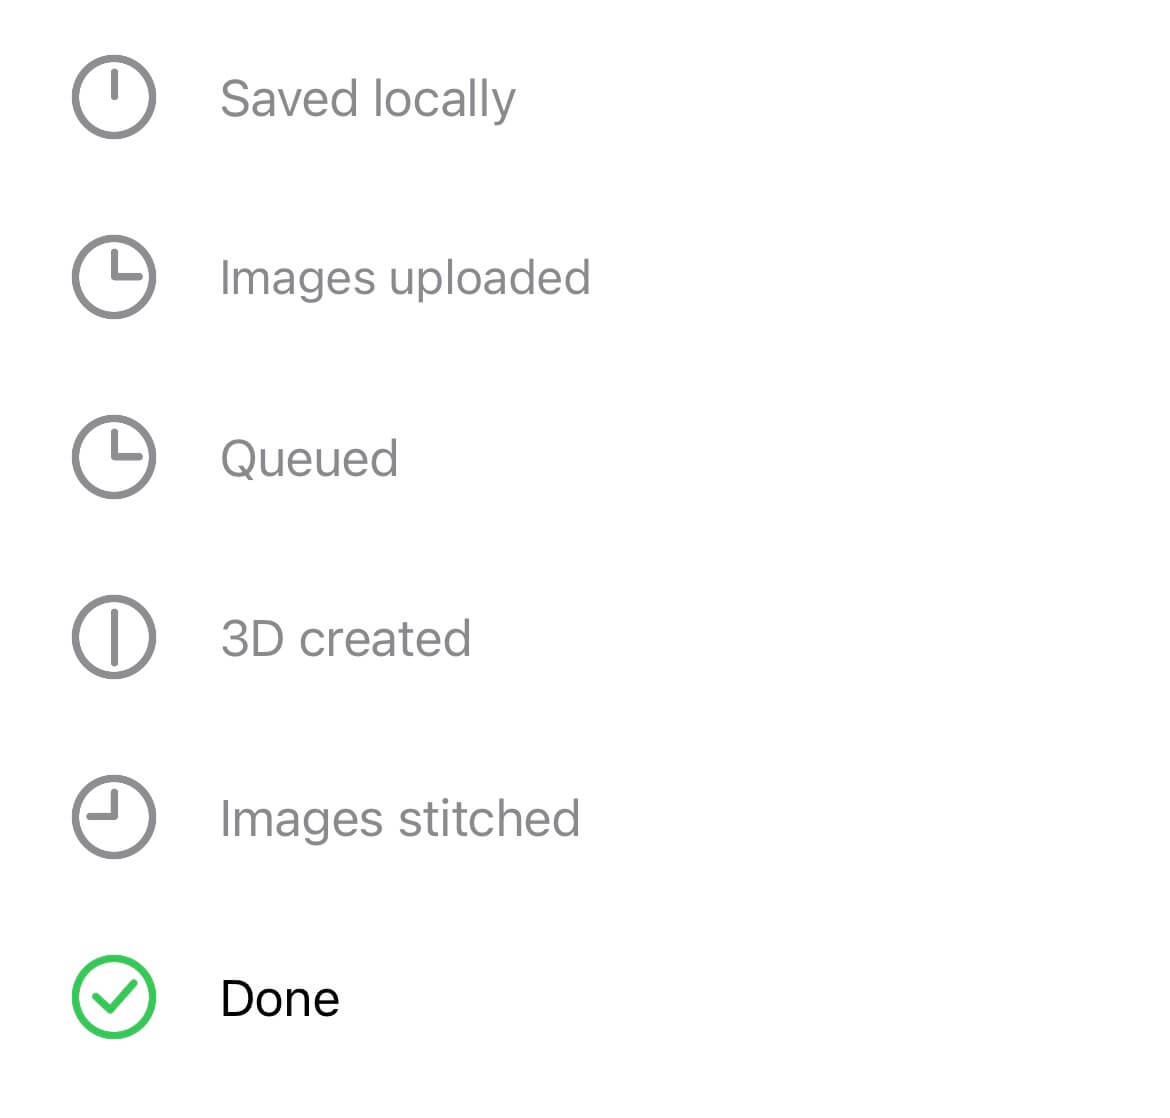
Wait until everything is done.
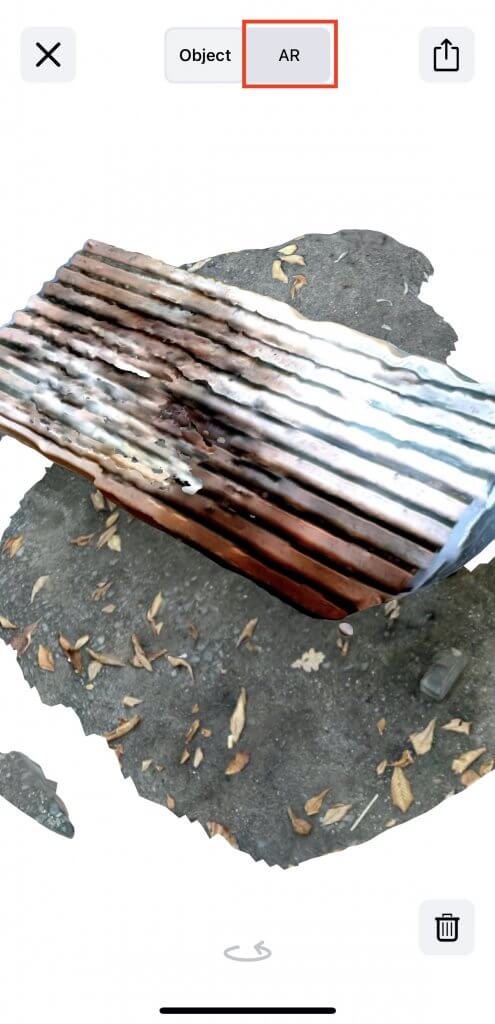
If you tap “AR” here, the 3D model will be displayed in AR in the space in front of you.
Creating a 3D model from multiple photos
In addition to using Object mode to take photos on the spot, you can also create 3D models from multiple photos you have taken beforehand.
Tap the photo icon in the upper left corner of the shooting screen.
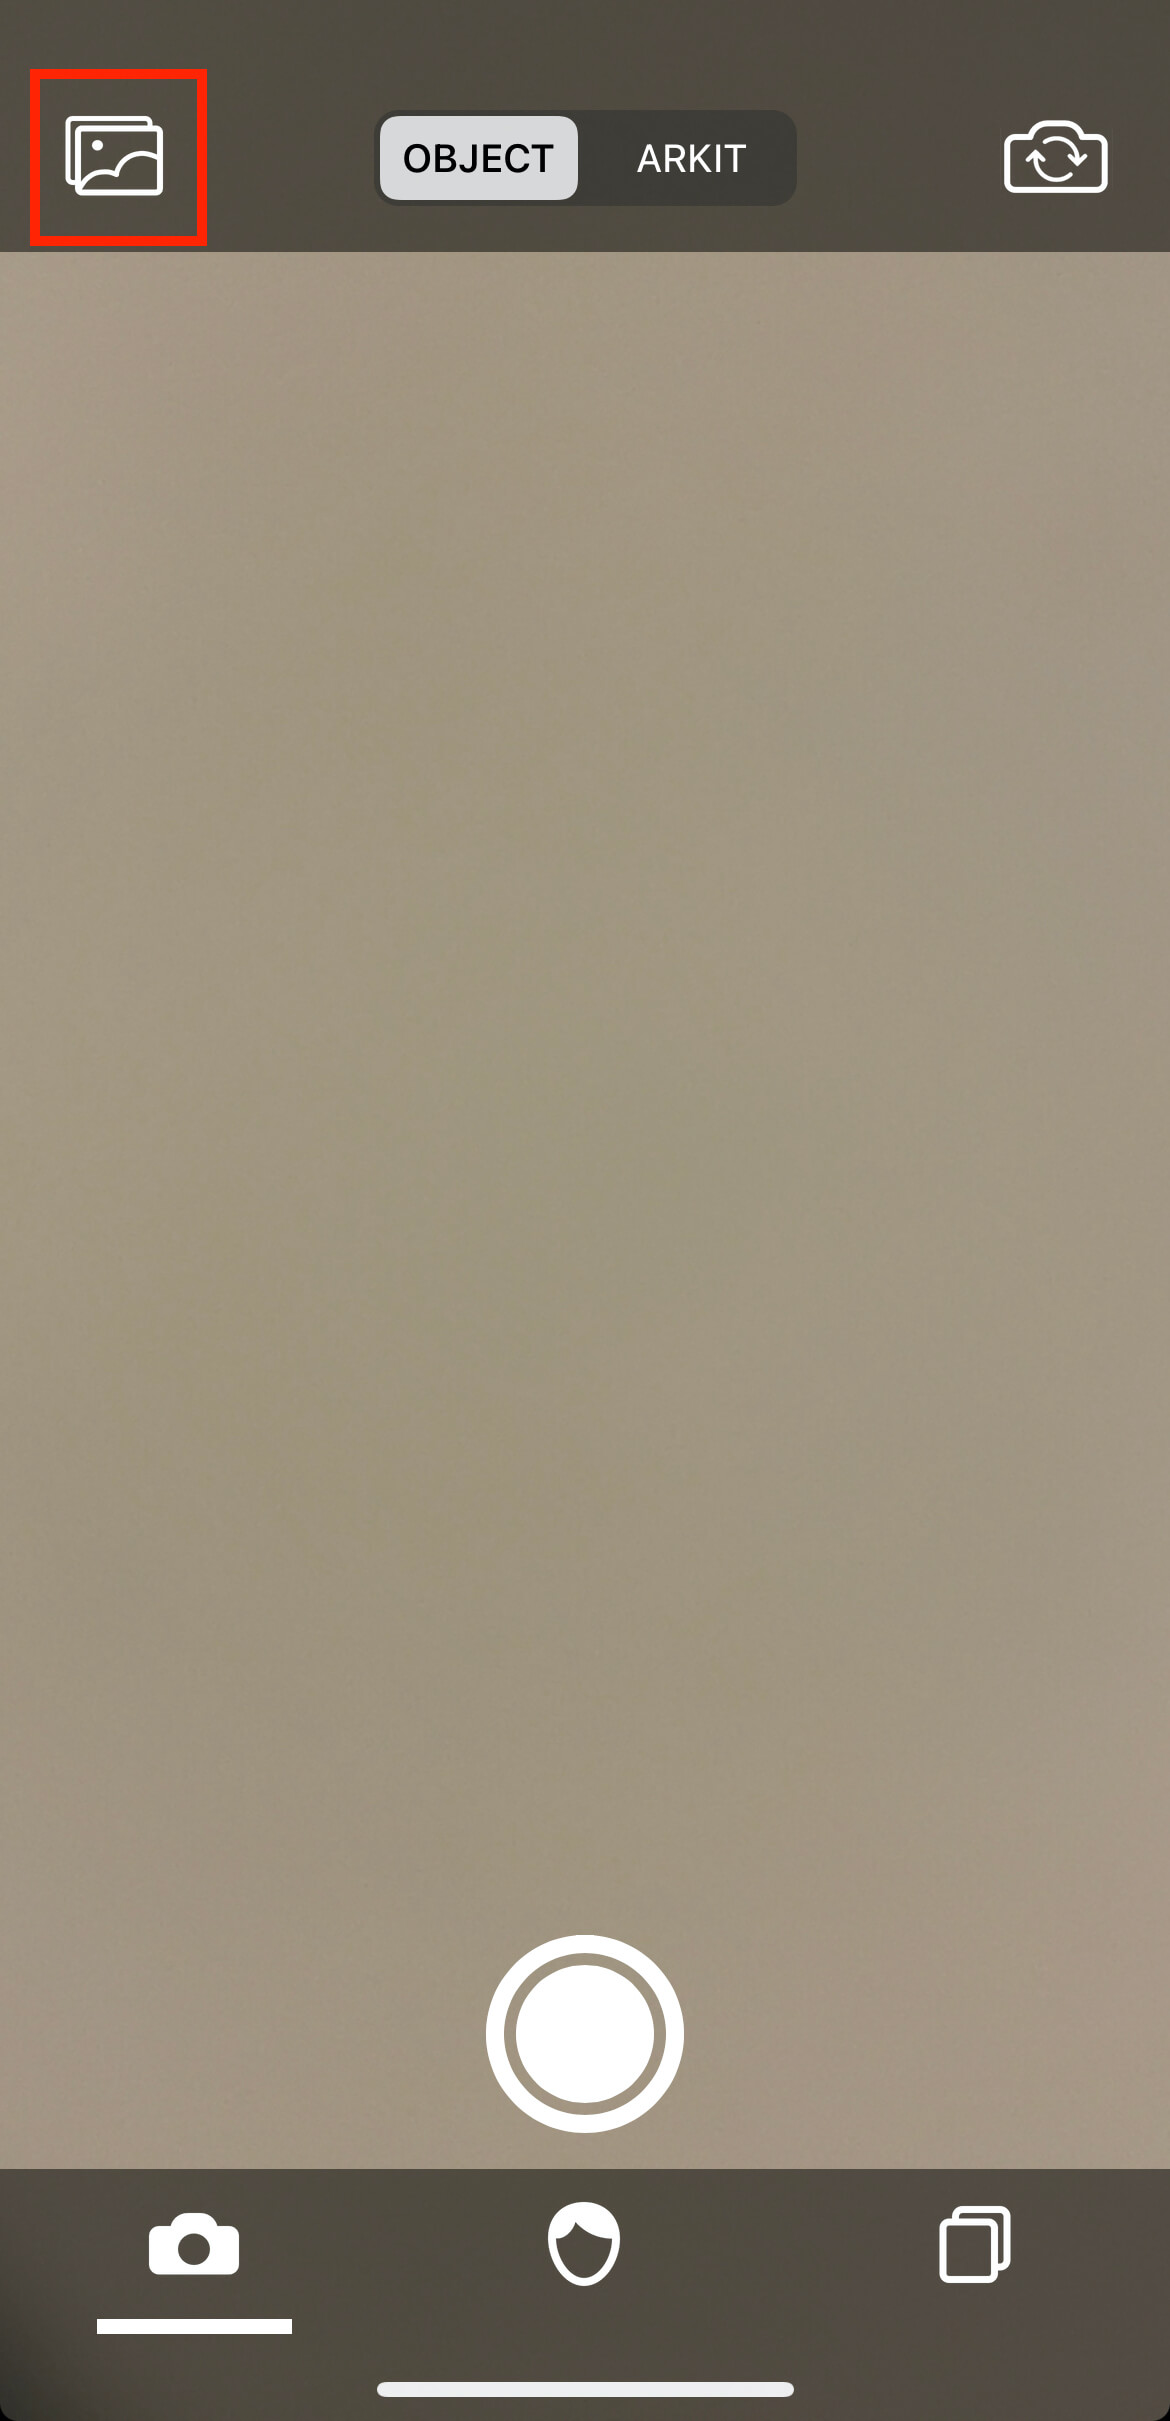
Tap the photo icon
Tap multiple photos stored in your iPhone/iPad to select them.
You can select up to 80 photos.
For best results, use as many photos taken from different angles as possible.
When you have completed your selection, tap Done in the upper right corner.
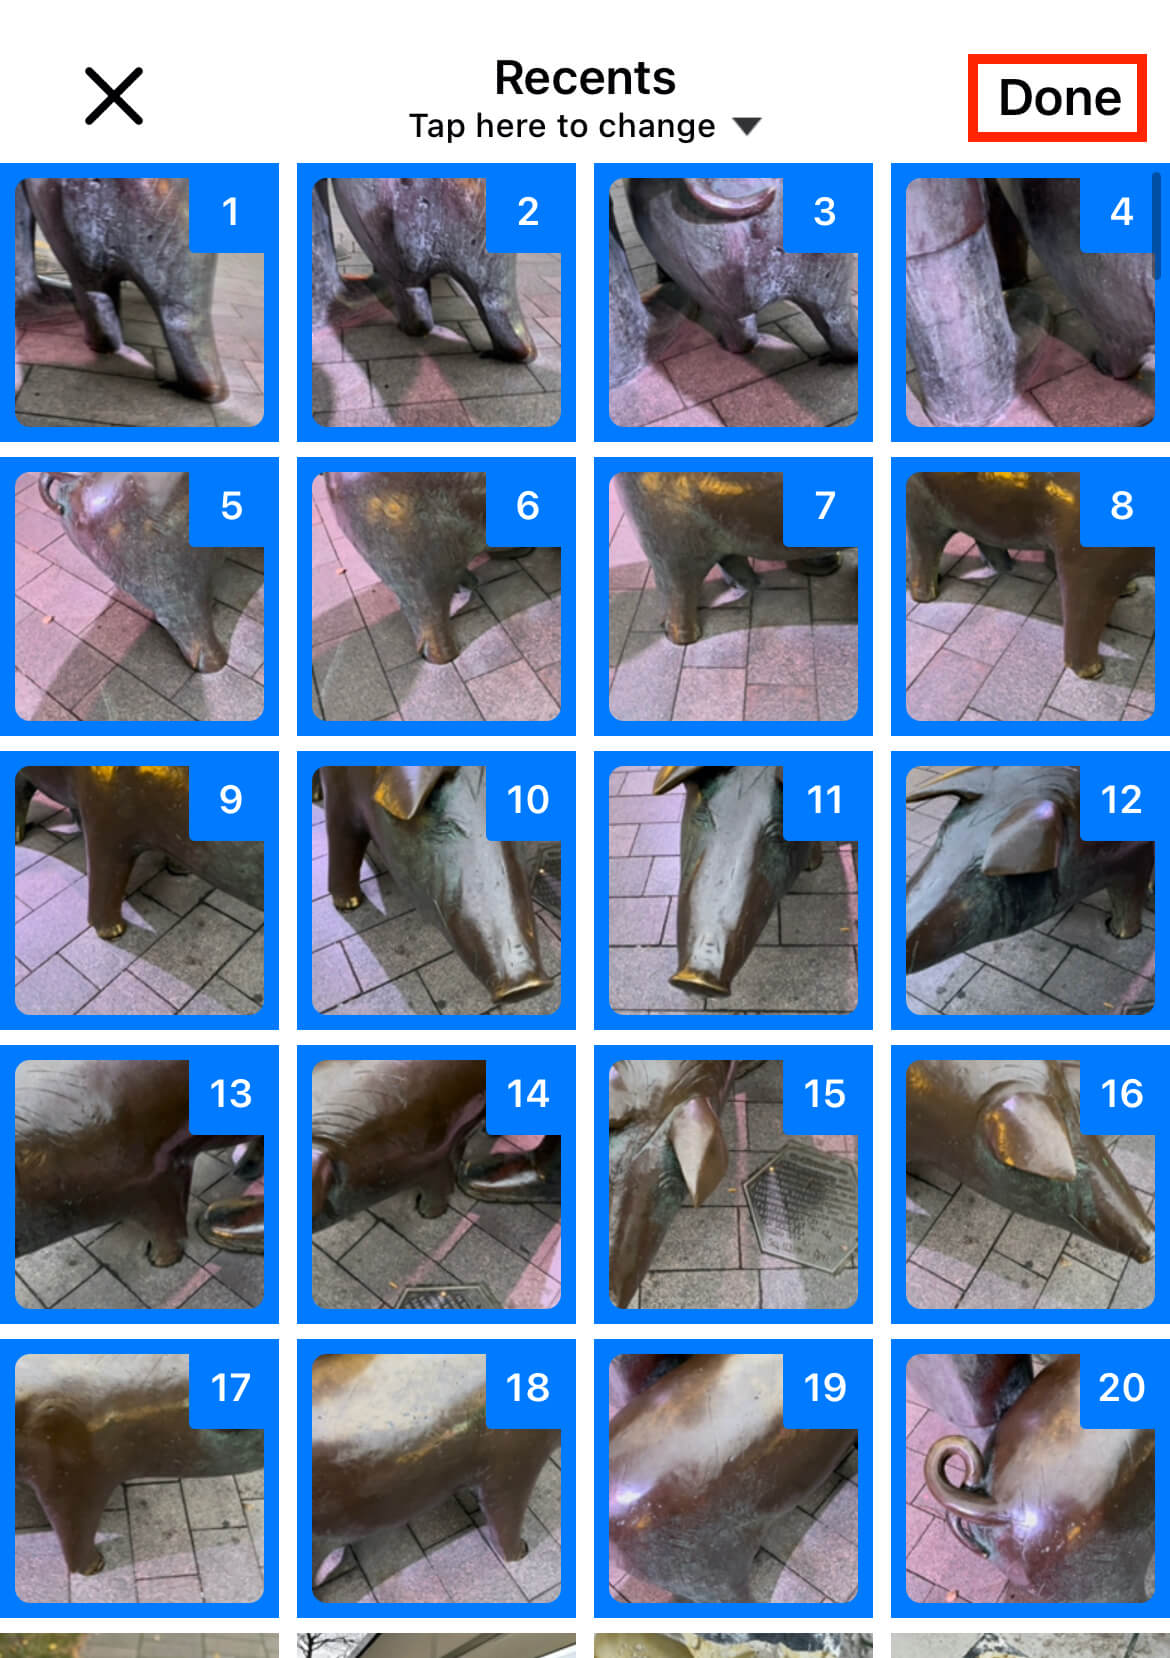
When you have selected all the images, tap Done in the upper right corner.
Then the images will be saved, and you can leave Trnio running while you do this.
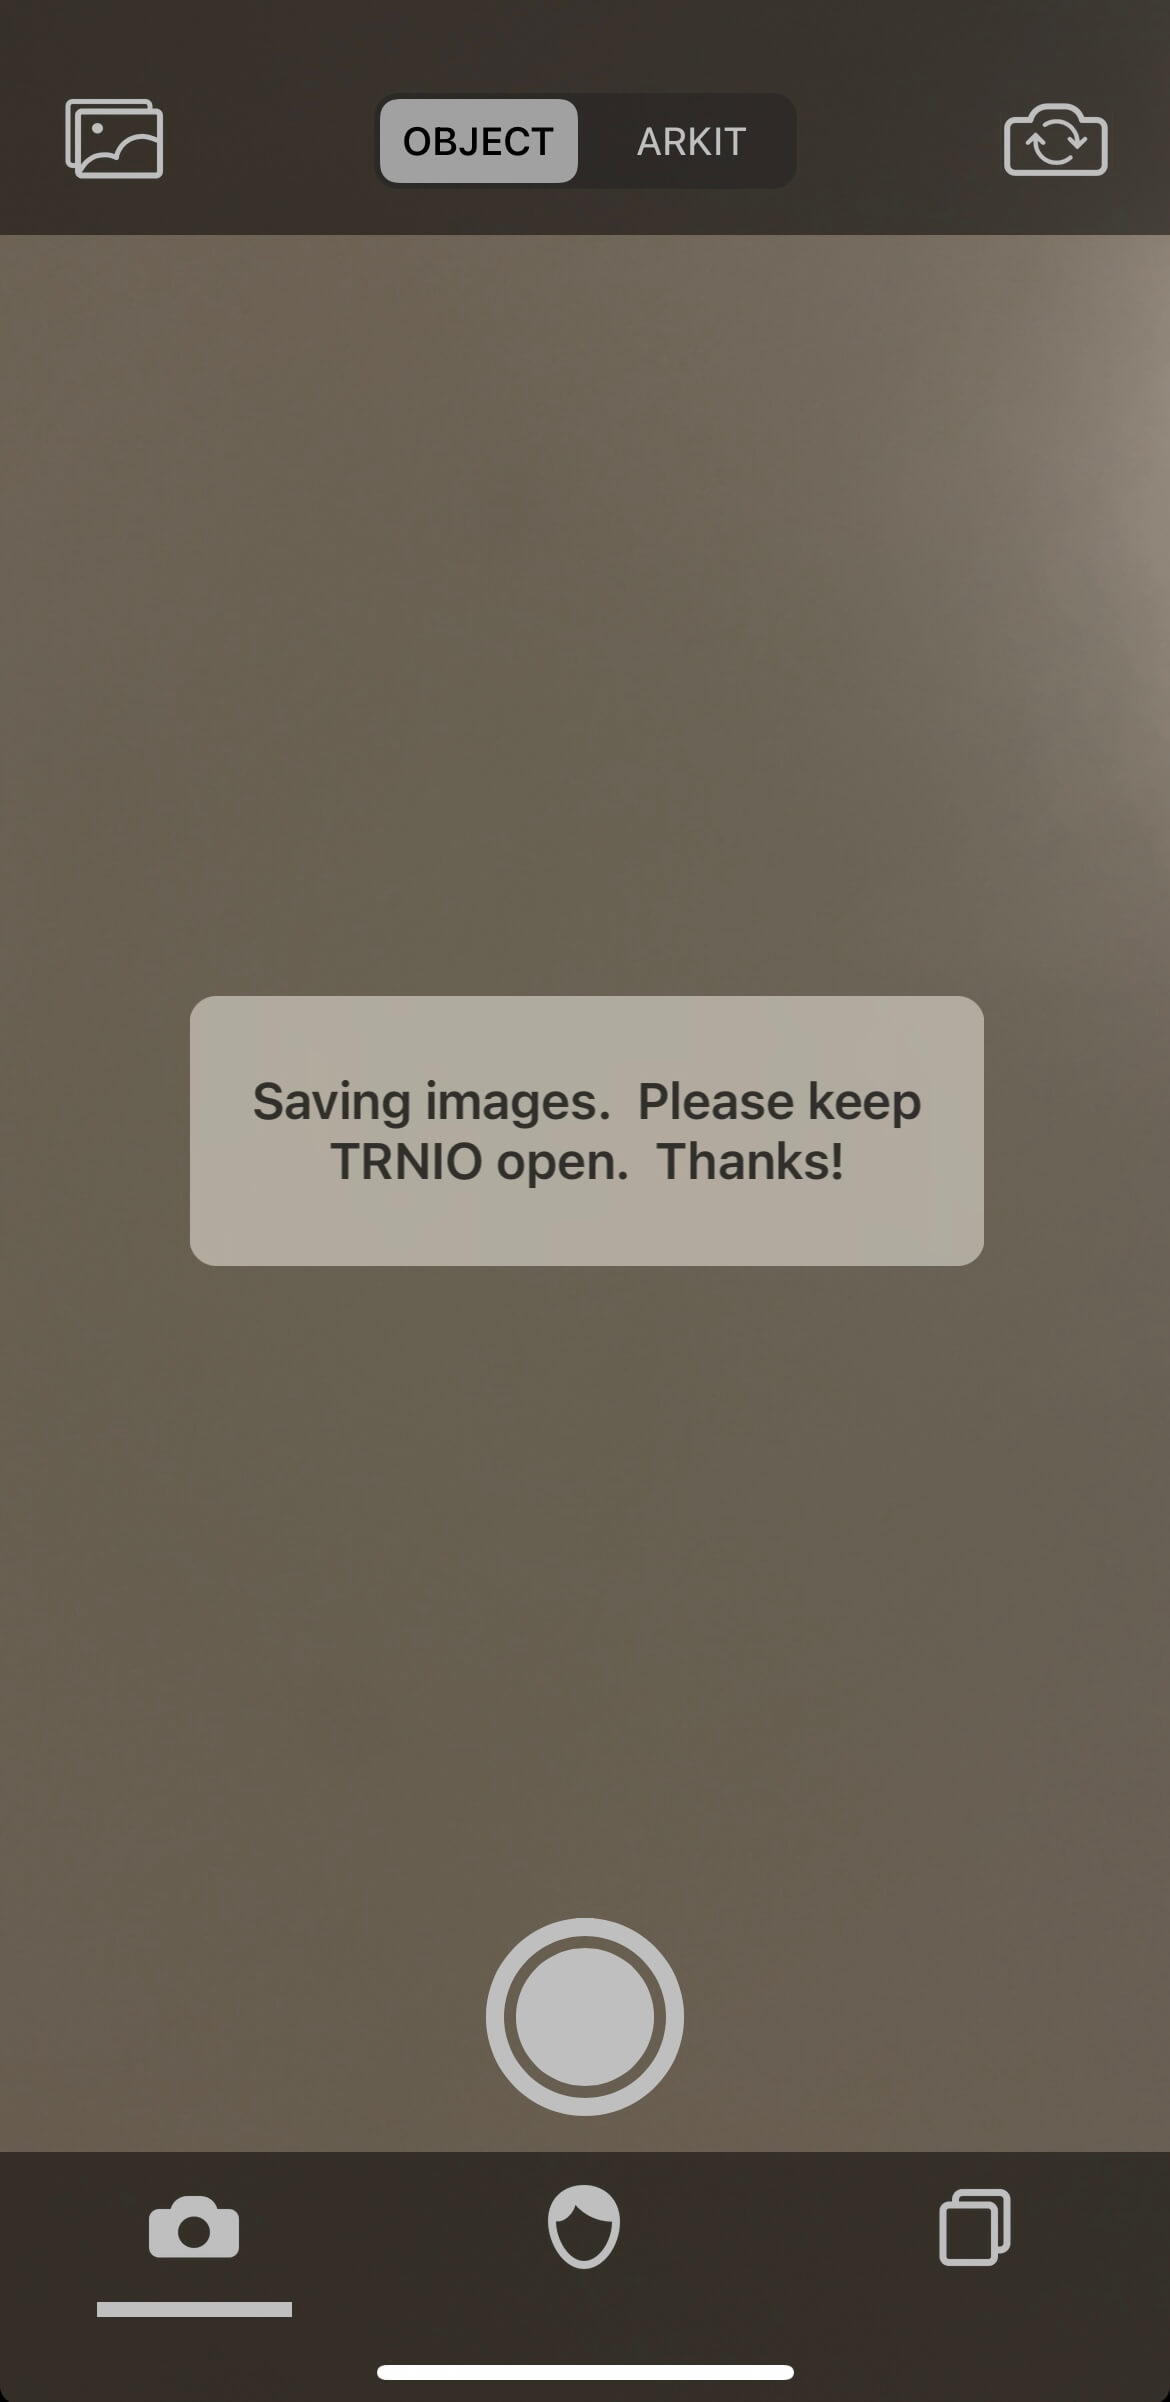
Leave Trnio running.
After that, the procedure is the same as taking a picture in Object mode.
ARKit mode
For large objects that are difficult to capture while rotating, or for sceneries, use ARKit mode.
In ARKit mode, take multiple pictures while shifting the camera to the right or left so that the entire scenery you want to capture is in the picture.
When you are done taking pictures, wait until the 3D modeling is complete as in Object mode.
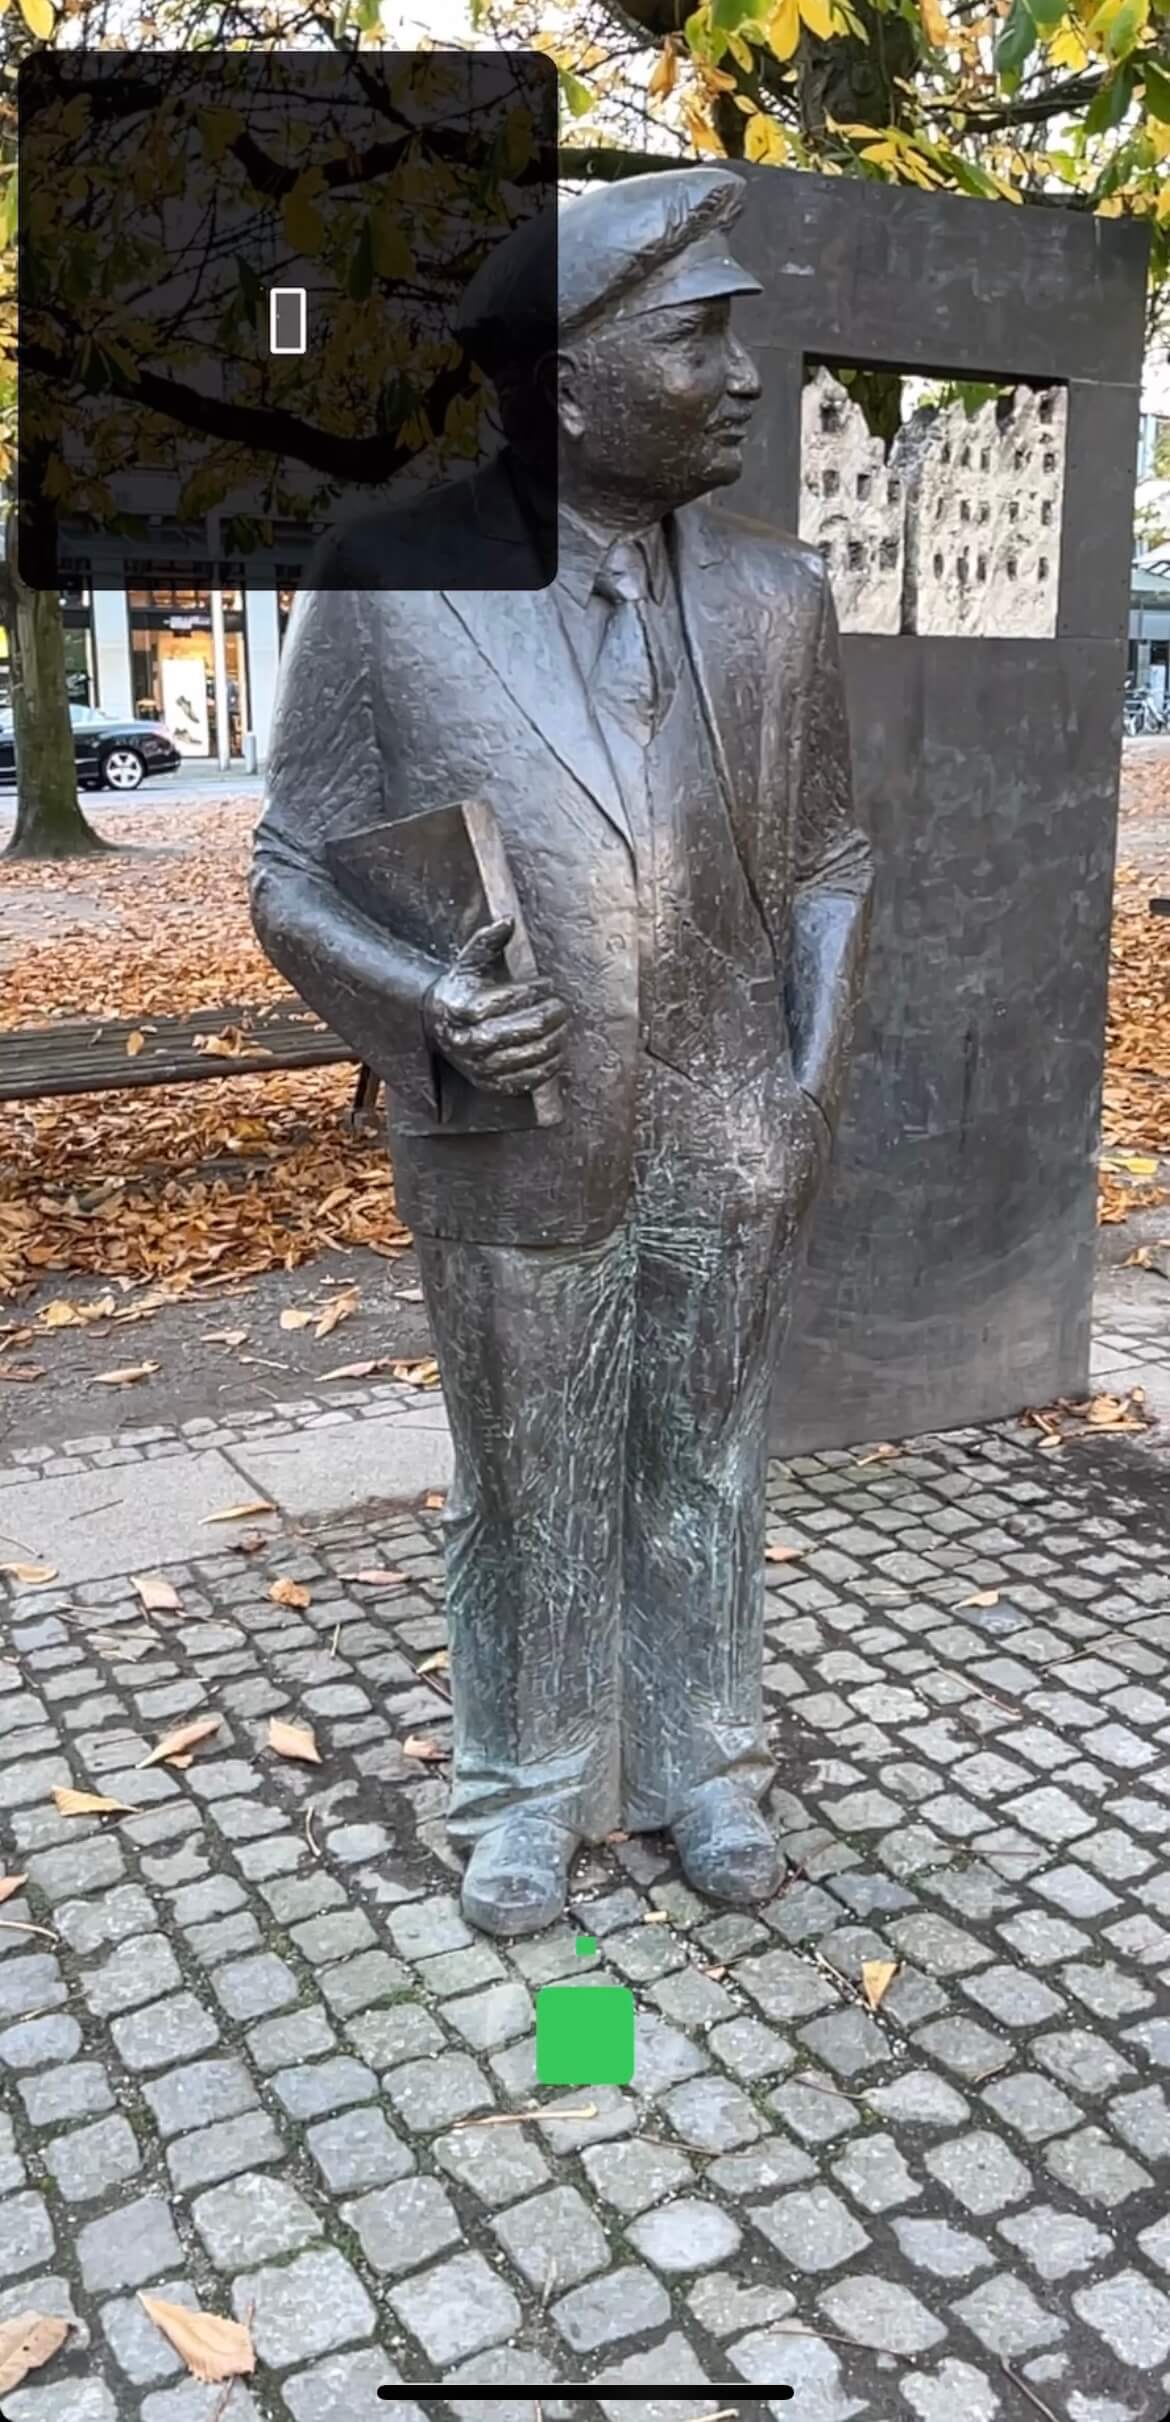
When you take a picture of an object, the scanned point cloud data will be displayed in the upper left corner.
The scanned model can be shared in several ways or used as an object on STYLY.
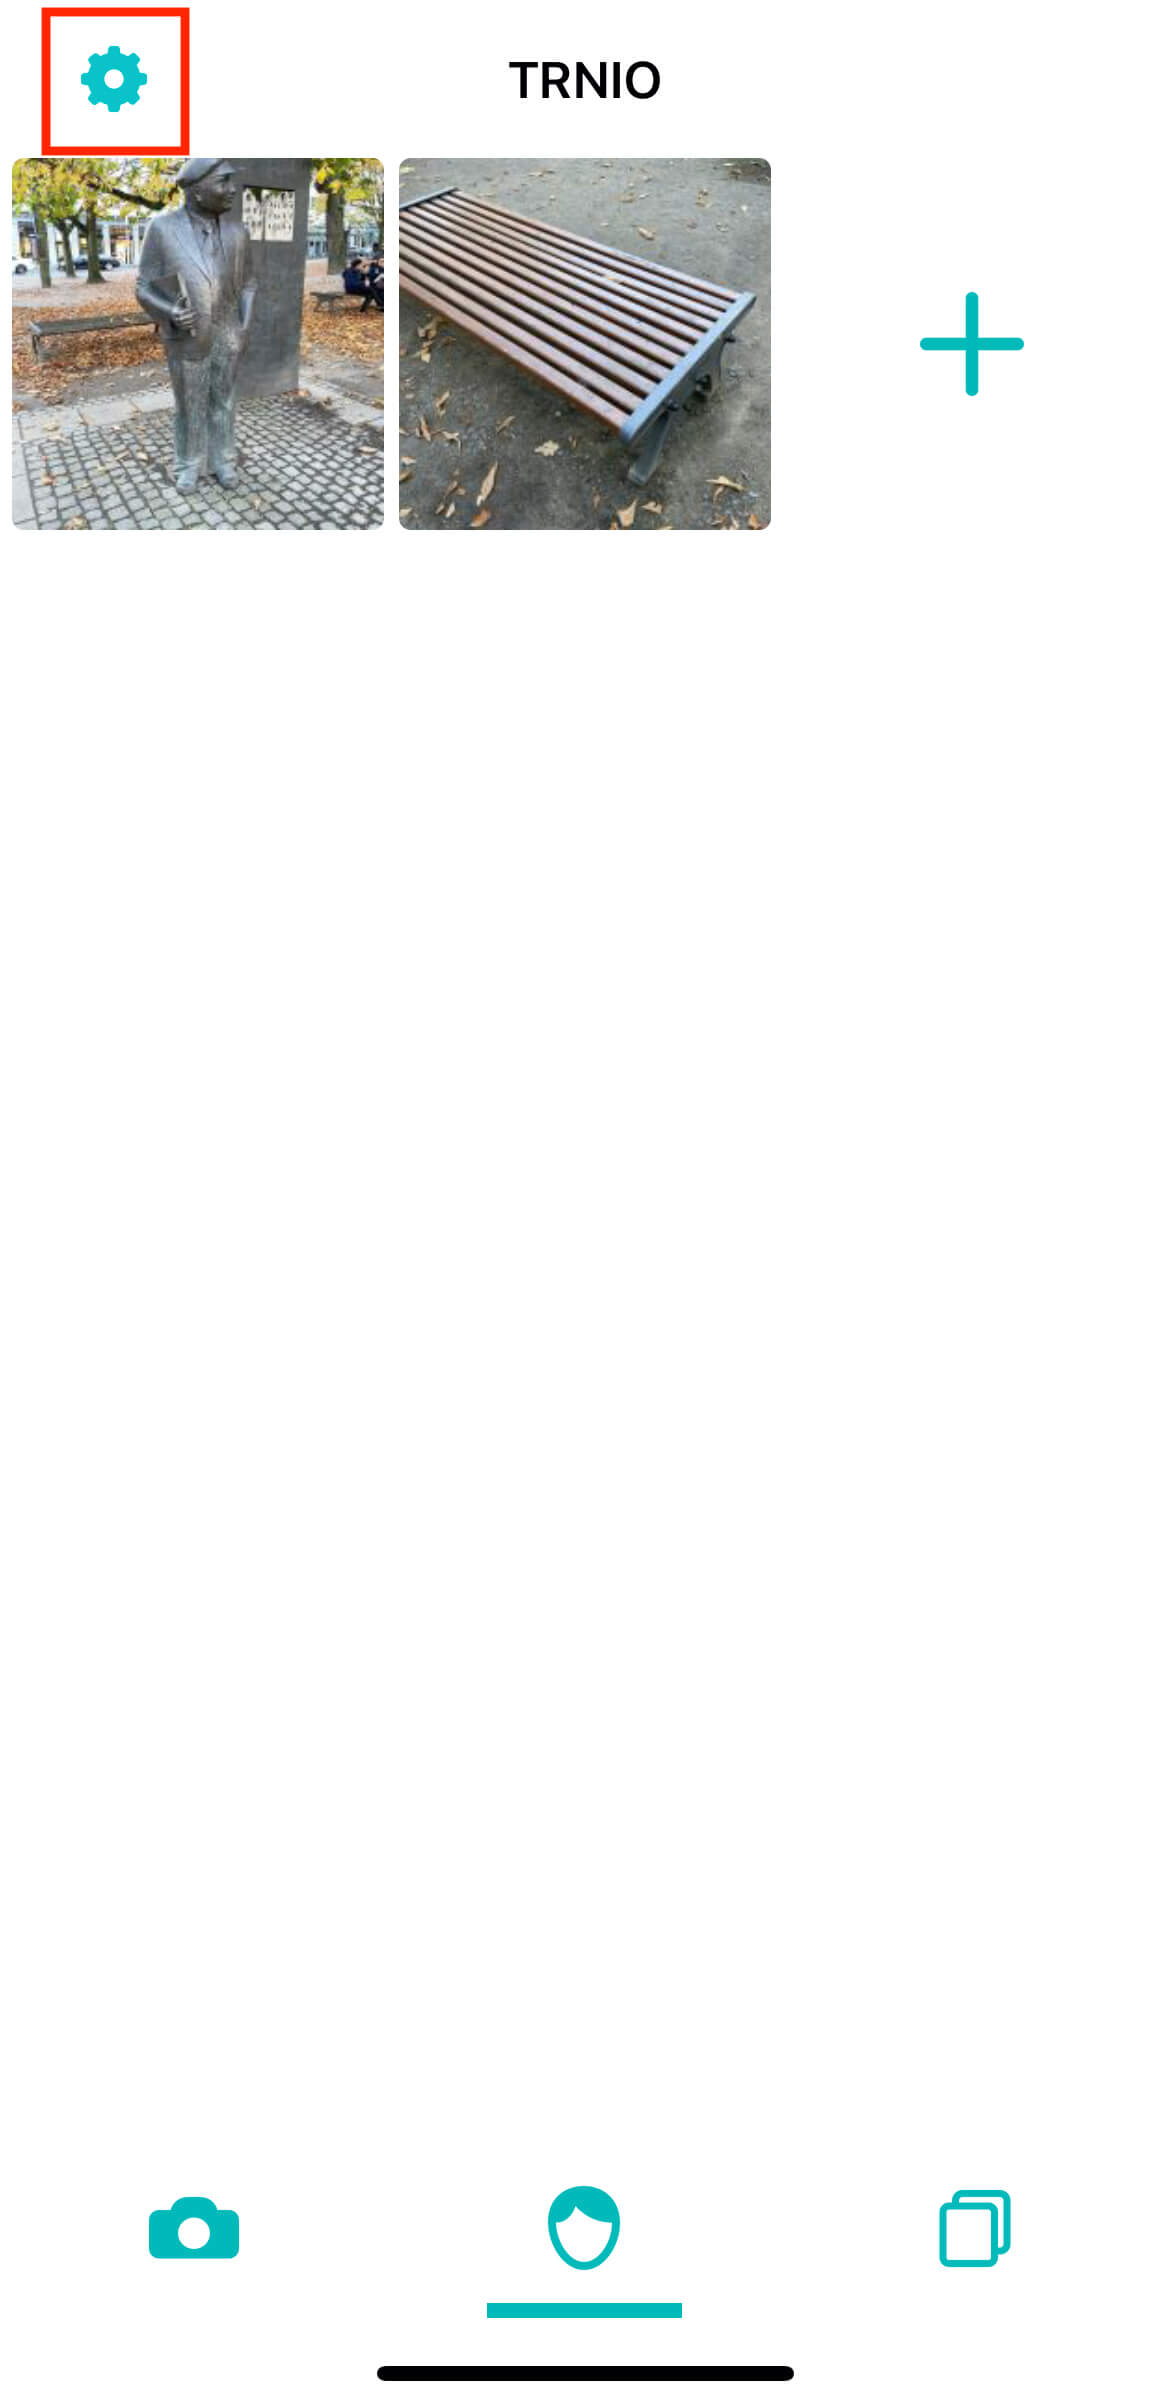
From the main screen, tap the bottom-right icon to open Gallery.
Here you can view models from around the world that have been scanned using Trnio.
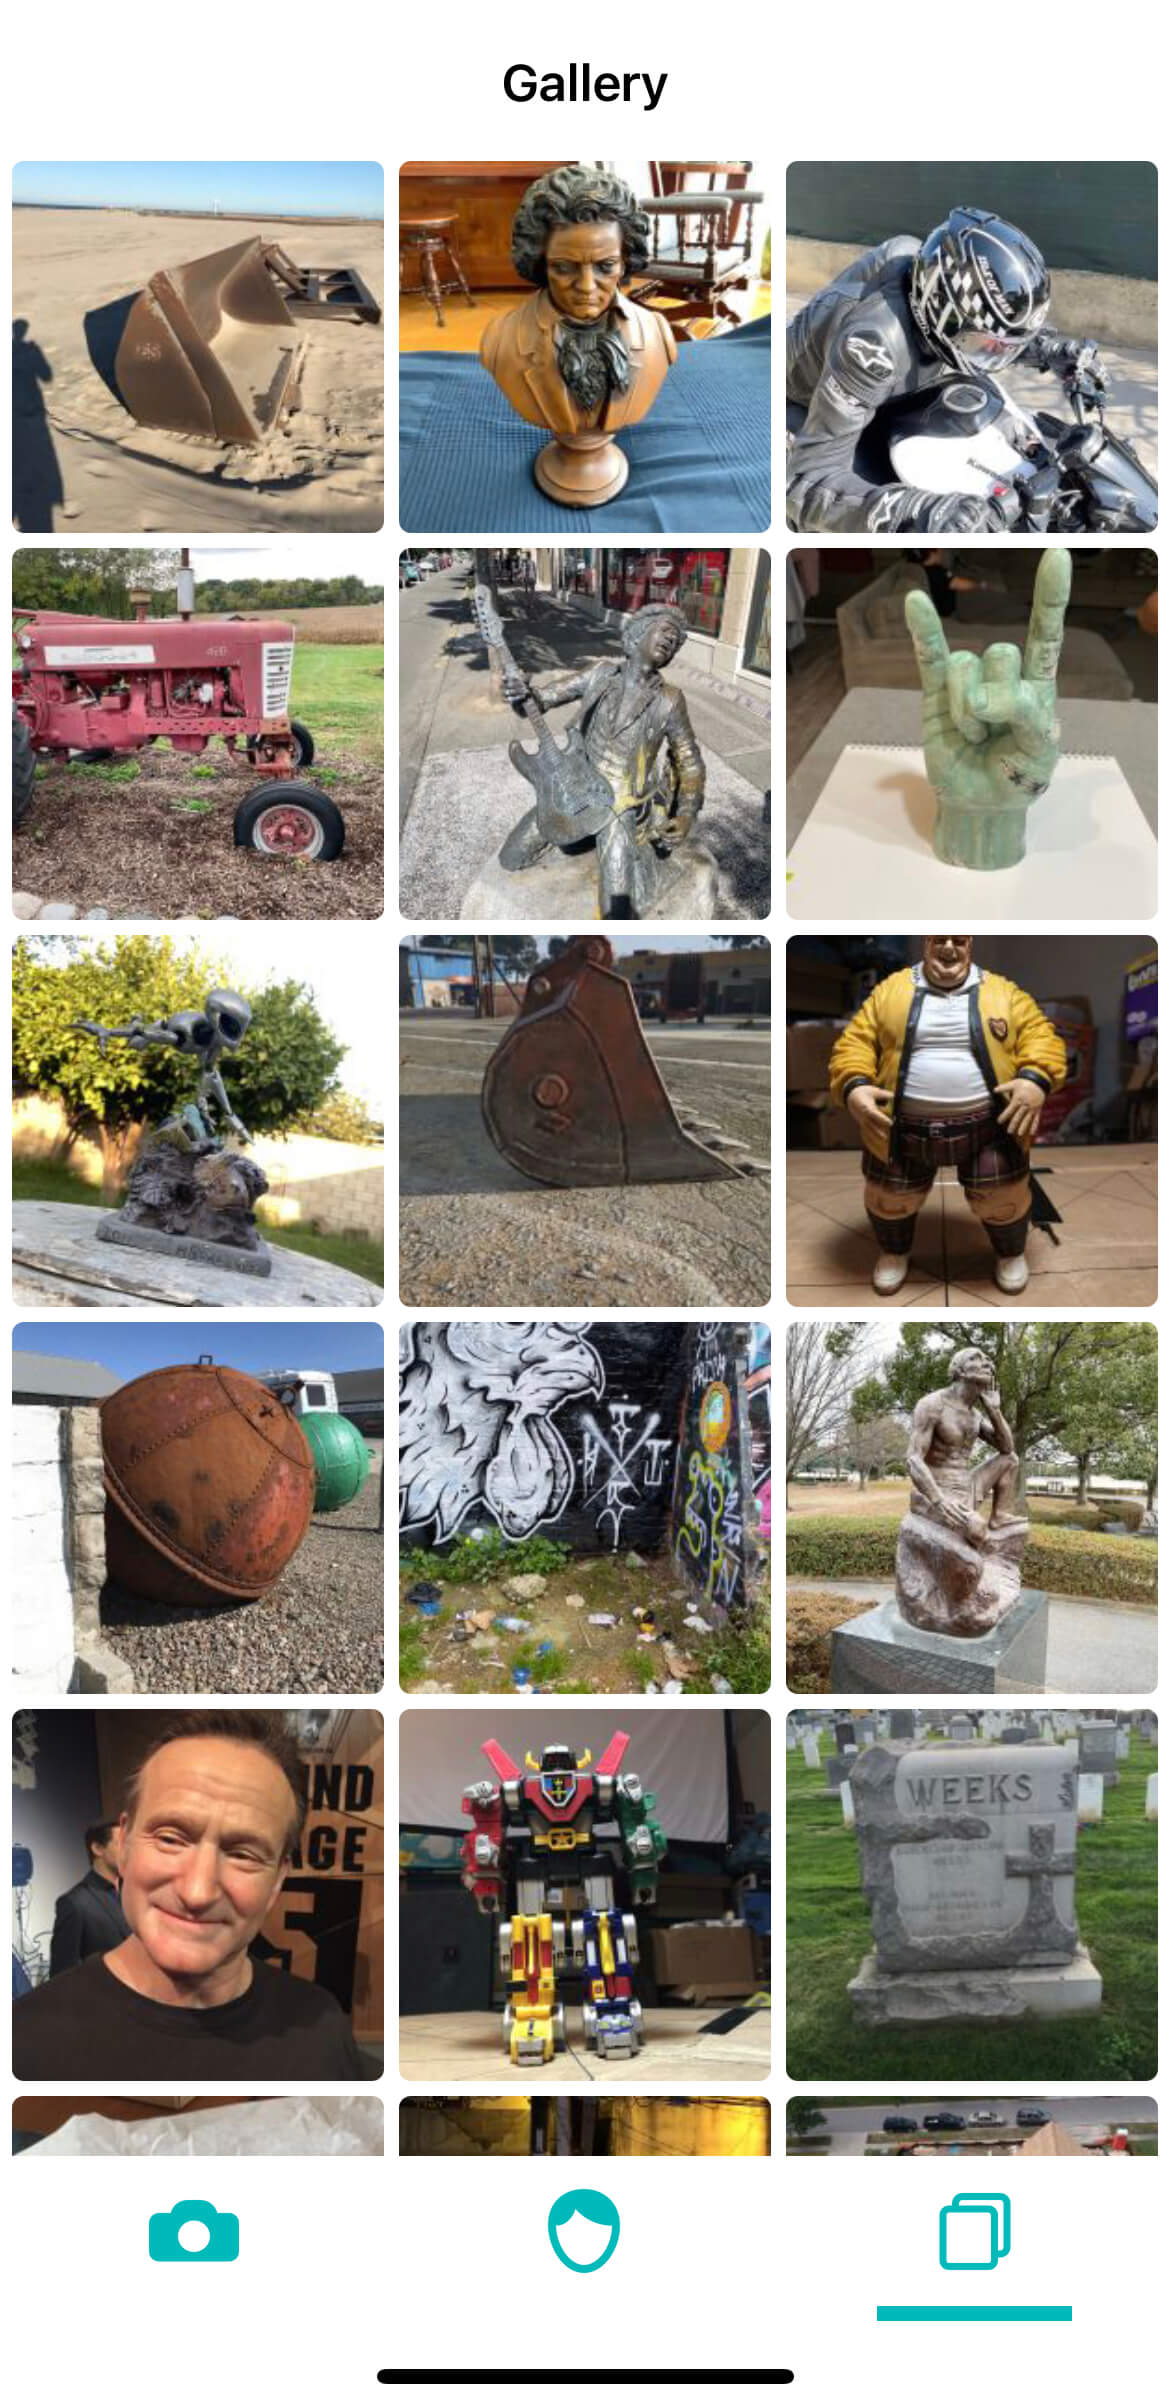
In Gallery, you can browse models of other users.
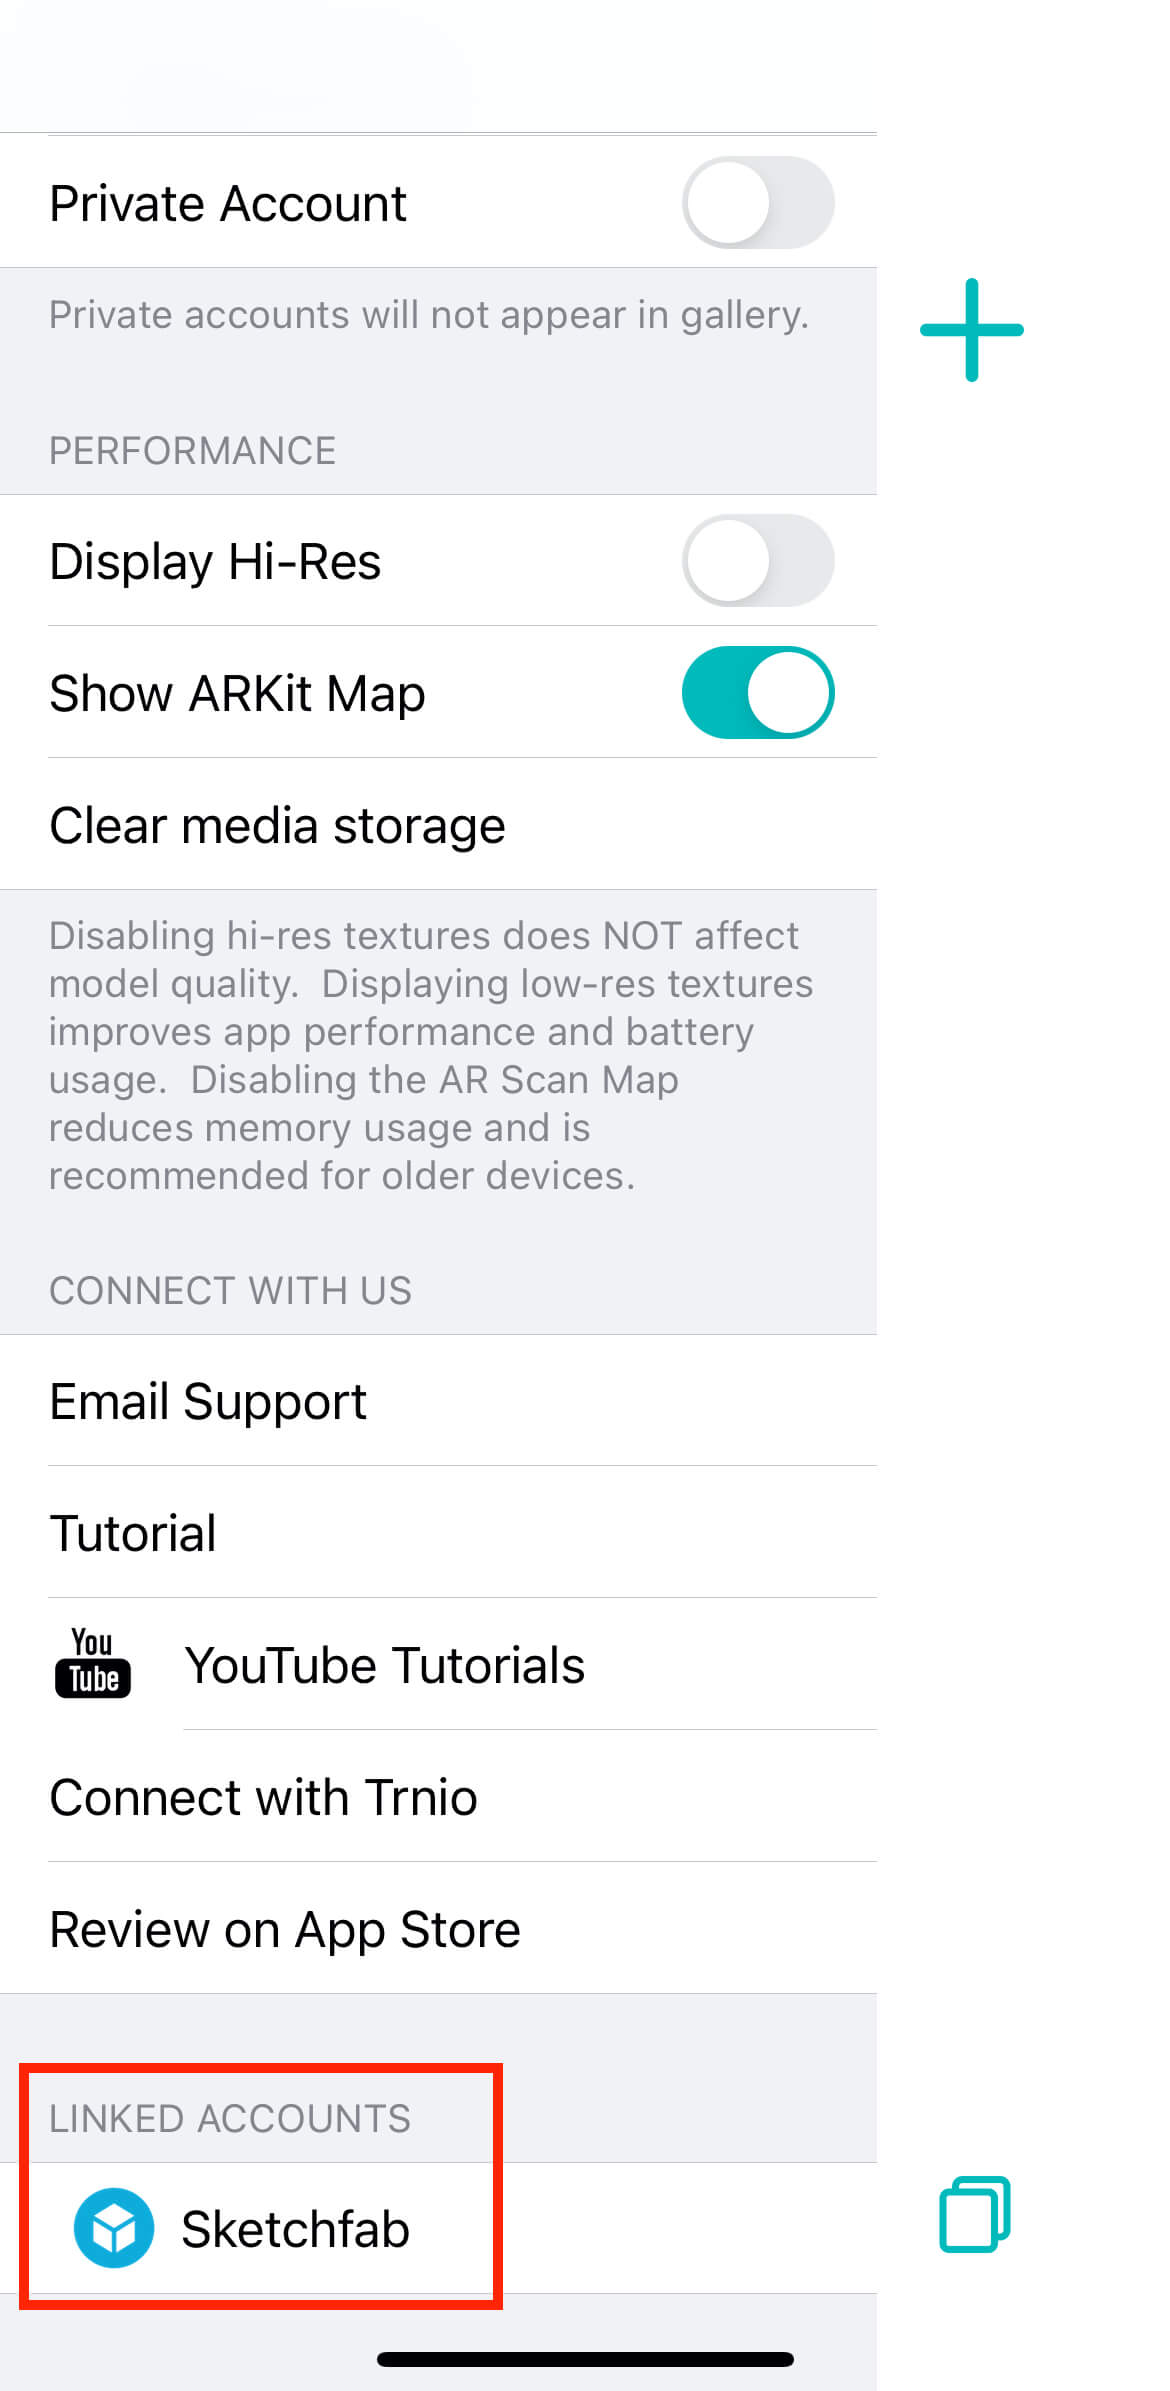
If you don’t want to share your own models, go to Settings on the main screen and change your account to Private.
Open Settings
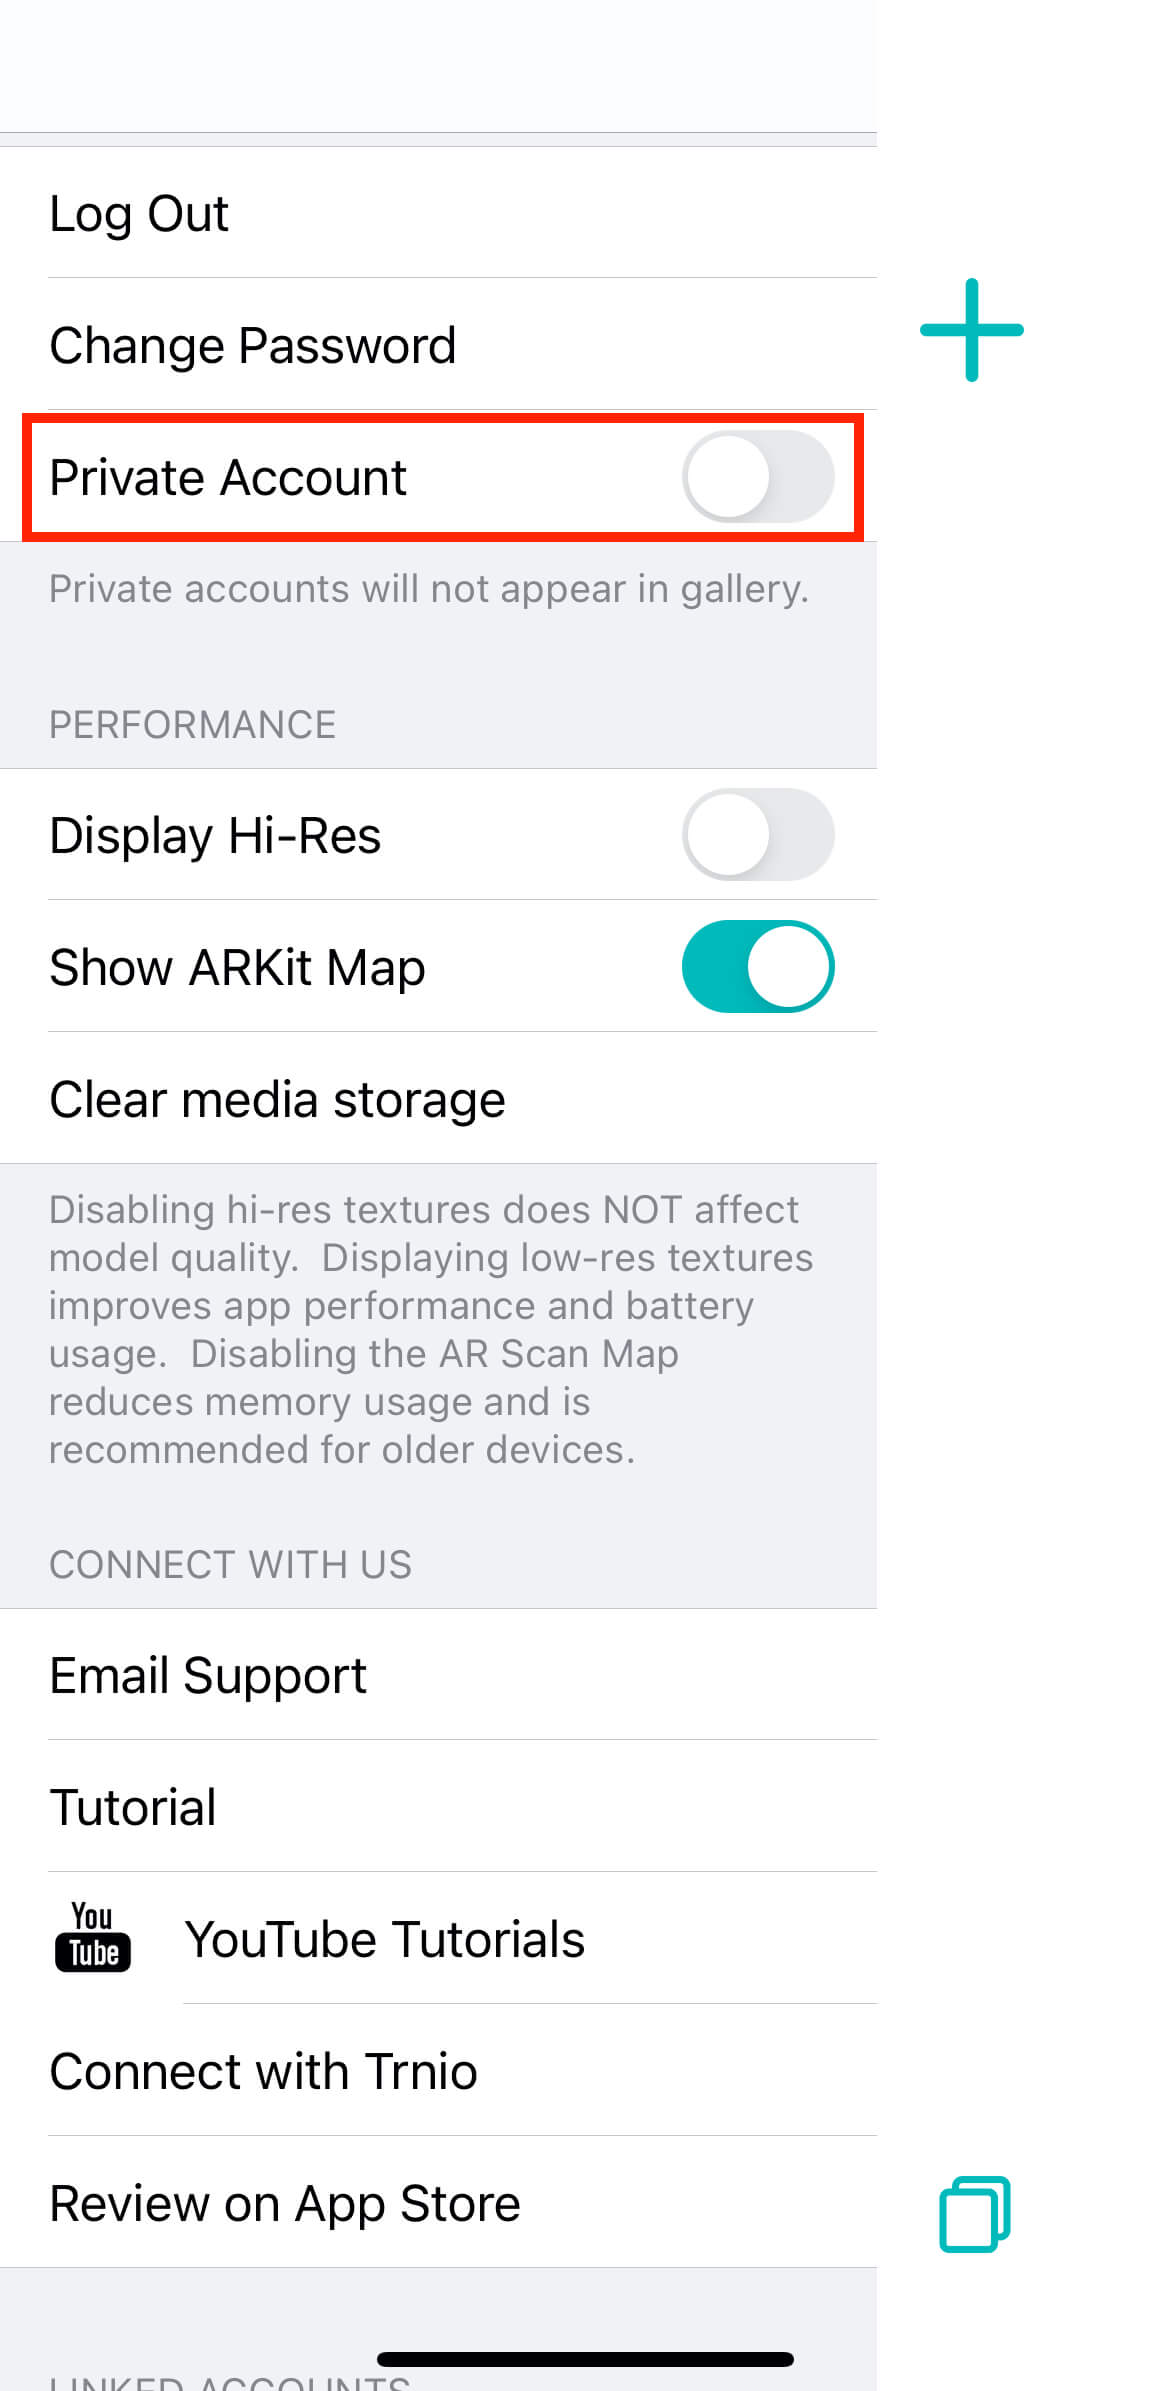
Switch to Private Account
Tap the model you want to export from the main screen to open it, then tap the icon in the upper right corner.
Select either OBJ or Sketchfab when the Export/Share button appears.

Exporting an OBJ file
Once you have selected an OBJ file, more sharing options will appear.
If you use a Mac, you can share directly through AirDrop.
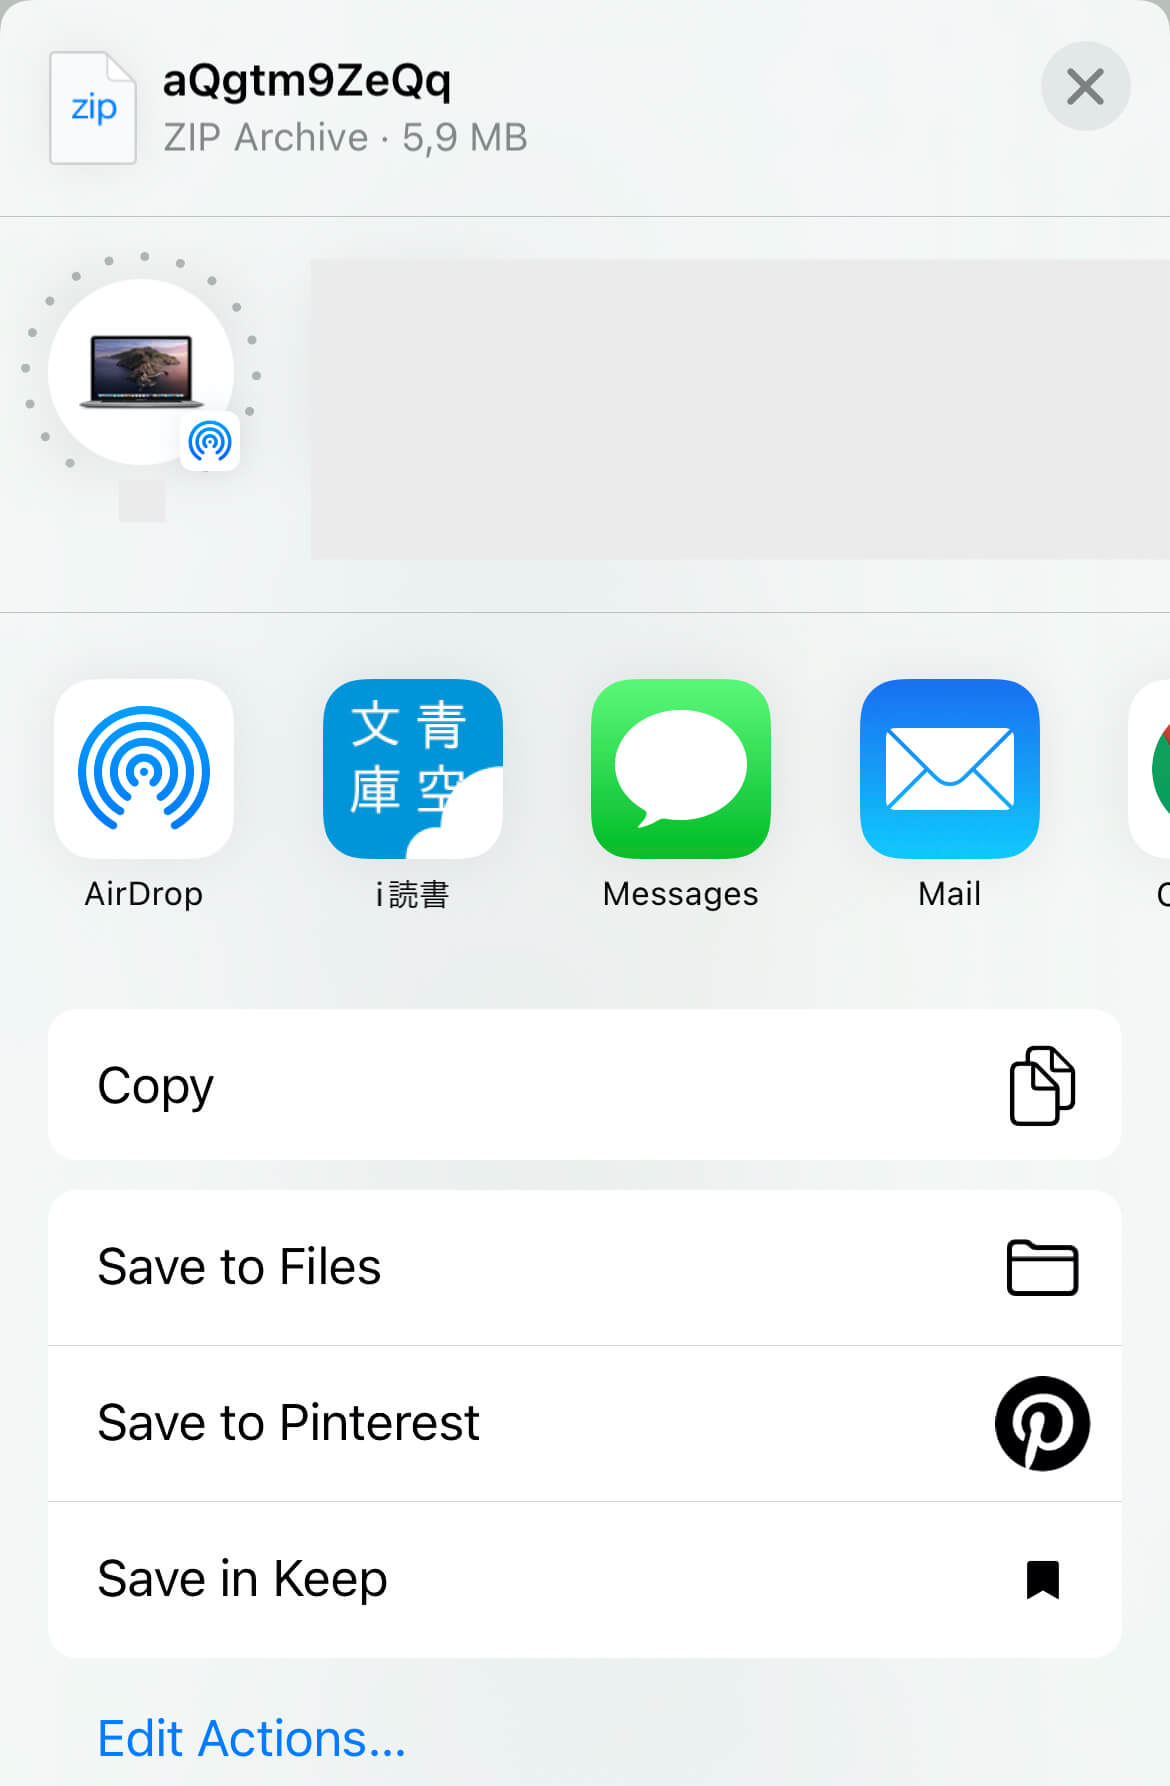
There are various methods including AirDrop and Mail.
If you select Mail, an email with the OBJ file attached will be created on the spot.
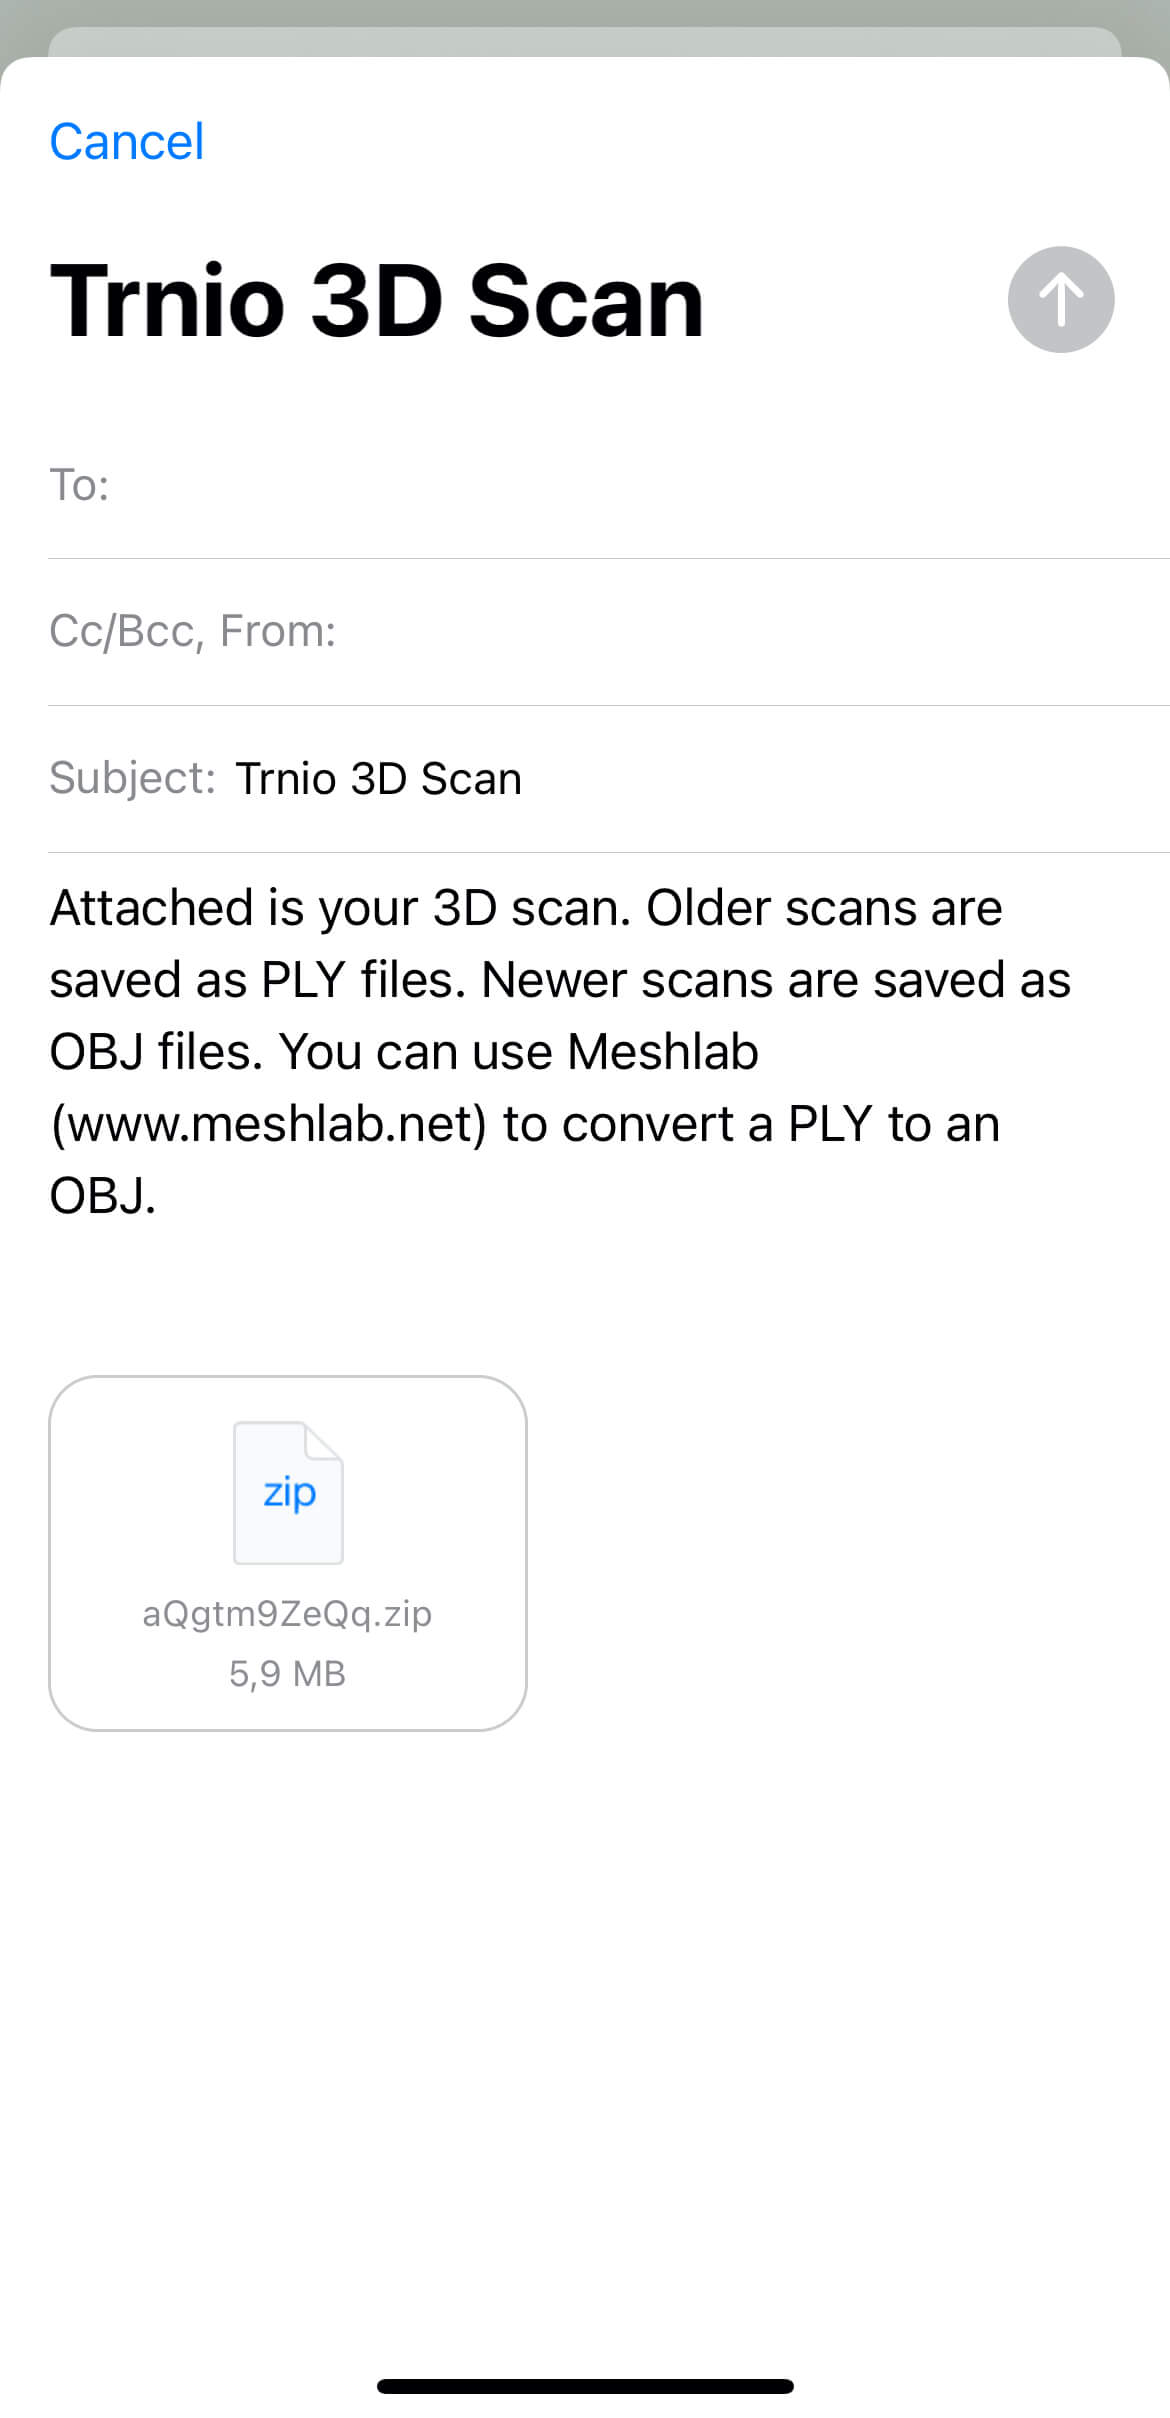
Just enter the email address of the recipient and send it to share.
Upload to Sketchfab and download the 3D model
You can also upload 3D models to Sketchfab.
If you haven’t created a Sketchfab account yet, please create one by referring to the following article “Registering a Sketchfab Account”.
Next, login to Sketchfab with Trnio.
Tap Settings from the top left.
Link Sketchfab
To link Sketchfab, you first need to request a Token.
Tap the button “Request Token” and enter the email address you are using in Sketchfab.
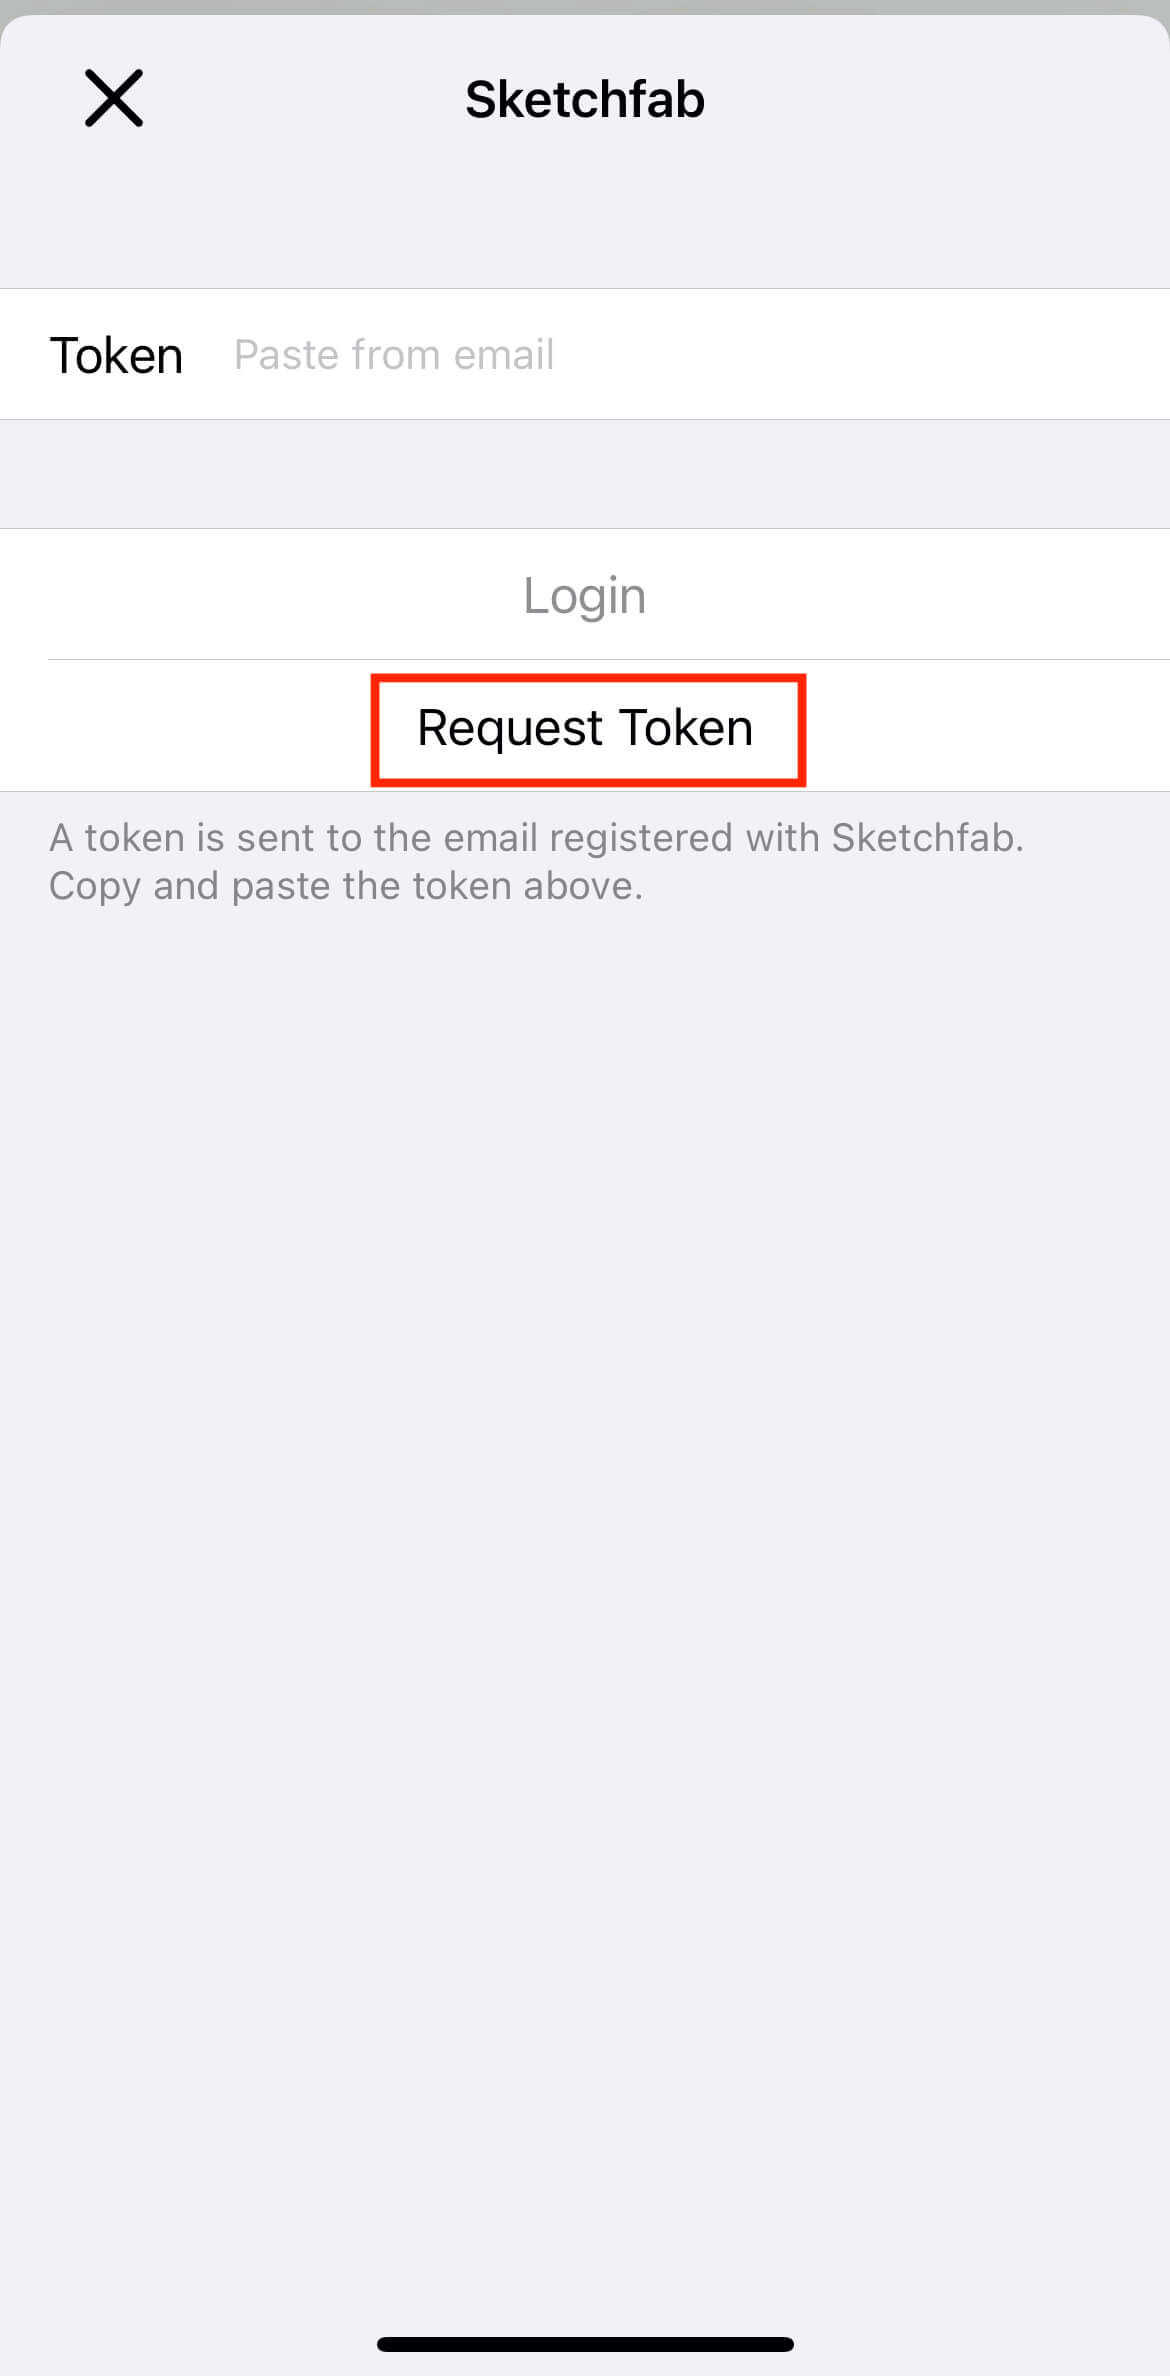
Request Token
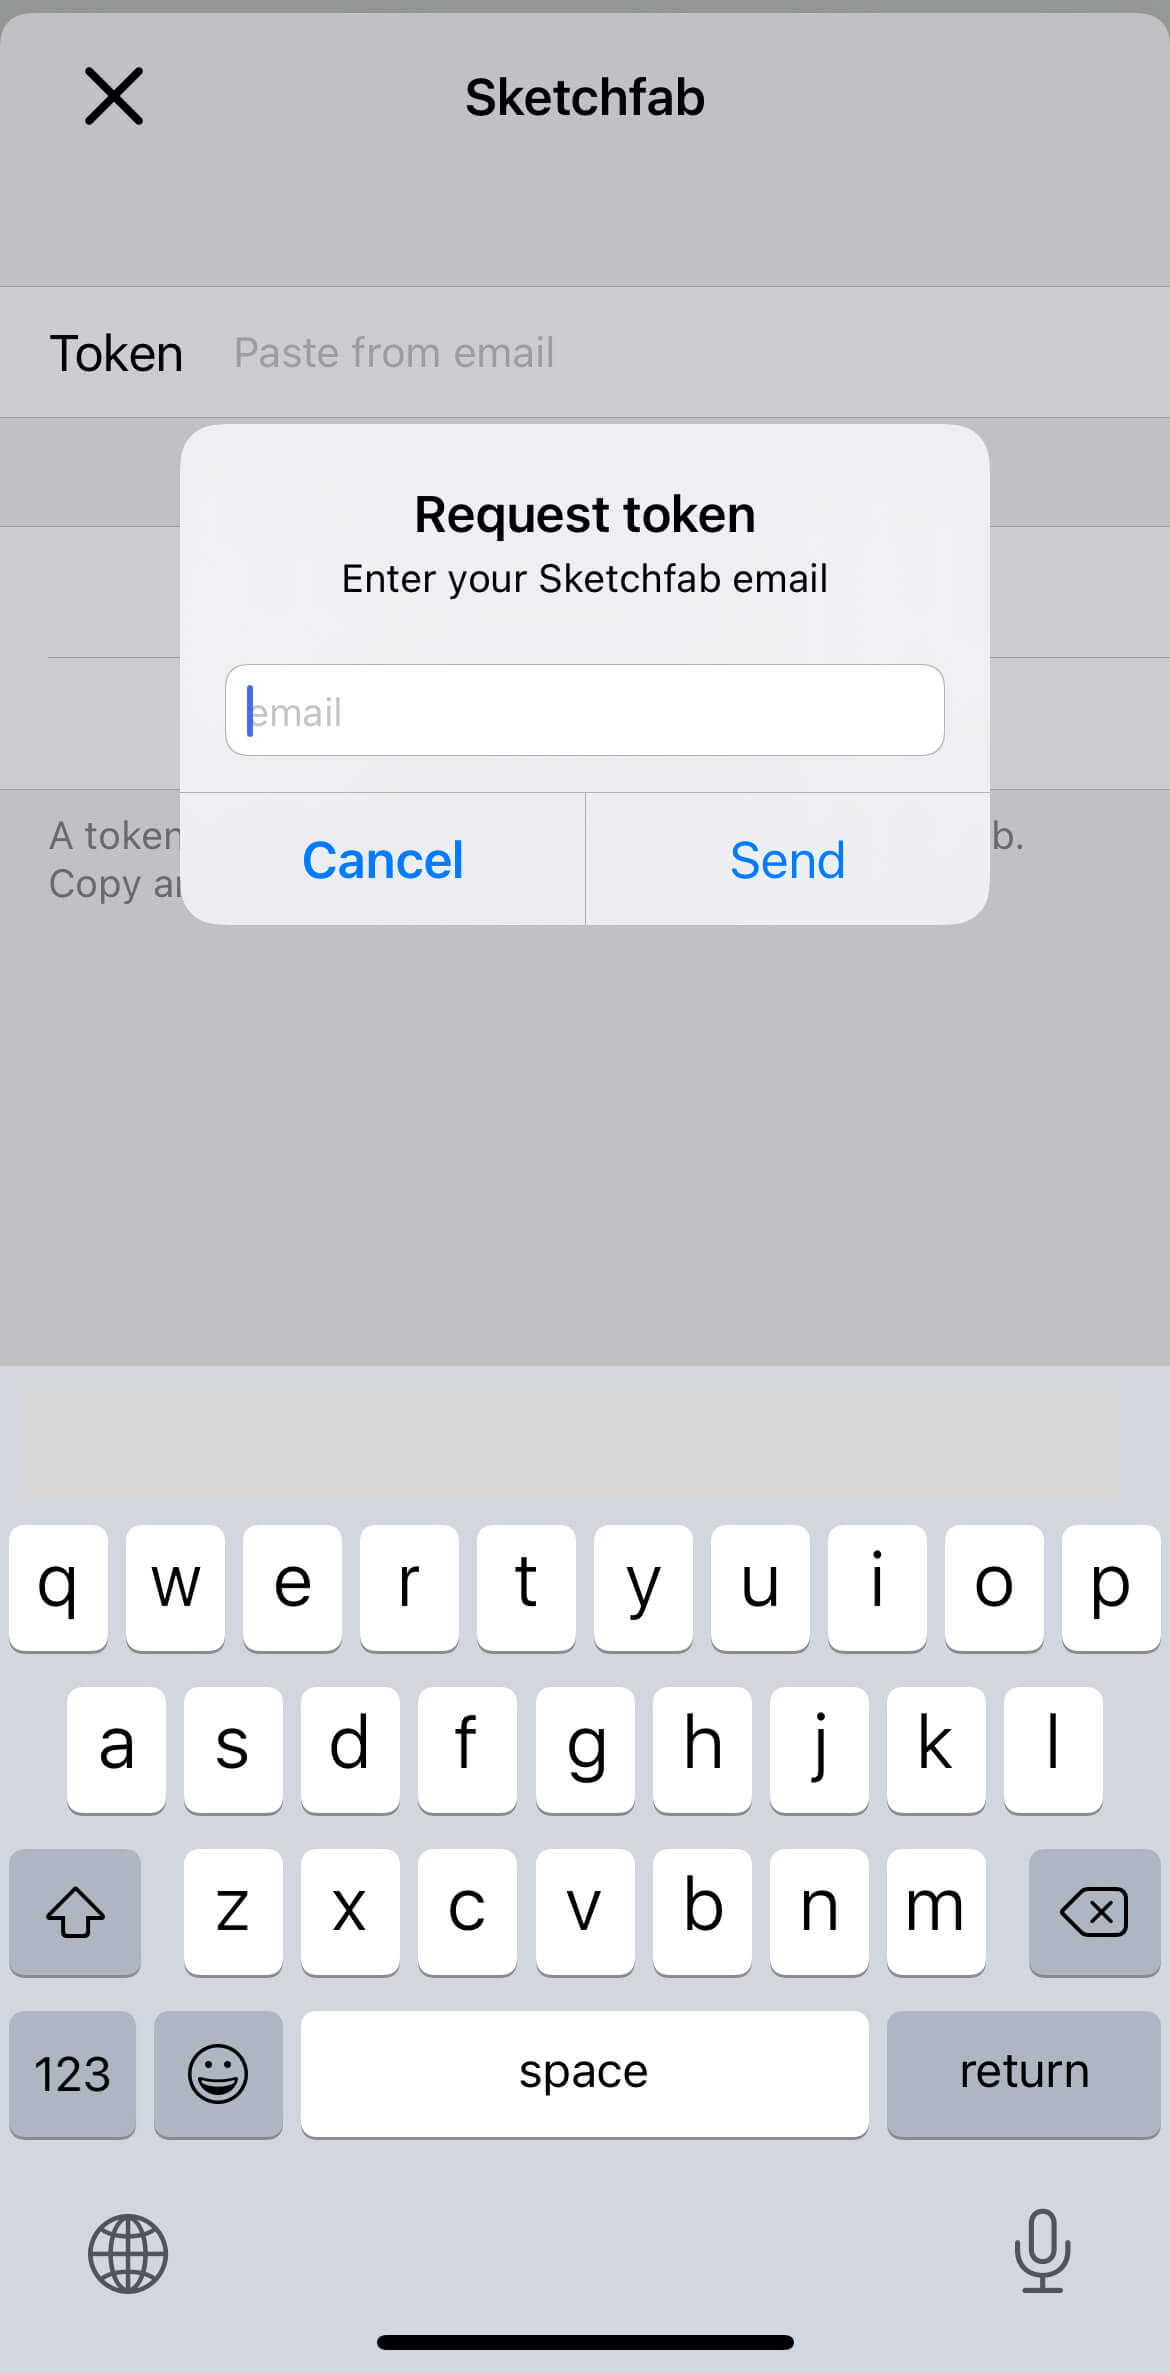
Enter the email address you use in Sketchfab
An email with the API private key will be sent to the email address you entered, so copy the API.
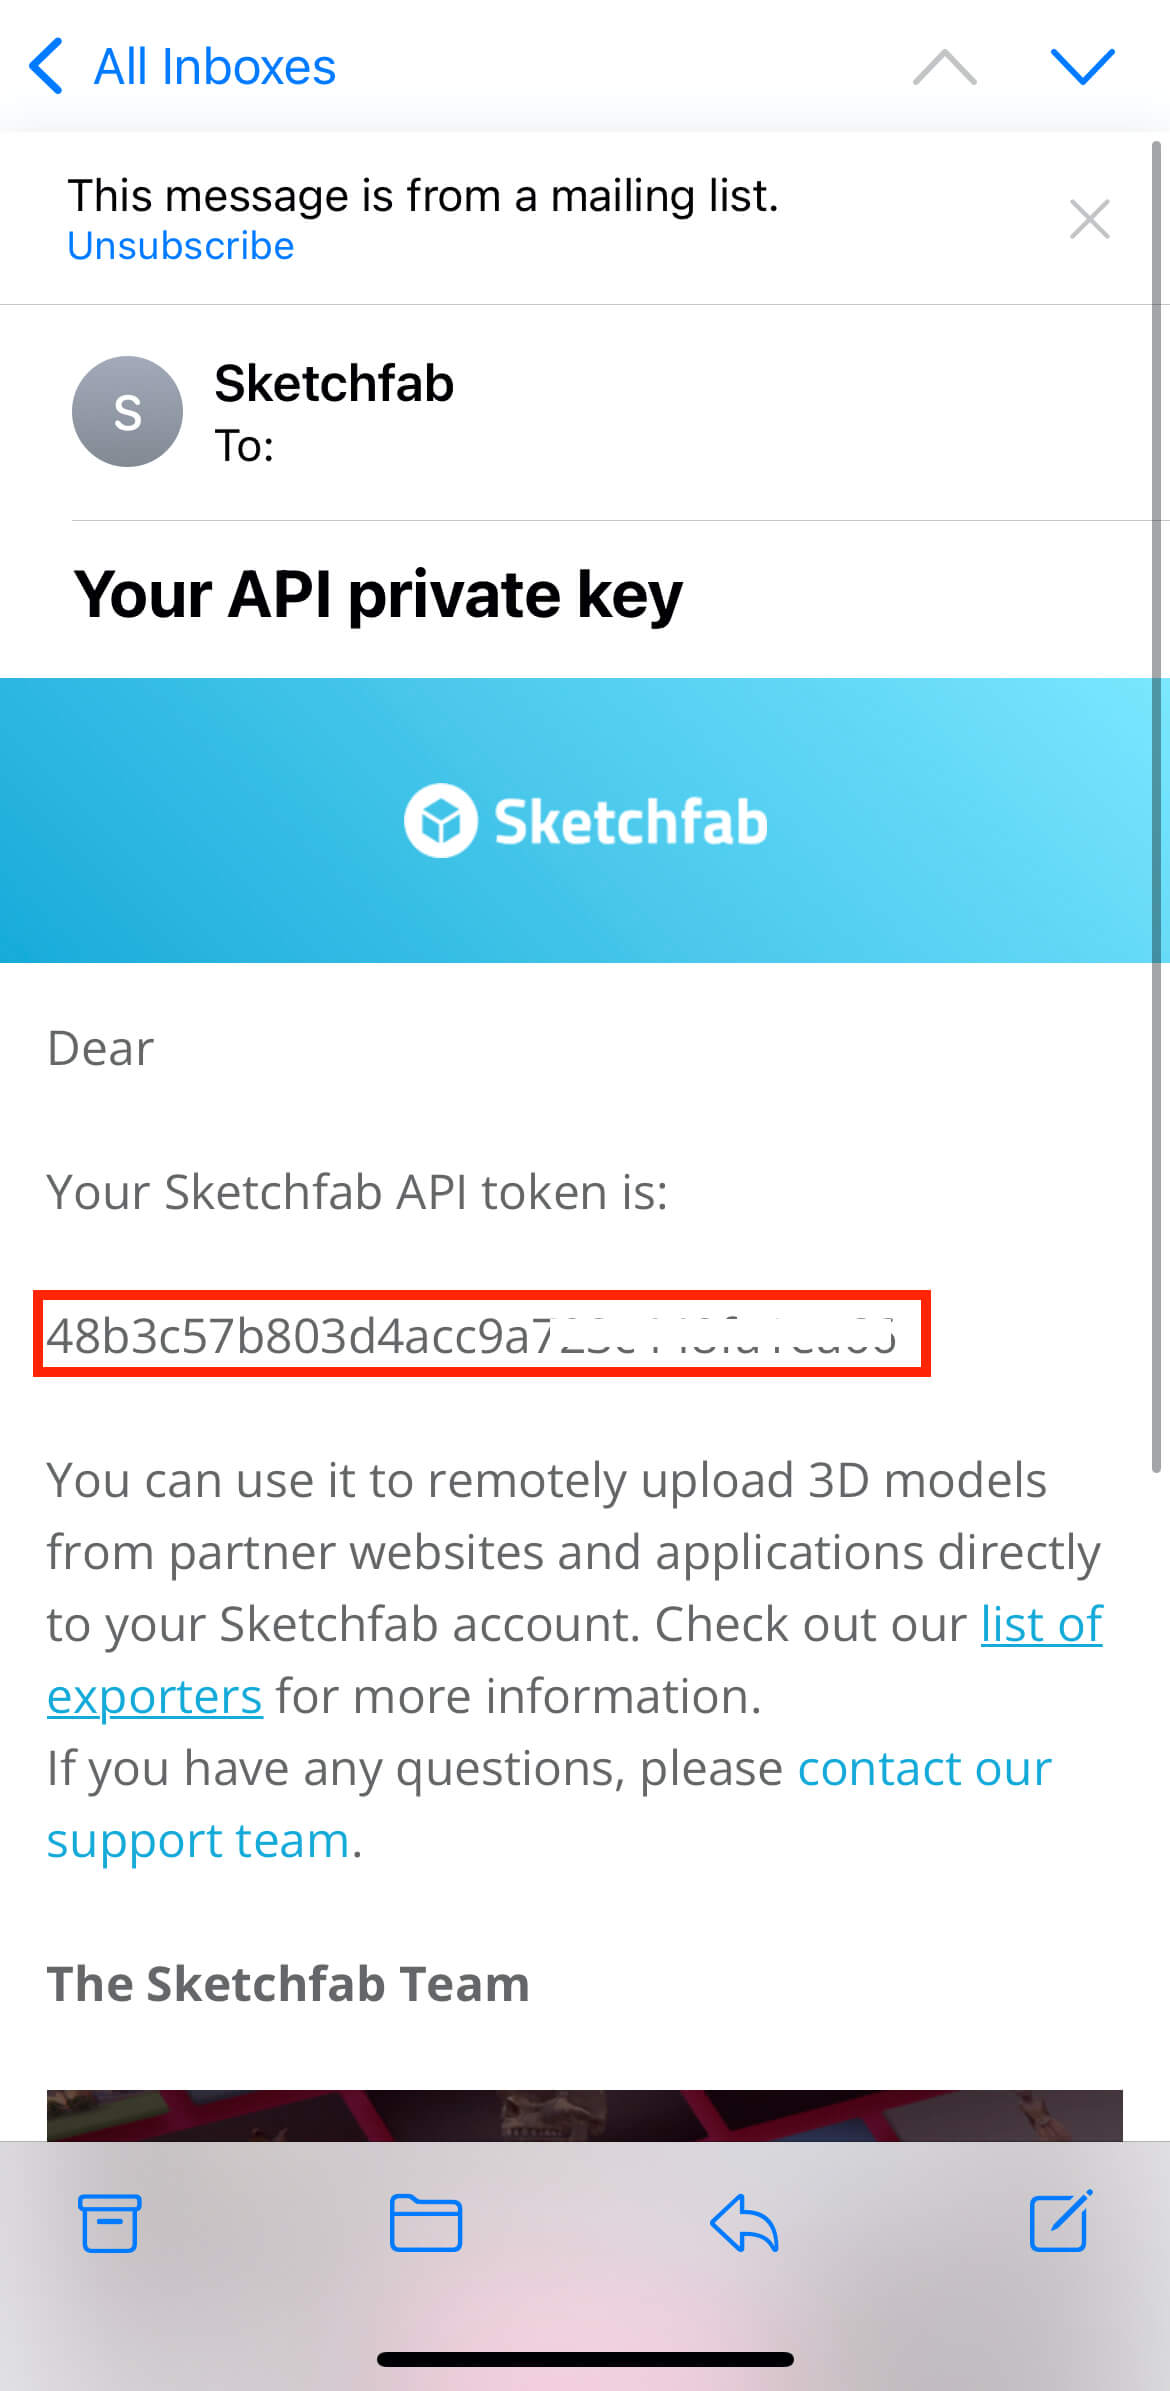
Copy the API
Go back to Trnio and paste the API you copied into the field named Token.
Then tap the Login button.
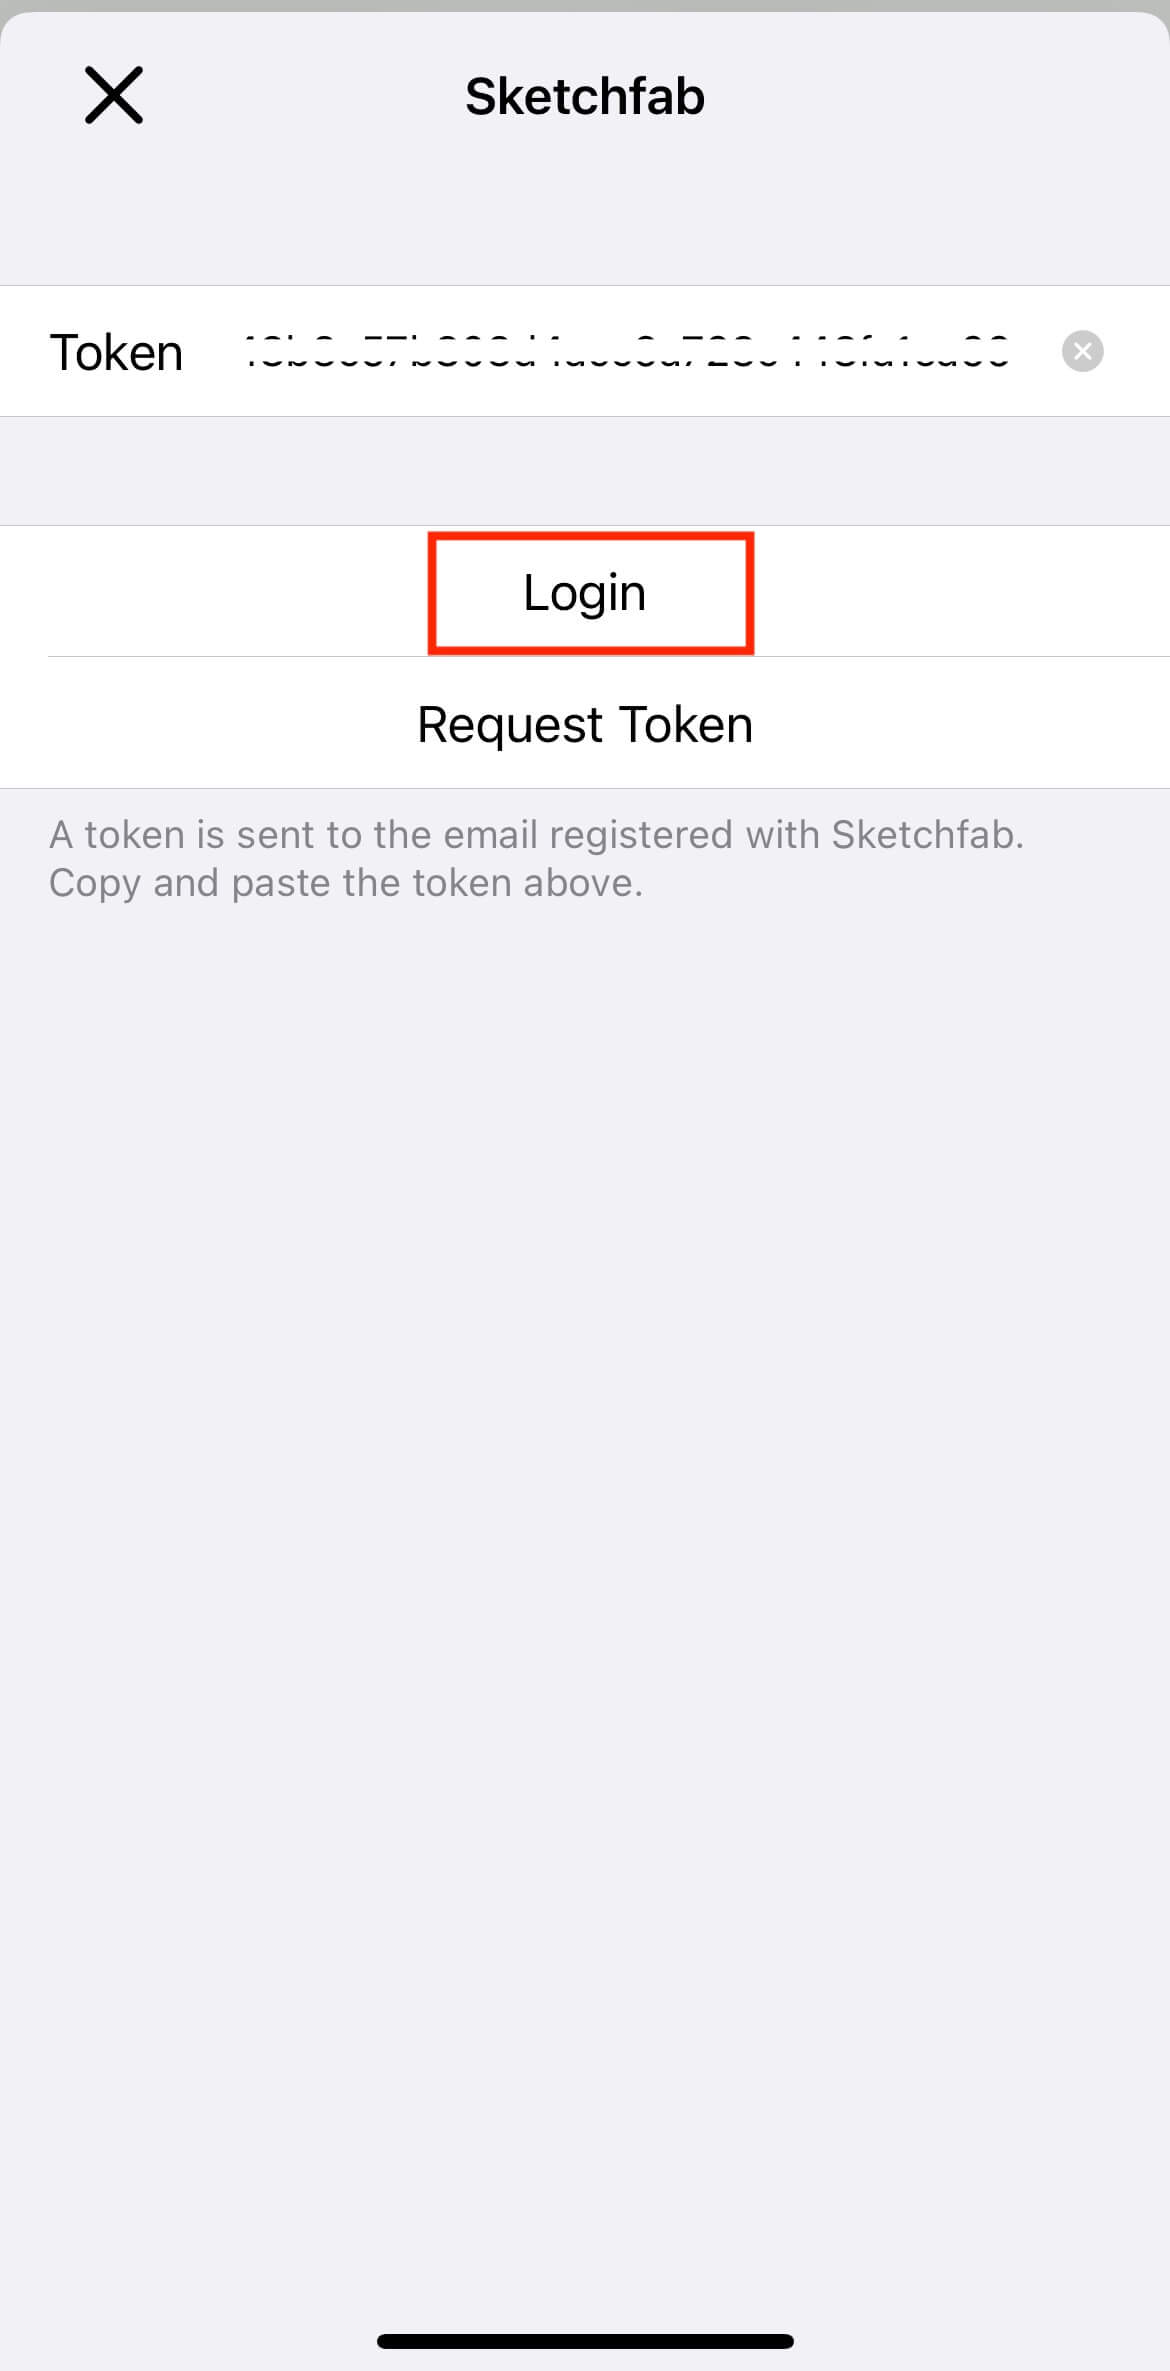
Paste the API and login
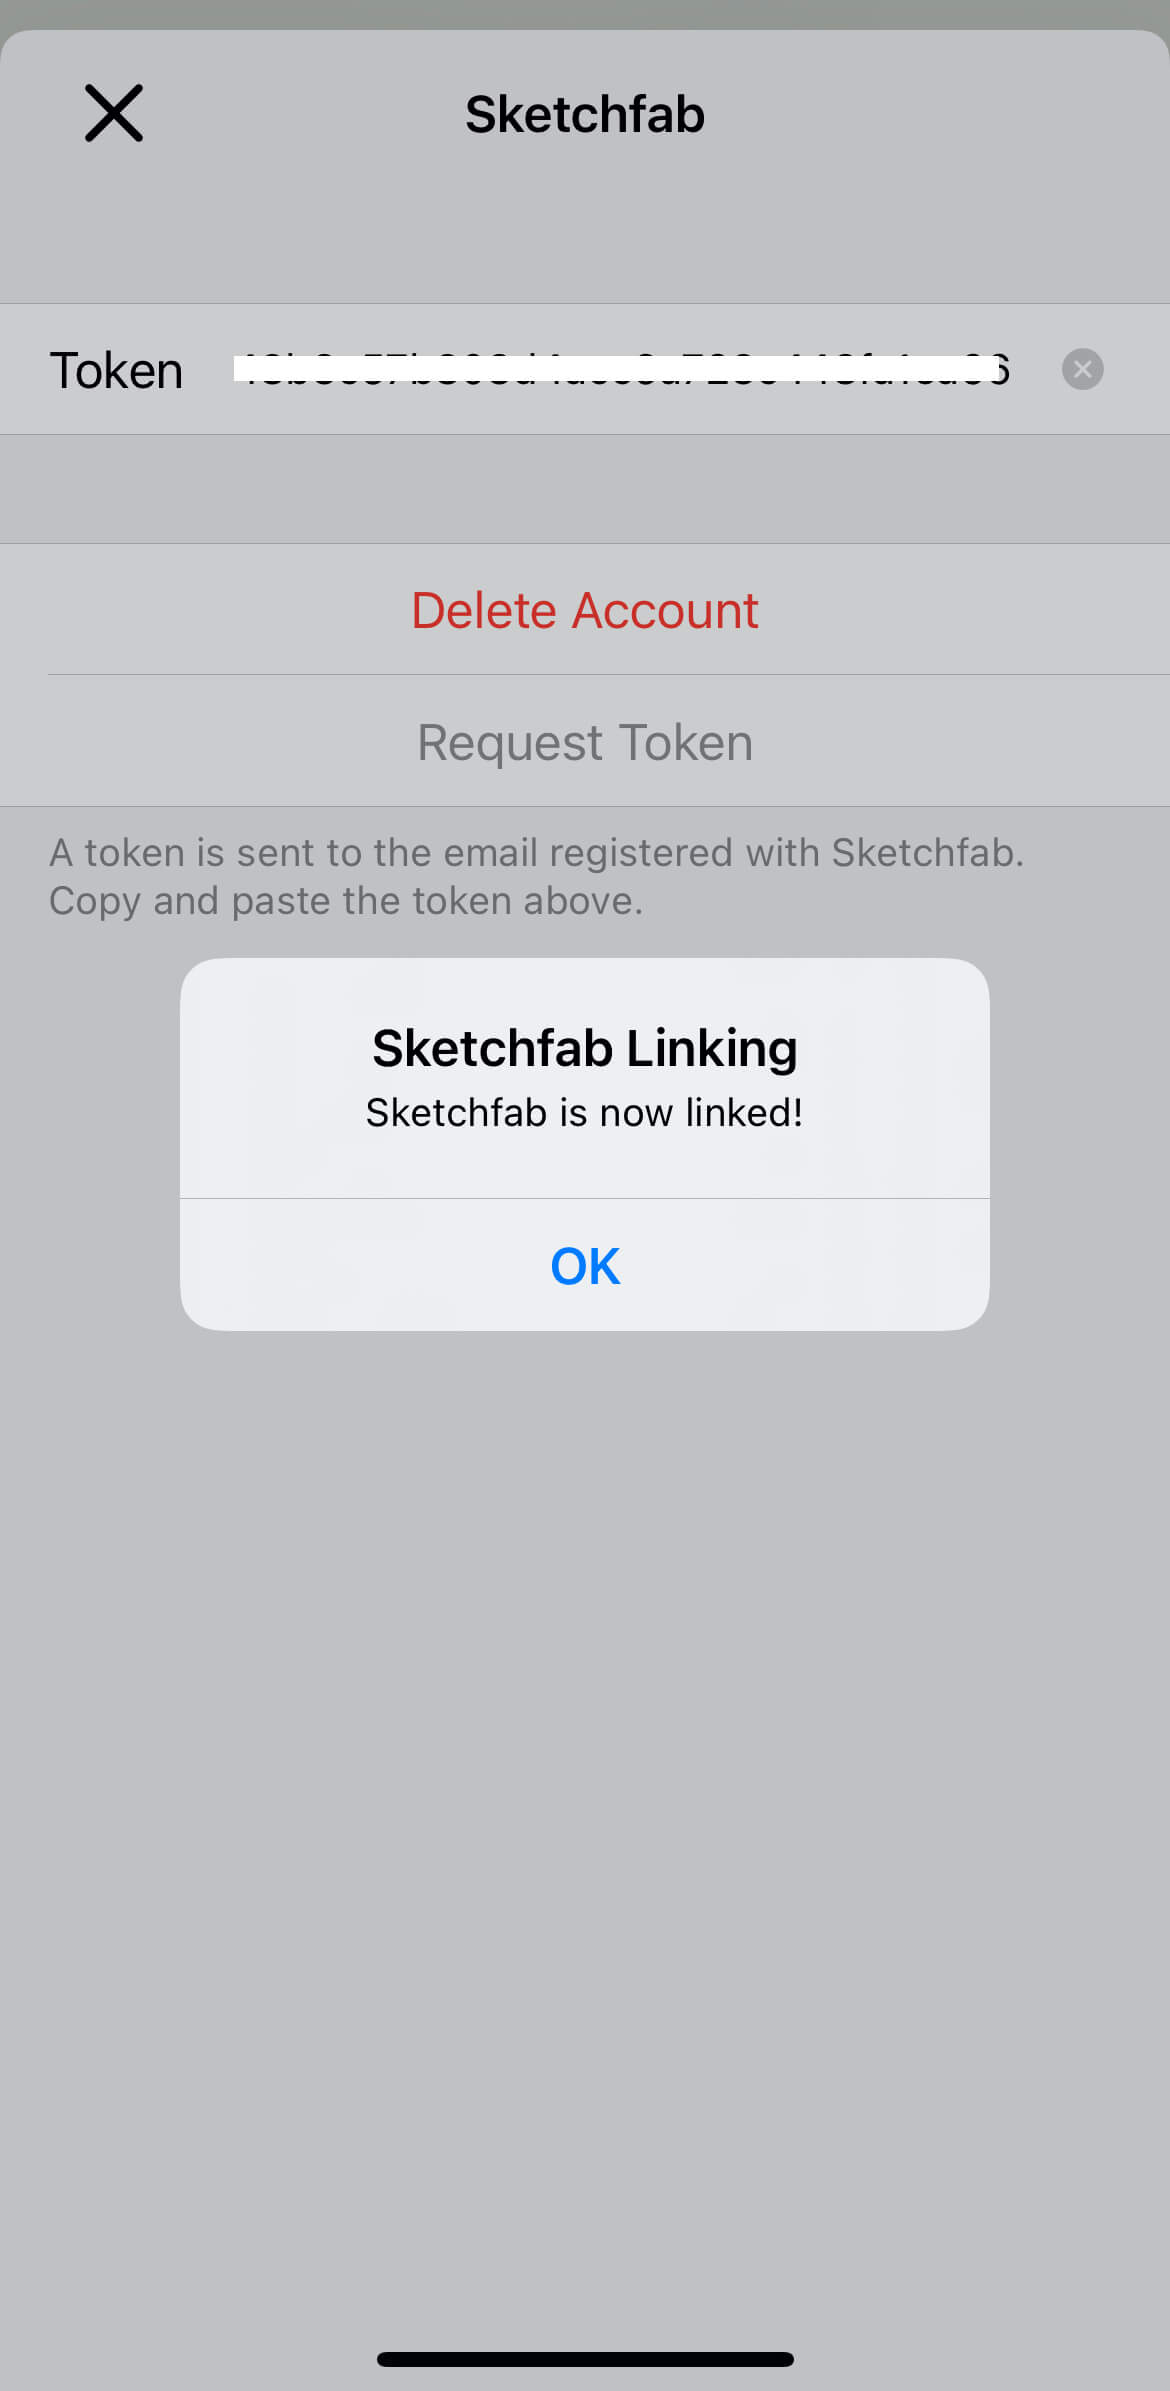
Sketchfab account link successful
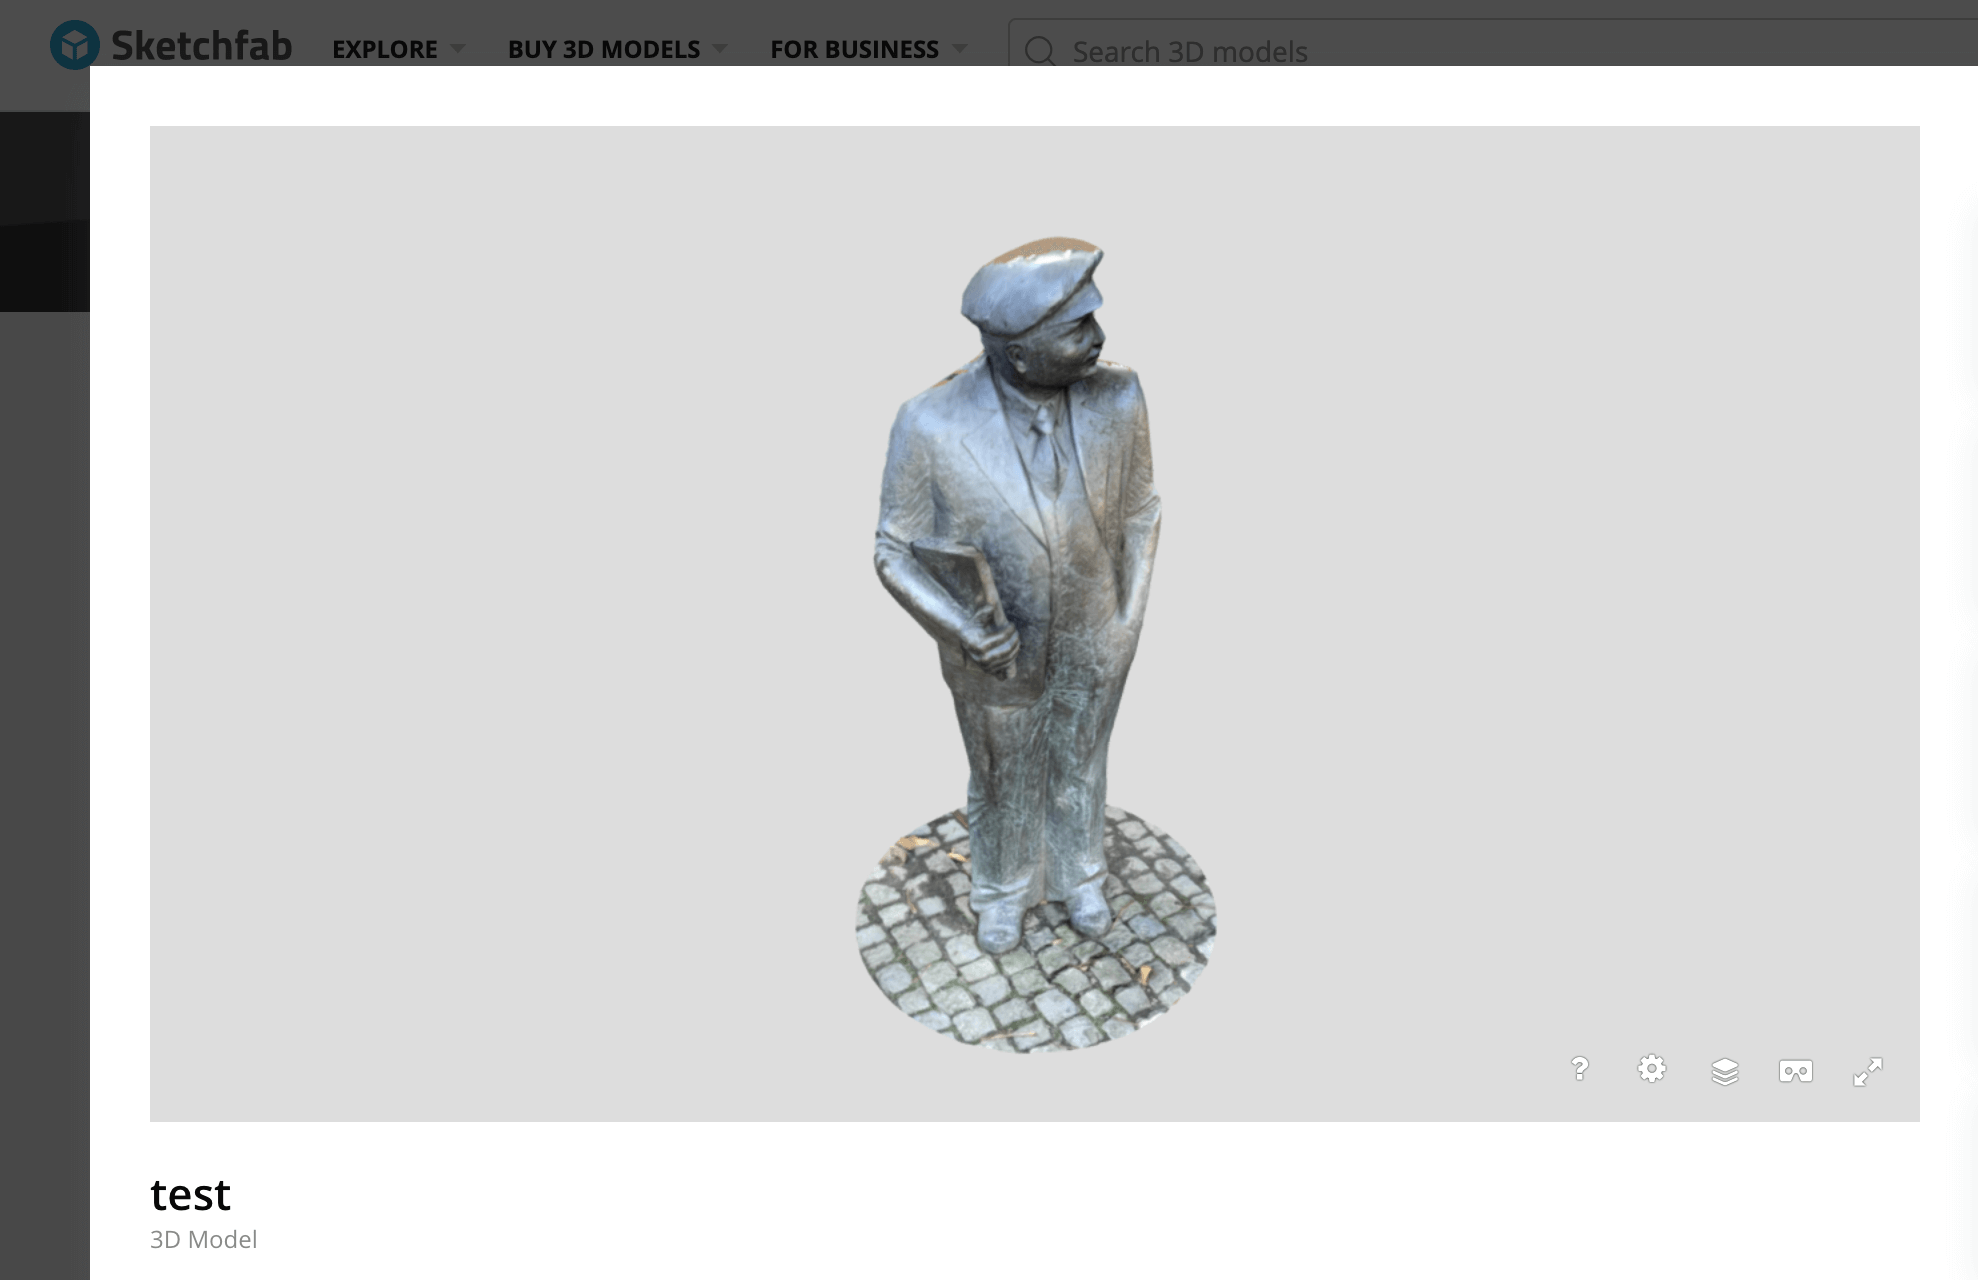
Open the model you want to upload and tap Sketchfab.
Sketchfab
Enter the title, description, and tags in order from the top.
Turn on Publish scan if you want to publish the model.
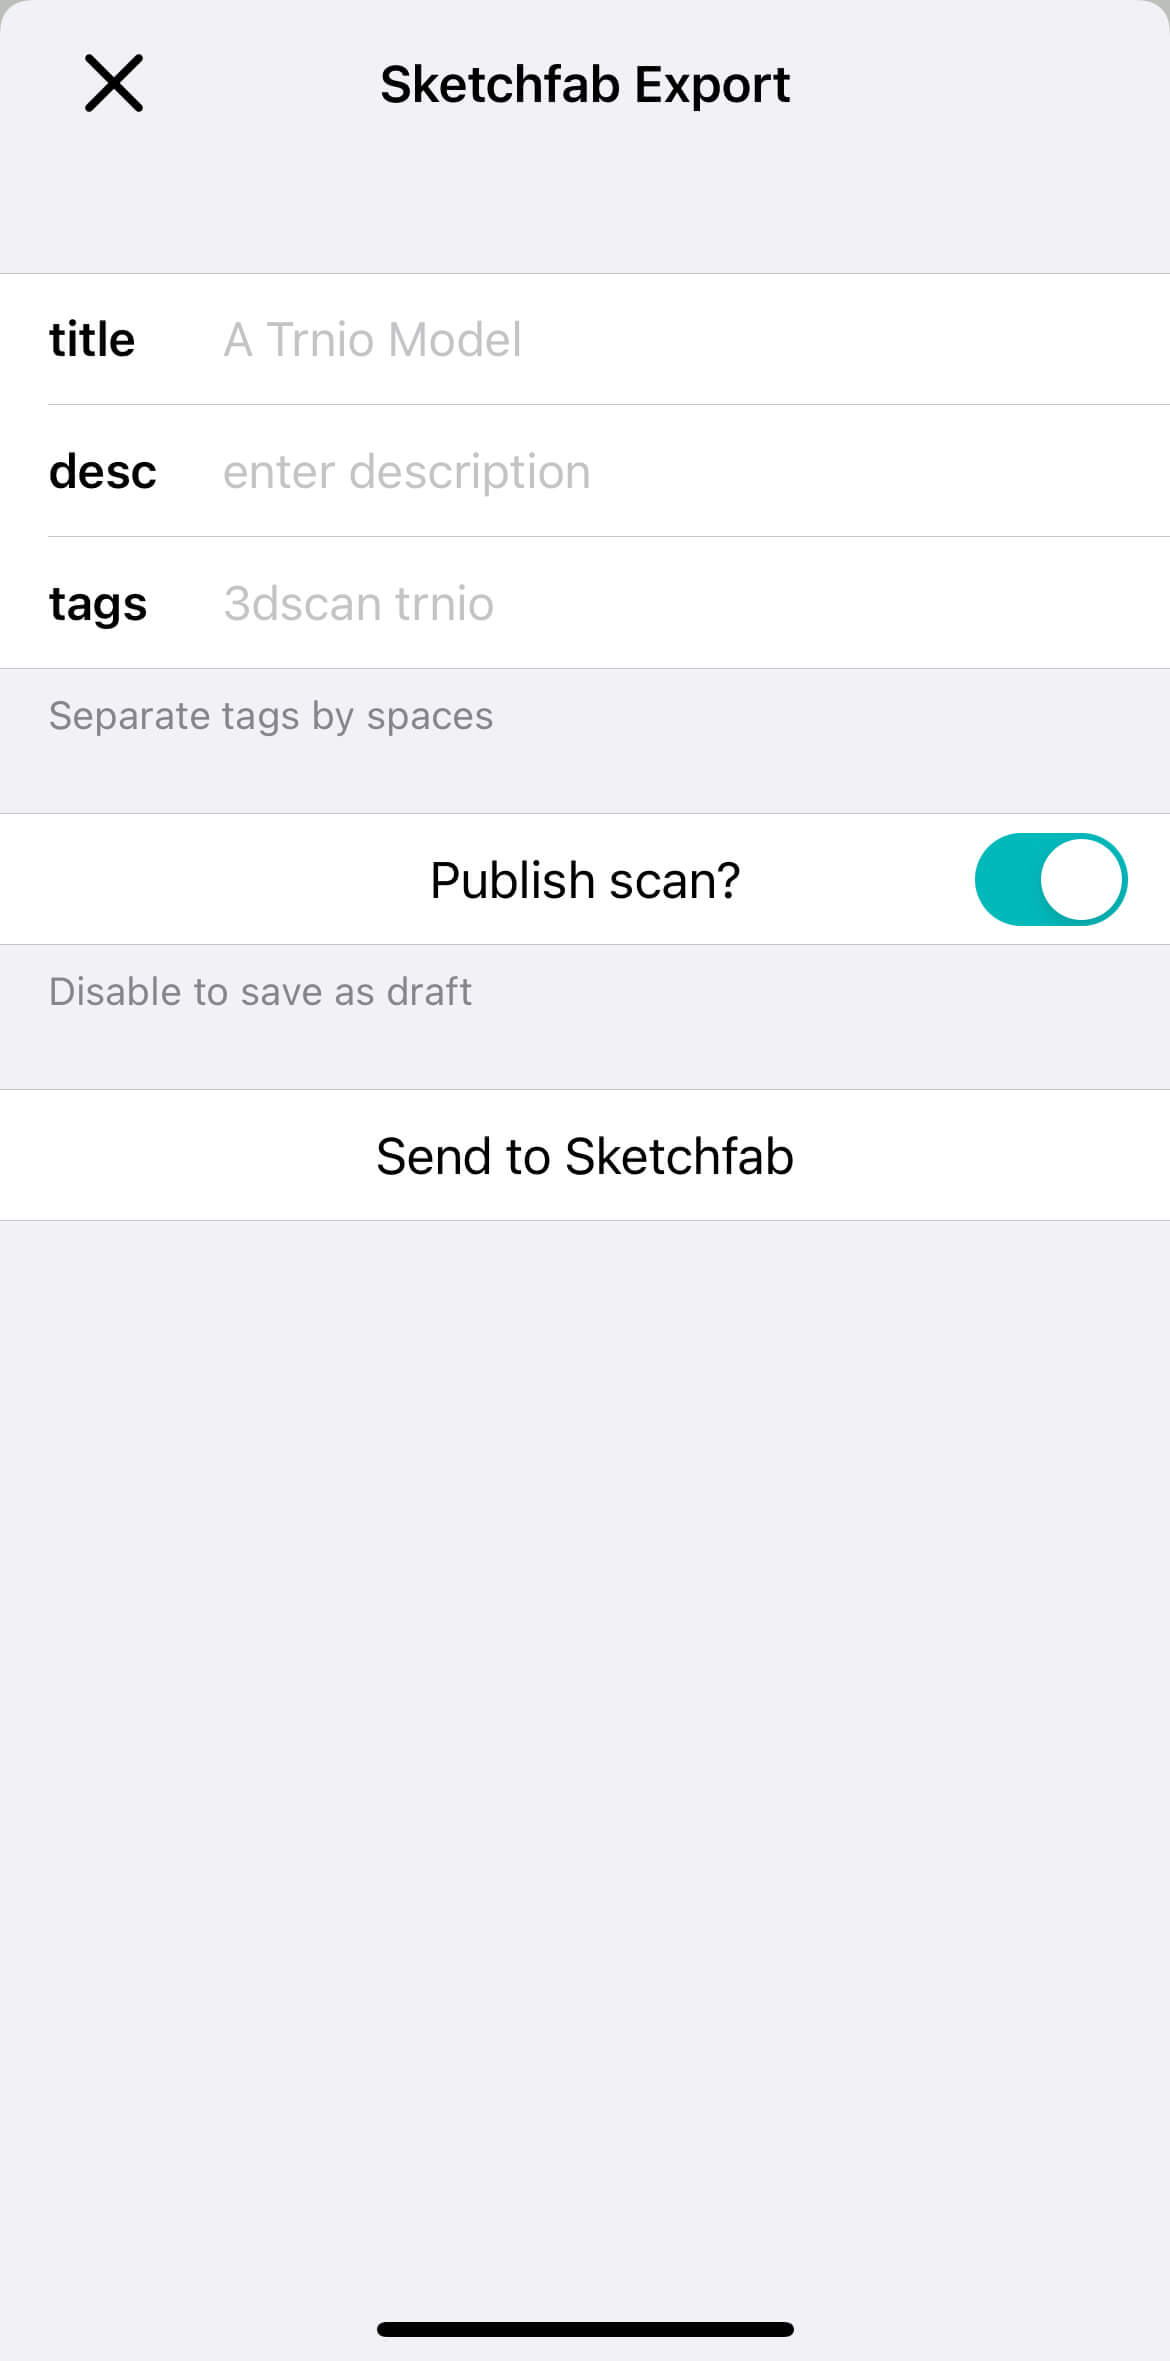
After entering the information, tap Send to Sketchfab.
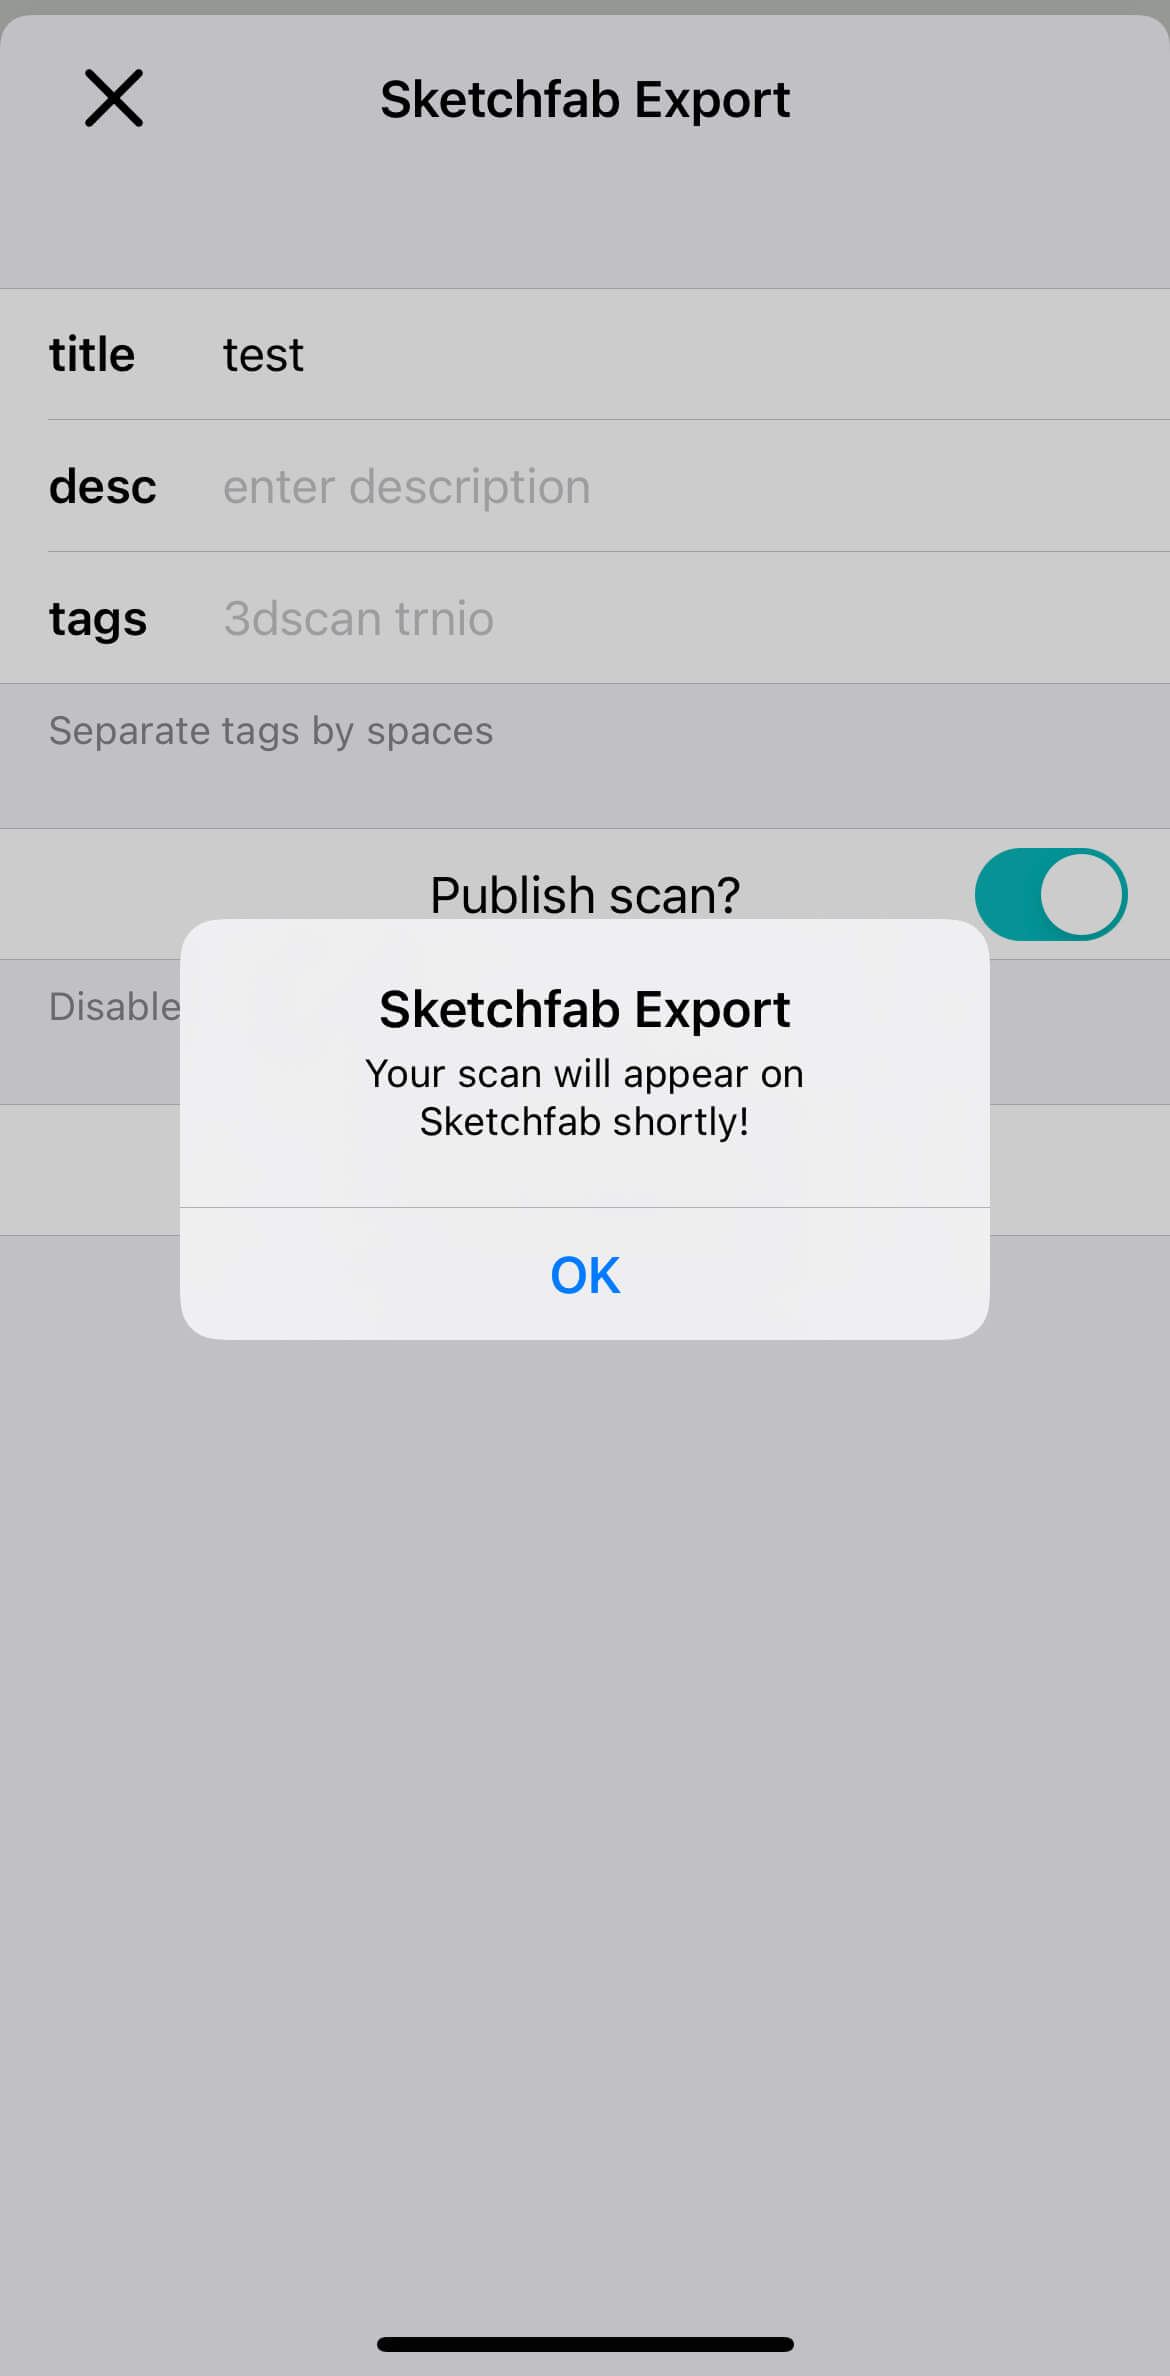
The model has been exported to Sketchfab.
When you log in to Sketchfab, you can see that the model you just created has been uploaded.
Uploaded successfully
In the default settings, 3D models uploaded to Sketchfab cannot be downloaded, so we will change the settings to allow downloading.
Click on your account in the upper right corner and select “Models”.
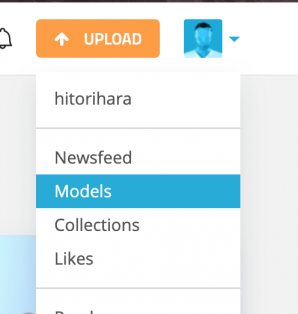
Display a list of your 3D models
Select the 3D model you want to download from the list of 3D models you have uploaded to Sketchfab.
Click EDIT PROPERTIES on the right side of the screen, set Download to Free, and select SAVE.

Change the Download setting to Free.
After a while, a download button will appear under your account name, click on it to download the 3D model.
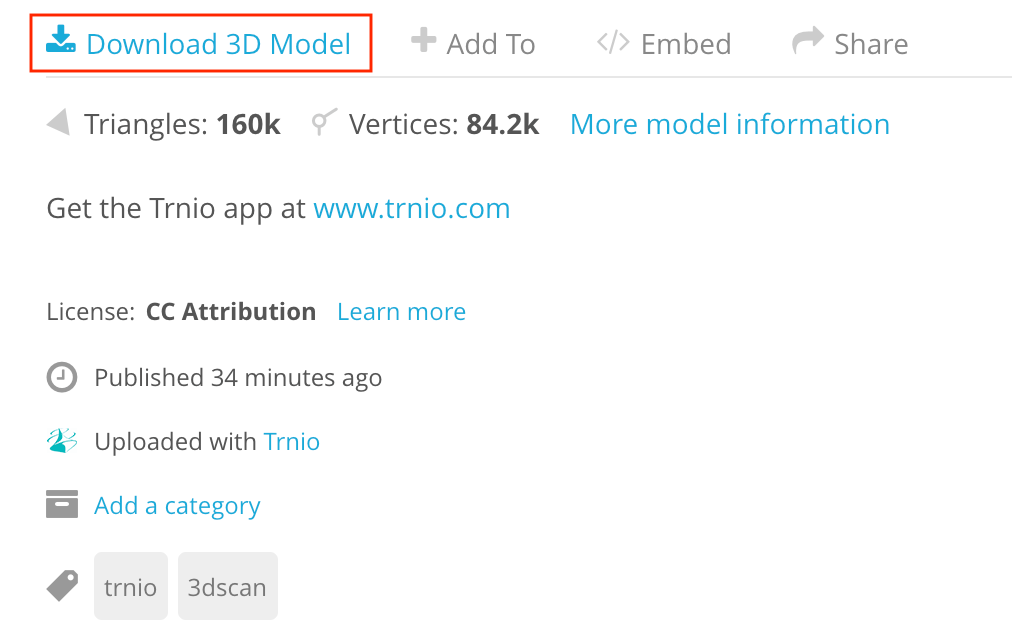
You can now download it.
You can choose between OBJ and glTF as the download format, but choose glTF this time.
Uploading to STYLY
When you download glTF, it will be saved in zip format.
As with uploading other 3D models, click on the [Assets] menu button, and then click on the [3D Model] button.
Next, click on the My Models & Upload tab and click on the Select… button.
For detailed instructions on uploading 3D models to STYLY, click here

*If you unzip the file, you will find a glTF file, but please note that the glTF file by itself cannot be uploaded to STYLY.
You can use STYLY FORUM to solve the problem. STYLY FORUM is a place where people can discuss a service or technical issue on STYLY, or provide bug reports on STYLY.
https://en.forum.styly.cc/support/discussions
Past articles about photogrammetry
When using Trnio, you may be asking yourself, “How many photos do I need to take? What other photogrammetric software is available?
The following article helps you with those questions!
Please refer to it.
If you could take pictures correctly and you want to modify the 3D model in detail, here is an article helps you out.

Trnio makes it easy for anyone to create photogrammetry of objects around them and upload it to STYLY, so go ahead and try it!