This article introduces the LiDAR scanning app “SiteScape”.
What is LiDAR scanning?
LiDAR scanning is an acronym that stands for “Light Detection And Ranging”.
It is based on the time between the reflection of the laser beam and its return when taking a picture, and allows you to obtain information about the depth of the space and the 3D shape of the object.
All current iPad/iPhone Pro models have LiDAR function.
What is SiteScape?
SiteScape is the LiDAR 3D scanning app for Architecture, Engineering, and Construction.
Capture as-built and existing conditions accurately to within an inch with an app built for construction workflows.
(Quoted from the official AppStore)
Download SiteScape
Download from AppStore
Click on this link or enter the word “SiteScape” at the top of the AppStore and search.
SiteScape is a non-paying app, so you can download it immediately.
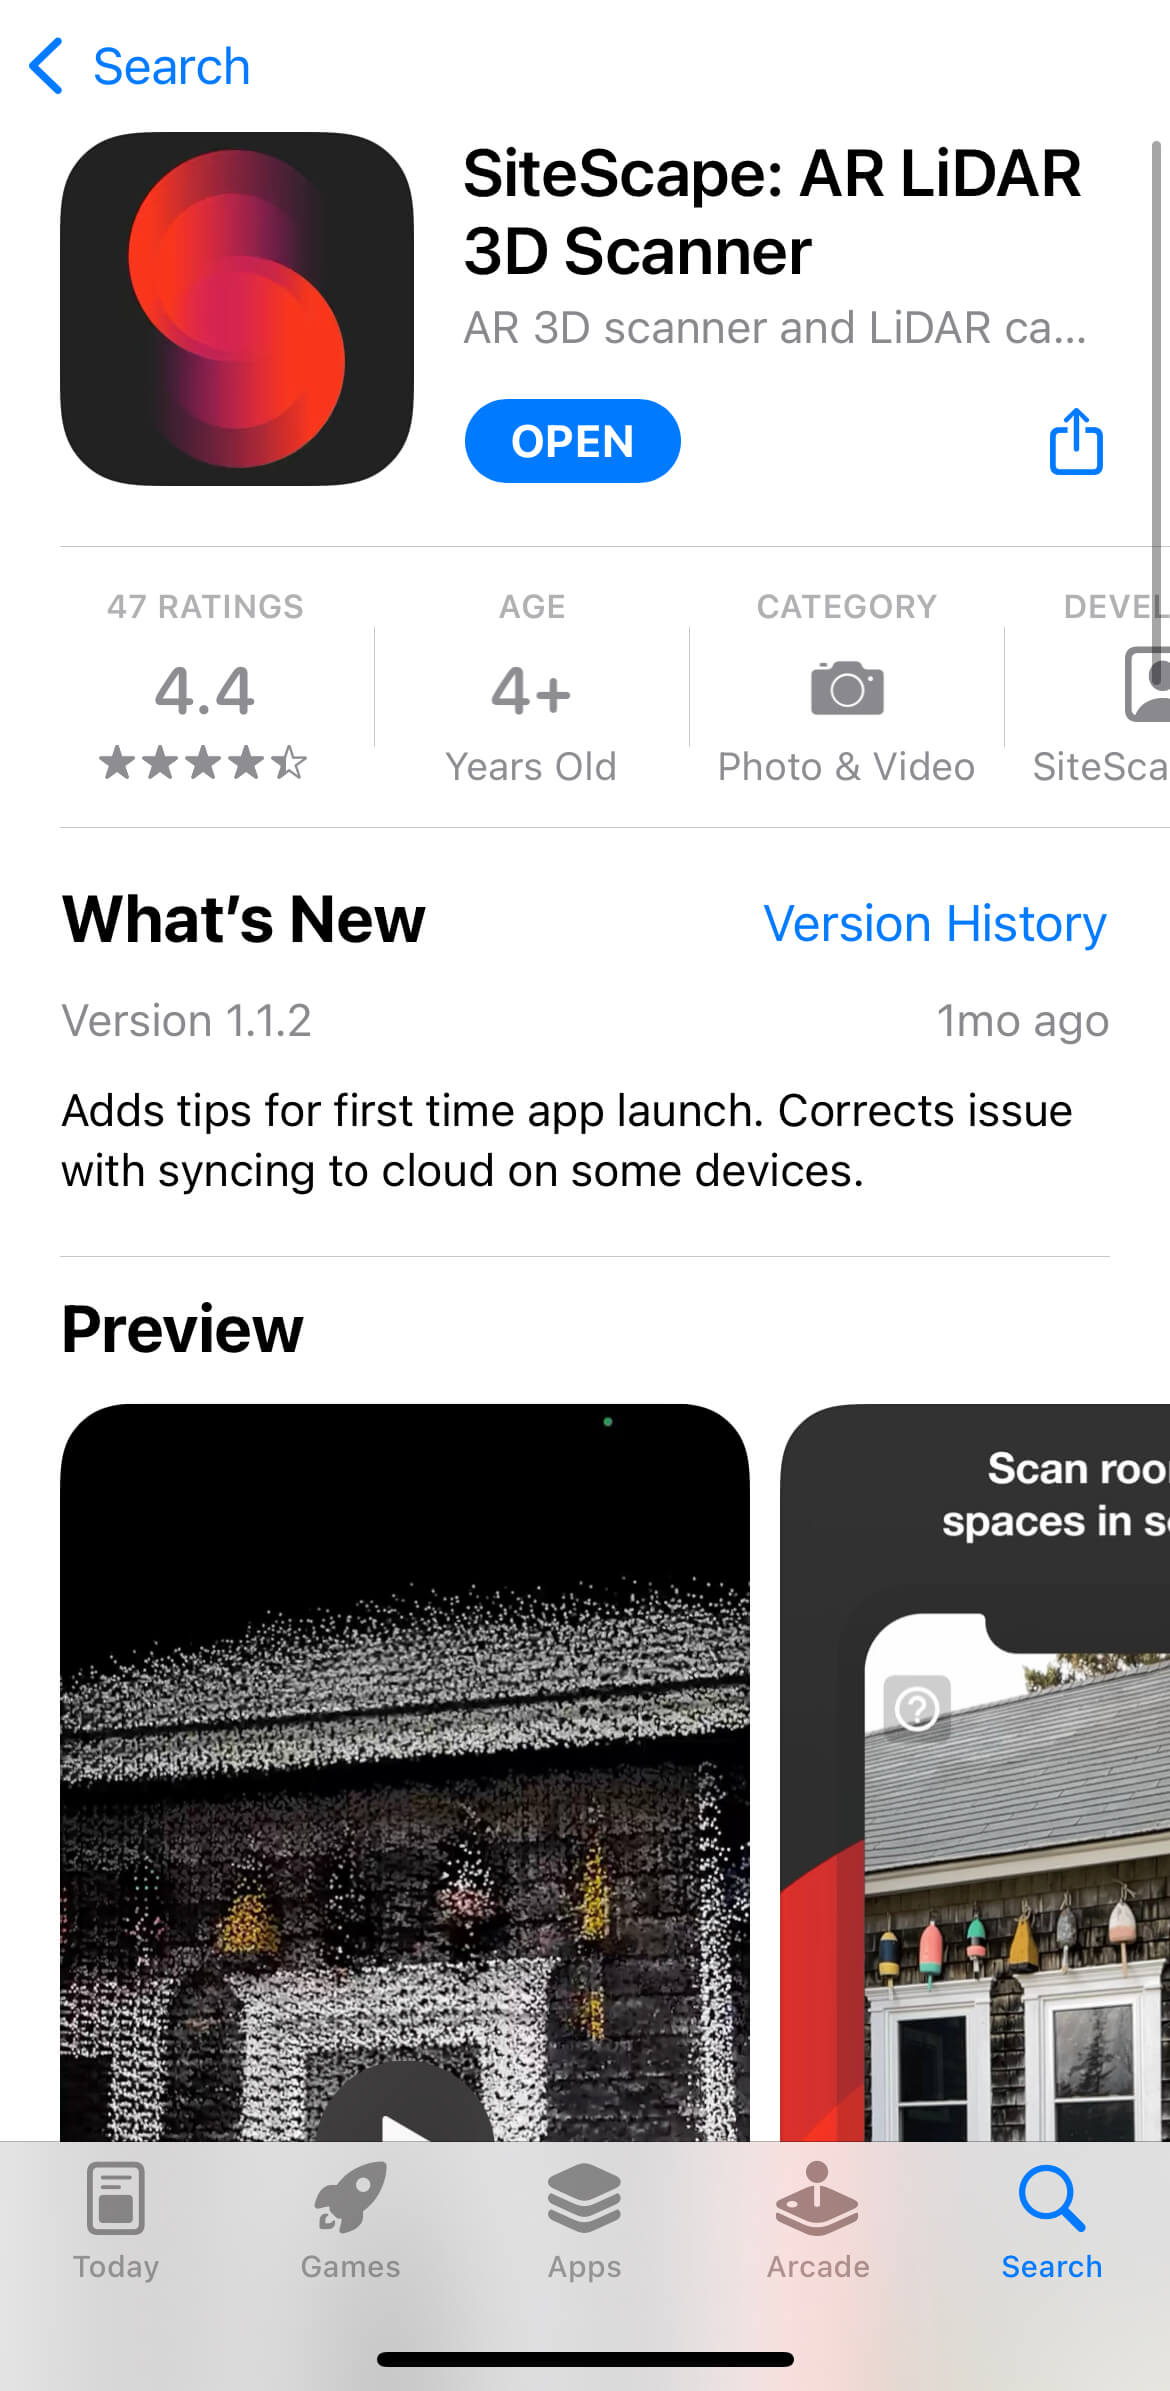
SiteScape
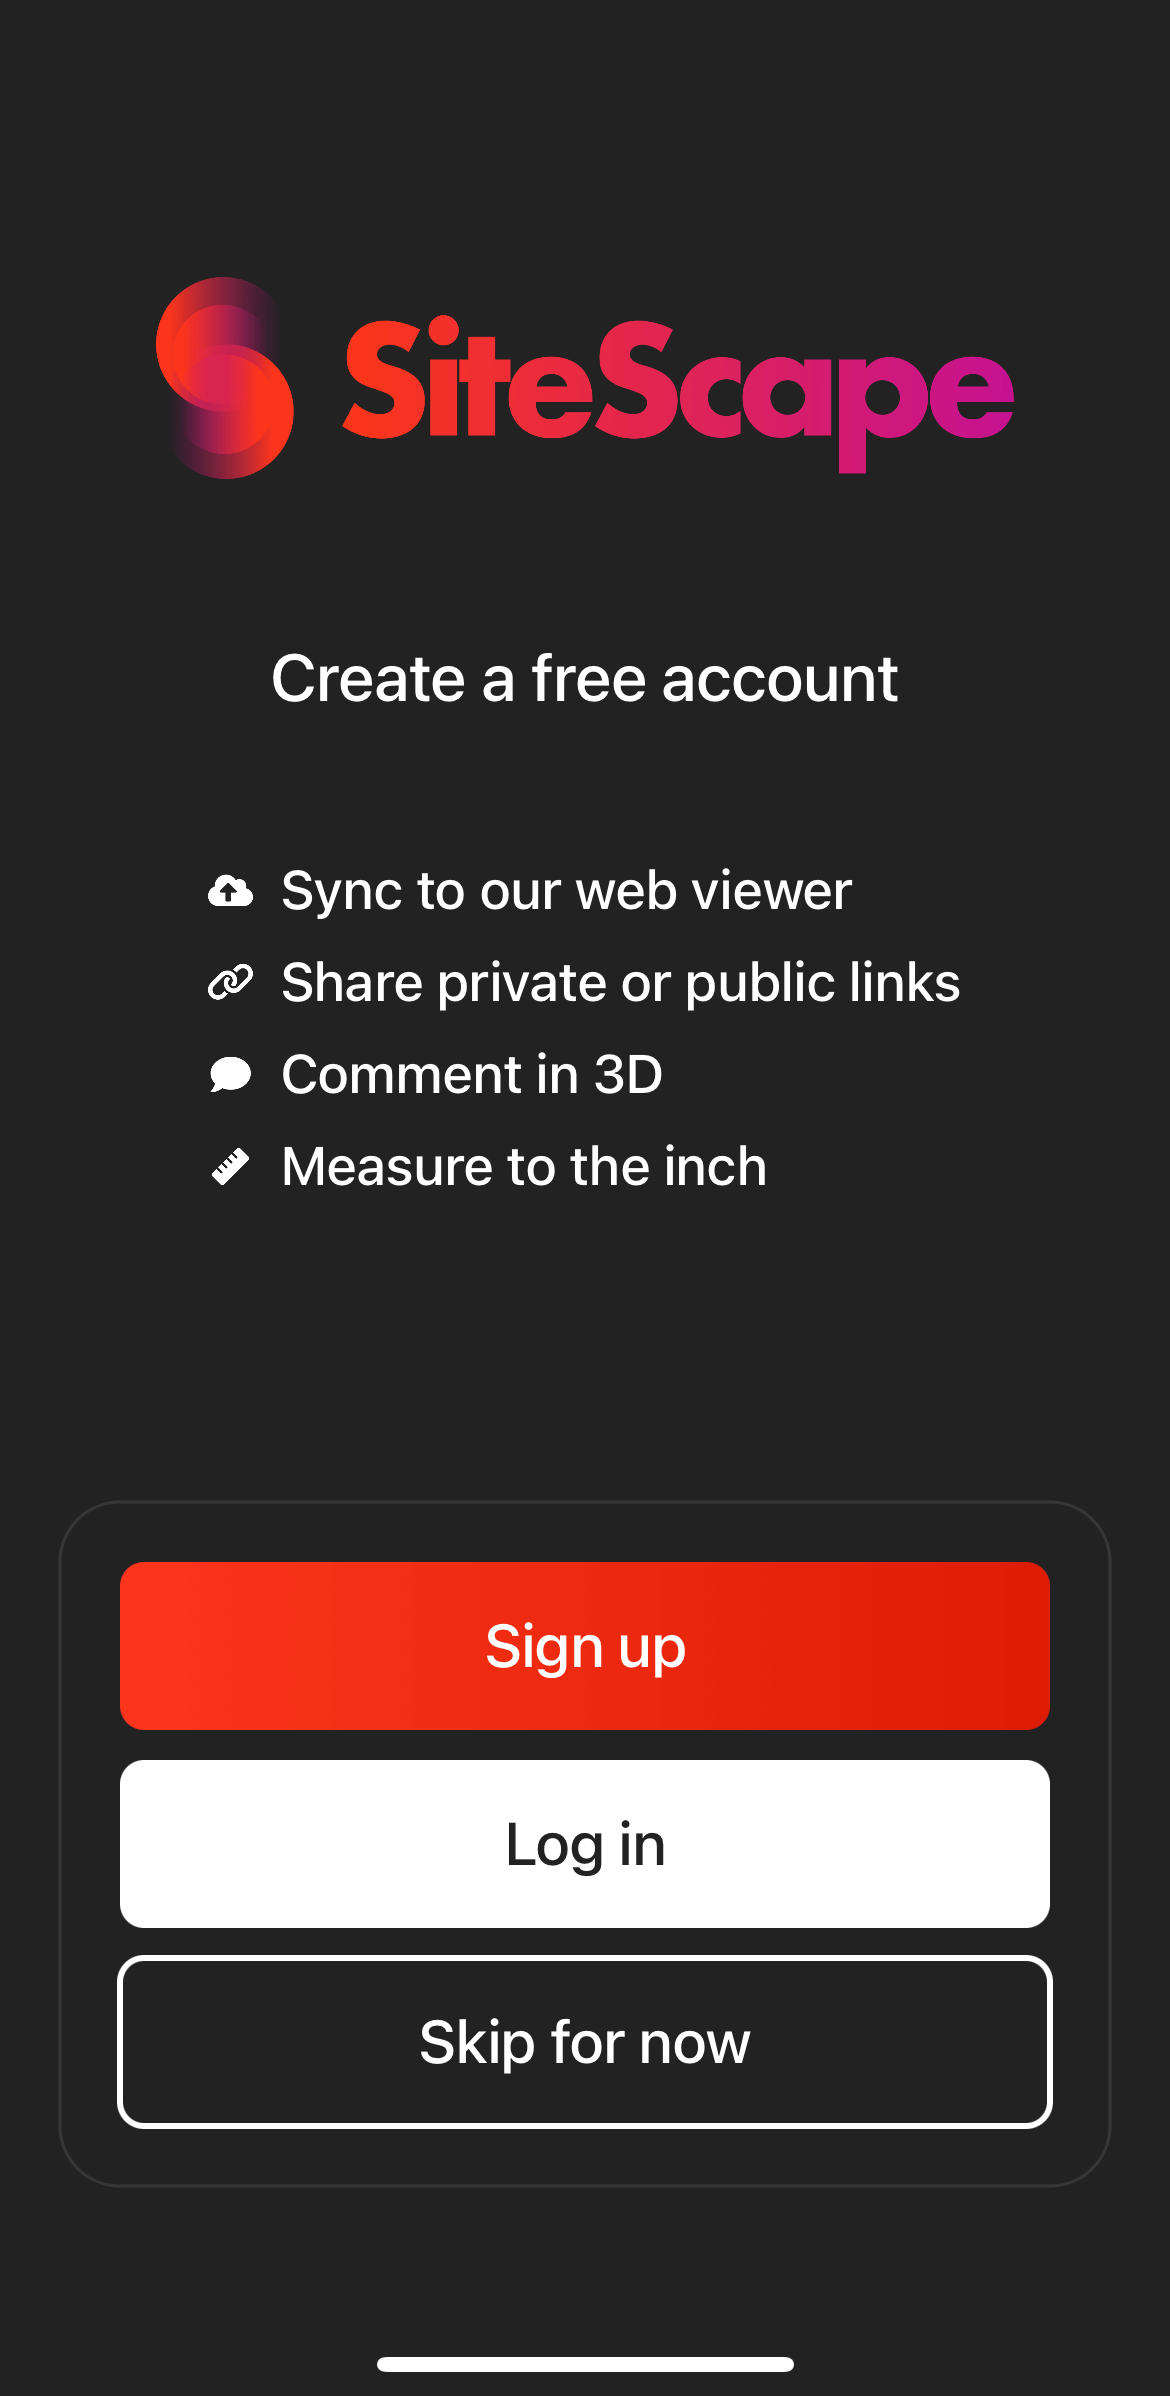
After downloading and launching the app, tap Sign Up to create a new account.
If you already have an account, select Log In.
If you want to try the app first, tap Skip for now at the bottom.
You can create a new account and log in later, but we recommend doing so first because you will be asked to sign up again when you share the scanned model.
Create a new account/Login
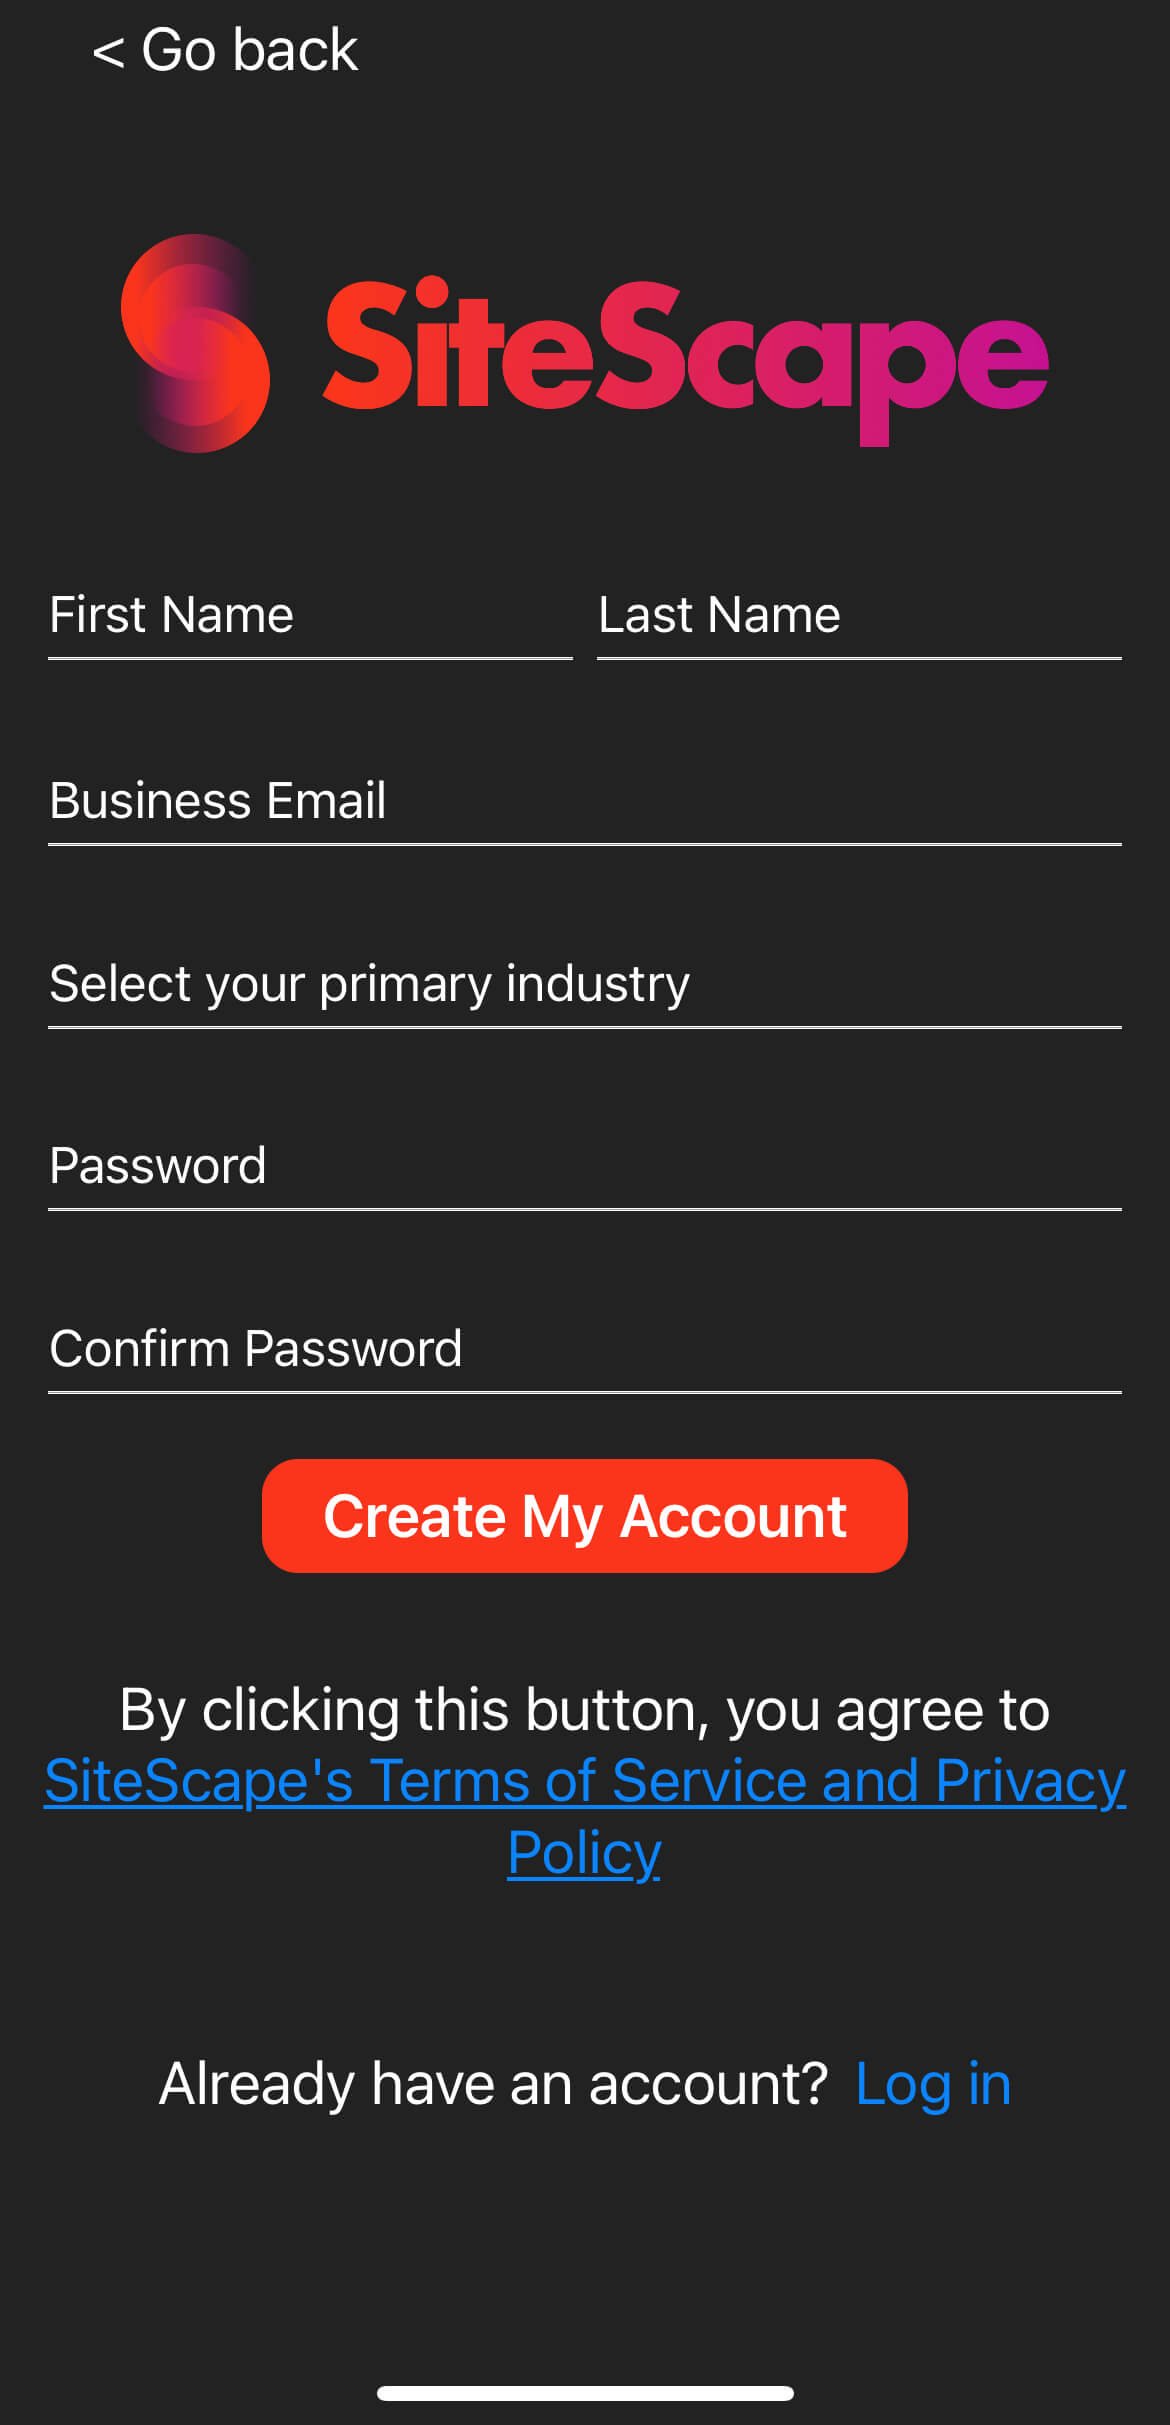
Create a new account
To create a new account, tap Sign up, fill in the required information, and then tap Create My Account.
Create a new account
You will then receive a confirmation email at the email address you registered.
Tap “Email confirmation” in the email.
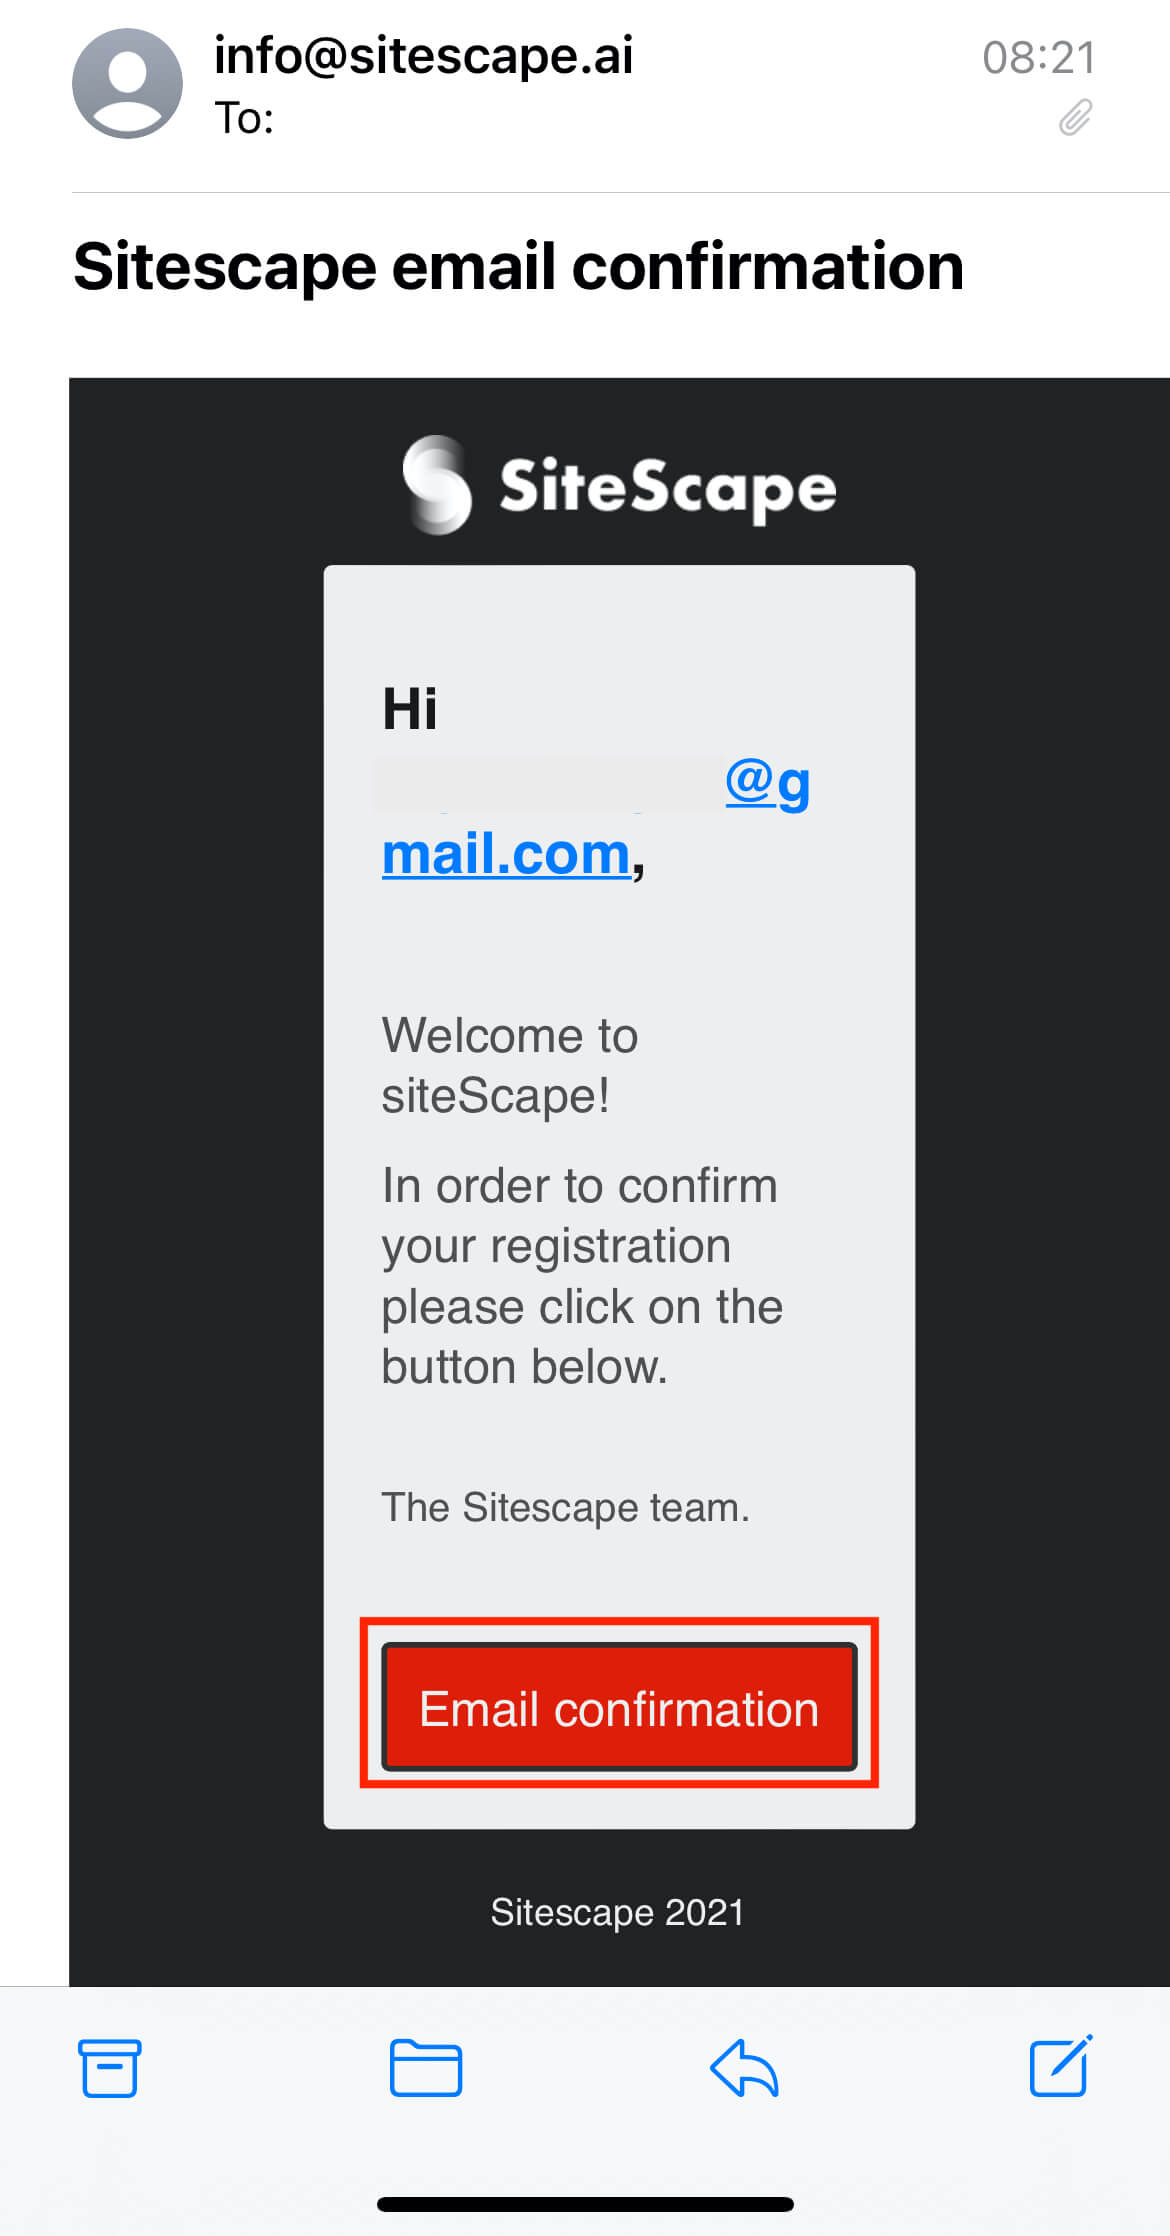
Email confirmation
Then tap the icon in the upper left corner of the app screen to log in, and your account registration is complete.
3D scanning
Tap the gear icon on the side to open the advanced settings.
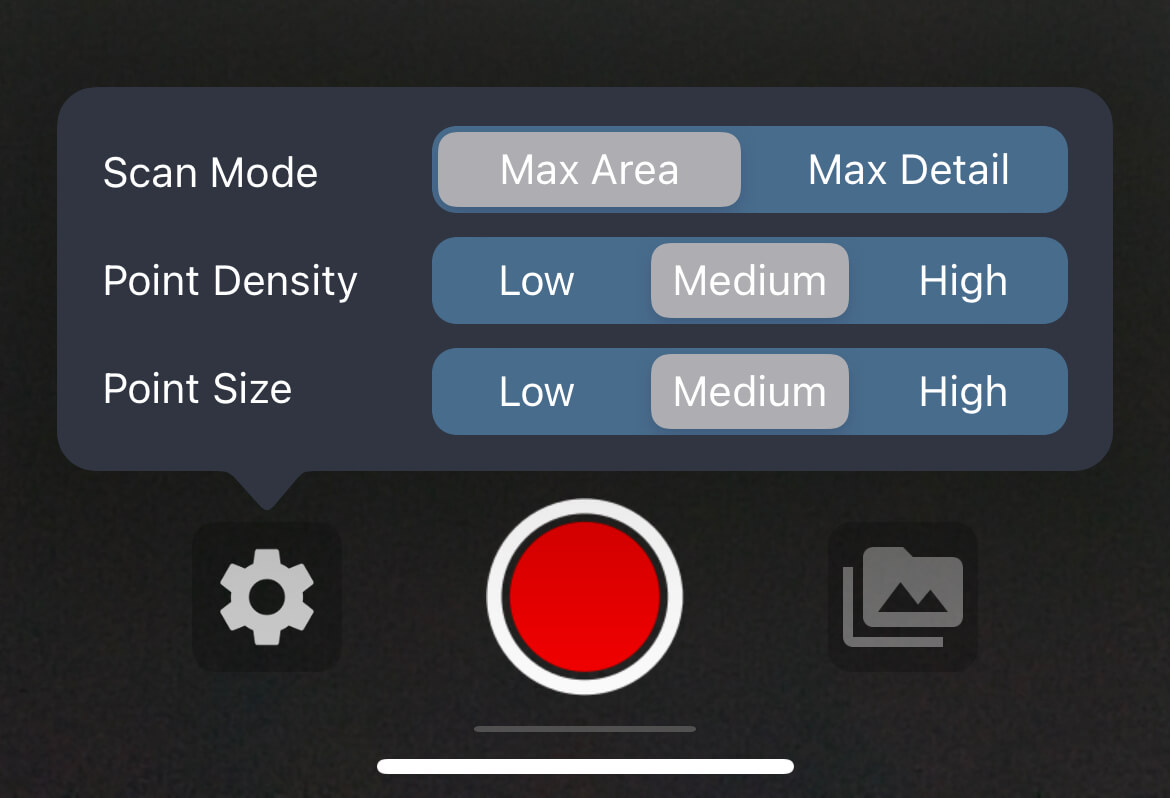
3D Scan Advanced Settings
There are two Scan Modes, Max Area and Max Detail, and you can change them depending on the object you want to scan.
| Scan Mode | Scan Mode |
| Max Area | Large objects such as buildings and wide area objects |
| Max Detail | Objects that are not very large, such as stuffed animals and small objects. |
| Point Density | Density of the point cloud |
| Point Size | Size of the points |
Tap the red circle that says “Tap to start” to start scanning.
In this case, I scanned a part of the park.
The blue bar at the bottom of the screen indicates how much data is left to scan, so be careful and scan the area from various angles.

Tap the red circle to start scanning.
When you have scanned a certain amount of data, tap the same button again to stop the scan.

Tap the red button again to stop scanning.
While stopped, swipe the center of the screen to see the scanned data superimposed on the actual scenery.

Swipe up and down the screen
Tap the red circle to add more scans.
Tap Restart to reset the scan data and start over from the beginning, or tap Complete to finish the scan.
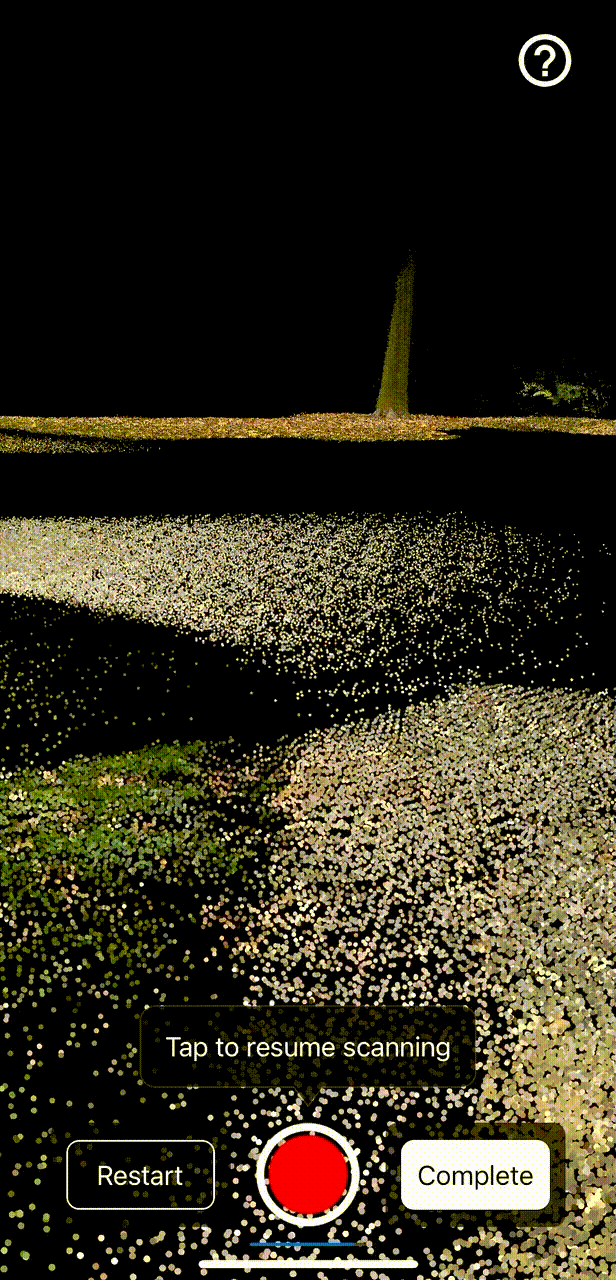
You can add additional scan leaks.
When you tap Complete, the scanned model will be previewed.
At this point, you can swipe or pinch to see the model from different angles and distances.
Tap Save to save the model.
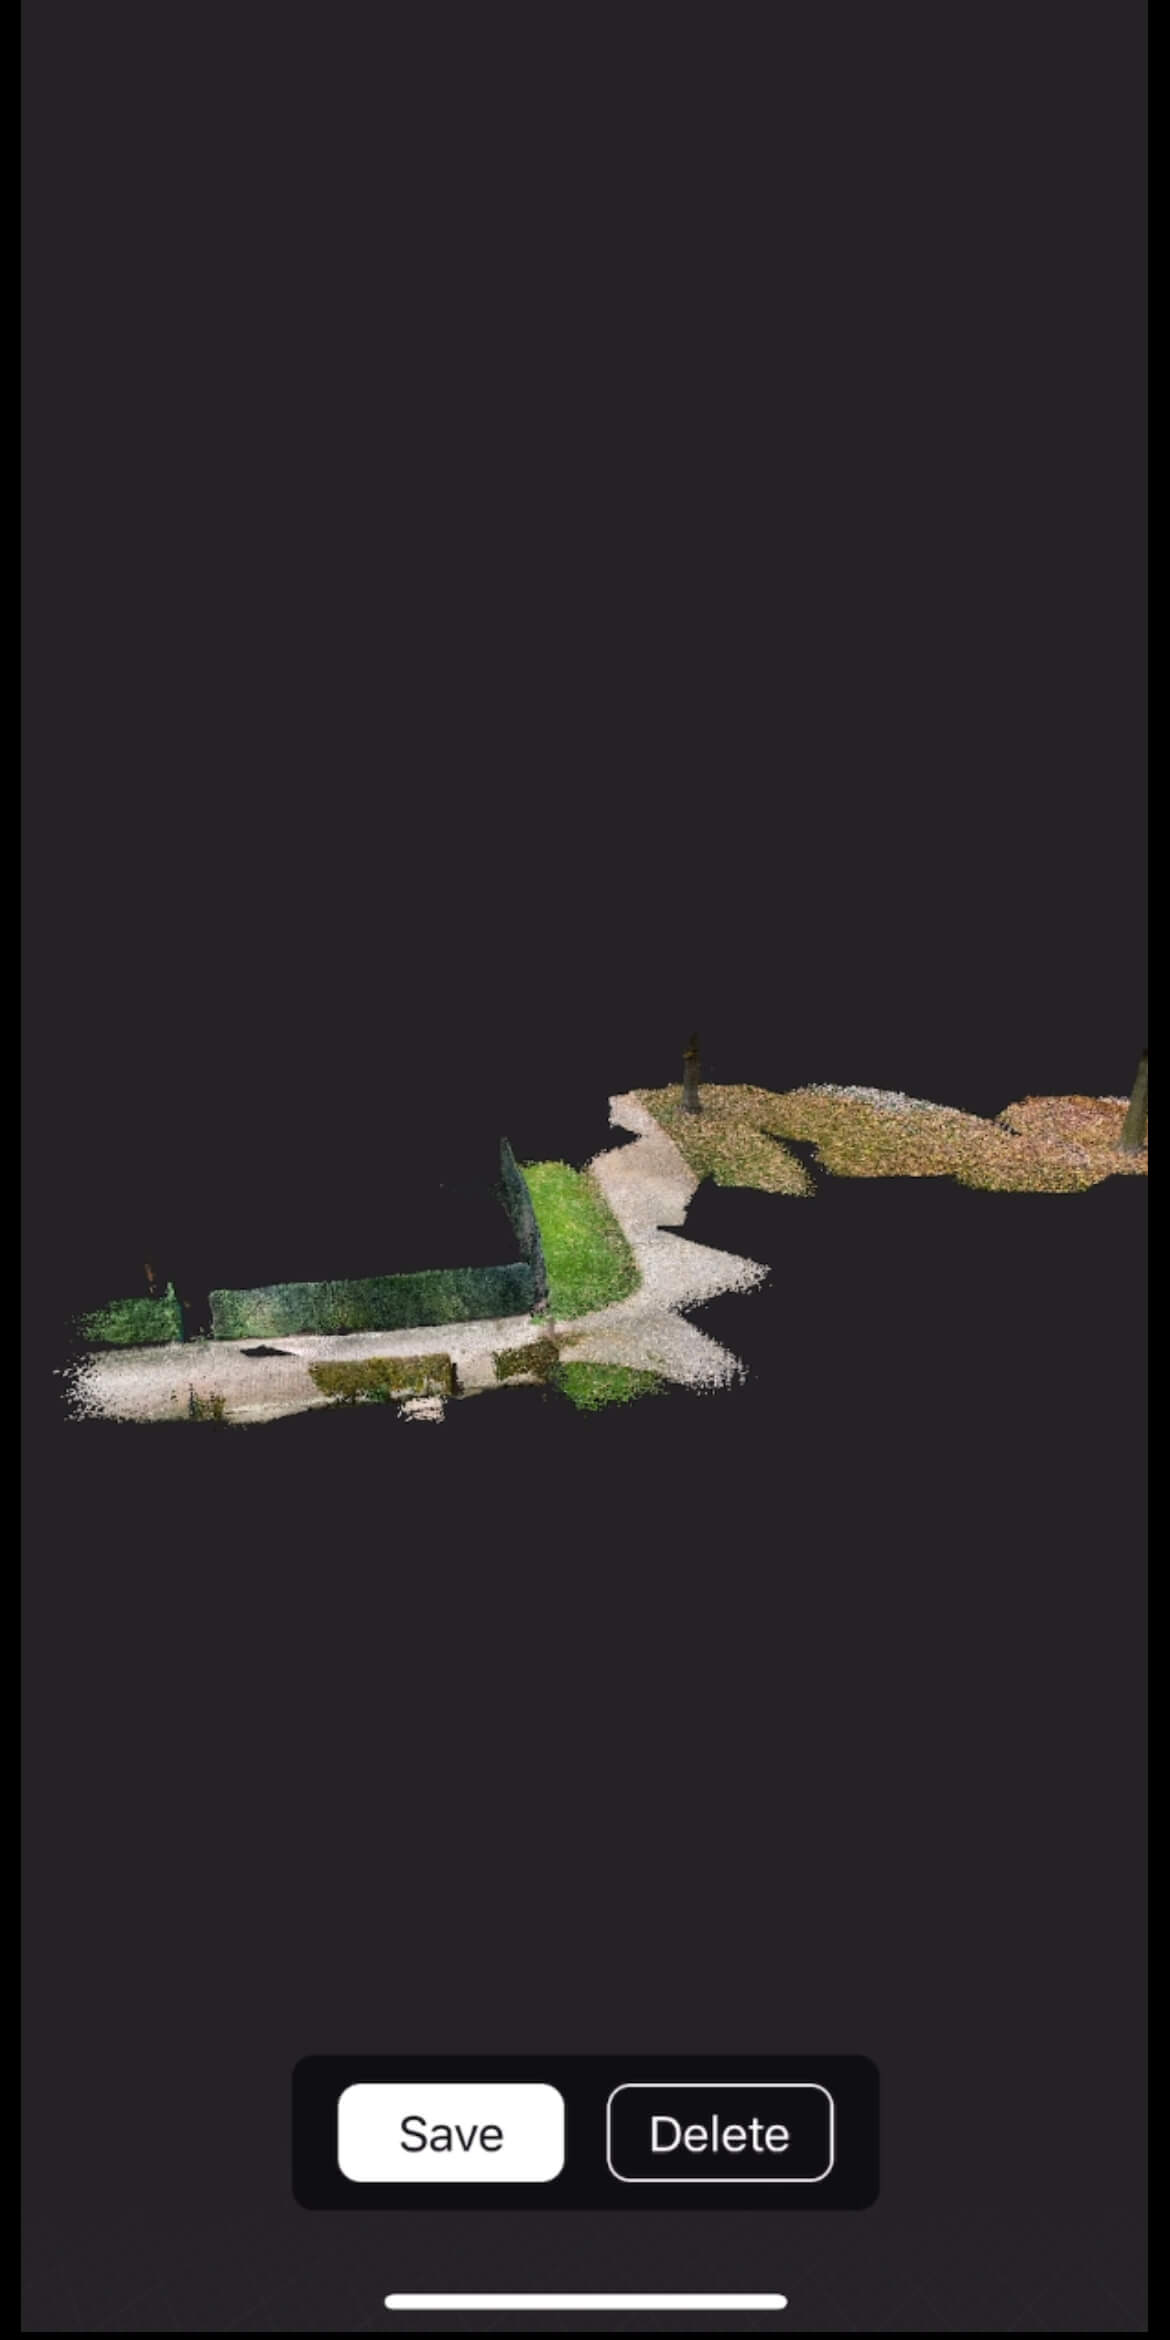
Checking the scanned model

Enter the name of the scanned model and it will be saved in .ply format.
The scanned model has been saved.
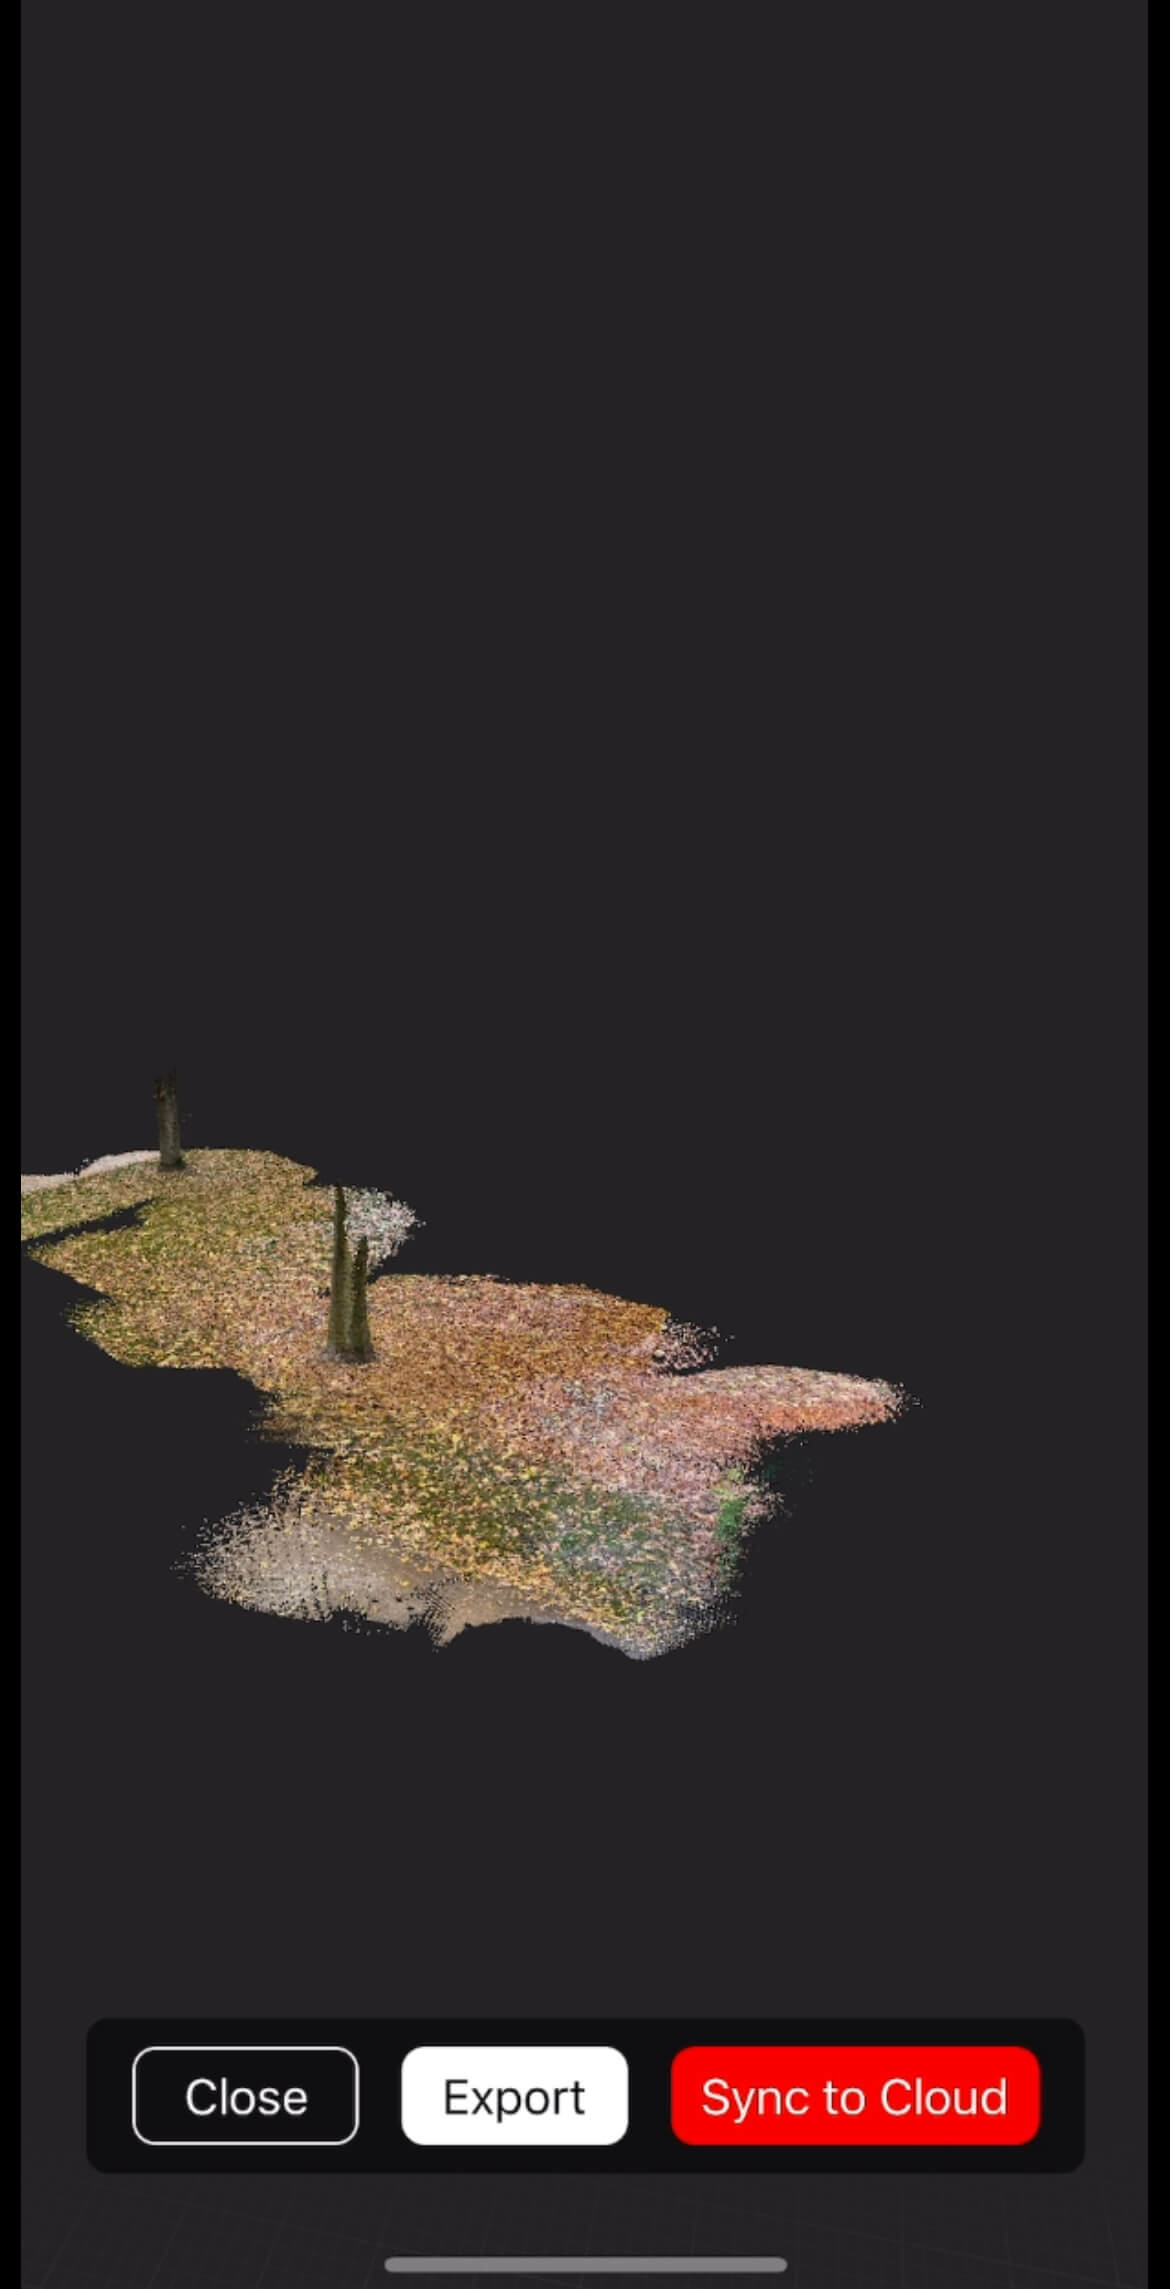
Tap Export to share the scanned model.
You can choose either PLY or E57 format, and the sharing method and destination will be displayed.

Select PLY or E57
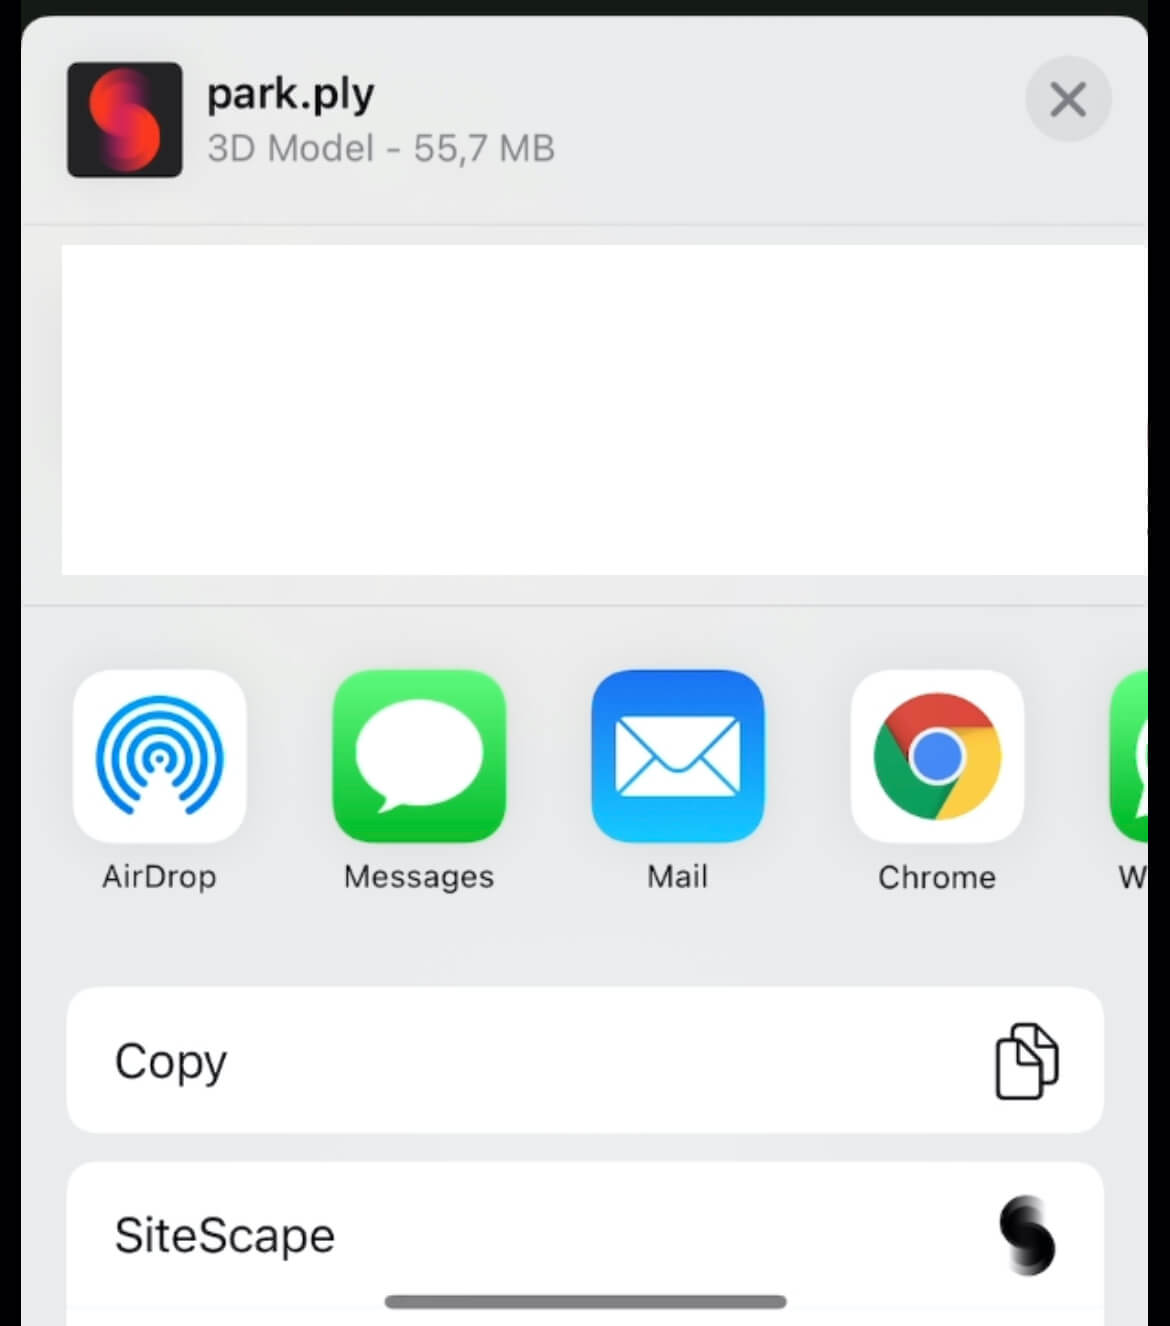
You can share via AirDrop, email, etc.
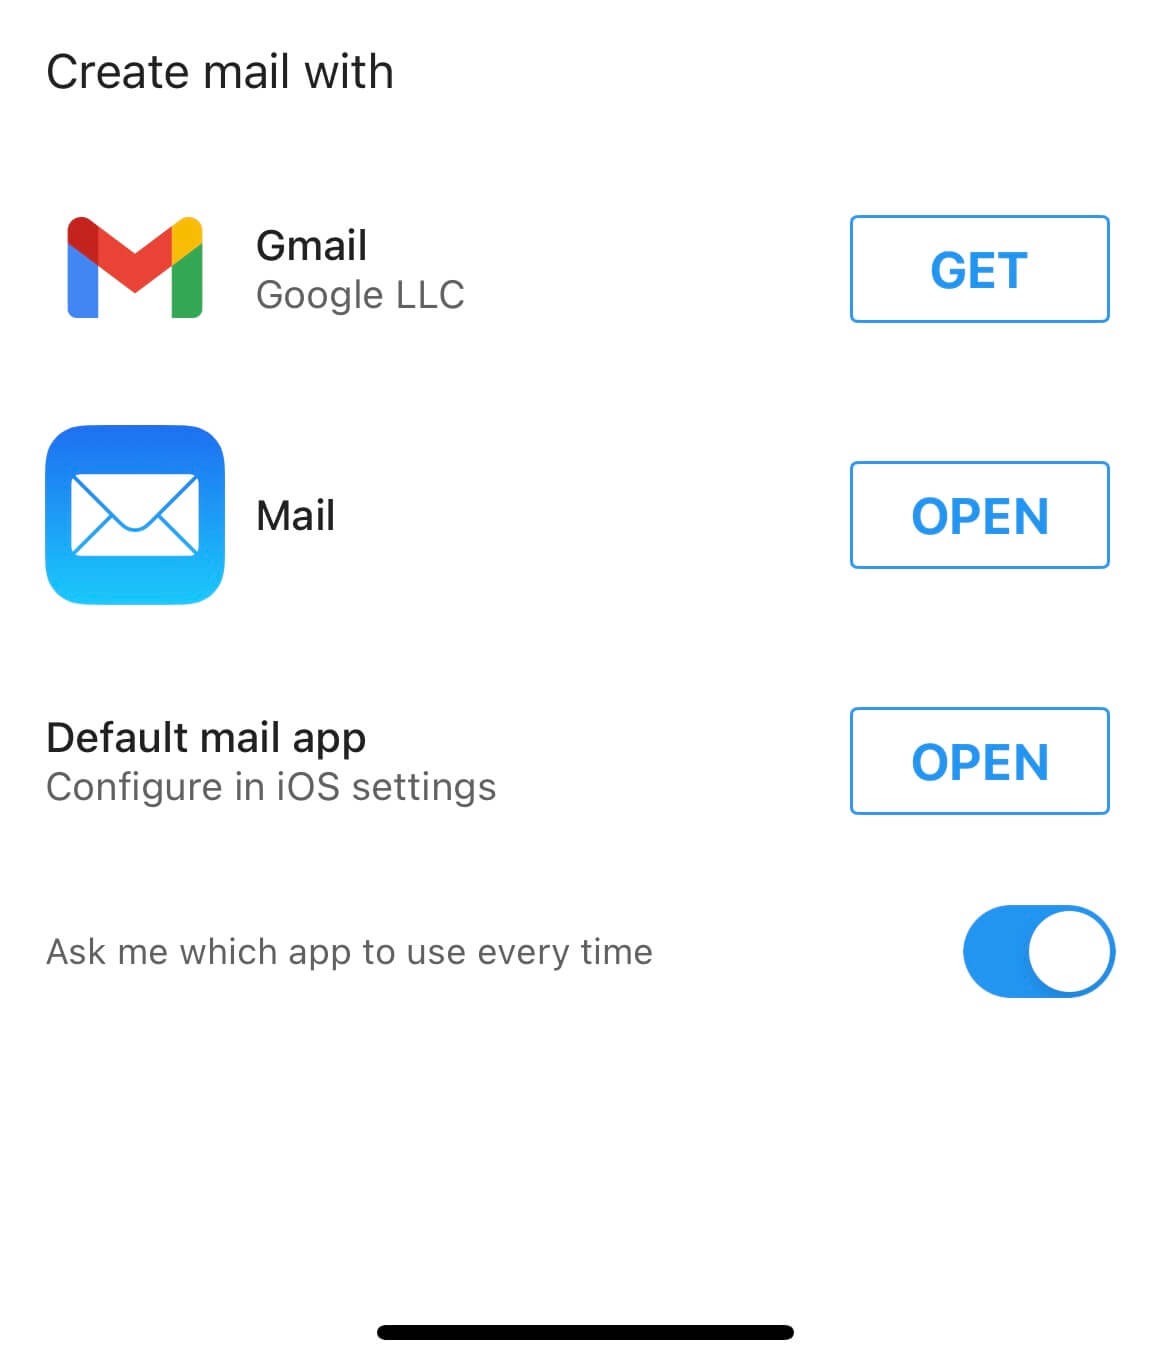
Tap the email icon to create an email with the data attached.
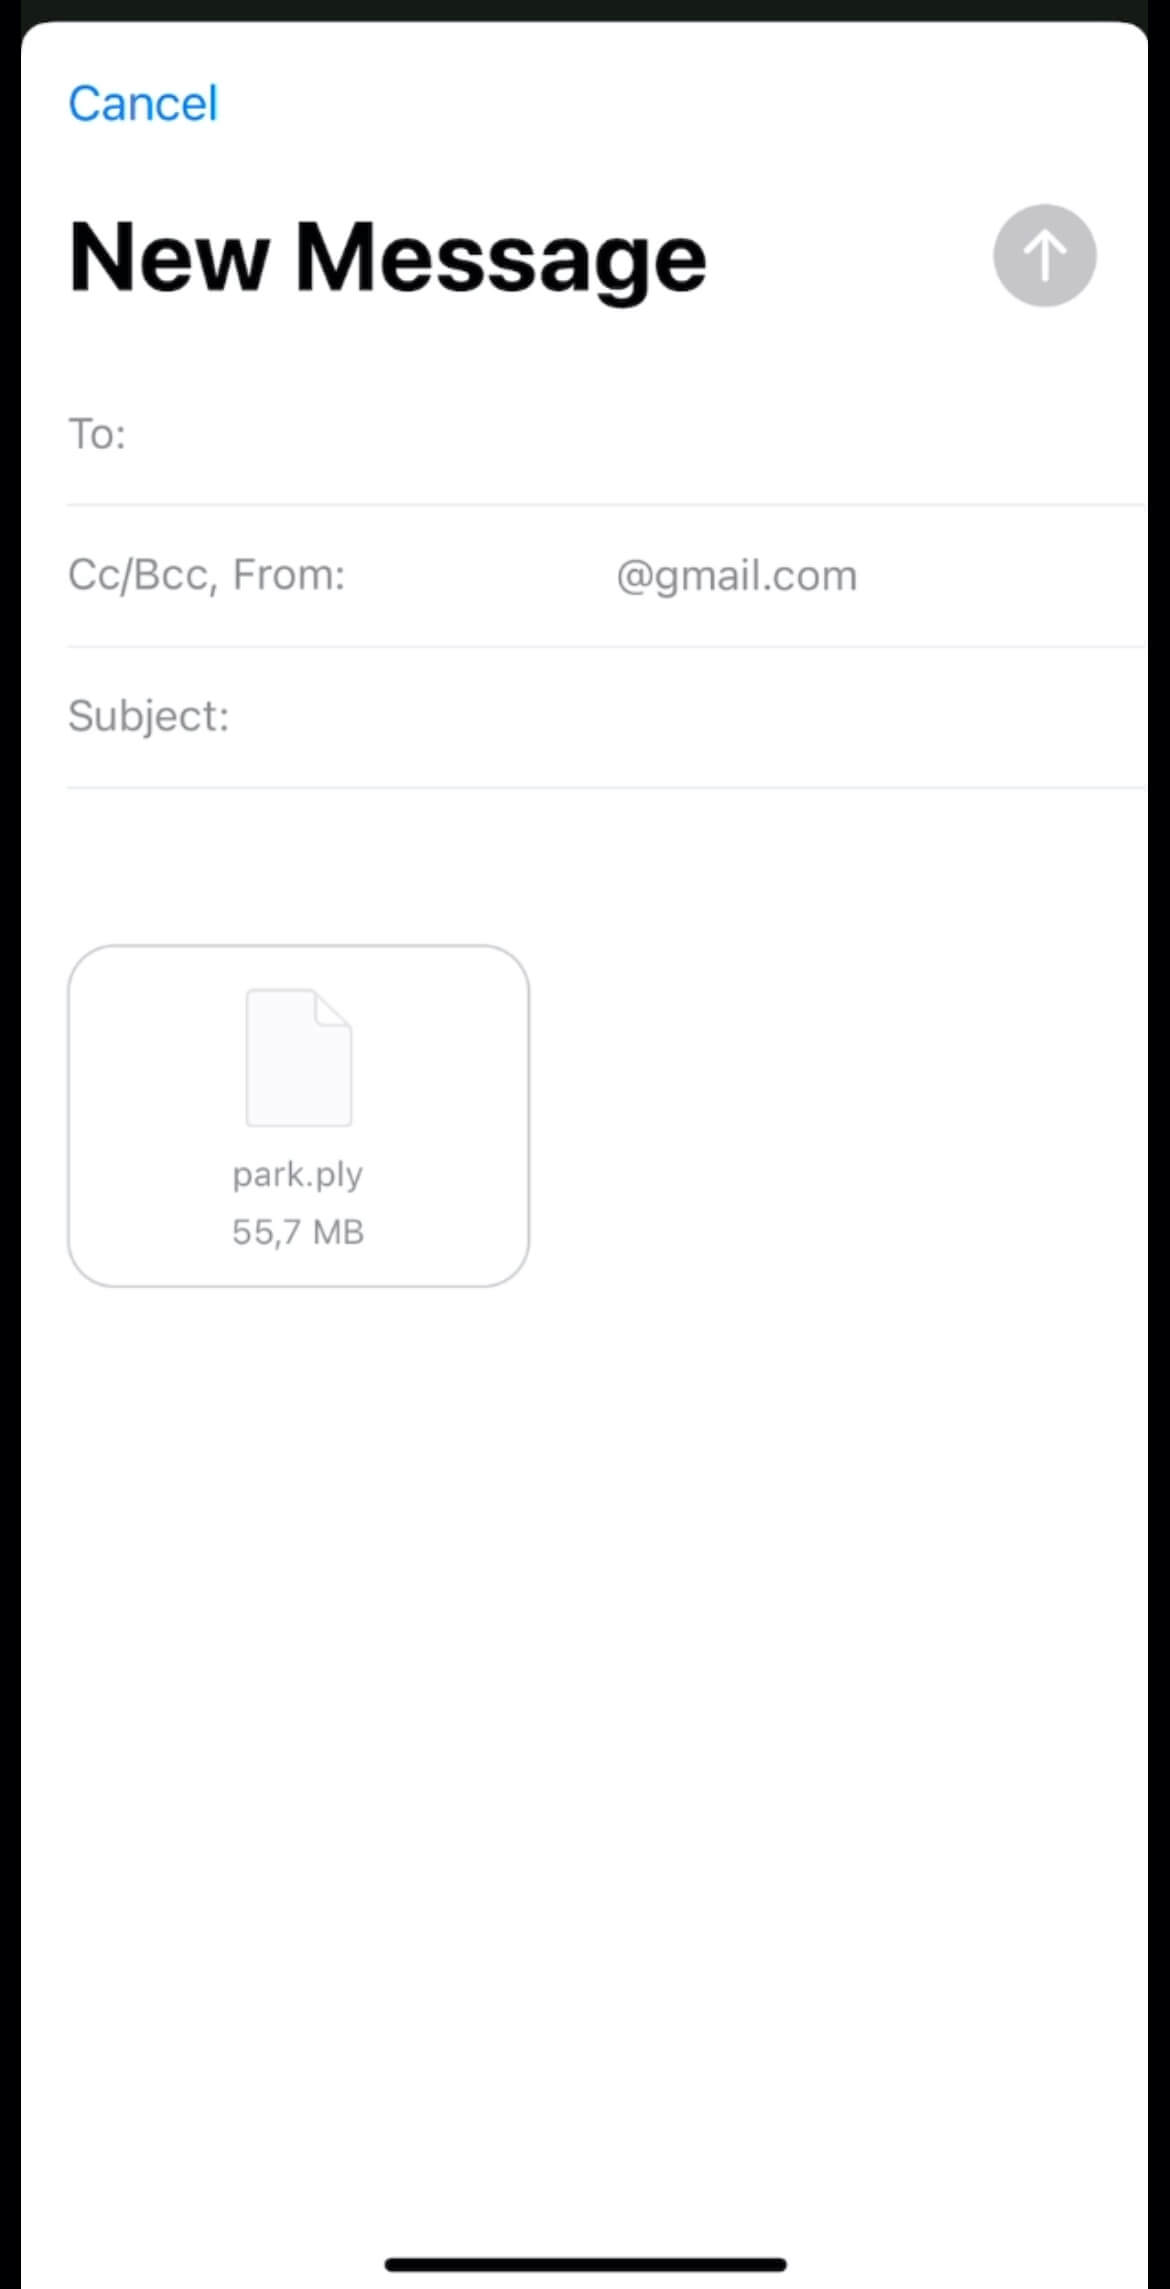
Tap the Mail icon
Tap the Sketchfab item to upload the scanned model directly.
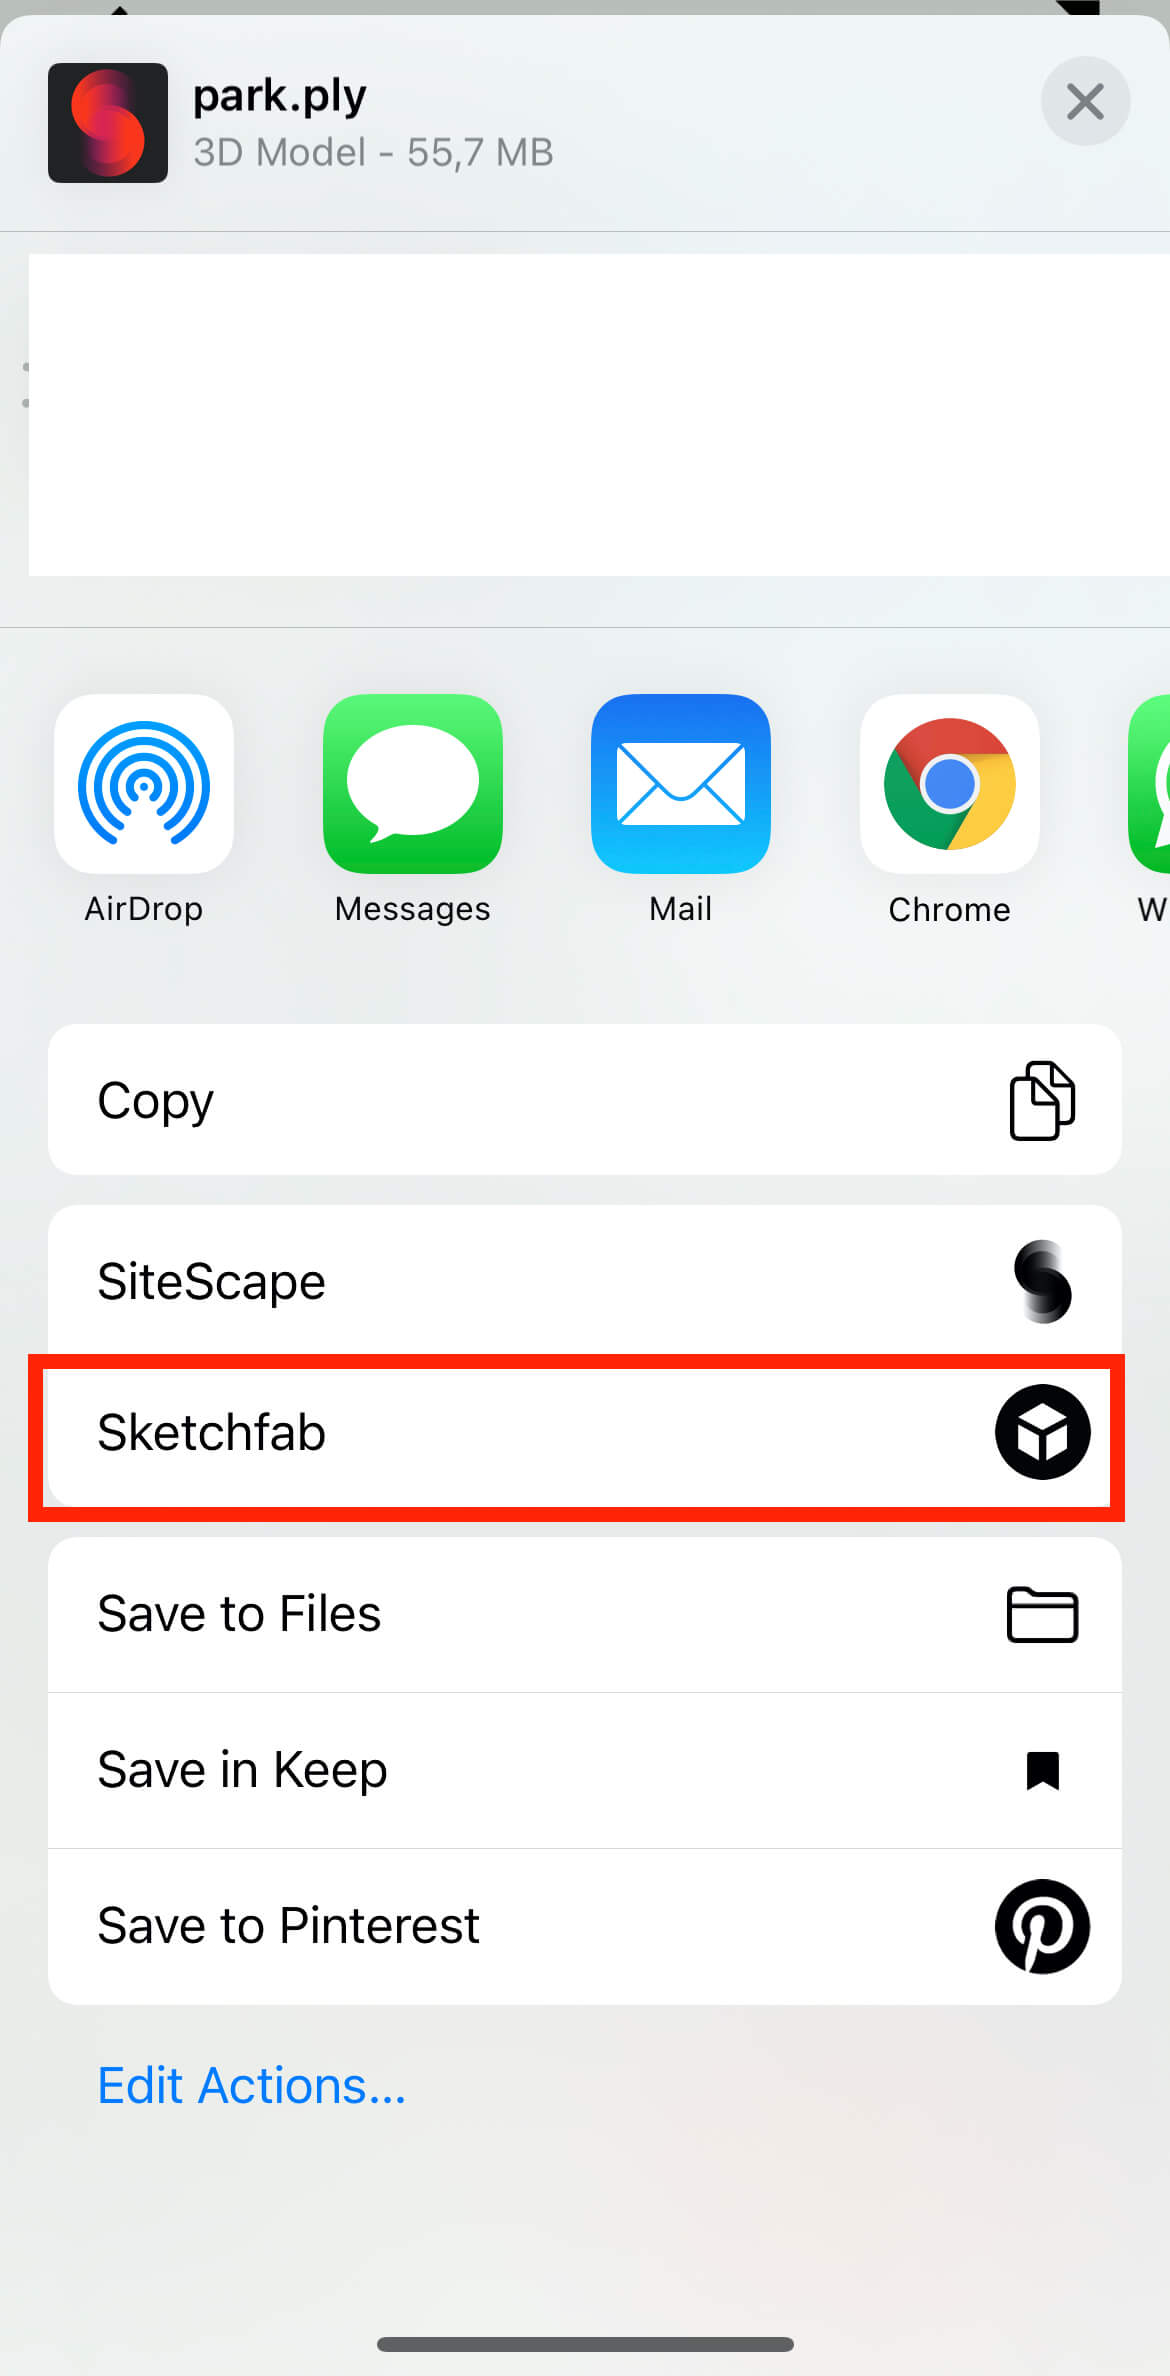
Sketchfab
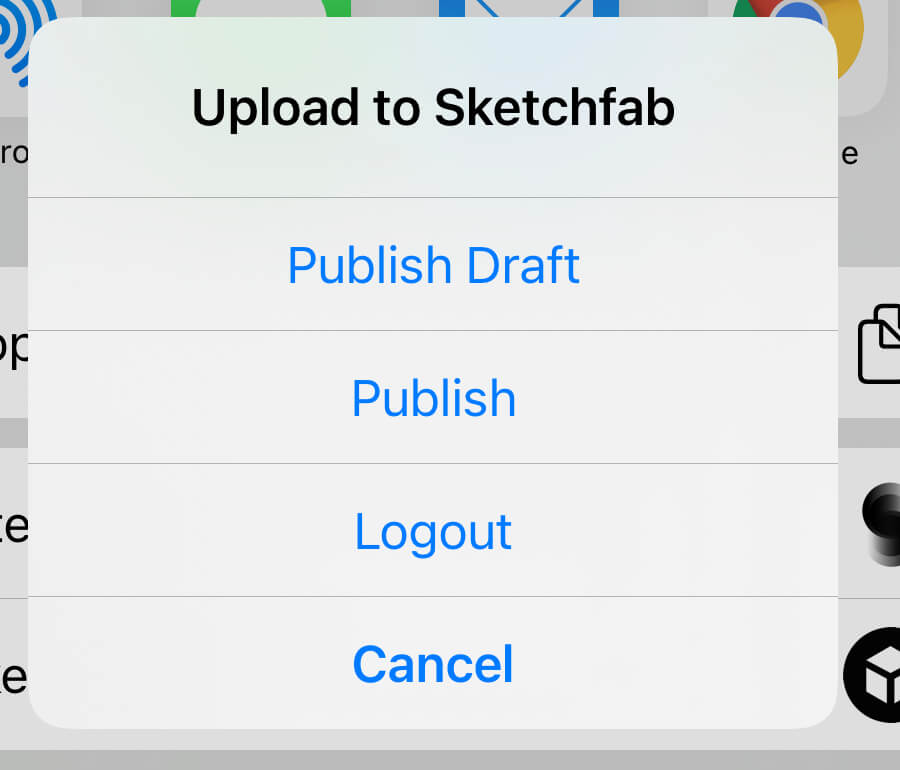
Select “Publish Draft” or “Publish”
Then the Sketchfab login screen will appear.
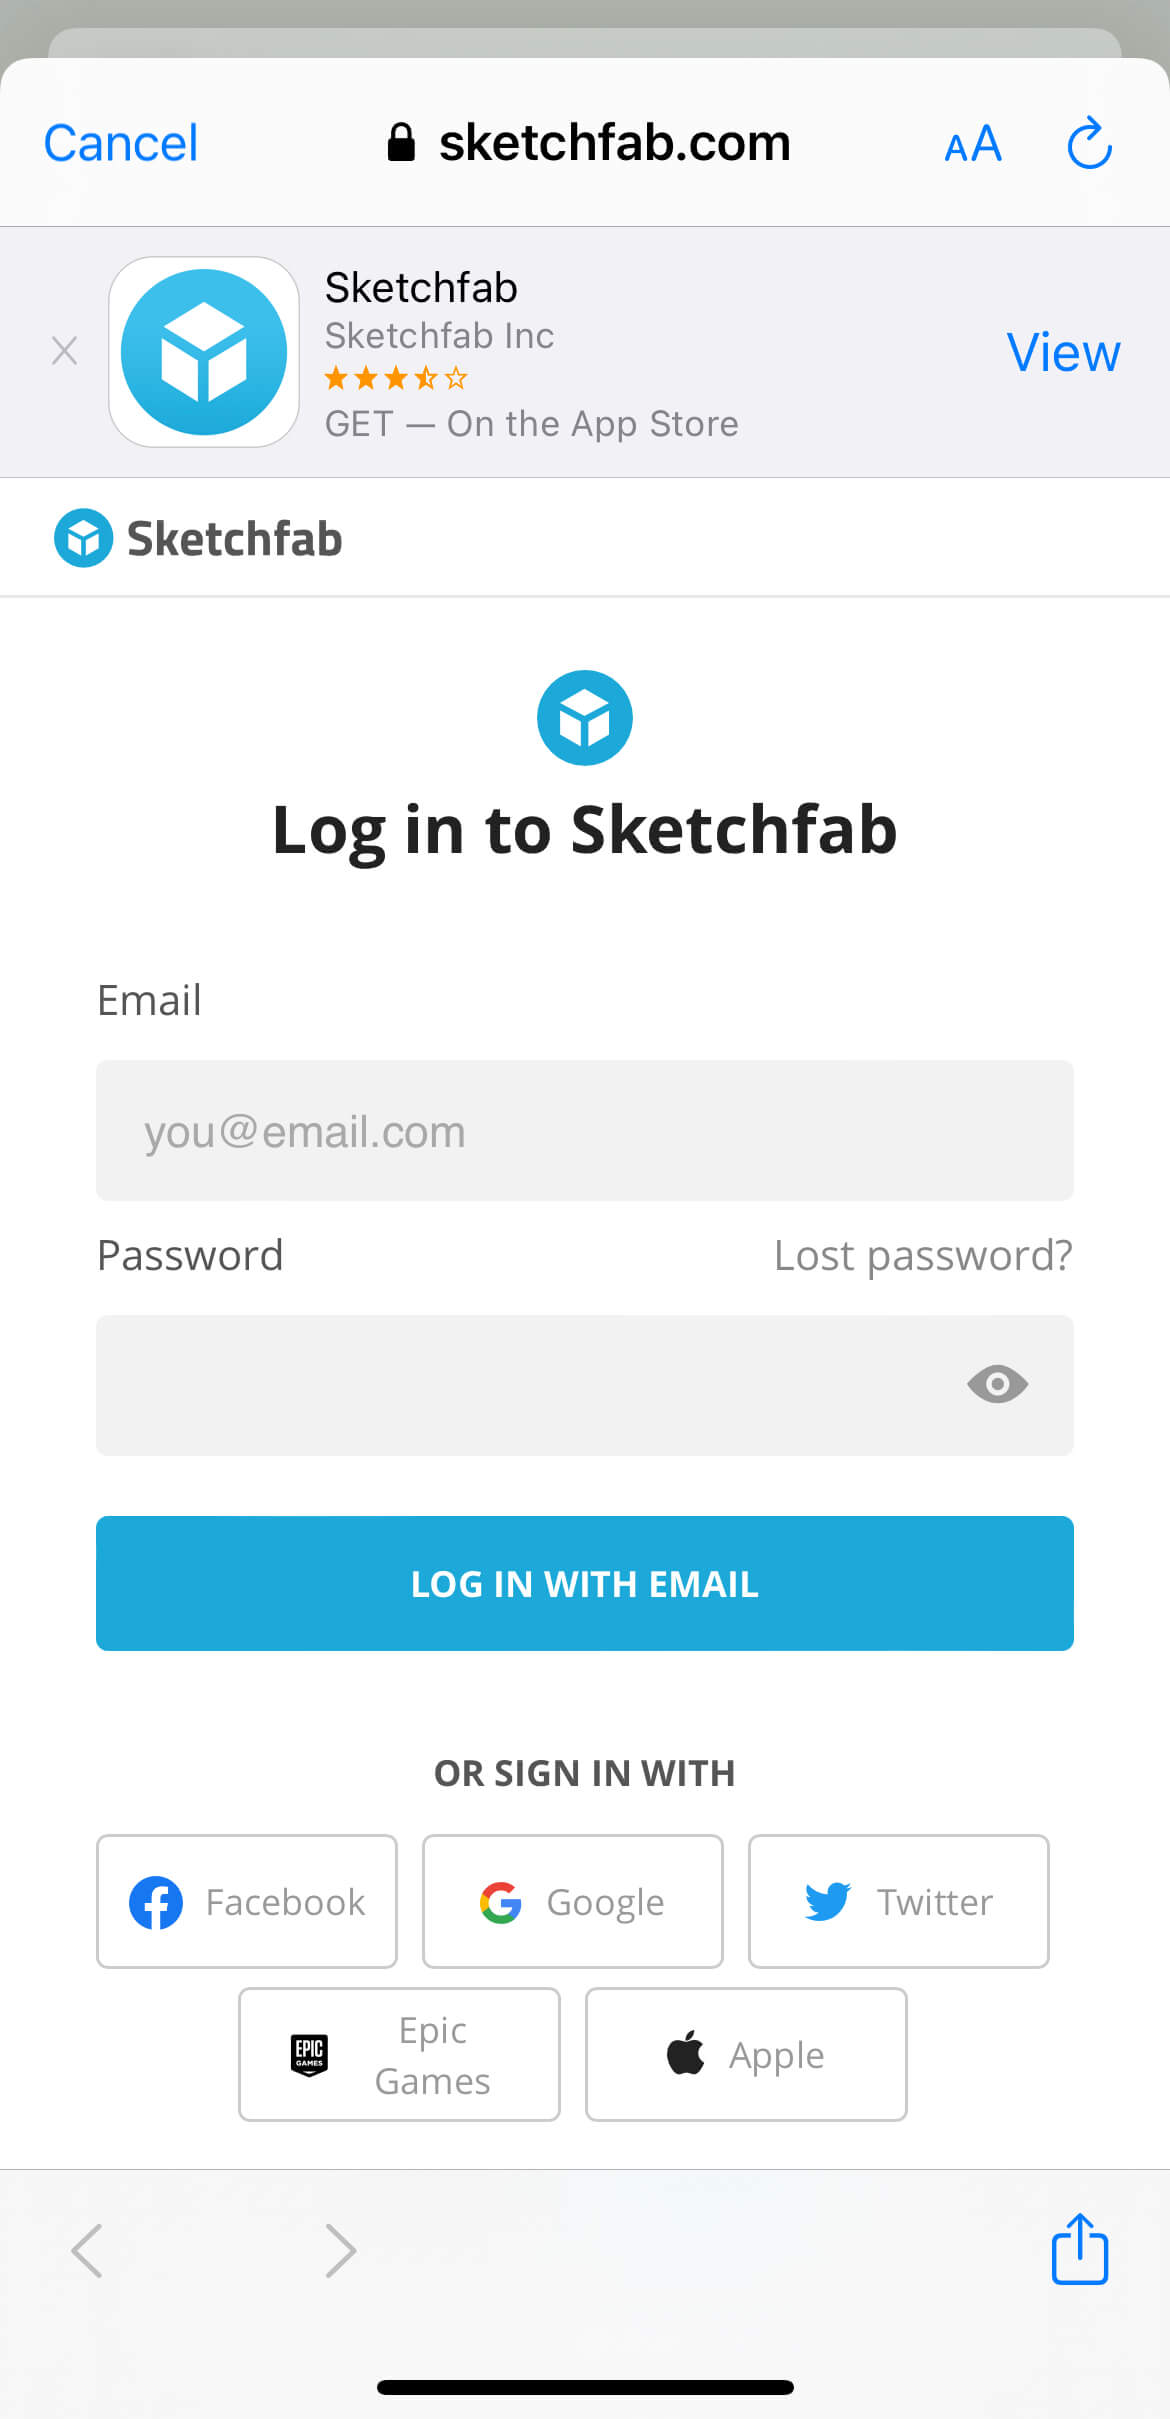
Login to Sketchfab
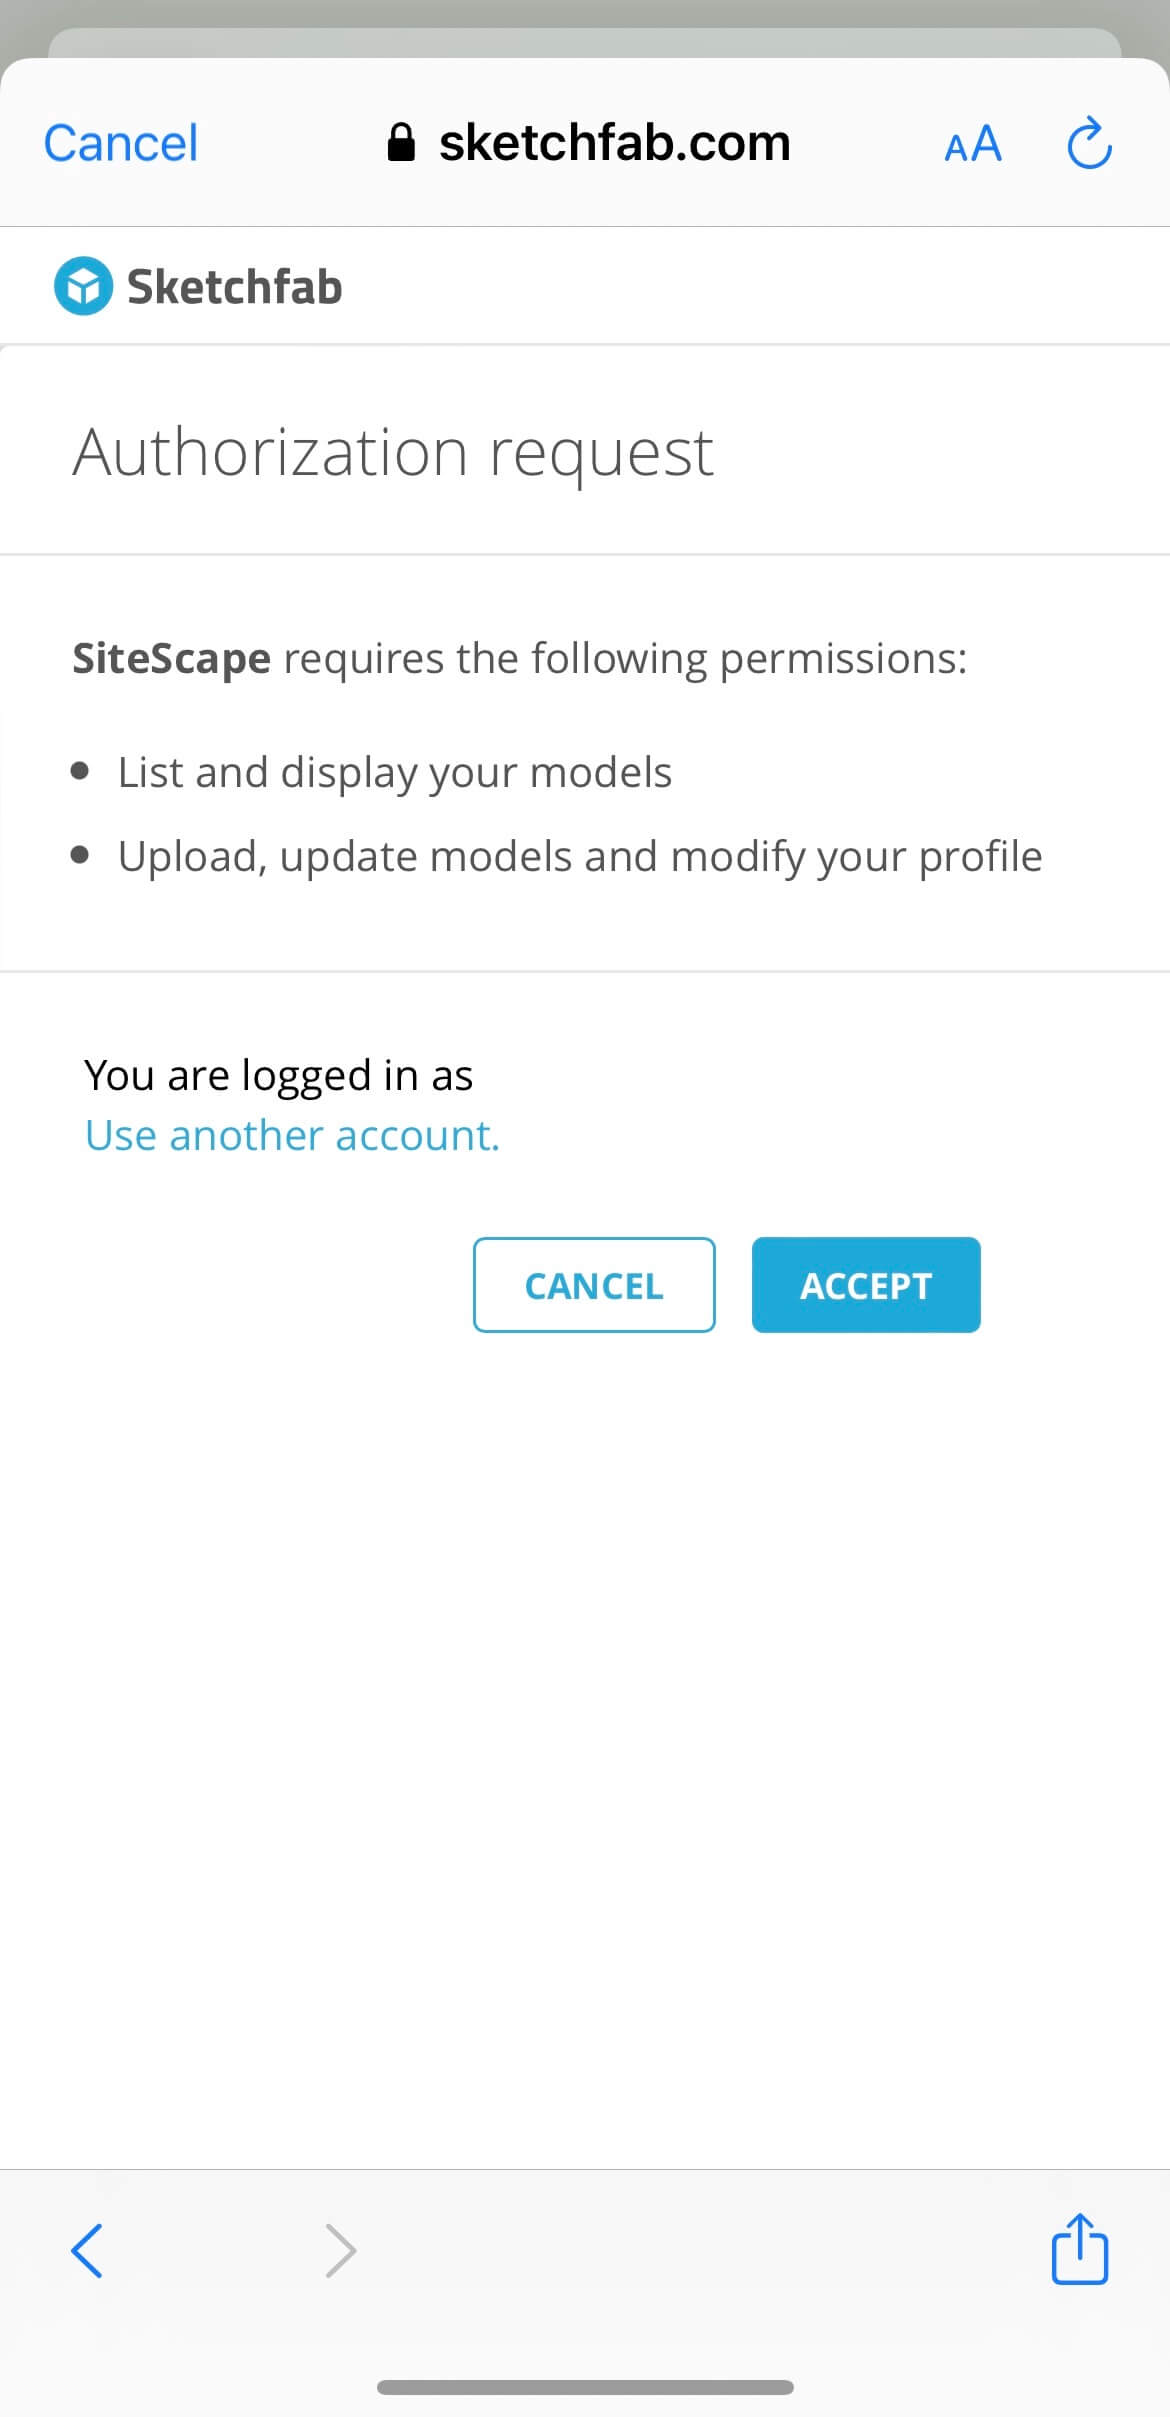
Request login authentication
Wait for a while, and your scanned model will be uploaded.

You will receive an email with a URL.
Save to Cloud
Tap Sync to Cloud to save the data to the cloud.
Sync to Cloud
You can save an unlimited number of scans in the app, but once you save in the cloud, you can log in from your desktop and access your scan model.
Upgrade your account
How to upgrade
When saving a second scan model, if you have a free account, you will see the following message.
Since a free account can only sync one model, you can either upgrade your account by tapping Upgrade, or replace the existing scan model by tapping Continue & Replace.
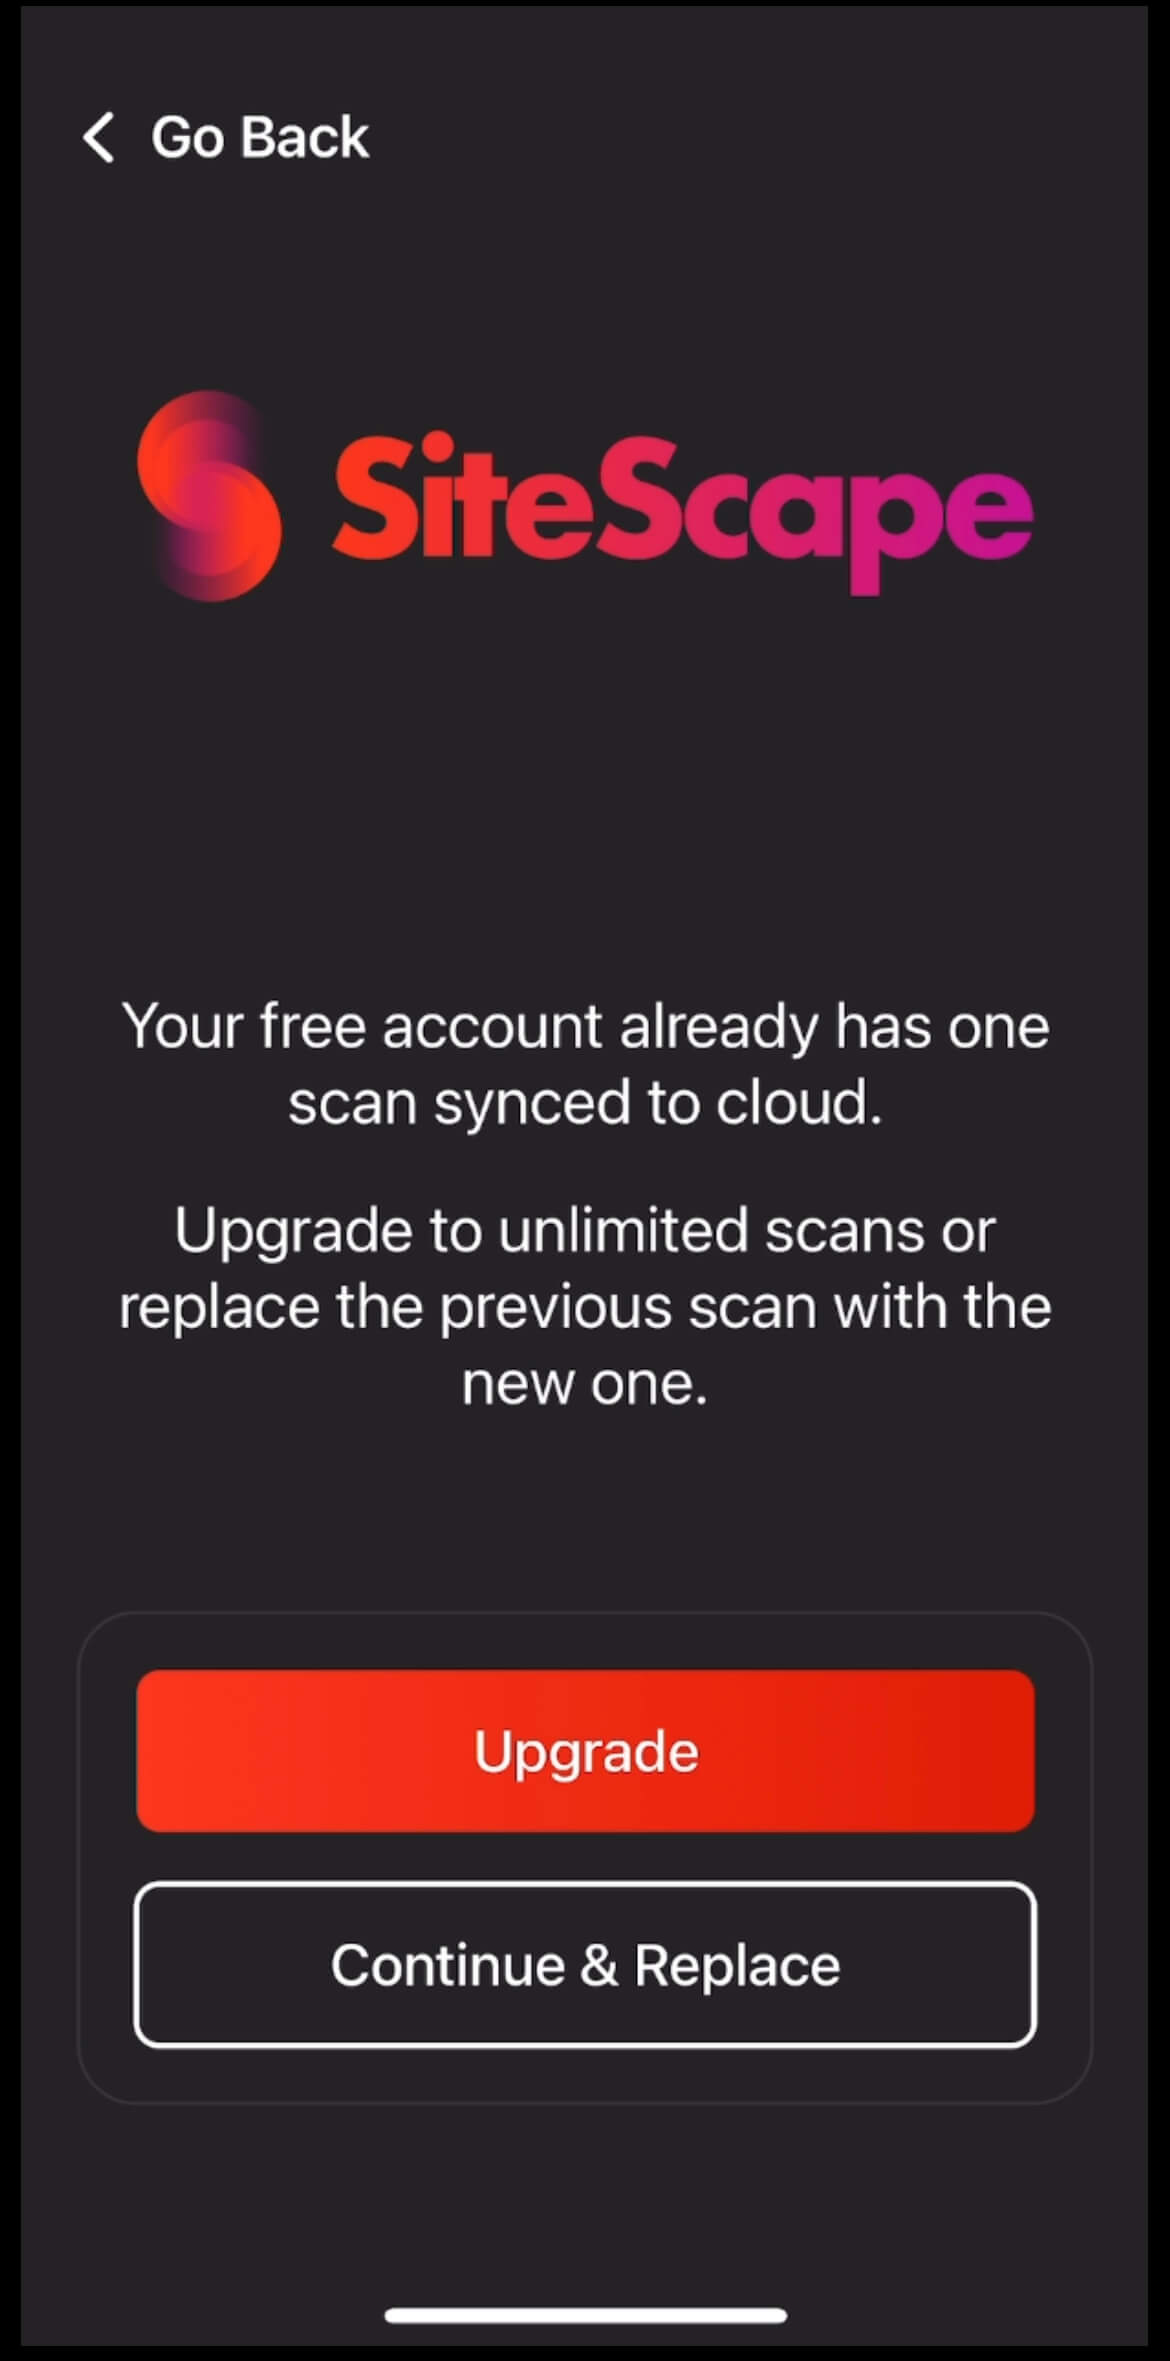
Upgrading your account or replacing a scan model
You can also upgrade your account by tapping the icon in the upper left corner of the main screen.

Tap the icon to view your account information
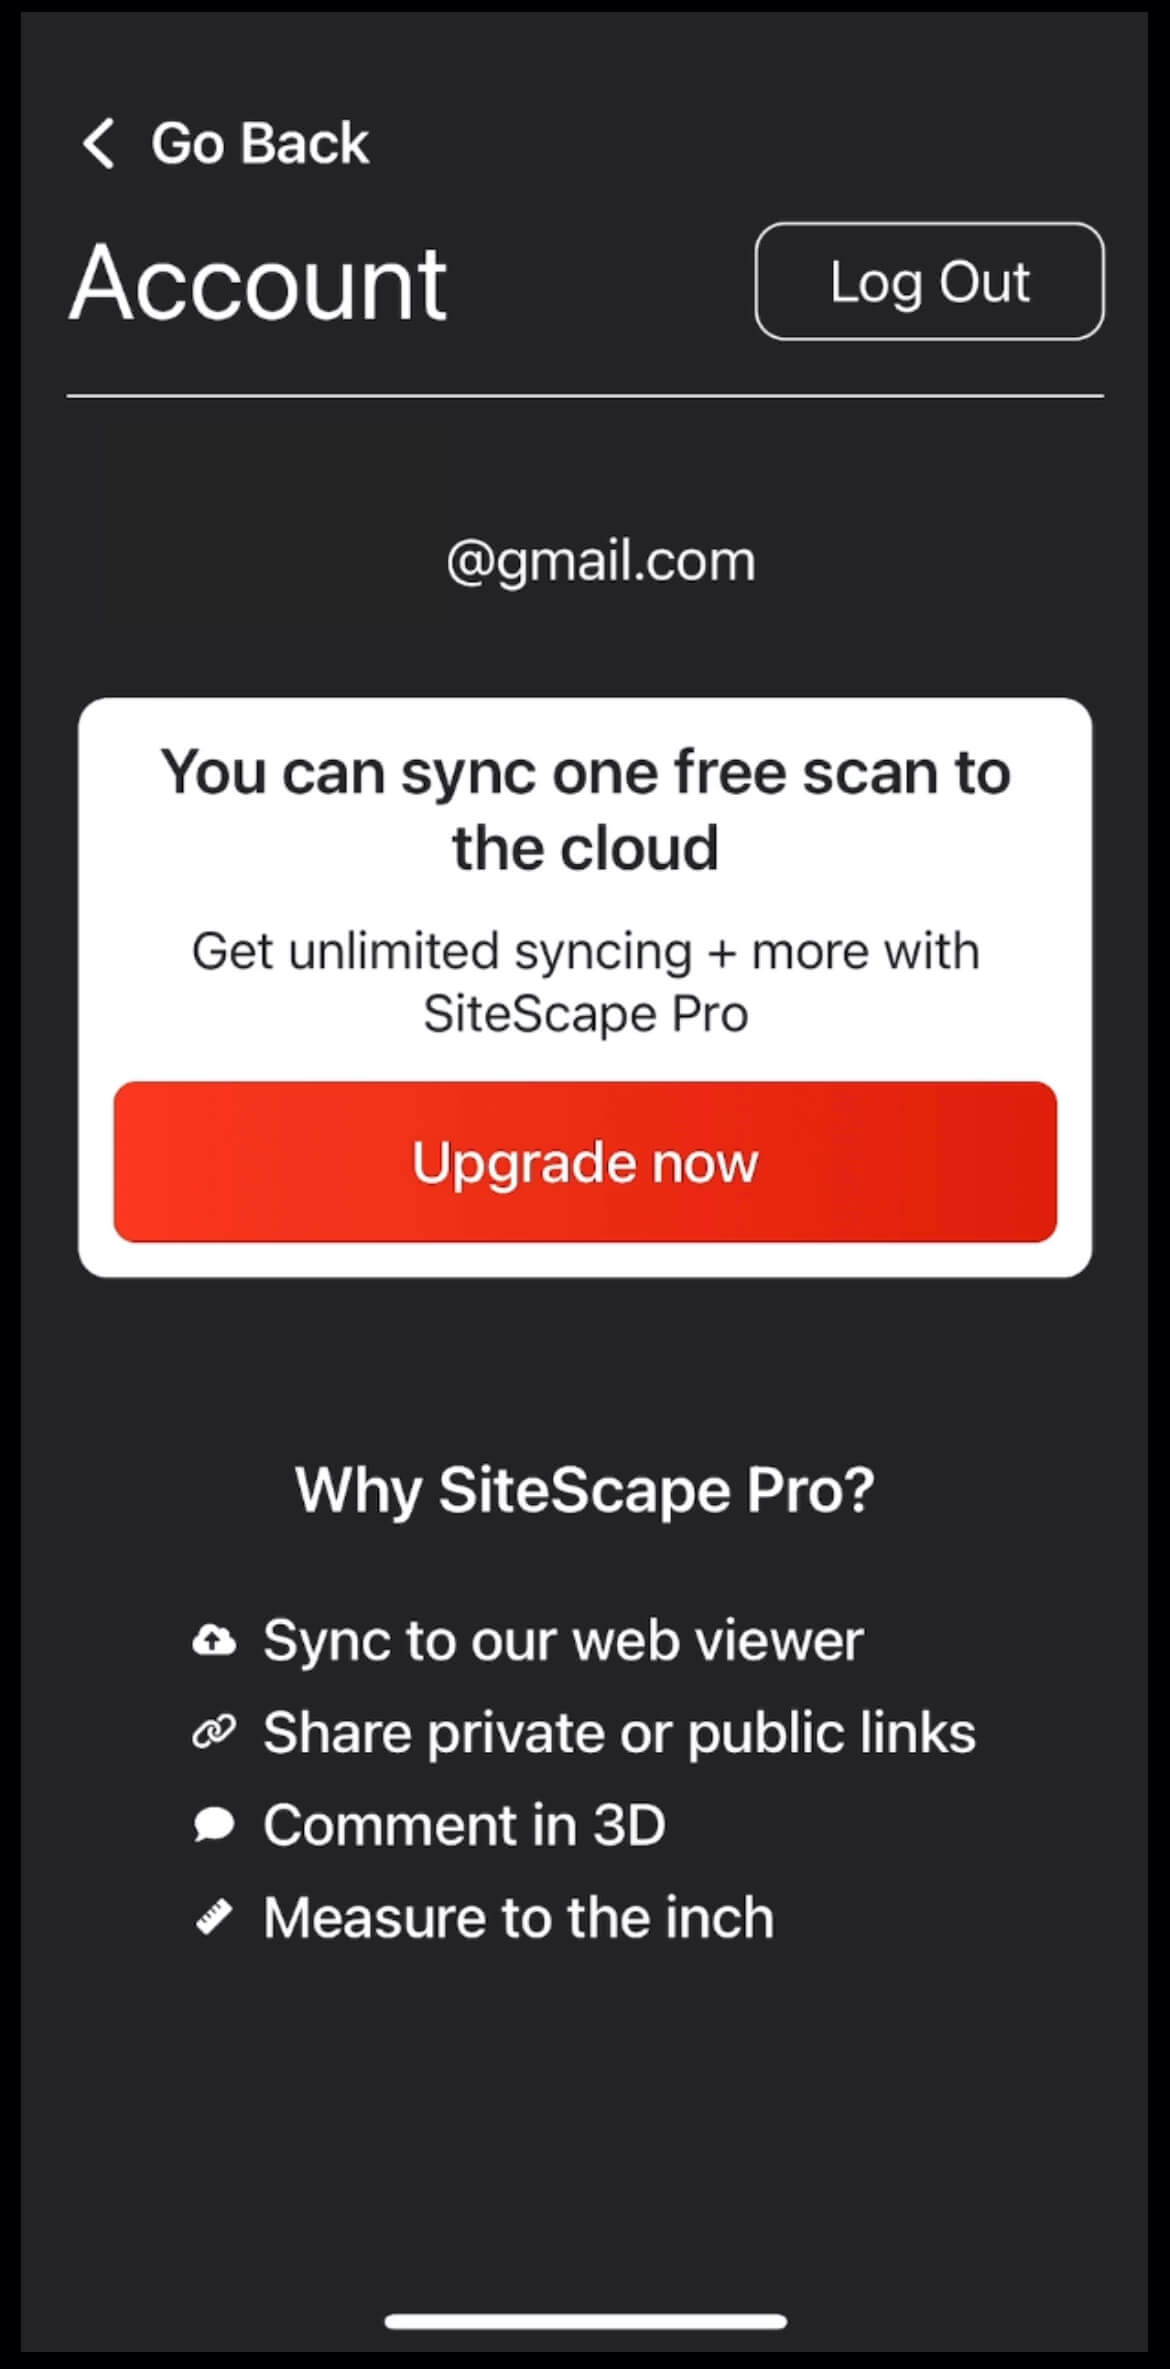
Account Information
You can use the basic features with a free account, but only one scan data can be stored in the cloud.
When you upgrade your account, the following features will be added.
- Store multiple scanned models in the Web Viewer in the cloud
- Create links to share your 3D scanned models (public or private)
- Ability to comment on 3D scanned models
- inch measurement function
When you tap Upgrade, a browser will open and a login screen will appear.
After logging in, the following message will appear.
Paid accounts are subscription-based, and you pay an annual fee of $468 ($39 per month) or $49 per month.
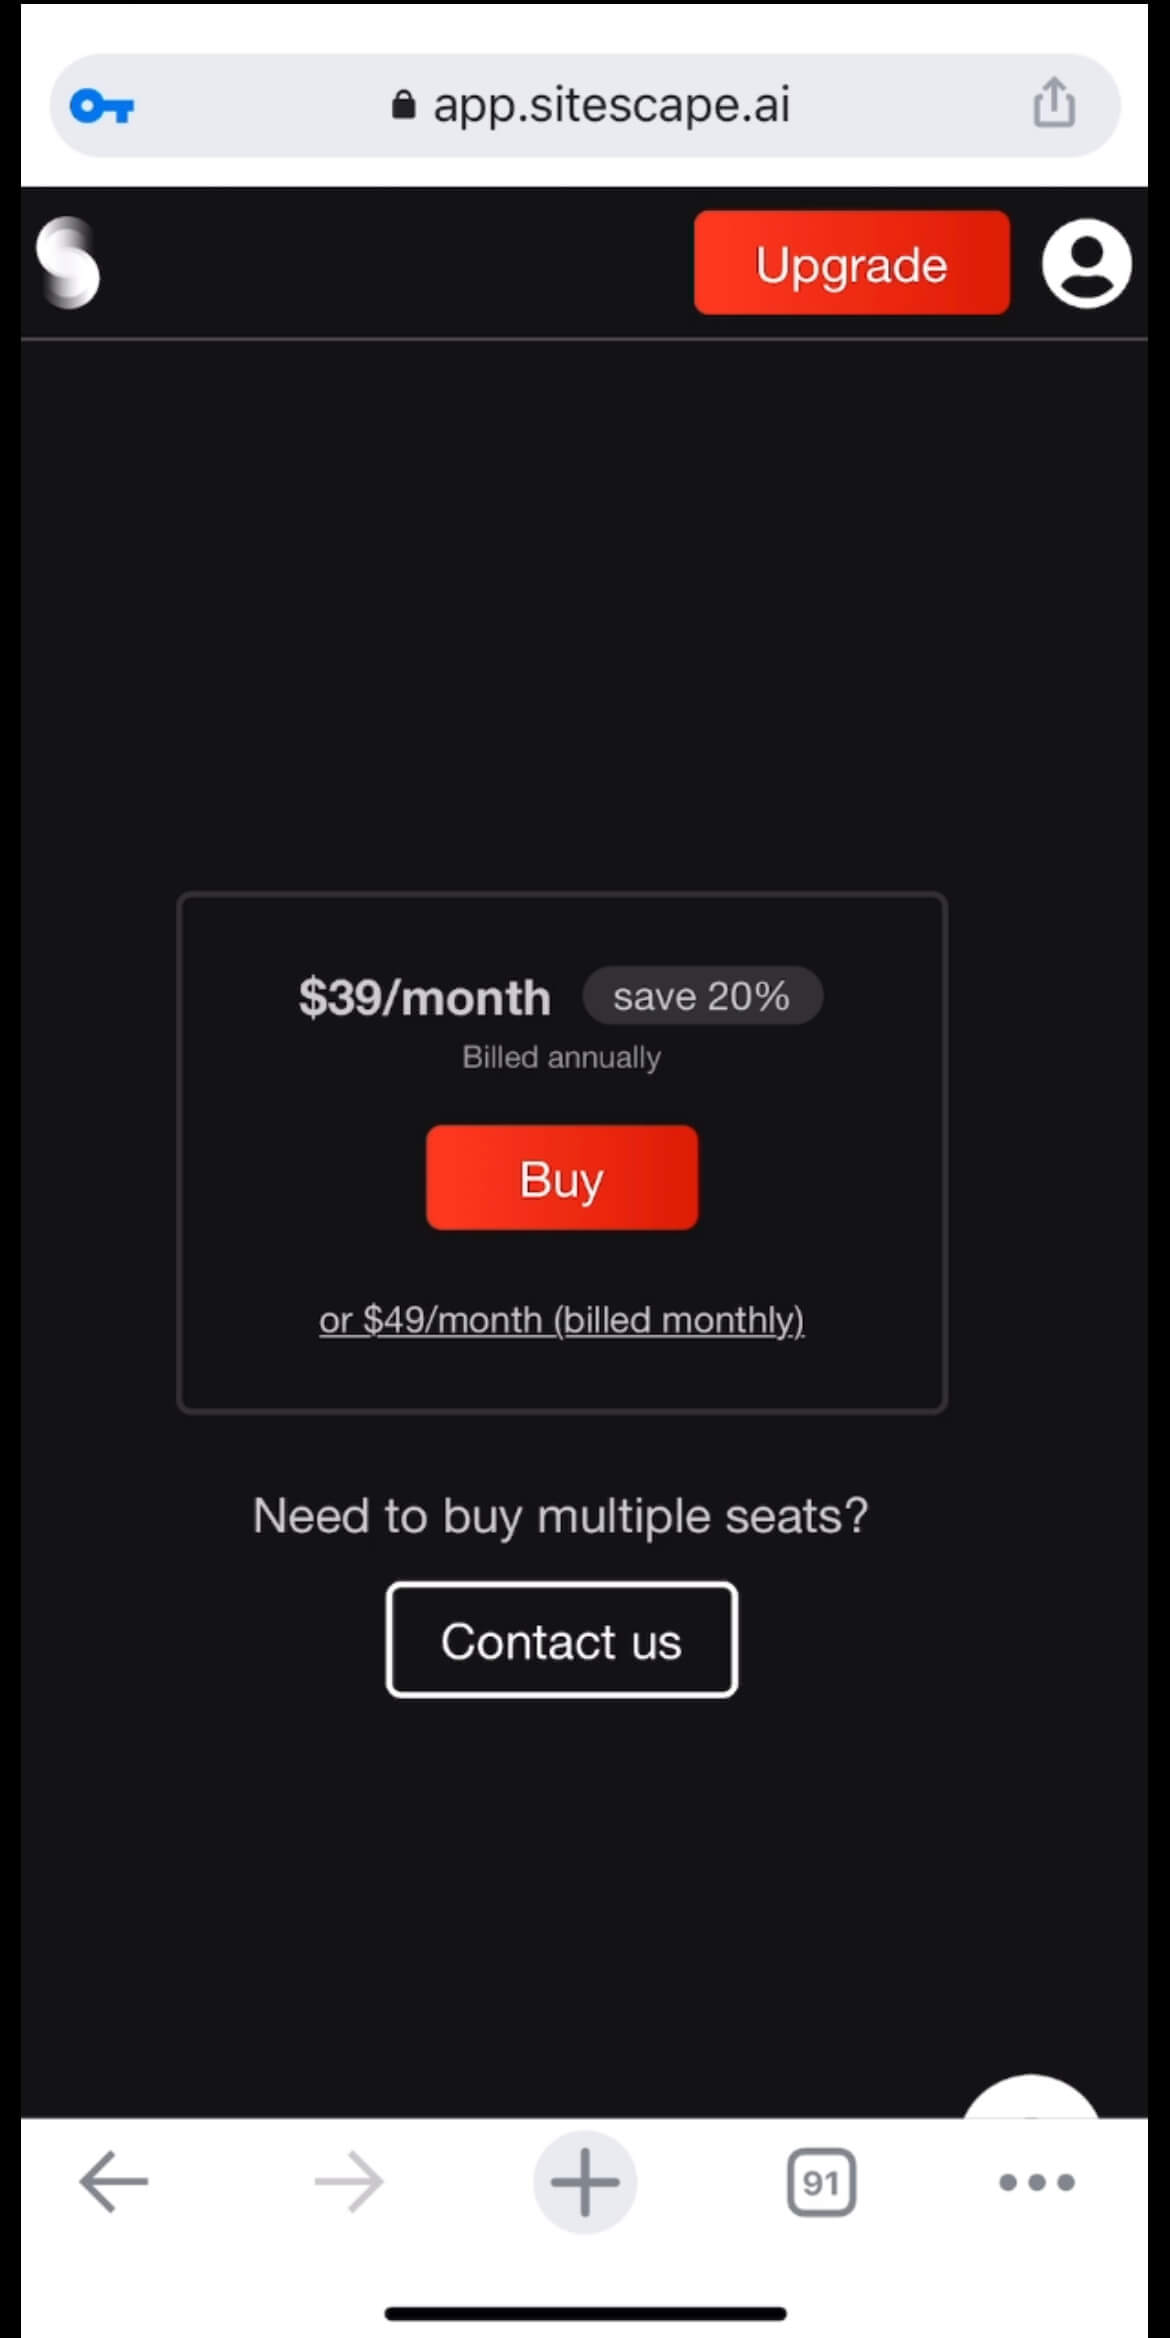
Choose whether you want to pay monthly or annually and tap Buy.
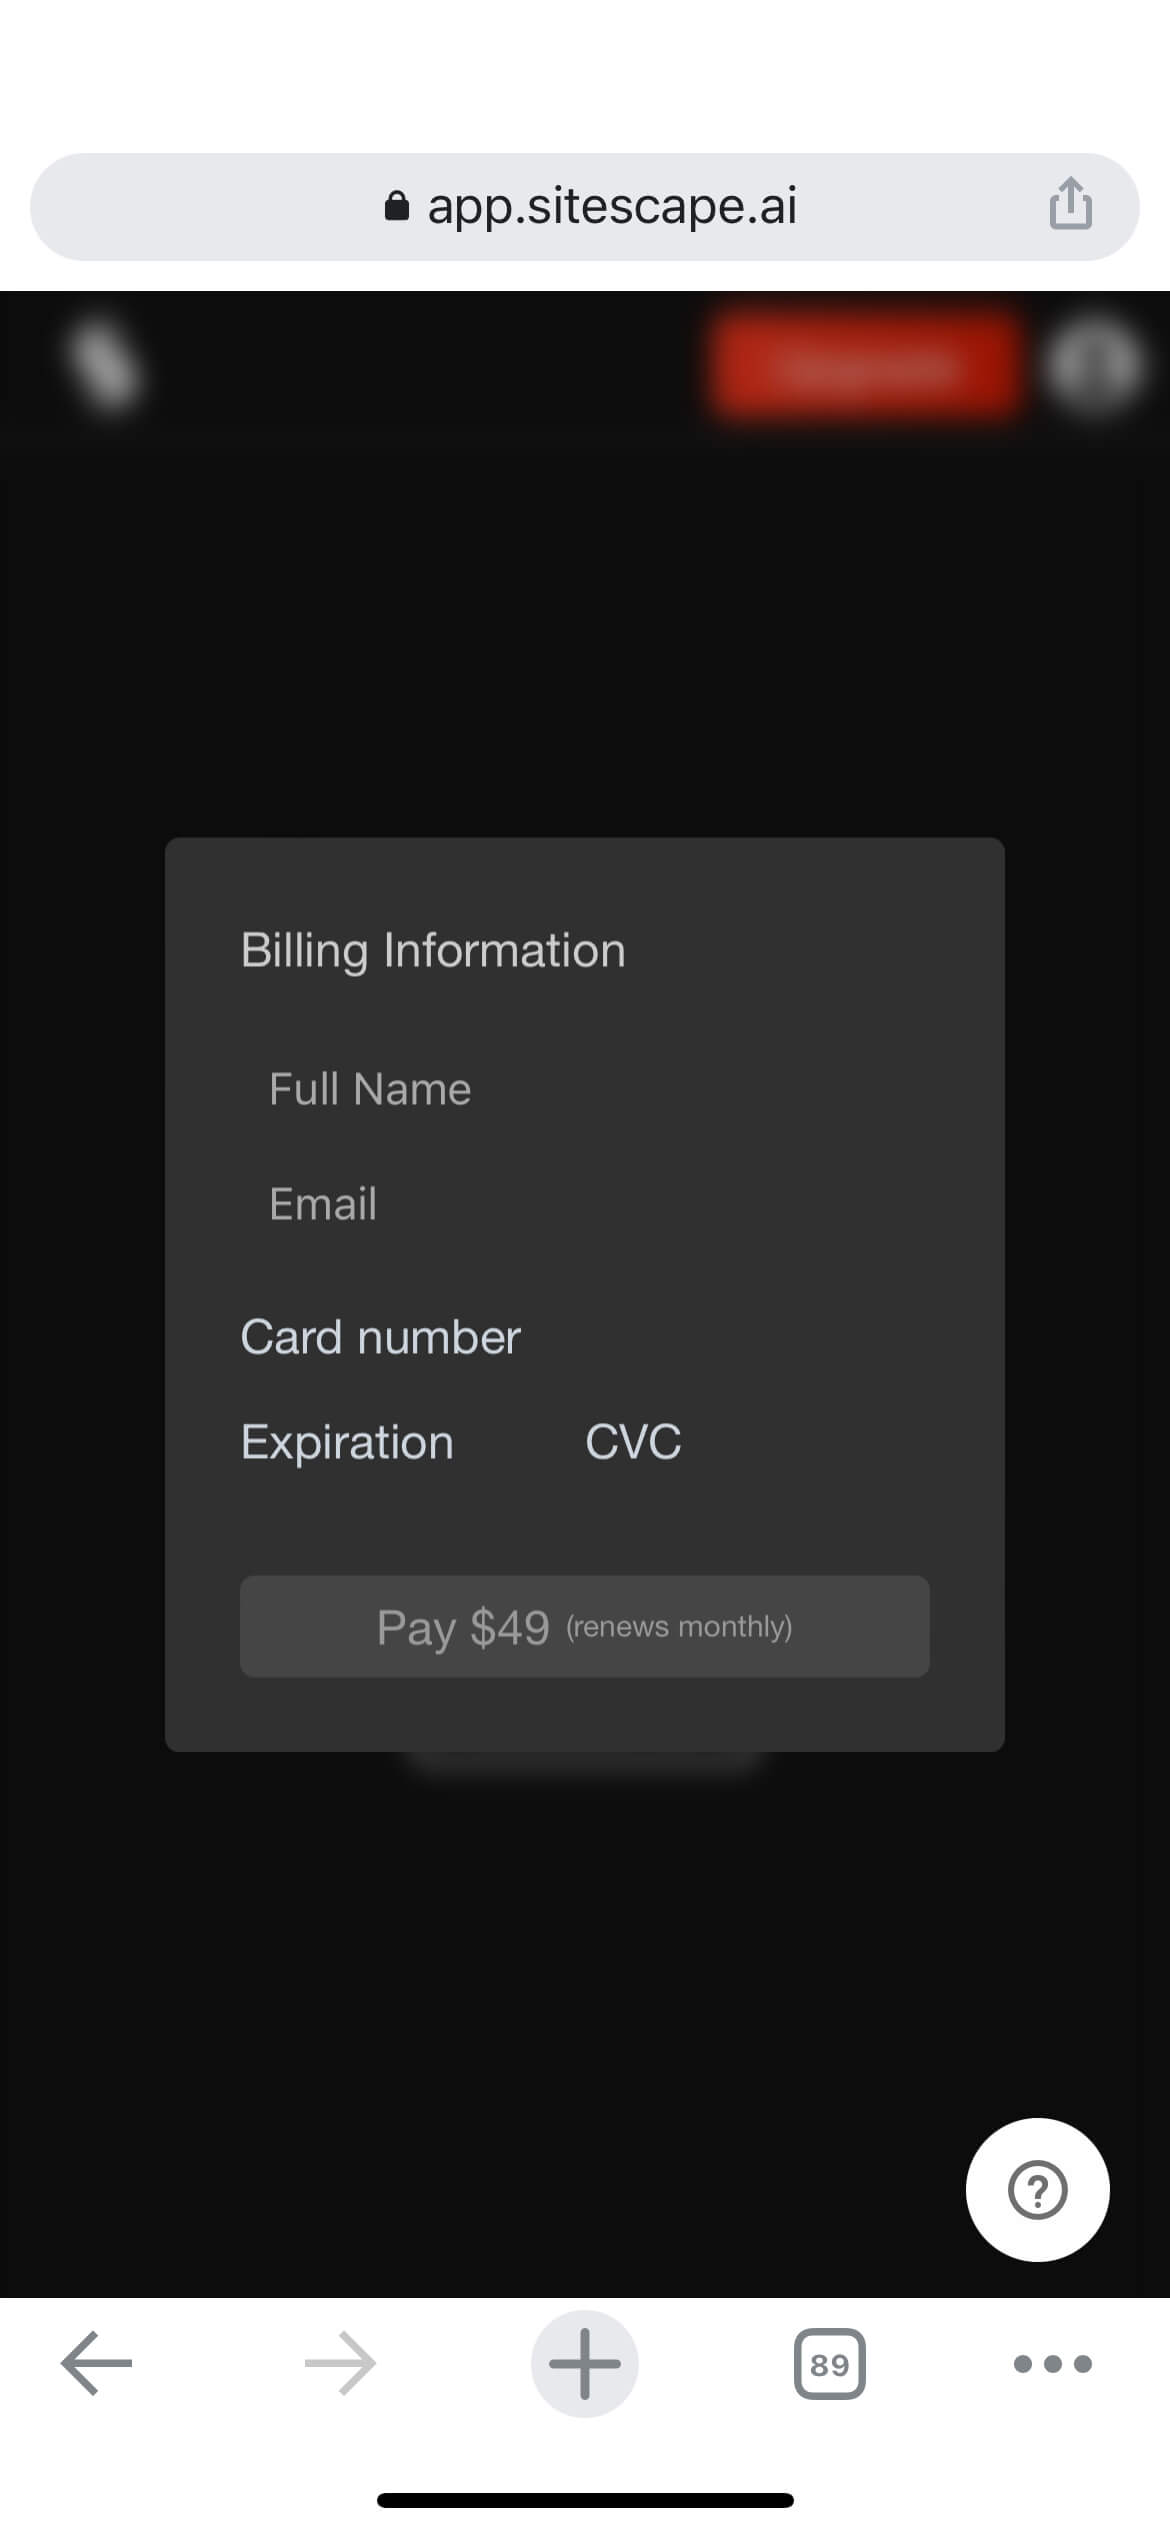
Enter your full name, email address, and credit card information from above.

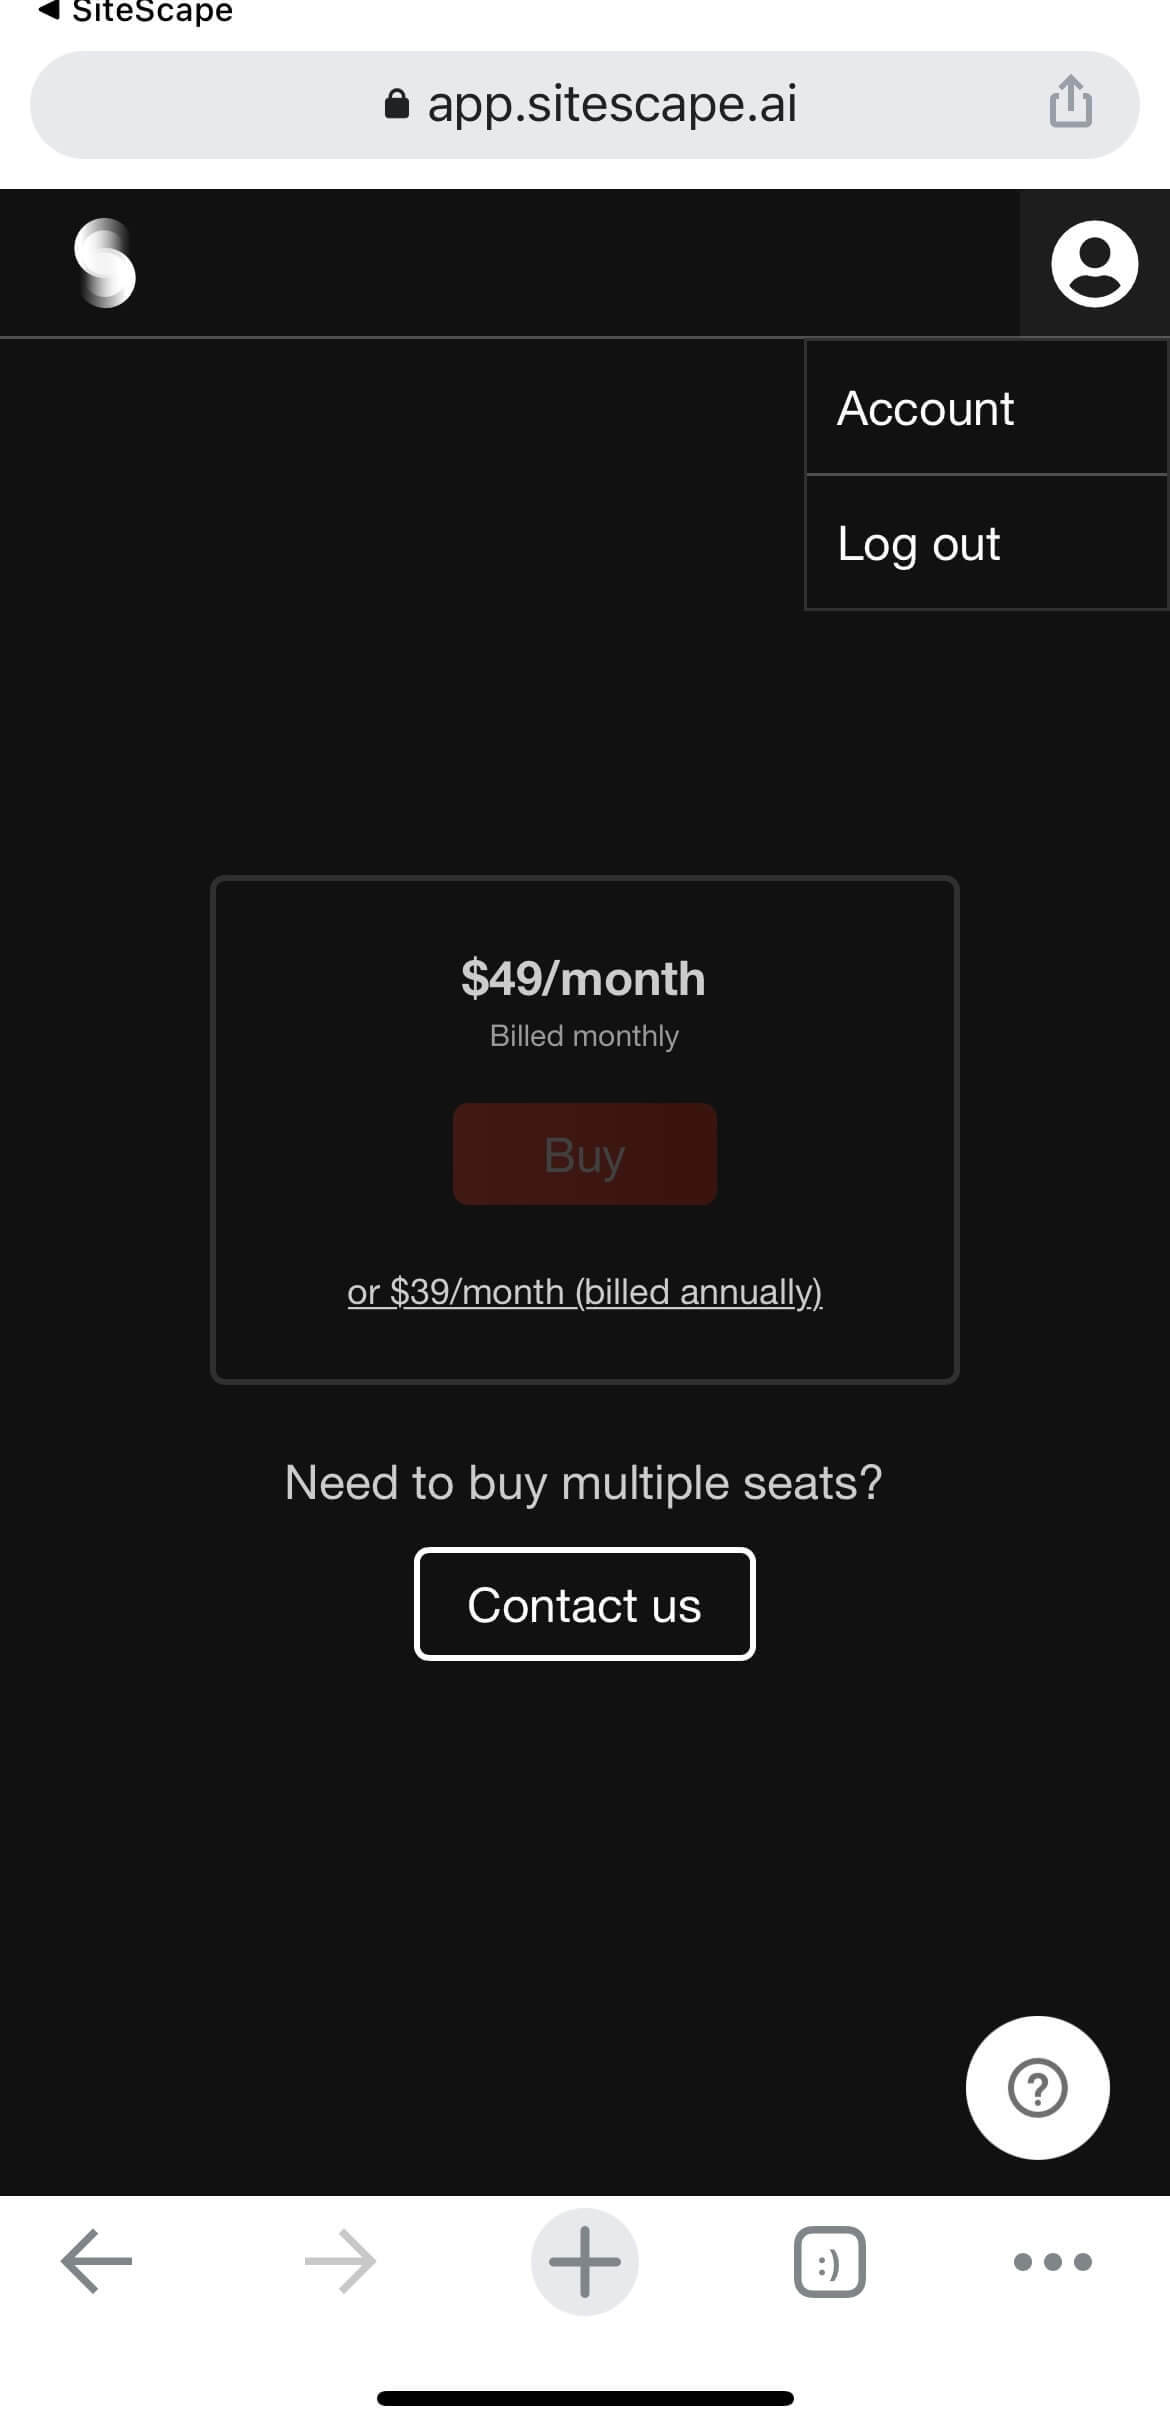
The upgrade to Pro is complete.
Tap Account from the top right icon to see that you are now Pro.
Tap the icon in the upper right corner to go to Account information.
Features available in Pro account
- Save multiple scanned models to Web Viewer in the cloud
Go to the official website and log in.
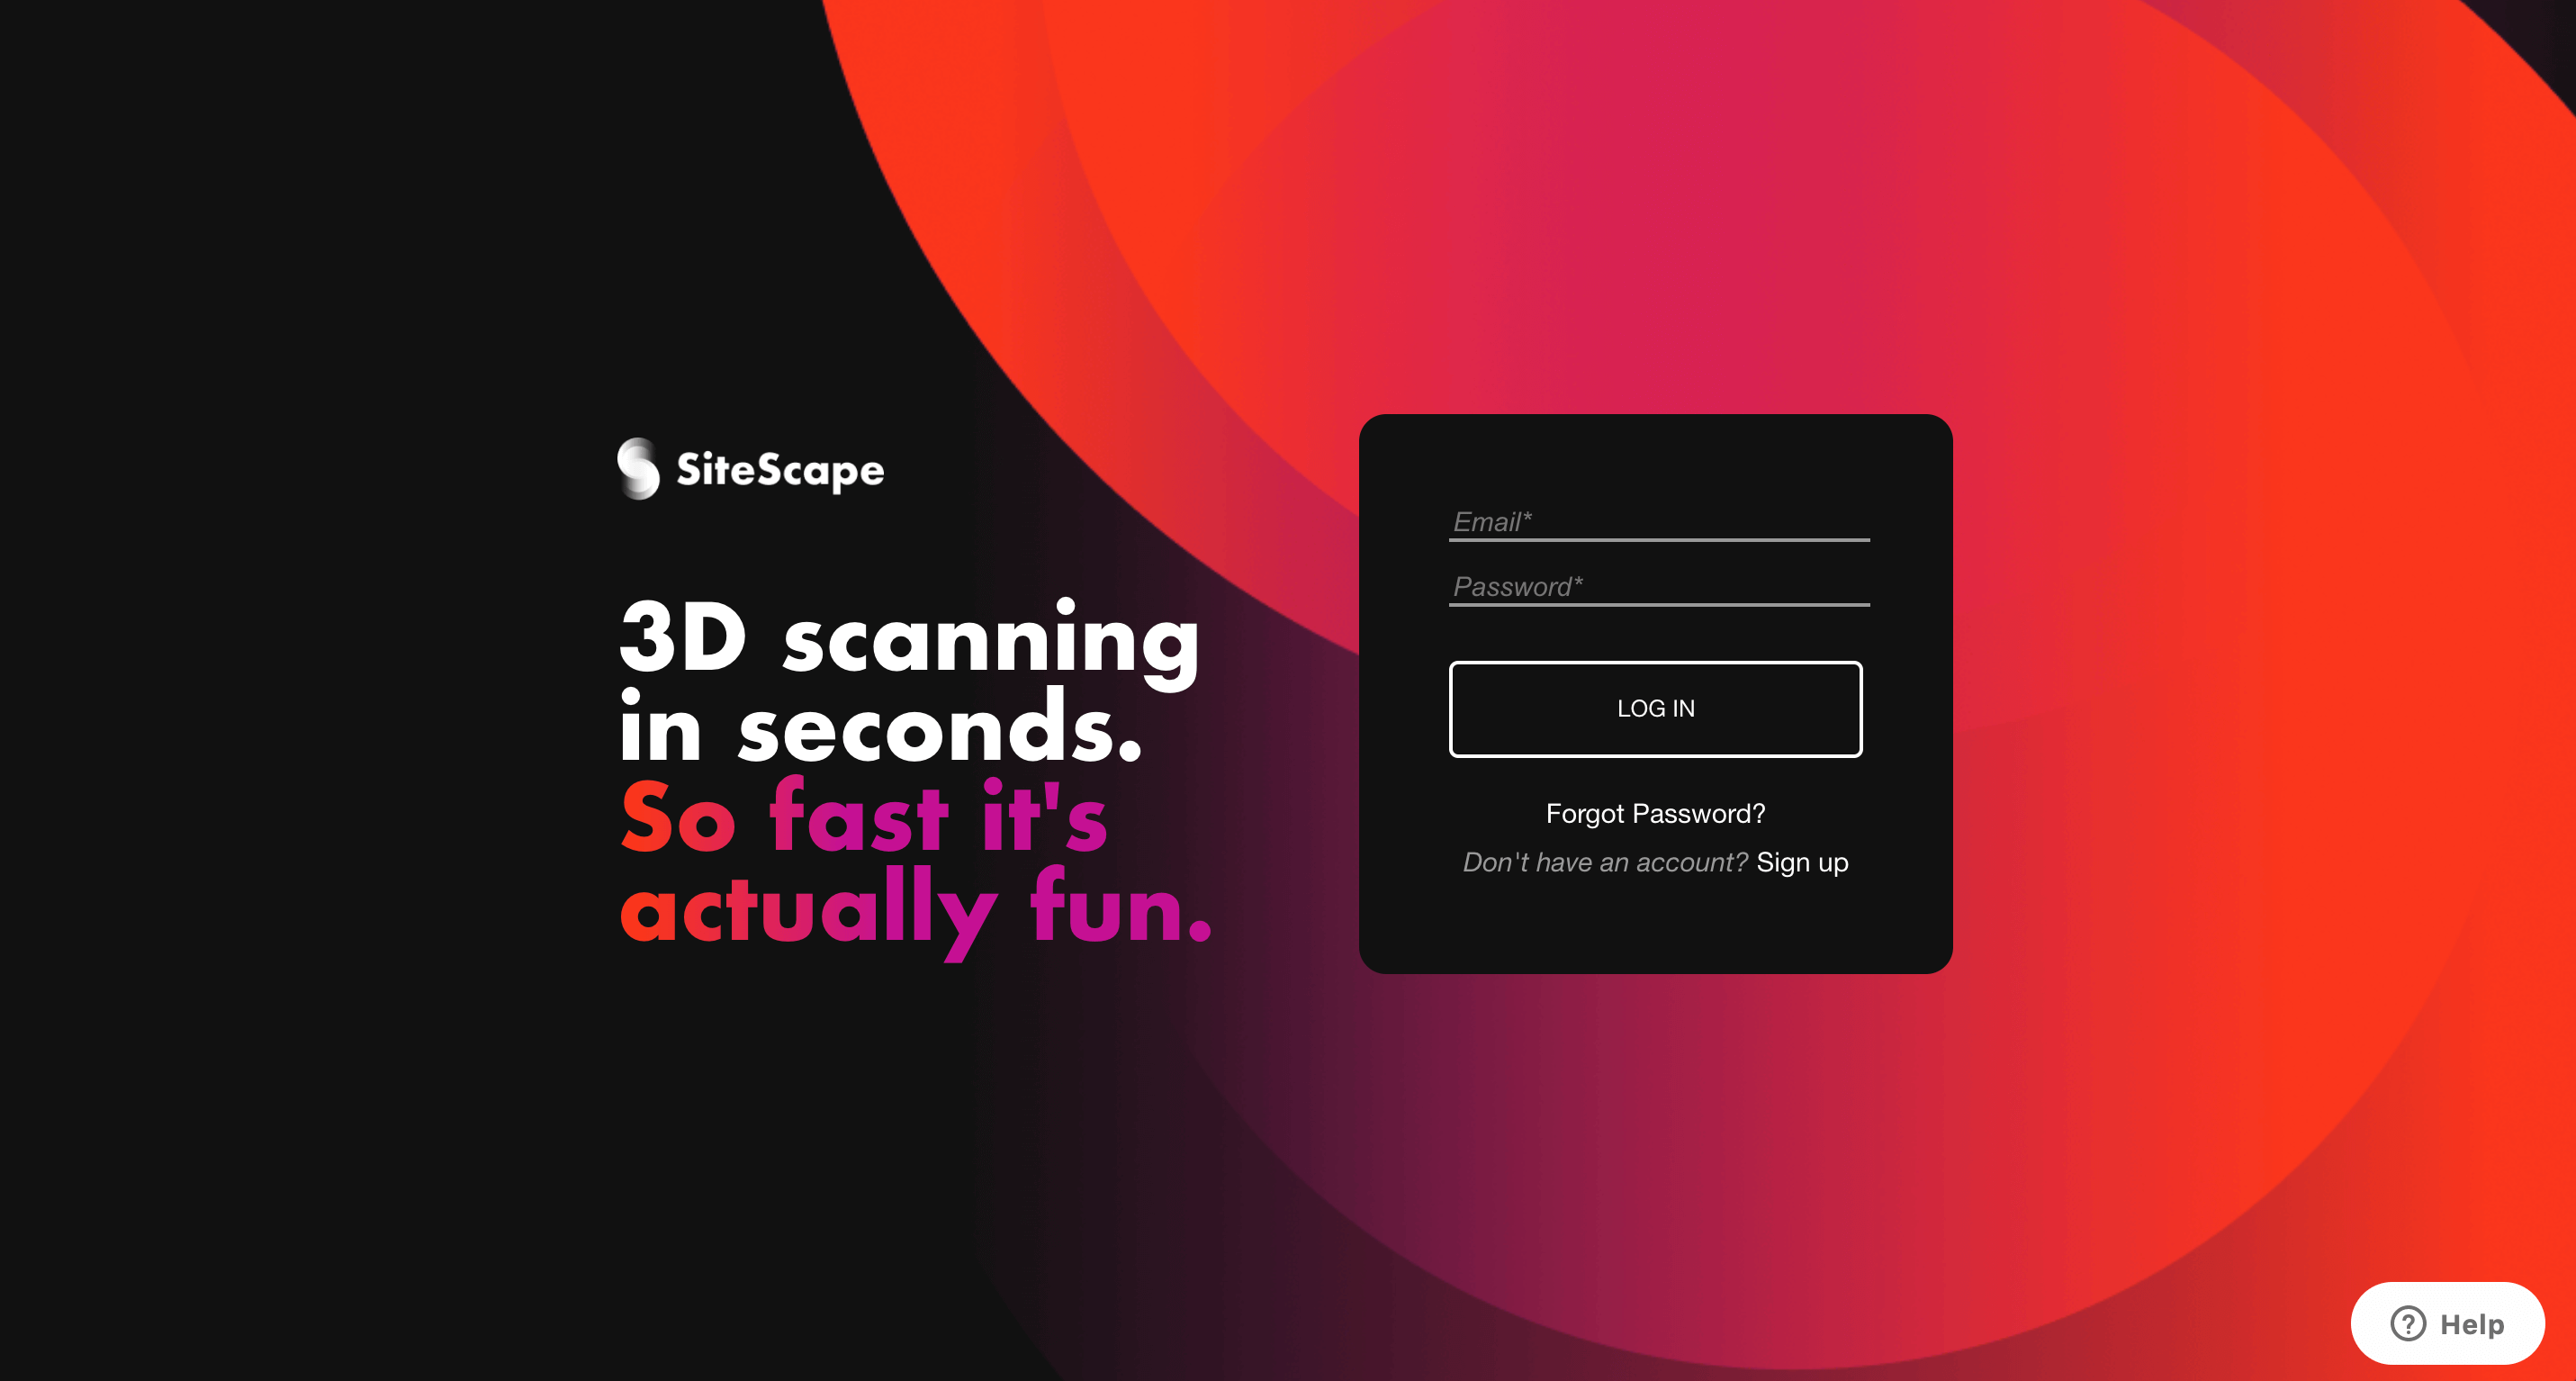
https://app.sitescape.ai/login
Then you can see the list of scanned models saved in the cloud from your iPhone.
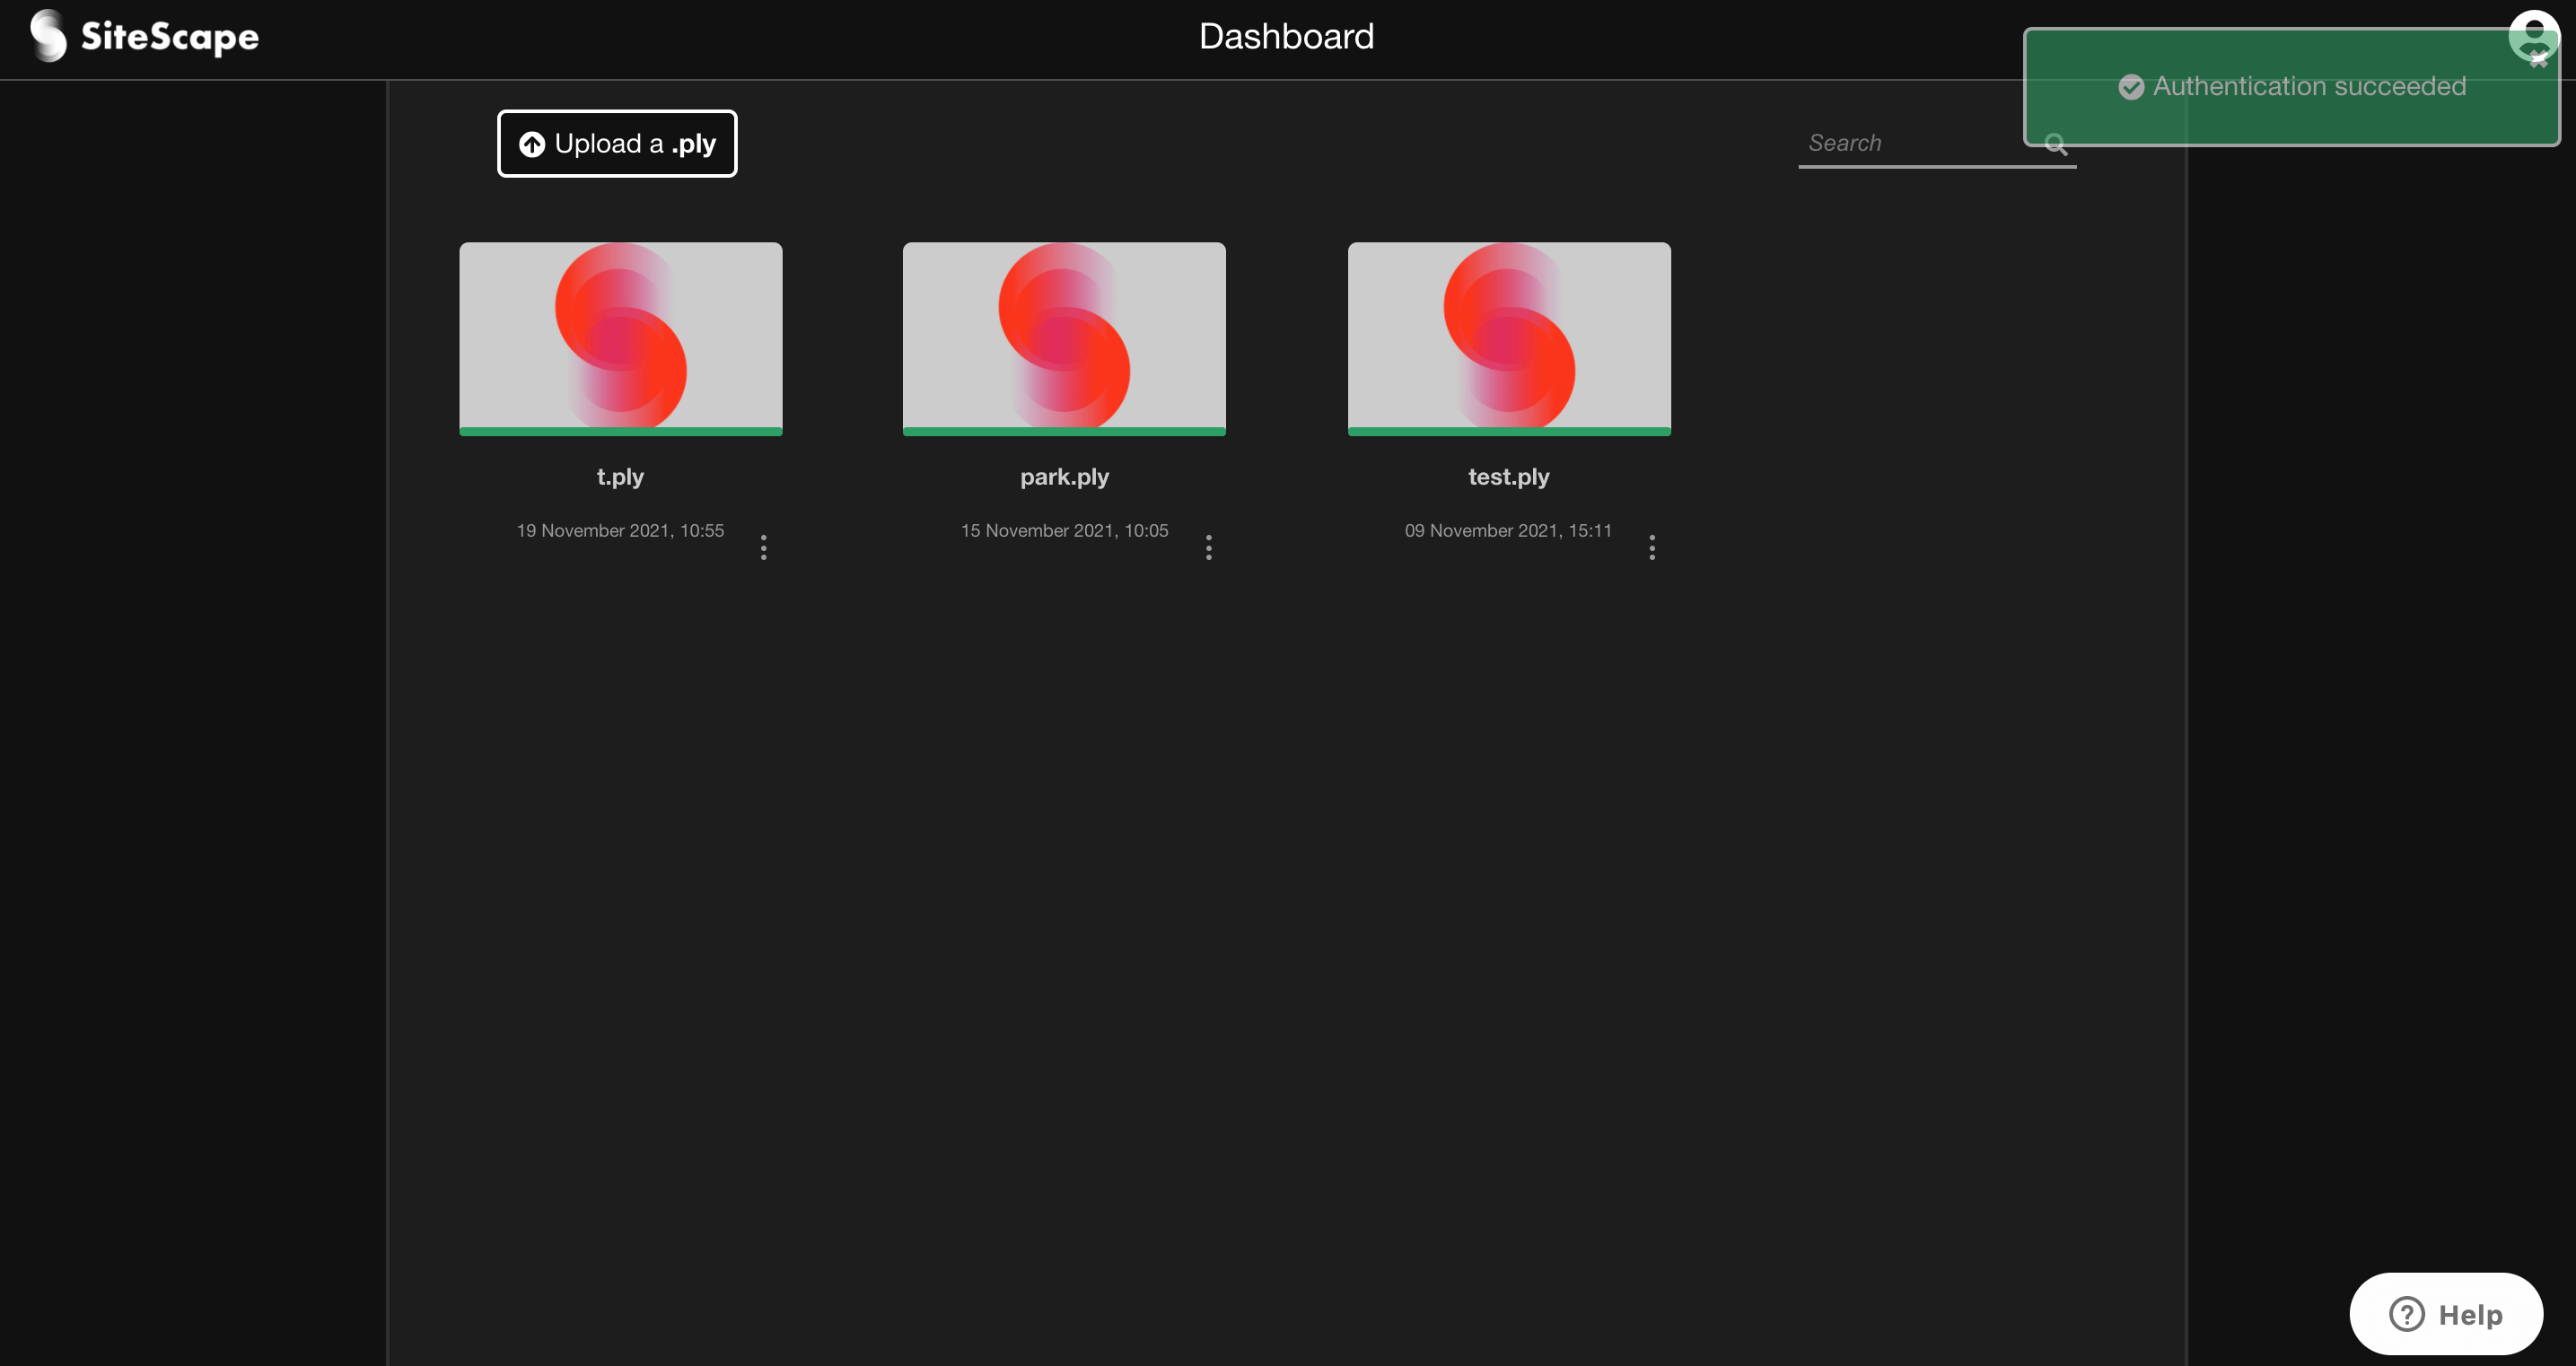
Dashboard
- Create a link to share your 3D scan models (public or private)
Click on the scan model you want to share a link to, open it, and select Share link in the lower left corner.
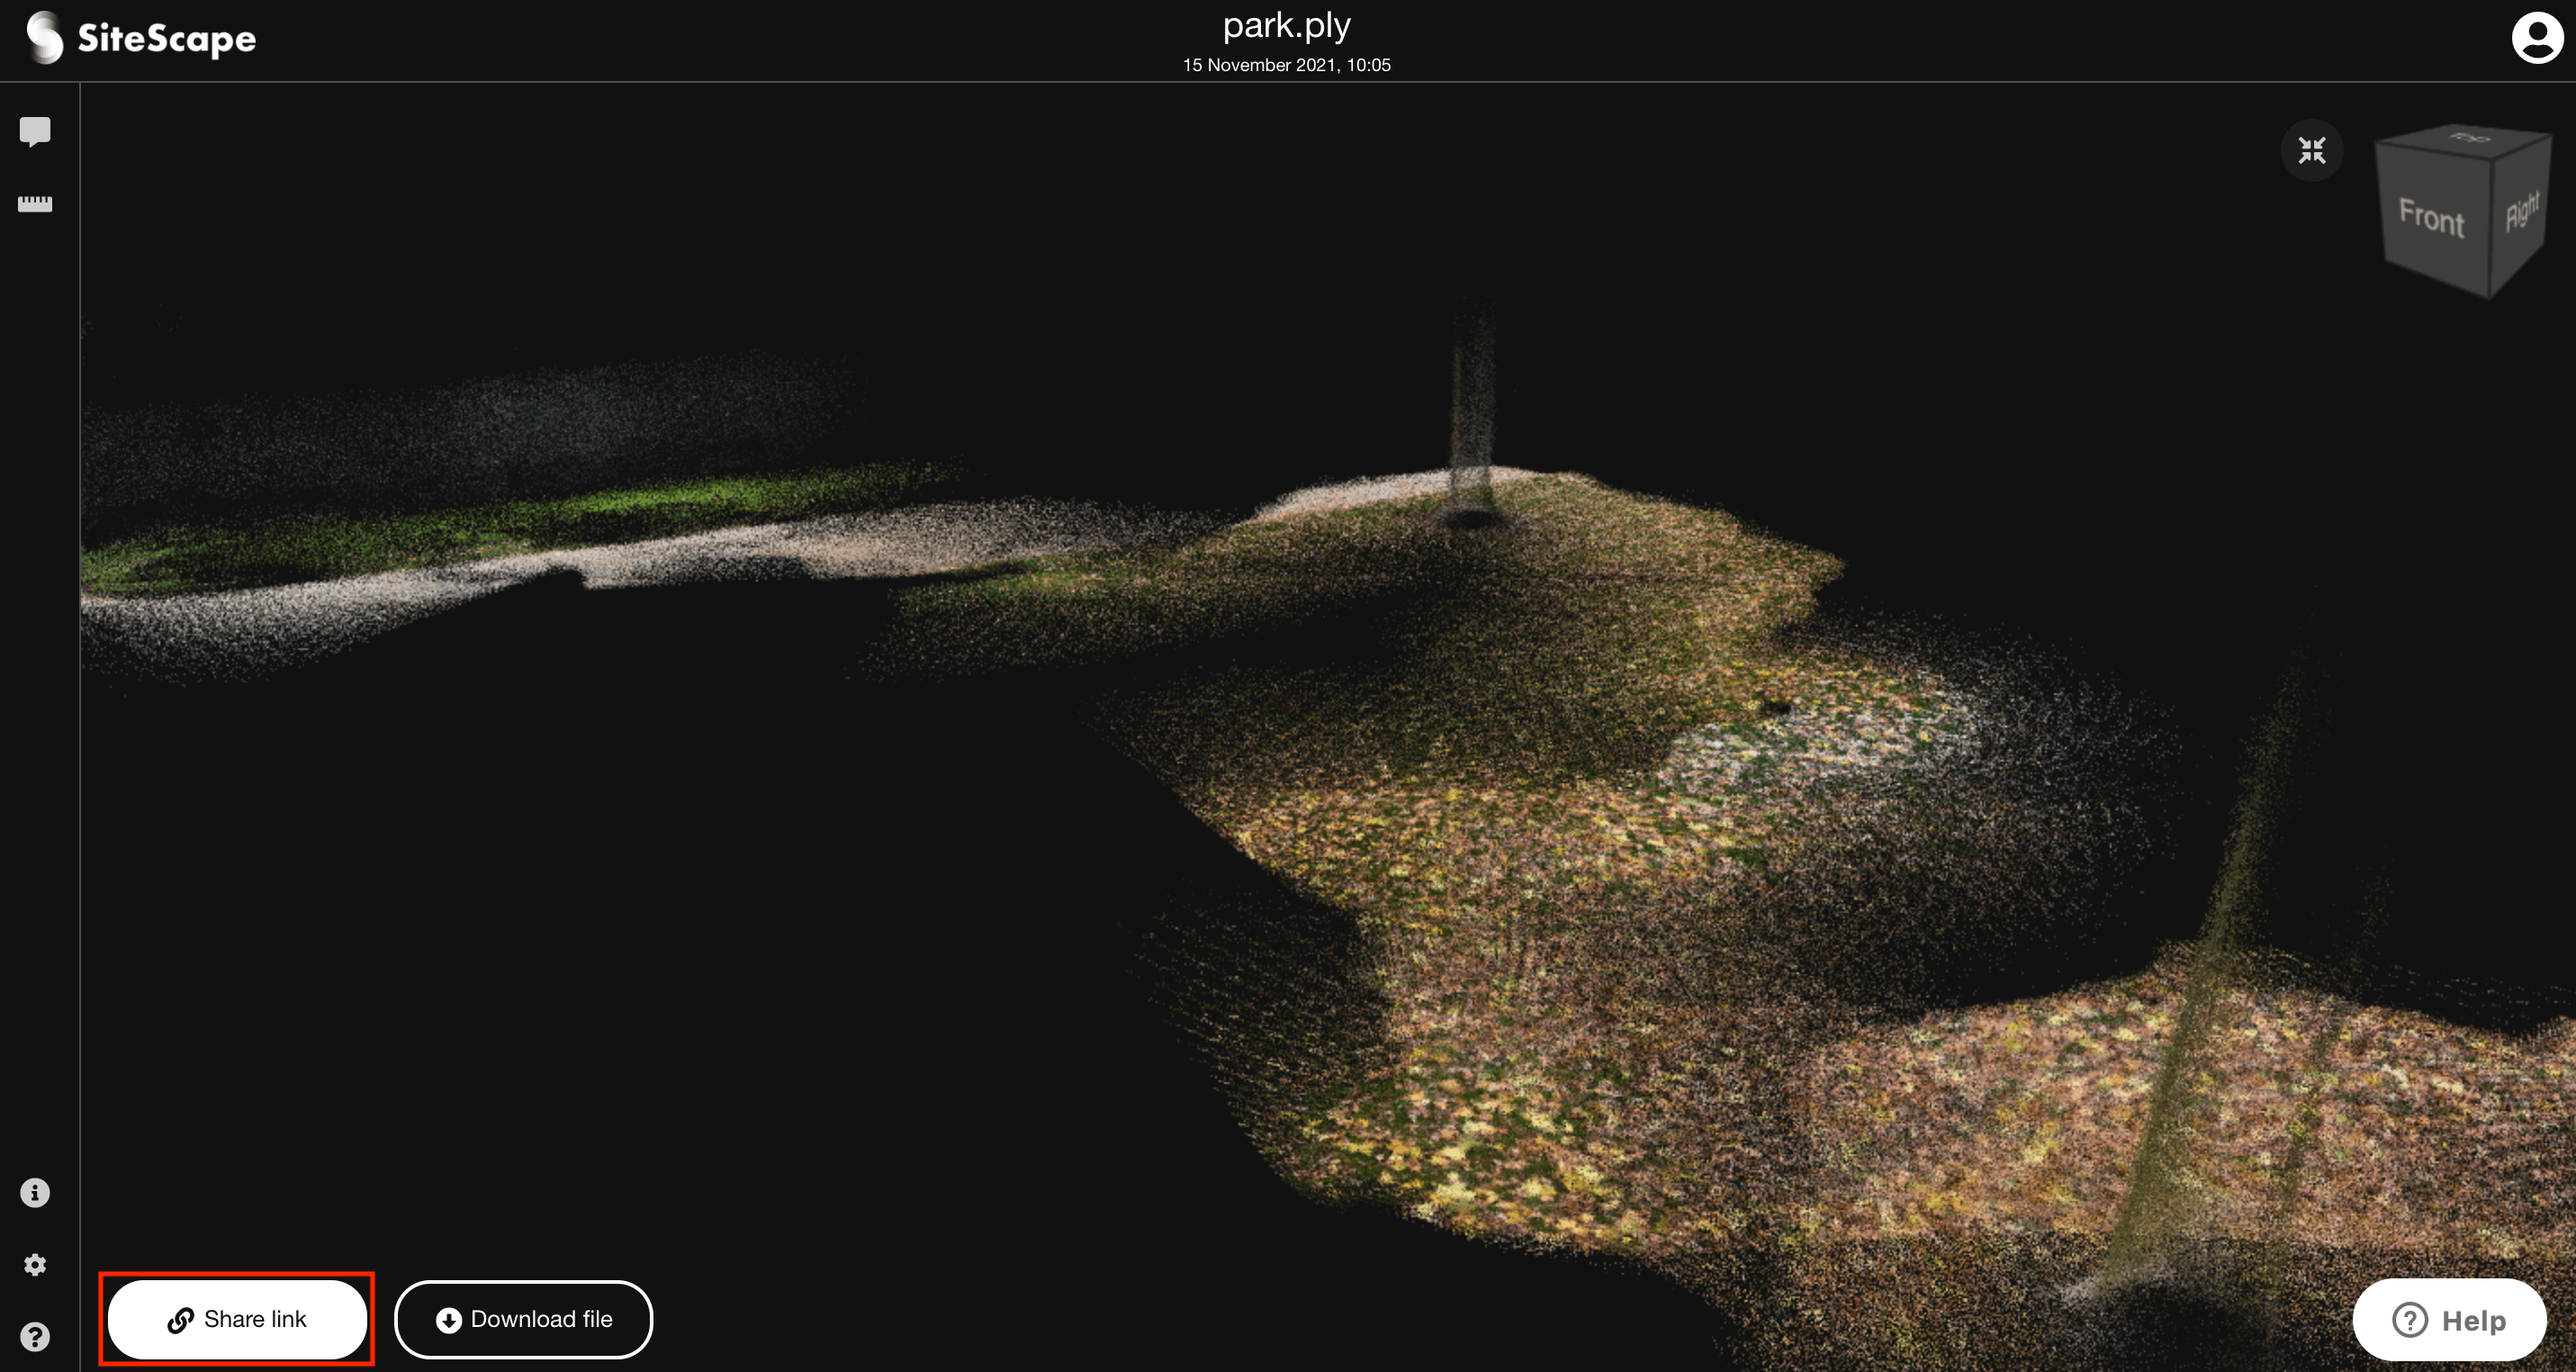
Share link
If the person you want to invite has an account, enter their email address in the Add people field and click Send invite.
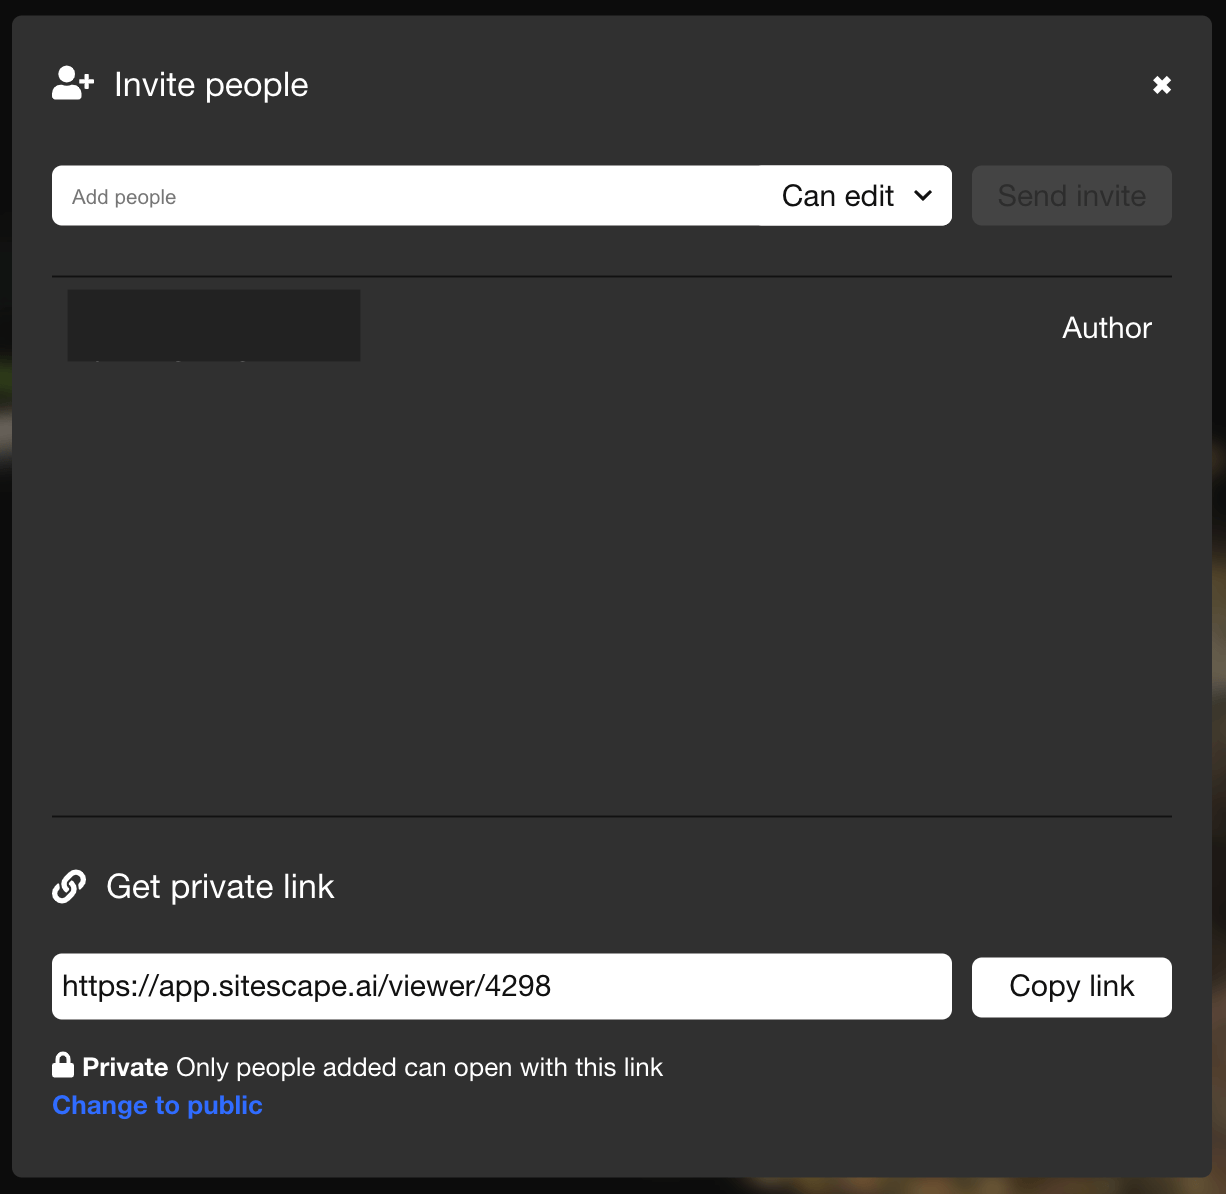
Add people
You can select whether the people you invite can also edit the scanned model or only view it from the tabs.

Select “edit” or “view
If you want to share your scan model with other people, click the blue Change to public link to make it public.
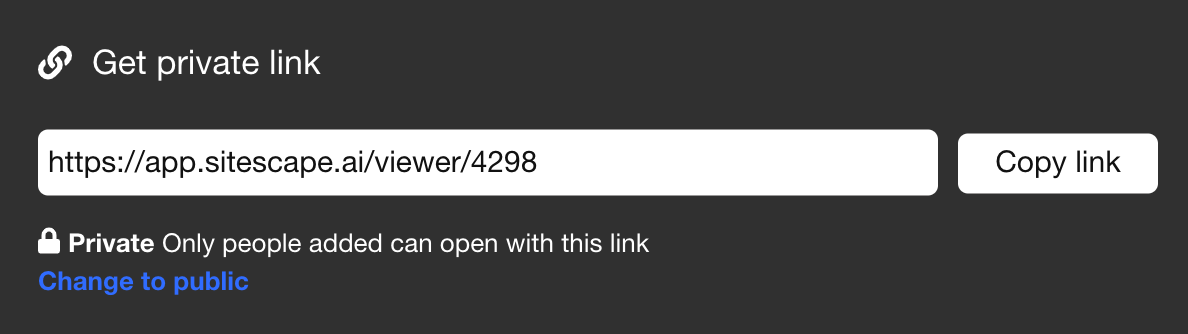
By default, the link is set to private.
Clicking “Change to public” will change the link from private to public.
- Commenting on 3D scanned models
Click on the speech bubble icon in the upper left corner of the screen.

Comment function
Click on the place on the scan model where you want to comment, and you can enter your comment.
You can also attach an image by clicking the clip mark.
Click on the paper airplane icon when you have finished entering your comment.

Entering a comment
A white circle with a serial number will appear at the location of the comment.
Click on this number to view the comment.
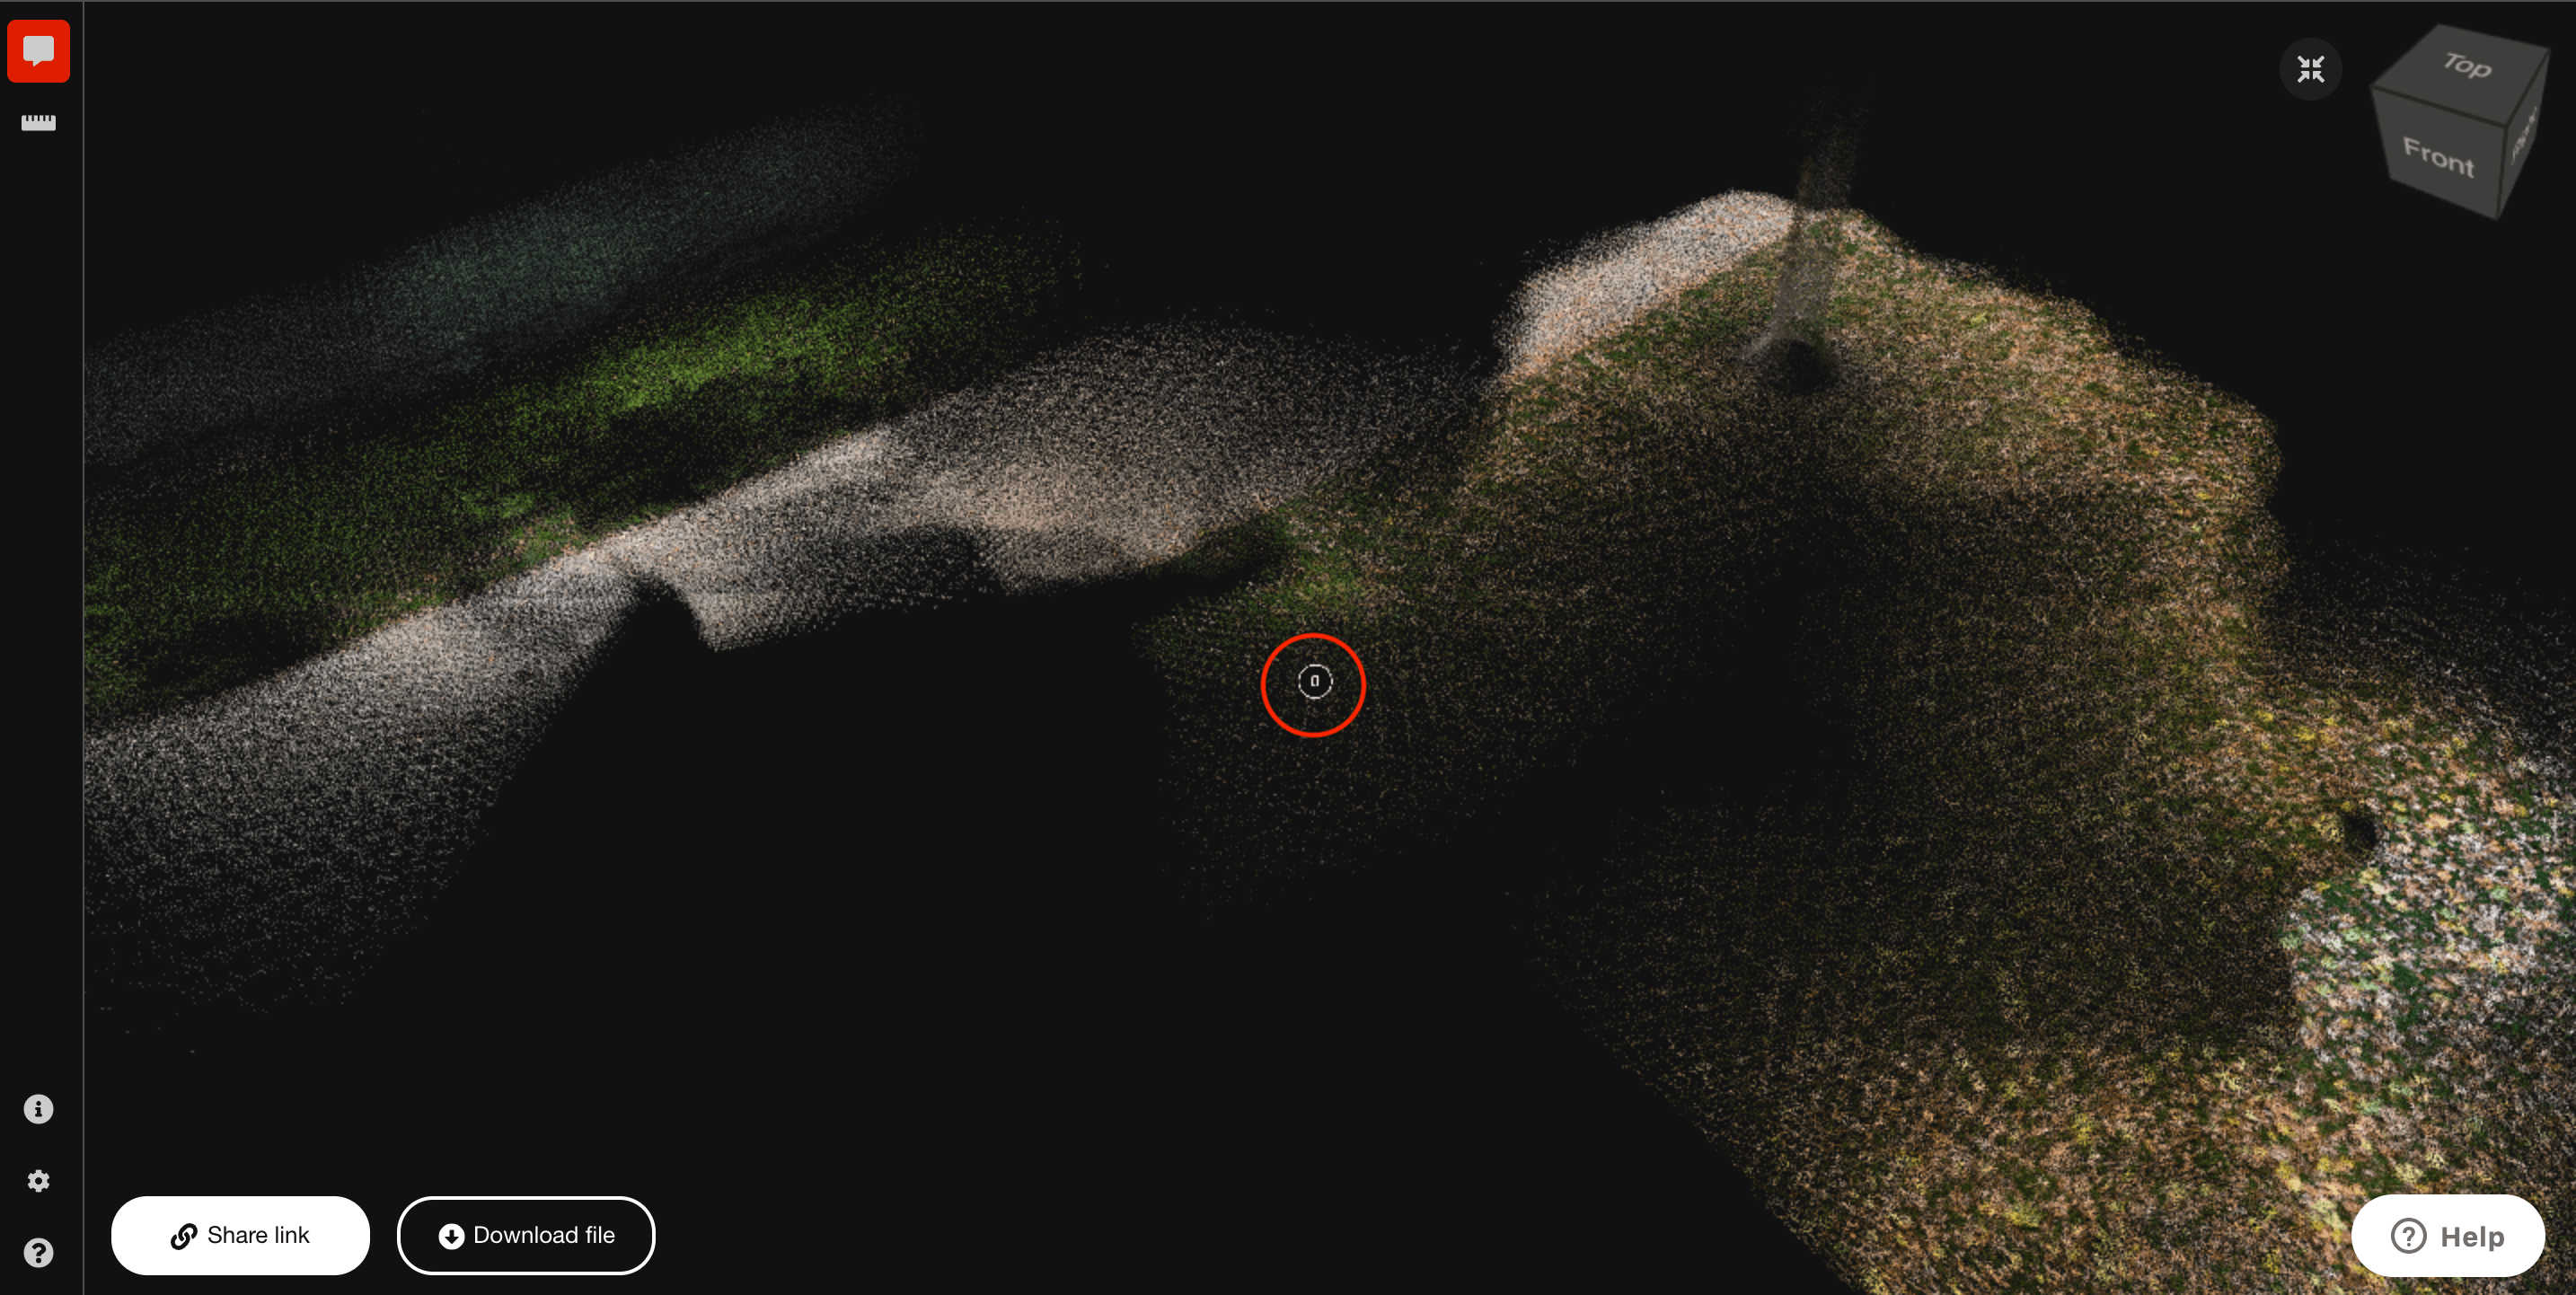
Viewing Comments
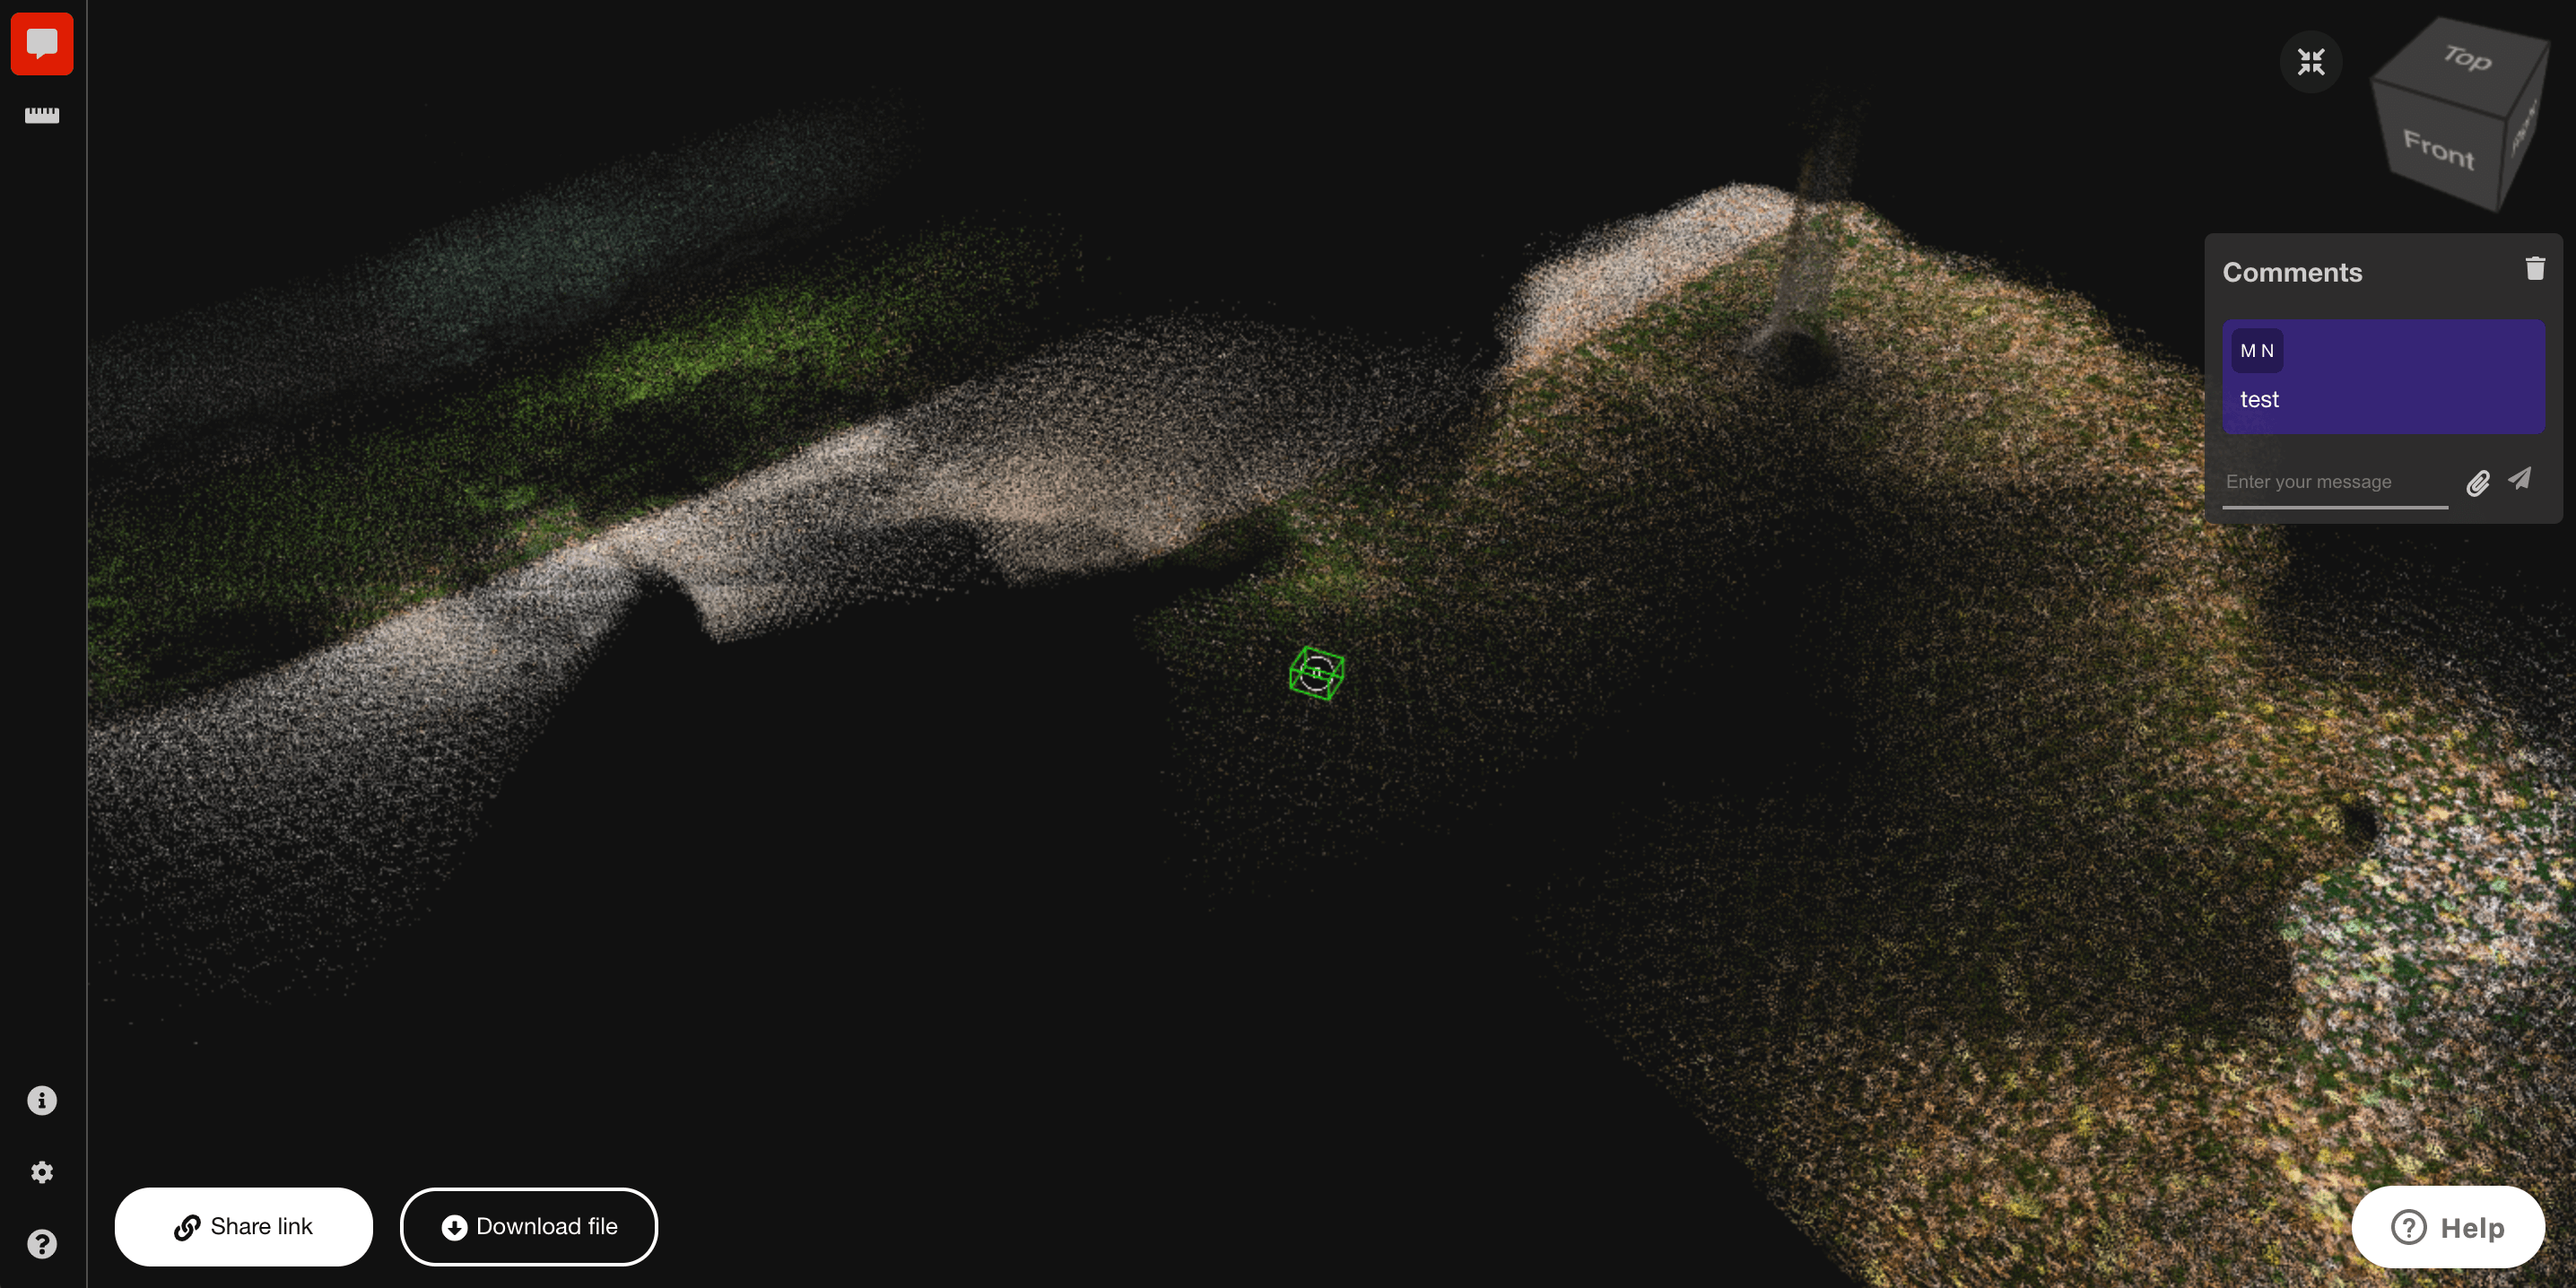
Comments are now displayed.
- inch measurement function
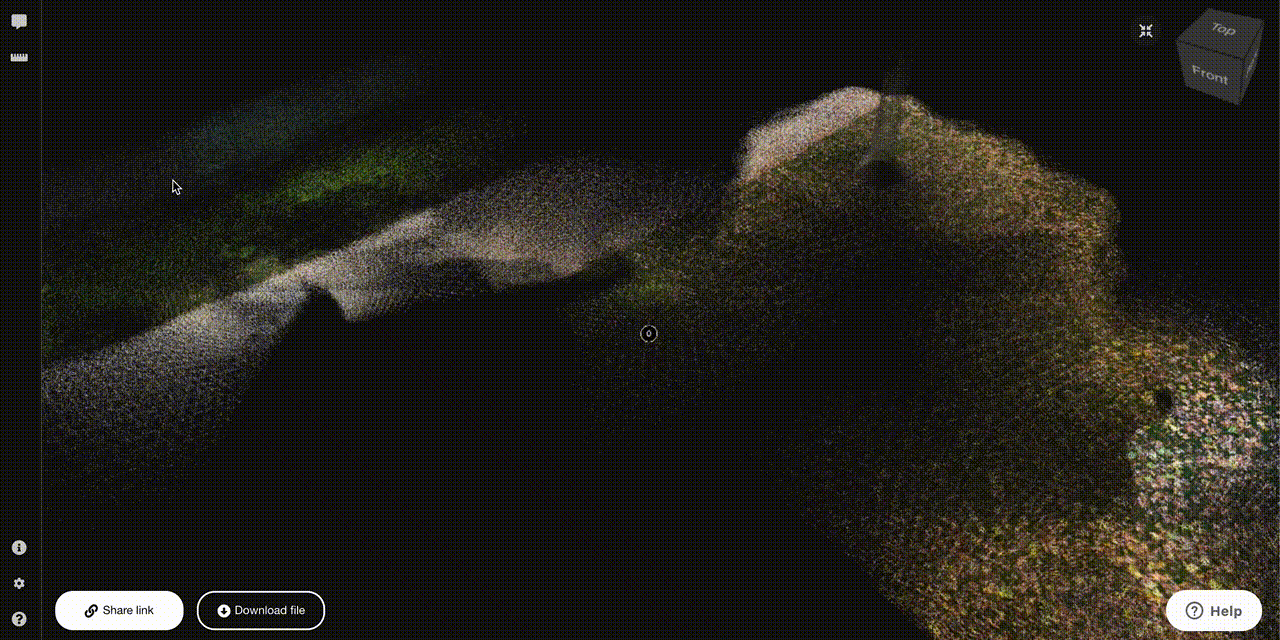
If you want to measure your scan model, you can use the measurement function.

Measurement function
After clicking the ruler icon, click twice on the part of the model you want to measure (start point and end point).
The measured location and values can be saved as data.
If you want to delete the data, click the trash can icon in the upper right corner of the value.
Measuring a scanned model
How to stop being charged and change to a free account
If you want to downgrade to a free account, tap Send email to support at the bottom of the screen.
Tap the icon in the upper right corner and go to Account Information.

A mailer will be launched. Send an email stating that you want to switch your account.
Tap one of the following

Fill in the text and send it.
You can use STYLY FORUM to solve the problem. STYLY FORUM is a place where people can discuss a service or technical issue on STYLY, or provide bug reports on STYLY.
https://en.forum.styly.cc/support/discussions