In this article, I’ll introduce the LiDAR app Scaniverse.
It’s free and easy to use, even if you don’t know which app to use.

Image of Scaniverse in use
About LiDAR
LiDAR is a technology that irradiates a laser beam onto an object and uses the reflected light to measure the distance and the shape of the object.
The following article explains about LiDAR for details.
![[iPad Pro] Easily create 3D models with the 3D Scanner App (LiDAR Scanner)](https://styly.cc/wp-content/uploads/2020/09/EYECATCH-1-160x160.png)
What is Scaniverse?
- iPhone12Pro
- iPhone12Pro Max
- iPhone13Pro
- iPhone13Pro Max
- iPad Pro(2020, 2021 models)
This is a dedicated 3D scanning app for iPad Pro (2020, 2021 models) (iPhone13Pro/Pro Max supported since Version 1.5.3: updated on September 29).
It used to require a 2000 yen (annual) subscription to use some of the advanced functions, but as of August 11, 2021, all functions are now available for free.
This is due to the acquisition of Scaniverse by Niantic, Inc., the company that develops and operates Pokémon GO.
You can download it from the Apple Store.
App Store
Jump to the link above or search for “Scaniverse” in the App Store.
Then tap GET to download.
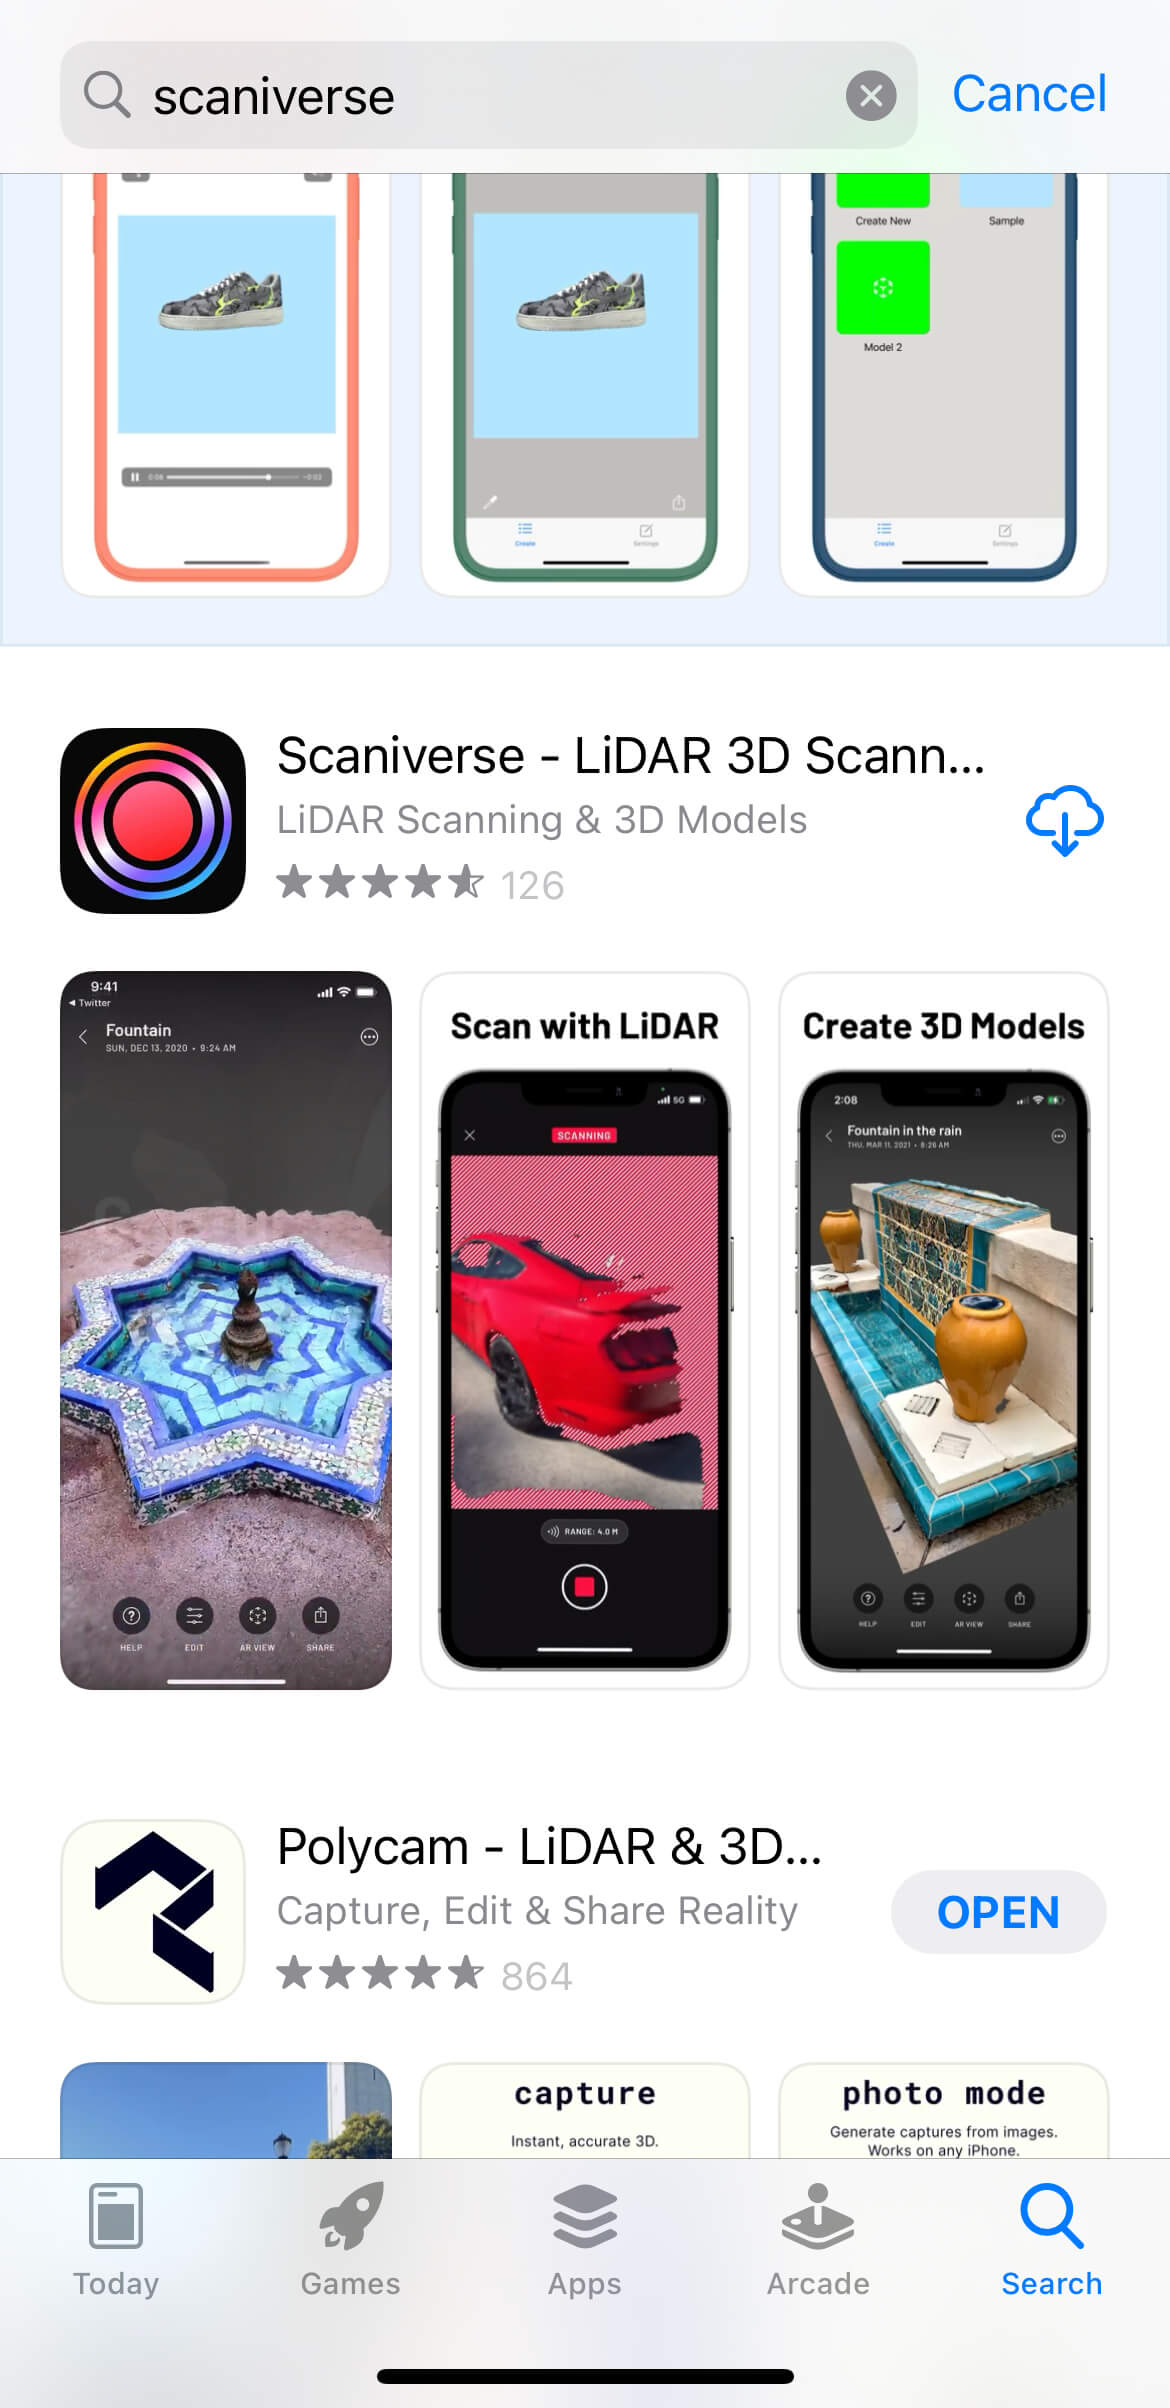
Scaniverse

When the download is complete, tap OPEN.
Let’s try using Scaniverse!
Start the app, and let’s try scanning in 3D.

3D scan of a pig sculpture in a town.
RANGE:RANGE:00m is the value of the range to scan the 3D object.
If you want to scan a nearby object like in this case, tap the RANGE: button to shorten the distance.
Then a red line will appear on the 3D object to be scanned, as shown in the screenshot below.
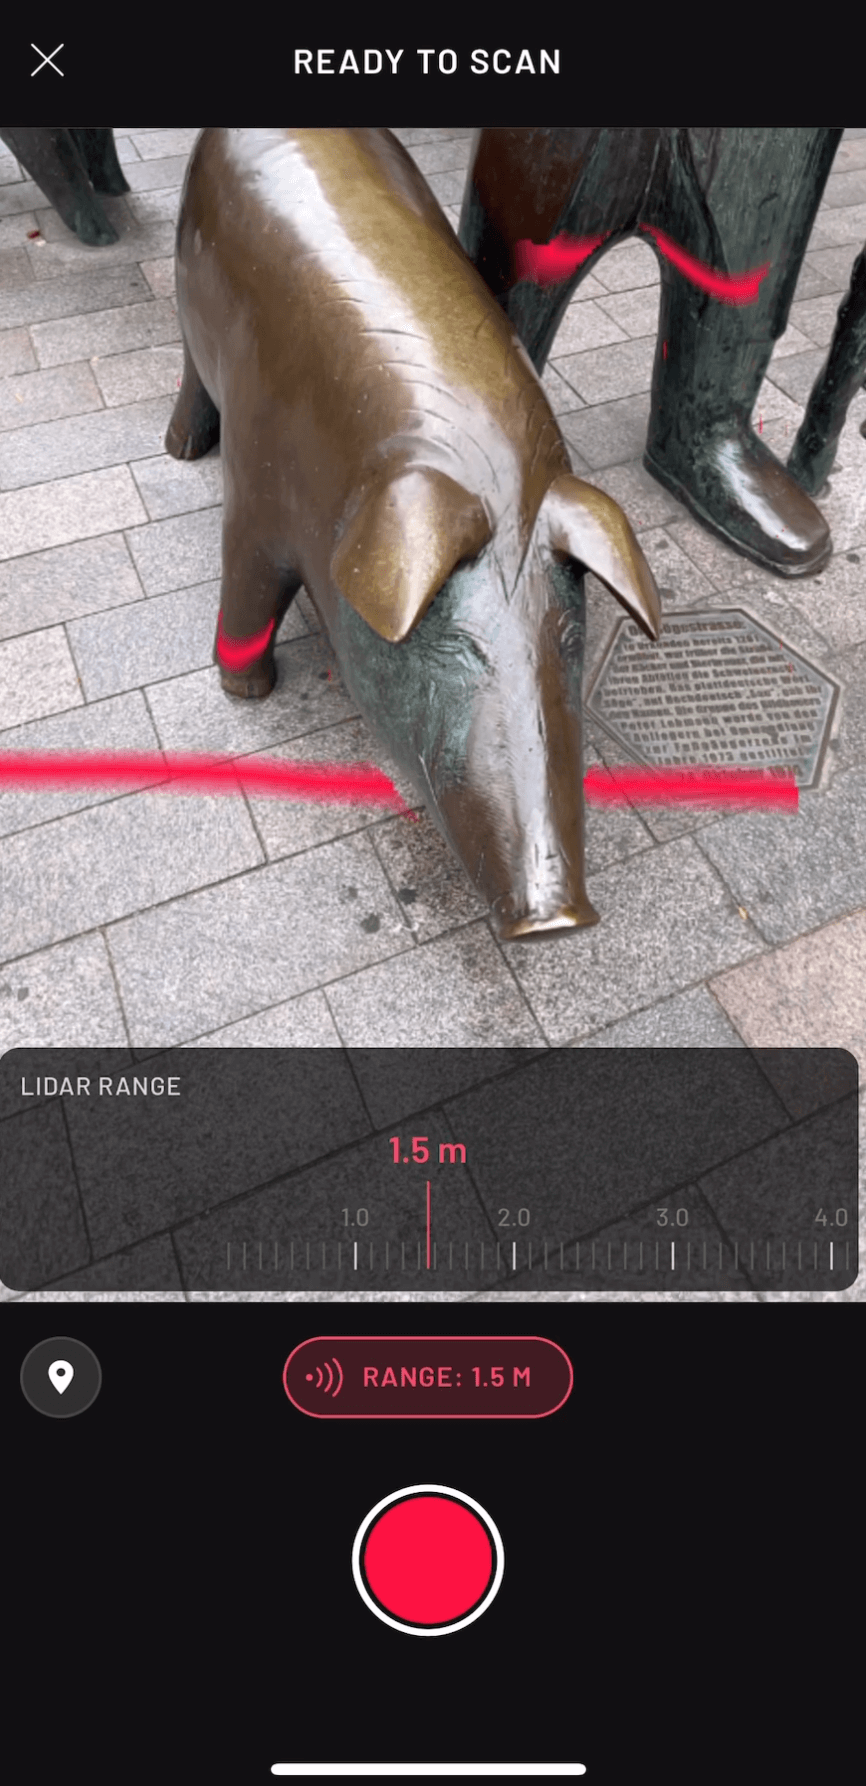
After setting the values, tap the red circle button to start 3D scanning.
We will take a picture of the target solid from various angles.
Be careful not to move the object too fast or it will not be scanned properly.
Once you have taken a picture, tap the red button again to finish.
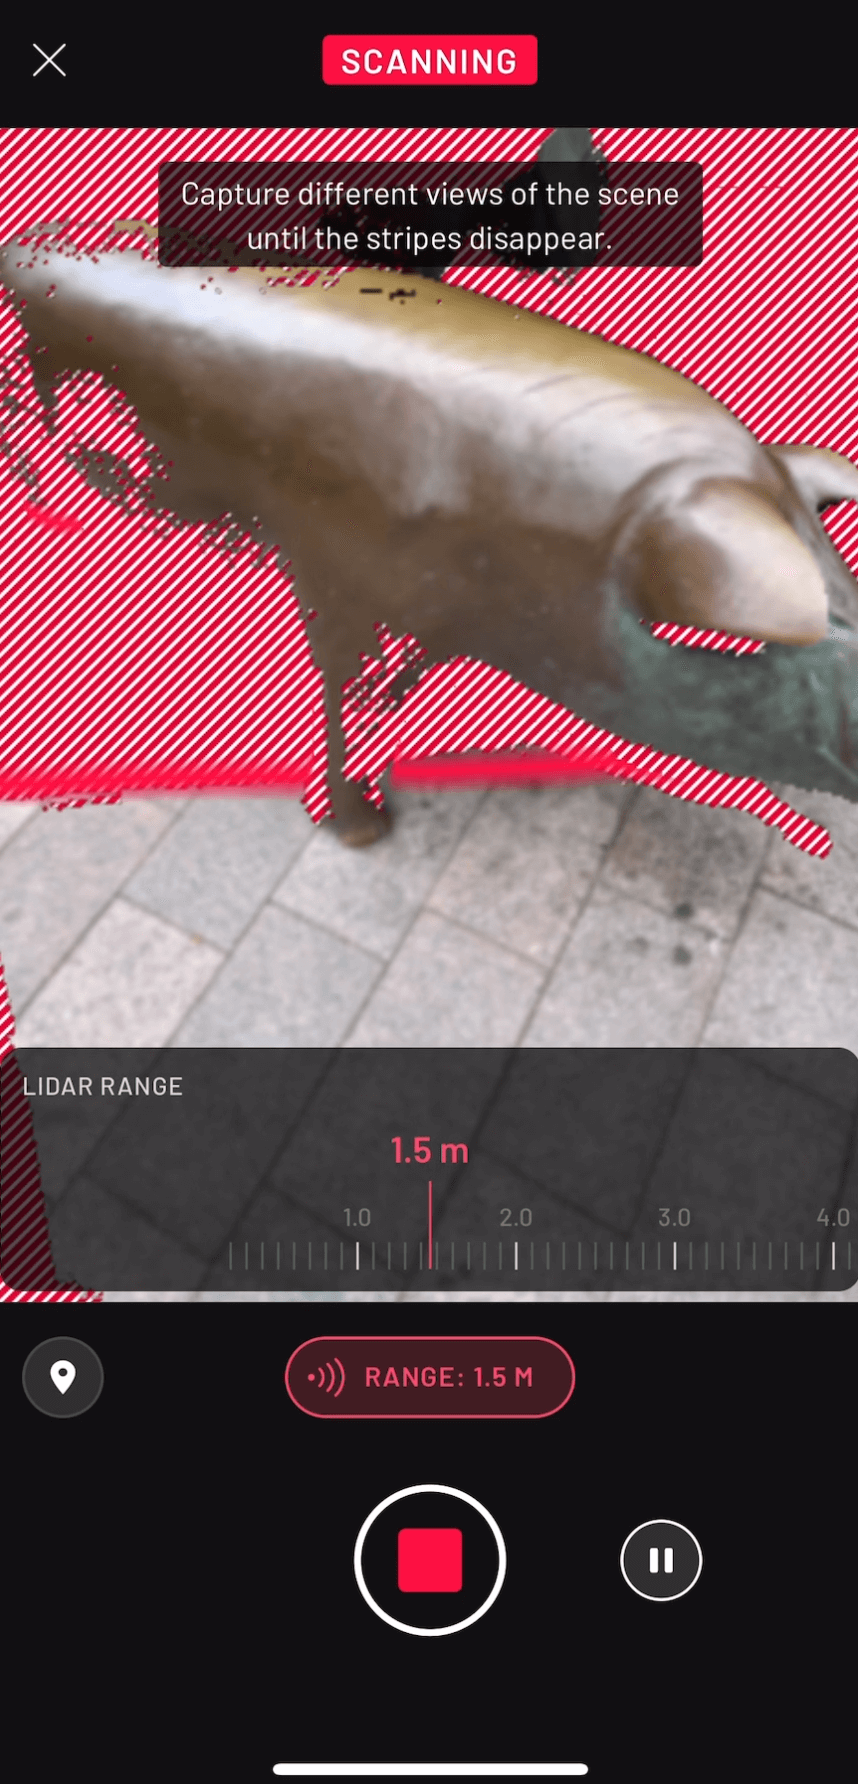
Make sure that the red stripes do not cover the object.
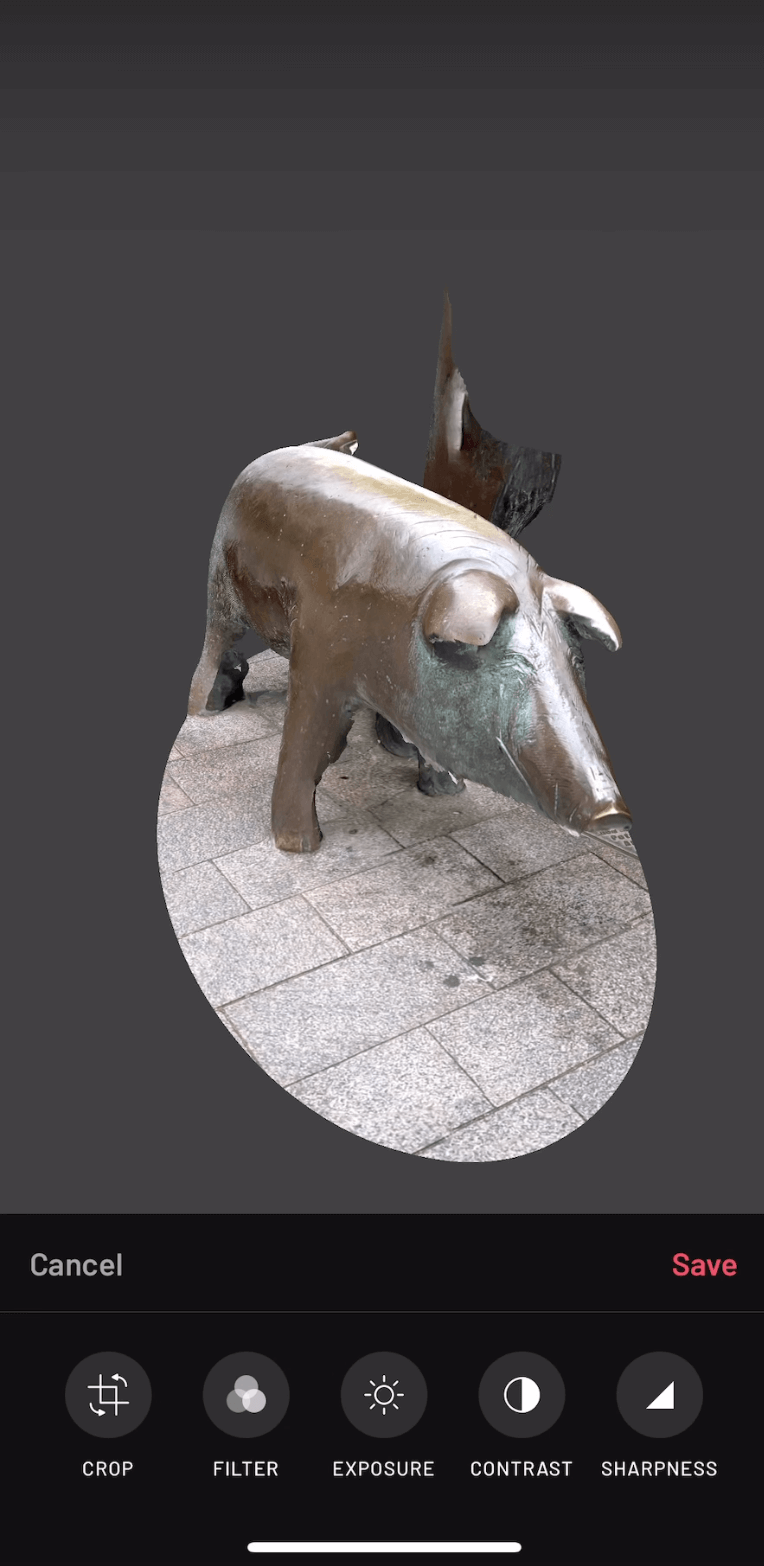
The pig has now been scanned.
You can swipe the sculpture around to make sure it is being scanned properly.
If everything is fine, select the resolution from three options.
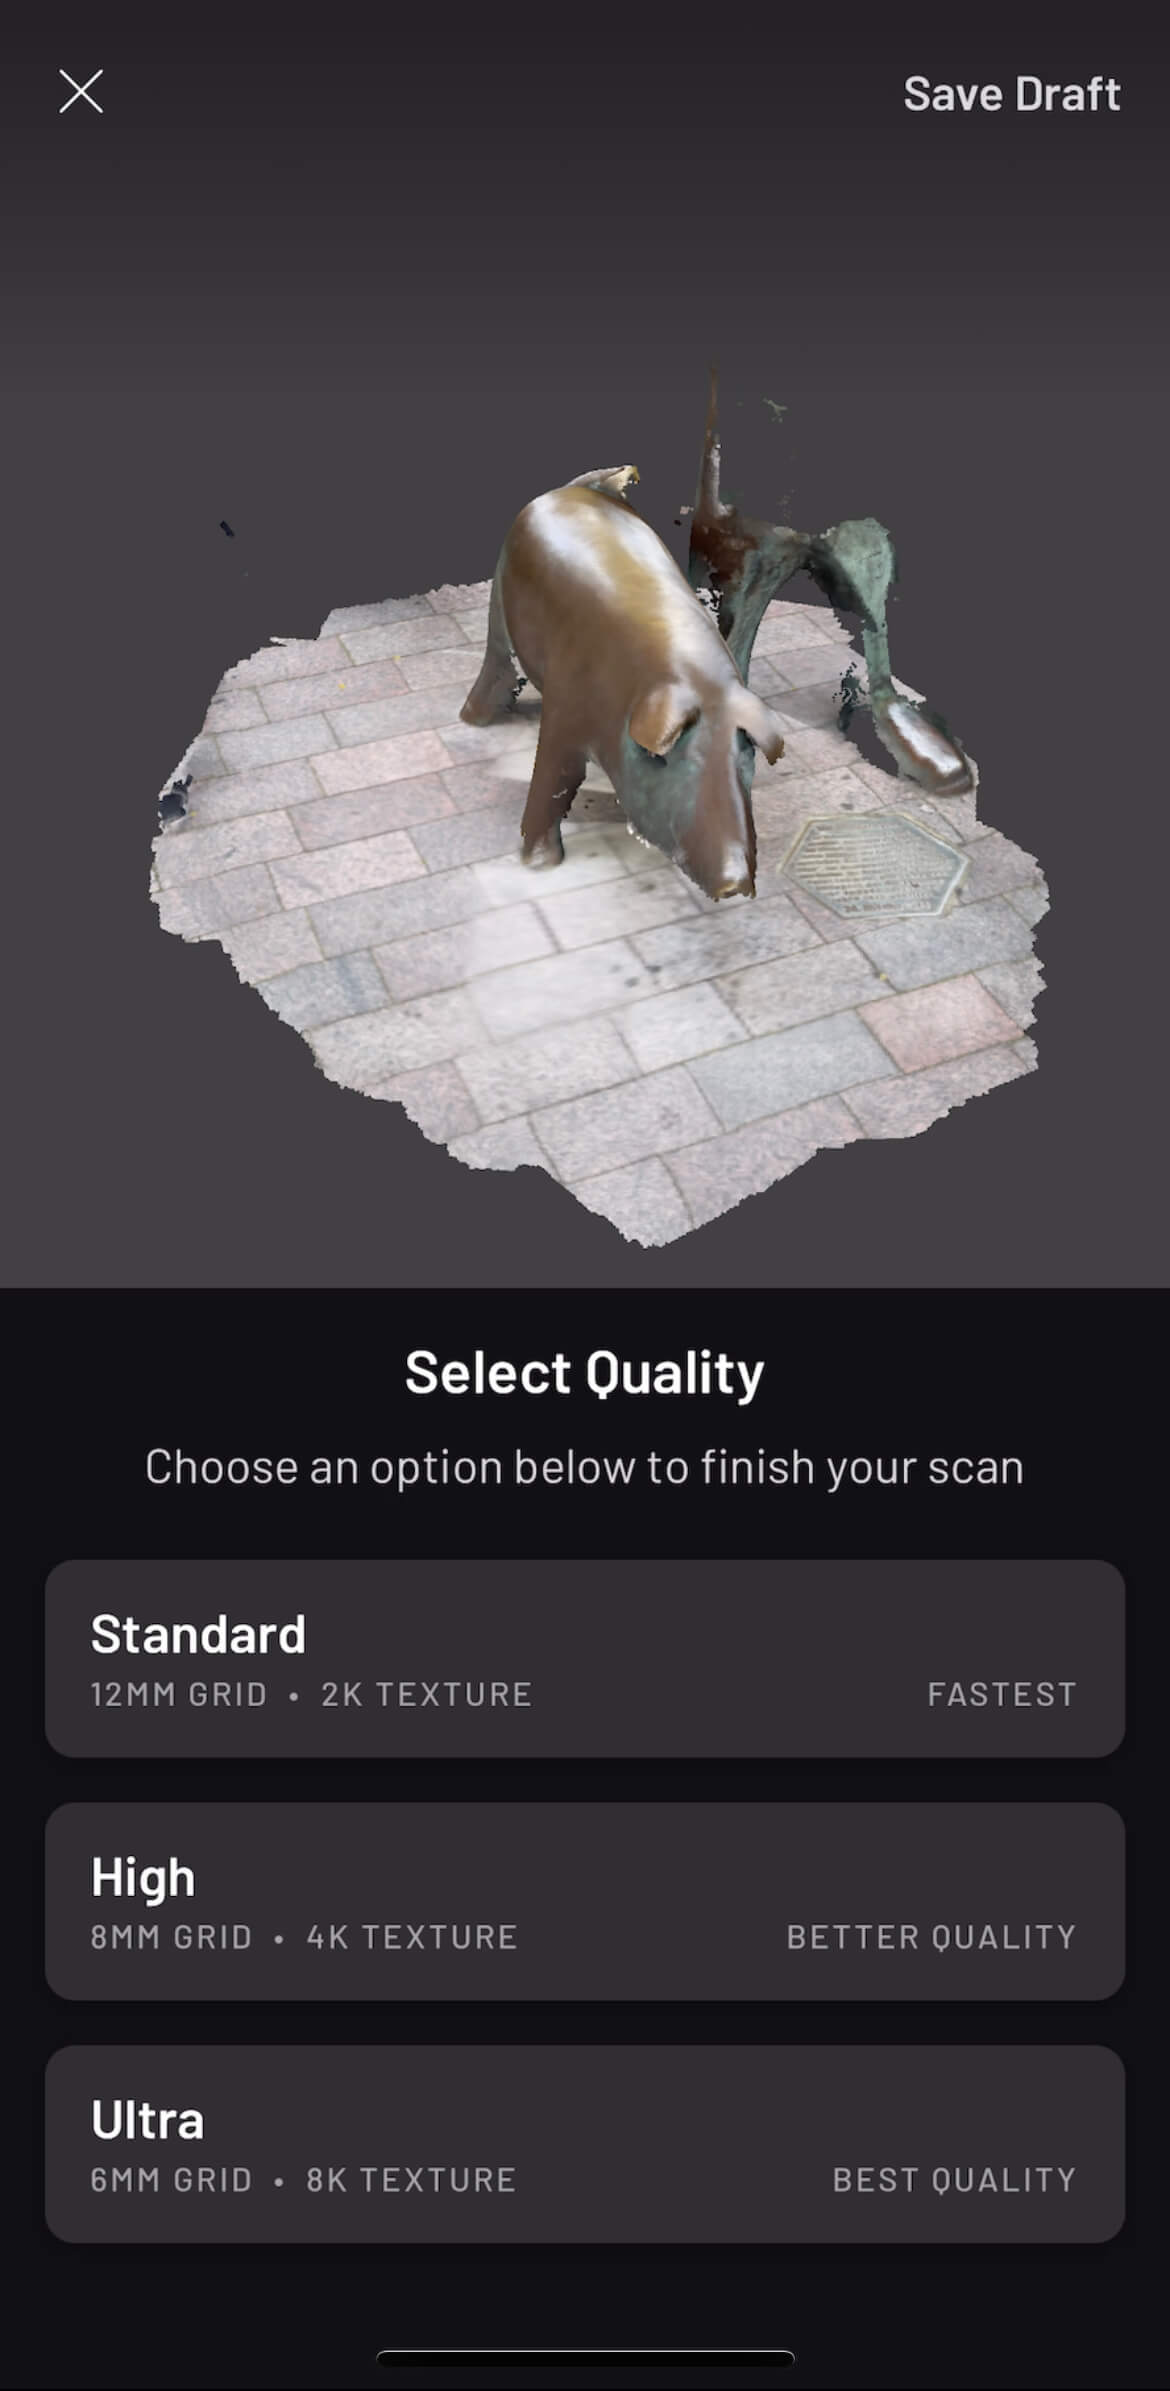
Click Save Draft in the upper right corner to save the draft.
The differences are related to each other as follows
| Quality | Speed of processing | |
| Standard | Low | Fast |
| High | | | | |
| Ultra | High | Slow |
Editing the scanned model
You can edit the 3D scanned model on the app.
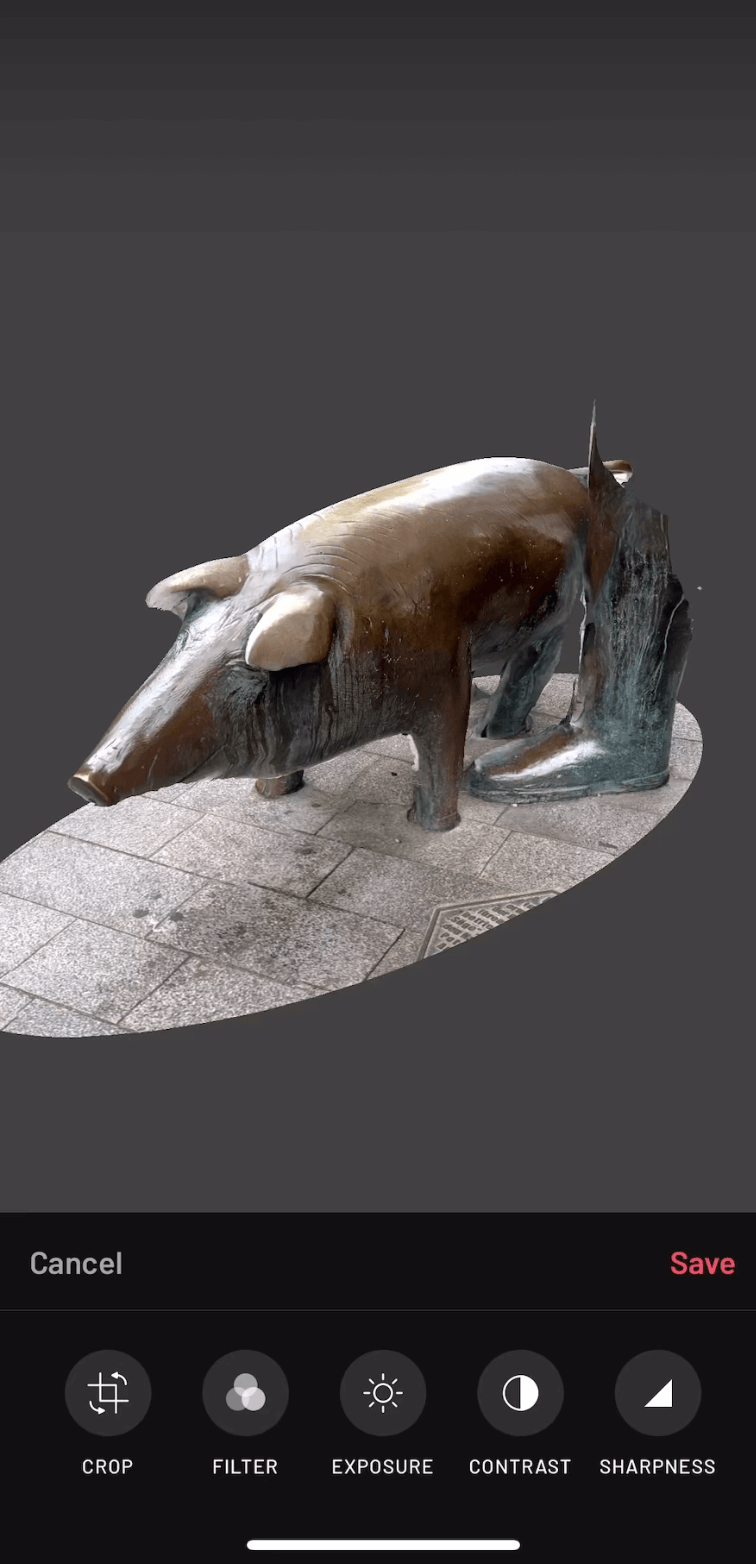
Edit screen
Crop the model
Tap CROP to cleanly crop out the jagged edges of the ground, as shown here.

CROP
TOP is selected, but you can change the viewpoint to LEFT, FRONT, or RIGHT to edit the model.
Swipe the corners of the square in the center of the screen to make it look the way you want.
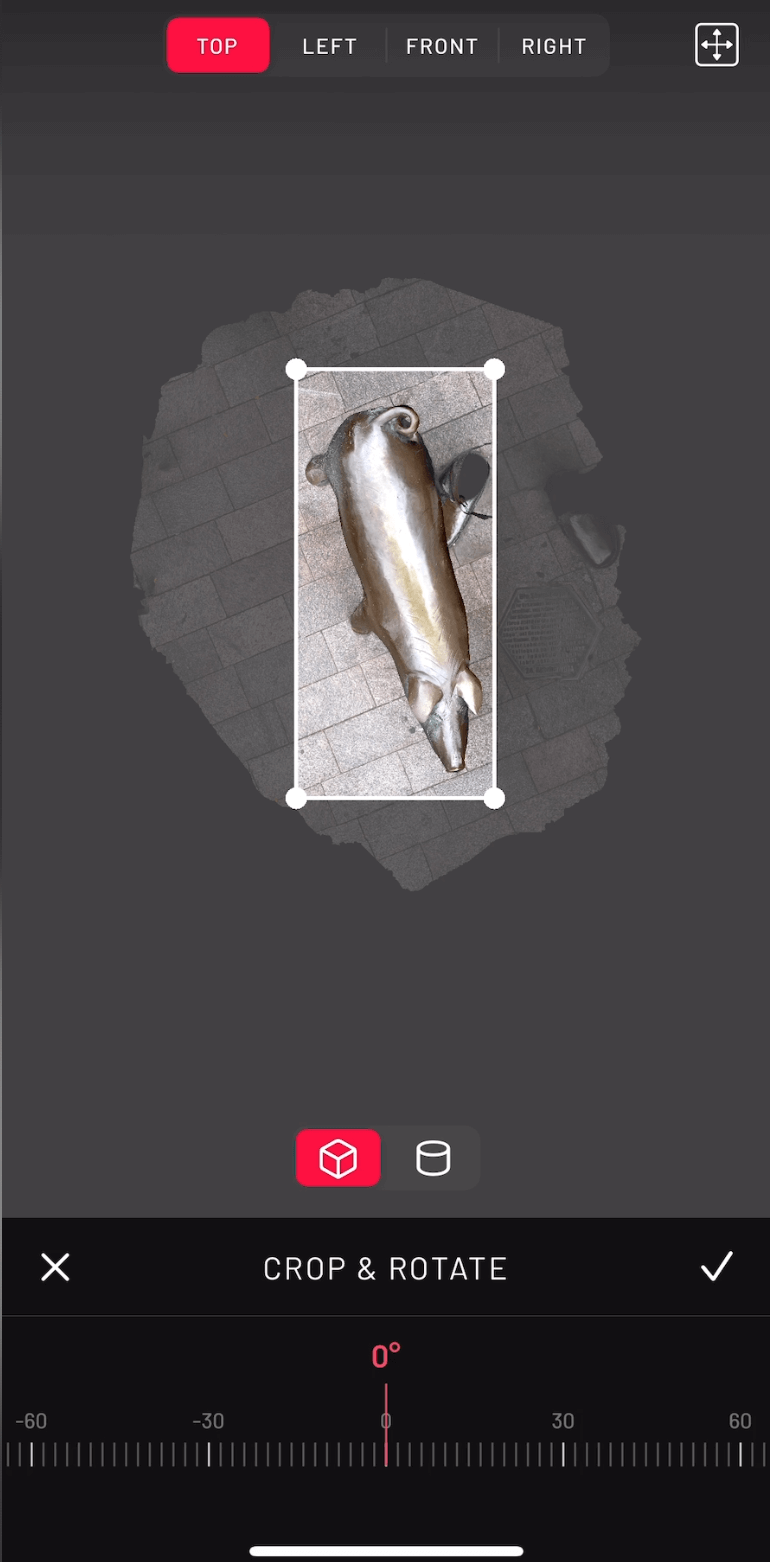
Tap the check button when you are done.
The ground has been clearly hollowed out.
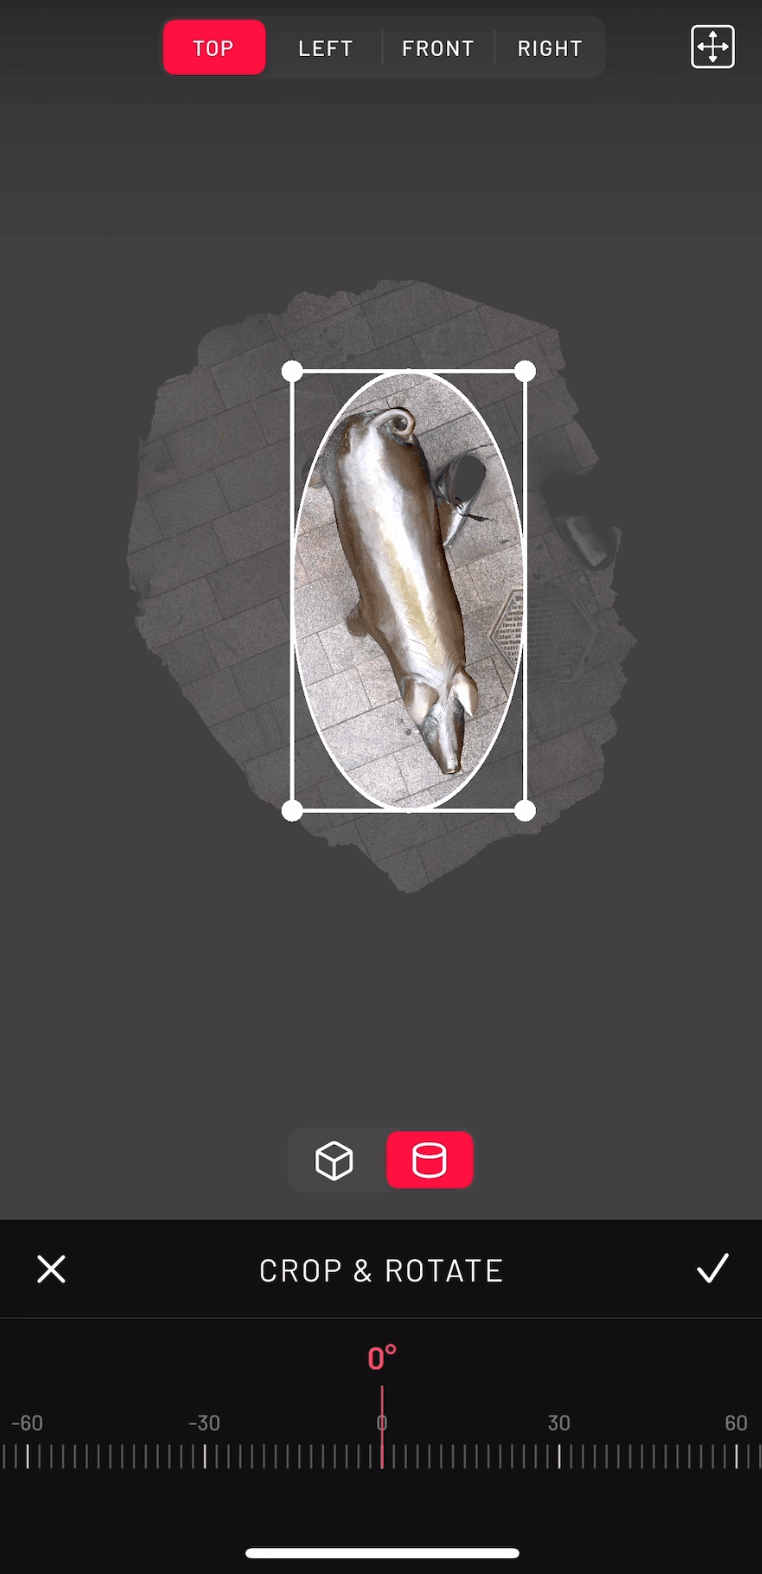
If you select the cylinder mark instead of the cube, you can cut out a circle.
Example of hollowing out a circle
Applying a filter to the model
Tap the FILTER button to change the color of the model.
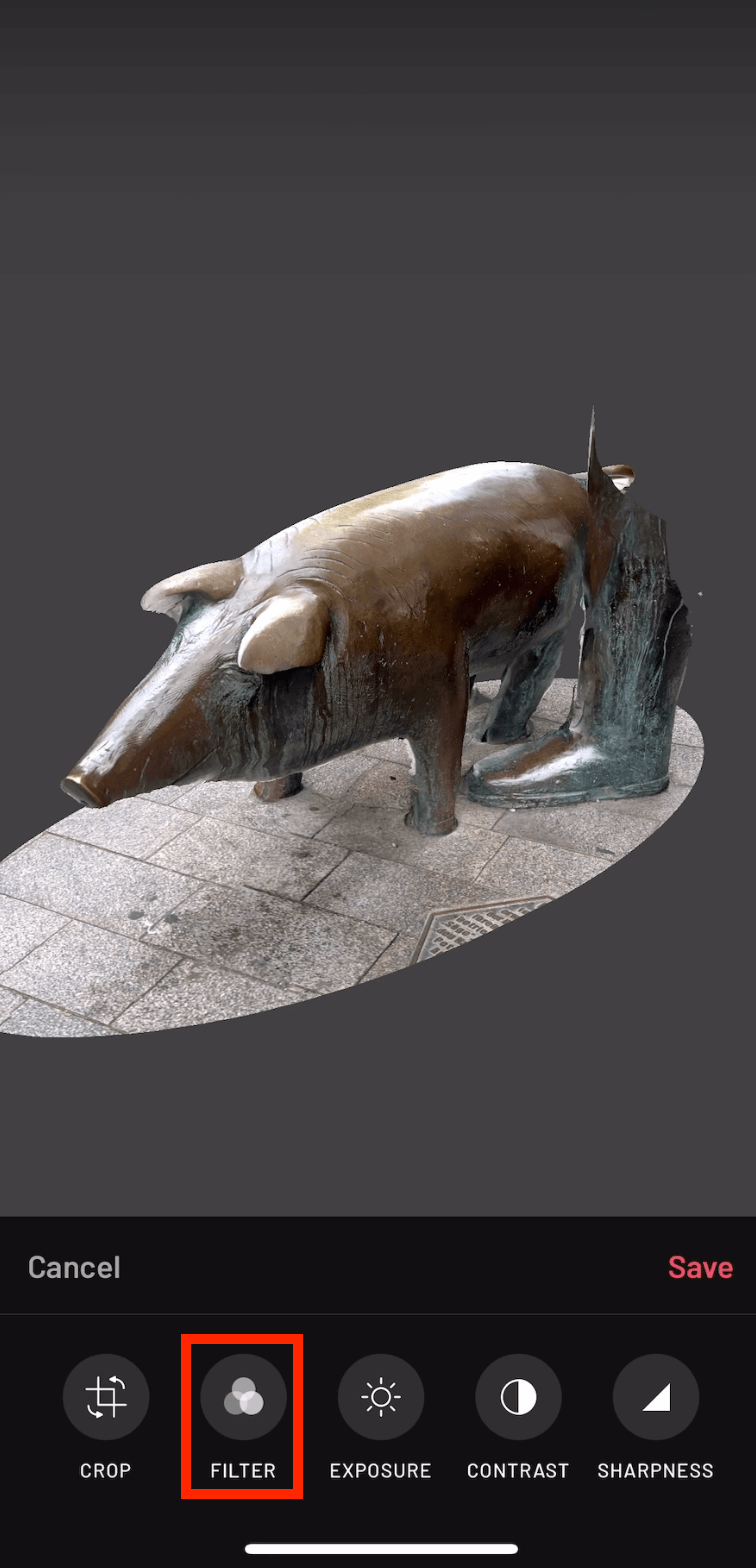
FILTER
When you have set the tint to your liking, tap the check mark to finish.
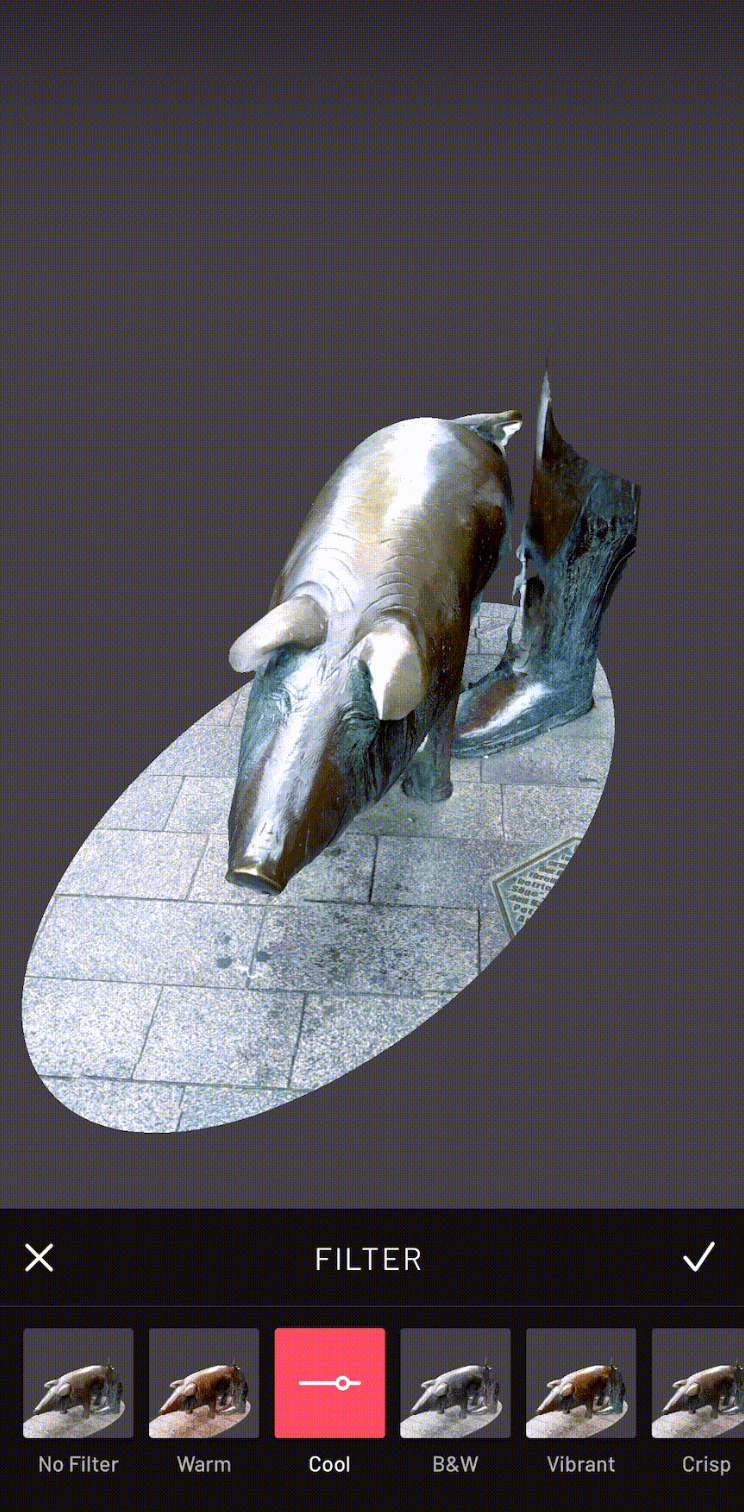
Tap twice to change the intensity of the filter.
Change the texture of the model
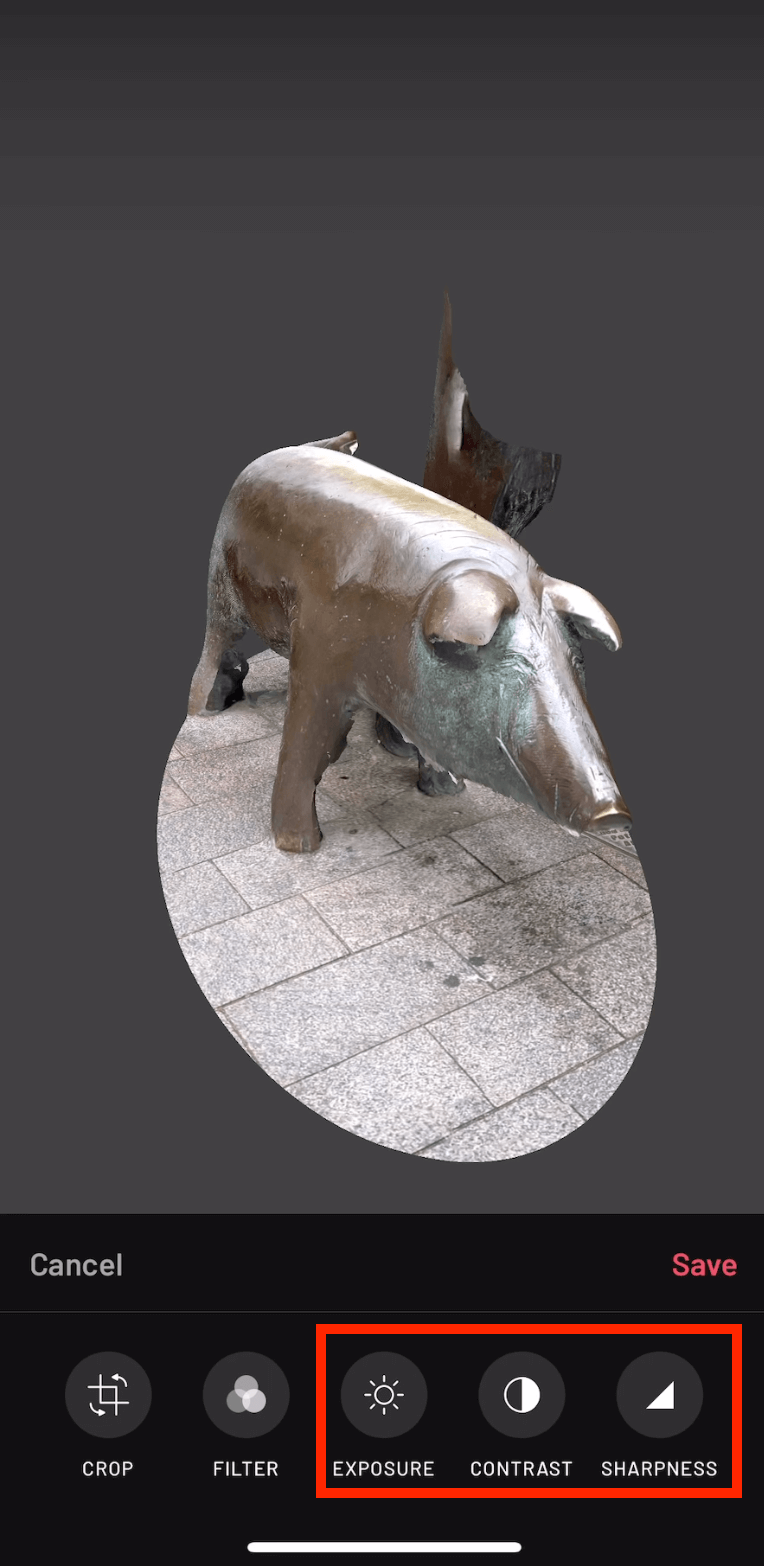
In addition to the filter, you can also change the following items.
| EXPOSURE | Luminosity | Change the brightness of the model. |
| CONTRAST | Contrast | Changes the intensity of light and shadow |
| SHARPNESS | Sharpness | Changes the intensity of the model’s contours |
Use the scanned model
Display it in AR
You can display the scanned model as AR in another location.
Tap the button that says AR VIEW.

AR VIEW
Then, the place where you are will be displayed through the camera.
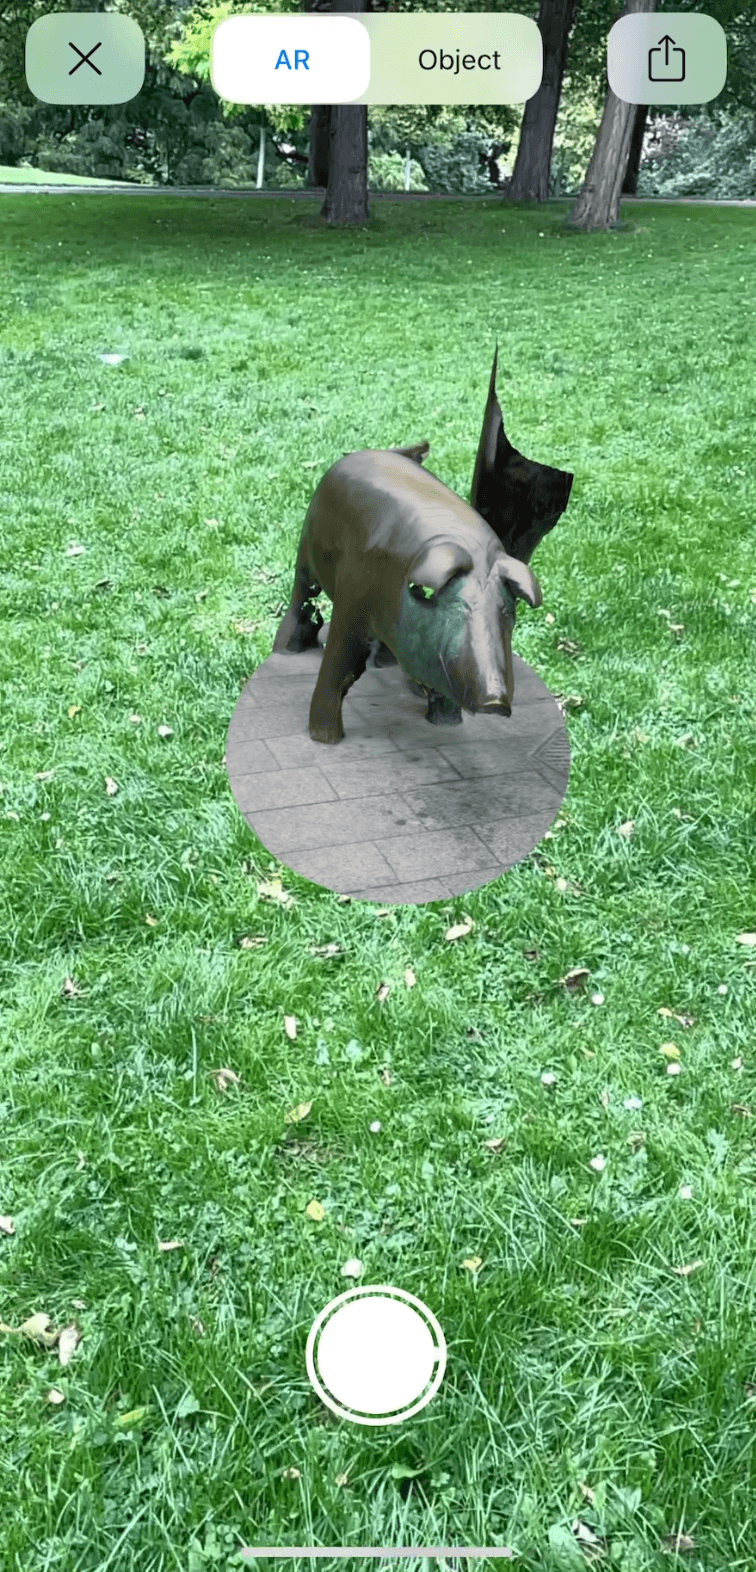
Sculpture goes to the park
Measure the size of the model
You can tap MEASURE to measure the approximate size of the model.

MEASURE
First, tap the beginning of the location you want to measure.
In this case, we want to measure the size of a pig, so we will tap the nose.
Then a red dot will appear as shown below.
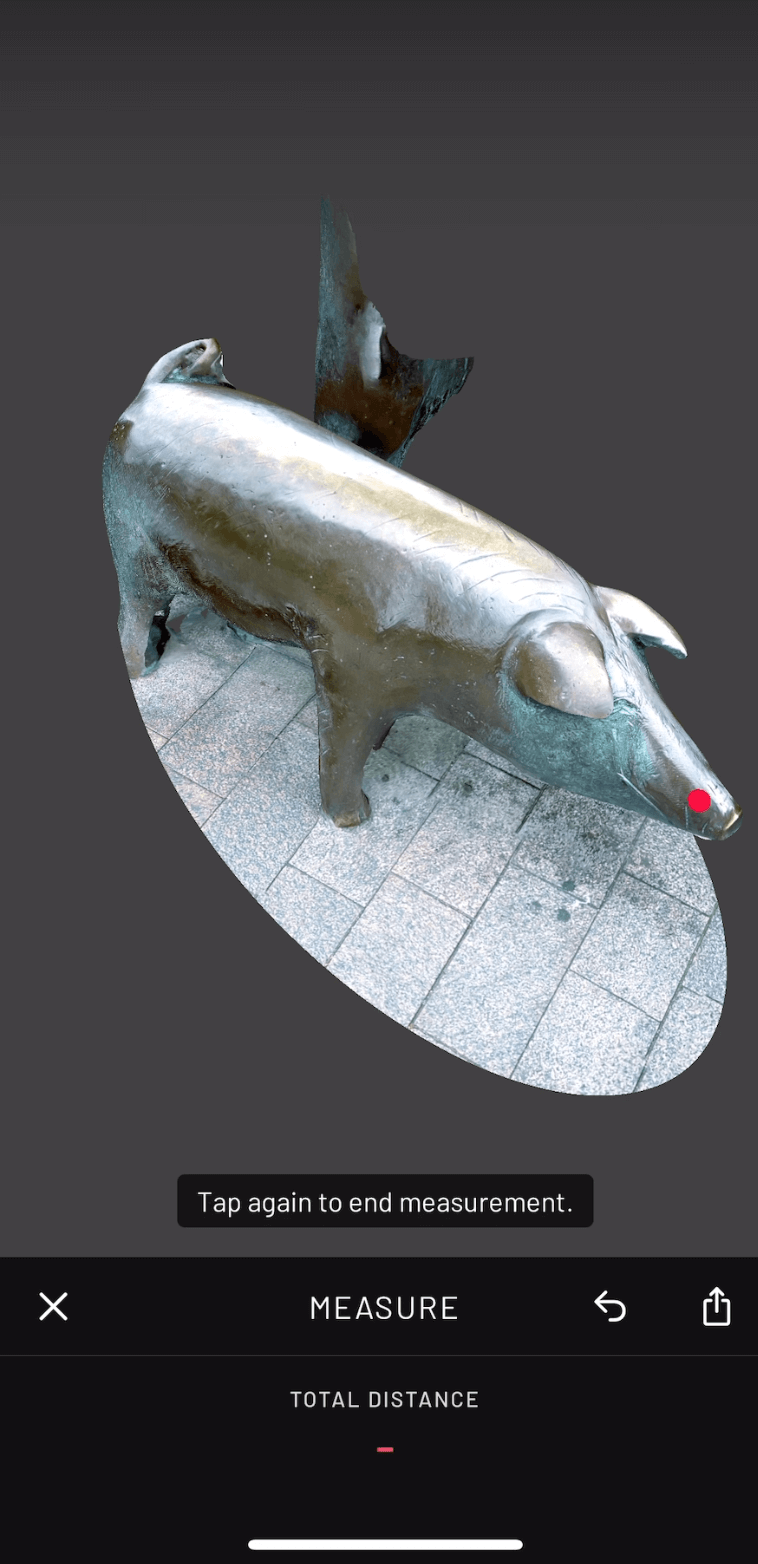
The starting point of the place you want to measure is now set.
Then tap on the buttocks, which will be the end point.
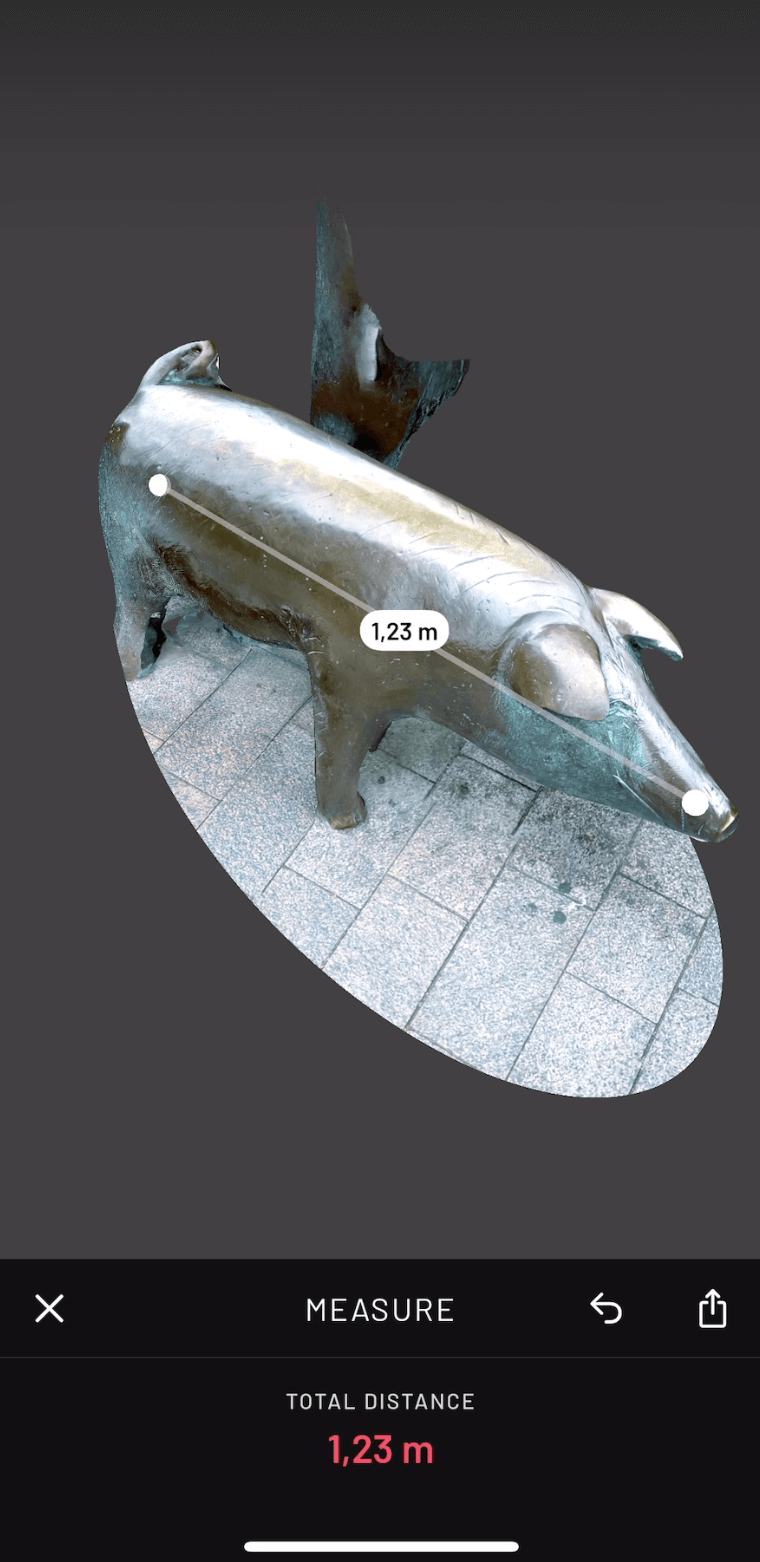
About 1,23m is now displayed.
If you want to remeasure, tap the arrow to the right of MEASURE.
Tap SHARE to share it externally.
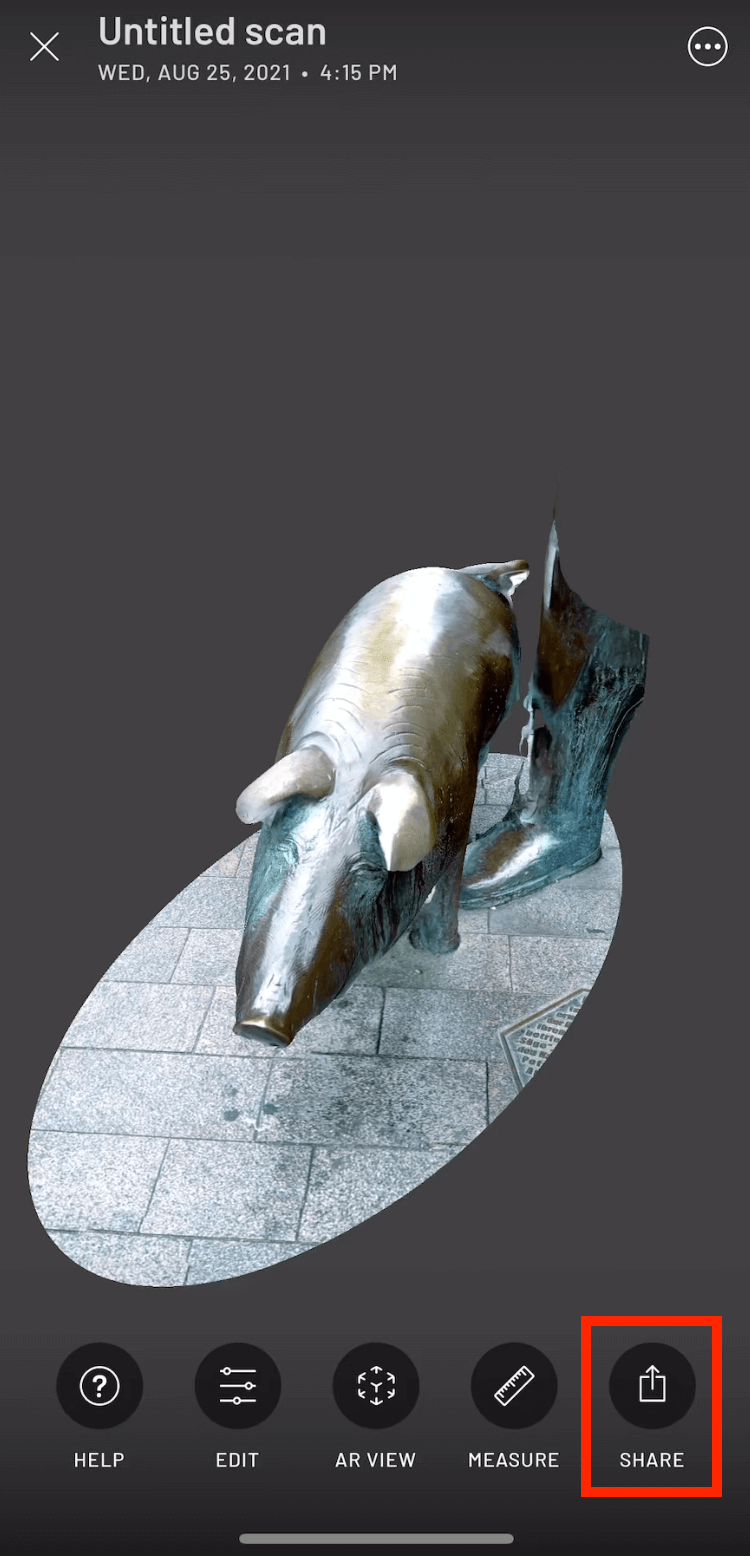
SHARE①
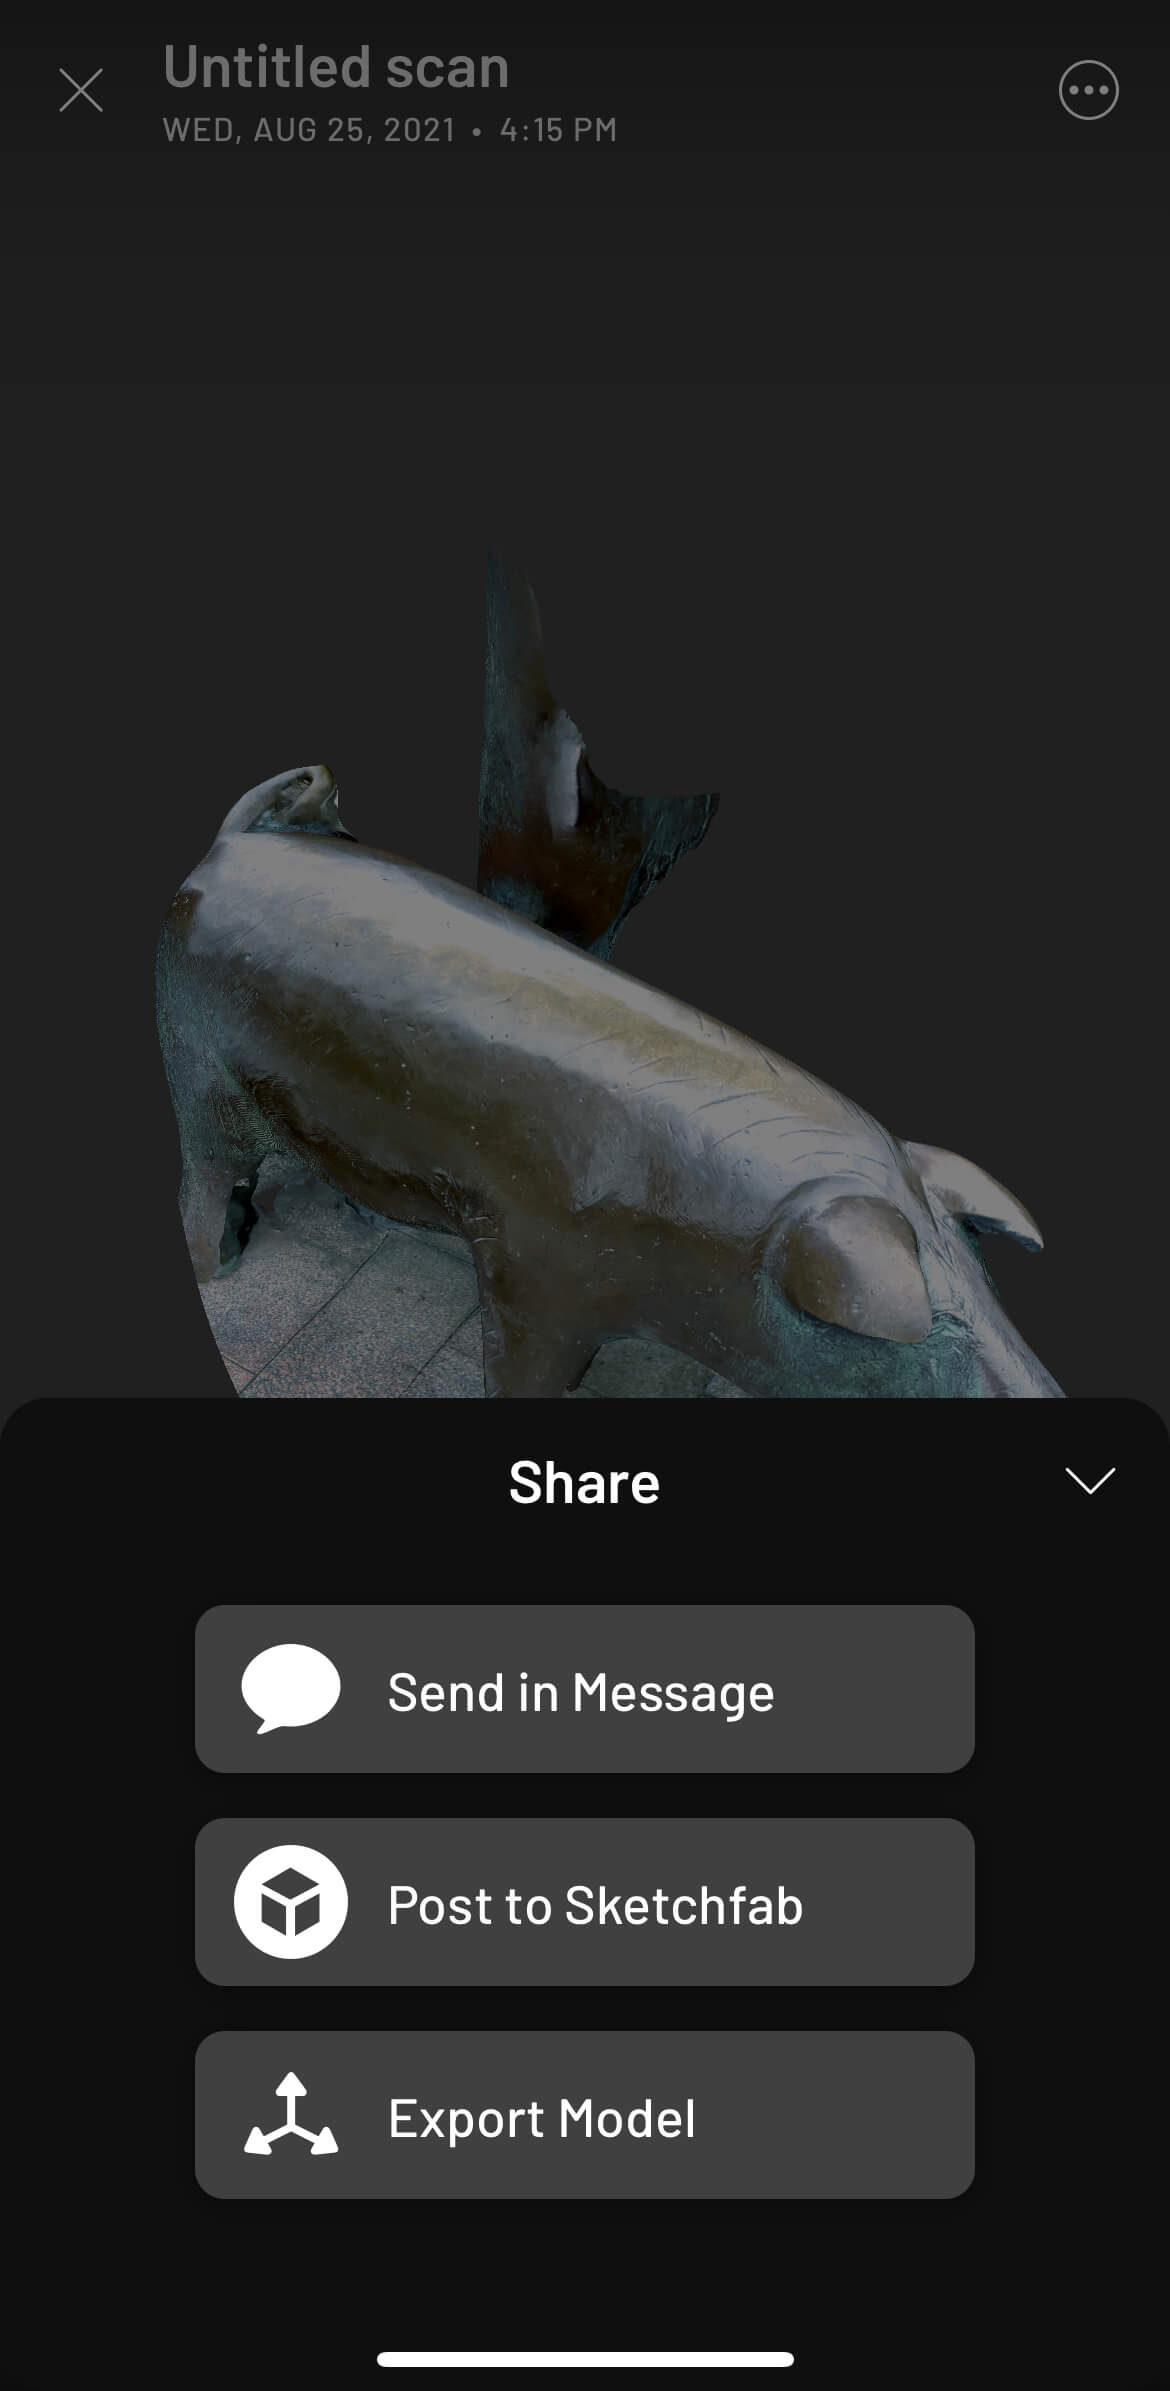
SHARE②
Post to Scaniverse
Using the Scaniverse app, you can share with other users.
To access this feature, register as a user.
Refer to the next paragraph to register.
After registering, tap Post to Scaniverse to go to the next screen.
After all the settings are complete, tap Post to post.
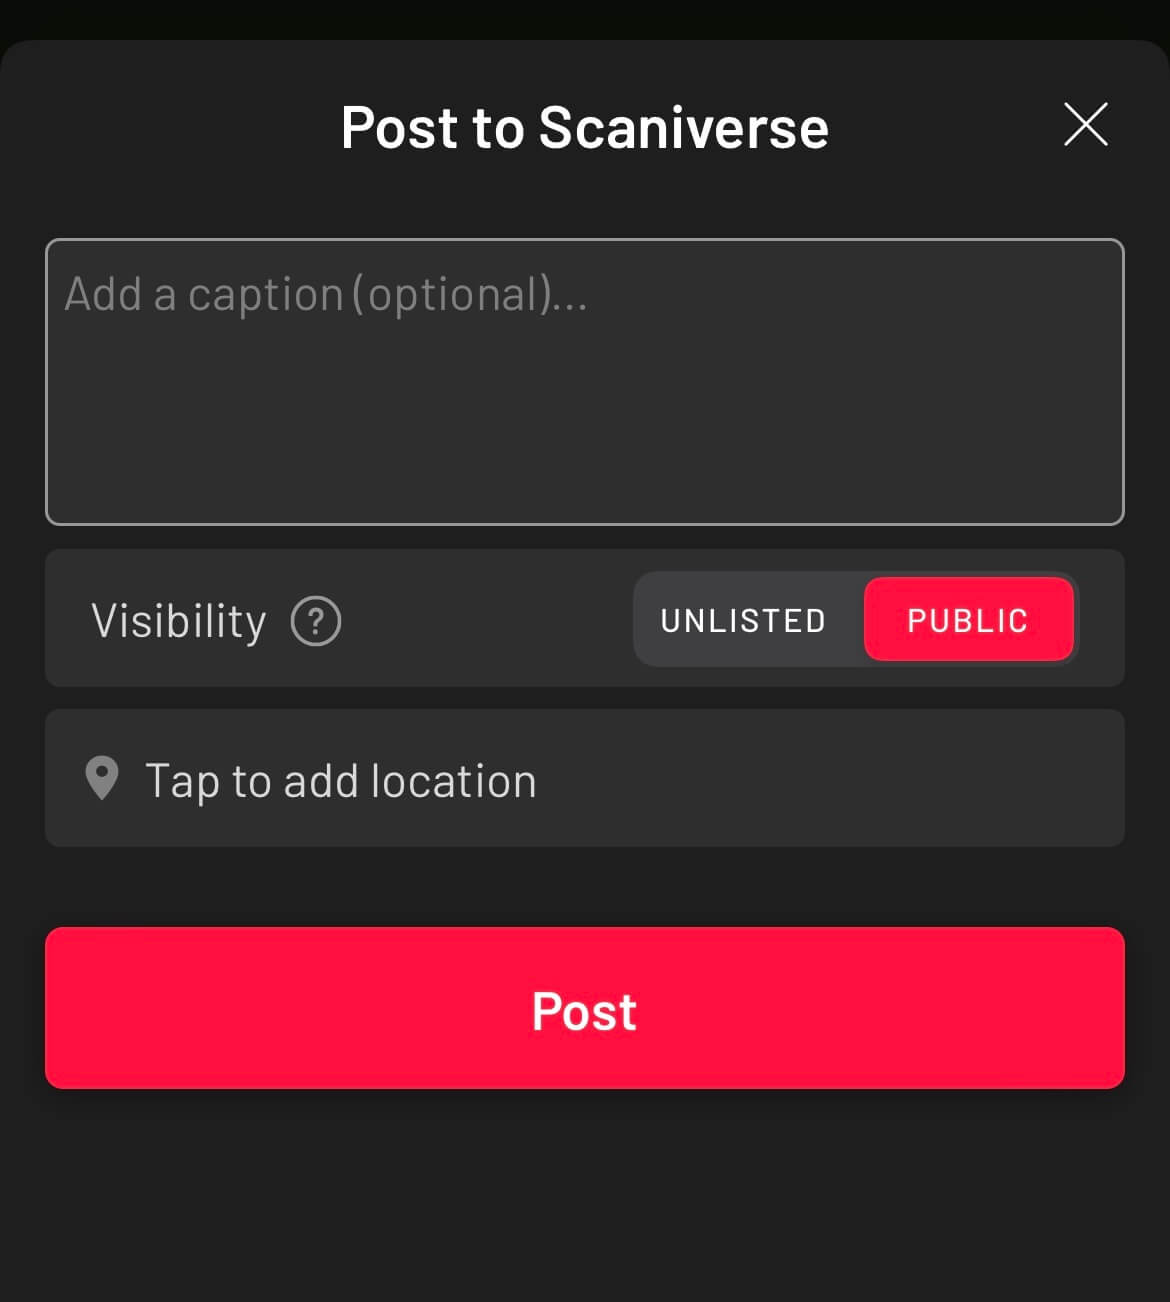
Post to Scaniverse
| Add a caption | As an option, add a description |
| Visiblity | Private/public |
| Tap to add location | Add your location |
Register as a User
Log in using your Apple or Google account.
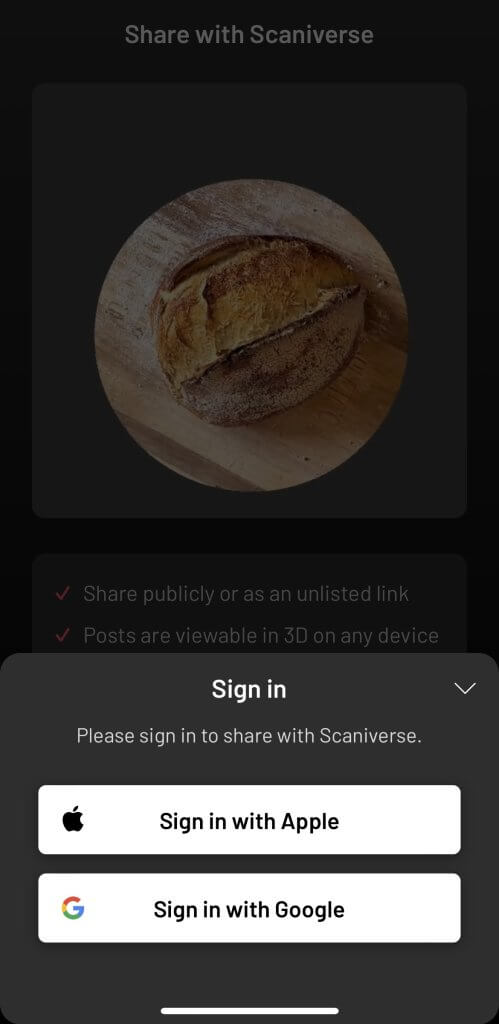
Sign In
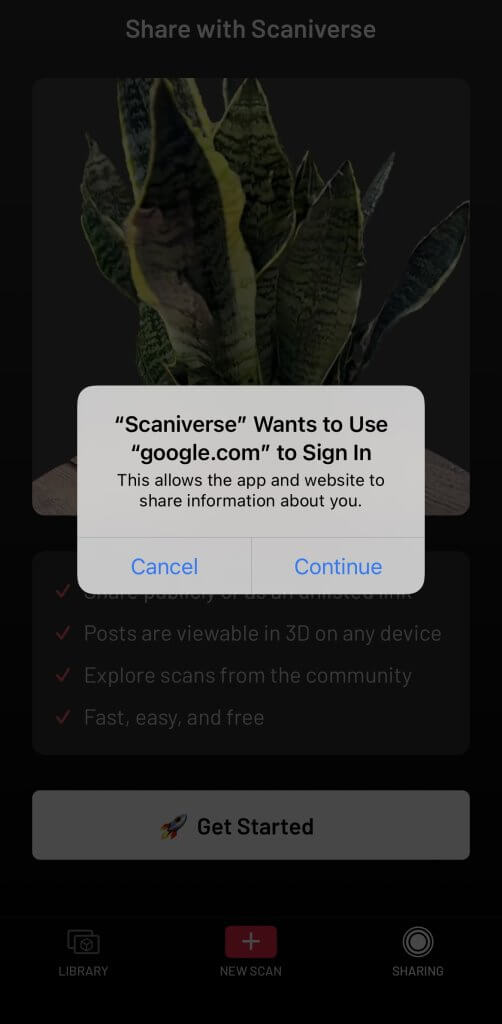
Sign In
Then accept the Terms of Use.
Tap Accept to proceed.
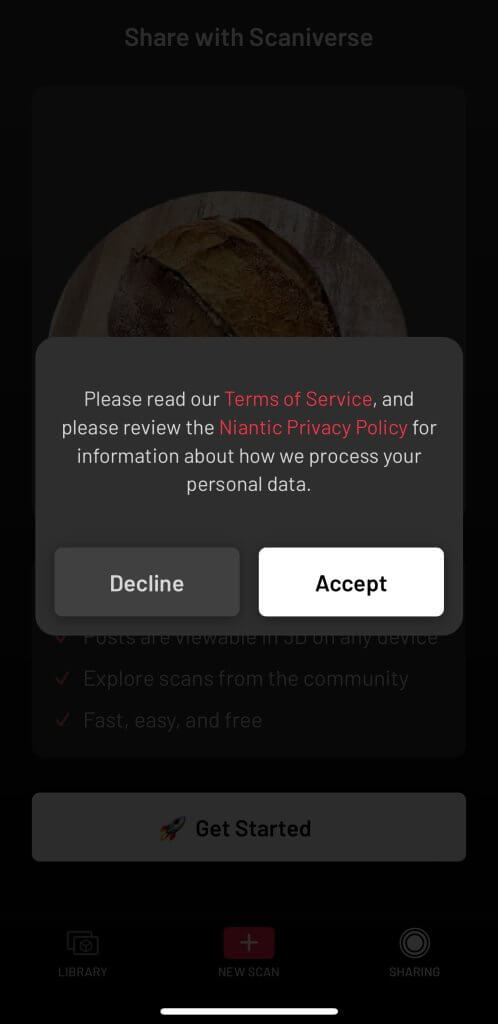
Terms of Service
In the next screen, select a user name.
You can change this later on the profile screen.
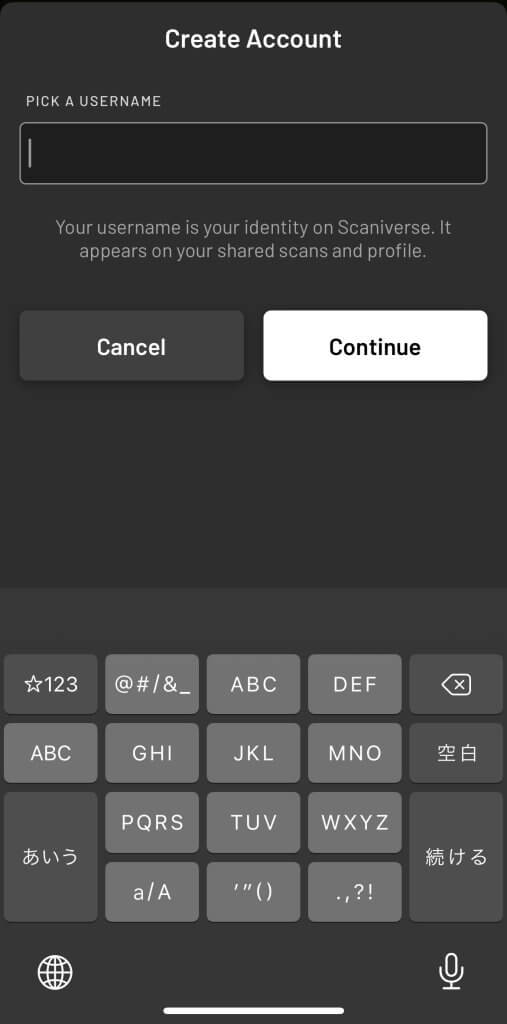
Create Account
The profile screen then appears.
You can share your profile from the icon next to your user name, change your username, etc.
Tap Explore the Scaniverse, tap the button in the upper right corner and browse 3D scan models shared by other users.
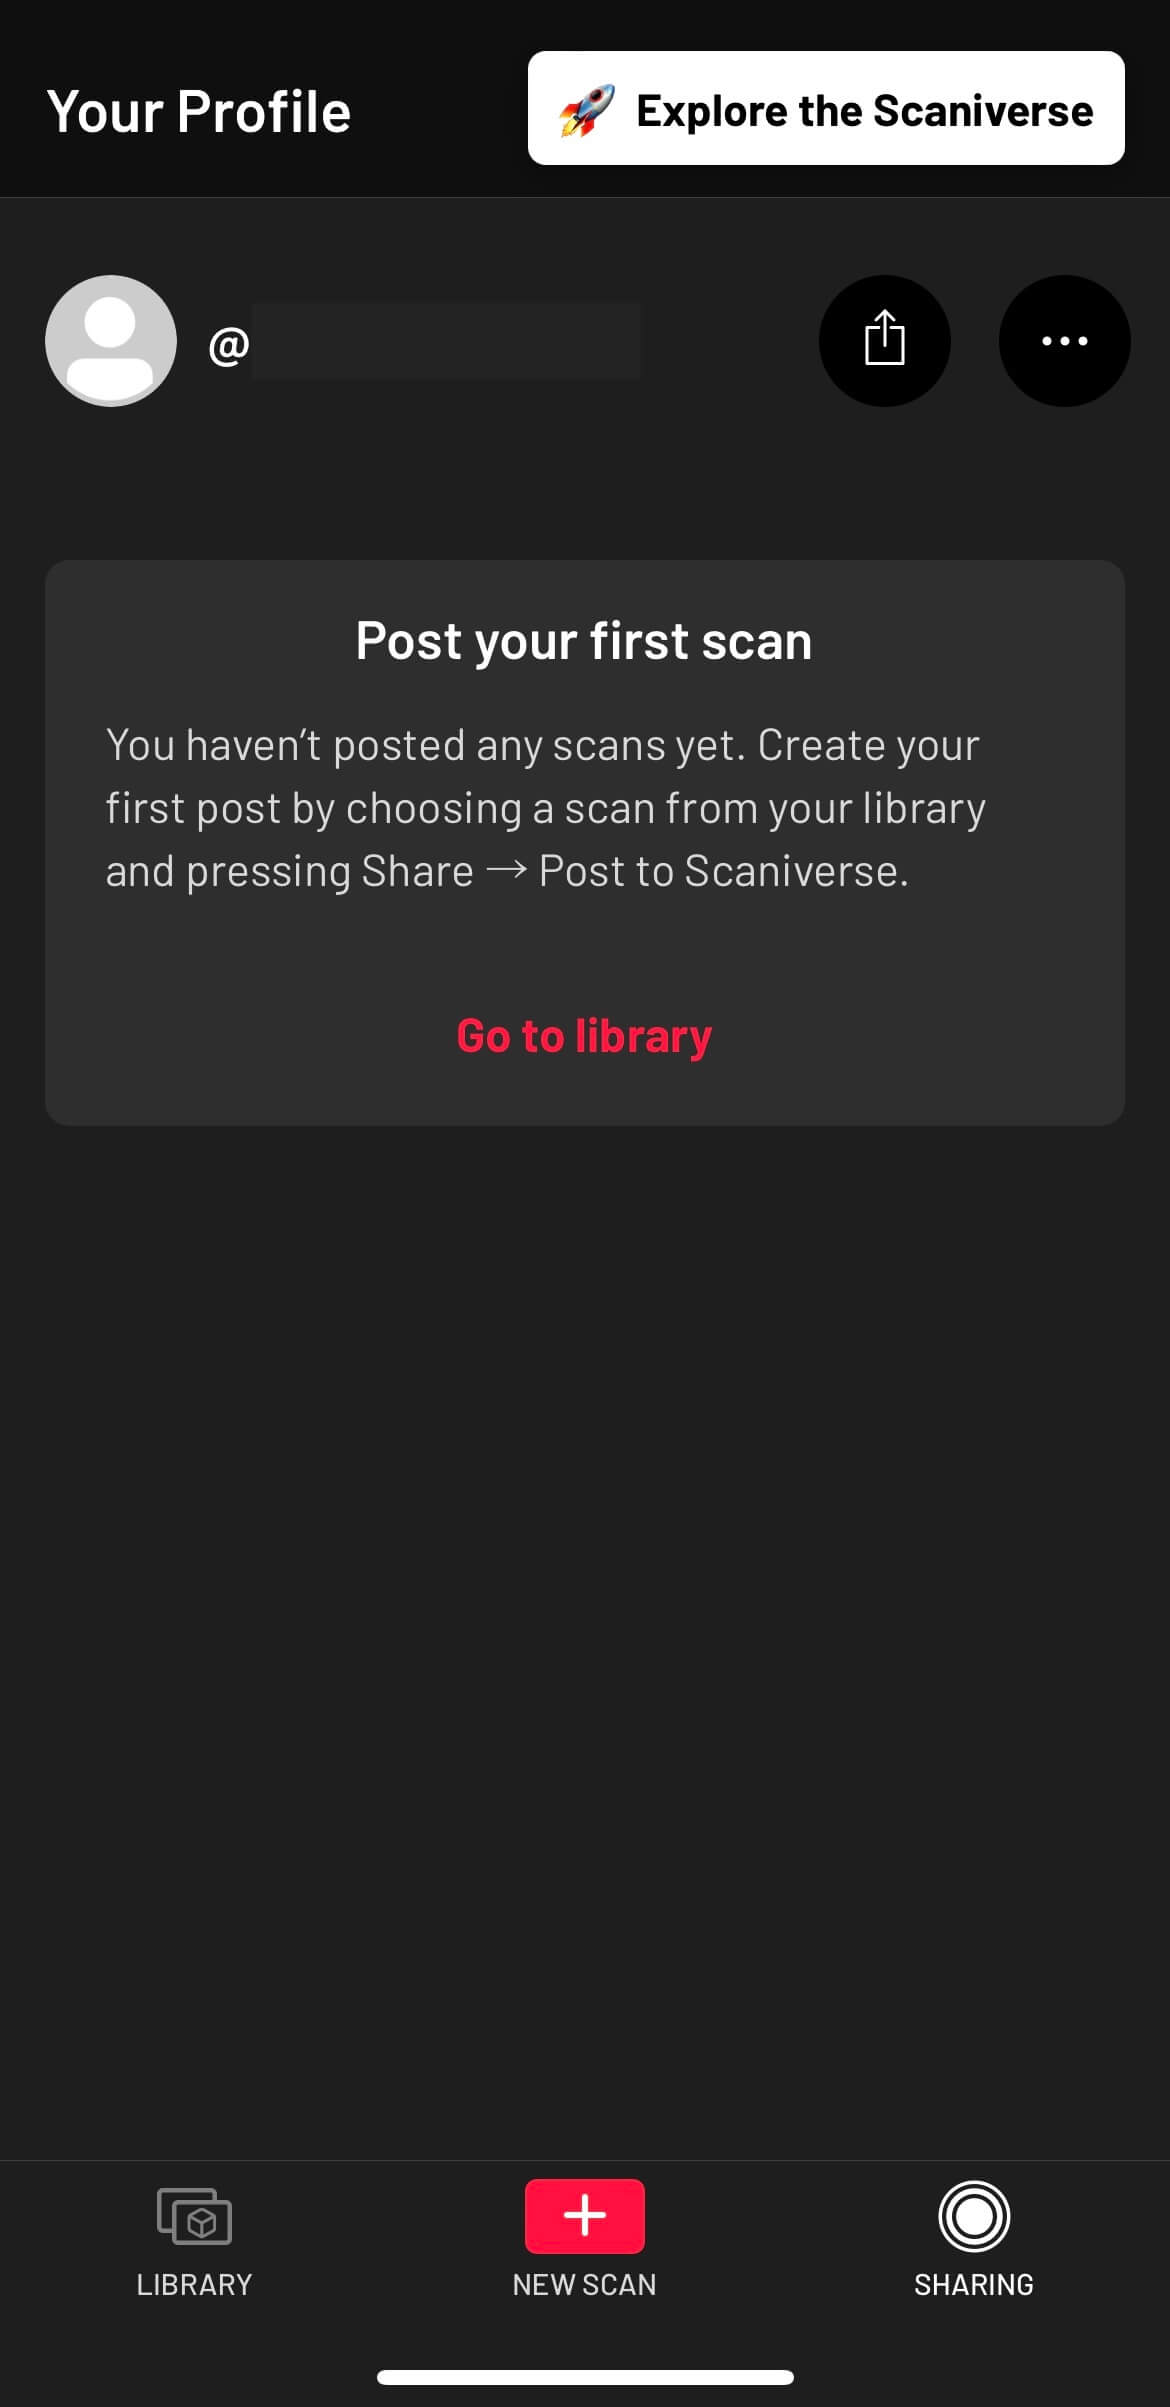
Your Profile
Tap the left and right arrows at the bottom of the screen to check out other works.

Explore the Scaniverse
Send in Message
You can send the model to your Mac via AirDrop, or share it via Mail or other SNS.
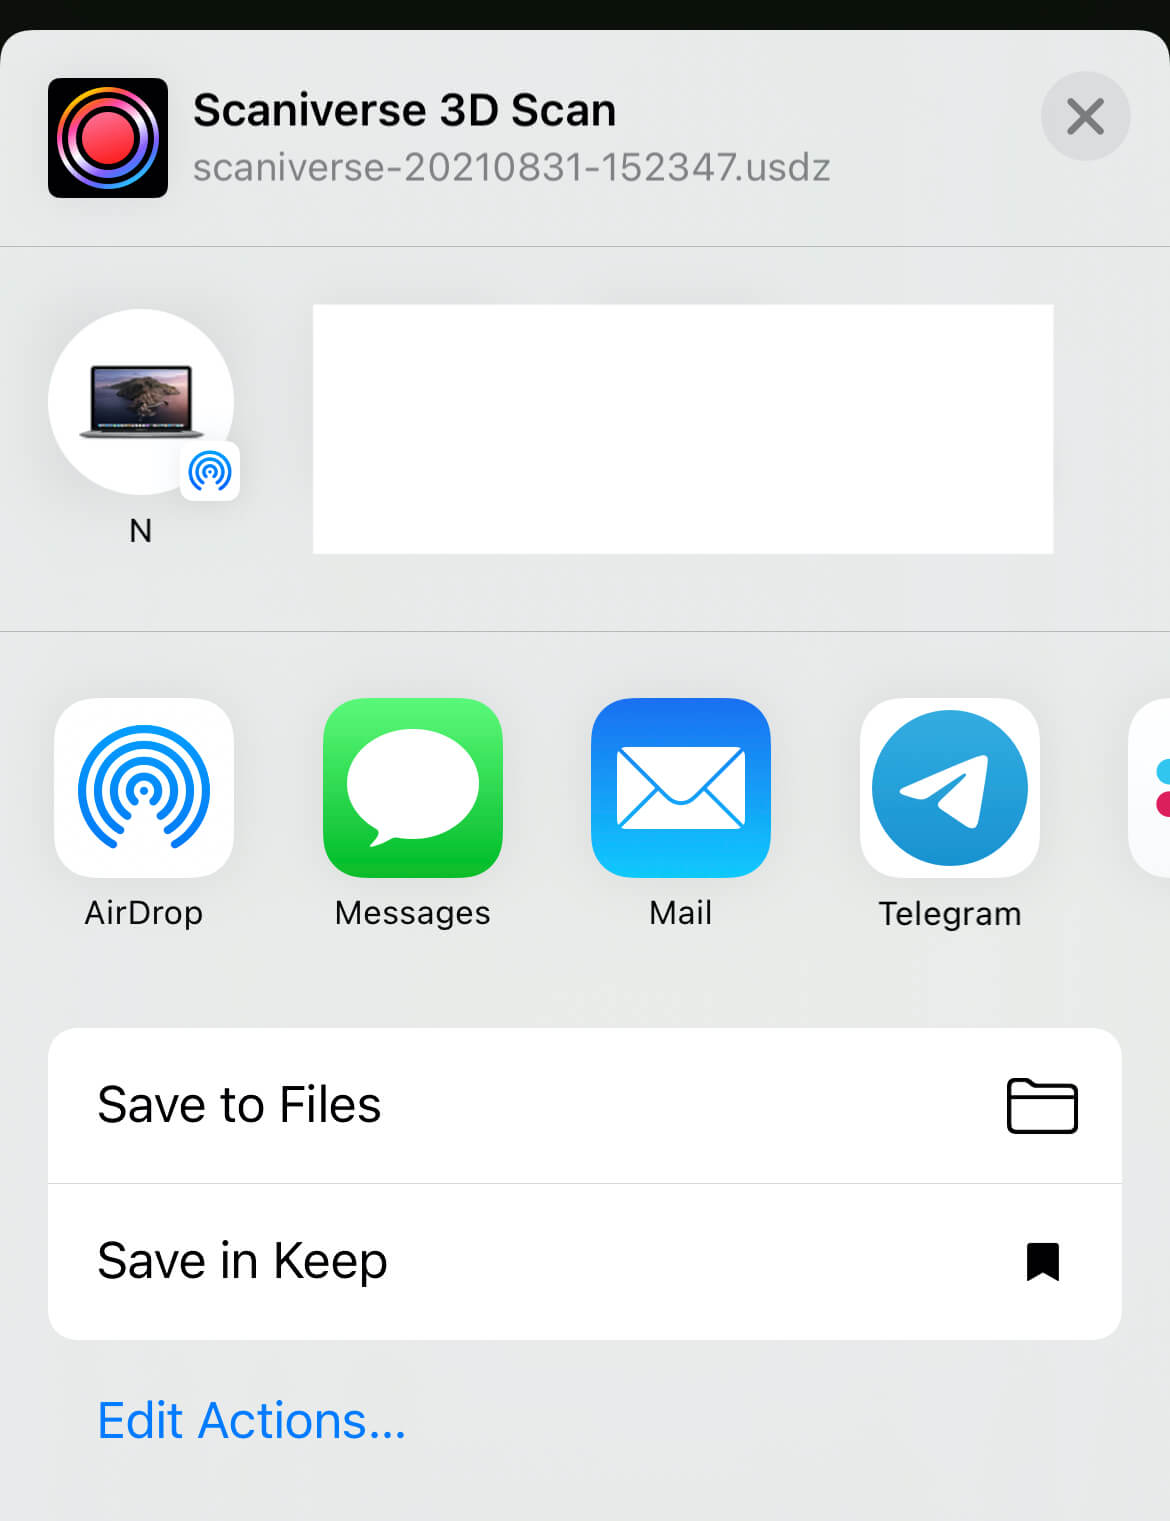
Easy to share
When you tap Mail, an email with the model attached will be launched.
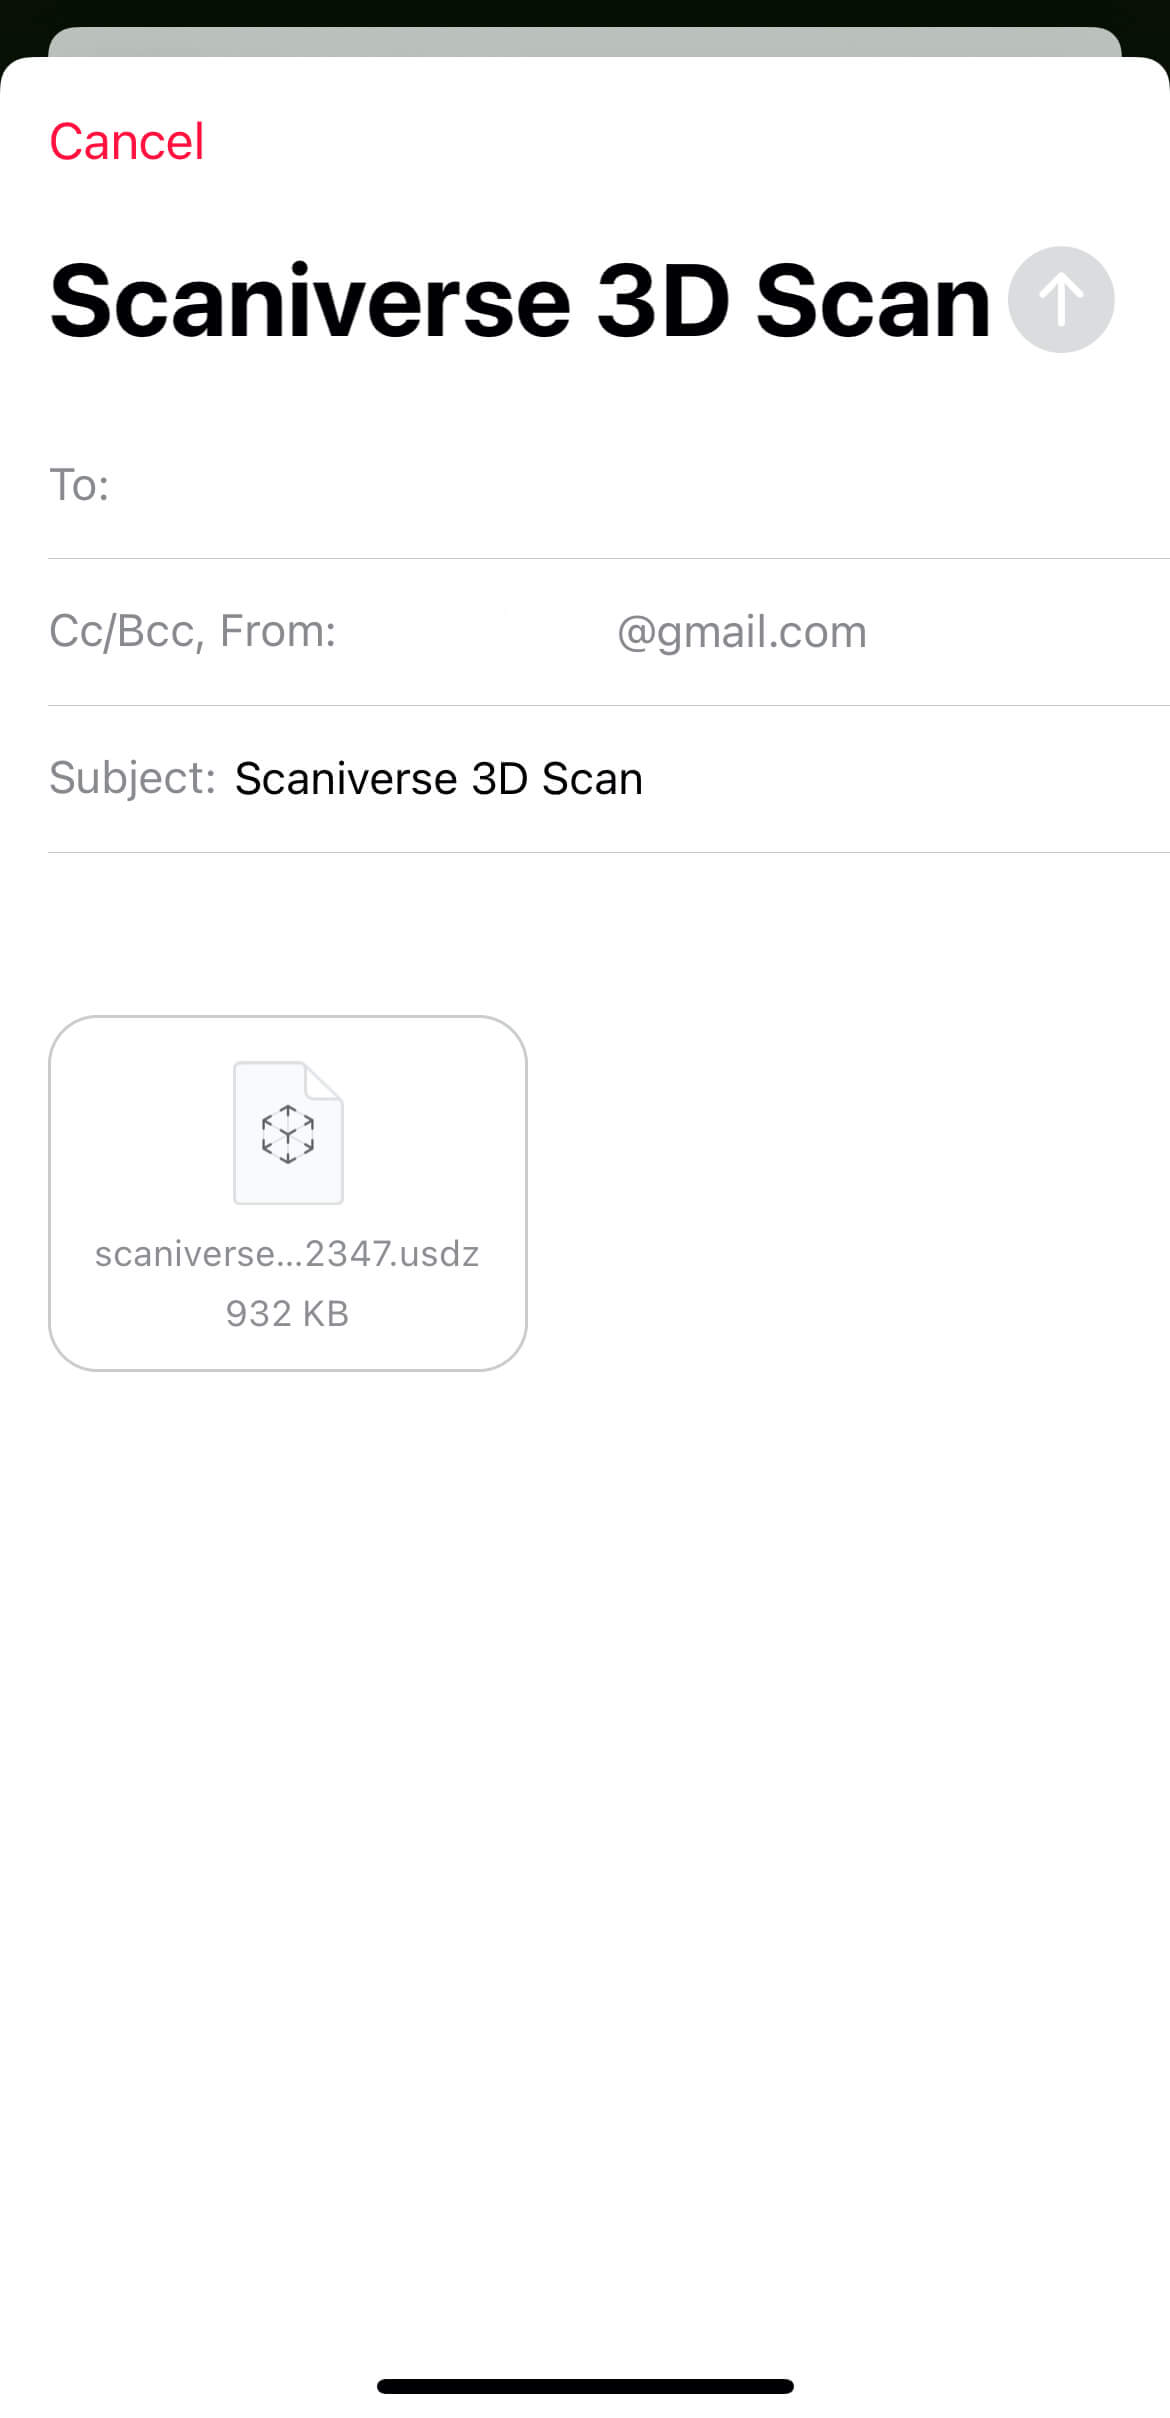
Send by Mail
Post to Sketchfab
Upload your model to Sketchfab, a 3D model platform.
You can use the model in STYLY via this platform.
First, log in to Sketchfab.
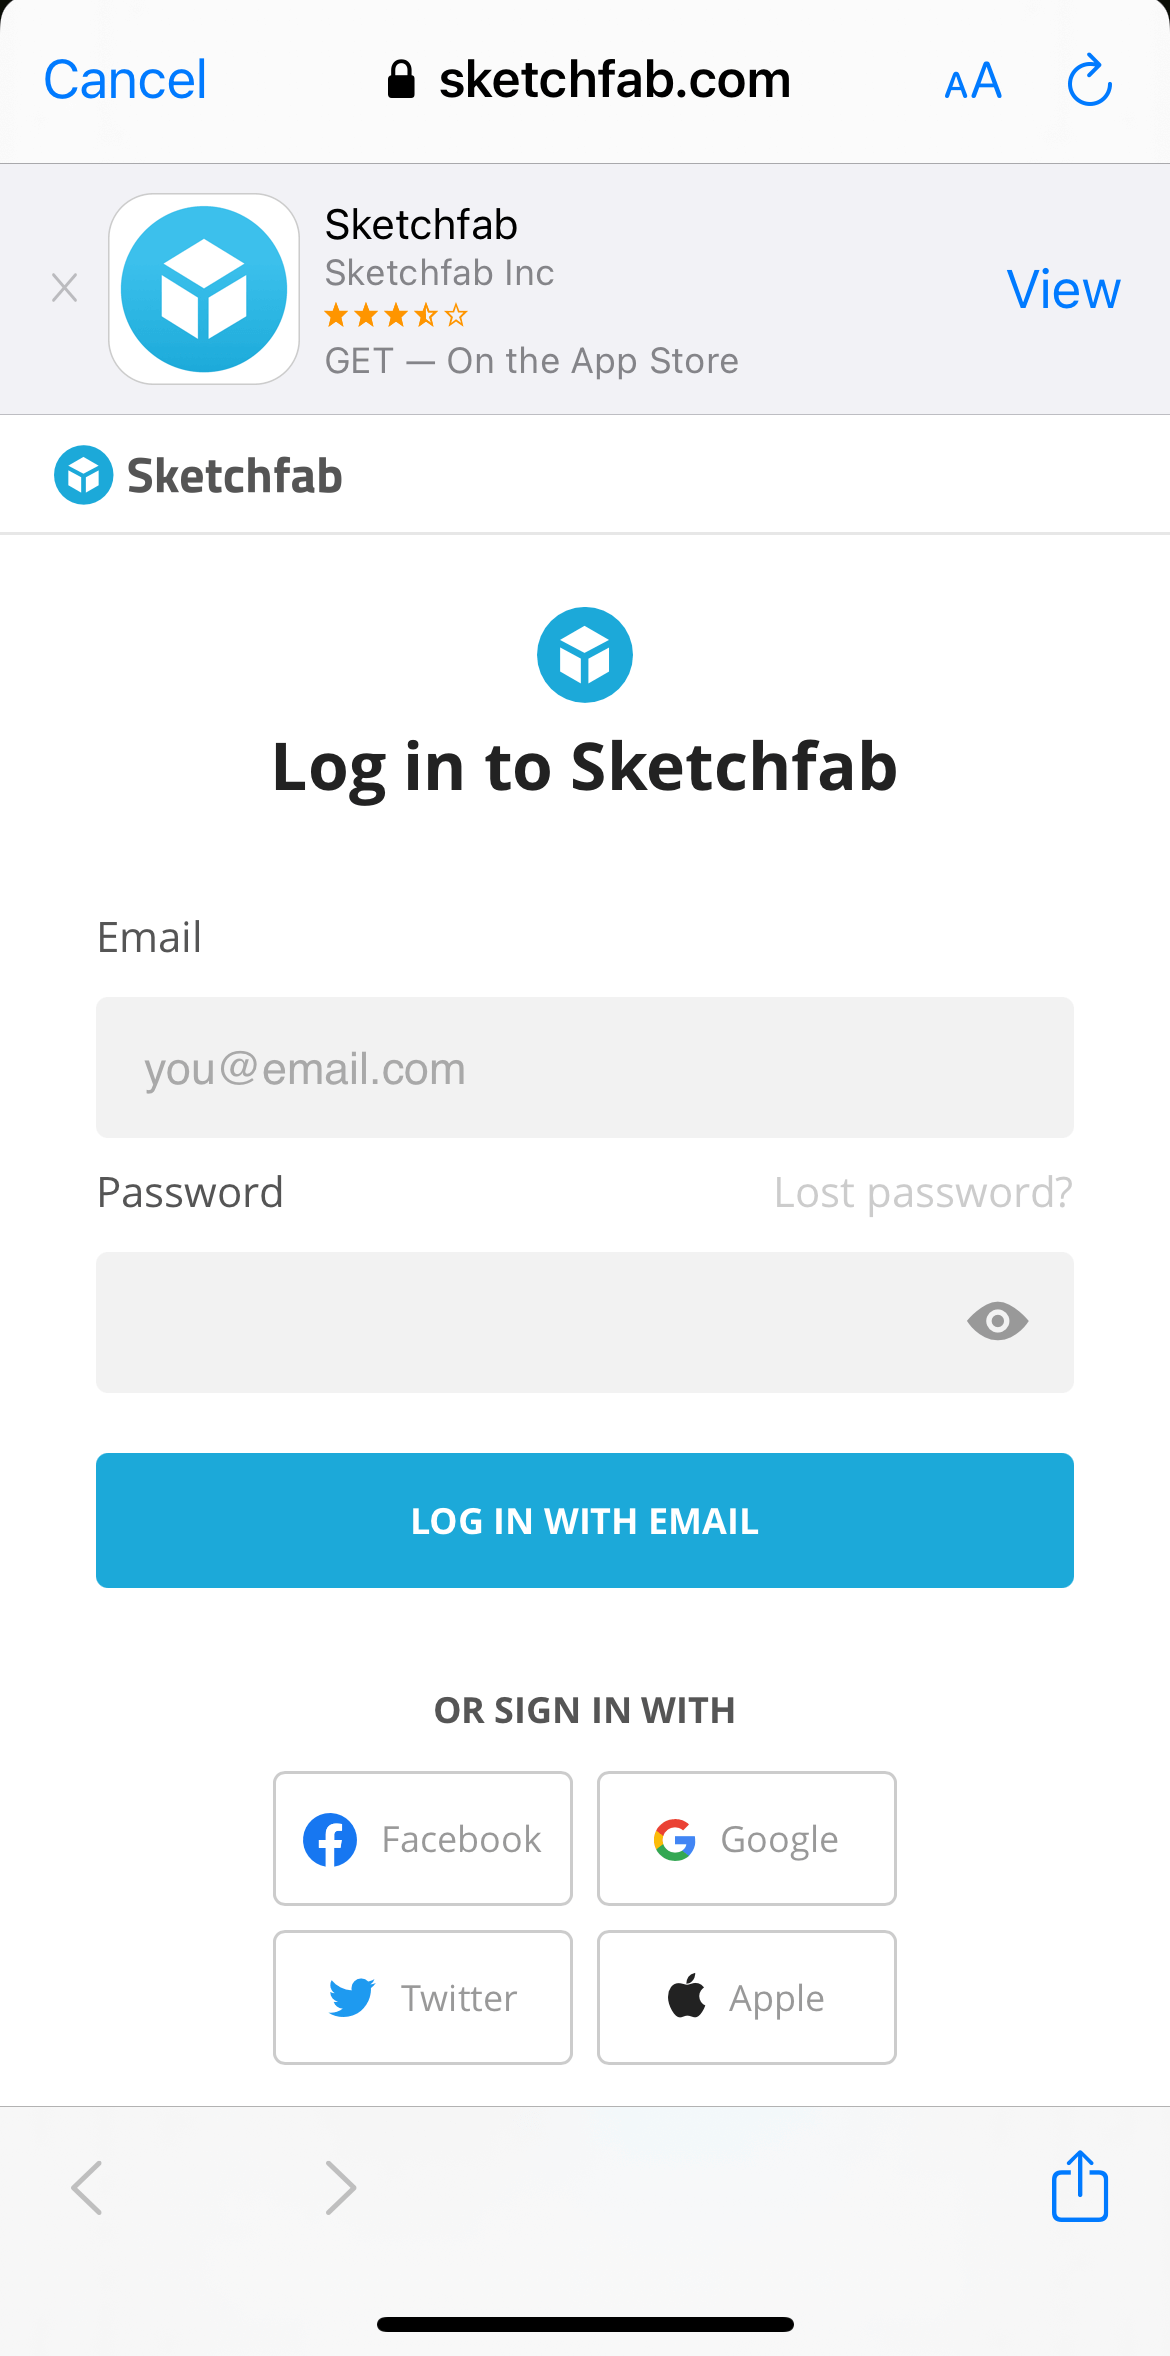
Log in to Sketchfab
Then, allow access and uploads from Scaniverse.
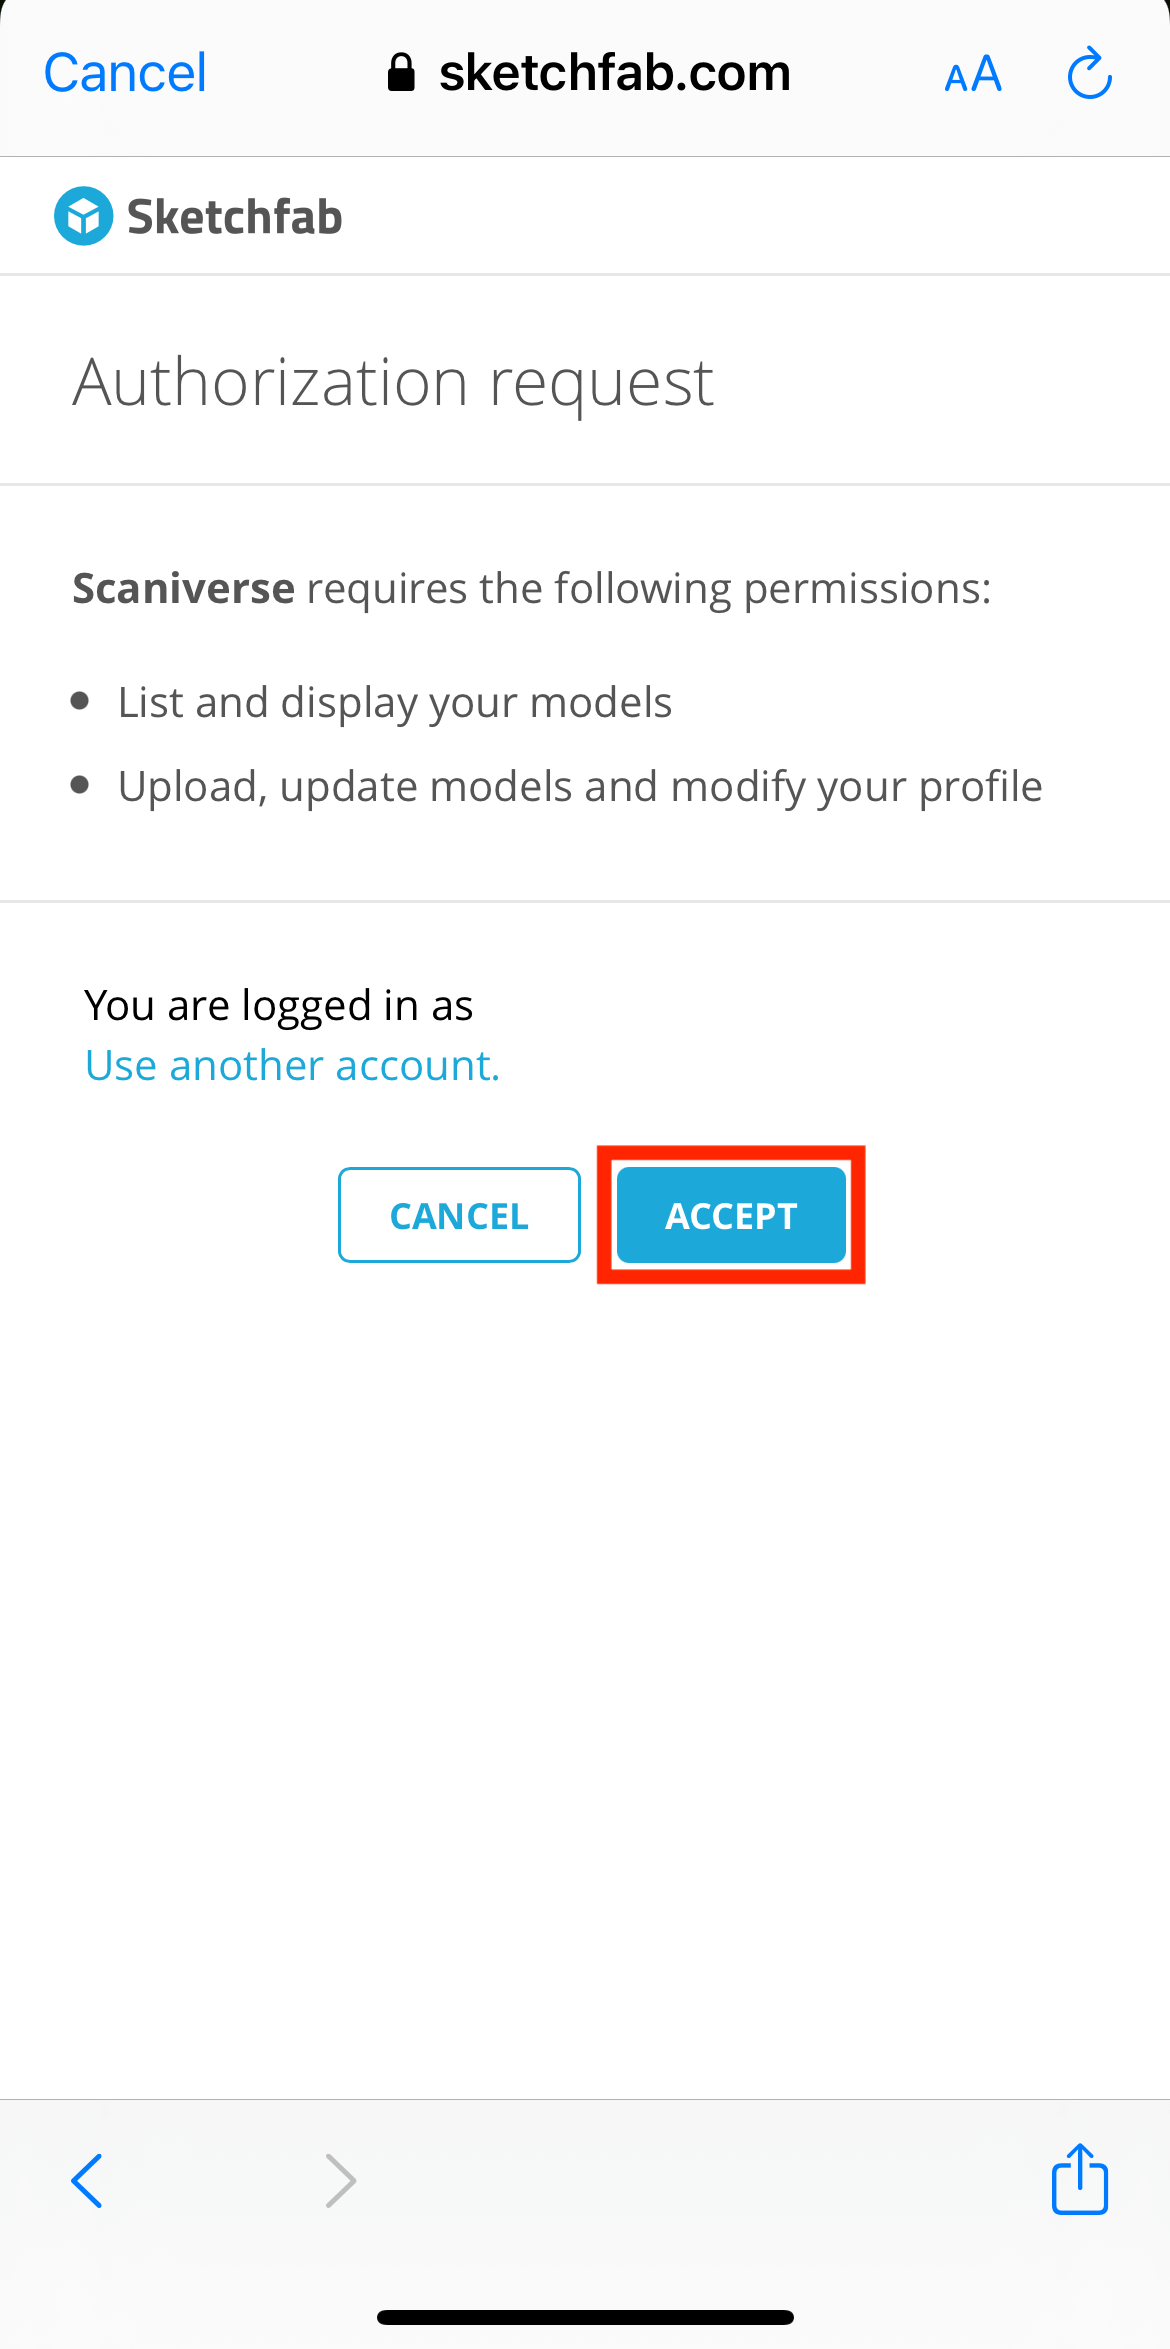
Tap ACCEPT.
Enter a title and other information.
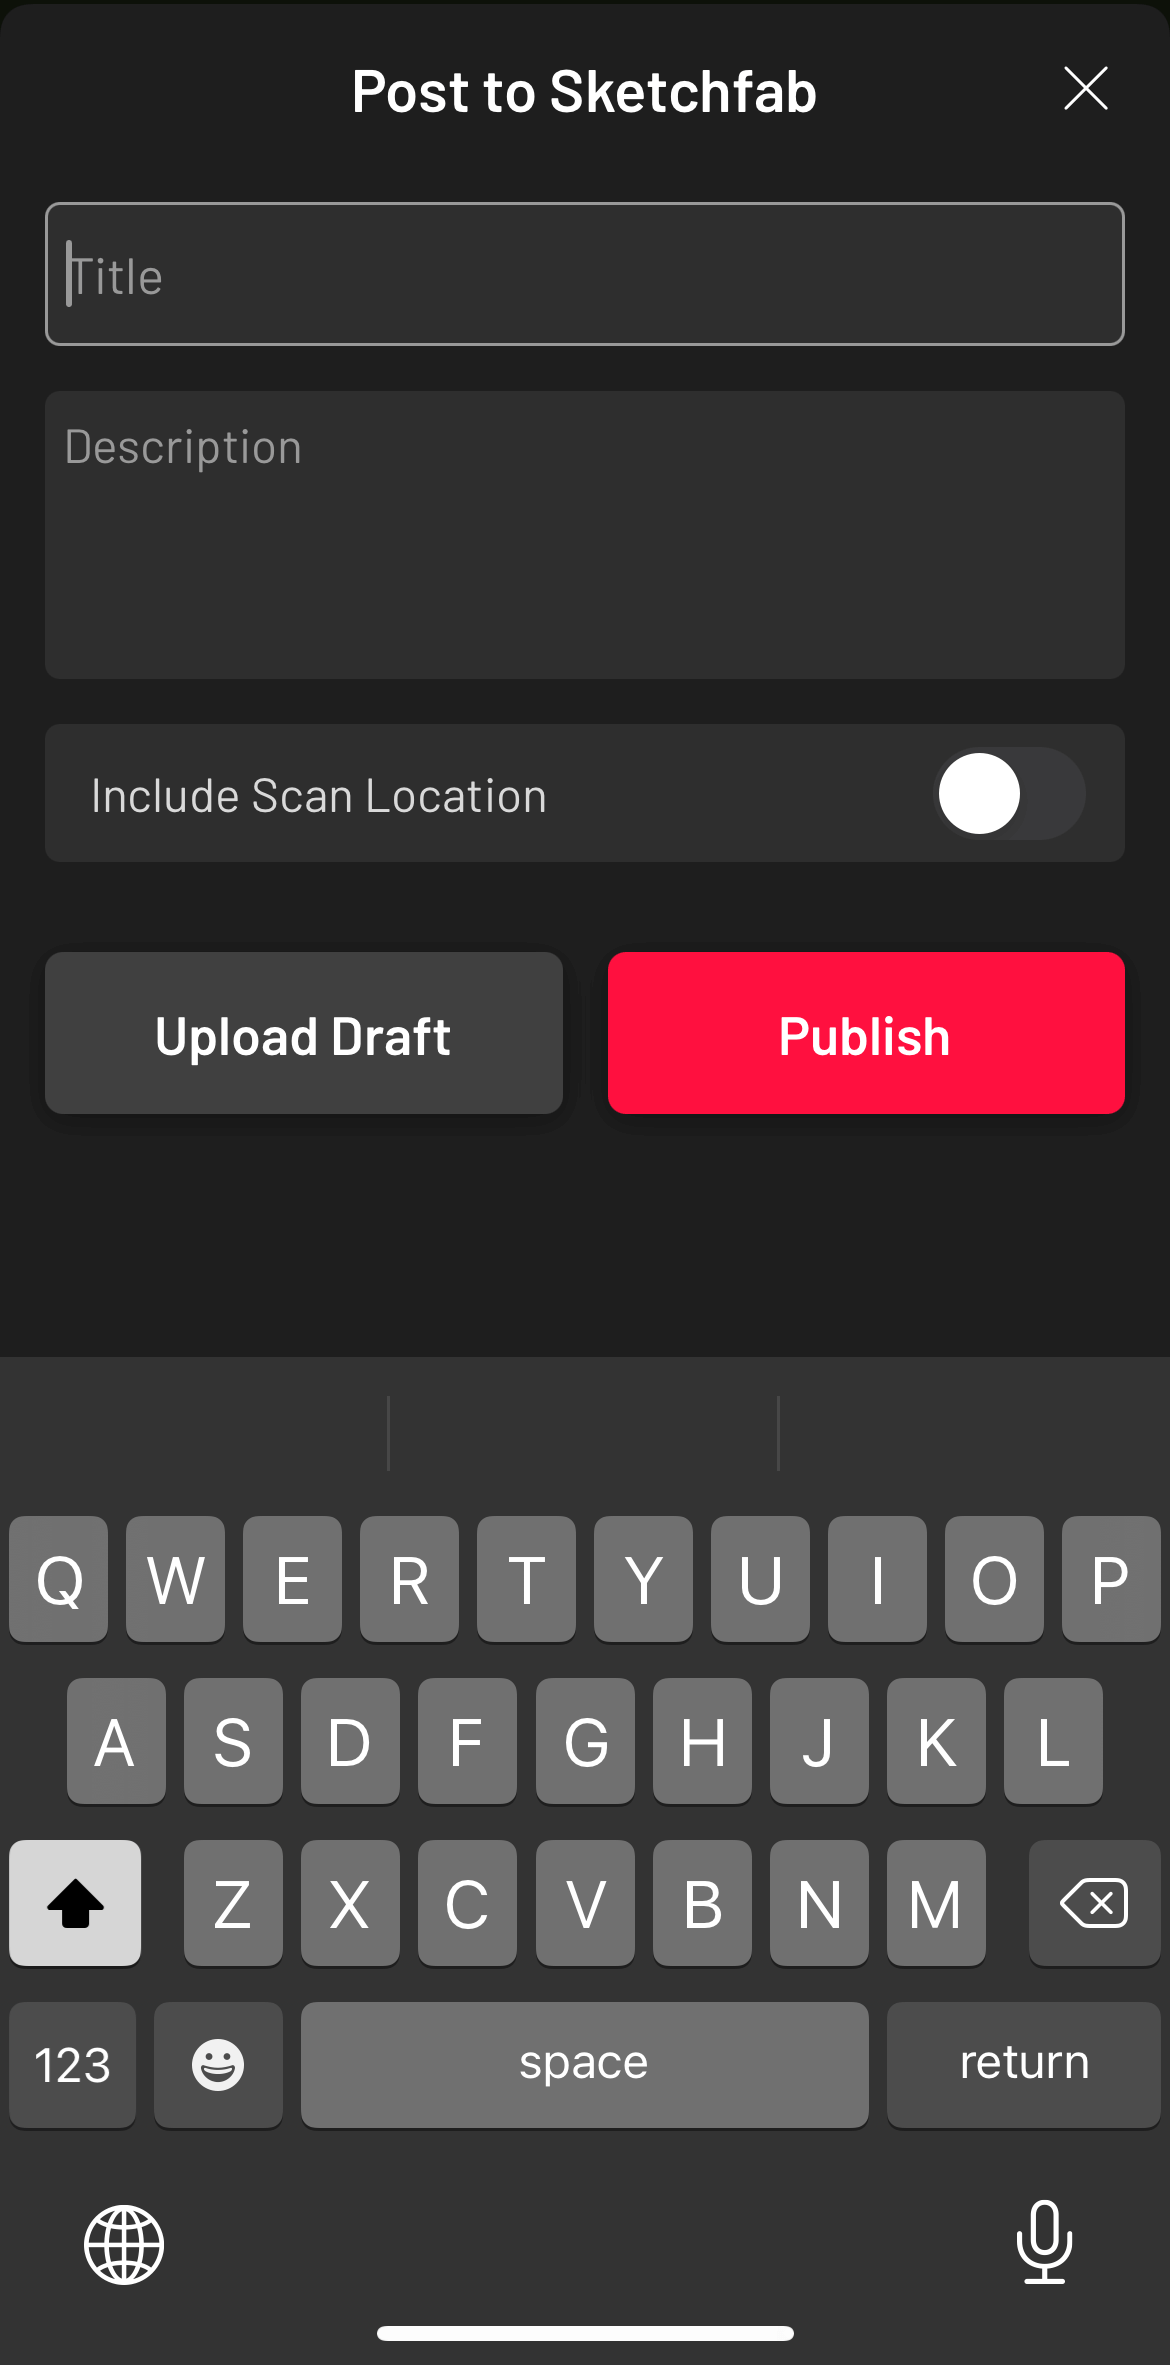
Post to Sketchfab
When you are done, tap Publish to publish.
If you tap Upload Draft, it will be uploaded as a draft.
For more information on how to upload from Sketchfab to STYLY, please refer to this article.
When I used Scaniverse this time, I found the UI to be simple and easy to understand, and it has a full range of functions.
The best part is that it’s free to use, from download to all functions.
I’d like to try it out! I recommend it to anyone who wants to try it out.
You can use STYLY FORUM to solve the problem. STYLY FORUM is a place where people can discuss a service or technical issue on STYLY, or provide bug reports on STYLY.
https://en.forum.styly.cc/support/discussions
Edited by : SASAnishiki
Certified by (QA) : Shota Shawn Yoshizawa
Translated by : Sho Ishiwata