I am Ryu lilea (Ryu Fujiwara@lileaLab) the artist who created Zeniarai Benten VR.
In the previous article, I wrote about ‘Photographing’.
This time I will write about ‘PC system requirement / 3DF Zephyr’, summarizing the Photogrammetry processing.
※I will use the Lite version of 3DF Zephyr (500 photos limit) in this article, but I also use the trial version of 3DF Zephyr Aerial (No limit for the number of photos).
※You can view the VR space from here:
- 1 Themes in This Series
- 2 PC System Requirement
- 3 3DF Zephyr
- 3.1 Pros and Cons of the Video-Based Photogrammetry
- 3.2 ‘Batch Processing’ Versus ‘Division Processing’
- 3.3 The Texture Size and the Resolution
- 3.4 Polygon Reduction
- 3.5 Photo with Shadows
- 3.6 The Photographic Environment Changed
- 3.7 If the ‘Deep’ Presets Still Failed…
- 3.8 Use the ‘Pause’ Function
- 3.9 Export the Model
- 4 The Next Theme
- 5 STYLY Photogrammetry Awards is Now Open!
Themes in This Series
- #1 Photographing
- #2 PC system requirement / 3DF Zephyr (This article)
- #3 Post-processing (Coming soon)
- #4 Converting into VR (Coming soon)
PC System Requirement
In this ‘PC system requirement’, I summarize the recommended specification and tools for ‘wide-area’ Photogrammetry.
PC Specification
CPU/GPU:
GPU performance is important for Photogrammetry to process photos. However, CPU performance equally plays an important part, so the higher the computational performance is, the more efficiently photos are processed. Please be aware that poor PC performance would compromise GPU performance even if you have a high-performance GPU (CPU causes a bottleneck). And, 3DF Zephyr will significantly slow down if the GPU doesn’t support CUDA.
Memory:
Photogrammetry processes an enormous number of photos. So, the more memory size your PC has, the more stable the processing will be. In the case of wide-area Photogrammetry, 32GB may not be enough, so 64GB would be a safe option. Be aware that significant memory shortage could make the PC crash. In particular, launching multiple 3DF Zephyr increases the risk of a crash. Even if multiple instances of 3DF Zephyr appeared working without problems, they would crash when completing the processing.
Hard disk drive:
I recommend using a SSD. In wide-area Photogrammetry, the project file of 3DF Zephyr could be close to 20GB, depending on the size of the target area. So, the processing will progress smoothly with SSD, which has a quicker read/write time. When processing, the data is saved frequently. So, I recommend setting the cache location in the SSD. Insufficient disk space could cause a problem for the Photogrammetry processing, so please make sure you have enough space when you are working on your photogrammetry project.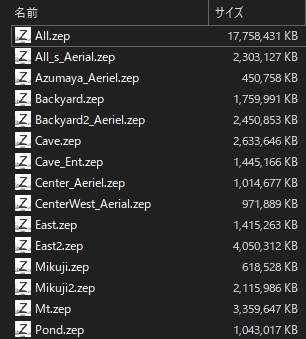
※Some project files I used this time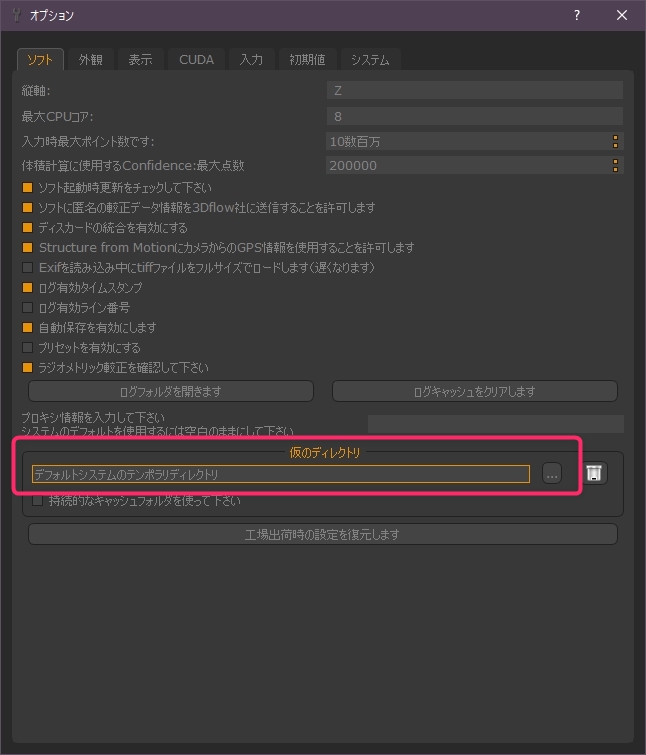
※You can change the cache location here
Recommended Tools
- PC remote access tool
- Adobe Bridge
- Windows10’s standard tag function
PC Remote Access Tool
Photogrammetry carries out most of the tasks autonomously.
In the case of Zeniarai Benten VR, the first process of calculating the positions of the photos (Align) took about 60 hours (with Core i7-7700HQ and GTX1070). In this case, if you are out when the process is finished, your PC cannot move on to the next process until you get home, which is a huge waste of time. So I recommend using a PC remote access tool.
There are some remote access tools available, but most of them require the port opening. So, if your environment doesn’t allow to open the port, you cannot use them. On the other hand, Chrome Remote Desktop doesn’t require the port opening. You can easily install it by adding a Chrome’s extension and it allows you to access your PC from a smartphone.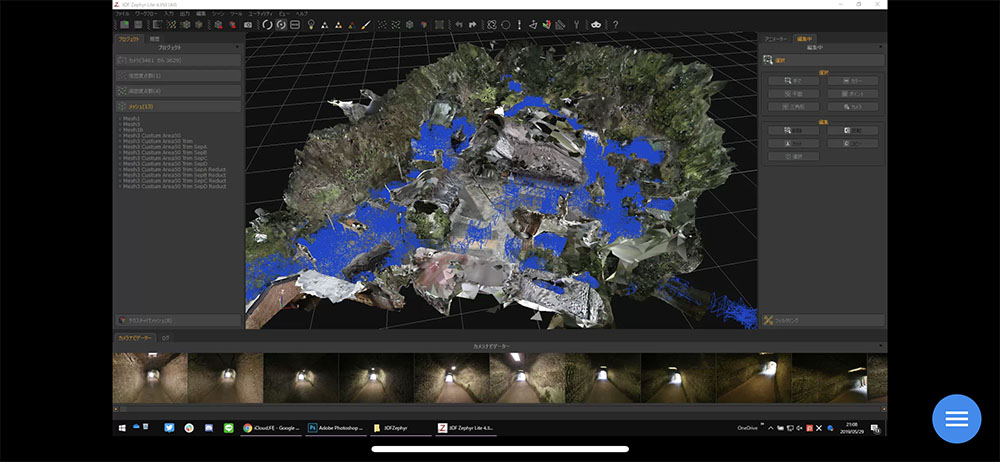 ※ My home PC is being operated from my iPhone
Adobe Bridge
We use Adobe Bridge to manage a lot of photos.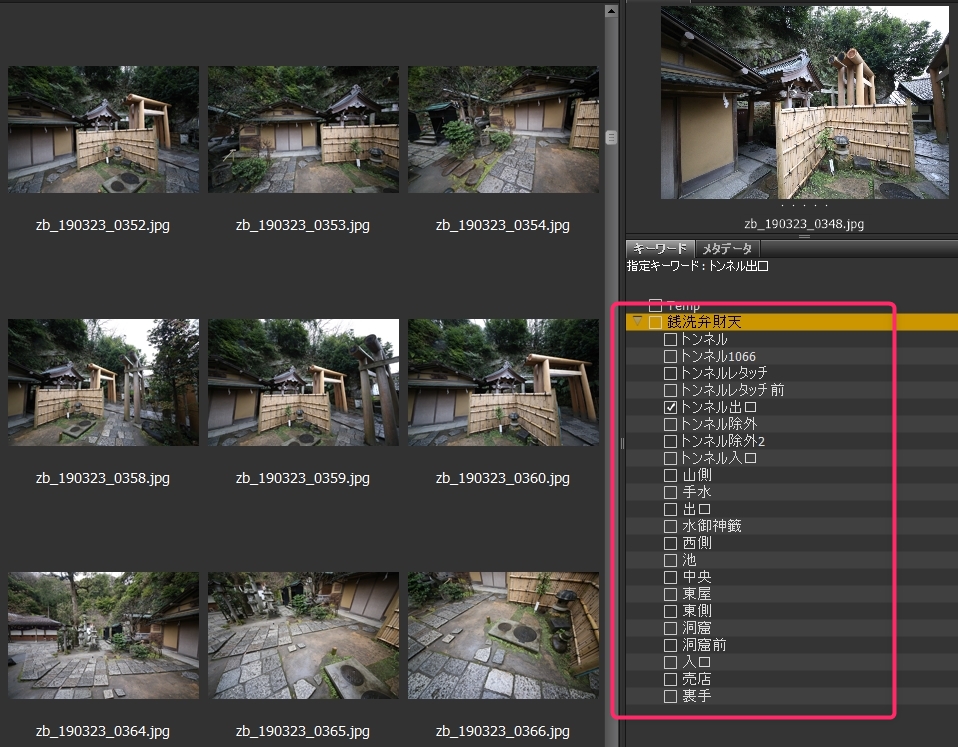
You don’t have to manage the photos closely when you process them at once. But, for ‘division processing’, I recommend adding a keyword to each part to manage them easily.
Windows10’s Standard Tag Function
Even without using Bridge, you can tag files with Windows10’s standard function.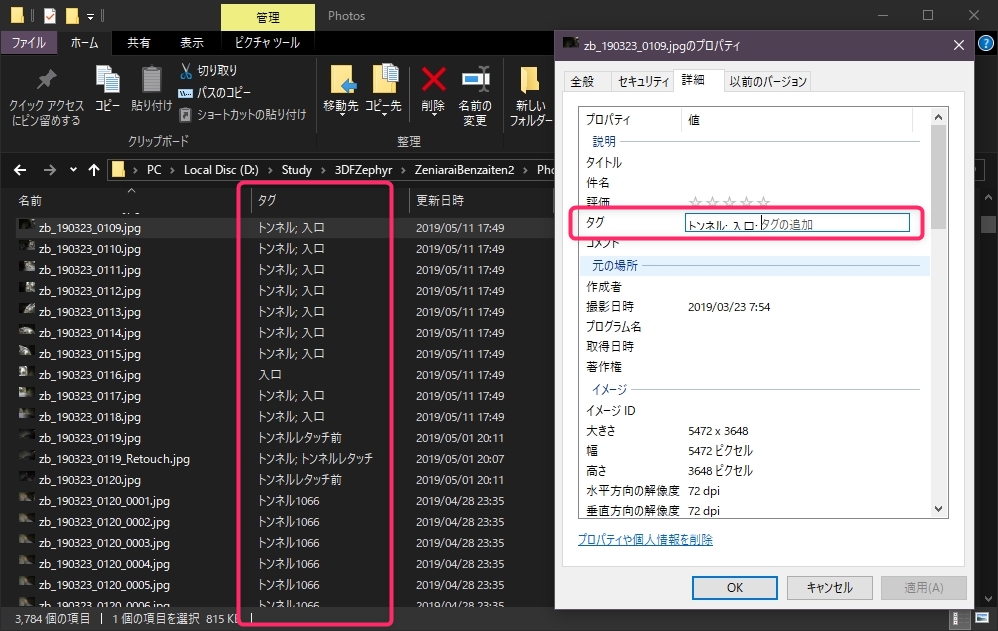
If you don’t have Adobe Bridge, then I recommend using this function.
3DF Zephyr
From this point onward, I summarize how to use 3DF Zephyr.
I will explain the techniques for wide-area Photogrammetry from this point.
The basics of 3DF Zephyr is clearly explained in this article, so please refer to it at any time.
Pros and Cons of the Video-Based Photogrammetry
One of the features of 3DF Zephyr is that you can apply Photogrammetry to the video file.
It’s a handy function but it has some drawbacks.
- It compromises the quality of textures as a video has a lower resolution than a photograph.
- It’s recorded while walking so it could easily have blurred images. Therefore it compromises the quality of textures.
The latter, in particular, lowered the quality significantly. So, keep higher FPS to prevent blurred images and move the camera slowly when scanning.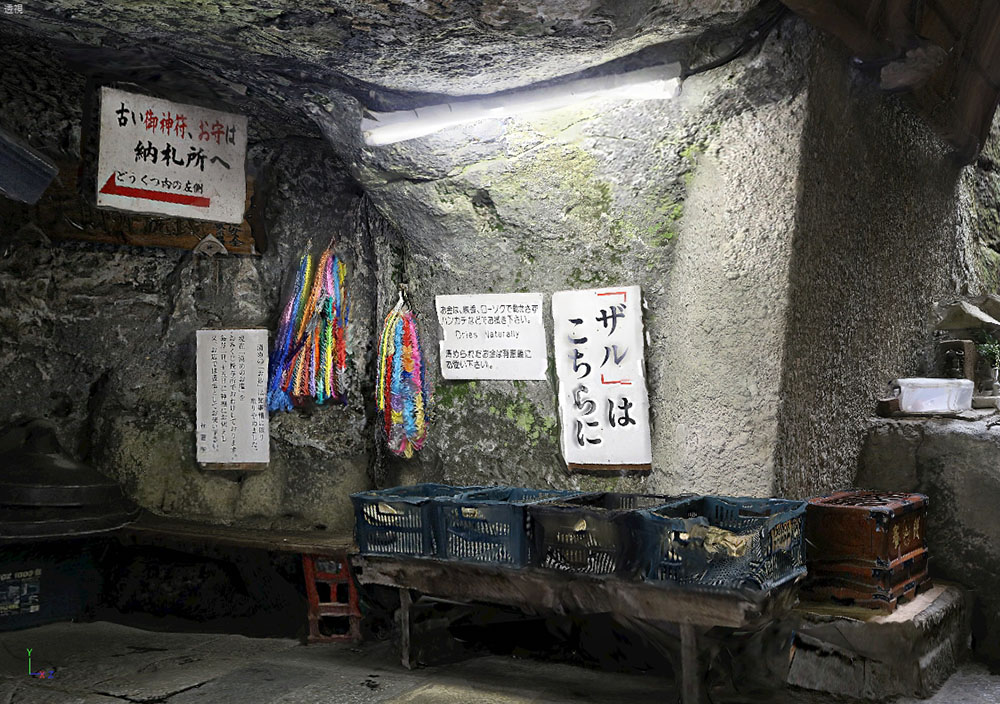
※ The model generated from photos – it’s captured clearly.
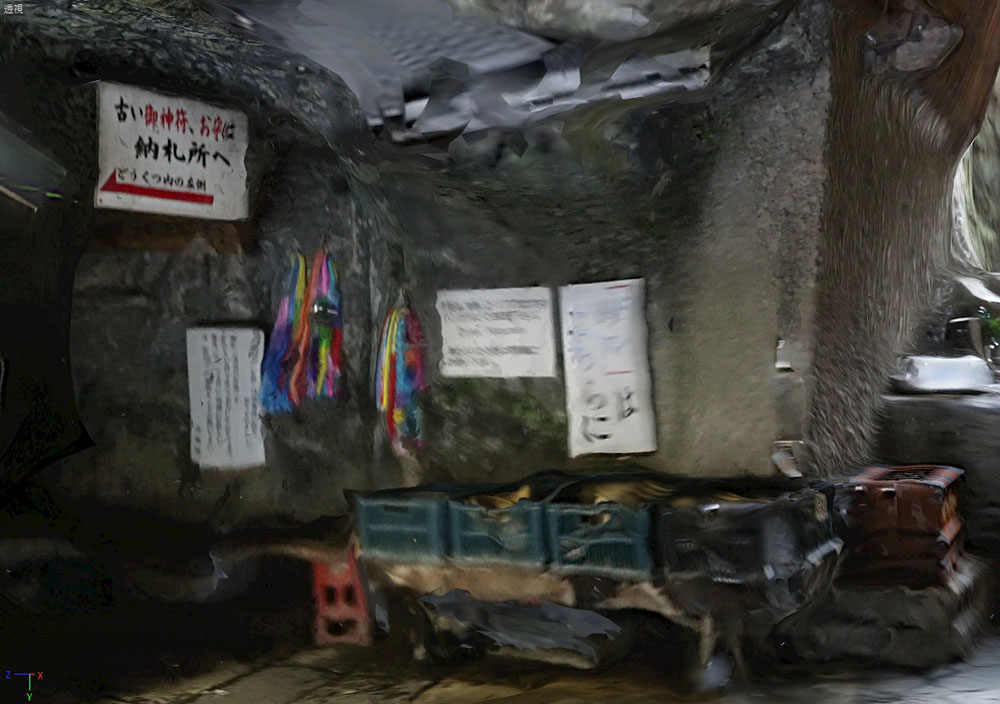
※ The model generated from video – The texture reflects on the blurred images.
| video | photo | |
| Handiness | ◯ | △ |
| Texture Quality | △ | ◯ |
Video-based Photogrammetry, however, has some advantages.
Although 90% of Zeniarai Benten VR was generated from the photos, only the ‘tunnel’ part at the beginning was generated from the video.
The ‘tunnel’ space has some poor conditions for Photogrammetry such as ‘it has similar views one after another’, ‘dark’, so you need to capture a lot of ‘high-density’ images. If you did the same by shooting photos, you would need to repeat the sequence of moving and taking a photo every few centimeters, which would take a huge amount of time. On the other hand, in the case of video-based Photogrammetry, you just need to walk with a video recorder. If you use a wide-angle lens, you don’t need to change the angle of the video recorder, either.
For the scene that requires many high-frequency photos, it’s a good idea to use video-based Photogrammetry.
By the way, the mechanism of this video-based Photogrammetry is ‘extracting still images with the specified FPS and apply Photogrammetry to them’. So, you can get the same result by extracting still images with other video-editing software.
‘Batch Processing’ Versus ‘Division Processing’
In Zeniarai-Benten VR, I tried to generate the model in the following two ways.
- ‘Batch processing’ applied to All 3600 photos
- ‘Division processing’ applied to the 12 parts divided so that each part has 500 photos or less.
※ In order to test the 3600-photo ‘batch processing’, I used the trial version of 3DF Zephyr Aerial.
※ The published VR was generated with ‘division processing’ on 3DF Zephyr Lite which I own.
Each processing method has the following pros and cons.
| Batch | Division | |
| 1.Total processing time | △longer | ◯shorter |
| 2.Model integration task | ◯not required | △required |
| 3.Point cloud density | △low | ◯high |
1. Total Processing Time
The result suggested ‘(required time for division processing) * (the number of division) < (required time with batch processing)’.
So the division processing can complete the model faster than the batch processing.
For the record, to process the 3600-photo ‘batch processing’ it took the times shown below.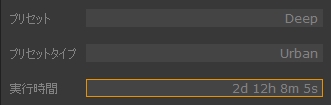
Calculating the positions of photos – 2 days and 12 hours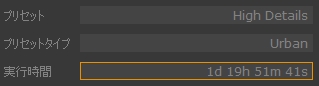
Generating dense point clouds – 1 day and 19 hours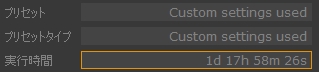
Mesh generation – 1 day and 17 hours
For wide-area photogrammetry, allow a week to process although it depends on the PC specification and the scale of the target.
For your information, it took just two months to create Zeniarai Benten VR, from the first photographing to the publication, although I spent most of the time doing trial and error (because it’s the first attempt…).
2. Model Integration Task
For ‘Division processing’, you need to integrate the models with a DCC tool.
Although I said that ‘Batch processing’ took more overall processing time, it requires less manual tasks because you can leave them to your PC.
3. The Density of Point Clouds
‘Batch processing’ processes the large area at once, so the density of the point clouds will be low when generating ‘dense point clouds’. As a result, the details will be lost in comparison with ‘division processing’.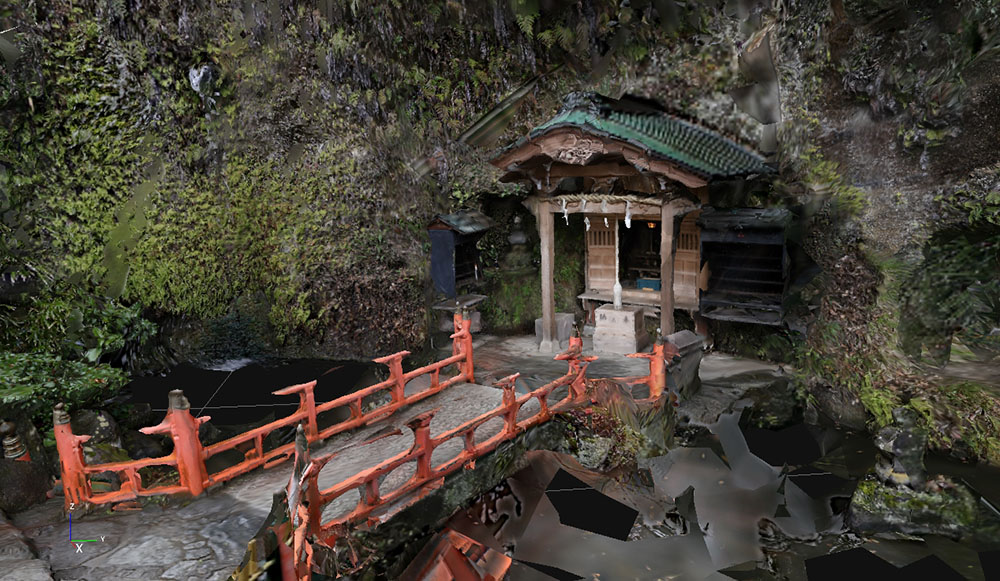
※ The model generated with ‘division processing’
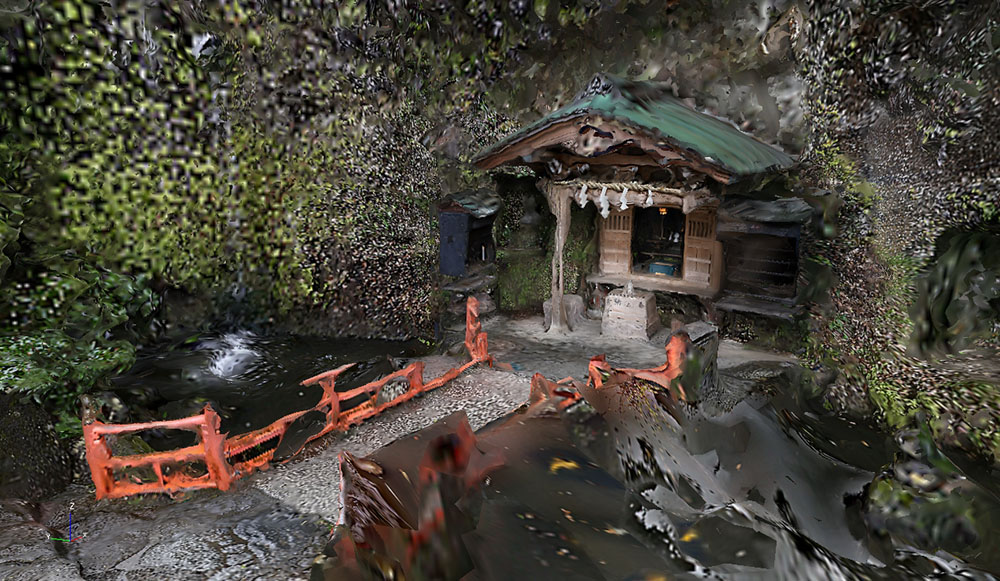
※ The model generated with ‘batch processing’
‘Batch processing’ lost the details significantly as it couldn’t generate the point clouds sufficiently.
You can improve the accuracy of the model by increasing the number of point clouds. However, even if you selected ‘high resolution’ from the presets, it would still be insufficient. The custom option allows you to increase the maximum number of the point clouds, but it takes a huge amount of time to process them (I actually terminated the test as it wouldn’t finish before the trial period expires).
After All, Which One Is Better?
- The scale of the target site is so small that sufficient point clouds are generated with the ‘High resolution’ option for the dense point-cloud generation > Use ‘Batch processing’.
- It’s too large to generate the point clouds sufficiently > Use ‘Division processing’.
※ If you didn’t have expensive ‘Pro’ or ‘Aerial’ version, there wouldn’t be any other option but ‘Batch processing’ anyway…
The ‘Batch Processing’ Version of Zeniarai-Benten VR
For the published version of ‘Zeniarai Benten VR’, I used ‘division processing’. But, I also uploaded the one generated with ‘batch processing’ here. Please refer to it if you want to compare them for yourself.
The Texture Size and the Resolution
If you aim at converting the model into VR, please be aware that the texture size is limited to 8k in Unity. It will be resized to 8k even if you make a larger size with 3DF Zephyr.
In the case of ‘Batch processing’, by default, only one 8k texture is generated for the whole site. So, it will be a low-quality blurred world.
To avoid it, divide the mesh just after it is generated. It attaches an 8k texture to each mesh divided, so a higher resolution can be maintained. The more you divide the mesh, the higher the resolution will be. The coordinates of divided meshes are unchanged, so it doesn’t take time to put them together. 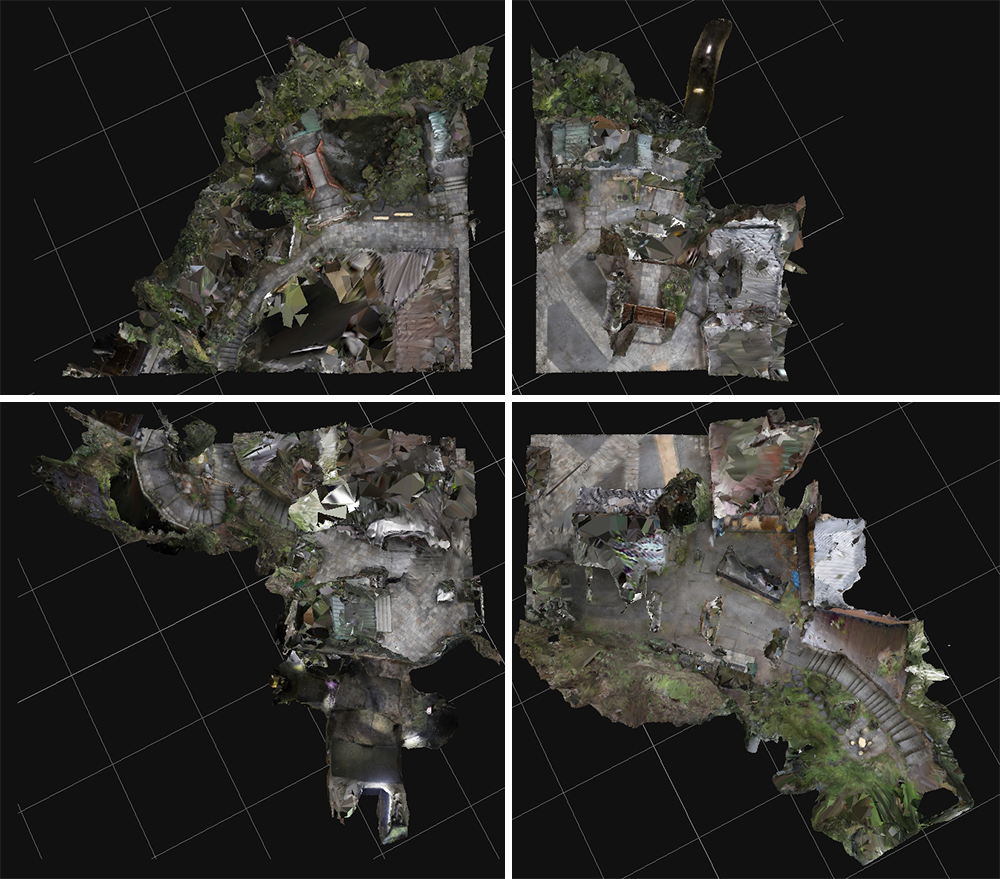
※ Example of dividing the mesh into 4 domains and converting them into the textured mesh.
Polygon Reduction
In order to convert into VR, you need to reduce the number of polygons as much as possible.
There are two ways to do it, 1. use 3DF Zephyr or 2. a DCC tool. But, if you exported the high-polygon model and reduced it drastically only use a DCC tool, otherwise it could destroy the UVs.
I recommend reducing polygons first, in 3DF Zephyr.
※ Right-click the mesh and select ‘filter > decimation’
Comparison between these two workflows:
△ From Zephyr, export the high-polygon textured model as it is > Reduce the polygons drastically with a DCC tool (the UVs will be destroyed).
◯ Reduce the polygons with Zephyr at first > Create the texture > Export the textured model > Fine adjustment of the polygon reduction with a DCC tool
By the way, in the case of reducing the polygon with a DCC tool, you can send the model with the UV mapping back to 3DF Zephyr and attach the texture again.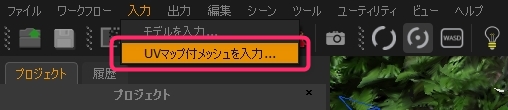
※ Select ‘Import > mesh with custom UVs’ in the menu
Photo with Shadows
If there is a dark area, the process could take a long time or stop when calculating the position of the photo. However, you can solve it by brightening the photo.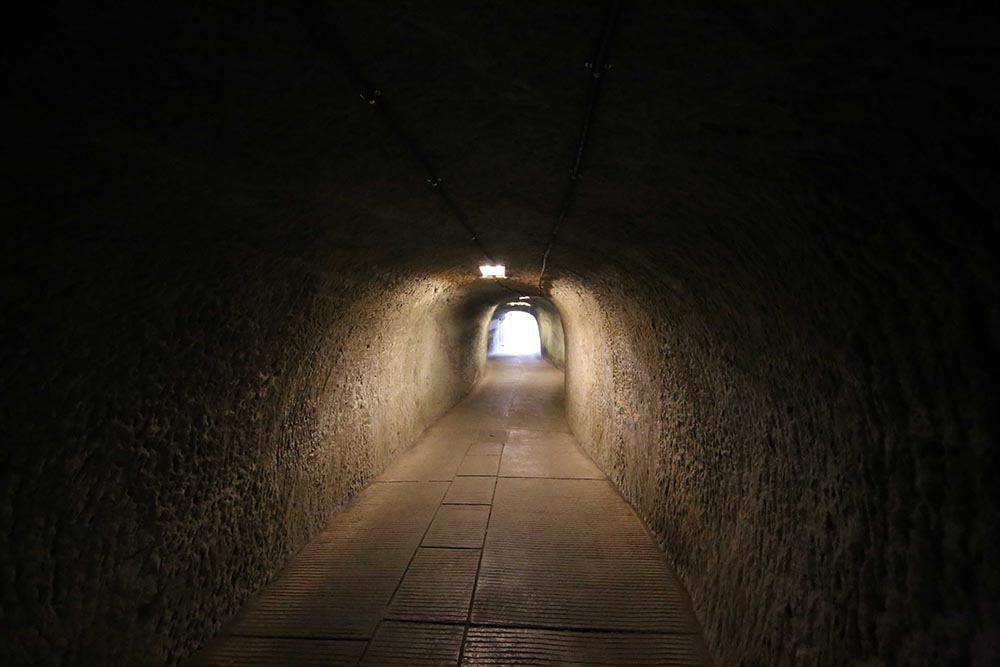
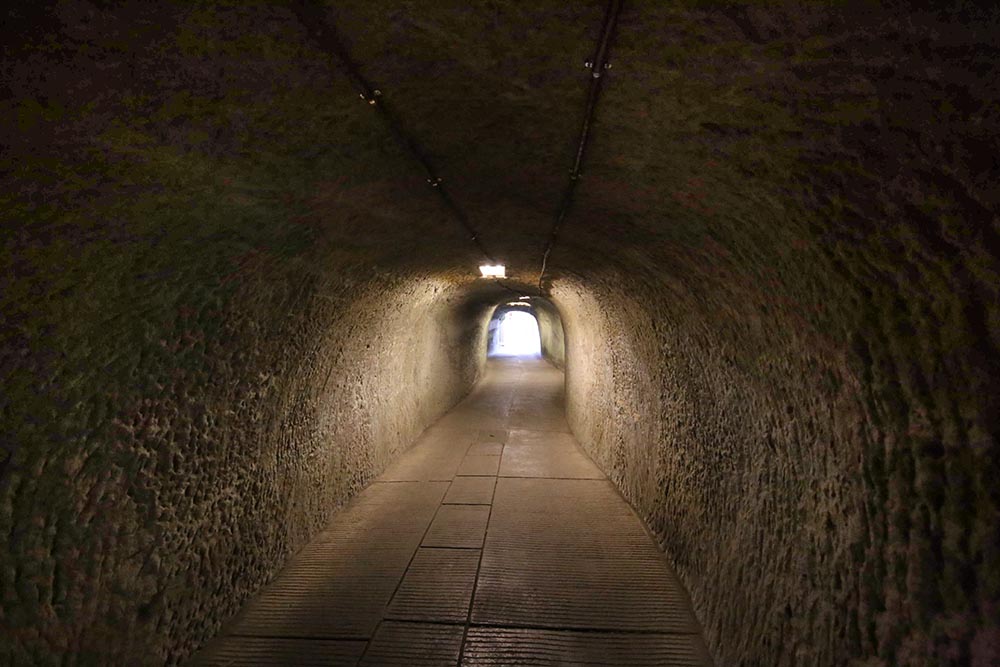
※The image before/after retouching the photo
When retouching the photo, don’t brighten it too much, or it becomes unnatural. So, I recommend brightening it so that you can just recognize the shape features. In the example above, I adjusted the image so that the texture and cables on the ceiling are visible.
The Photographic Environment Changed
Although the weather may change when taking photos, the software can still process them.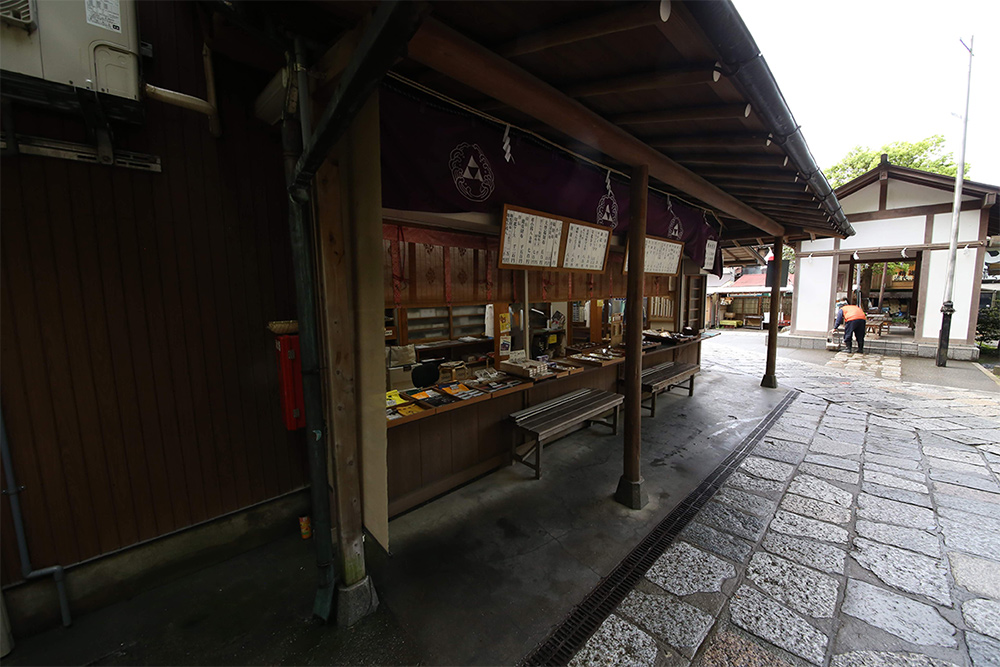
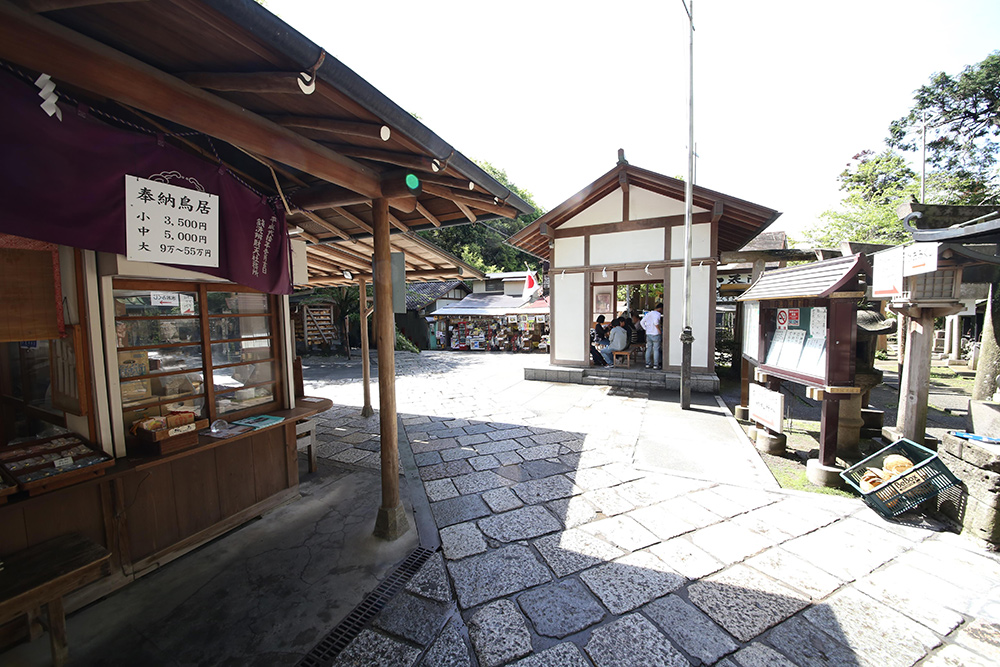
※The photos in cloudy weather and in fine weather
The following image was generated from the above photos taken in cloudy weather and in fine weather.
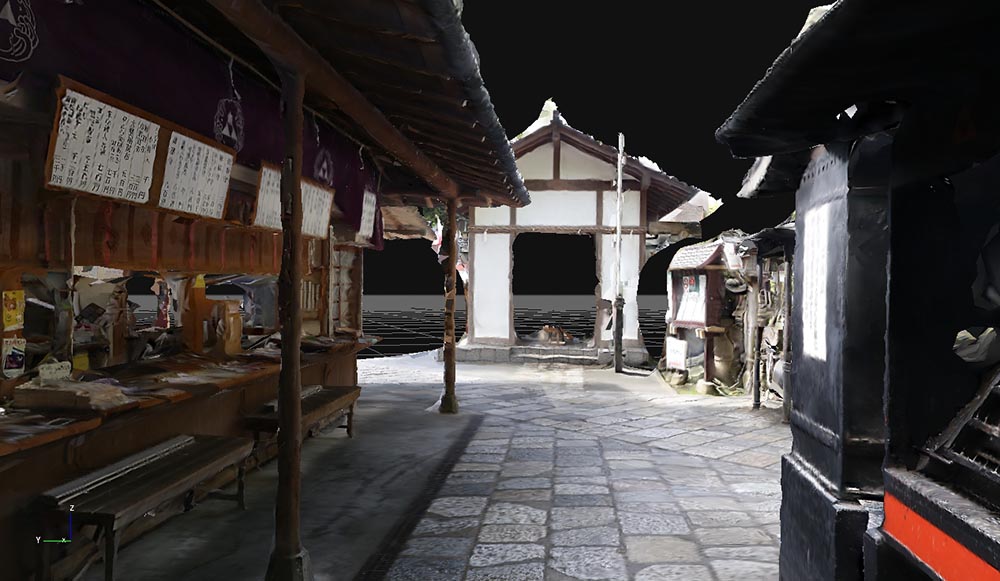
※ The generated model
Although it’s not perfectly natural, the model generation itself looks successful.
Once the model is generated, you can correct it by editing with a DCC tool or adjusting the texture. So, do not stop shooting photos even if the weather has changed.
※ If the lighting environment recovered later, retake the photos.
If the environment changed significantly, the photo-position calculation would fail. In that case, you can solve it by selecting the ‘deep’ presets. 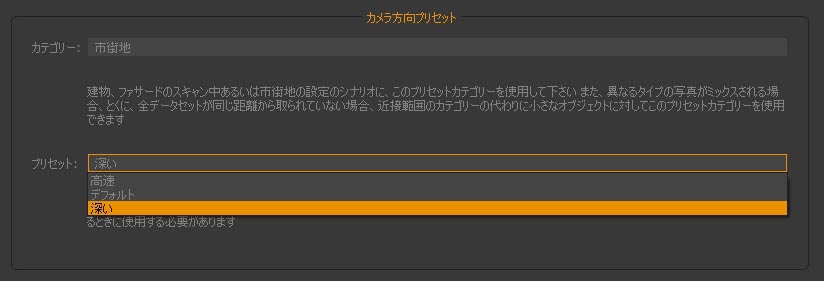
※ Use the ‘deep’ presets
If the ‘Deep’ Presets Still Failed…
If the first process of calculating the photo positions still failed with the ‘deep’ presets, switch to advanced mode and change the settings as shown below to improve the accuracy.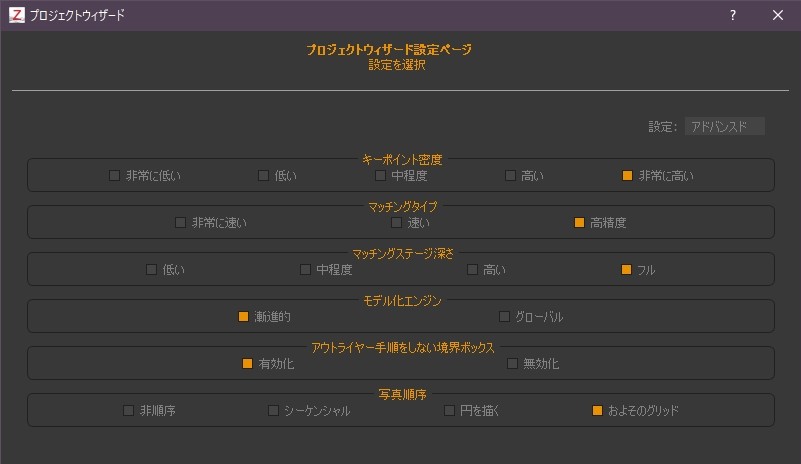
Compared to the ‘deep’ preset, this takes twice the amount of time or more. So, I recommend using it only when you have sufficient time. And, as it increases the load on your PC, refrain from doing another computational task simultaneously.
Use the ‘Pause’ Function
You may think you cannot do other tasks when your PC processes the photos for tens of hours. However, you can pause the task in 3DF Zephyr. Please make good use of the ‘pause’ function as it’s risky to do other tasks with your PC loading being high.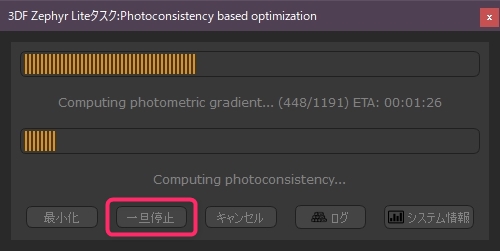
Export the Model
Finally, export the model in the file format you need (fbx, obj etc.) and check the shape with a DCC tool.
When checking, use the view that hides backfaces in the DCC tool, allowing you to check the shape in the same condition as seen with the game engine such as Unity.
The Next Theme
Thank you for reading through this tutorial.
If you have any questions, please don’t hesitate to contact me via Twitter (Reply or Direct Message).
In the next article, I will write about ‘Post-processing’, summarizing the techniques for the optimization and integration of the exported model.
※For your information, the current published VR space is not complete, so I am updating it. I am improving the accuracy of the model and adding some contents unique to VR. Please view it when published.
STYLY Photogrammetry Awards is Now Open!
‘STYLY Photogrammerty Award’ is now open. I will be participating as a judge!
The prizes for this Photogrammetry Awards are:
- Oculus Quest
- Looking Glass
- chloma parka
You are more than welcome to submit an entry for these awards.
Written by Ryu Fujiwara (Ryu lilea)