Introduction
Hi, do you guys like the listening big four? I sort of like them.
※The listening big four refers to the four characters that appeared in the 2019 national center test English test. The unique characters became famous soon after, and many fanfictions were created.
They may soon go out of fashion (since time flows so fast nowadays), but I hope this article makes it in time. If someone starts 3D modelling from this article, I am very happy.
There were numerous other people who created 3D models of the big four, and I outputted them in AR and tweeted photos. I secretly aimed to make a buzz, but it was harder than I thought. FAILURE ?
例の人参、WebARで出せるようにしてもらった pic.twitter.com/zYJsfdXvZi
— めーぷる (@MapleSyrupCS6) January 22, 2019
I will explain how to create this carrot character today! I imagine there are many ways to do this, but I am introducing my method for this article!
For Blender beginners
I am writing this article for the Blender for beginners series, so I will explain operations in details such as shortcut keys, but please note that this article is wrote with people that already know the basics of Blender in mind.
If you’re a complete newbie, the article below explains from how to install the software, so please read it first.
If you are a more “Feel, don’t think” sort of person, I will give you a secret tip. You need to “Right-click”!
Creating
Preparing the background image
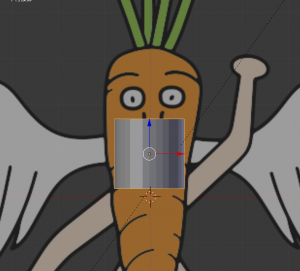
Run Blender, select the Cube in the center, click X → Delete to delete the Cube.
Go to the menu on the right (as in the image below), and click on the background image checkbox.
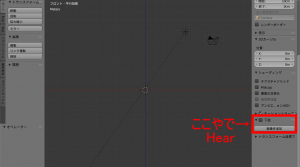
Background image checkbox
Once you click on the checkbox, select “Add image > Open” and import the carrot character picture.
You can use any picture for this. There are many pictures on the internet, but use one that looks straight forward at the camera.
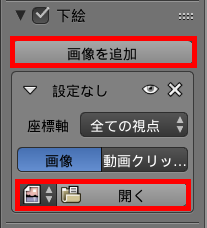
Adding an image
After you add the image, change the background image coordinate axis to “front”, and press “5”, then “1” on your keyboard, and the carrot picture will appear on your screen.
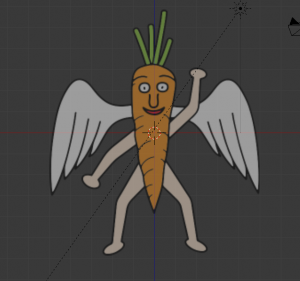
Background image
The settings for the image is as below.
①Set which view you want the image to be visible from. I am using a front looking picture for this tutorial, so I selected “Front”.
②The transparency of the image. You can change this when you need to.
③Set if whether you want to place the image in front of the object, or in the back. For this tutorial, select back.
④Set the position, direction, and angle of the object.
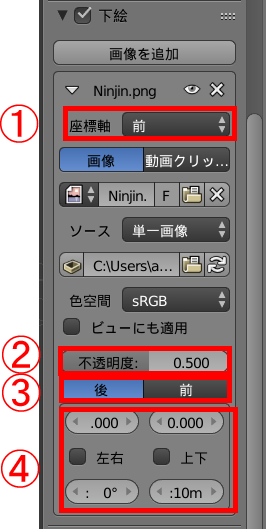
Background image settings
The character’s position might be out of place, according to the image you are using. If the character is not in the center in Blender, change the image position using the ④ settings.
If you can’t spot a icon like a white and red swimming ring in the center (the 3D cursor), press the Shift key and the S key → Cursor → Origin and move it to the center.
Now, we’re ready for the modelling part! Let’s create the body!
Creating the body
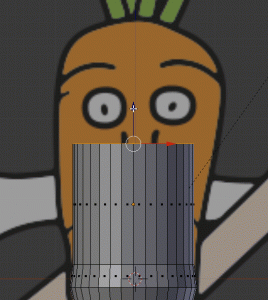
Let’s begin with the orange part of the body. Carrots have a cylinder-like shape, so I think that beginning with creating a cylinder is the simplest way. Go the the left menu, select the create tab, and click “Cylinder”.
By the way, you can make the left menu invisible!Just press the T key when it is in the way.
Select the created cylinder, and press the S key to change the scale, drag the arrow to move it to an appropriate position.
Adjusting the cylinder’s position
The hollow part is probably a good place to put it.
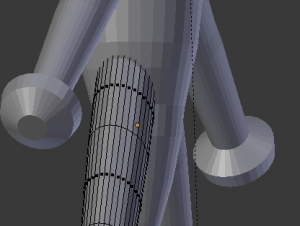
Press the Tab key to enter the edit mode, click the face select mode, and select the bottom face of the cylinder.
You probably can’t select it without moving the camera, since you are in the “Front” view. Move the camera a bit, select the face and press “1” to return to the Front view.
Selecting the bottom face
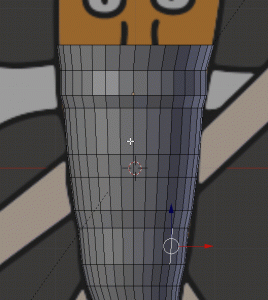
Next, press the E key, and extrude the bottom face. Do it slowly, and extrude it along the character’s outline on the image by changing the size with the S key, and moving it along the X-axis, or the Z-axis. Try to match your faces with the uneven outlines of the character.
Creating faces along the uneven character outline
Repeat this process, and your final result should be like the image below. The front tip is somewhat cylinder-like, so let’s sharpen it up.
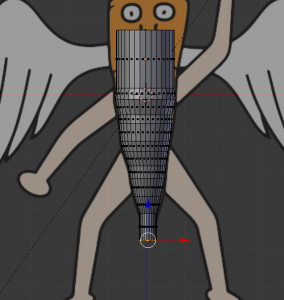
Body image
Change from face select mode to vertex select mode. All the vertices on the selected face will become selected.
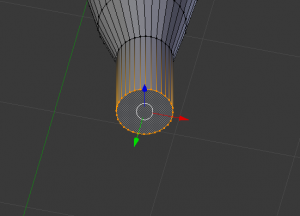
Vertex select
Then, press Alt + M key → click at center. The selected vertices will become combined.
This operation is called merging. One for all, all for one.
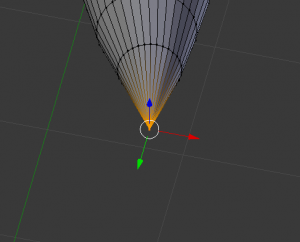
The vertices combined!
It looks like this from the front. Looks just like a carrot, right?
Sharp carrot
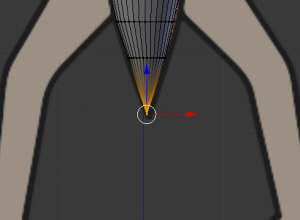
Let’s create the head part by repeating the same process for the top face.
Creating the head
When you want to adjust somewhere in between, change to edge select mode, select a edge as you press the Alt key, and the edges surrounding it will be selected, so change the size or adjust the position.

Selecting an edge as you press the Alt key
When you want to add a ring, move the cursor to where you want to add it, press Ctrl + R and move the cursor a bit, then a pink ring will appear. If you need just one, left-click once, or press the Enter key to select the position, and do so one more time. If you need more than one, press the corresponding number key for the number of rings you want.
Adding a ring
Did all go well with your head creation?
If you’re done, press the Tab key and return to Object mode.
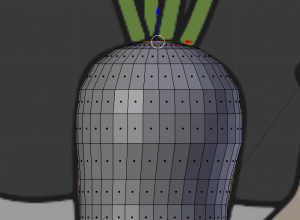
Head image
It’s sort of jittery, but we will improve it in after steps, so it is ok for now.
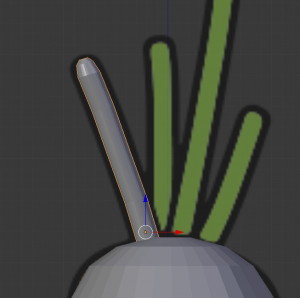
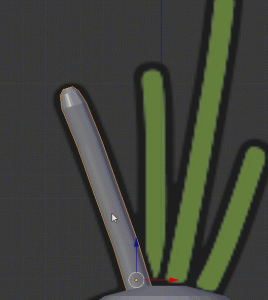
Next, we will create the carrot leaves. We can use cylinders again!
Create another cylinder from the left menu.※When you create another object, you can create a new object by using object mode. If you do the same operation in edit mode, the object will get created as part of the selected object, so it will be very hard to use.
Change the scale and position of the new cylinder, and rotate it slightly in the Y-axis direction (Press the R key → Y key to rotate it) to match the character image. Then, perform the same processes as the body parts. Select the top face, and extrude it.
The leaves are much more straighter than the body, so it is easier, right?

Matching the character image
We created a leaf! It looks like we can just copy the leaf we made now for each other leaf, and just adjust the size.
Leaf image
Select the leaf we just created, and press Shift + D → X in Object mode. We can move the copied leaf in the X-axis direction. Copying is Shift + D, and by following that with X, you can move the object in the X-axis direction.
Move this to somewhere around the next leaf, press R → Y and move it in the Y-axis direction, S → Z for the X-axis direction, and change the scale to match the image.
Copying a leaf
After you create 4 leaves, the leaf second left grows from the back, so move the 5th leaf in the Y-axis direction.
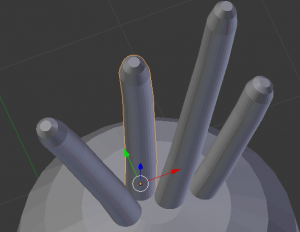
Moving it slightly backwards
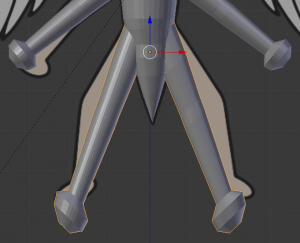
It looks like this from the front view!

Front view
Creating the arms and legs
The body and head is done, so let’s create arms and legs next.
We can try to match the character image for arms and legs too, but if you want to add animations to the created model, you should use the T-pose or the A-pose. I found the T-pose unsuited for this model since the body is too slim (making the leg joints hard to model), so I used the A-pose.
We can use cylinders again for legs and arms.
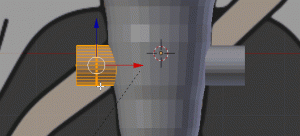
Change the mode to Object mode, create a new cylinder from the left menu, press R → Y → 90 to tilt it 90 degrees, and move it to the right shoulder joint.
Adjusting to the right shoulder joint
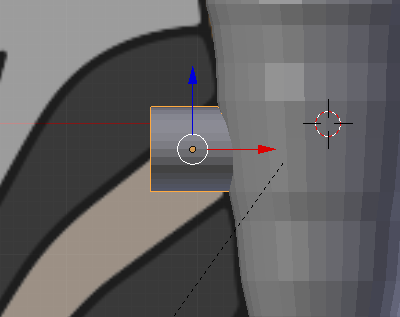
We want to create arms and legs symmetrically, so let’s create a mirror copy.
Press Shift + S → Cursor → Origin, and move the 3D cursor back to the center.
Next, go to the left menu tool tab, click “Set origin”, and choose Origin to 3D Cursor.
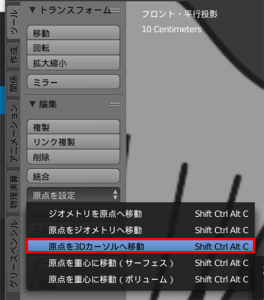
Origin to 3D Cursor
The origin moves from the center of the cylinder, to the 3D cursor position.
Click the Modifier tab at the right menu, and add a mirror.

Adding a mirror
Click on the Z checkbox in the Mirror menu.
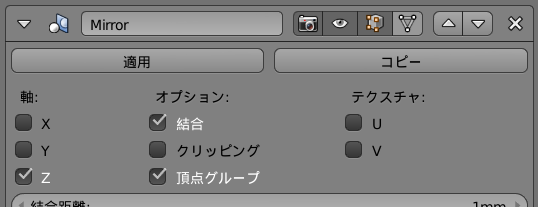
Uncheck X, and check Z
A cylinder will appear on the opposite side. Press the tab key to enter Edit mode, move the original cylinder, and you will see that the mirror object moves symmetrically.
The mirror object moves too
Press the E key to shape up the arm, just as we did for the body and head. Since we are creating the model with an A-pose, match the character image from the shoulder to the elbow, and from the elbow to the hand tip, I just used my imagination.
Creating an arm
I created the round hand part by using extrude 3 times.
Hand image
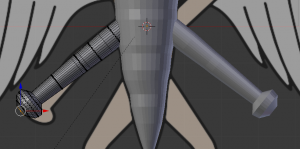
Next, let’s create the legs. The shape is similar to the arms, so I copied the arm first.
Press the Tab key and enter object mode, select an arm, press Shift + D → Z to move the copied object along the Z-axis.
The mirror object will be copied and move symmetrically too!
The bottom part of the body is very thin, and the leg joint part looks weird with the current size. I made it smaller for the Y-axis direction, so that it somewhat fits on to the body.
Making the leg thinner
I made the leg scale and length like in this image. The character image had bent knees, so I used my imagination to create straight ones.
Filling in the gaps with imagination
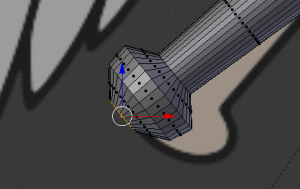
The toe part of the leg is weird, so I adjusted them. Select the round toe part using Edit mode, and press Delete → face to delete the face.
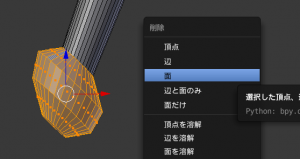
There will be a hole instead of the face now, so we need to fill it. Use the Edge select mode and click an edge of the hole while pressing Alt, and press the F key. The hole will get filled.
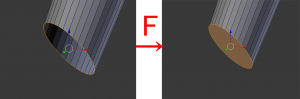
Fill the gap using F
When you look at the model from the front, the edge is tilted, so select the face you just created, and press S → Z → 0 to flatten the face.
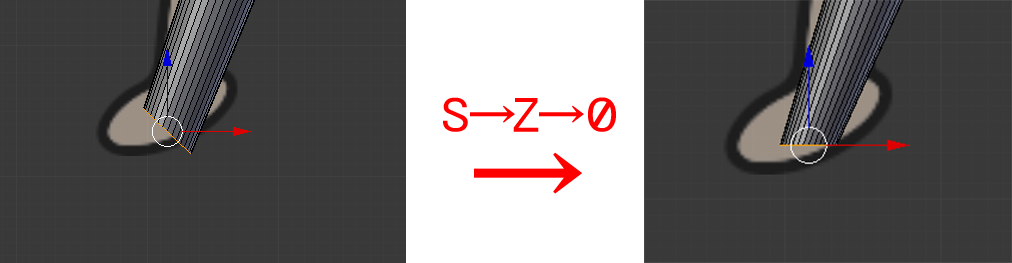
Flattening the face
Select the bottom face, extrude using E, change scale using S, and adjust the size for the Y-axis direction, so it looks more like a toe.
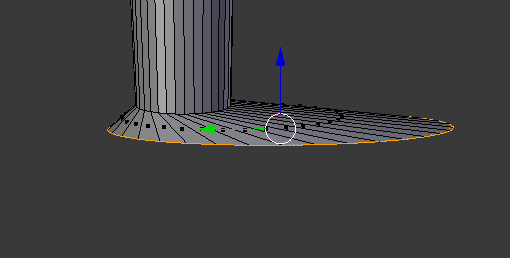
Making the toe 1
From there, extrude the bottom face and change the size to create a toe like this.
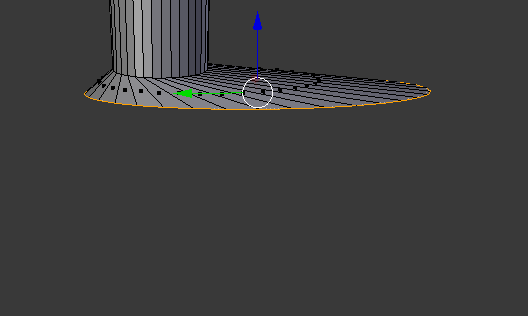
Making the toe 2
Once you are satisfied with the whole mode, change to Object mode, and apply the mirror modifier for both arm and leg, you are finished with the whole body!
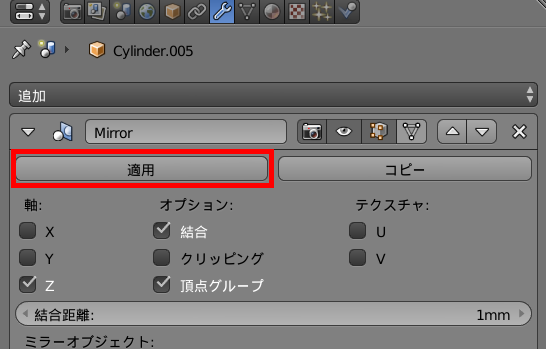
Appliying the mirror modifier
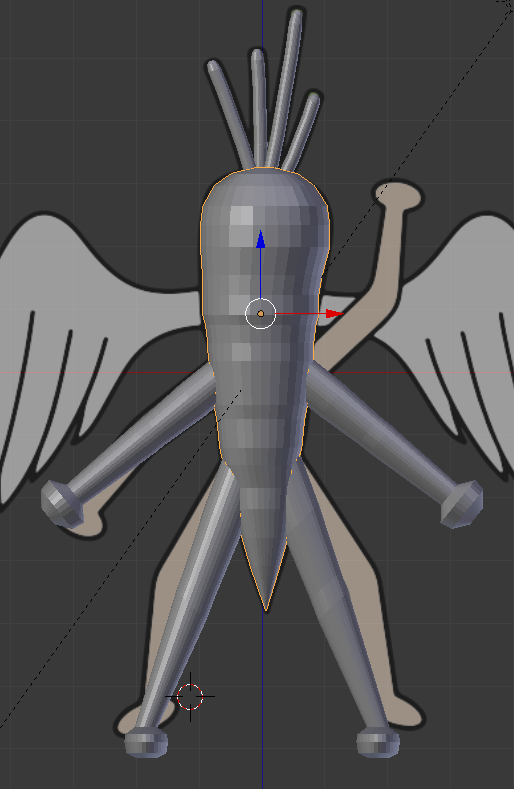
Done with the body modelling!
I will explain how to create the wings, face, and coloring of the model in the next article!