In this article, I introduce the workflow to use Blender, create a simple model and upload it to STYLY for people who have never done any 3D modelling work.
We create a panda shown below, which is easy to create even for the absolute beginner.
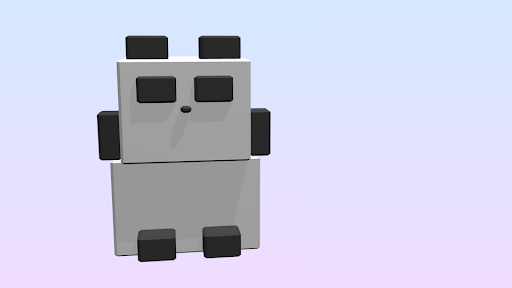
The completion image of the model we create in this article
- 1 Basic operations in Blender
- 1.1 How to download Blender
- 1.2 Change the default interface language on Blender
- 1.3 Practice operating Blender – Navigation
- 1.4 Practice operating Blender – how to select an object
- 1.5 Practice operating Blender – how to move an object
- 1.6 Practice operating Blender – how to scale an object
- 1.7 Practice operating Blender – how to rotate an object
- 2 Let’s create a panda?
- 3 Import the model to STYLY?
Basic operations in Blender
This article shows the operations in Blender on Window PC. Note that Mac may use different shortcut keys.
How to download Blender
- Access to the download page for Blender.
- Download the zip file (※For Windows user, check your PC to know which file is required, 32bit or 64bit).
- Unzip the file and launch ‘blender.exe’.
Change the default interface language on Blender
Note by translator: Ignore this section assuming reader requires English as default.
Select ‘File > User Preferences’.
It brings up the window as shown below. Check the ‘International Fonts’ box and select your language. Press the ‘Interface’ button at the bottom to change the user-interface language. I recommend pressing the ‘Tool Tips’ button to activate the mouse-over tips.
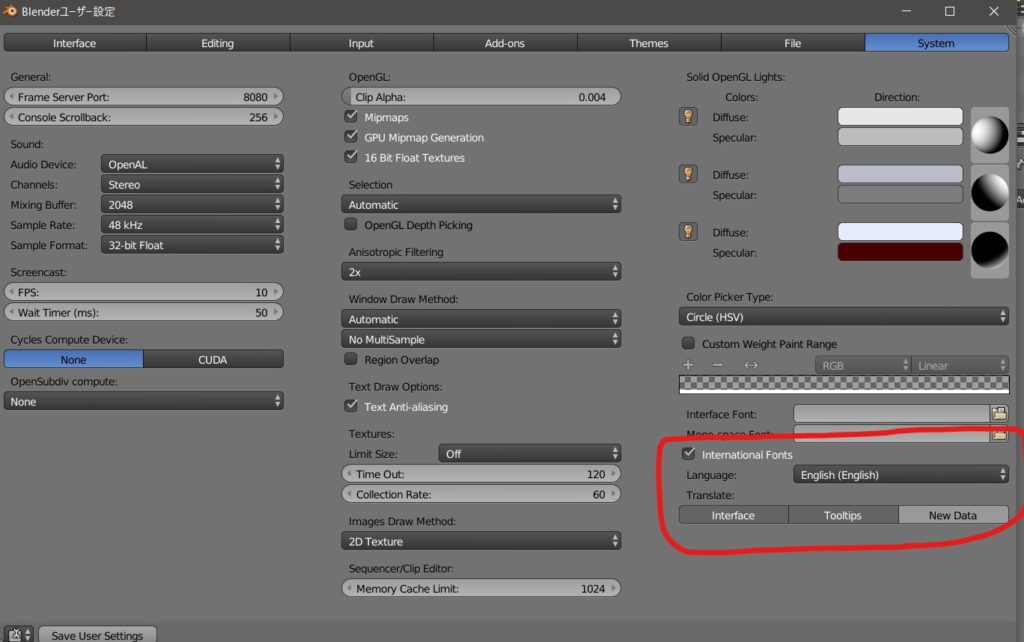
Blender – change user-interface language
When you launch Blender, it brings up the screen as shown below.
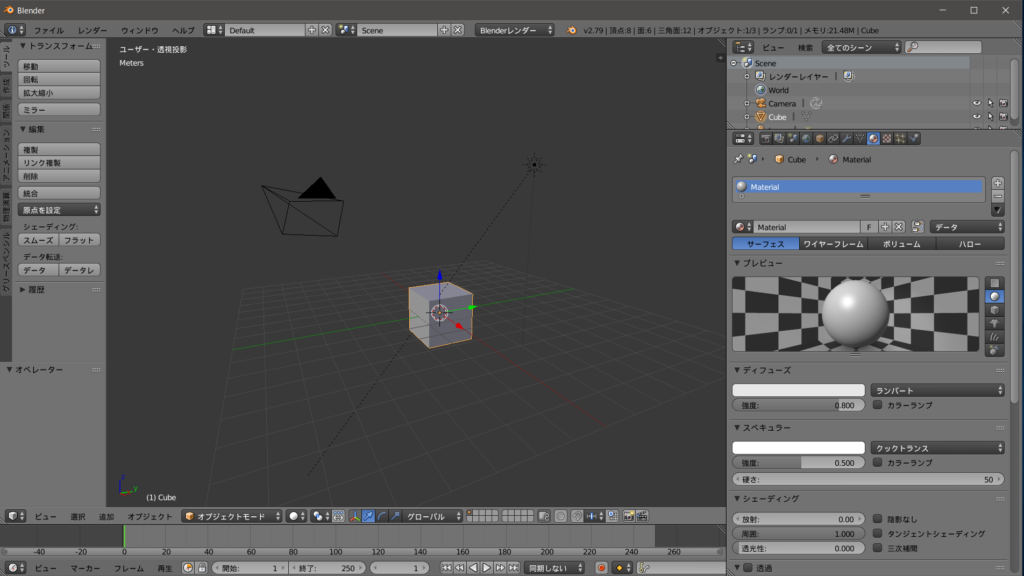
Blender’s initial screen
Let’s learn the operations in Blender. We practice changing the viewing direction in 3D space. Blender is easier to handle by the mouse. I strongly recommend using it.
There are three operations to change the viewpoint and the viewing angle.
Click and drag the mouse wheel: Orbit. the view is rotated around the selected object.
Rotate the wheel: Zooming
Hold down the Shift key and drag with the mouse wheel: Panning
Practice operating Blender – how to select an object
Next, let’s learn how to select an object. Select a cube. Please be aware, in Blender, you need to click the right mouse button to select an object, vertex, edge and face instead of clicking the left button. If you clicked the left button by mistake, you would move the 3D cursor (the red and white circle). As the 3D cursor should be kept at the centre, press Shift+S to open the pop-up menu and select ‘Cursor to Center’ in case you moved it accidentally.
Practice operating Blender – how to move an object
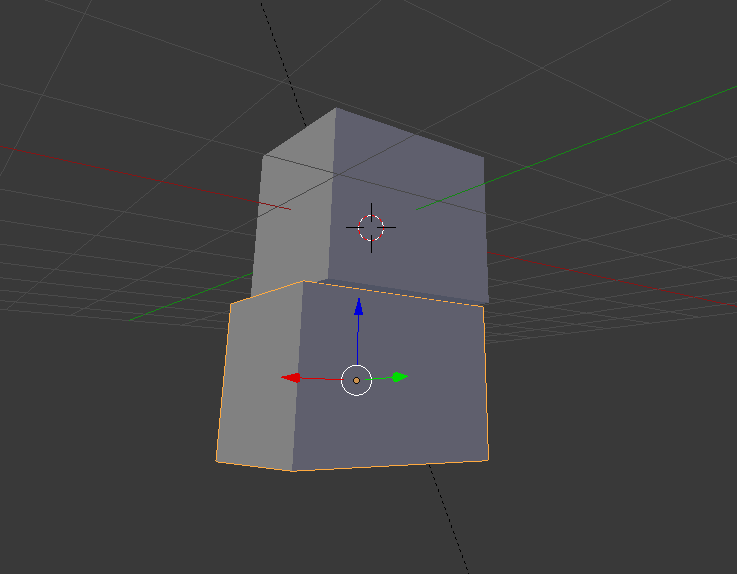
When an object is selected, it’s highlighted by orange and three arrows are displayed. The red, green, blue arrows correspond to the X, Y and Z axis respectively. Drag each axis to move the object in the corresponding direction. You use the left mouse button for this operation.
The G key can be used to move an object as well. ‘G’ stands for ‘Grab’. If you want to move in the X direction, press the ‘G’ key and then press the ‘X’ key. Similarly, press ‘G’ → ‘Y’ for Y-translation and press ‘G’ → ‘Z’ for Z-translation. Click the left mouse button to exit the translation mode.
Practice operating Blender – how to scale an object
Next, let’s learn how to scale an object. With an object selected, press the S key to scale. ‘S’ stands for ‘Scale’. If you want to scale only in the X direction, press ‘S’ → ‘X’. Similarly, press ‘S’ → ‘Y’ for Y-scaling and press ‘S’ → ‘Z’ for Z-scaling. Click the left mouse button to exit the scaling mode.
Practice operating Blender – how to rotate an object
Press the ‘R’ key to rotate an object. ‘R’ stands for ‘Rotate’. You can now guess what I am going to say, can’t you? Press ‘R’ → ‘X’ to rotate the object around X-axis. Similarly, press ‘R’ → ‘Y’ to rotate around Y-axis and press ‘R’ →’Z’ to rotate around Z-axis. Click the left mouse button to stop the rotation.
Let’s create a panda?
That’s all for the basic operations in Blender. If you learnt the operations above, you could hit today’s target, creating a panda.
There are a lot of shortcut keys in Blender so it’s hard to master them. So let’s learn them one by one.
The workflow to make a panda consists of three stages.
- Model a panda
- Colour it
- Tidy up the shape
1.Model a panda
Firstly, select the default cube and press the ‘X’ key and select ‘Delete’ in the pop-up menu to delete it.
Then, select ‘Cube’ from the ‘Create’ tab on the left. A new cube is now created (OK…I deleted a cube and make a cube again! Never mind…).
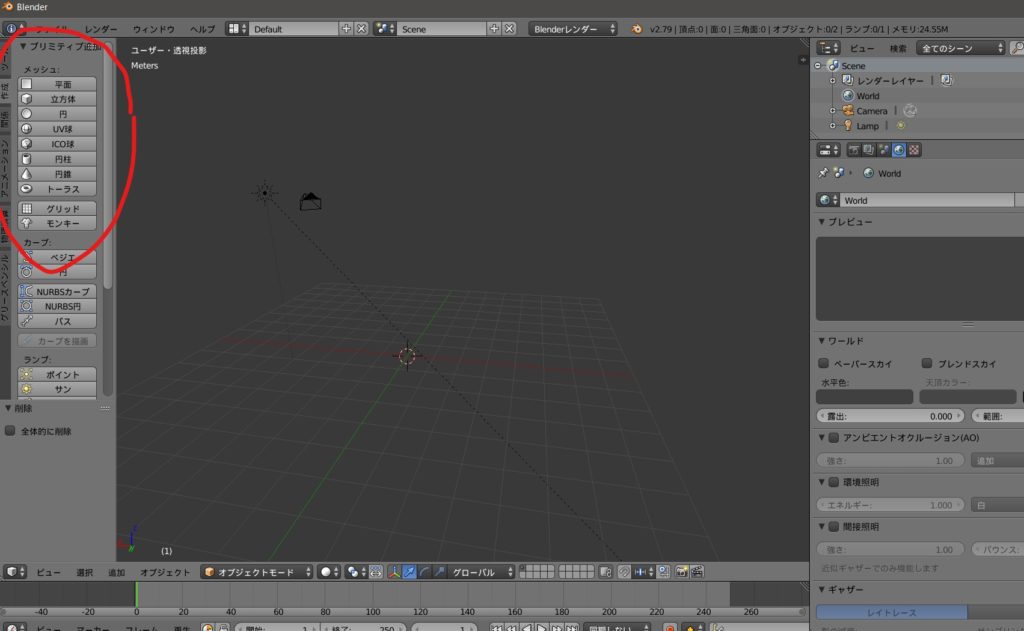
Select ‘Cube’ from the ‘Create’ tab on the left.
Shape this cube into a head. Make your favourite head shape by scaling it while checking the appearance from various viewpoints.
Once it’s done, select the cube and duplicate it by pressing Shift+D. After pressing Shift+D, you can move the duplicated object in the X, Y and Z direction by pressing the ‘X’, ‘Y’ and ‘Z’ key respectively.
Shape the duplicated object into a body by moving and scaling.
Shape the duplicated object into a body
Similarly, with the ‘Shift+D→X/Y/Z‘ operation, add ears, hands, legs, eyes and nose to form a panda by duplicating, moving and scaling. It doesn’t matter you end up with panda-ish rabbit or panda-ish cat, of course. Please make your own ‘panda’.
At the moment, each part is a separate object. But, it’s OK for now, as we put them together into one single object at the final stage.
By the way, if you want to add an animation later, make the model in the T-pose.
In addition to the operations for moving and scaling explained above, you can also enter the values directly in the boxes on the right menu to adjust the movement more precisely. if the menu is hidden, press the ‘+’ button to bring it up.
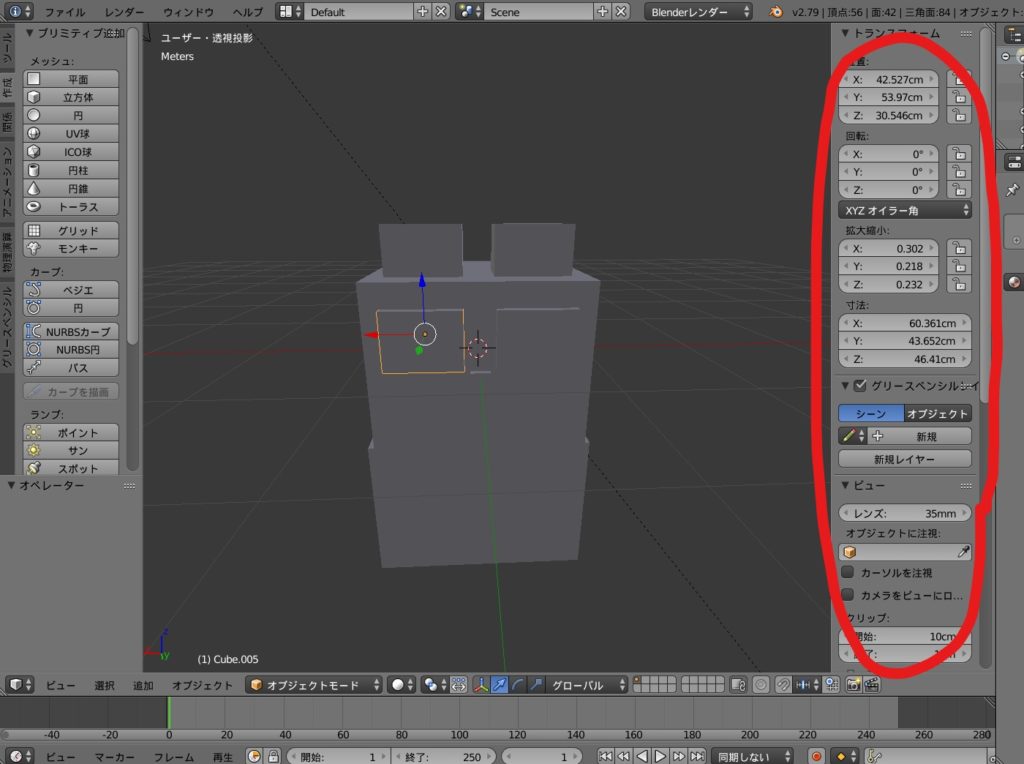
Move and scale by the right menu.
2.Let’s colour it
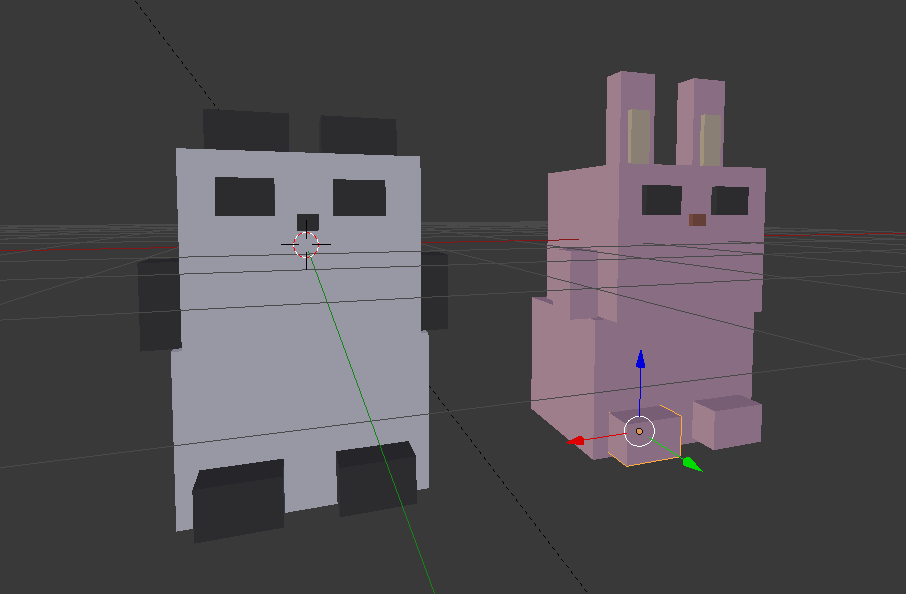
Have you created your panda? I created two pandas.
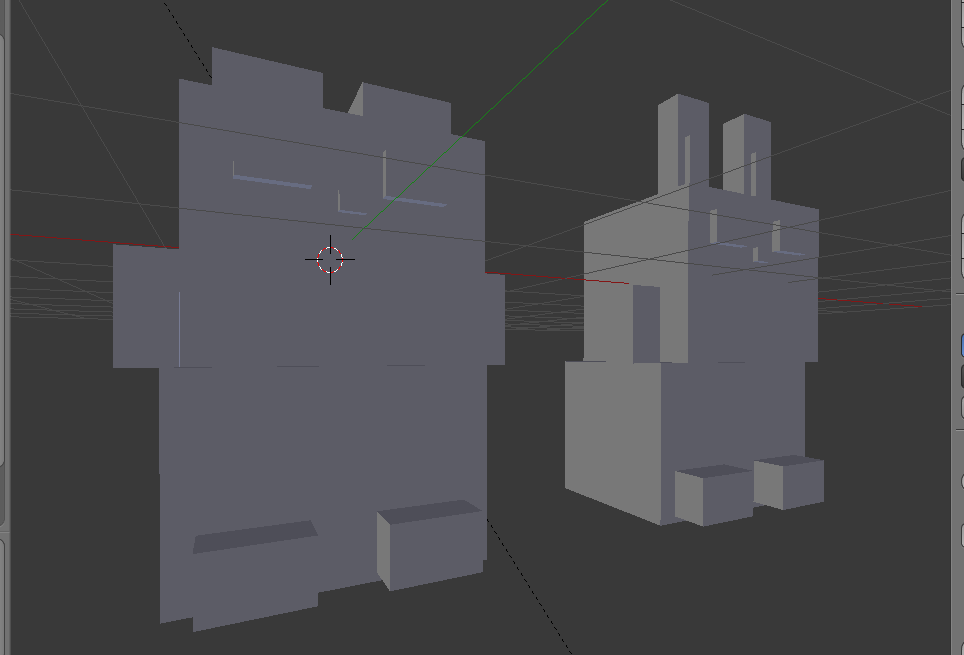
The completion image – The modelling finished
In the current state, they look poor animals petrified by a witch’s magic.
Let’s colour them to solve it. To colour the models, firstly, you need to switch ‘Viewport Shading’ on the bottom menu from ‘Solid’ to ‘Material’. Otherwise, you cannot see the change when you assigned Materials. It’s a ‘magic’ to lift the curse (^_-)
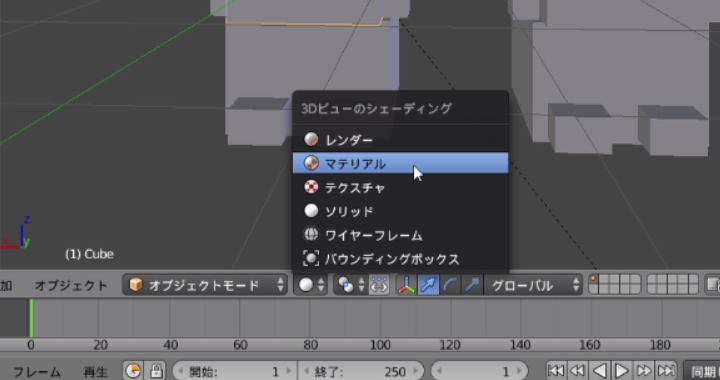
Switch ‘Viewport Shading’ from ‘Solid’ to ‘Material’.
Let’s select the object you want to colour. For now, select the head or the body.
Select ‘Material’ on the right menu (① in the screenshot below), and click the ‘New’ button (② in the screenshot below).

Select ‘Material’ and click the ‘New’ button.
By pressing the ‘New’ button, a new Material is added (① in the screenshot below). Double-click the label of the Material name to rename.
Click the white bar (② in the screenshot below) in the ‘Diffuse’ section to change the colour on the selected object.
‘Specular’ controls how shiny the object looks when it reflects lights (③ in the screenshot below). You can also change the colour and the intensity of the effect. Adjust them as you like.
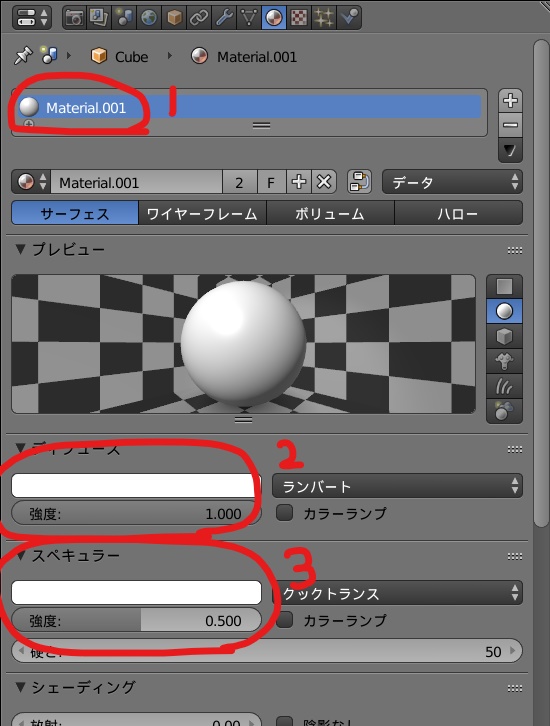
Make the colour.
Similarly, you can assign Materials to the body, ears and etc. But it would be painful to make the Material with the same colour again and again. If you want to use the Material you already made, click the ‘Material’ icon, which is highlighted by a red circle below, to bring up the list of all existing Materials. Select the one you want from the list.
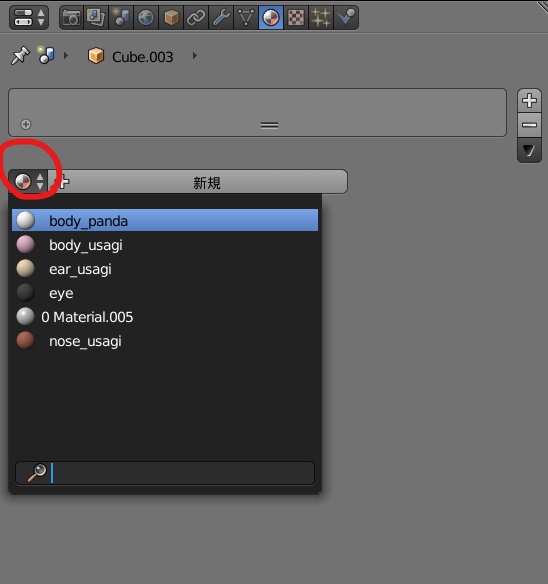
Use the Material you already made.
When you finish colouring, it would look like the shown below, I guess.
Animals with ‘witch’s curse’ lifted.
3.Tydy up the shape
We are almost there. All you need to do is a final touch to complete the shape.
At the moment, each part (ear, face, body and etc.) is a separate individual object. We now put them together. All things become one. How heart-warming it is 🙂
Hold down the Shift key, select all objects to join.
Select all objects to join.
After selecting objects, press Ctrl+J. Now they have been joined.
Rabbit is now the joined object.
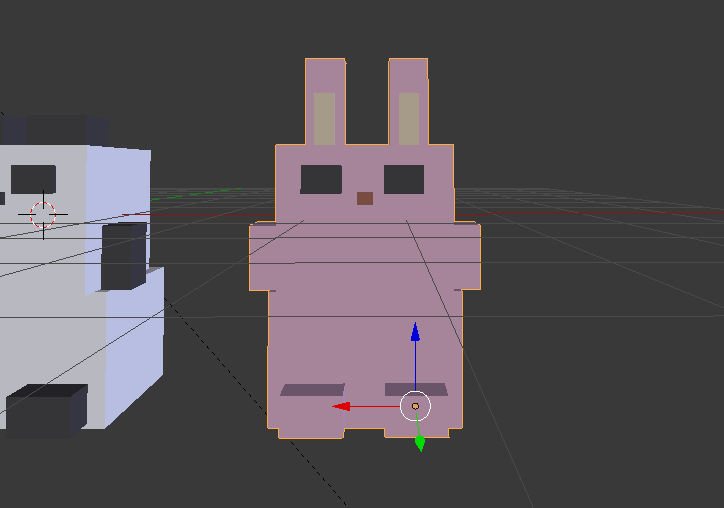
Finally, chamfer the edges a little bit as they look ‘unsafely’ sharp.
On the right menu, press the ‘spanner’ icon (① in the screenshot below) and then press ‘Add Modifier’ (② in the screenshot below) to bring up the Modifier list. Select ‘Bevel’ (③ in the screenshot below) from the list.
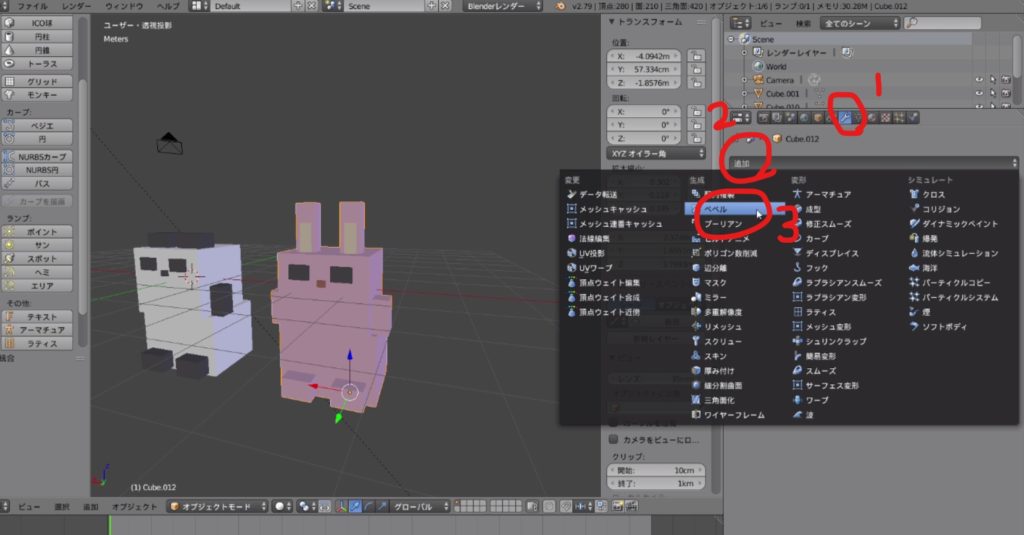
Select the ‘Bevel’ modifier.
Then, it displays the setting window for the Bevel function as shown below.
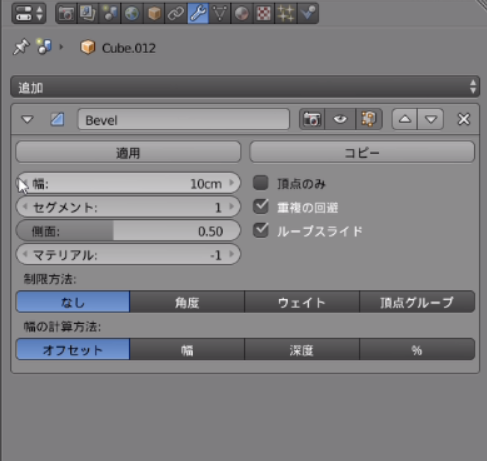
the setting window for the Bevel function
Set the width of the bevel. For the complete model of the panda in this article, I set the width to 5cm. It’s just for your reference.
Once it’s done, press the ‘Apply’ button. Now it’s finished!
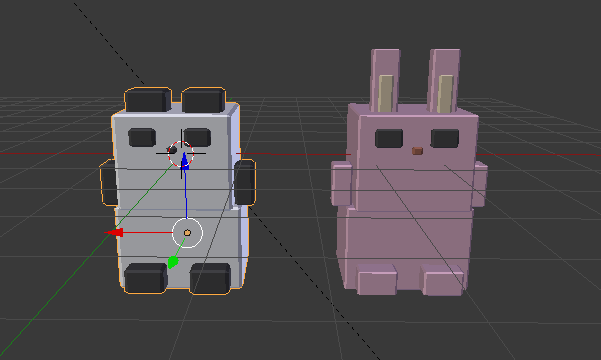
Finished!
Import the model to STYLY?
- Export the model
- Upload to STYLY
1.Export the model
Although I made two pandas, I export one model at a time. Yes, they chose separate paths 🙂
Select the object you want to export and then select ‘File > Export > FBX(.fbx)’ on the top menu.
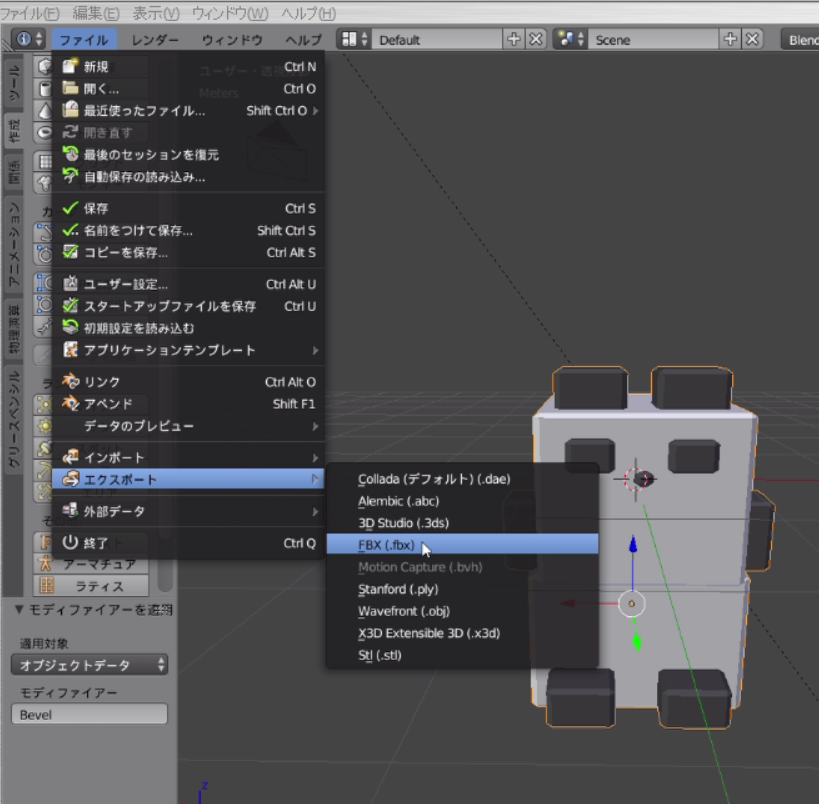
Export as a FBX file.
It brings up the Export screen. Change the filename (① in the screenshot below) and set the destination to save.
Then, check the ‘Selected Objects’ box in the Export setting on the bottom-left (② in the screenshot below).
With the Shift key held down, select ‘Mesh’ and ‘Other'(③).
Press the ‘ Export FBX’ button (④).
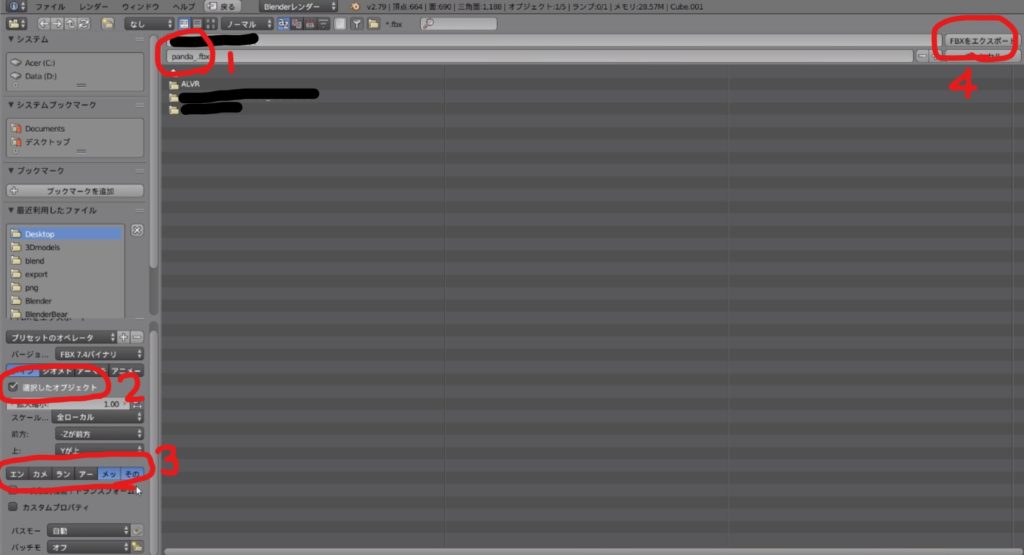
The Export screen
Now the export has been completed.
2.Upload to STYLY
Upload to STYLY
Access to STYLY and launch STYLY Editor.
※How to create your STYLY account: https://styly.cc/manual/styly-account-create/
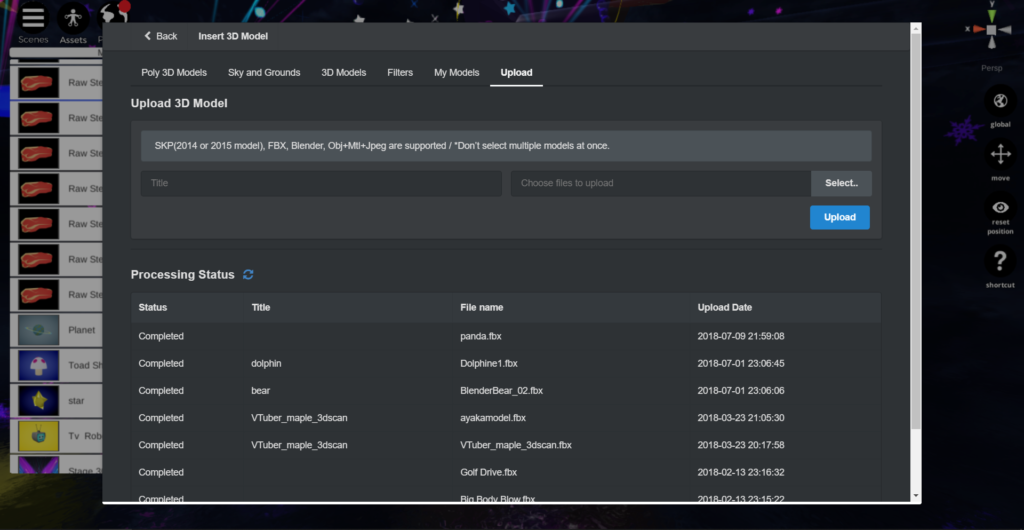
Once STYLY Editor is launched, select ‘Assets > 3D Model > Upload’ to upload the model you exported above.
When the ‘Status’ column under the ‘Processing Status’ changed into ‘Completed’, the upload has been done.
You can find the 3D character data uploaded under My Models. So click it to place in the space.
※ How to publish a Scene: https://styly.cc/manual/scene-create-tutorial/
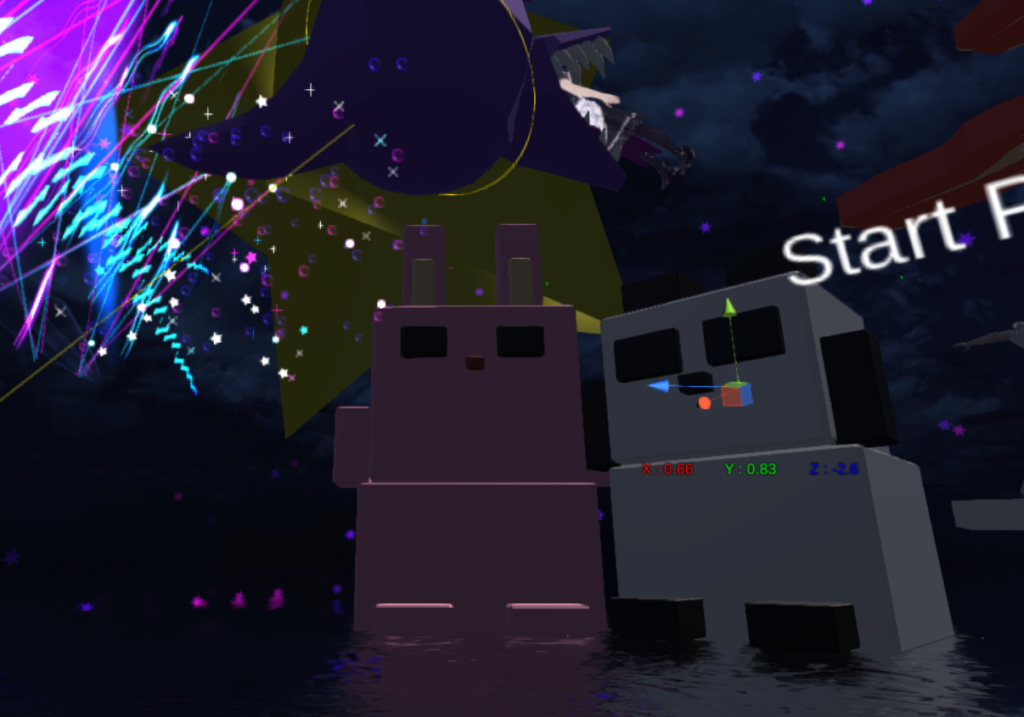
The models have been uploaded to STYLY!
Now Rabbit and Panda met together once again in STYLY. How happy they are!
That’s all for today.
Extra note: In the modelling phase, I briefly mentioned T-pose to add animations. Please refer to the below to learn how to make animations. ※Note that you can ignore the task to make Zip file and just export the FBX file as we didn’t use textures this time.
The next episode is…↓↓
[Blender for Beginners] Let’s Start Modeling Part 2 – Extruding