Have you ever heard of an add-on that allows you to complete image editing with just Blender when using textures?
In this article, I’ll show you how to use an add-on called Image Editor Plus.
Image
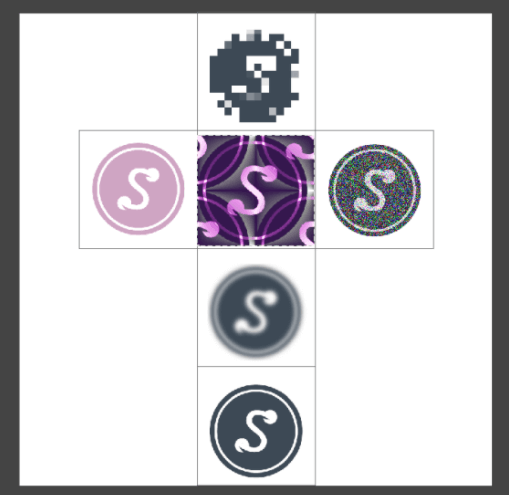
Texture image
What is Image Editor Plus?
Image Editor Plus is an add-on for Blender that is sold in Blender Market.
With this add-on, you can edit images in Blender, so you can edit UV textures without using external software such as Photoshop.
Image Editor Plus offers the following features
- Cut, copy, and paste
- Transparency
- Crop
- Hue and saturation adjustment
- Brightness and contrast adjustment
- Gamma Adjustment
- Adjusting Color Curves
- Flipping and Rotating an Entire Image
- Flip, rotate, and scale layers
- Offset
- Filters (blur, sharpen, denoise, pixelate, seamless)
There is also an extension called Image Editor+Text Tool, which is introduced later in this article.
Download and install
Image Editor Plus can be downloaded from here, and the Image Editor+Text Tool extension can be downloaded from here.
Operating environment at the time of writing
| Blender | 2.90.0 |
| Image Editor Plus | 1.6.2 |
| Image Editor+Text Tool | 1.1.0 |
The supported Blender version is 2.93 or higher.
After downloading, launch Blender and open Preferences from the top left icon.

Preferences
Click the Install button and select the downloaded zip.
Then click Install Add on.
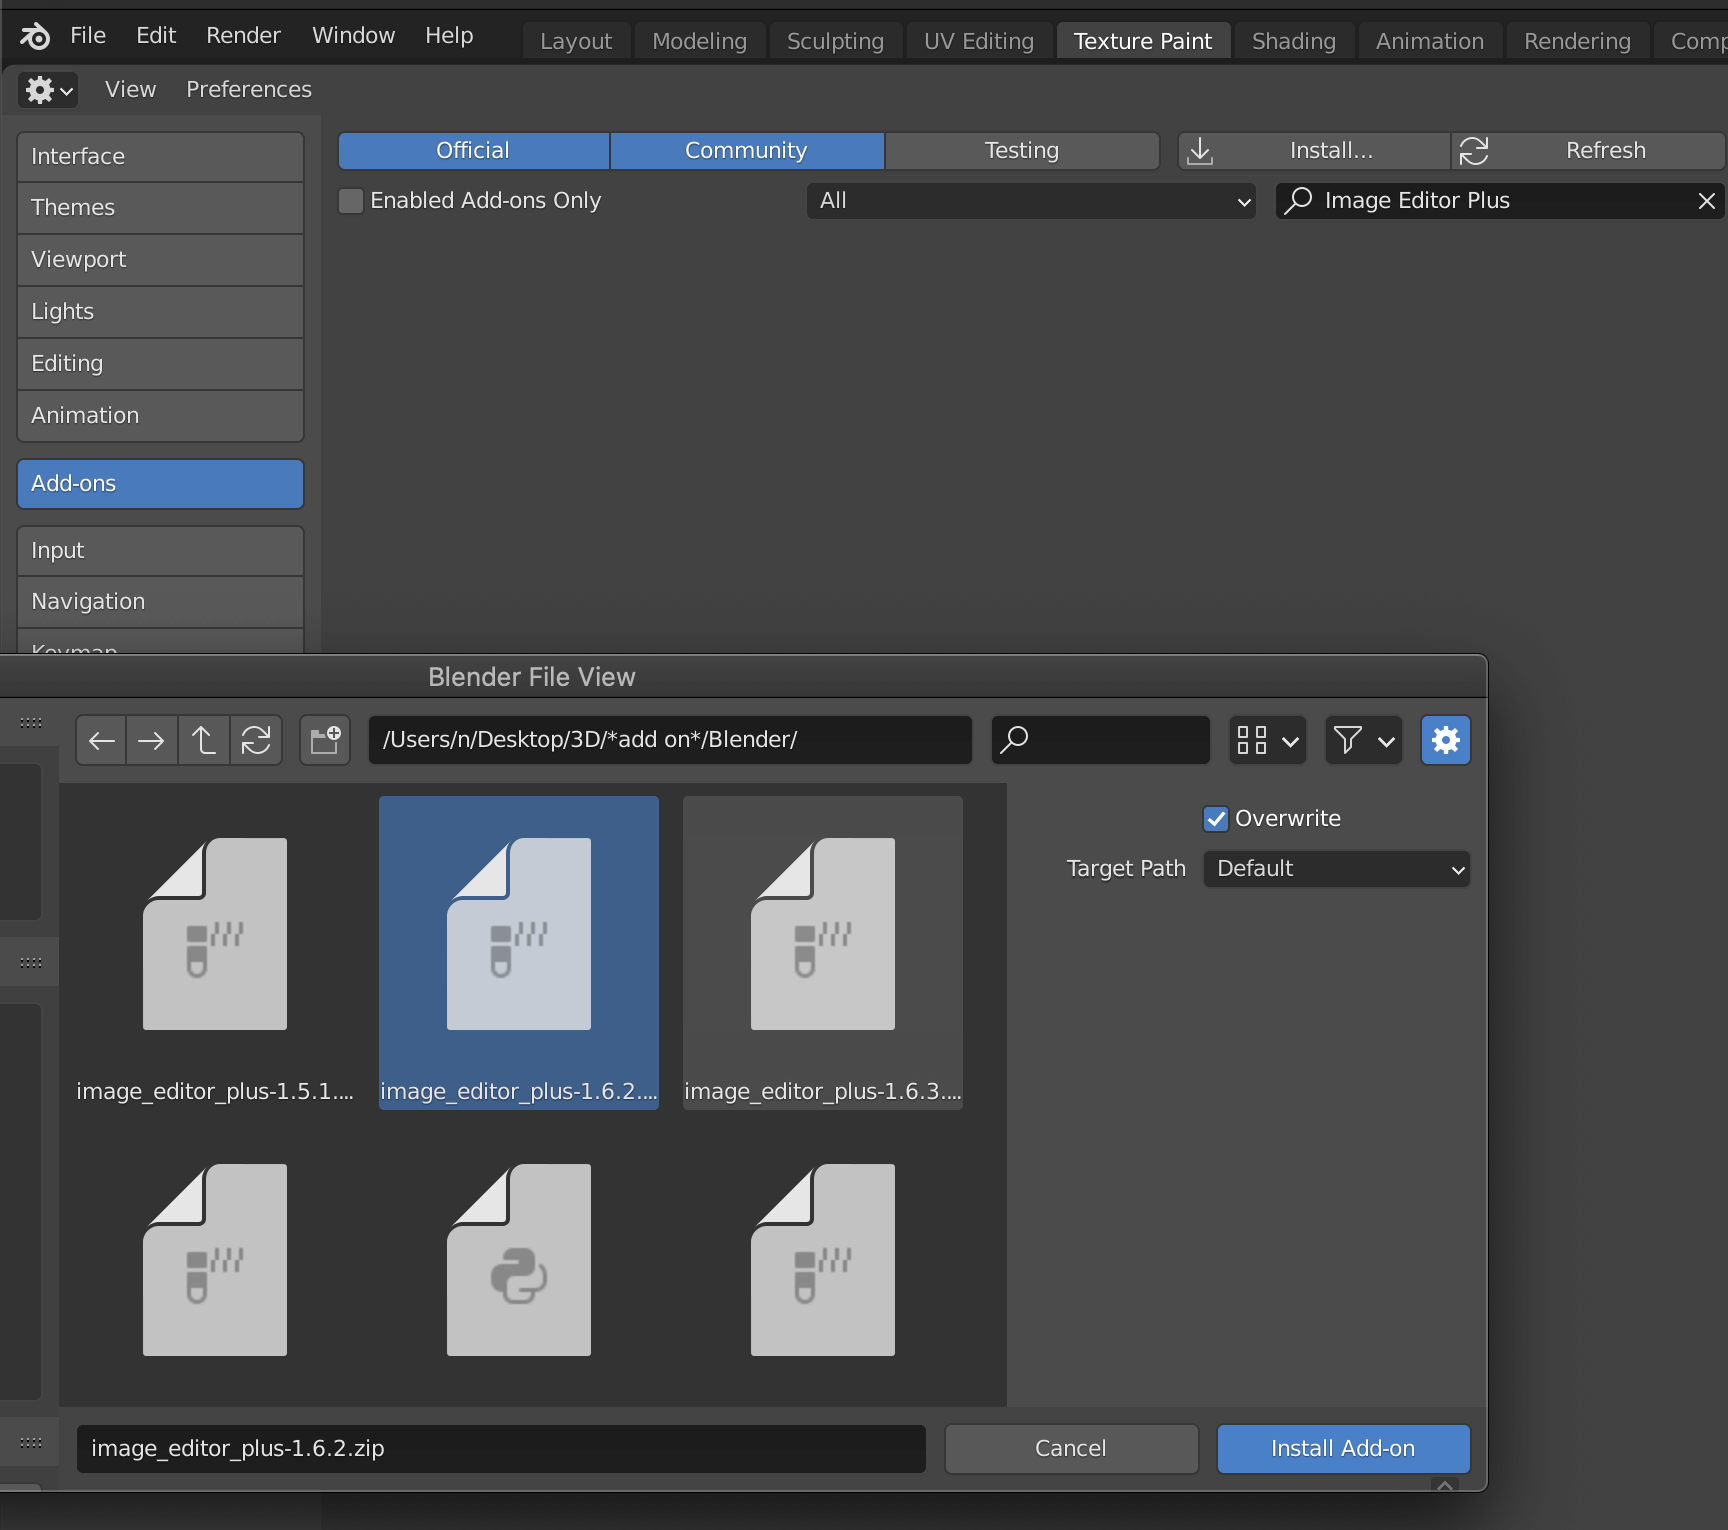
Once done, search for downloaded add-ons from the search field in the upper right corner and check the add-on items that come up.

Check the box and activate it.
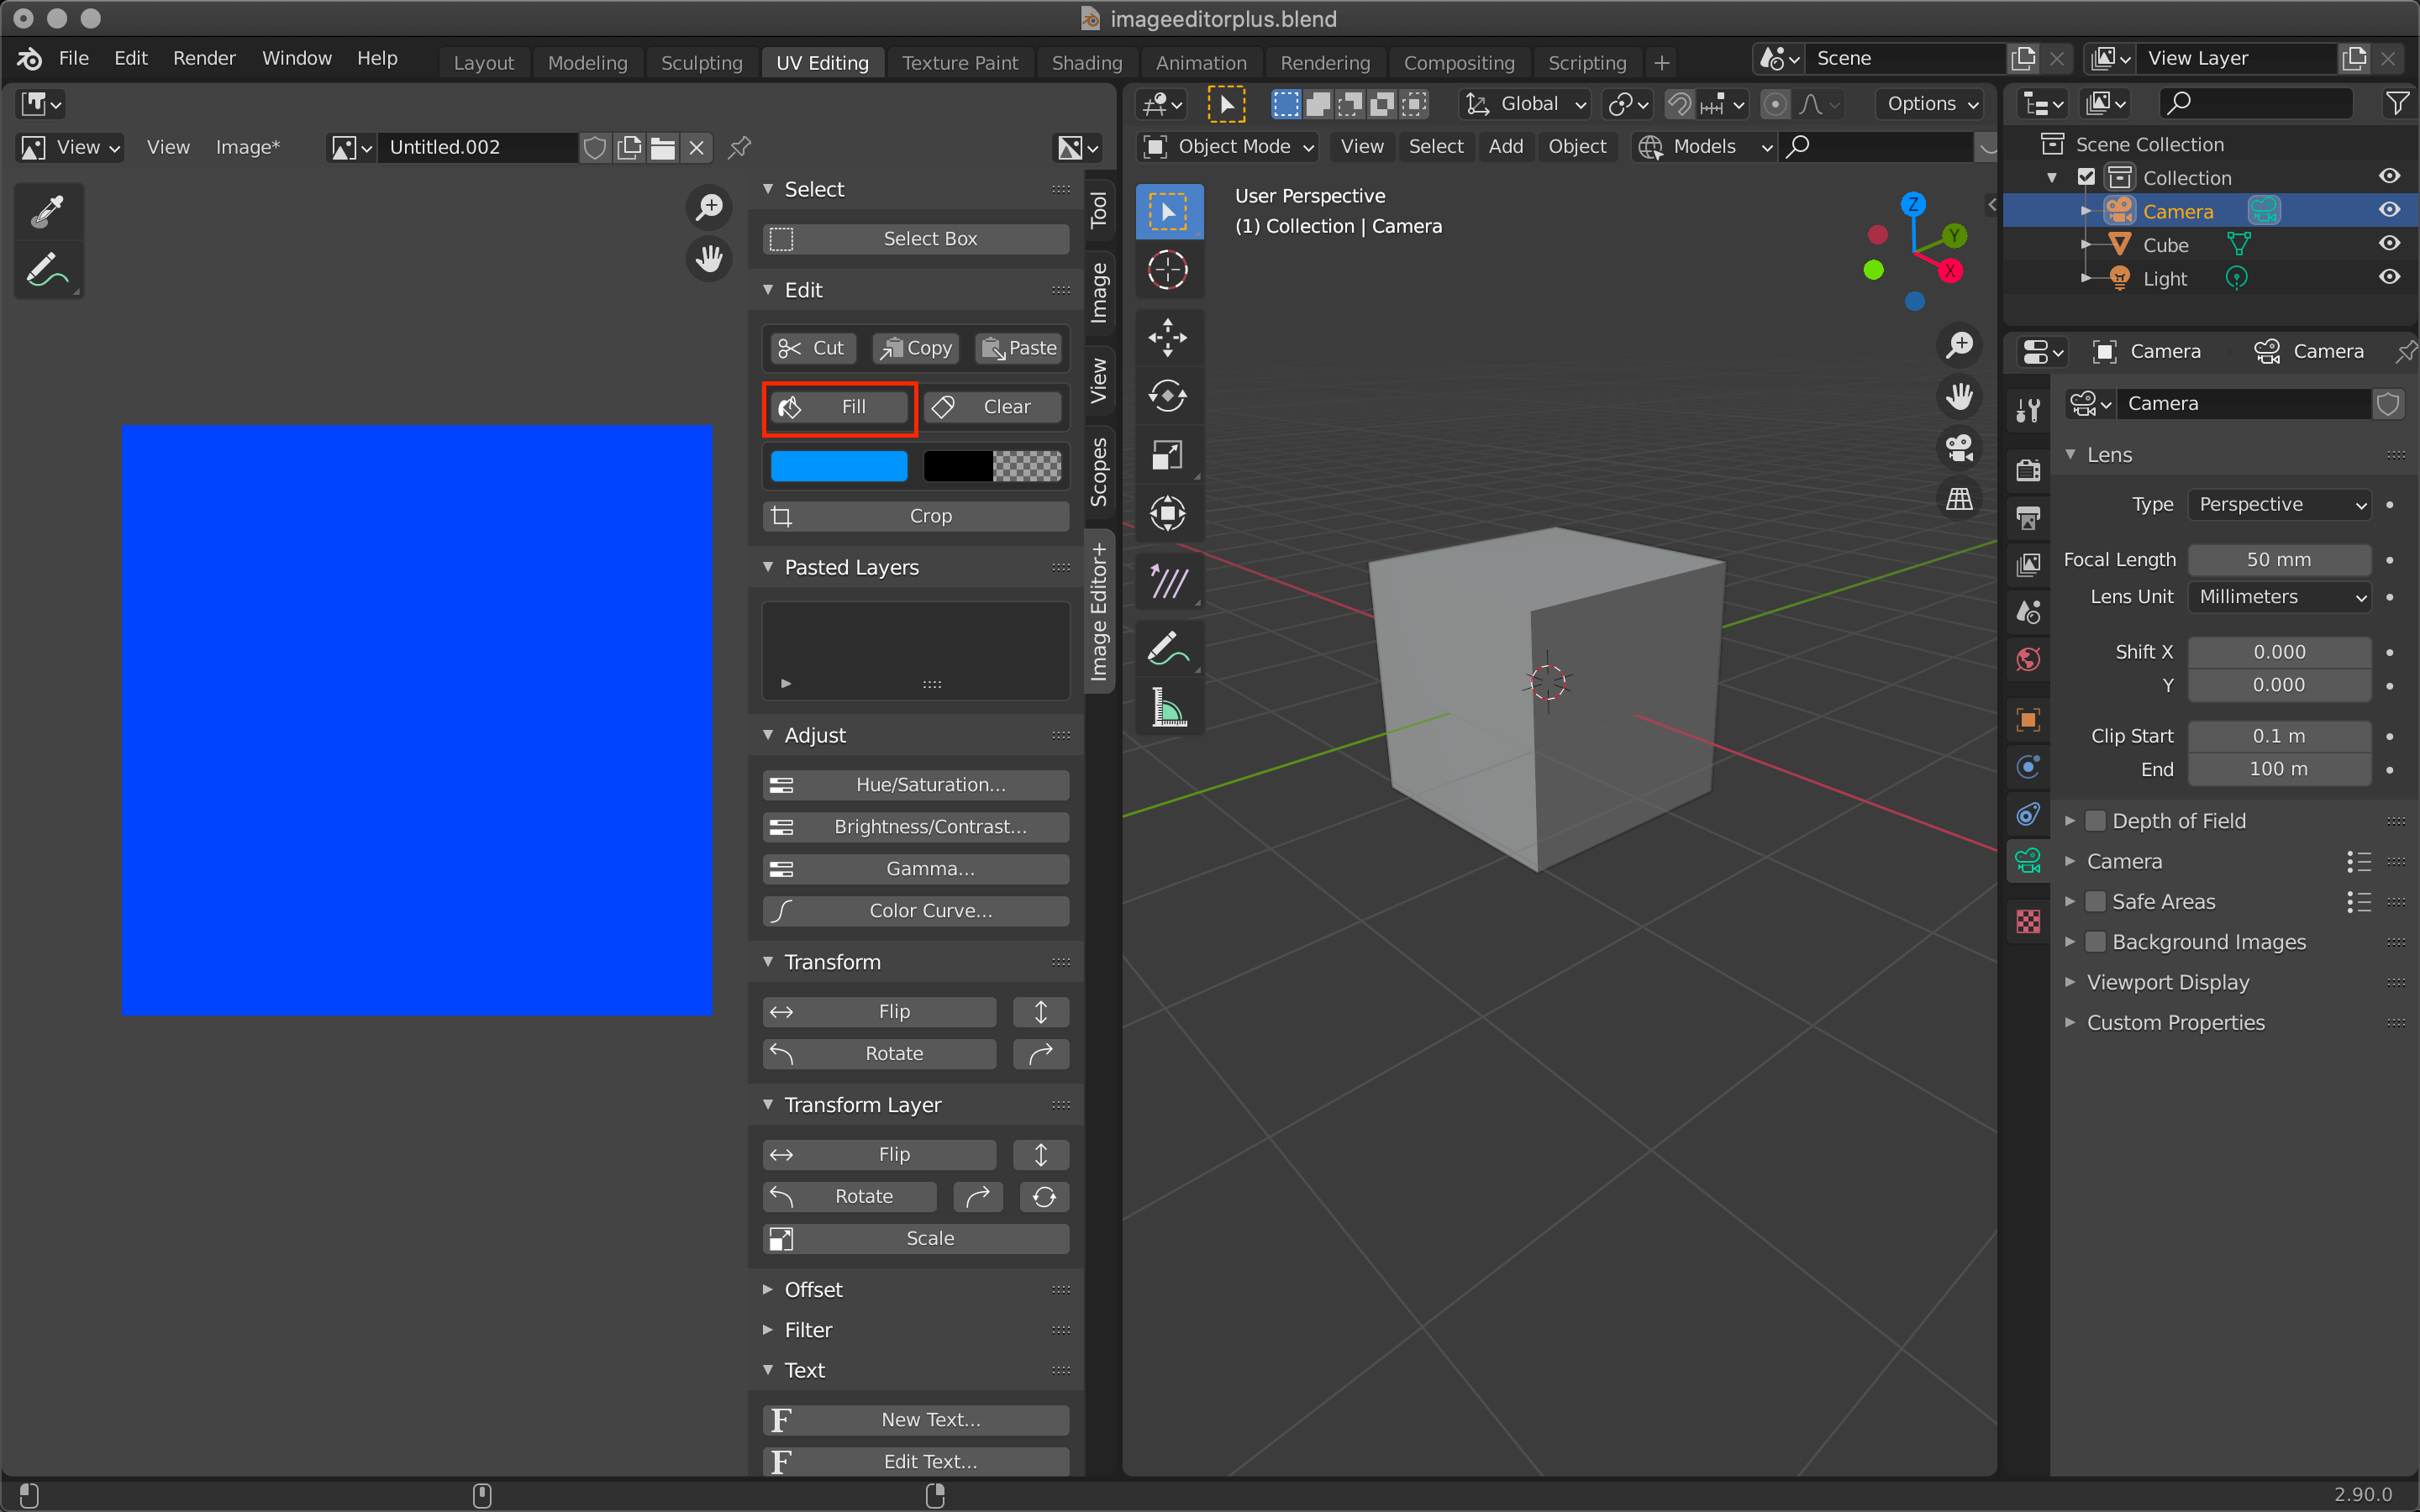
Try using Image Editor Plus
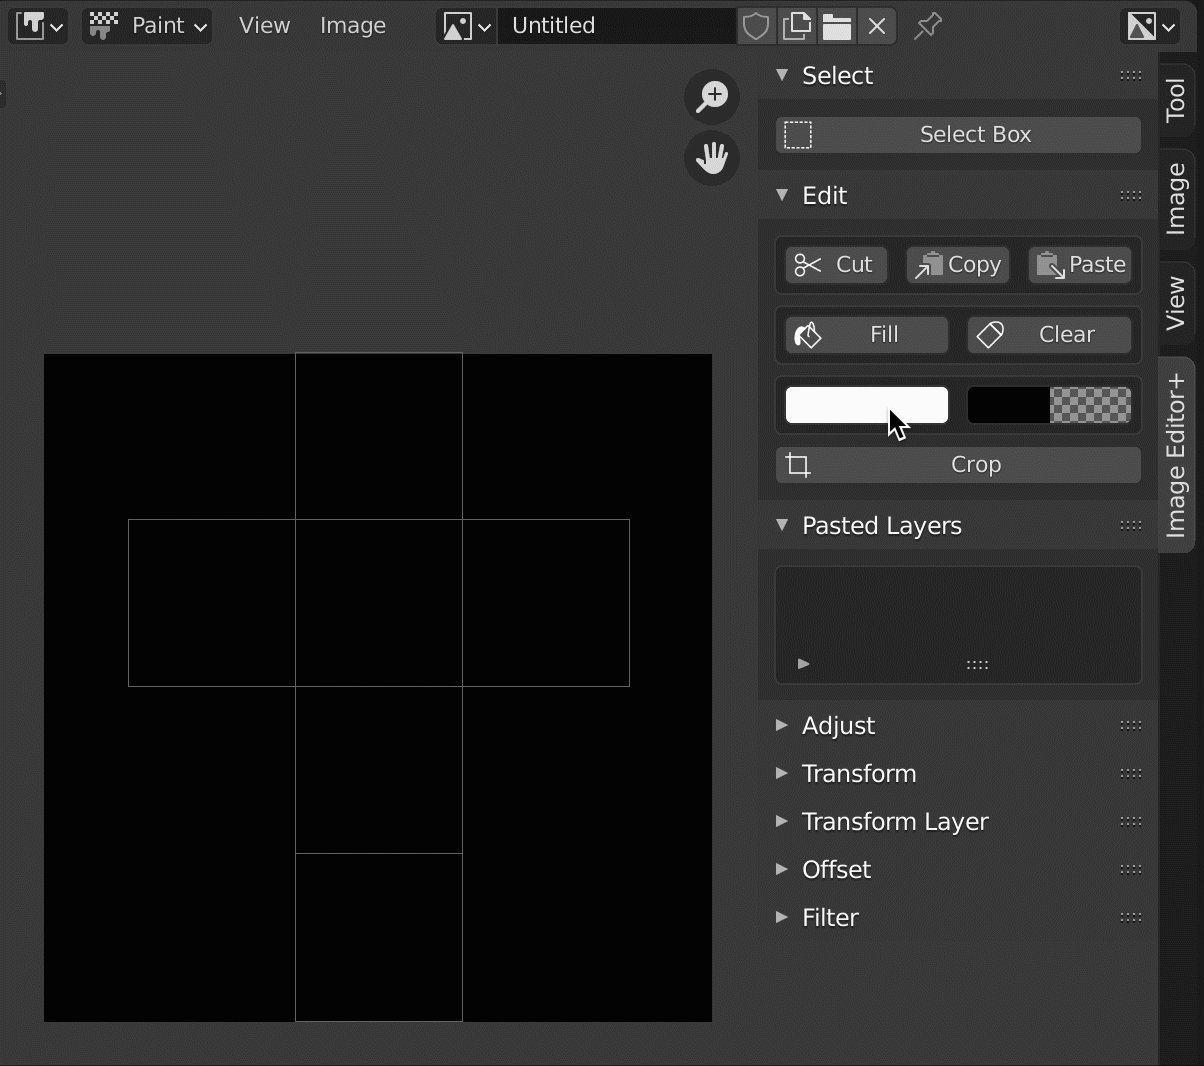
Return to the 3D viewport from the icon in the upper left corner, and switch the tab at the top of the screen to Texture Paint.
The left side of the two screens will be used for image editing, and the right side will be used for cube texture editing.
In both cases, the Image Editor is displayed from the top left icon.
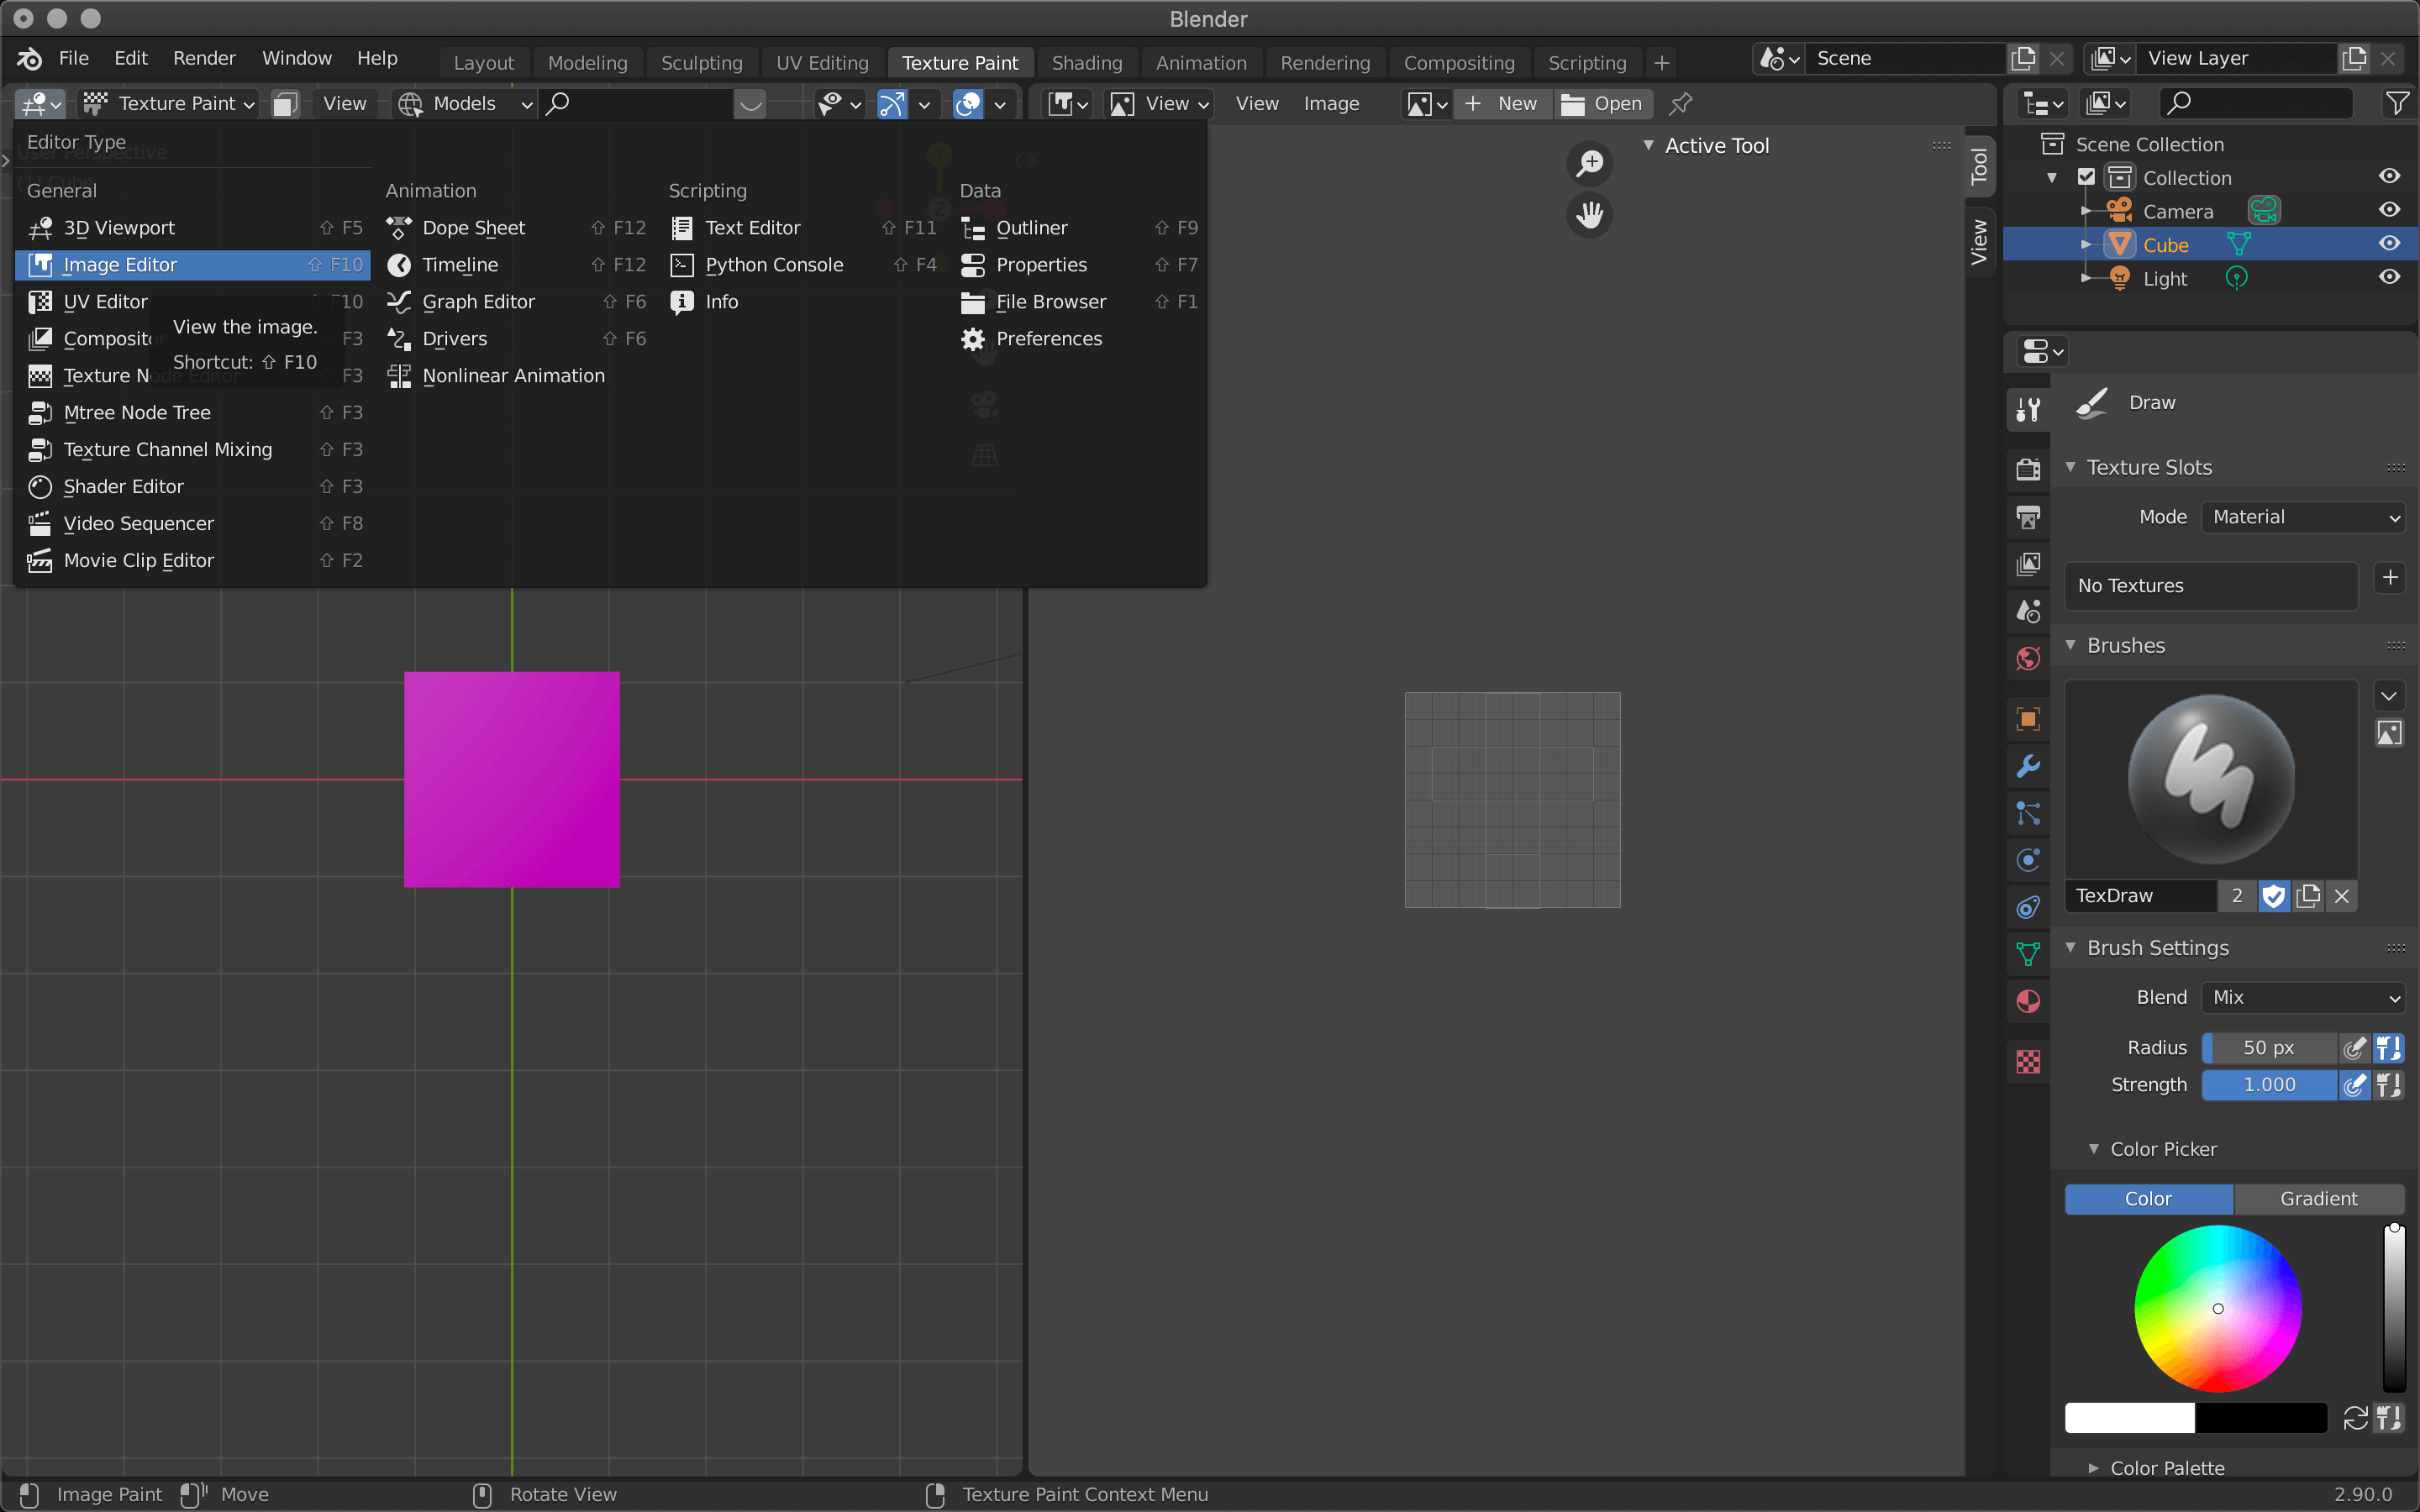
Image Editor
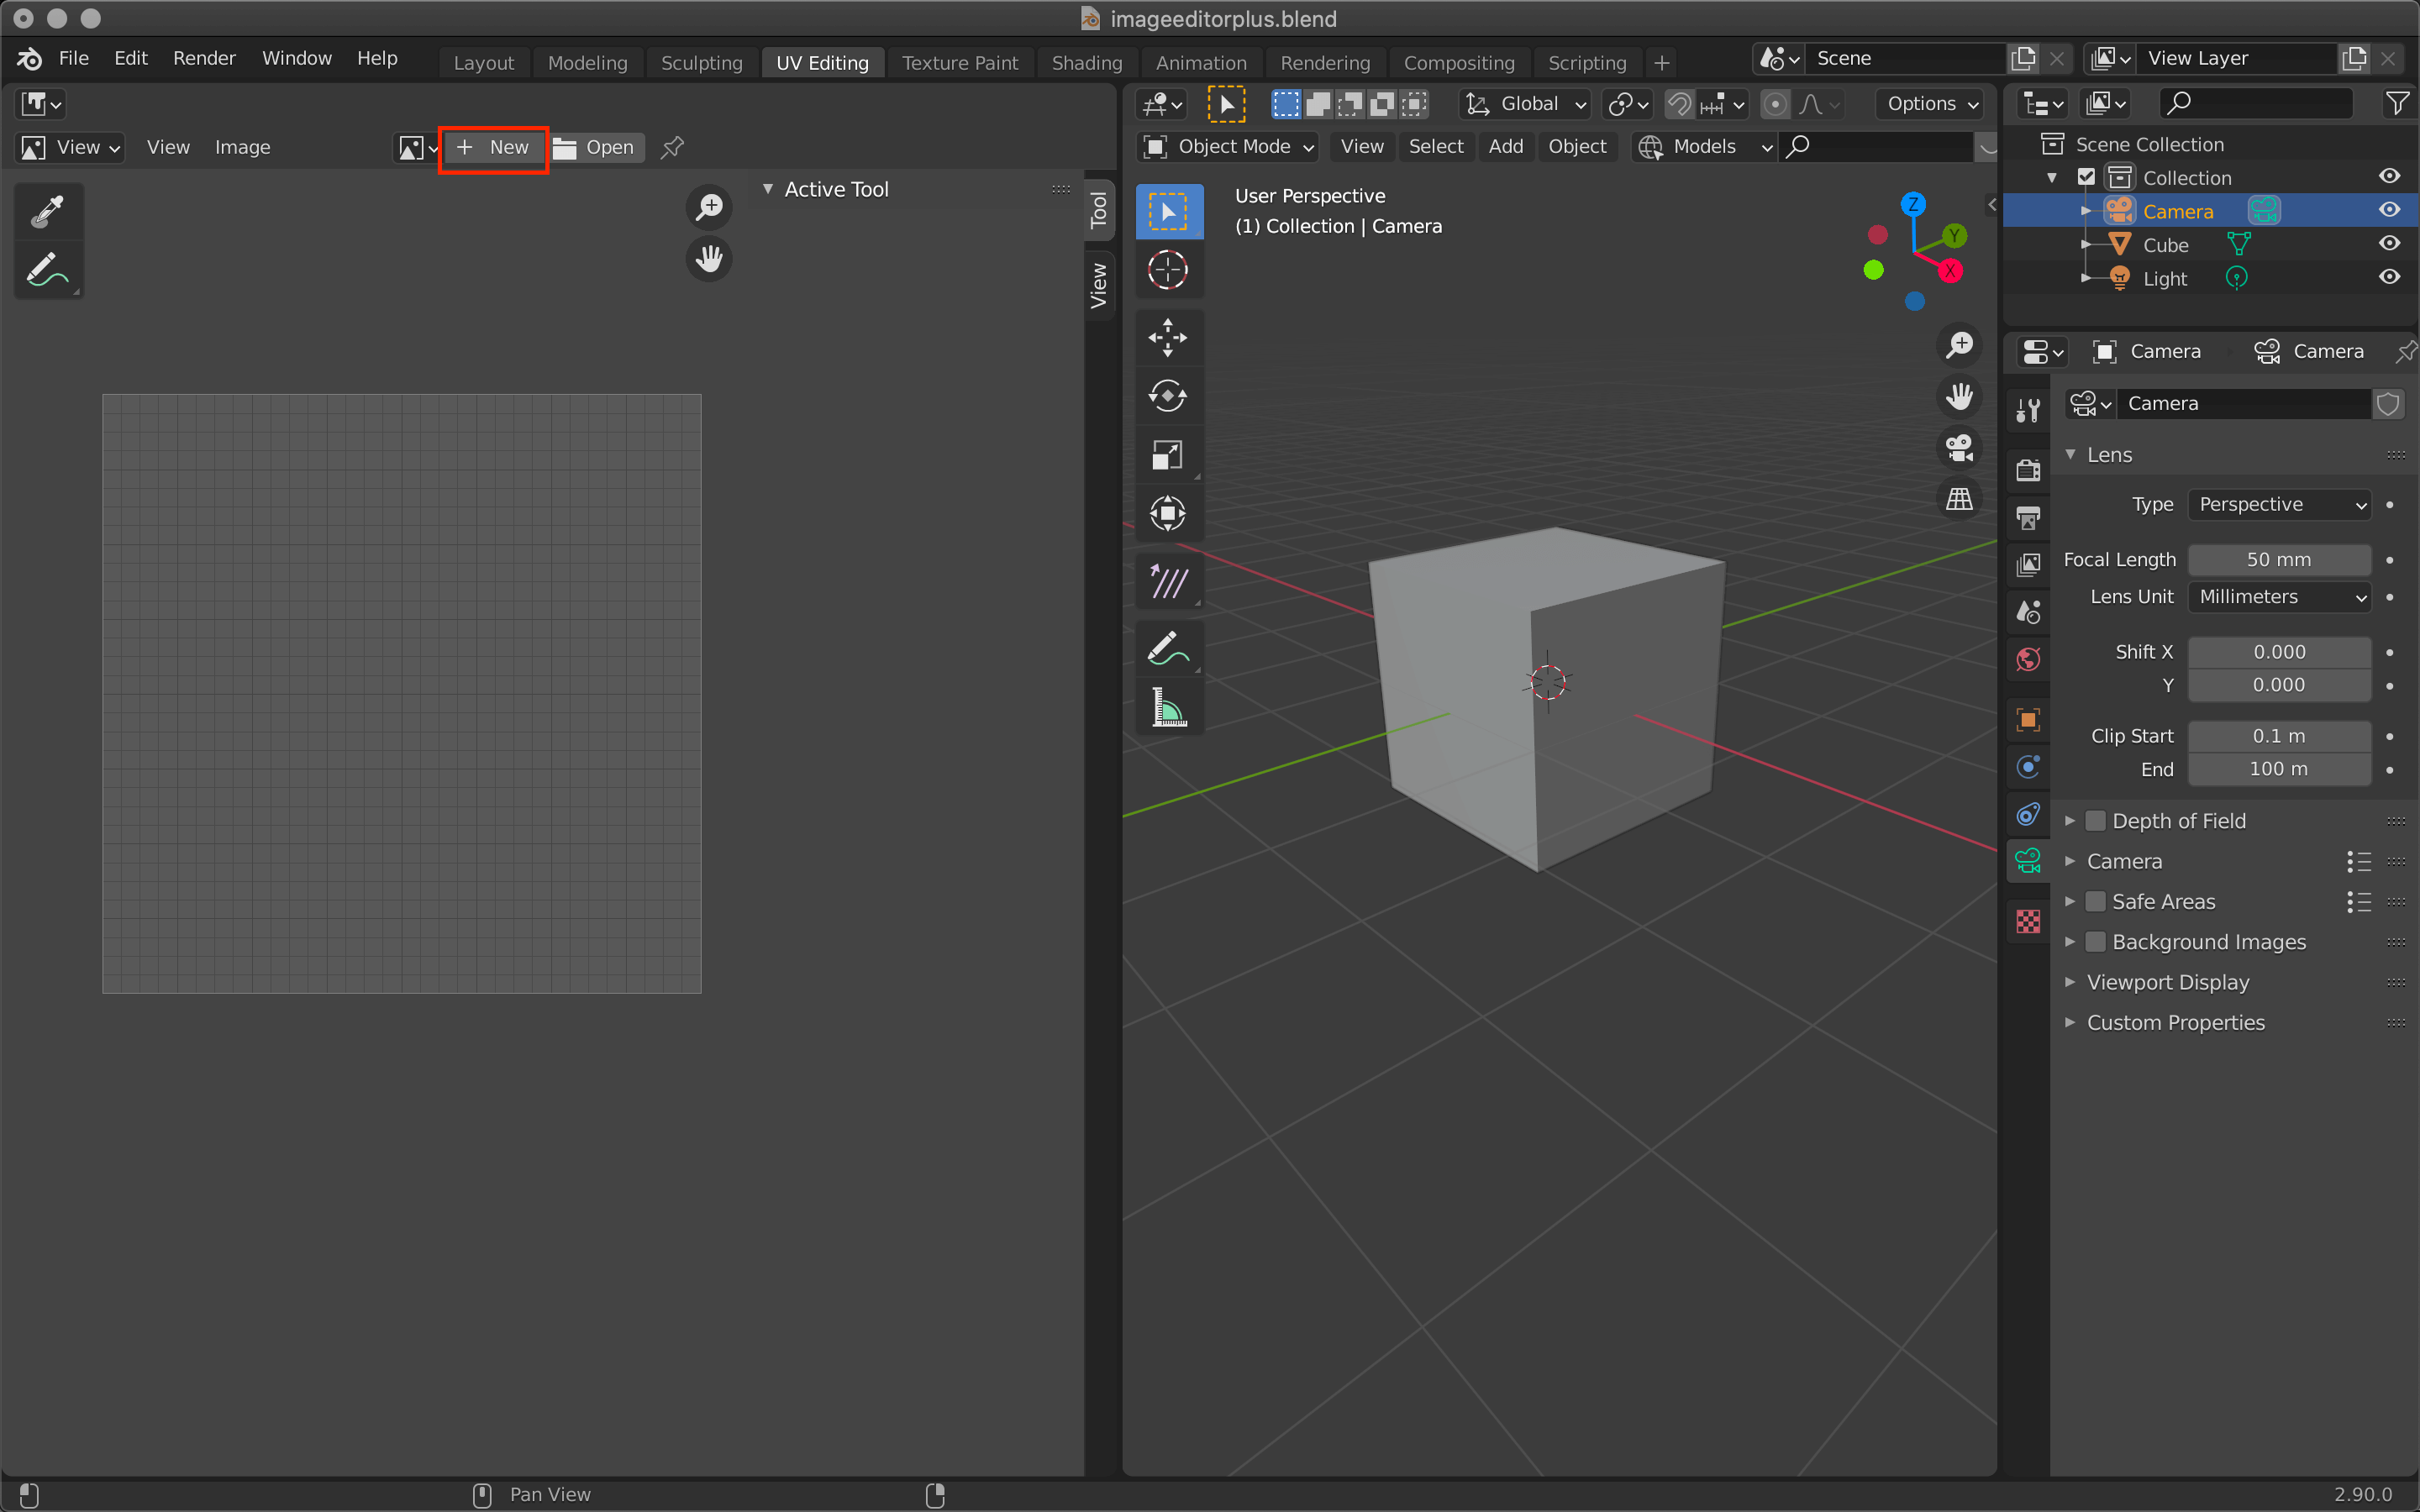
Since there is no default texture for the cube, let’s create a new texture by clicking +New at the top of Texture Paint on the right.
Click on the < at the right edge of the screen to bring up the stored menu and add a tab for Image Editor+.

New Image→Image Editor+
All image editing can be done from this menu.
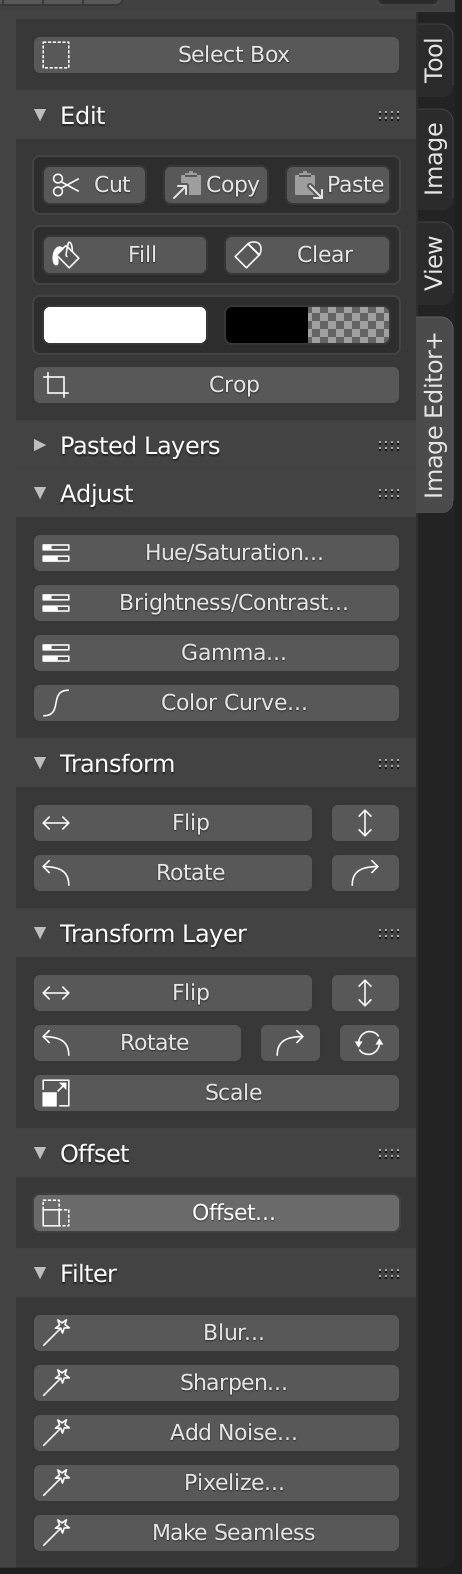
Image Editor+ menu
Fill Texture
Click on the Fill button in the Edit menu to fill in the texture.
The color and transparency can be changed under Fill.
You can also choose the color and transparency.
Paste an image as a texture
On the left screen, browse for the image you want to paste as a texture from the file icon at the top.
A transparent background (png) is recommended.
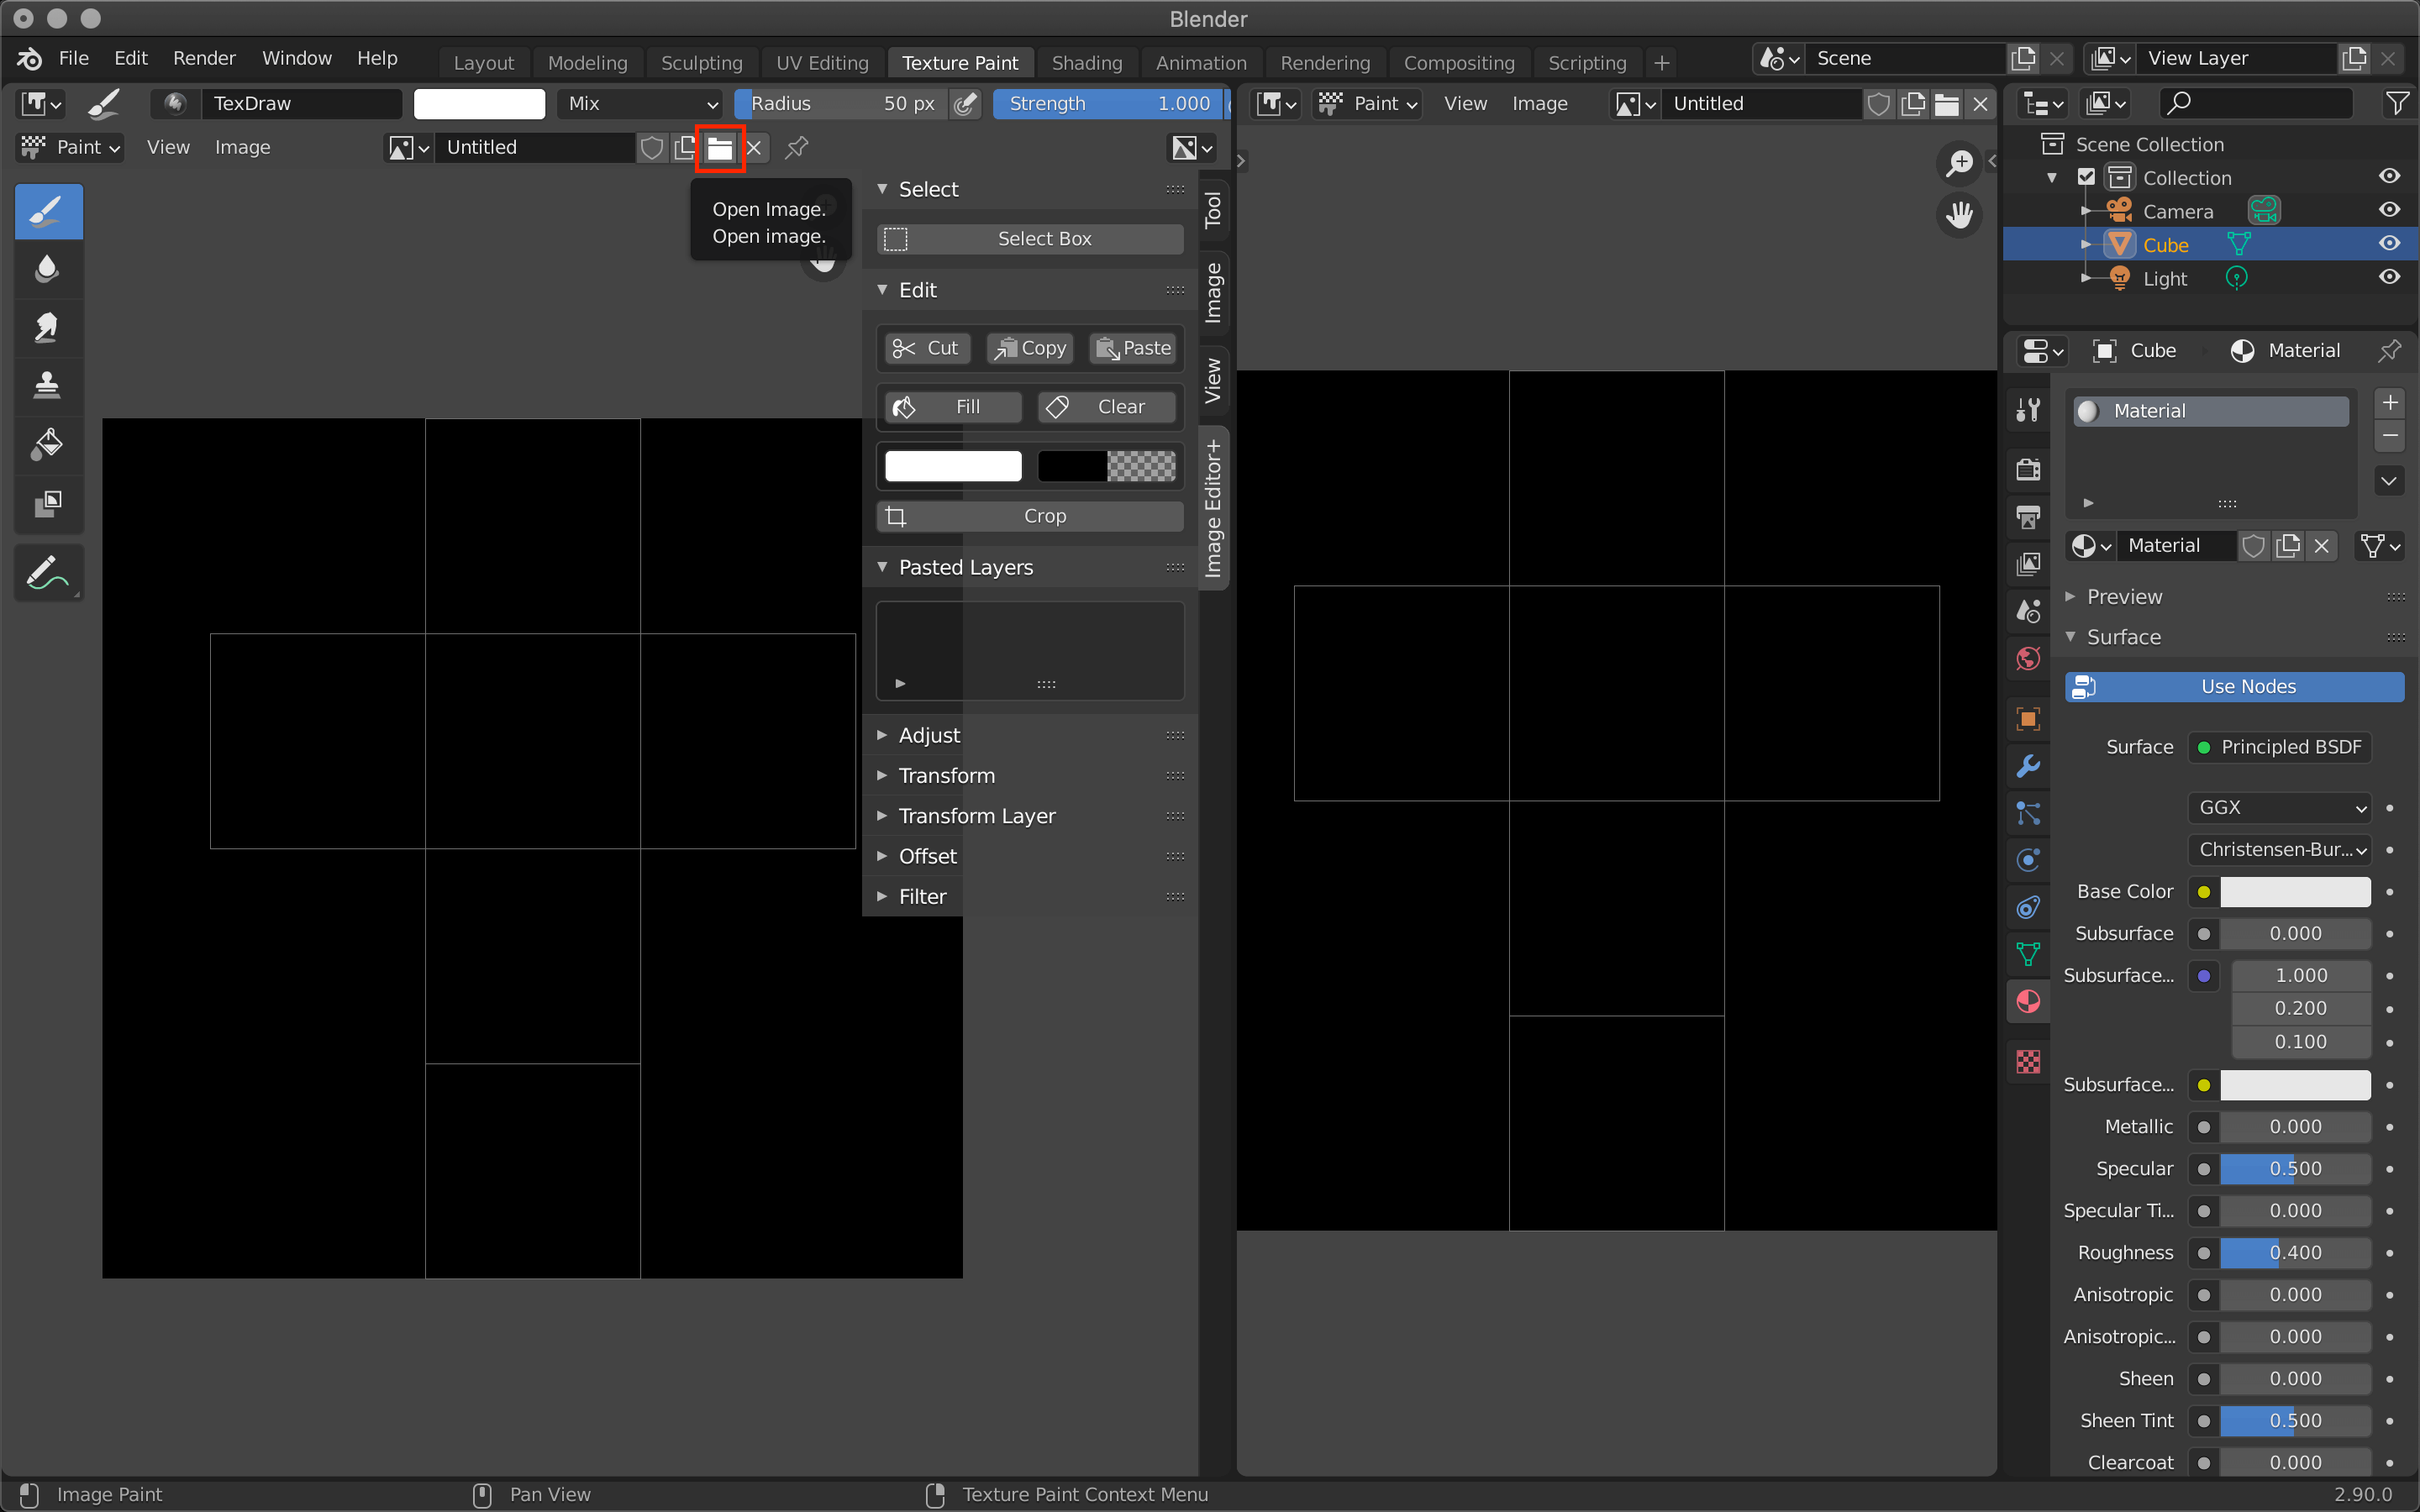
Load the material image.
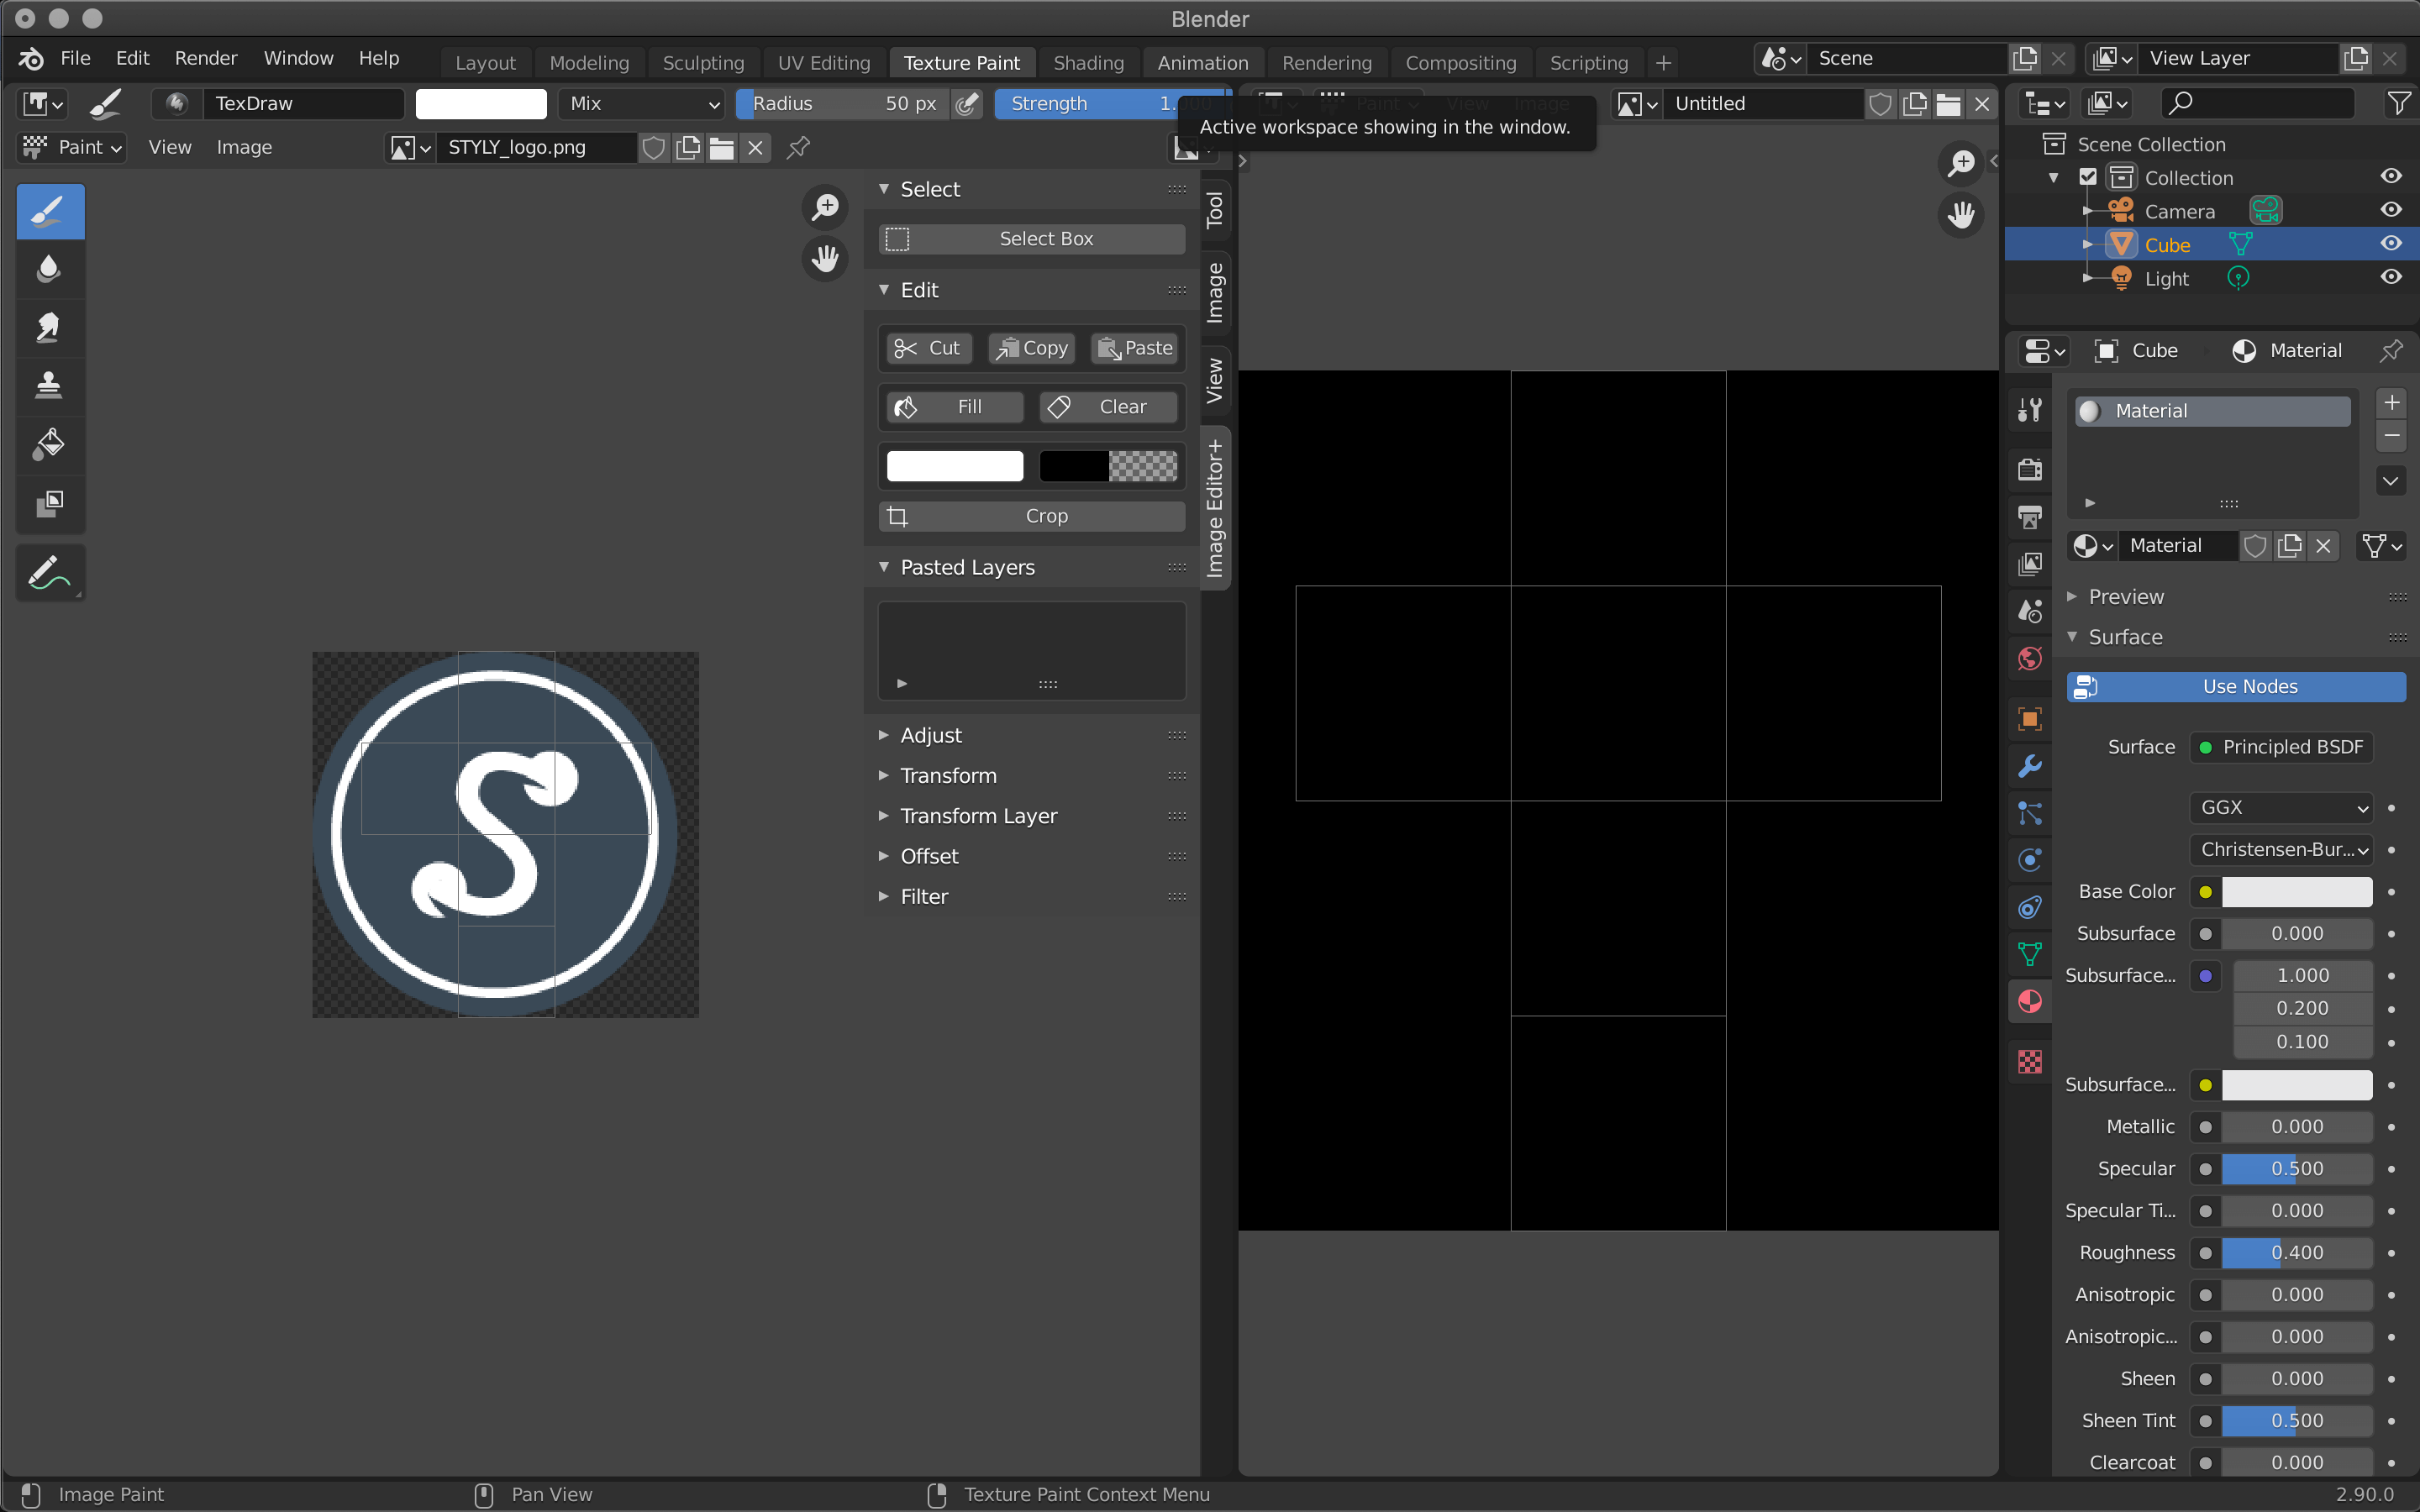
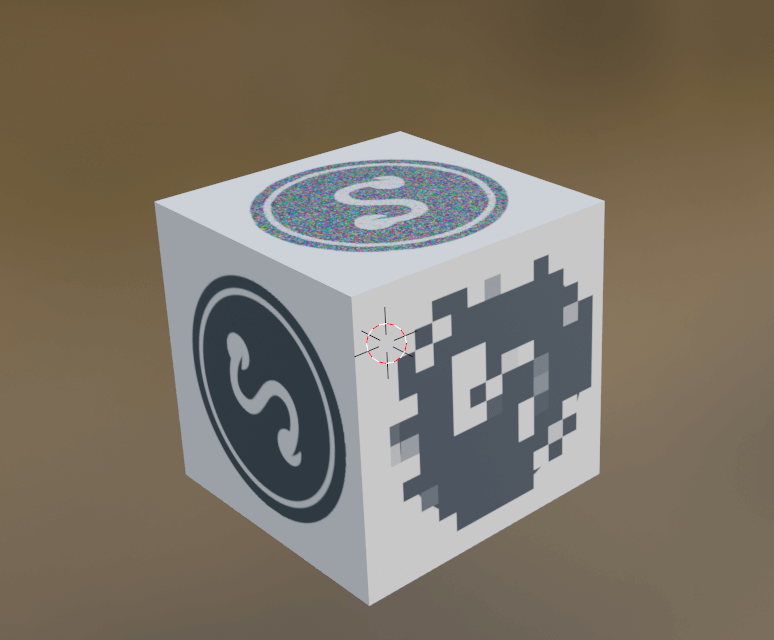
Using the STYLY mark
Paste this mark into the texture on the right screen.
Click Copy in the Image Editor+ on the left screen to copy it, then click Paste on the right screen.
The STYLY mark is then pasted into the texture of the cube.
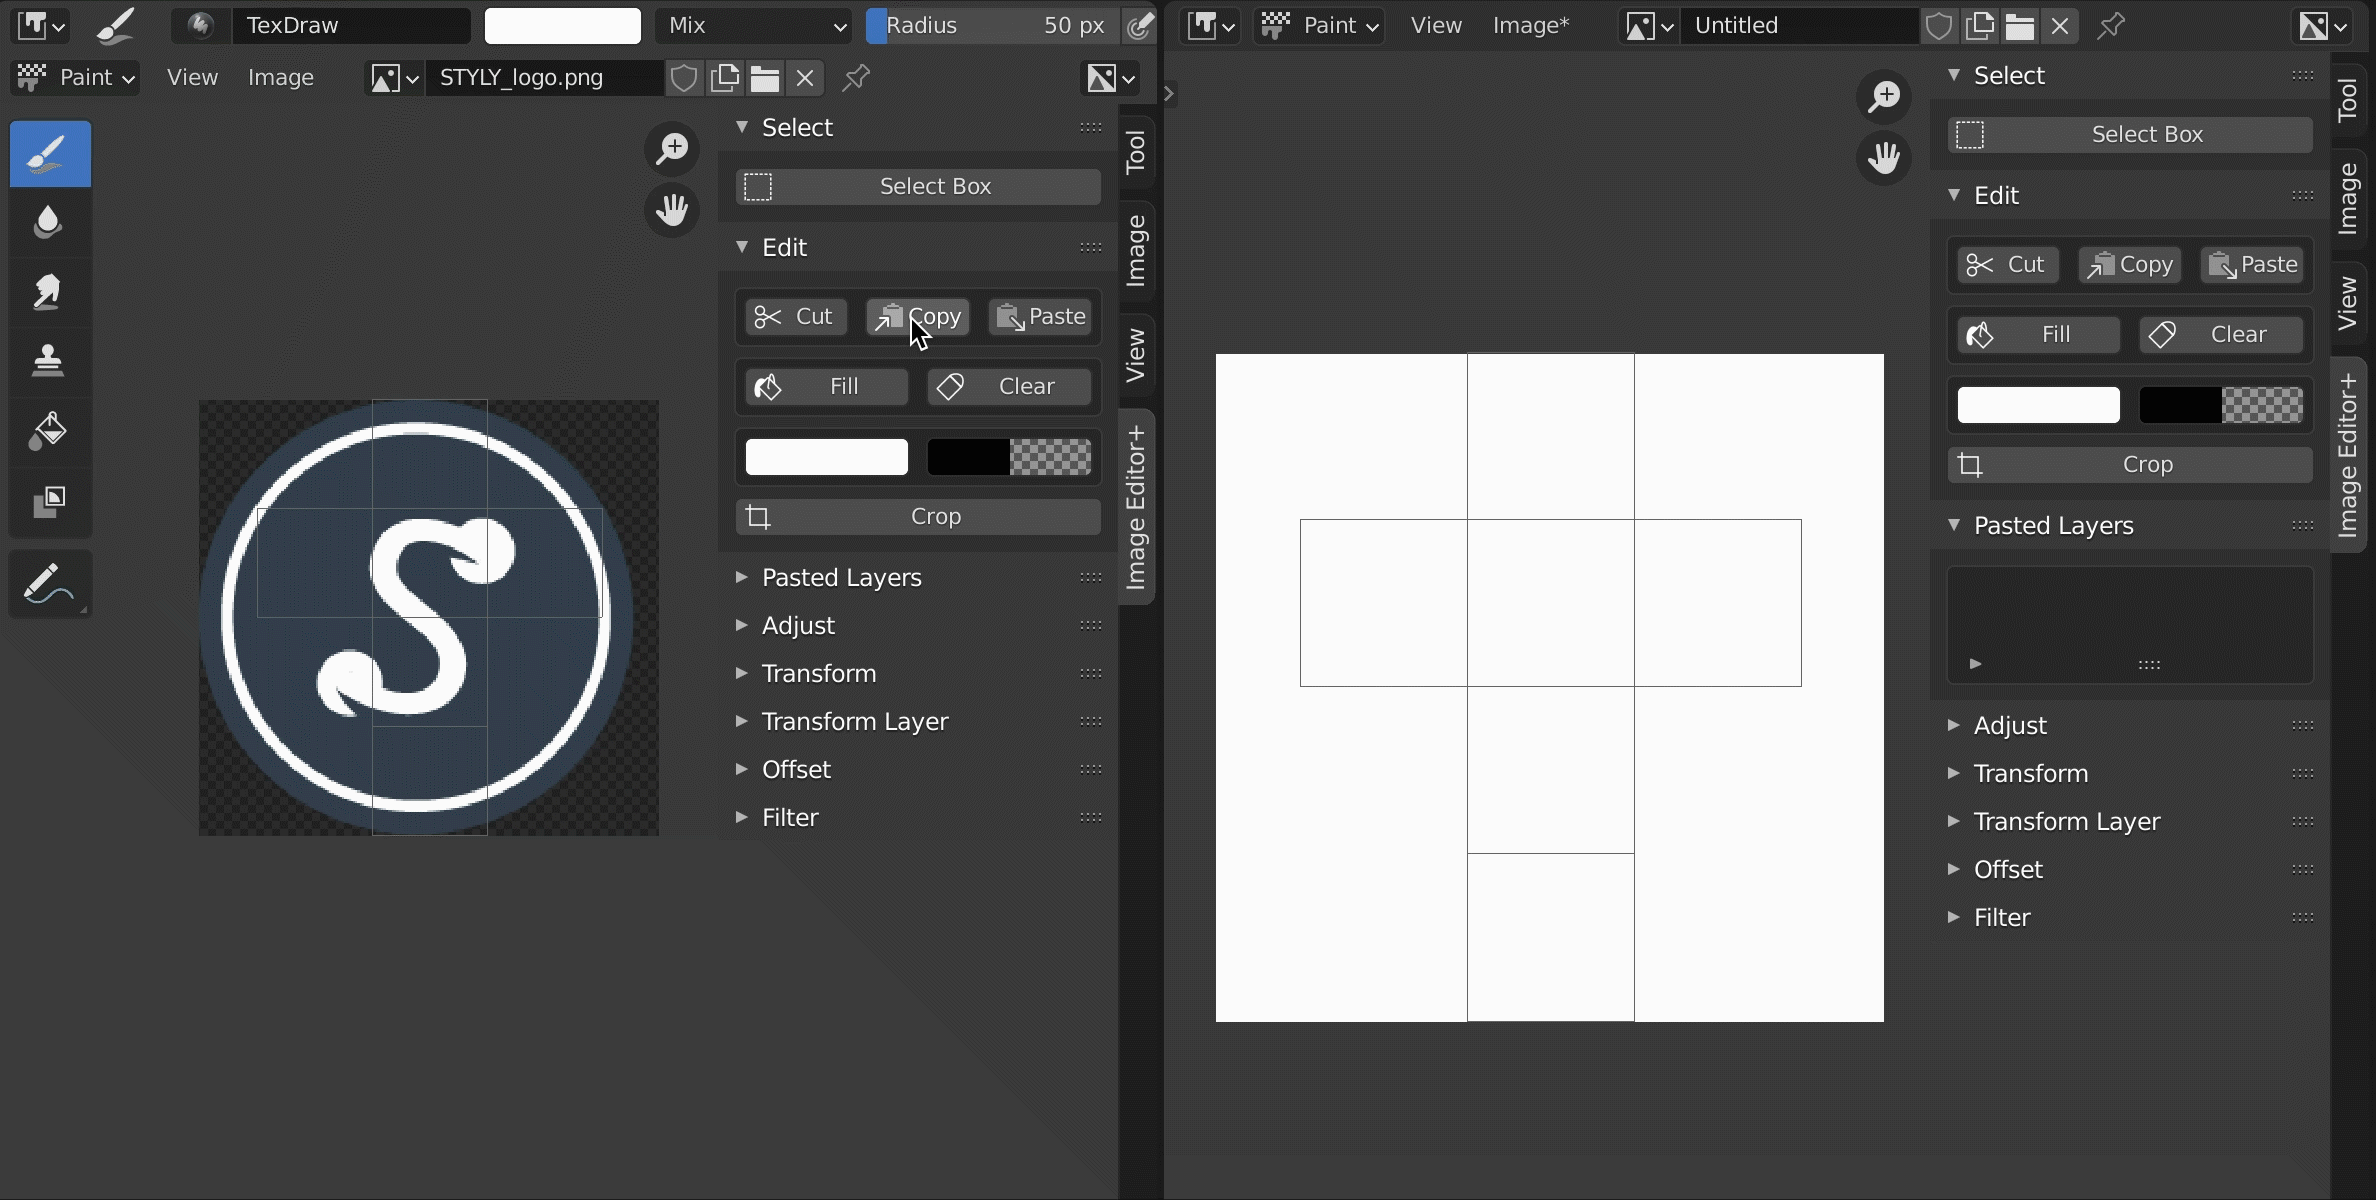
Copy in the left screen -> Paste in the right screen
Each time you paste, a layer is created, so you can edit each image individually.

A layer is created for each pasted image.
Moving an image
Select the layer you want to move, then click the cross-arrow symbol.
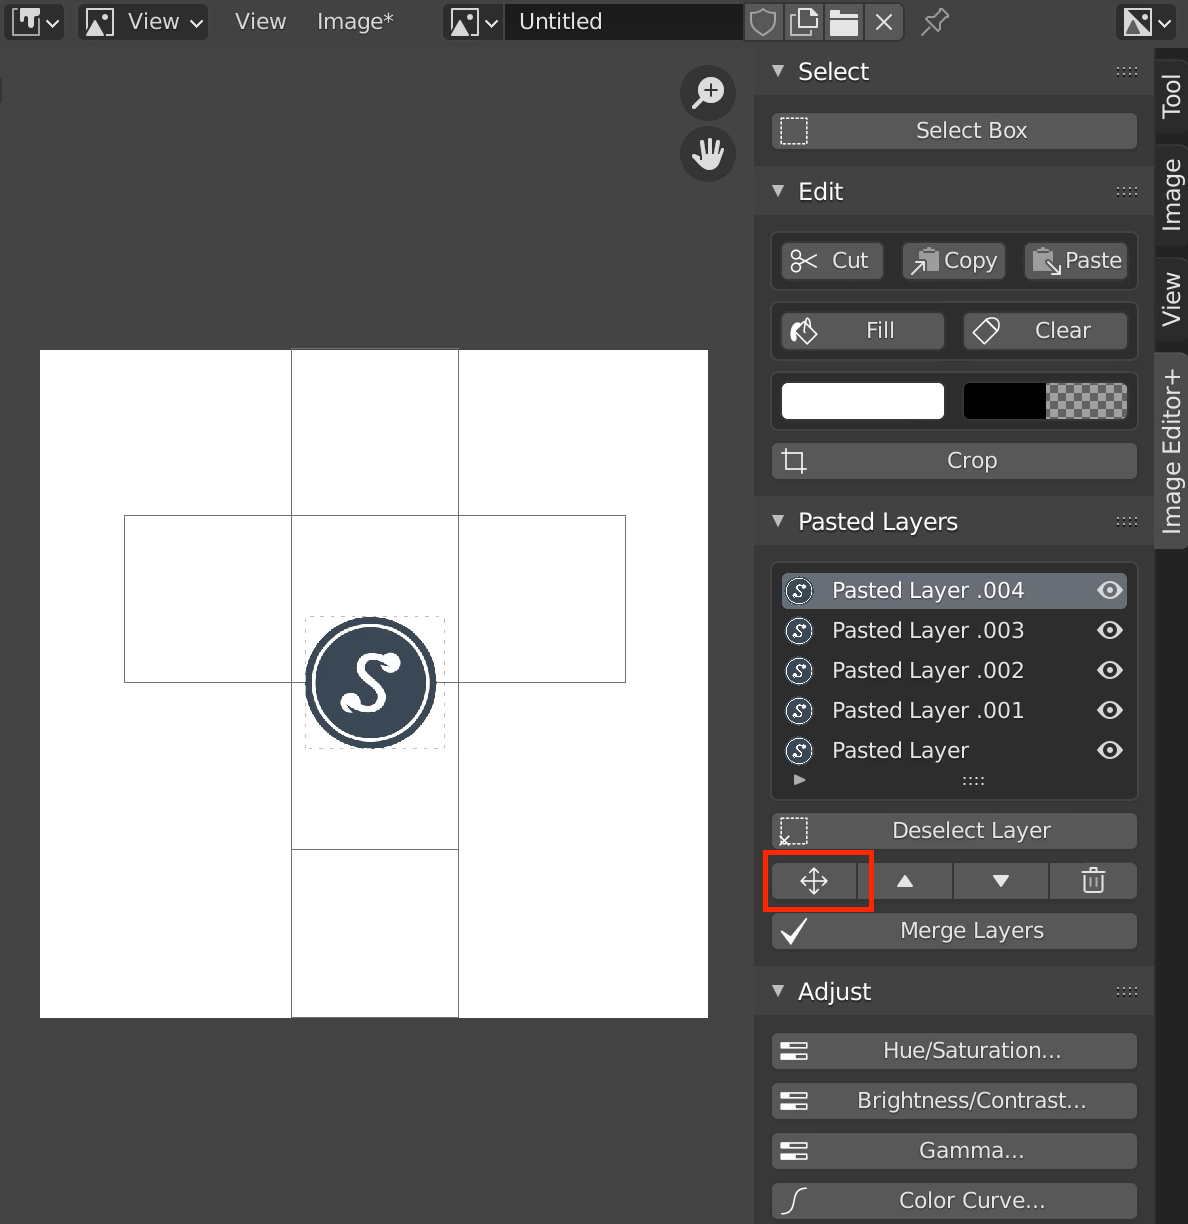
Move Layer
Move the cursor and click to place the image in a specific location.

Move Layer
Changing Image Tint
You can change the following items from Adjust.
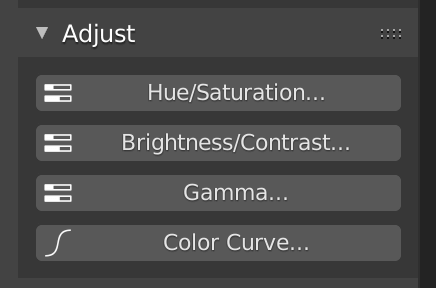
Adjust
| Hue/Saturation | Allows you to change the hue and saturation. |
| Brightness/Contrast | Allows you to change Brightness and Contrast. |
| Gamma | Allows you to change the brightness. |
| Color Curve |
Adjusts the ratio of |
Apply to preview, OK to apply.
If you want to go back, click Reset.
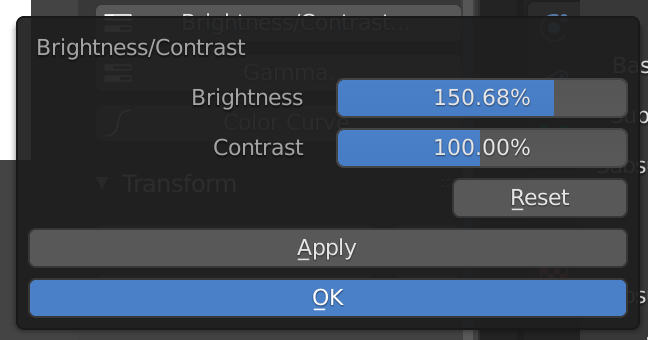
Apply/OK
Resize and rotate the image
Transform is applied to all layers, while Transform Layer is applied to the selected layer only.
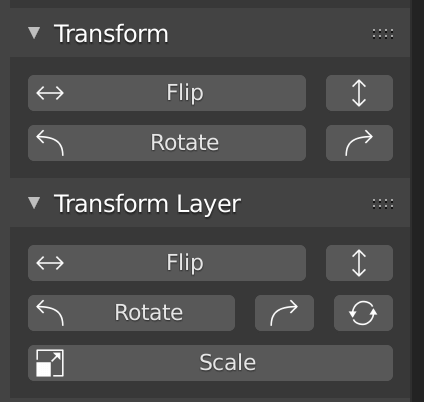
Transform/Scale
| Flip | Flip horizontally | Flip vertically | |
| Rotate | 90 degrees to the left | 90 degrees to the right | Rotate (click → move cursor, click → confirm) |
| Scale | Scale the layer |
Offset
Change the display position of the image.
Filter
We can make changes other than color.
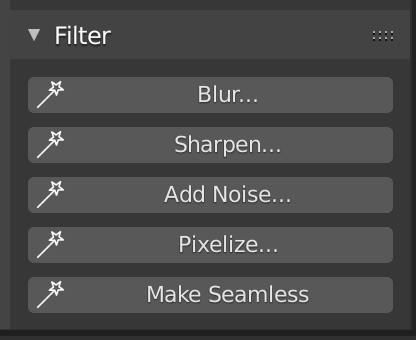
Filter
| Blur | Blurs the image. |
| Sharpen | Makes the colors and lines of the image clearer. |
| Add Noise | Roughens the image. |
| Pixelize | Makes the image look like a mosaic. |
| Make Seamless | Creates a seamless pattern when laid out. |
Saving the Texture
When you are done editing, click Marge Layers to merge the layers.
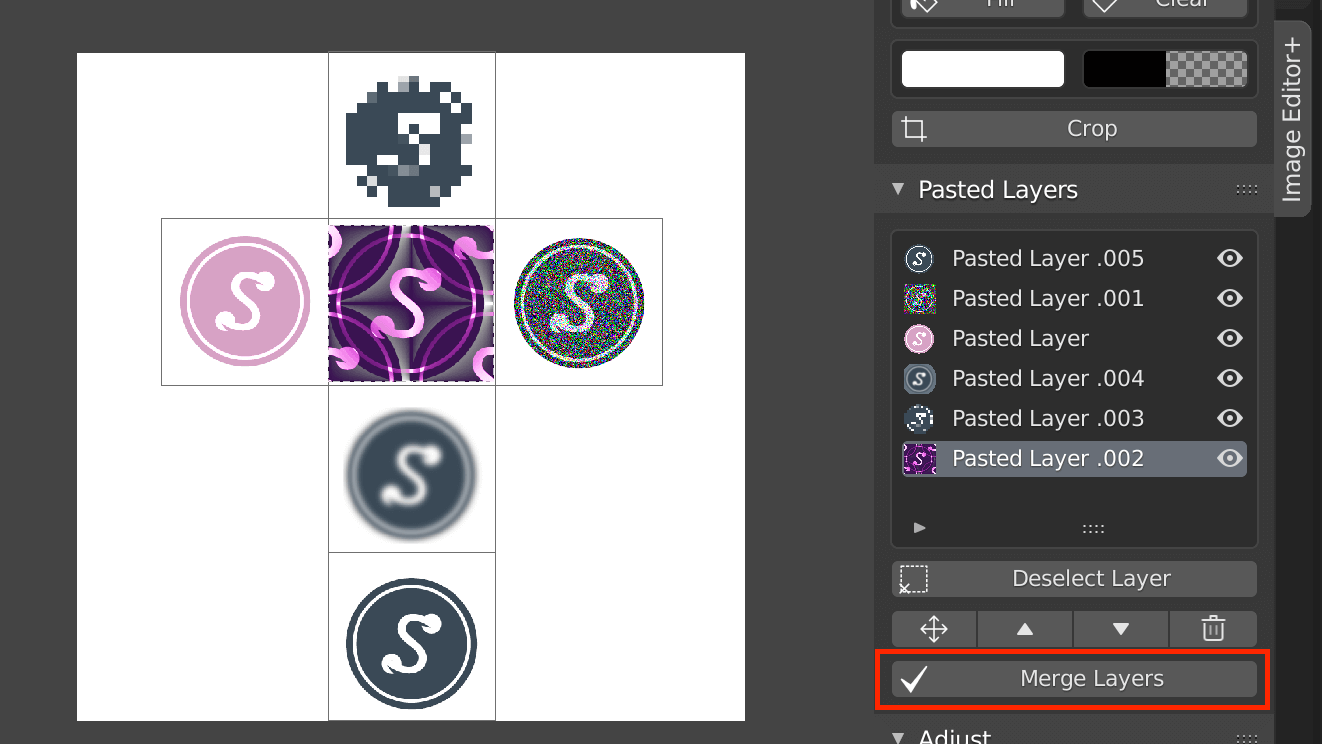
Marge Layers
Then select Save from the Image menu at the top of the screen to save the image.
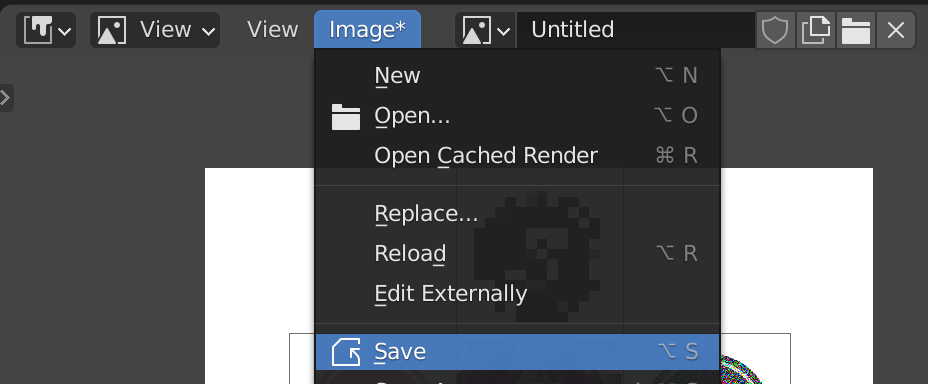
Save
Assigning Textures
Switch to the layout screen and open the material properties from the list of icons in the lower right corner of the screen.
By default, only the color can be set in Base Color, so we will change it so that textures can be used.

Base Color
Click on the yellow circle in Base Color and select Image Texture to assign an image or texture.
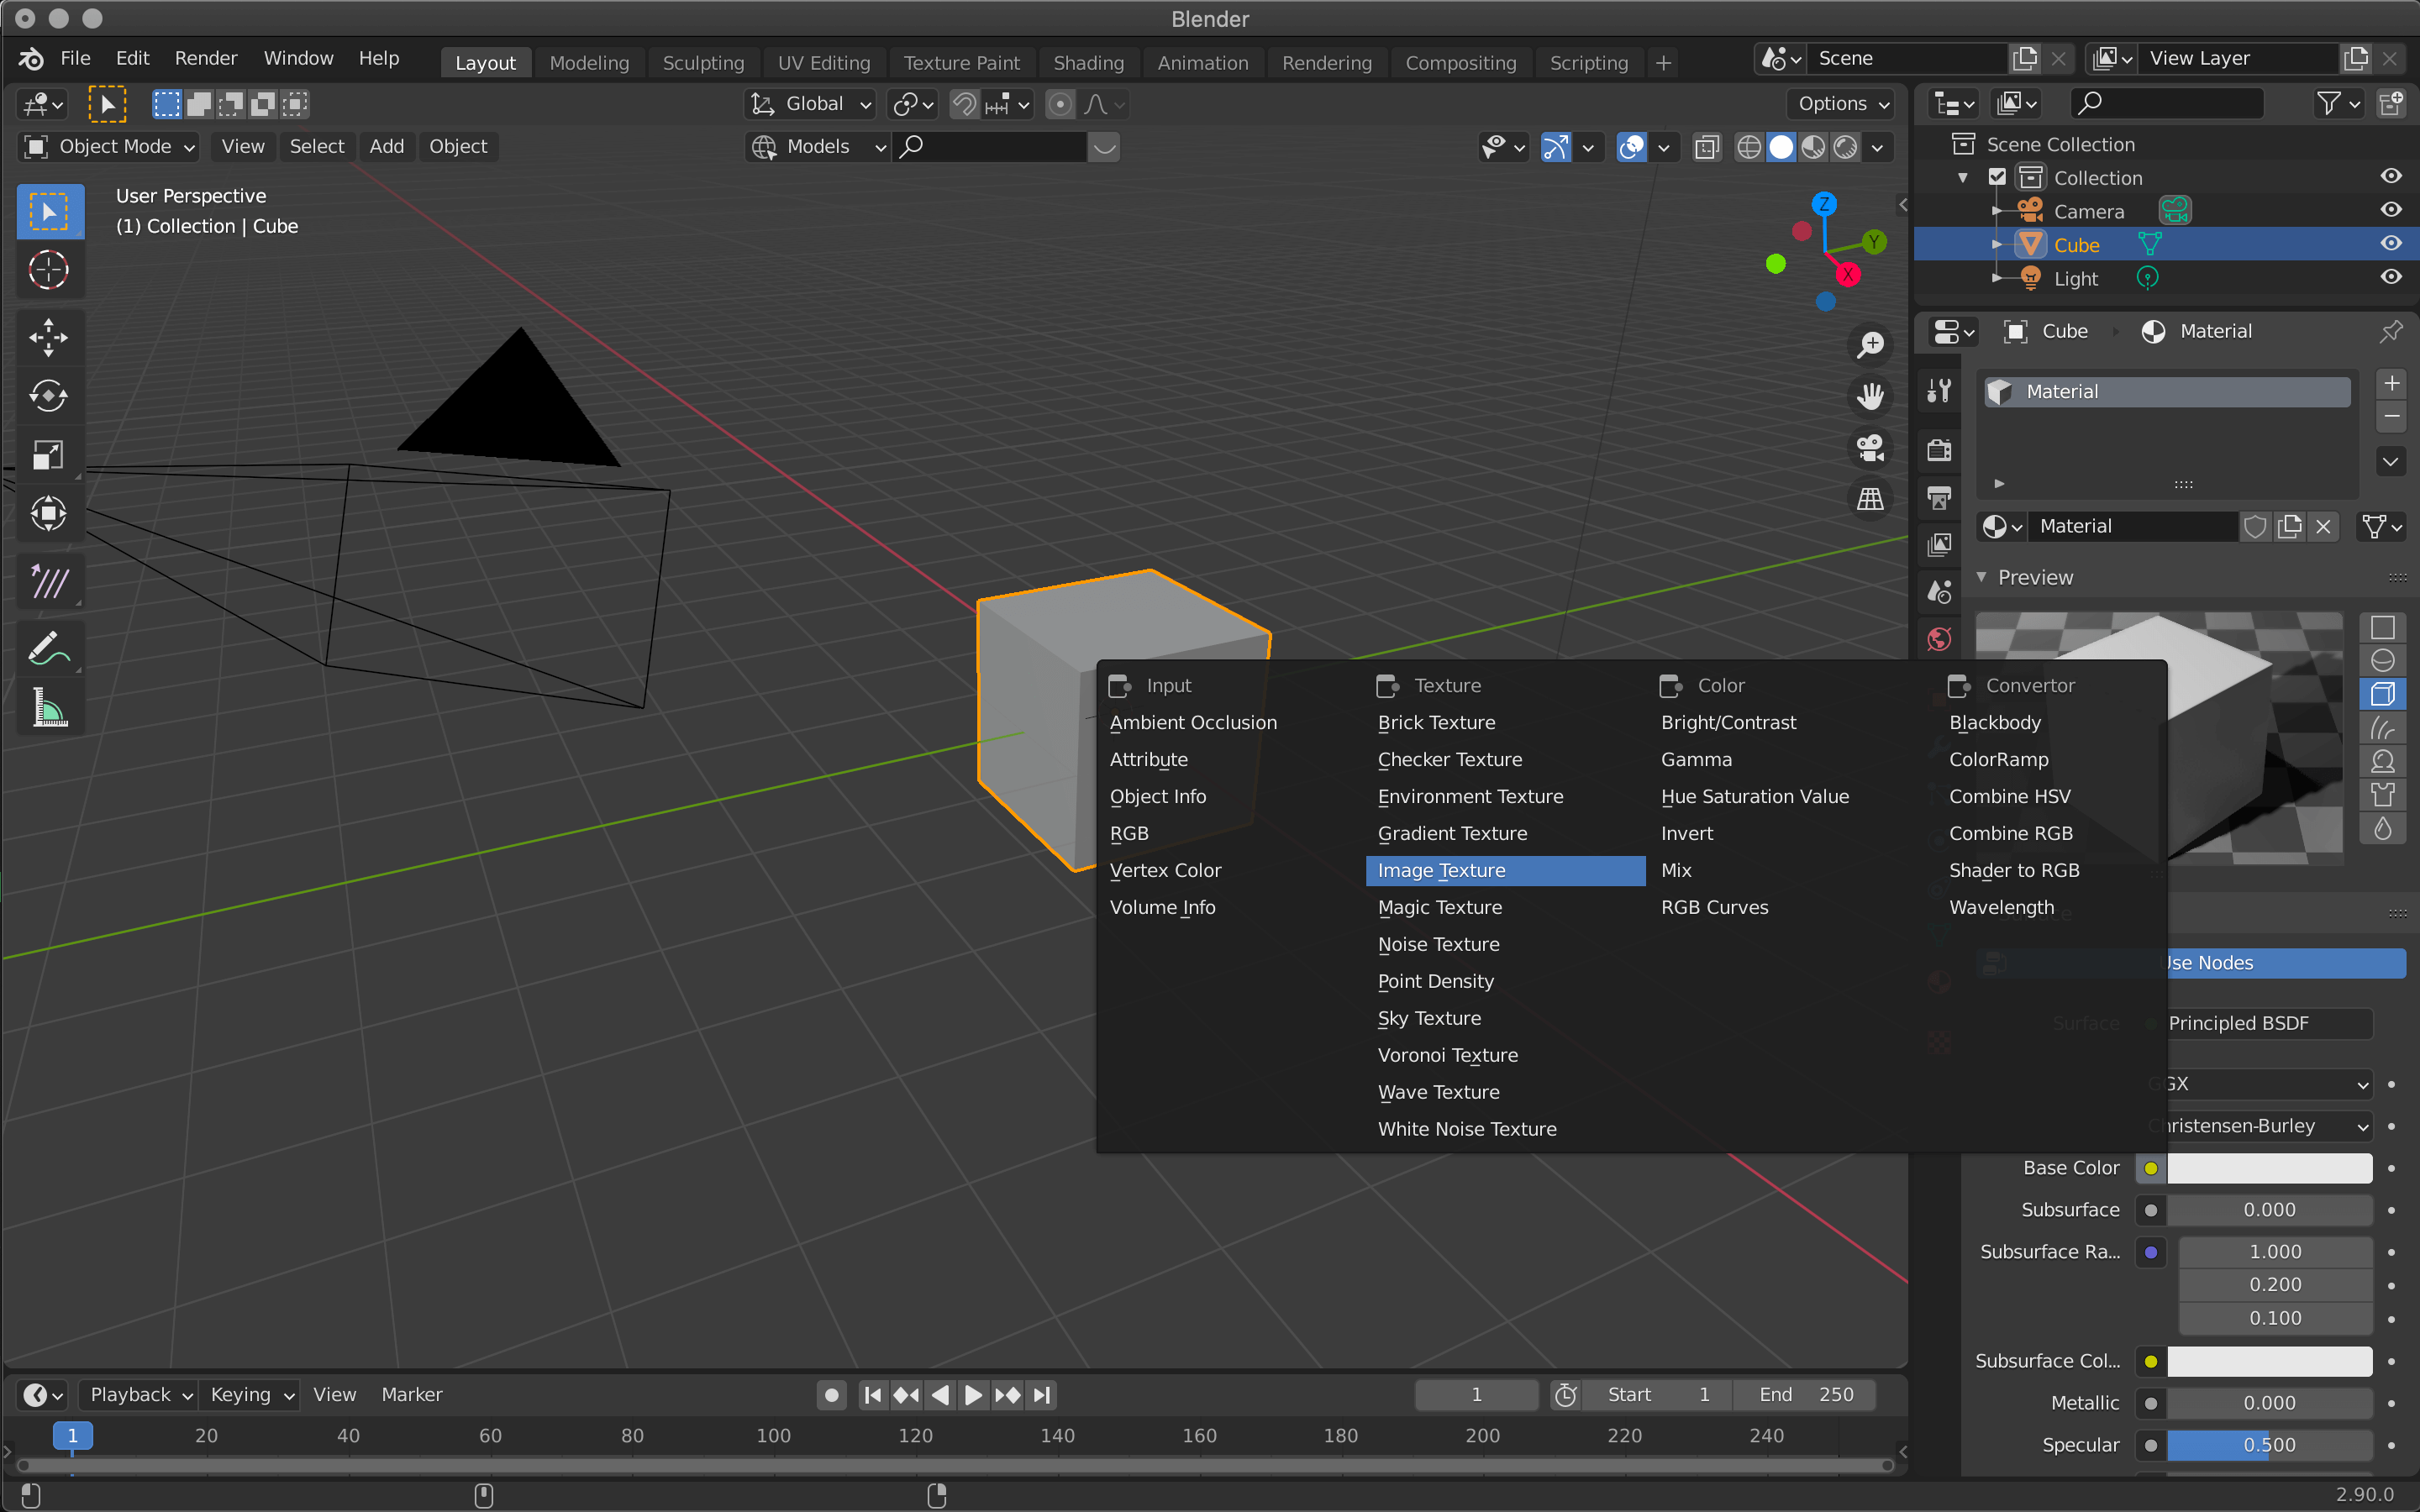
Image Texture
Click on the image icon and select the texture you just used.
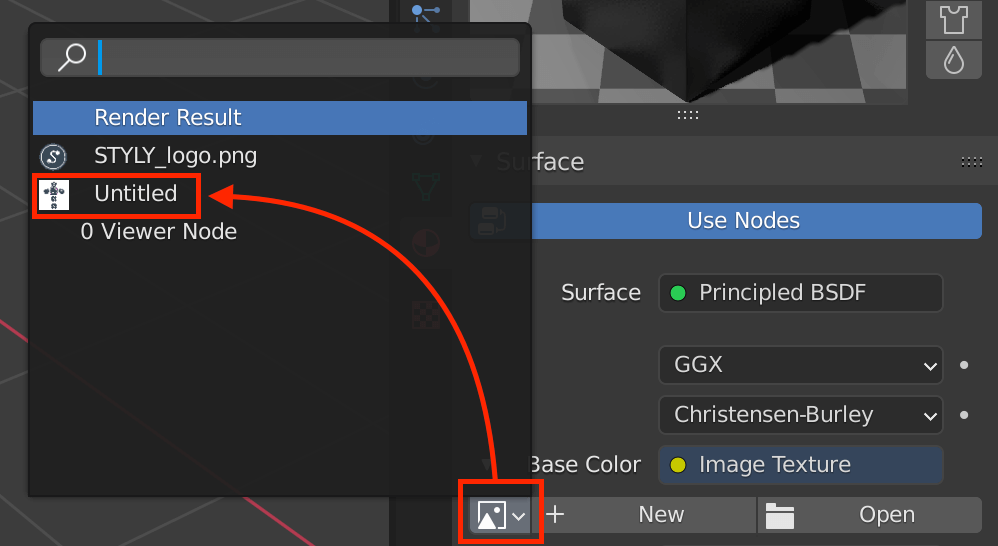
Click on the image icon -> Texture
Select Z → Material Preview to check if the material is actually reflected.

Material Preview
In this example, we used cubes to create a simple texture, but if you want to create a texture for a complex shaped object, you will need to use UV expansion.
UV expansion is the process of cutting open a 3D object into a 2D plane and setting where the texture will be placed.
For more details, please refer to this article.
![[Blender for Beginners] Let’s Start Modeling Part 4 – Creating Textures](https://styly.cc/wp-content/uploads/2018/10/test_.png)
Try using the Image Editor+Text Tool
Go back to the 3D viewport from the top left icon and switch the tab at the top of the screen to Texture Paint.
Select the cube and create a new texture by clicking the New button at the top of the left screen.
New Texture
Click on the < button in the upper right corner of the window to display the Image Editor Plus menu that is stored there.
New Image→Image Editor+
Check that the Text item has been added to the bottom of the menu.
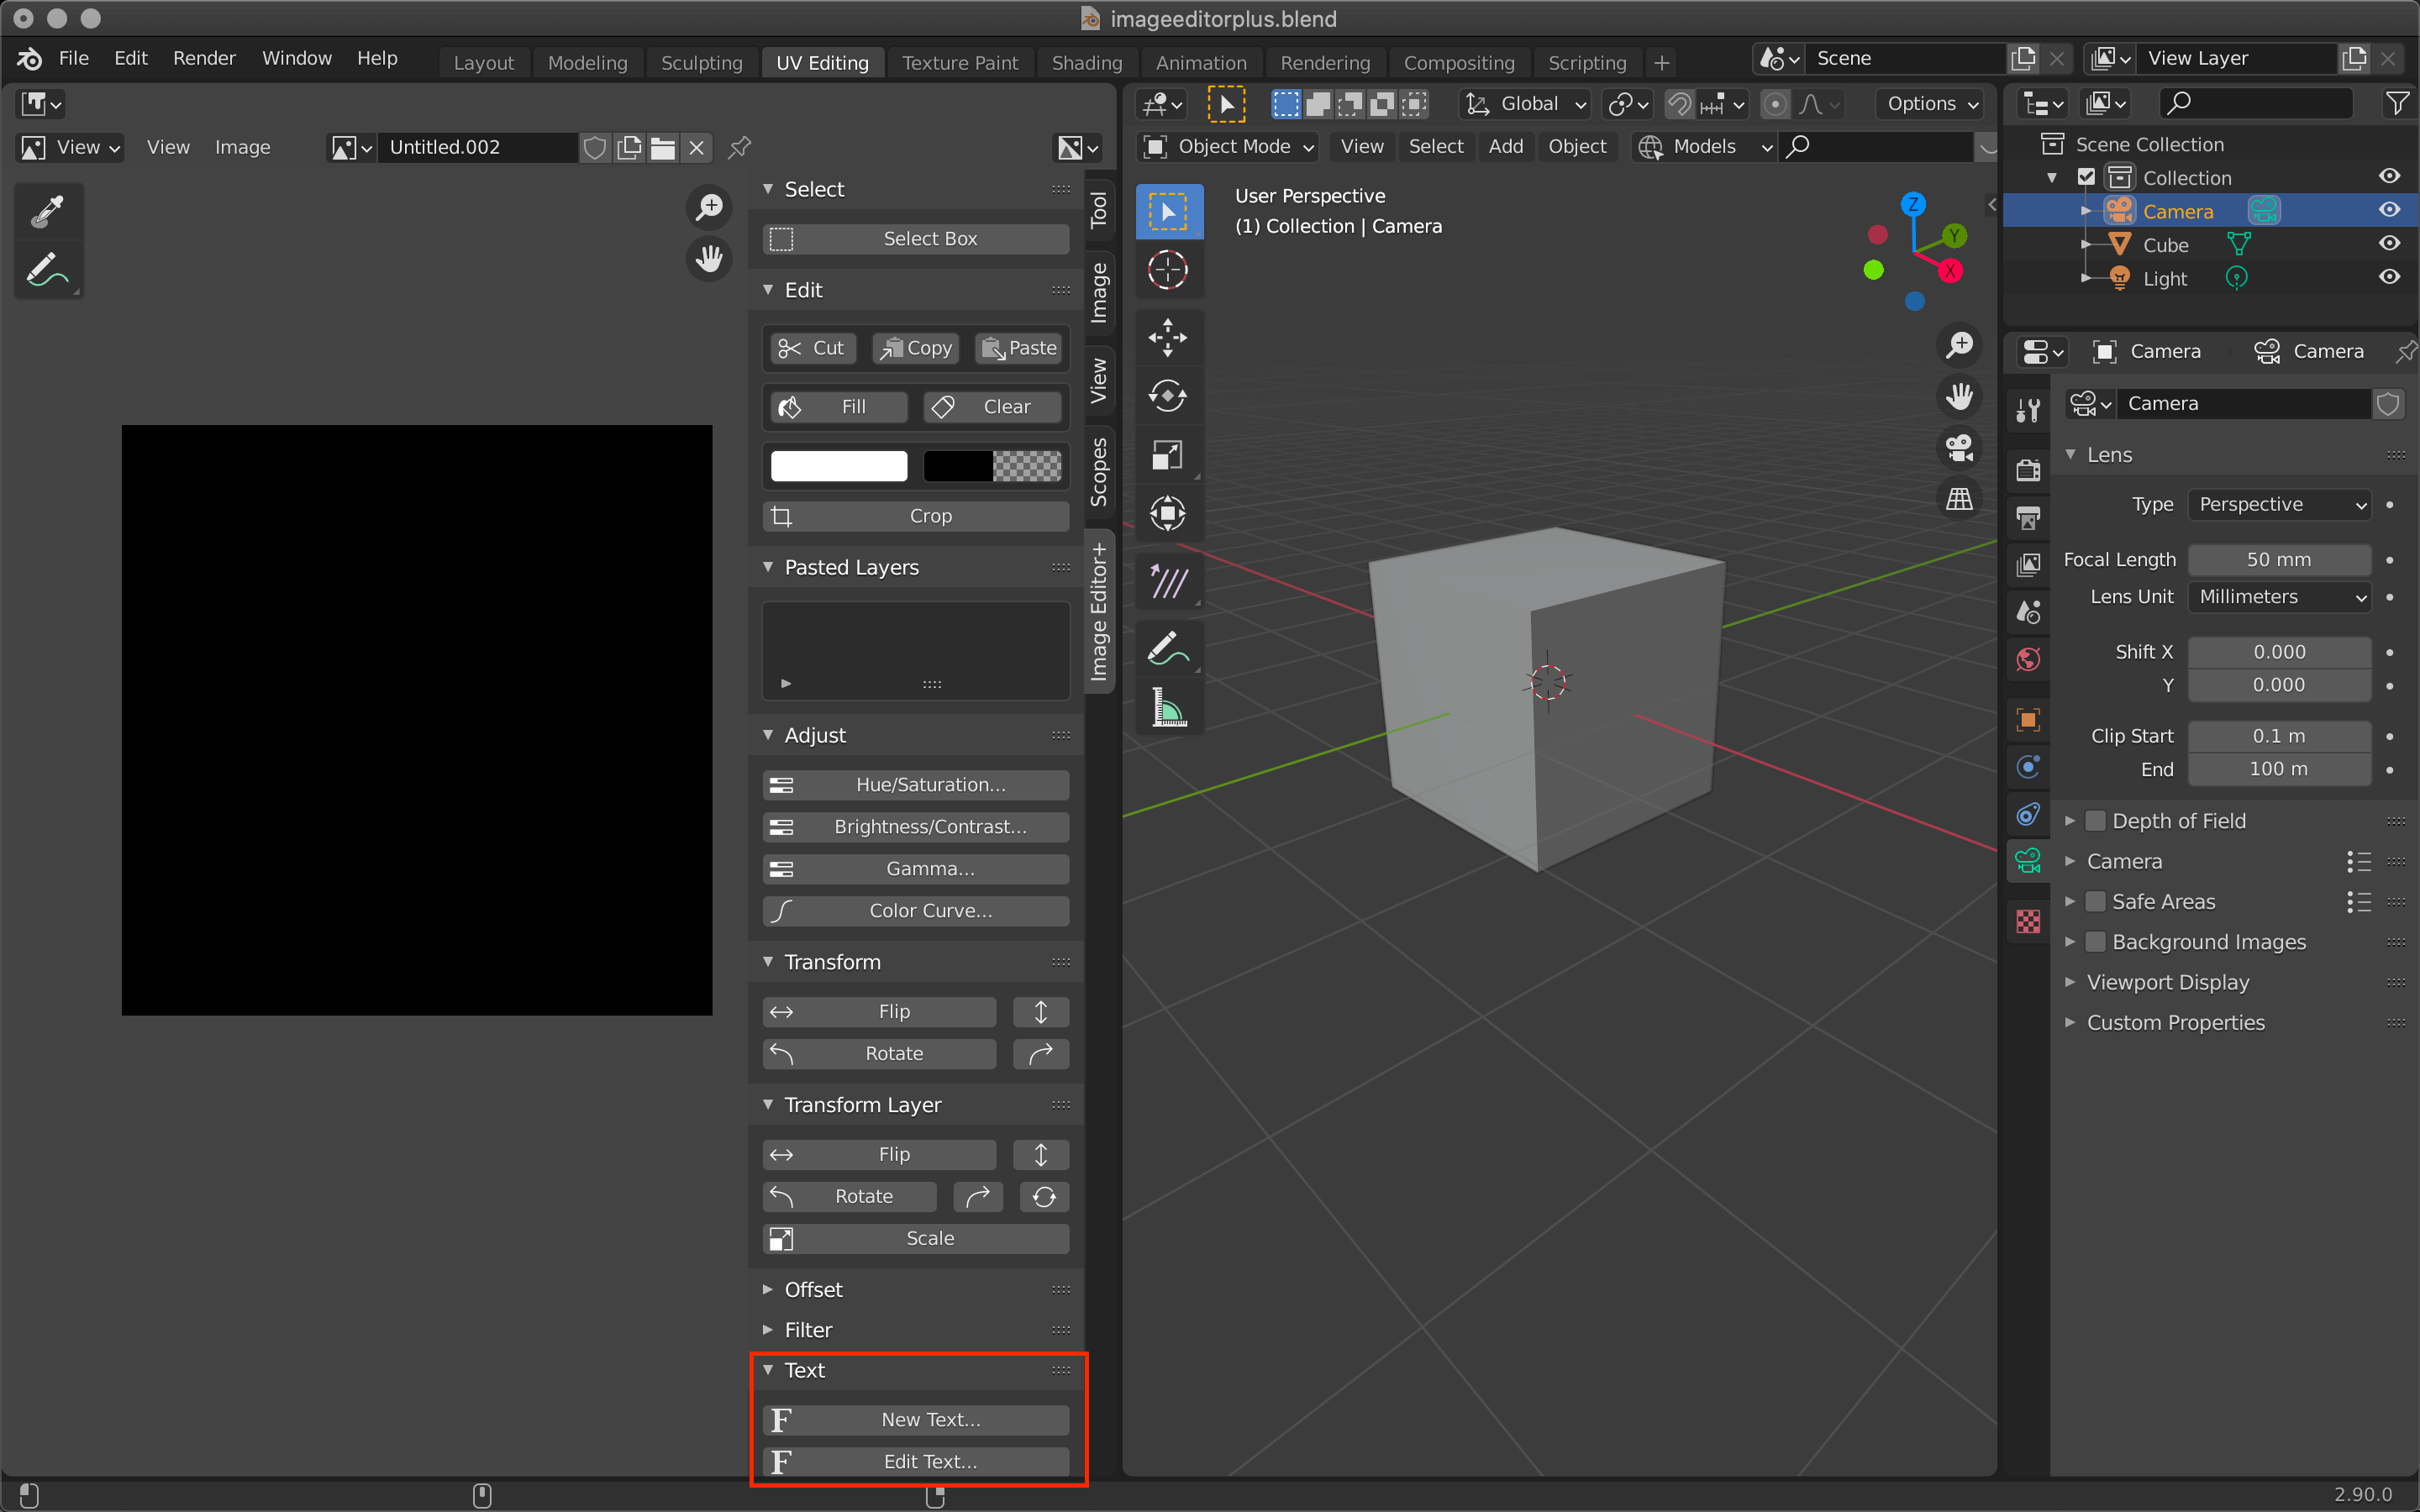
Text
Select Fill, and click on the texture on the left side of the screen to fill the entire area.
Click on the square below Fill to select the color and transparency.
Fill
Click “New Text” to enter new text.
If you want to edit the text again after applying it, select the layer of the font you want to edit from Pasted Layers and click the Edit Text button.
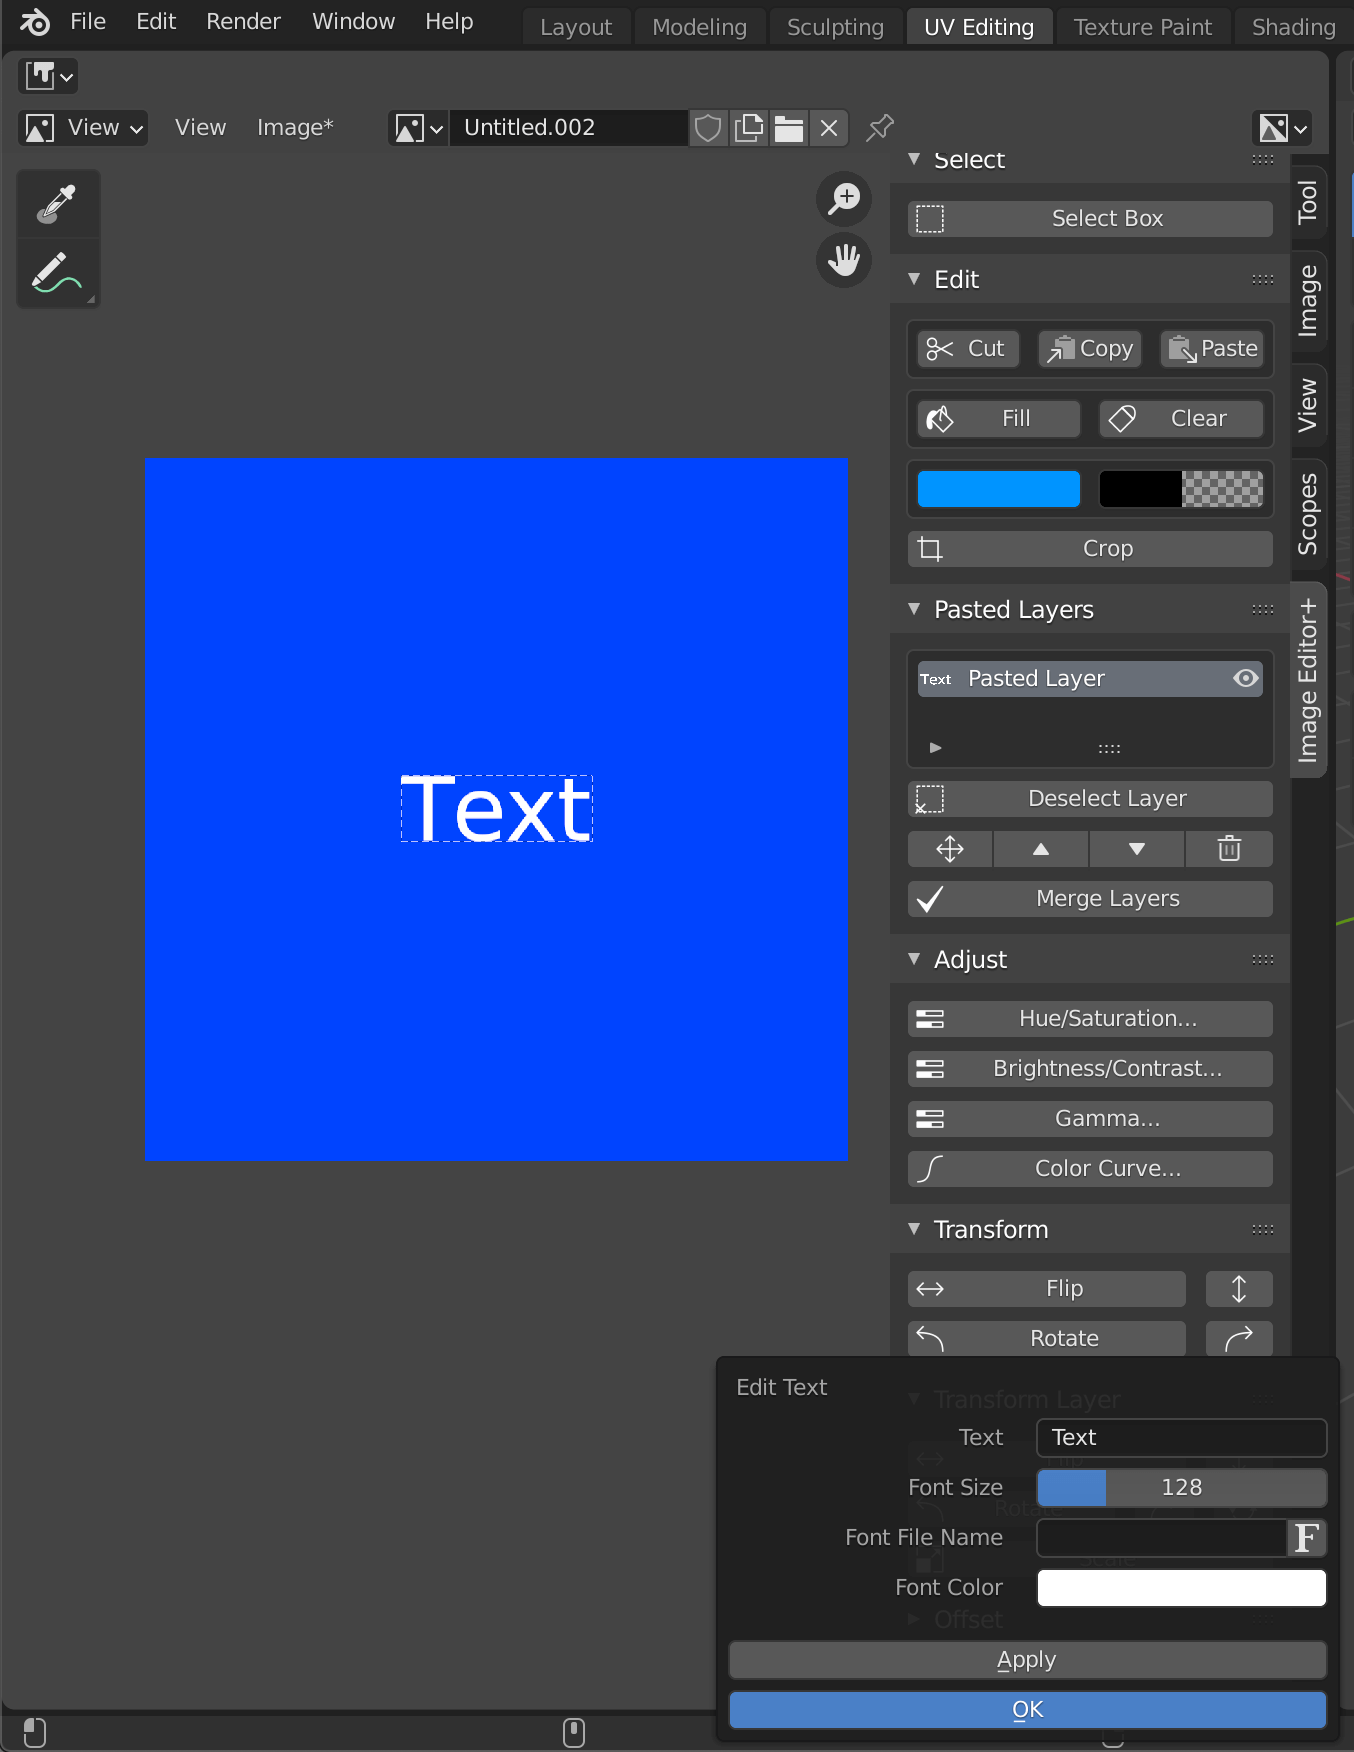
New Text
| Text | Text input |
| Font Size | Font Size |
| Font File Name | Click F→Refer to font list |
| Font Color | Select the color of the text. |
If you have downloaded a lot of fonts to your computer, please note that browsing the font list will slow down the operation.
If you have not specified a font, you can use the default font.
Click the cross-arrow to move the cursor.
When you move the cursor, the text will also move.
When the position is decided, click to confirm.
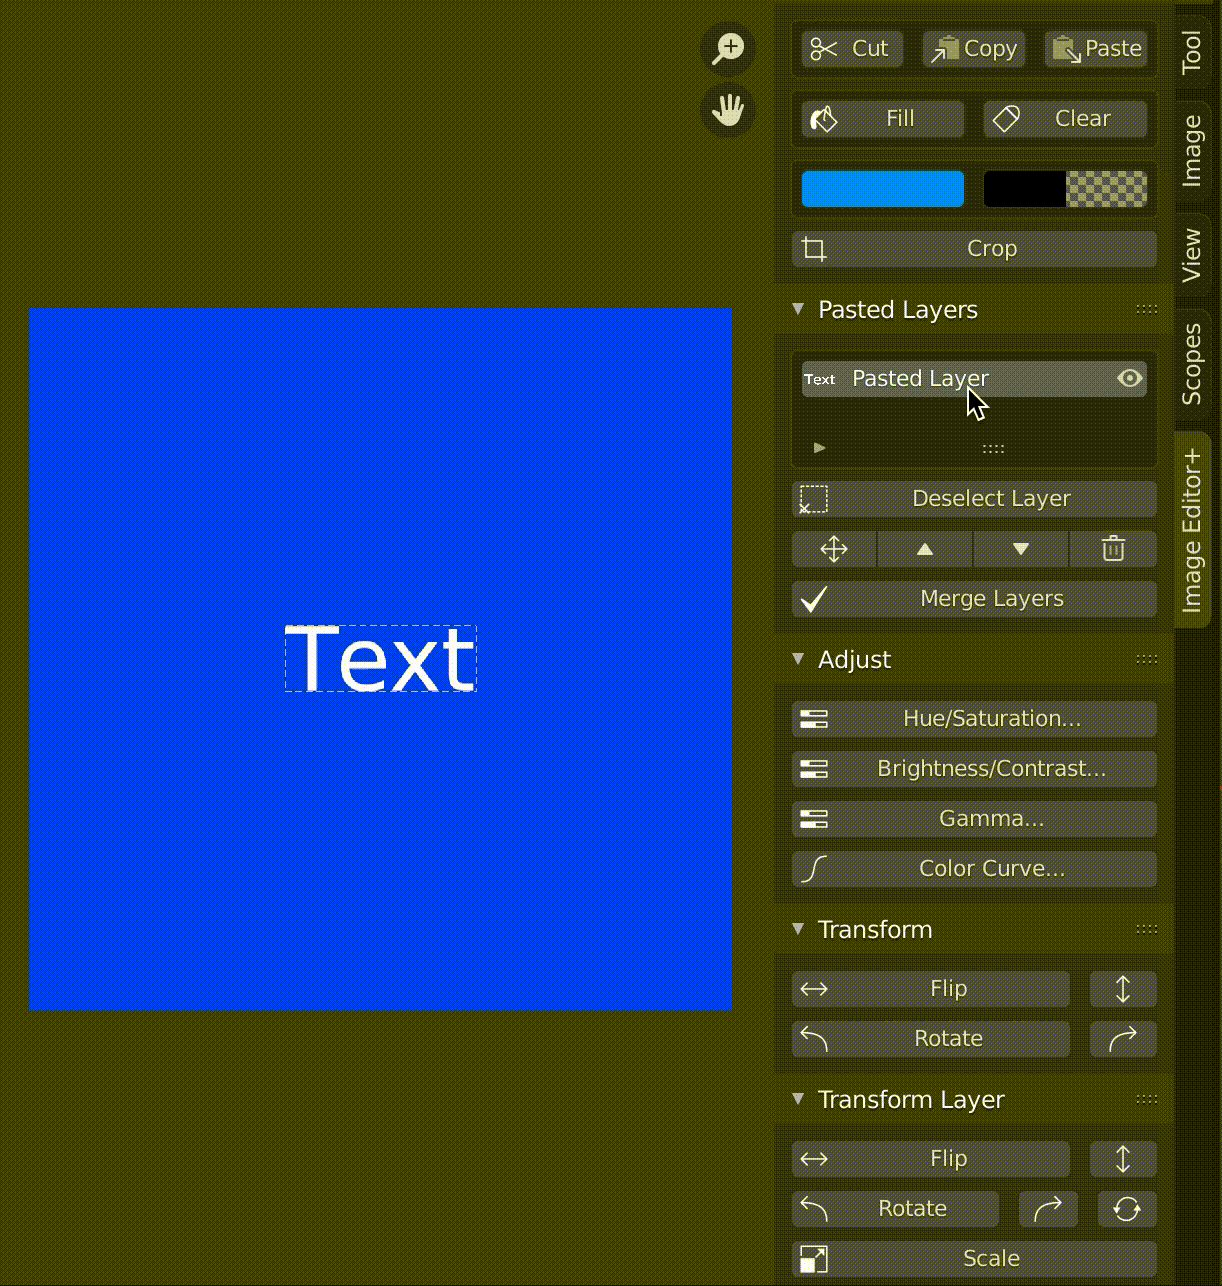
Moving a font (layer)
Click the Rotate button in Transform to rotate the font by 90 degrees.
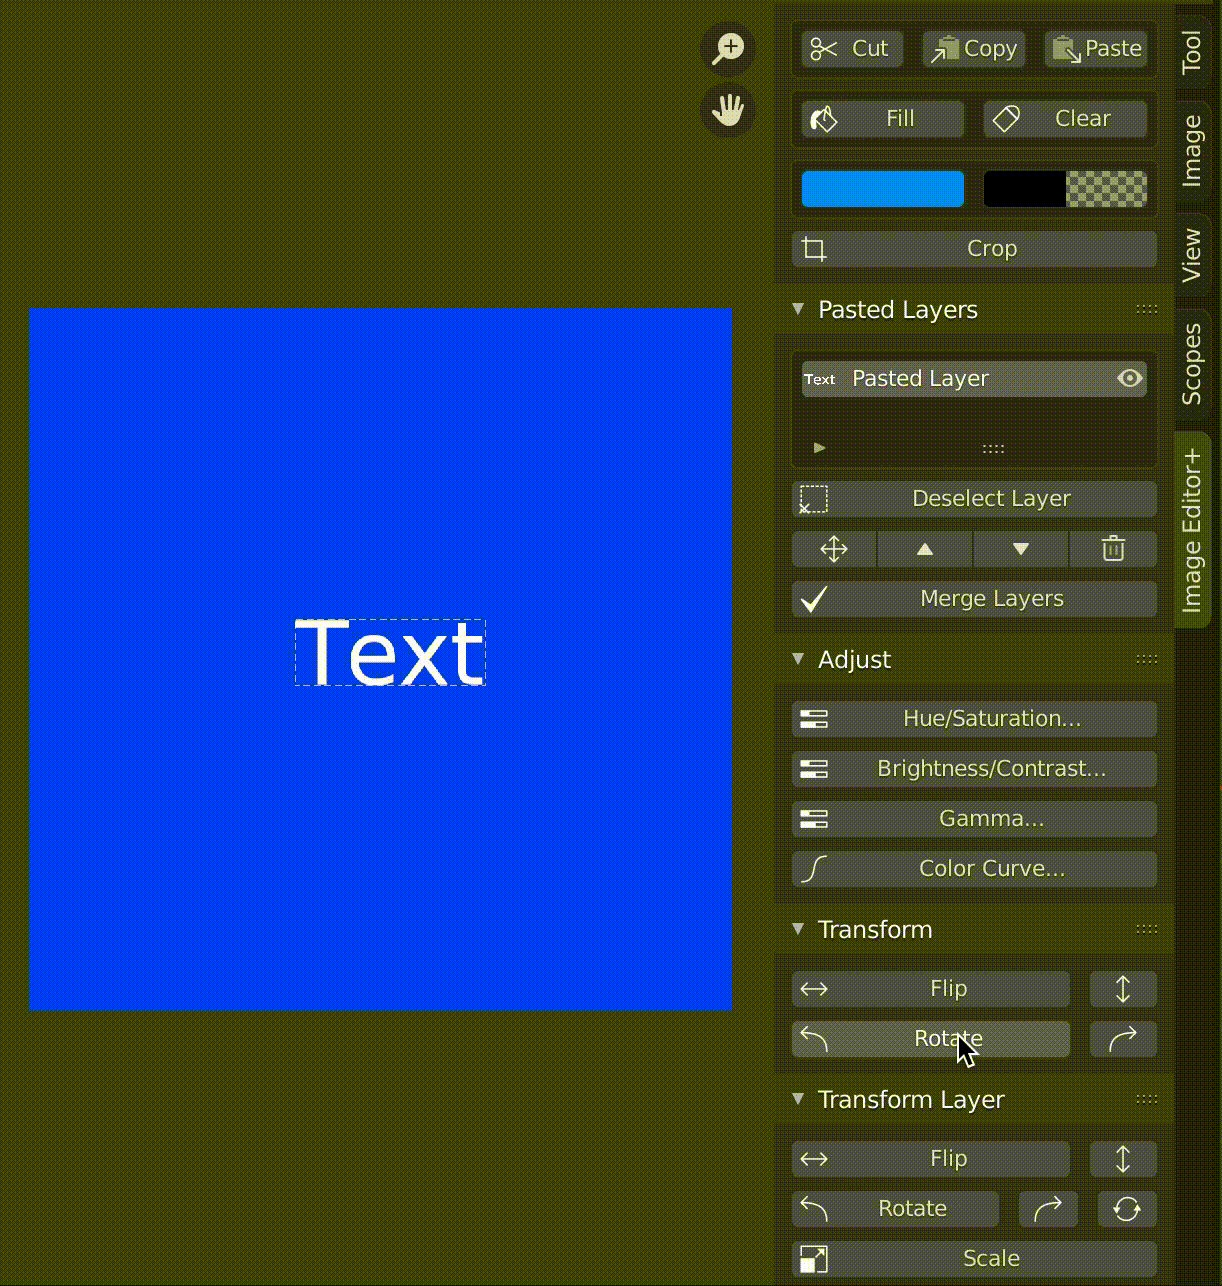
Rotate Font (Layer)
When you have finished setting the font and position, click Merge Layers.
Note that the layers will be merged and you will not be able to edit them after this.
Assigning textures
Switch to the layout screen and open the material properties from the list of icons in the lower right corner of the screen.
By default, Base Color can only be used for color settings, so we will change it to allow the use of textures.
Base Color
Click on the yellow circle in Base Color and select Image Texture to assign an image or texture.
Image Texture
Click on the image icon and select the texture you just used.
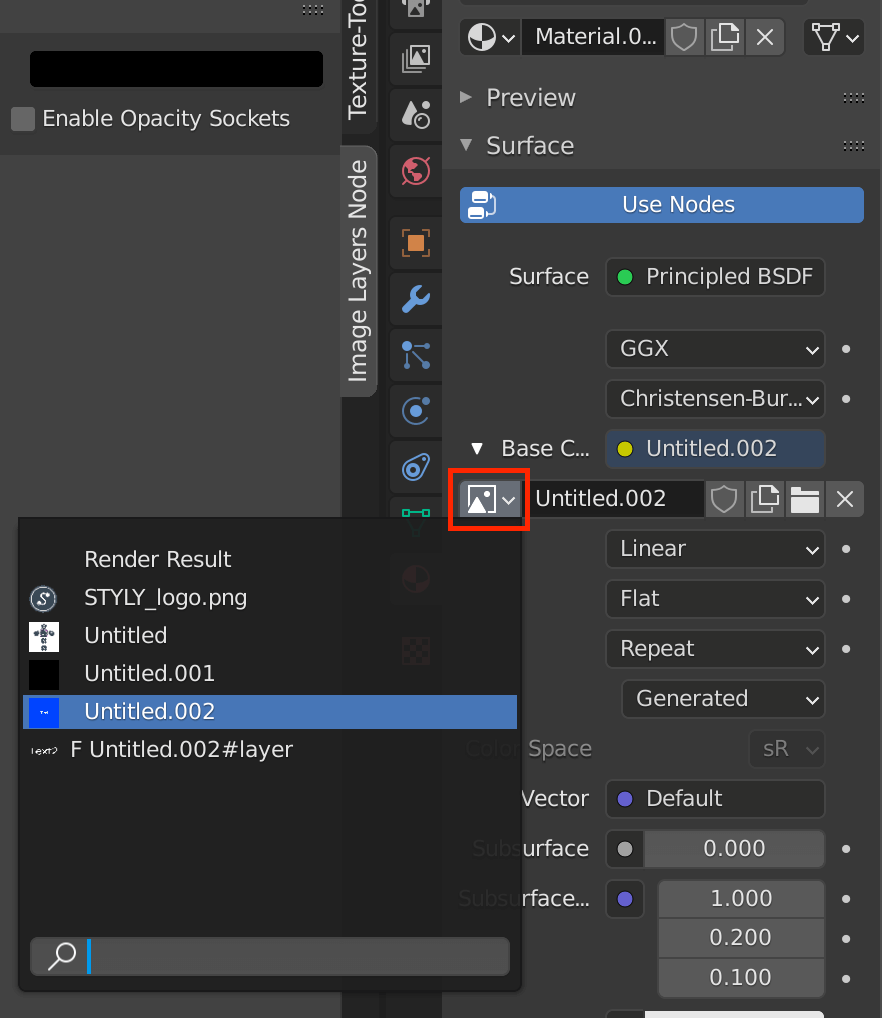
Image Texture
Select Z → Material Preview and check if the material is actually applied.
Material Preview
How to upload to STYLY
Let’s upload the 3D model to STYLY.
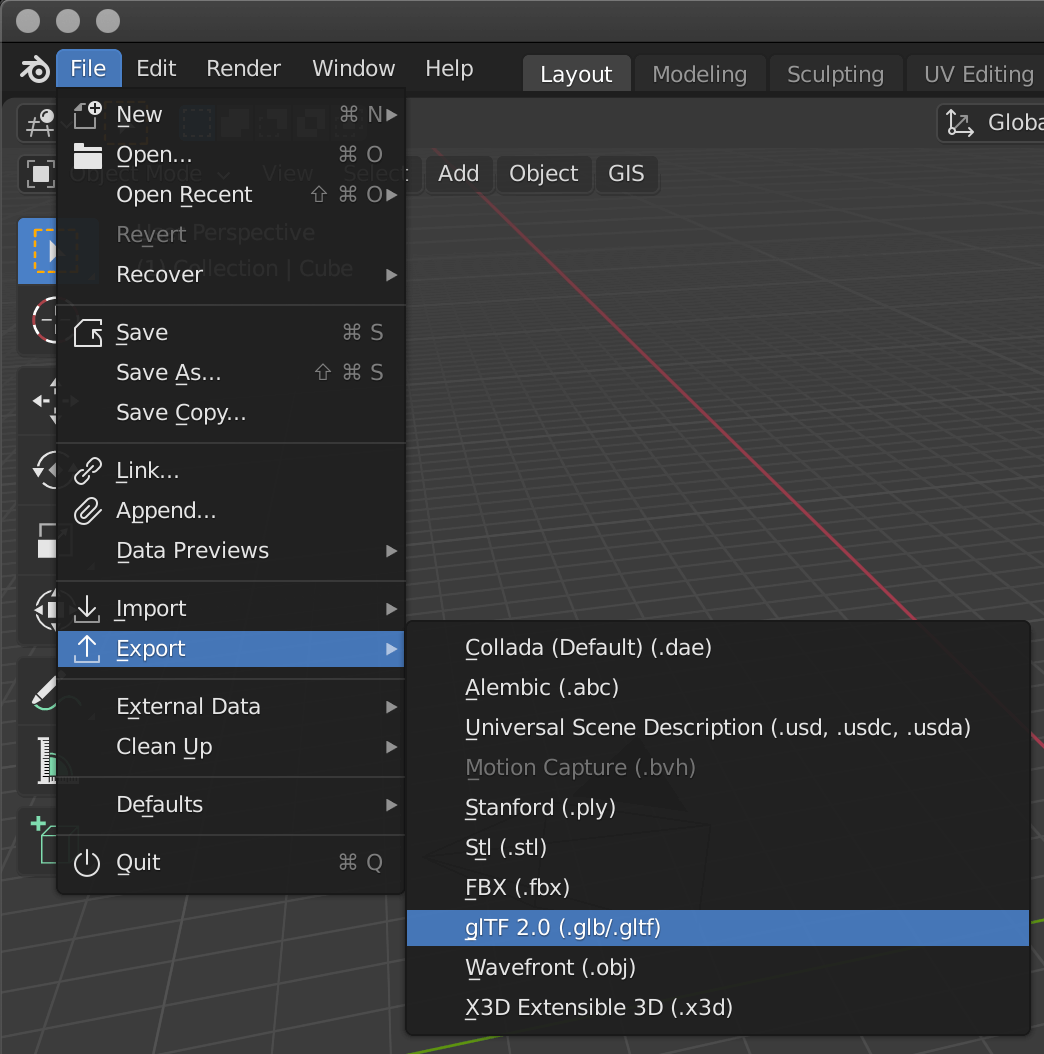
File→Export→glb
When you upload a model with this add-on to STYLY, you need to export it in GLB format.
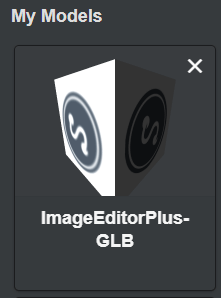
ImageEditorPlus-GLB
How to create a STYLY account

How to upload 3D model to STYLY

How to upload from Unity to STYLY
