You can use existing asset models or free 3D models, but I recommend using the Modular Tree addon, a free Blender asset that allows you to quickly create the tree you want.
In this article, I will show you how to download the addon and the basic operations.
Sample
You can experience the sample space from STYLY GALLERY.
Download and add to Blender
Click Code→Download ZIP in the upper right corner of this GitHub page.
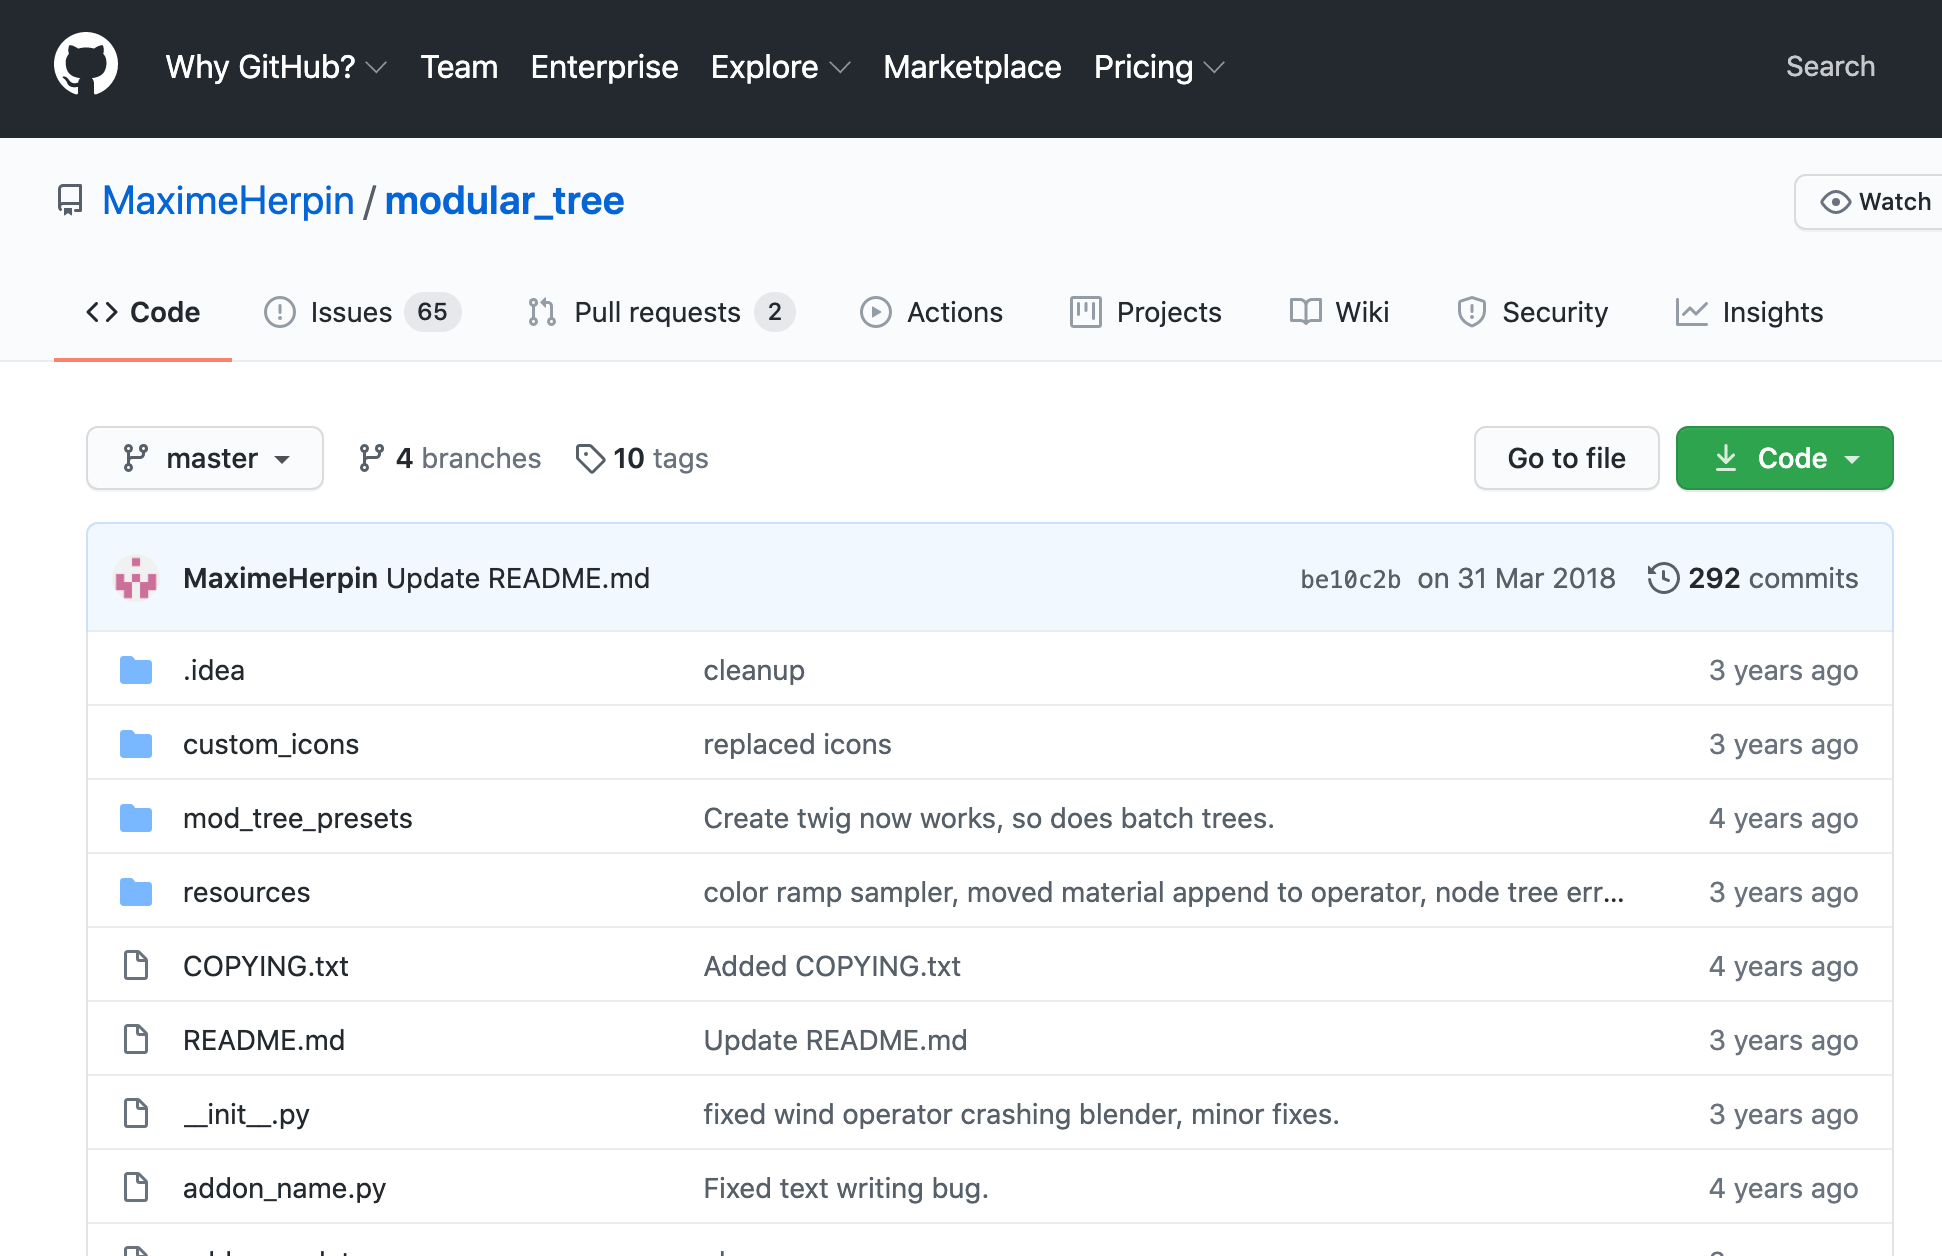
download modular tree
Also, the “master” branch is an addon for Blender 2.7.
If you are using Blender 2.8 or later, change the branch to “blender_28” instead of “master” and download the ZIP.
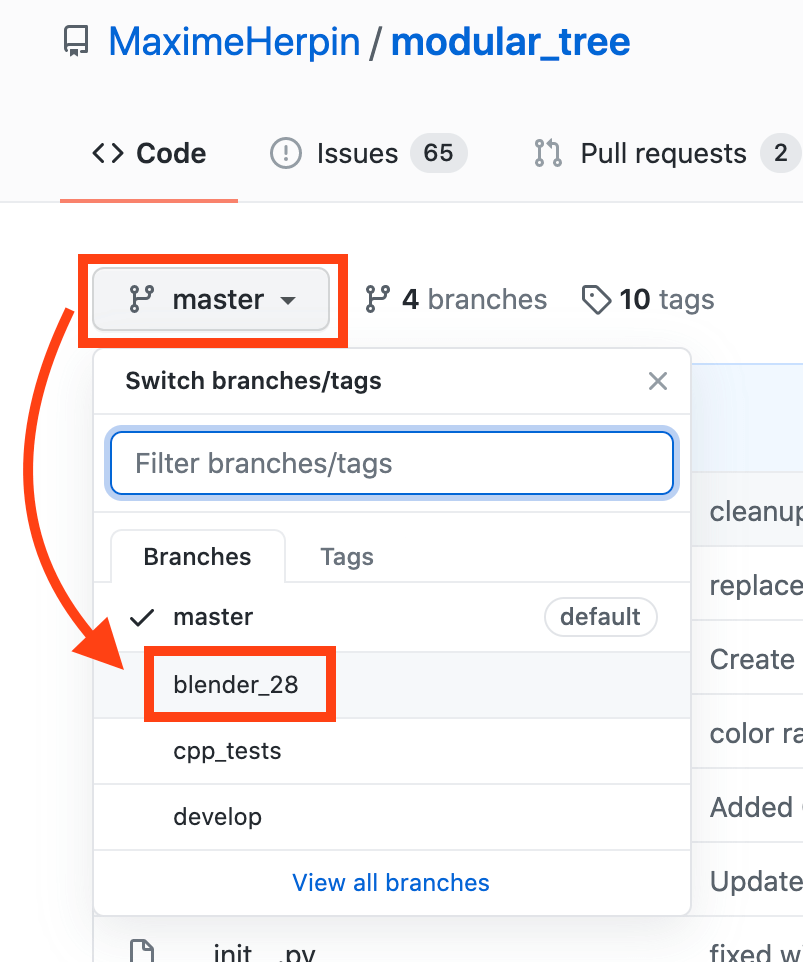
download modular tree
Move the downloaded zip to the desired location and add it to the Blender addon.
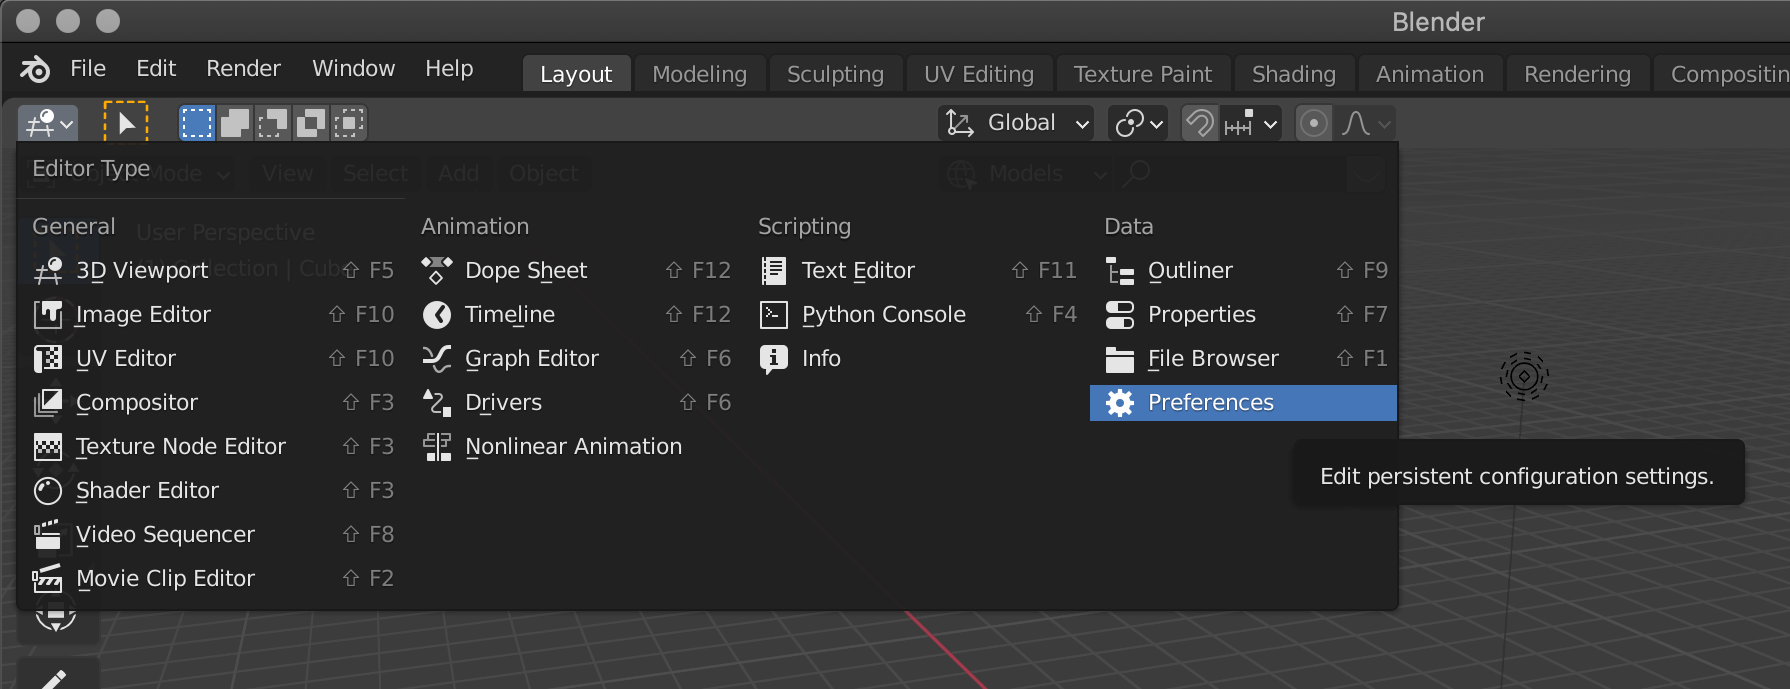
Preference
Open Blender, click Editor Type on the upper left, and go to Preferences.
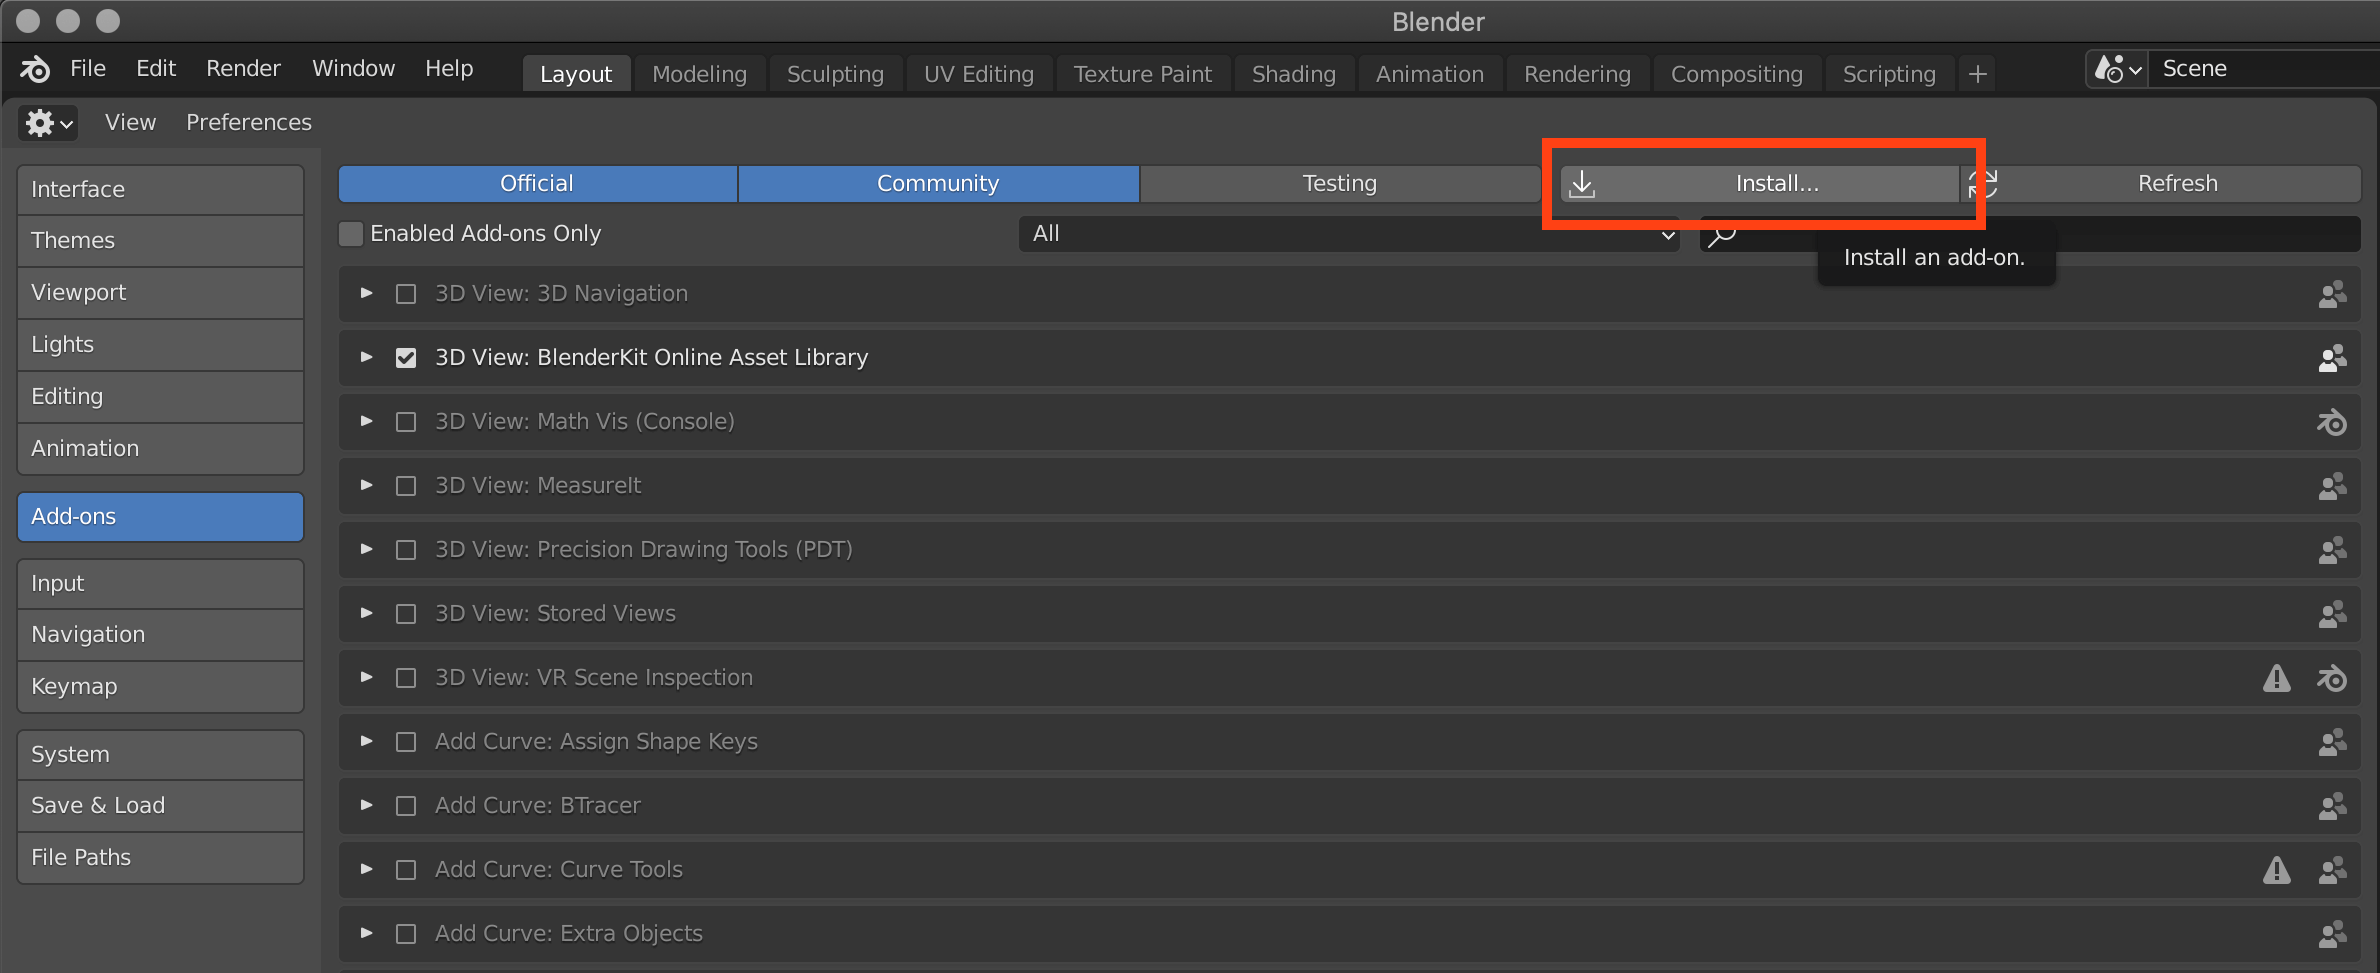
Install Add-on
Click “Install” and you will see a list of files. Select the Modular Tree ZIP file that you downloaded earlier, and click “Install Add-on” at the bottom right.

Install Add-on
In the case of blender_28, the notation is Mtree.
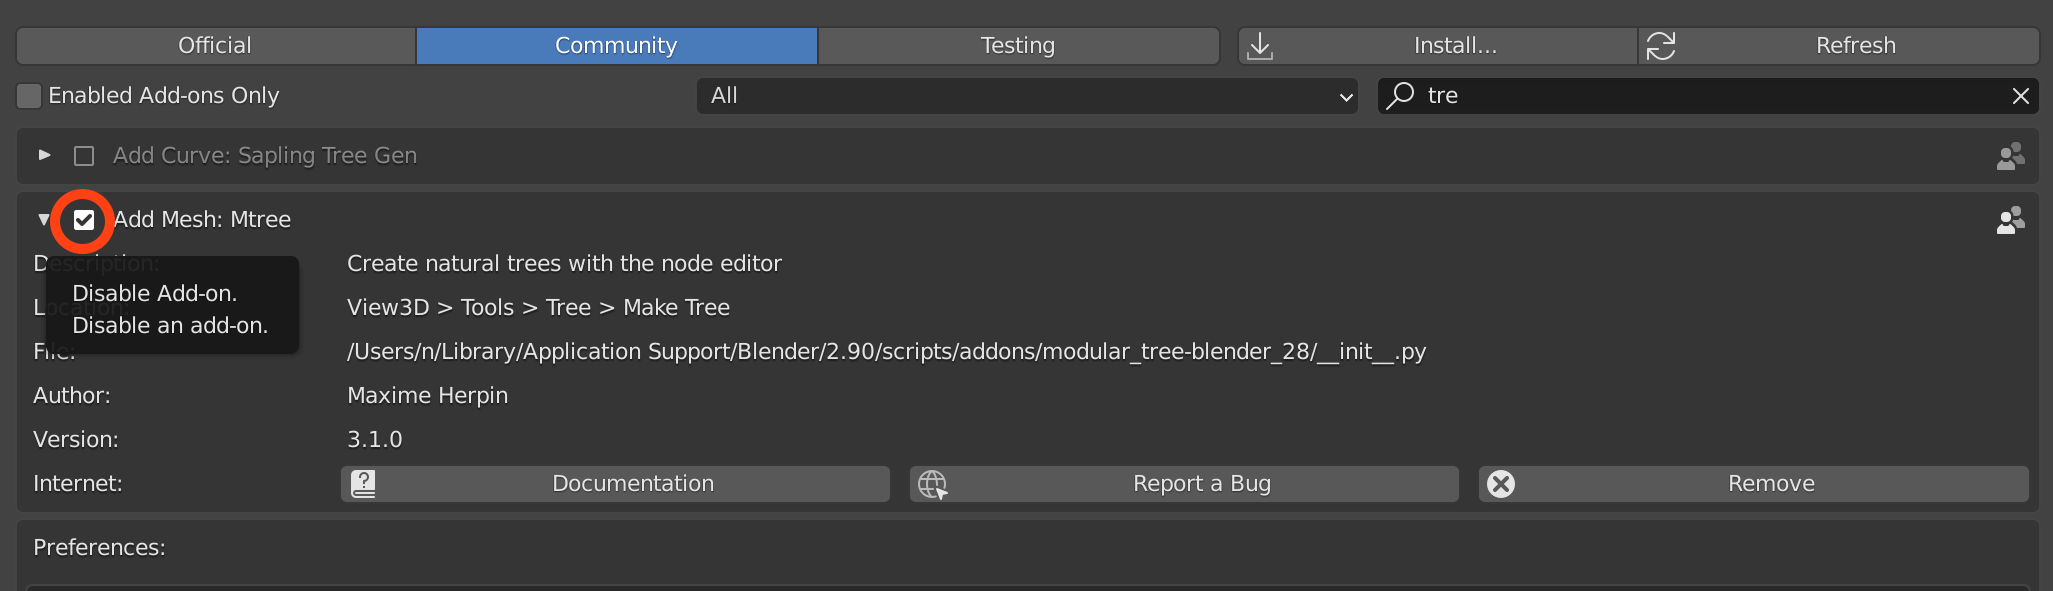
Install Add-on
When “Modules Installed” is displayed in the console, search for Modular Trees and don’t forget to check the box.
Now you’re done adding the add-on!
Create a tree
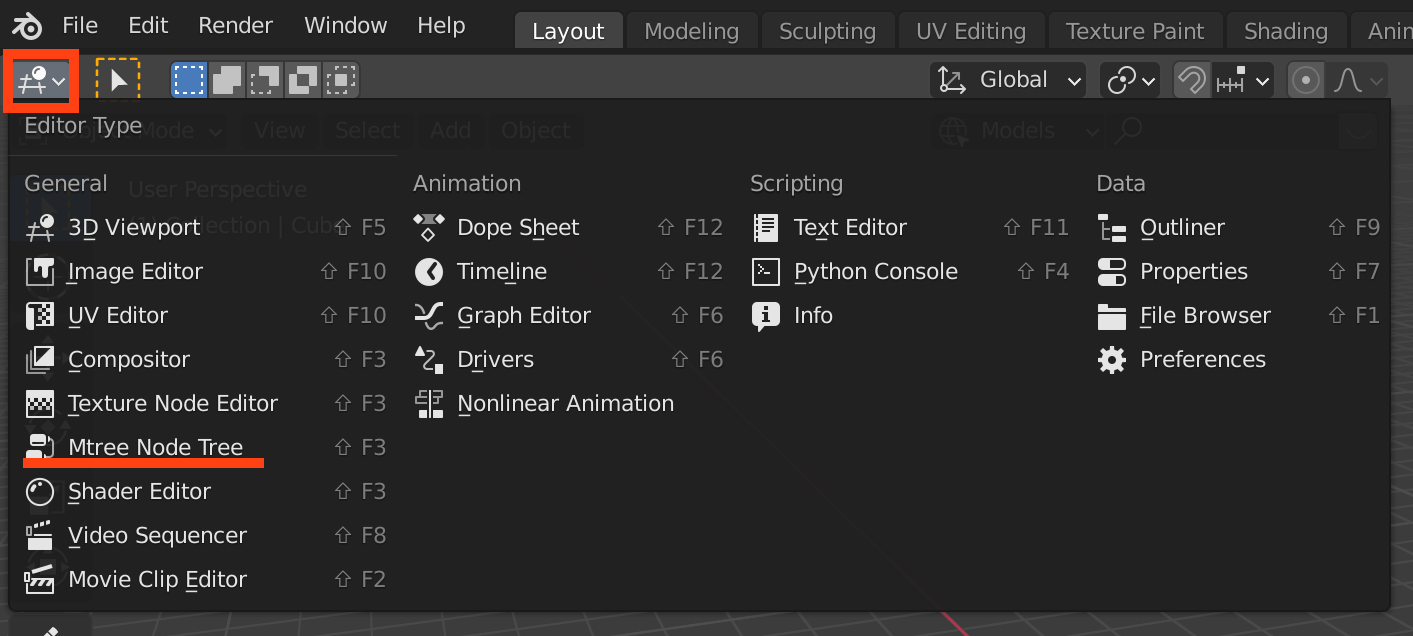
Mtree Node Tree
Click on the icon in the upper left corner of the screen, and select the Mtree Node Tree item that has been added.
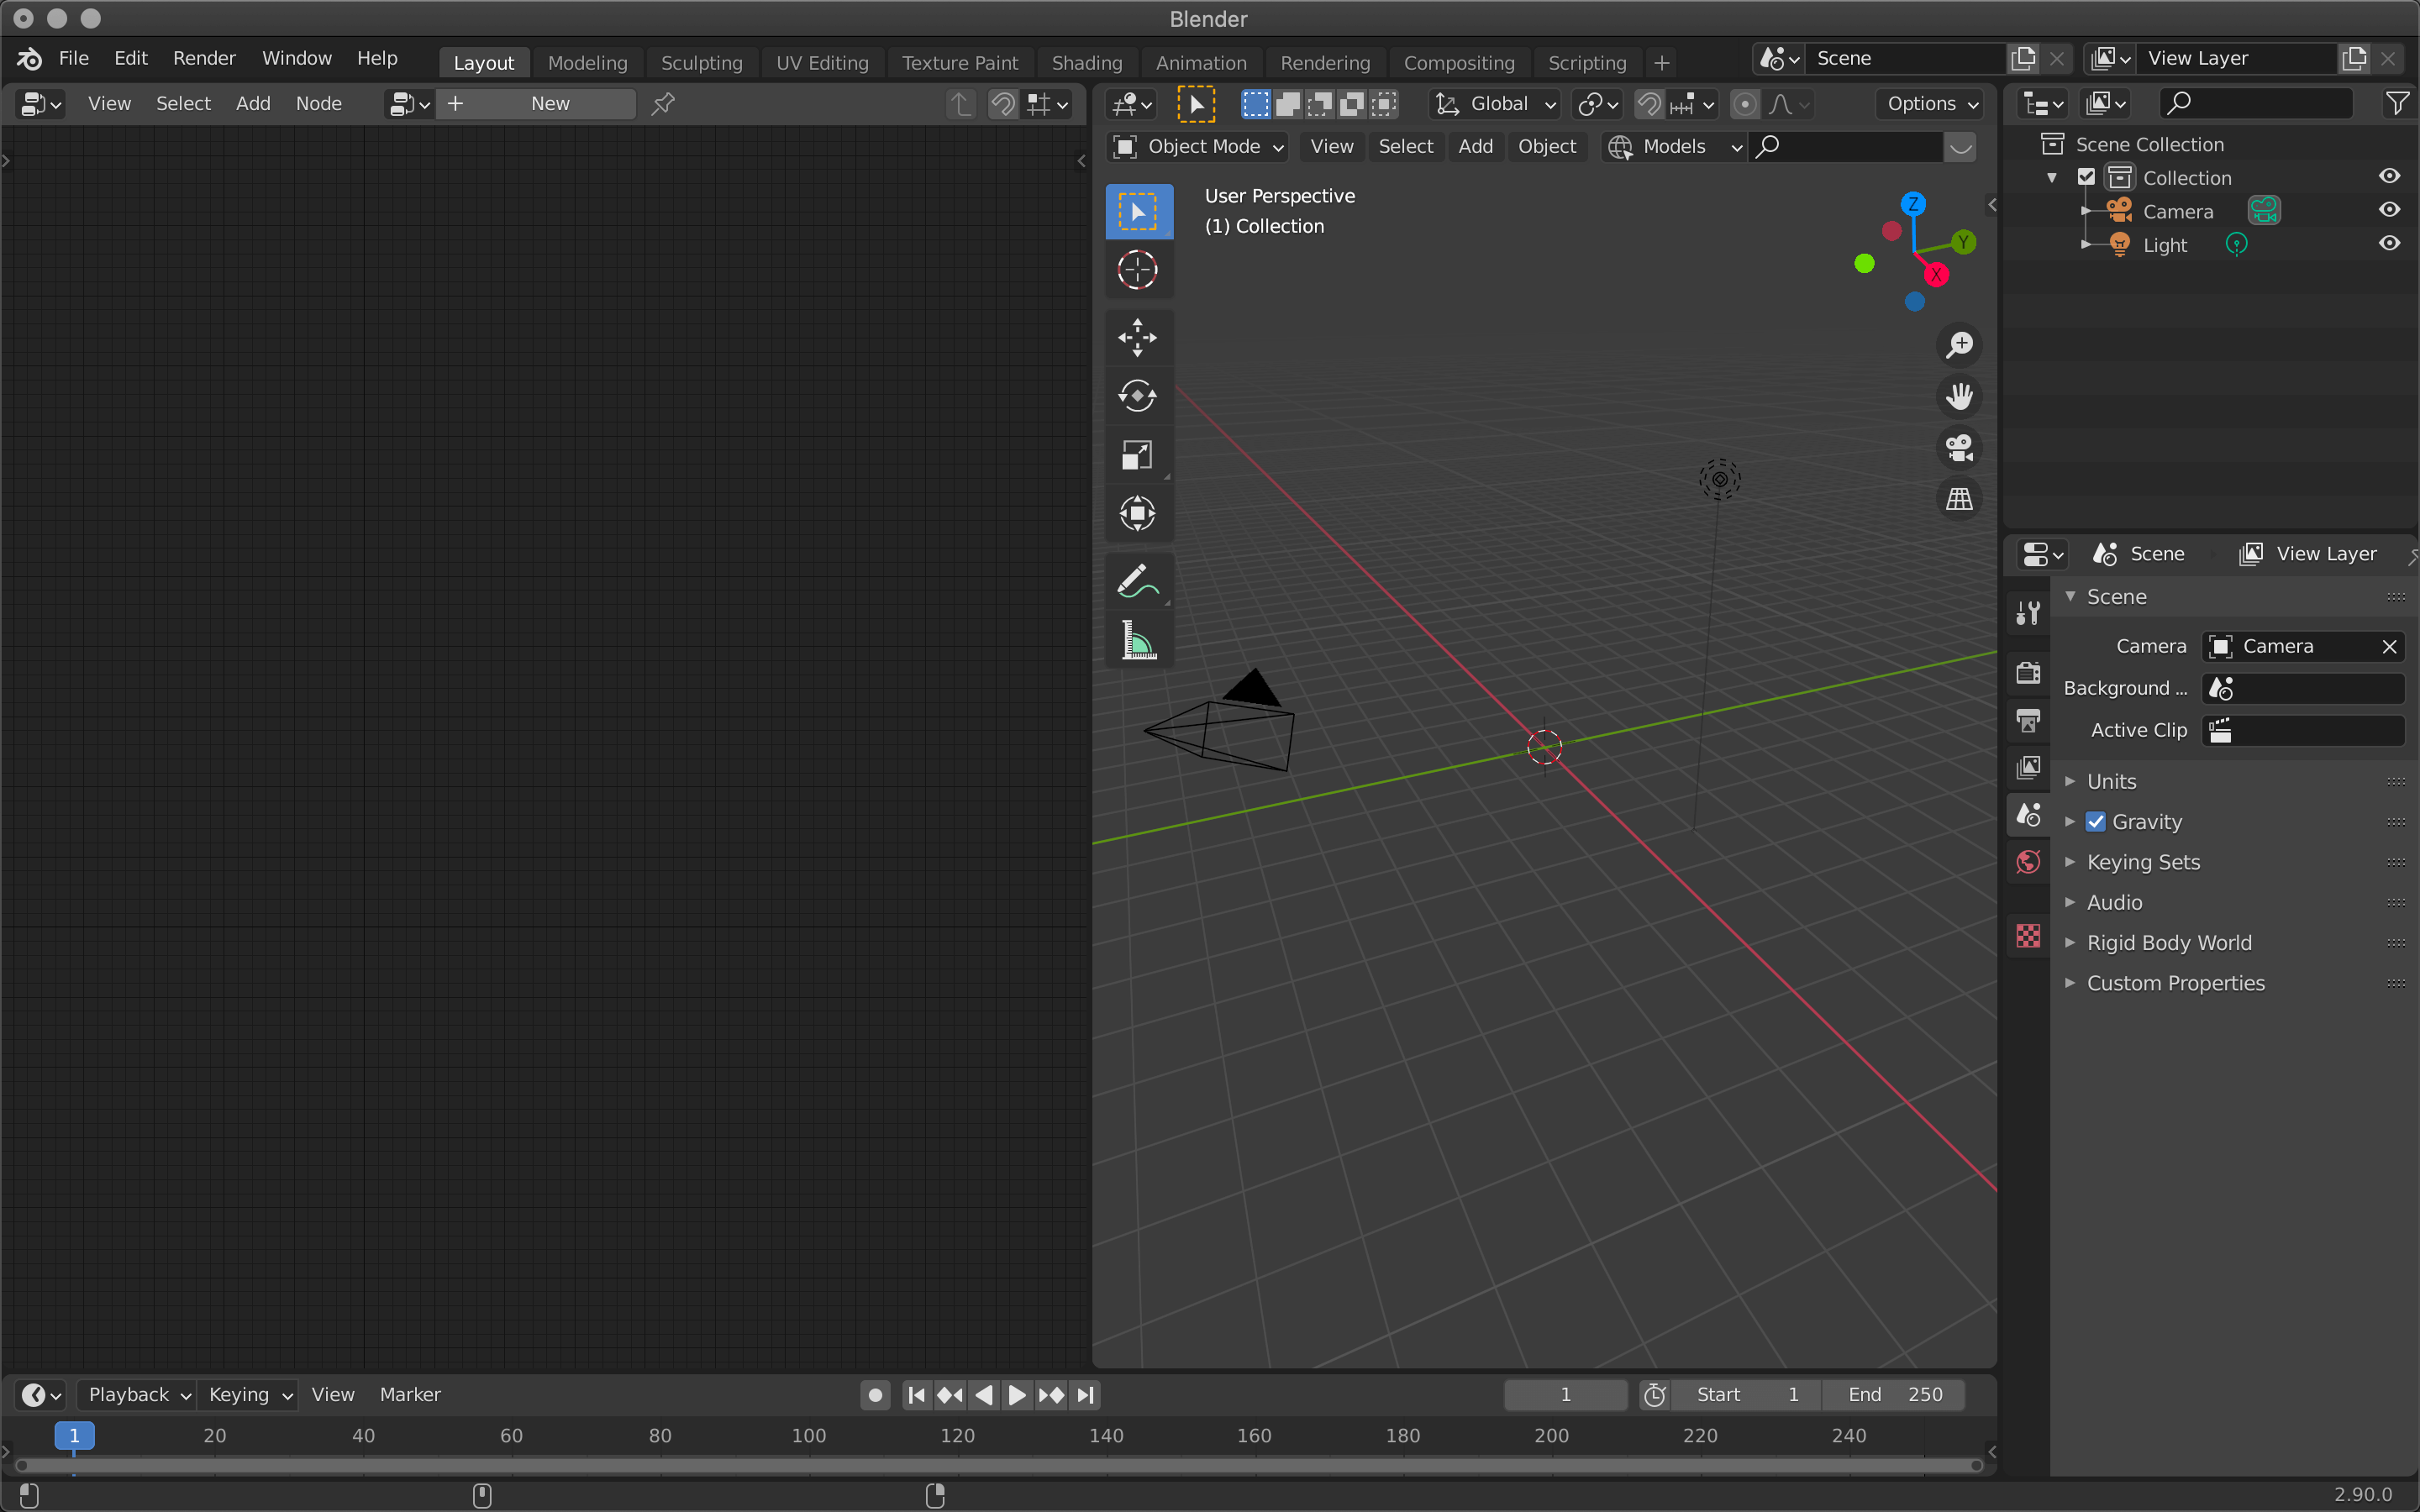
Viewport divide
Click and drag the upper right corner of the Viewport to divide it into two screens, and we recommend working with two screens, one for the Mtree Node and one for the 3D Viewport.
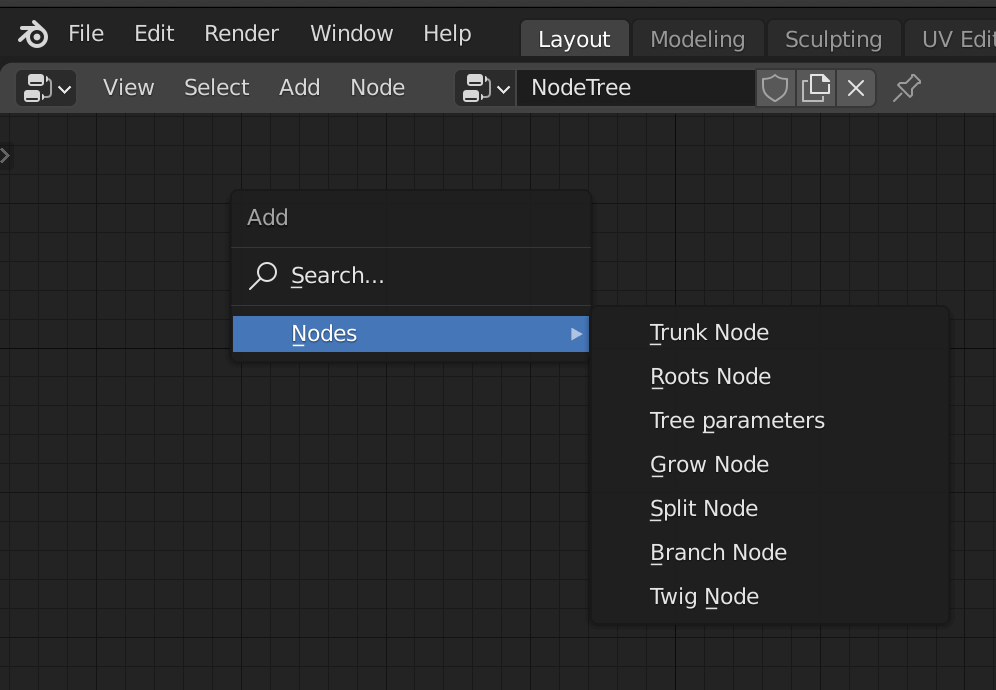
Mtree Node
Click New on the Mtree Node screen to create a new NodeTree, and then press [Shift+A] to add a Trunk Node (trunk), Branch Node (branches), and Tree parameters (outputs).
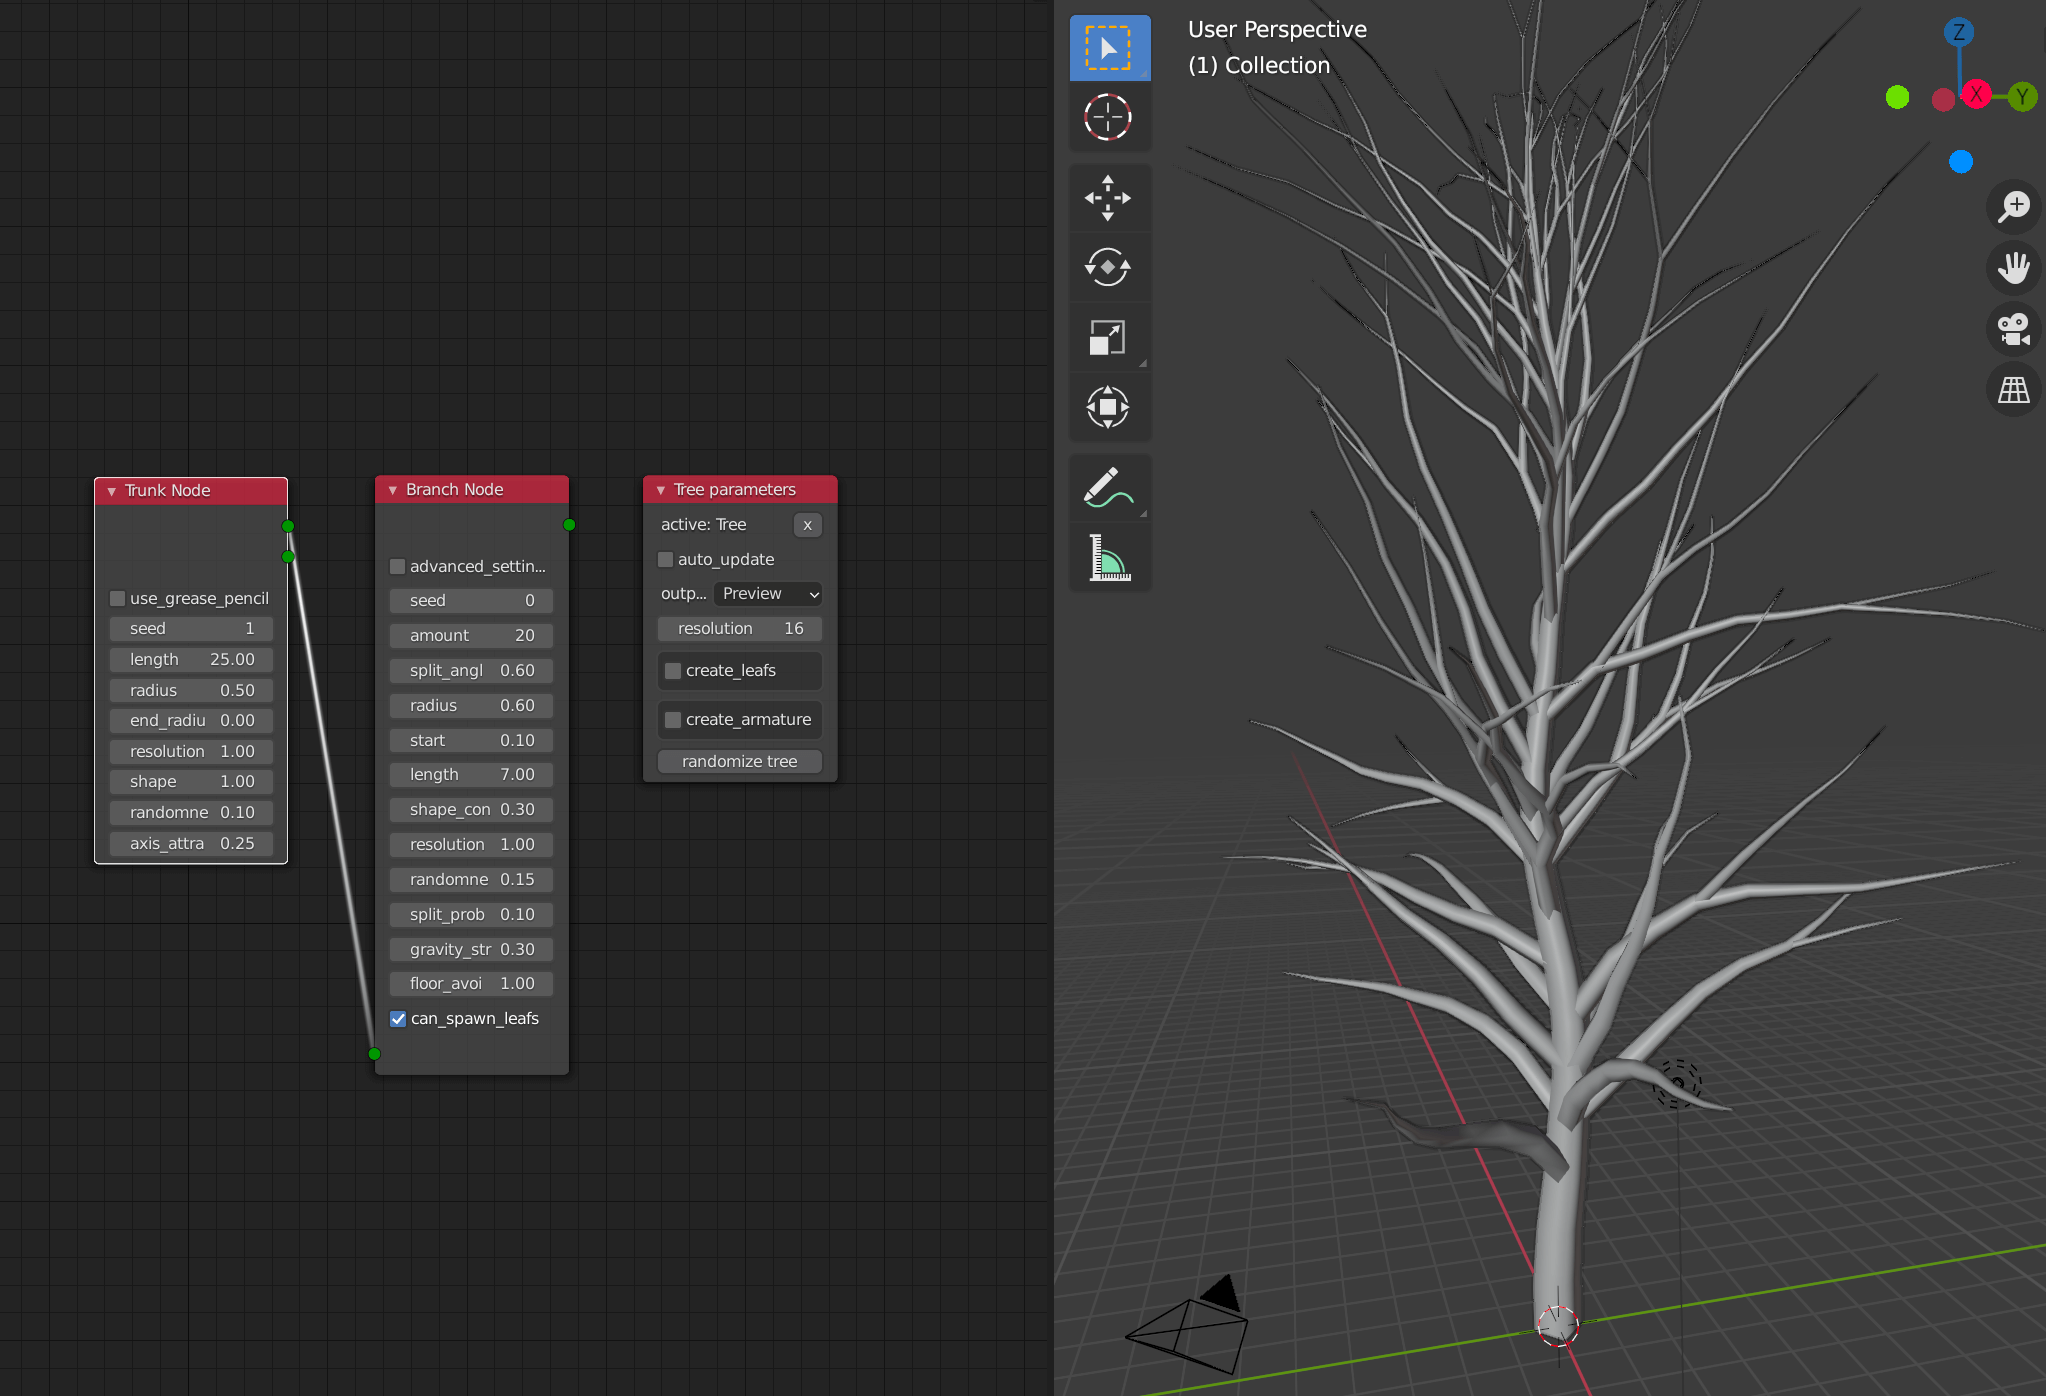
Create Tree
Connect the Trunk Node and Branch Node, and click Create Tree on the Tree parameters to create a tree.
Node Description
Here are the values of the nodes that will be mainly used.
Branch Node
| amount | Number of branches from the trunk |
| split_angle | Angle of the branch |
| radius | The thickness of the branch |
| start | The starting position of the branch |
| length | Length of the branch |
| resolution |
Fineness of the branch tip. |
| randomness | Bend of the branch (curve) |
| gravity_strength | Bend of the branch (gravity) |
| floor_avoidance | Bend of the branch (change from the ground) |
Trunk Node
This node has the same items as the Branch Node, but unlike radius and radius_end, the shape in this node seems to change the thickness of the tip.
Tree Parameters
| resolution | Resolution of the trunk |
| auto_update |
Automatically update objects with values. *Note that this will cause a lot of crashes. |
Growing Roots
Roots can be created by adding a Roots Node and connecting it to a Branch Node.
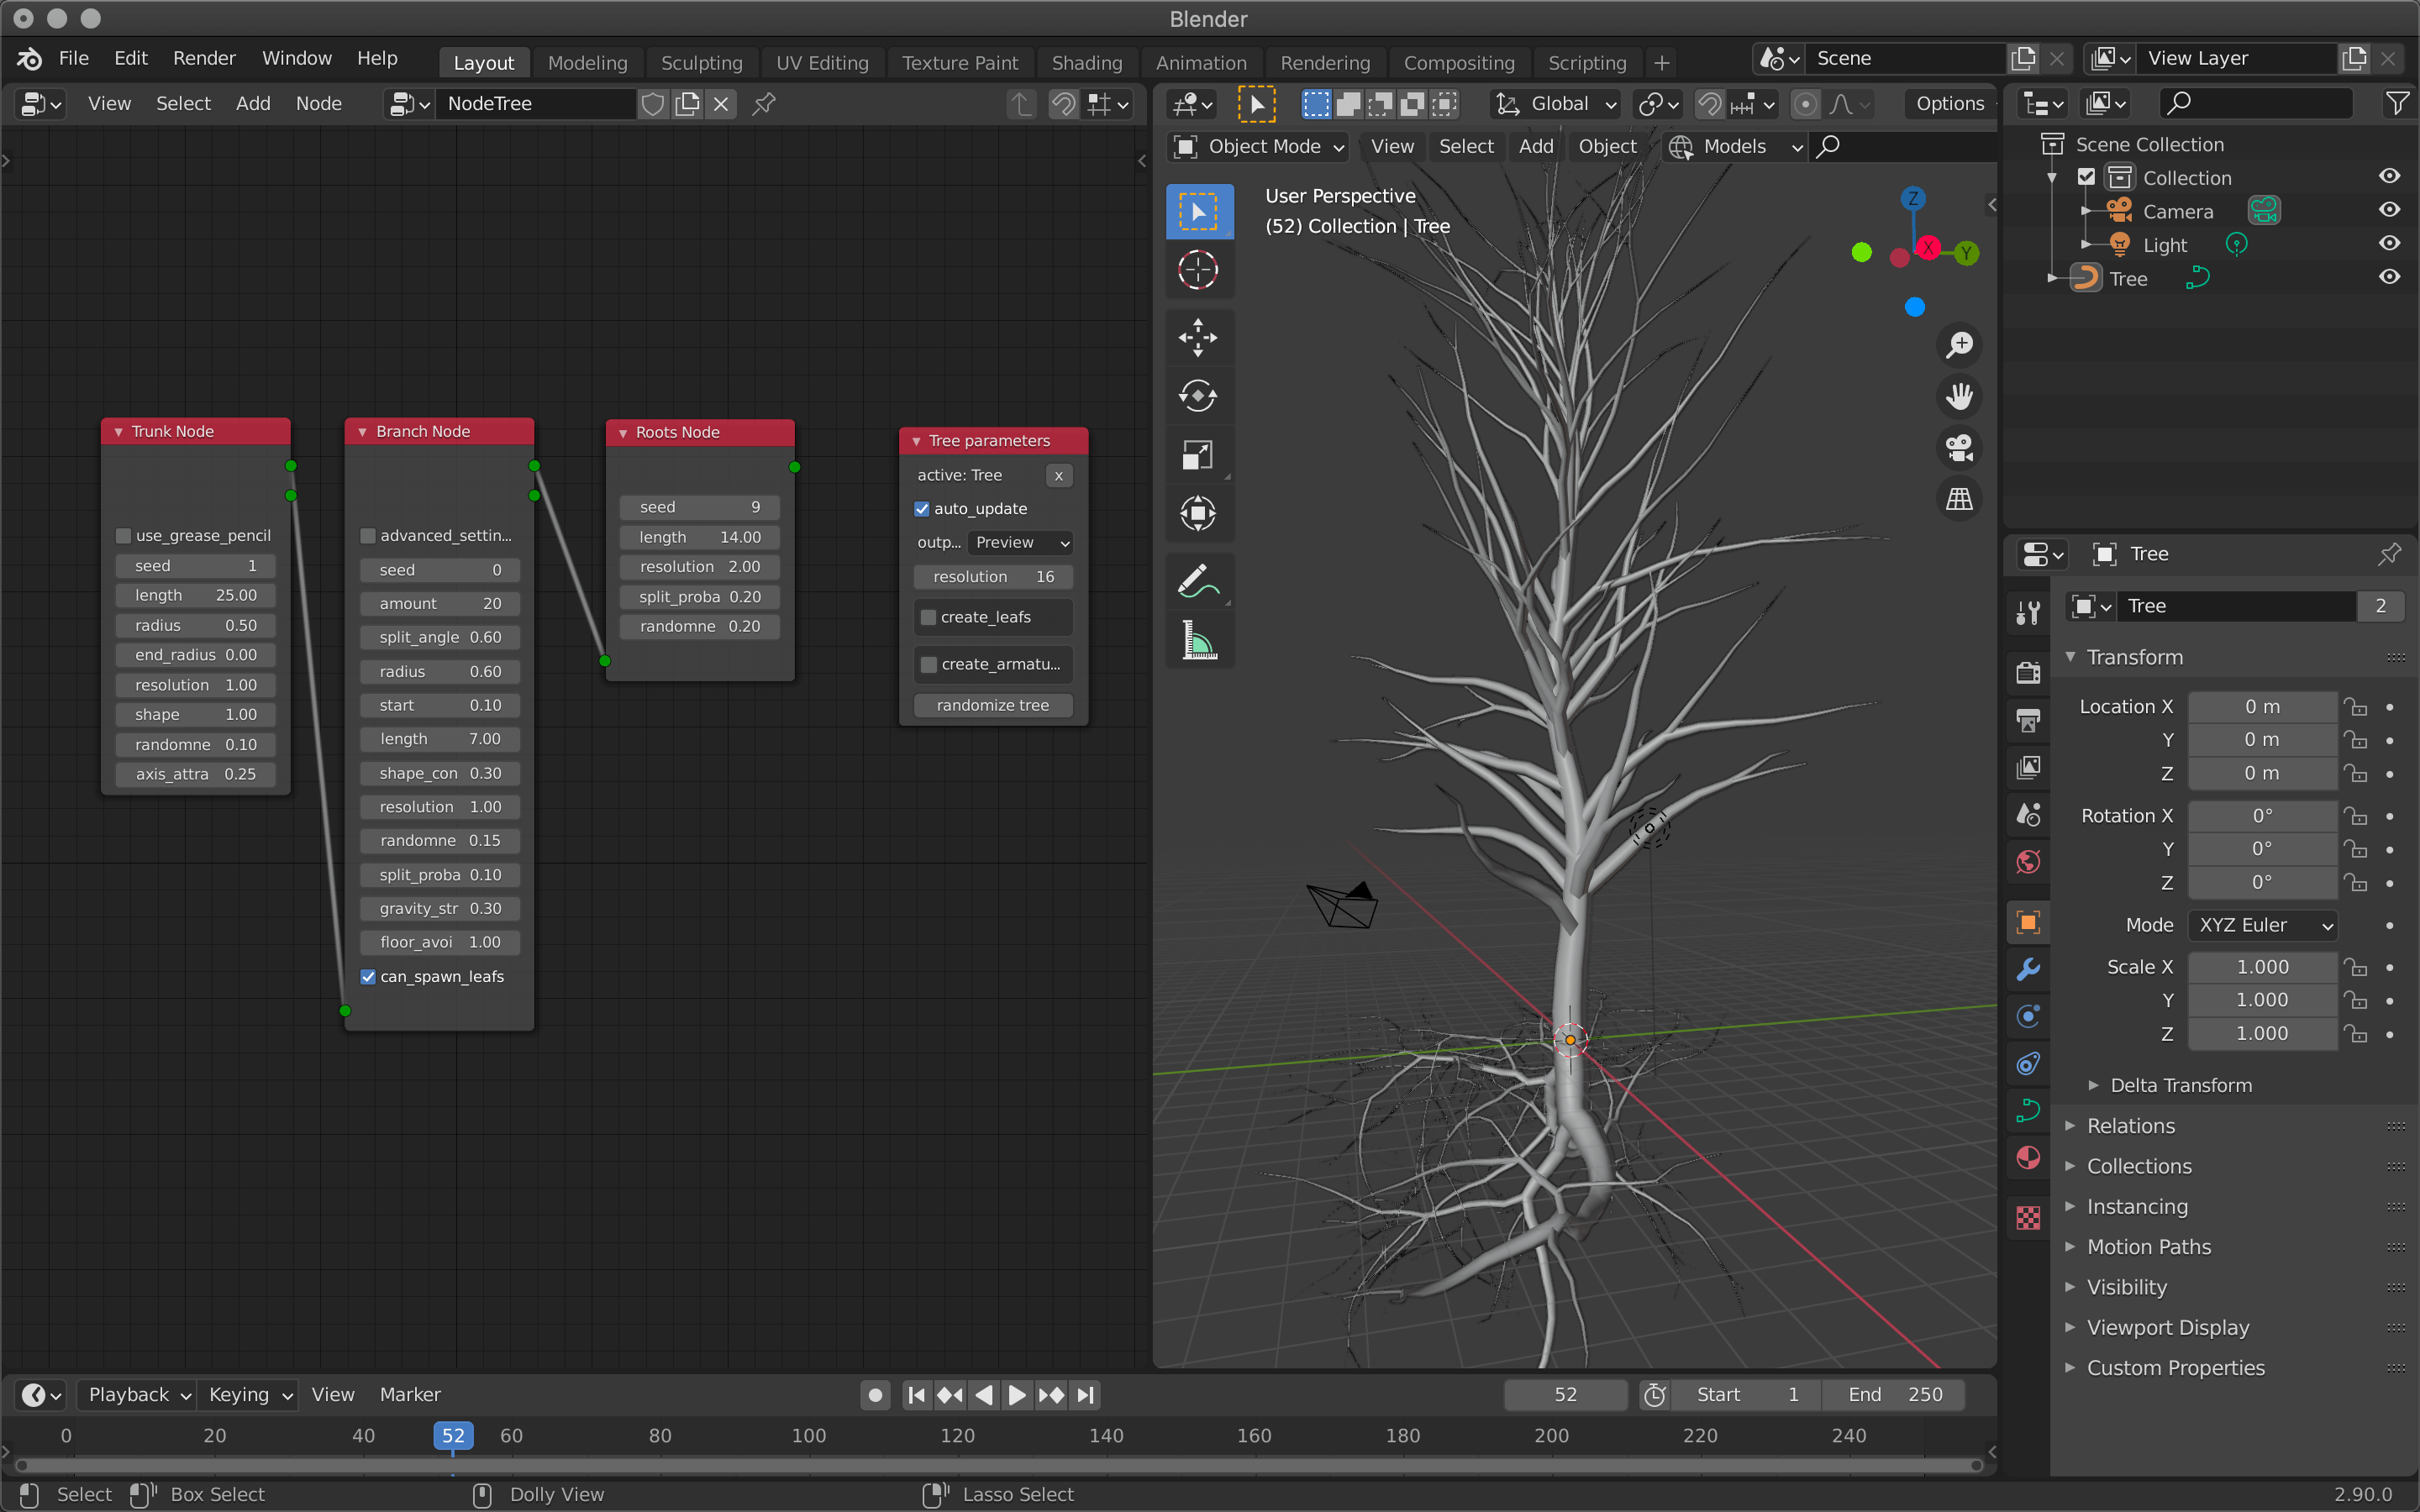
Roots Node
Growing leaves
Add a new Twig Node.
Select one of the leaf types at the bottom and click “execute” to apply it.
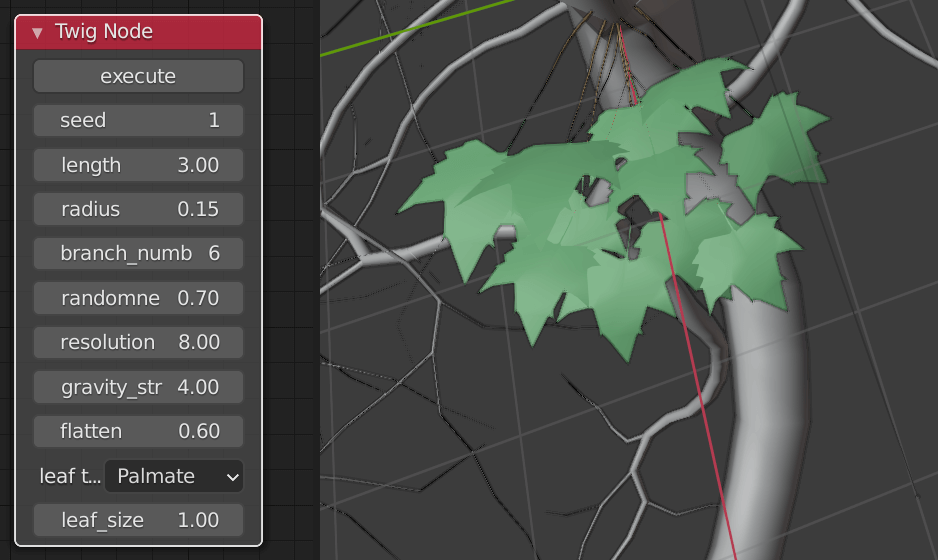
Palmate
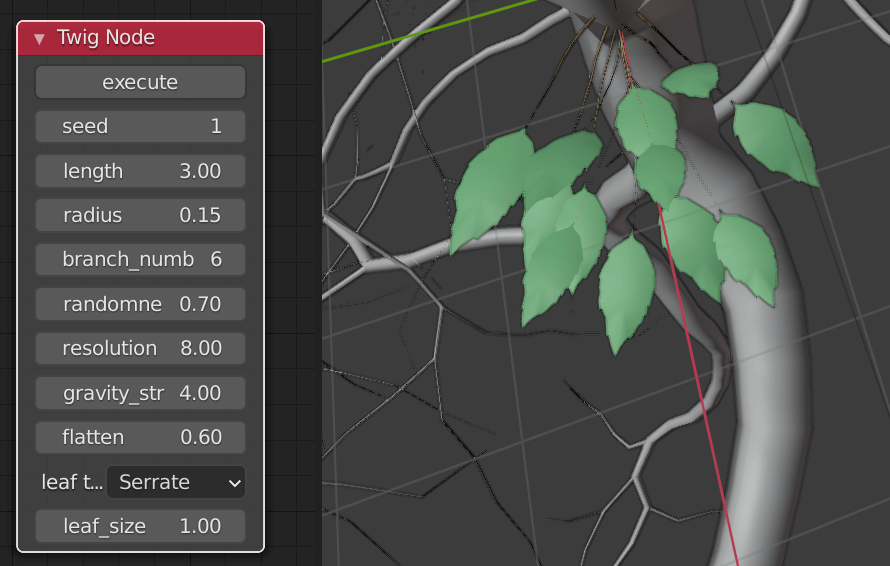
Serrate
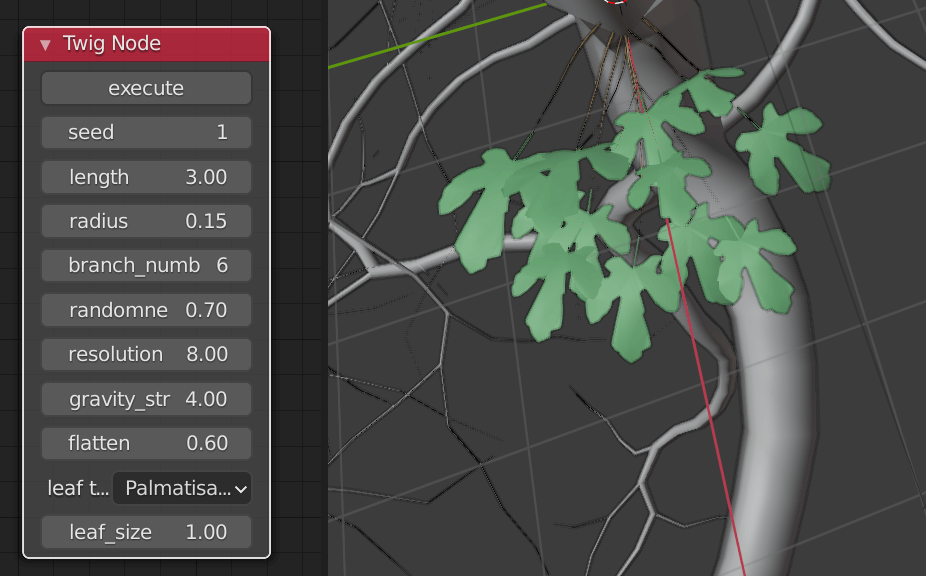
Palmatisate
Select Custom if you want to use a leaf other than the preset, such as a texture you saved from another free texture site or one you took yourself.
Each time you click execute, a new leaf will be created.
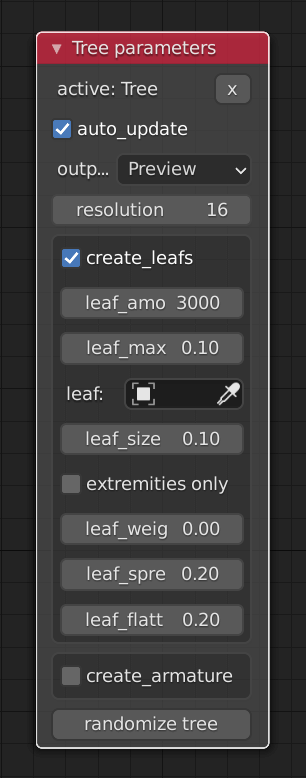
Tree parameters
Once the leaf settings are complete, check the “create_leafs” checkbox in Tree Parameters to make the leaves grow on the entire tree, and assign a leaf object to the leaf in the advanced settings that appear.

Assigning a leaf object to a leaf
Select the object name by clicking on ■, or click on the object directly with the eyedropper mark.
Select the object name or use the eyedropper mark
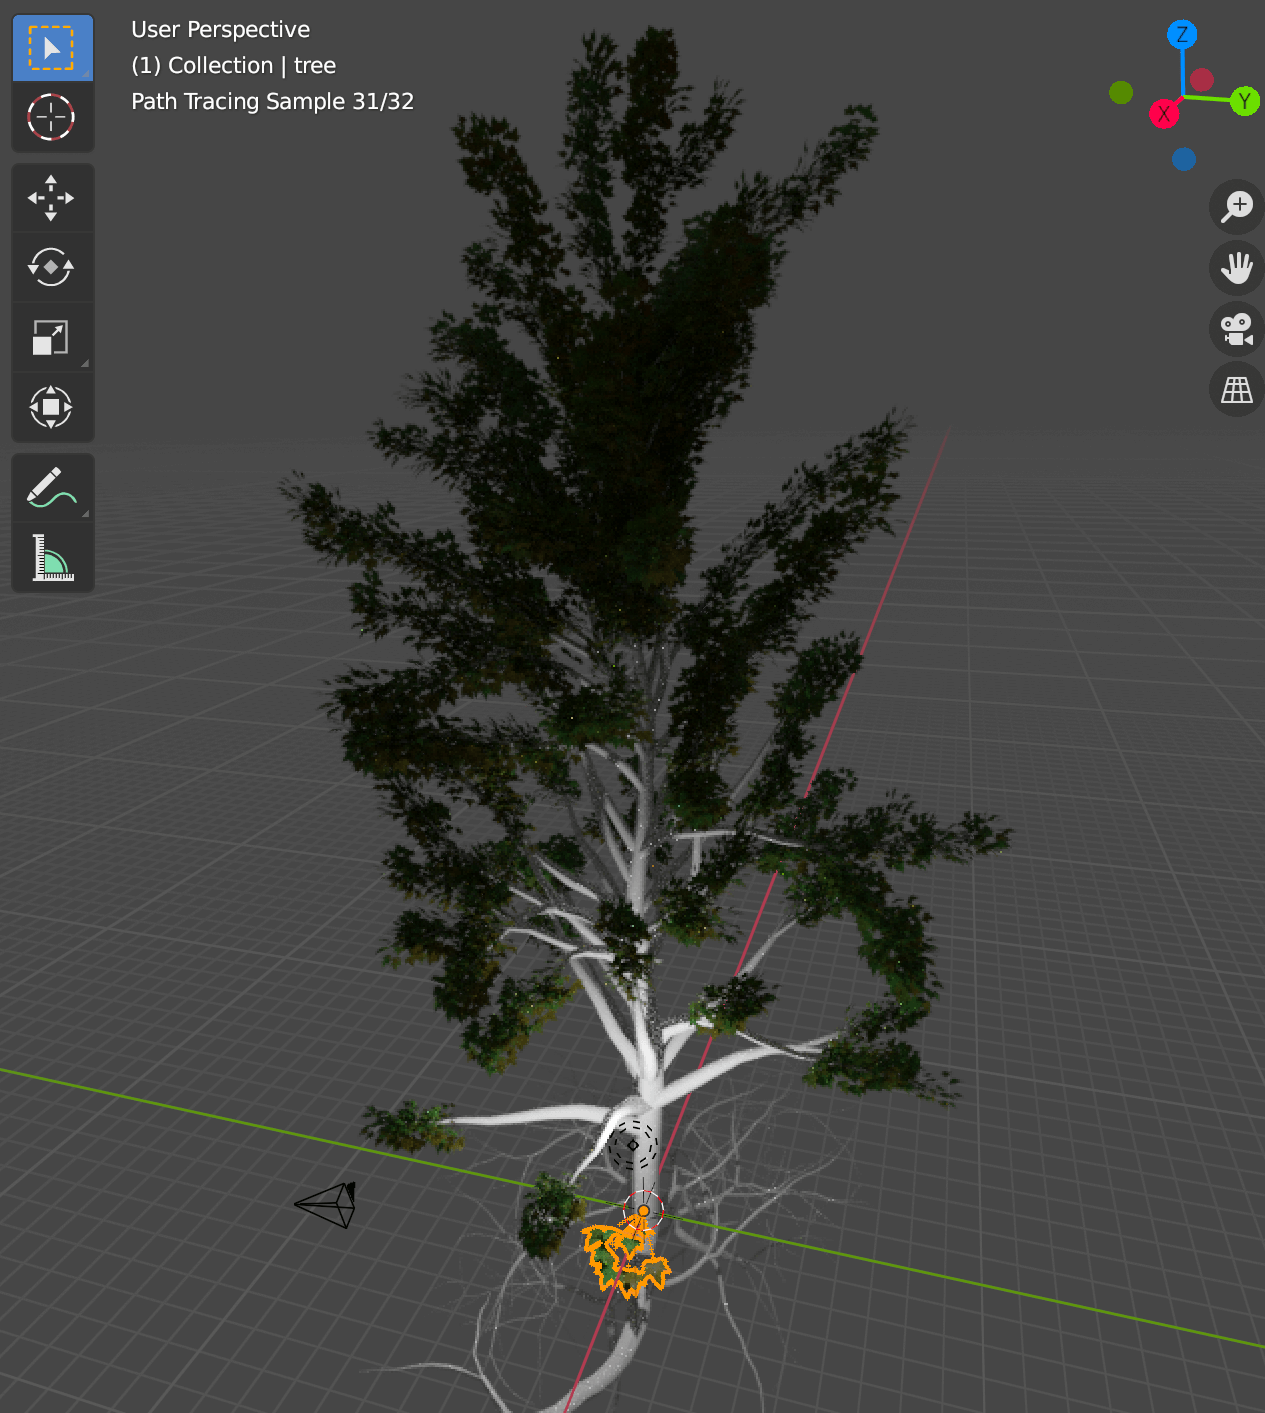
The leaf is now reflected in the entire tree.
If the tree itself disappears in Rendered, try changing the Shading to Solid and then to Rendered again.
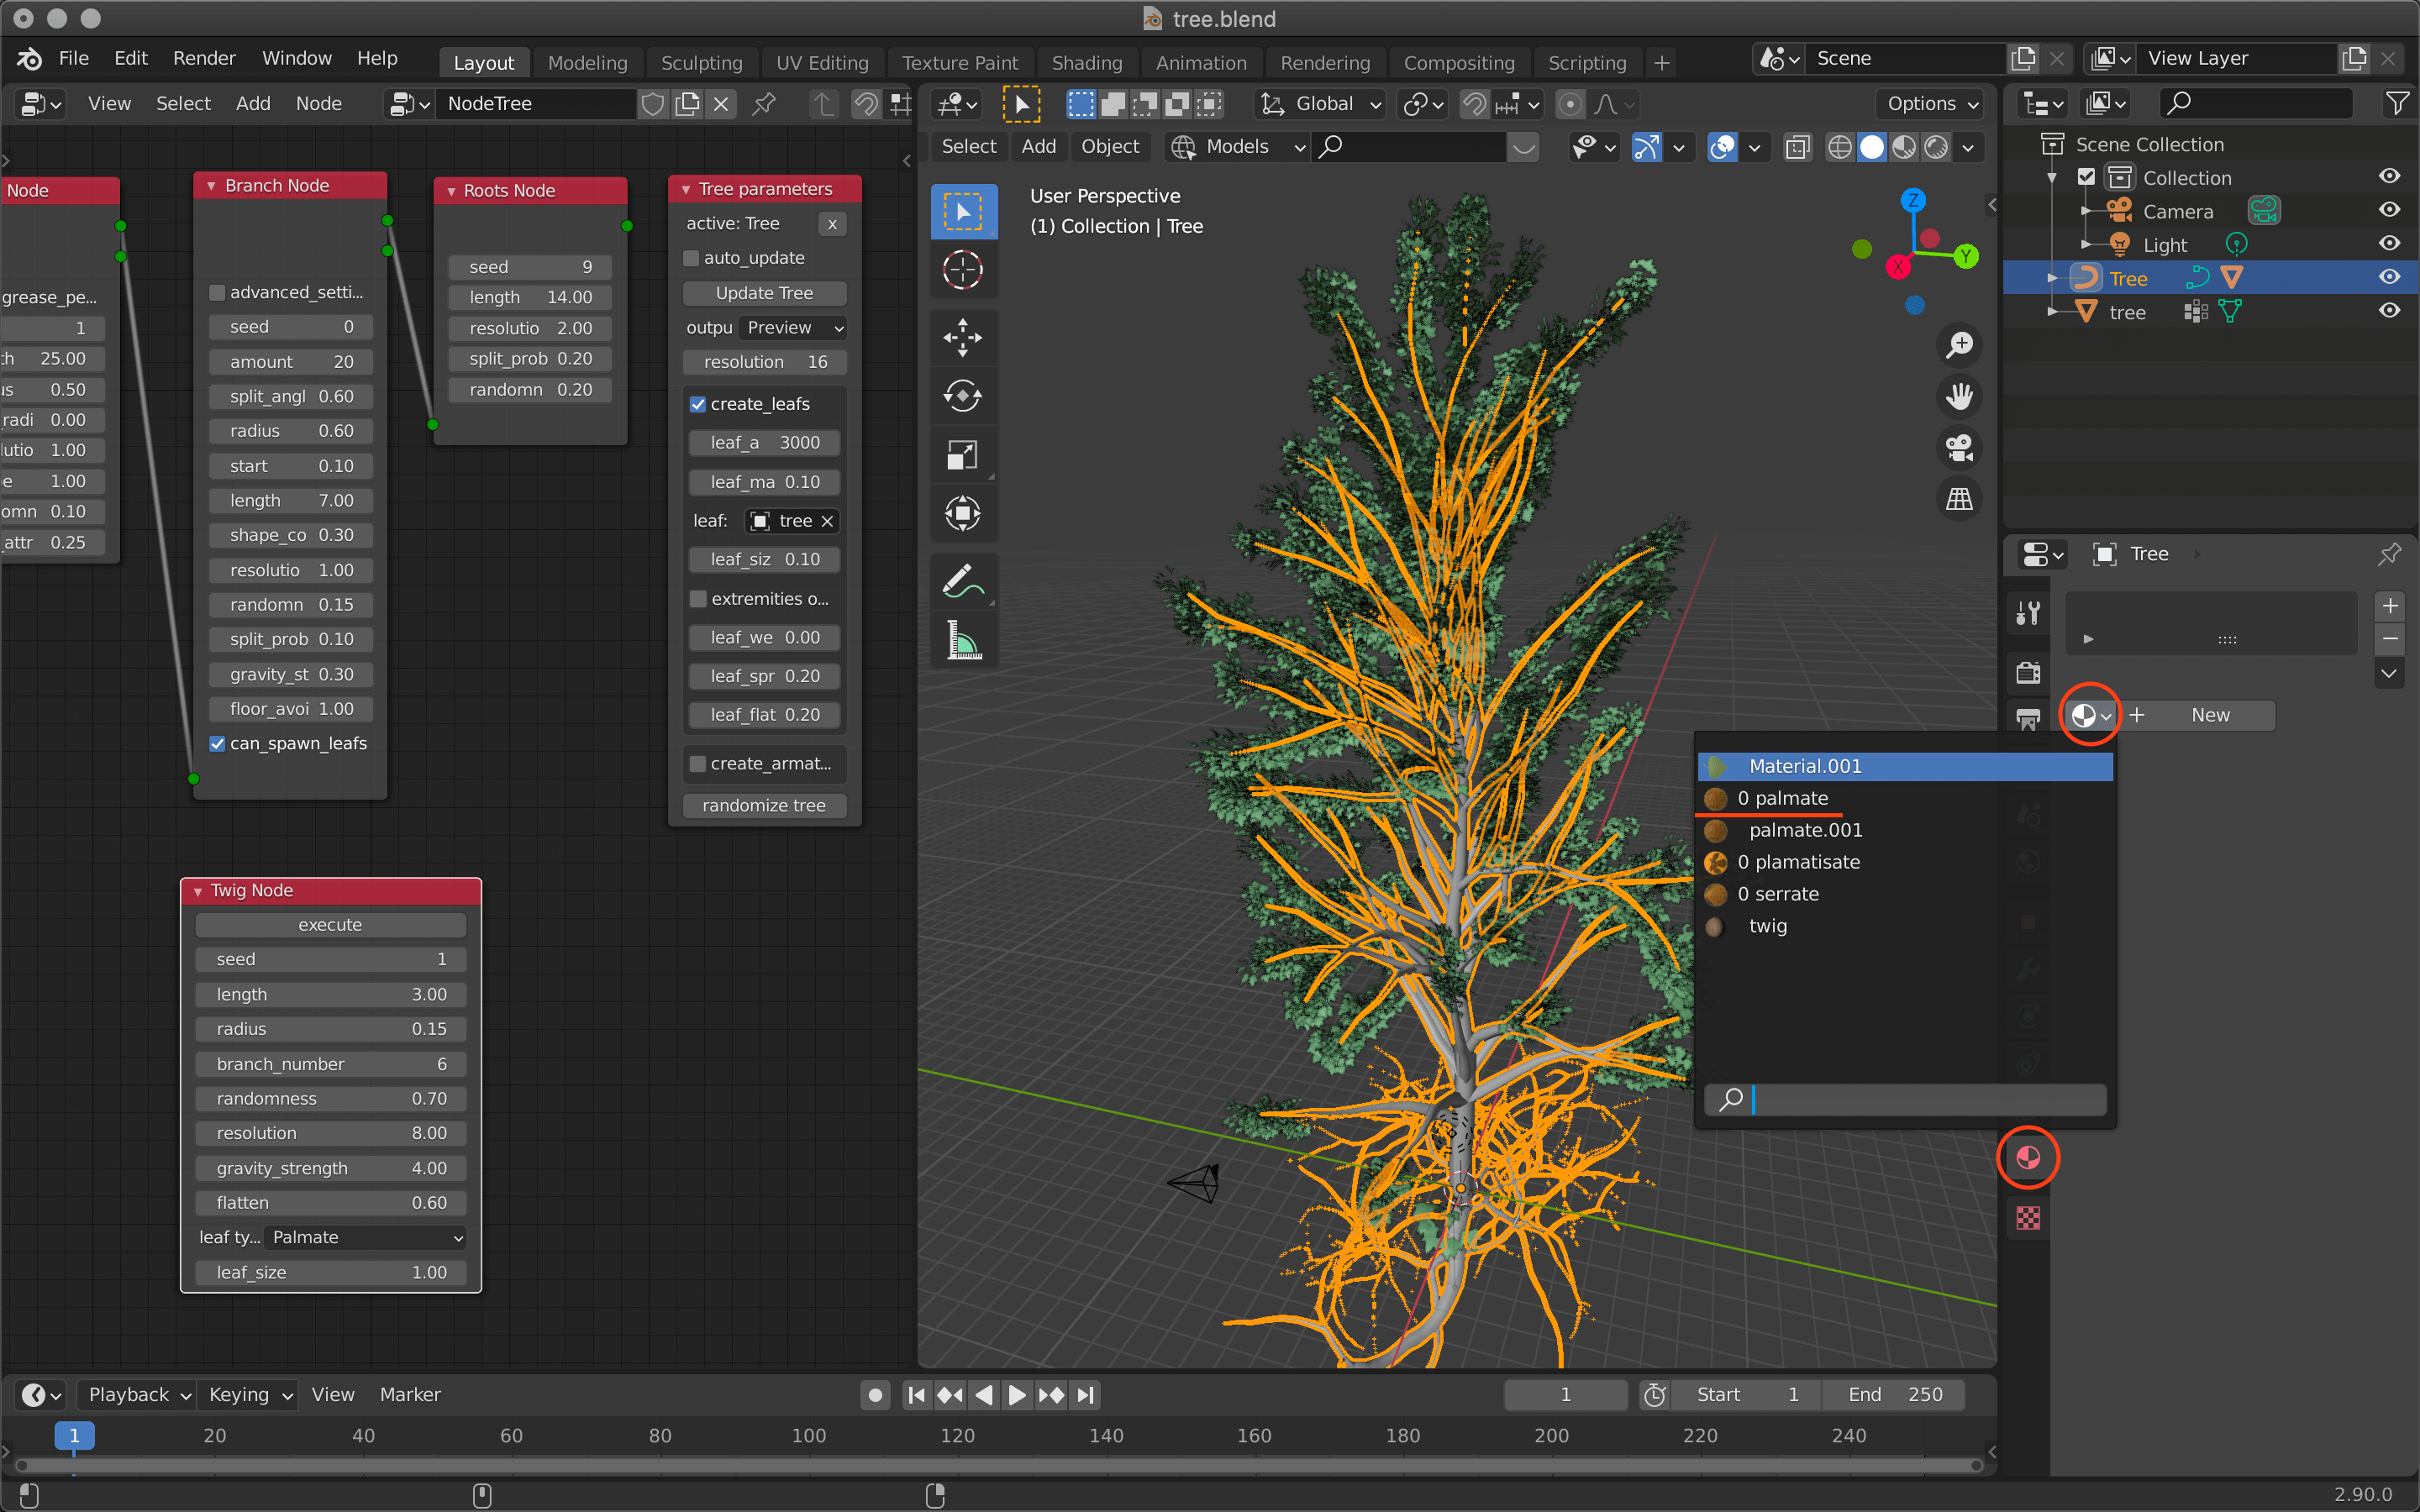
Material assignment
The easiest way to assign a material to a tree is to select the tree, open the Material Properties, and click on the button next to +New.
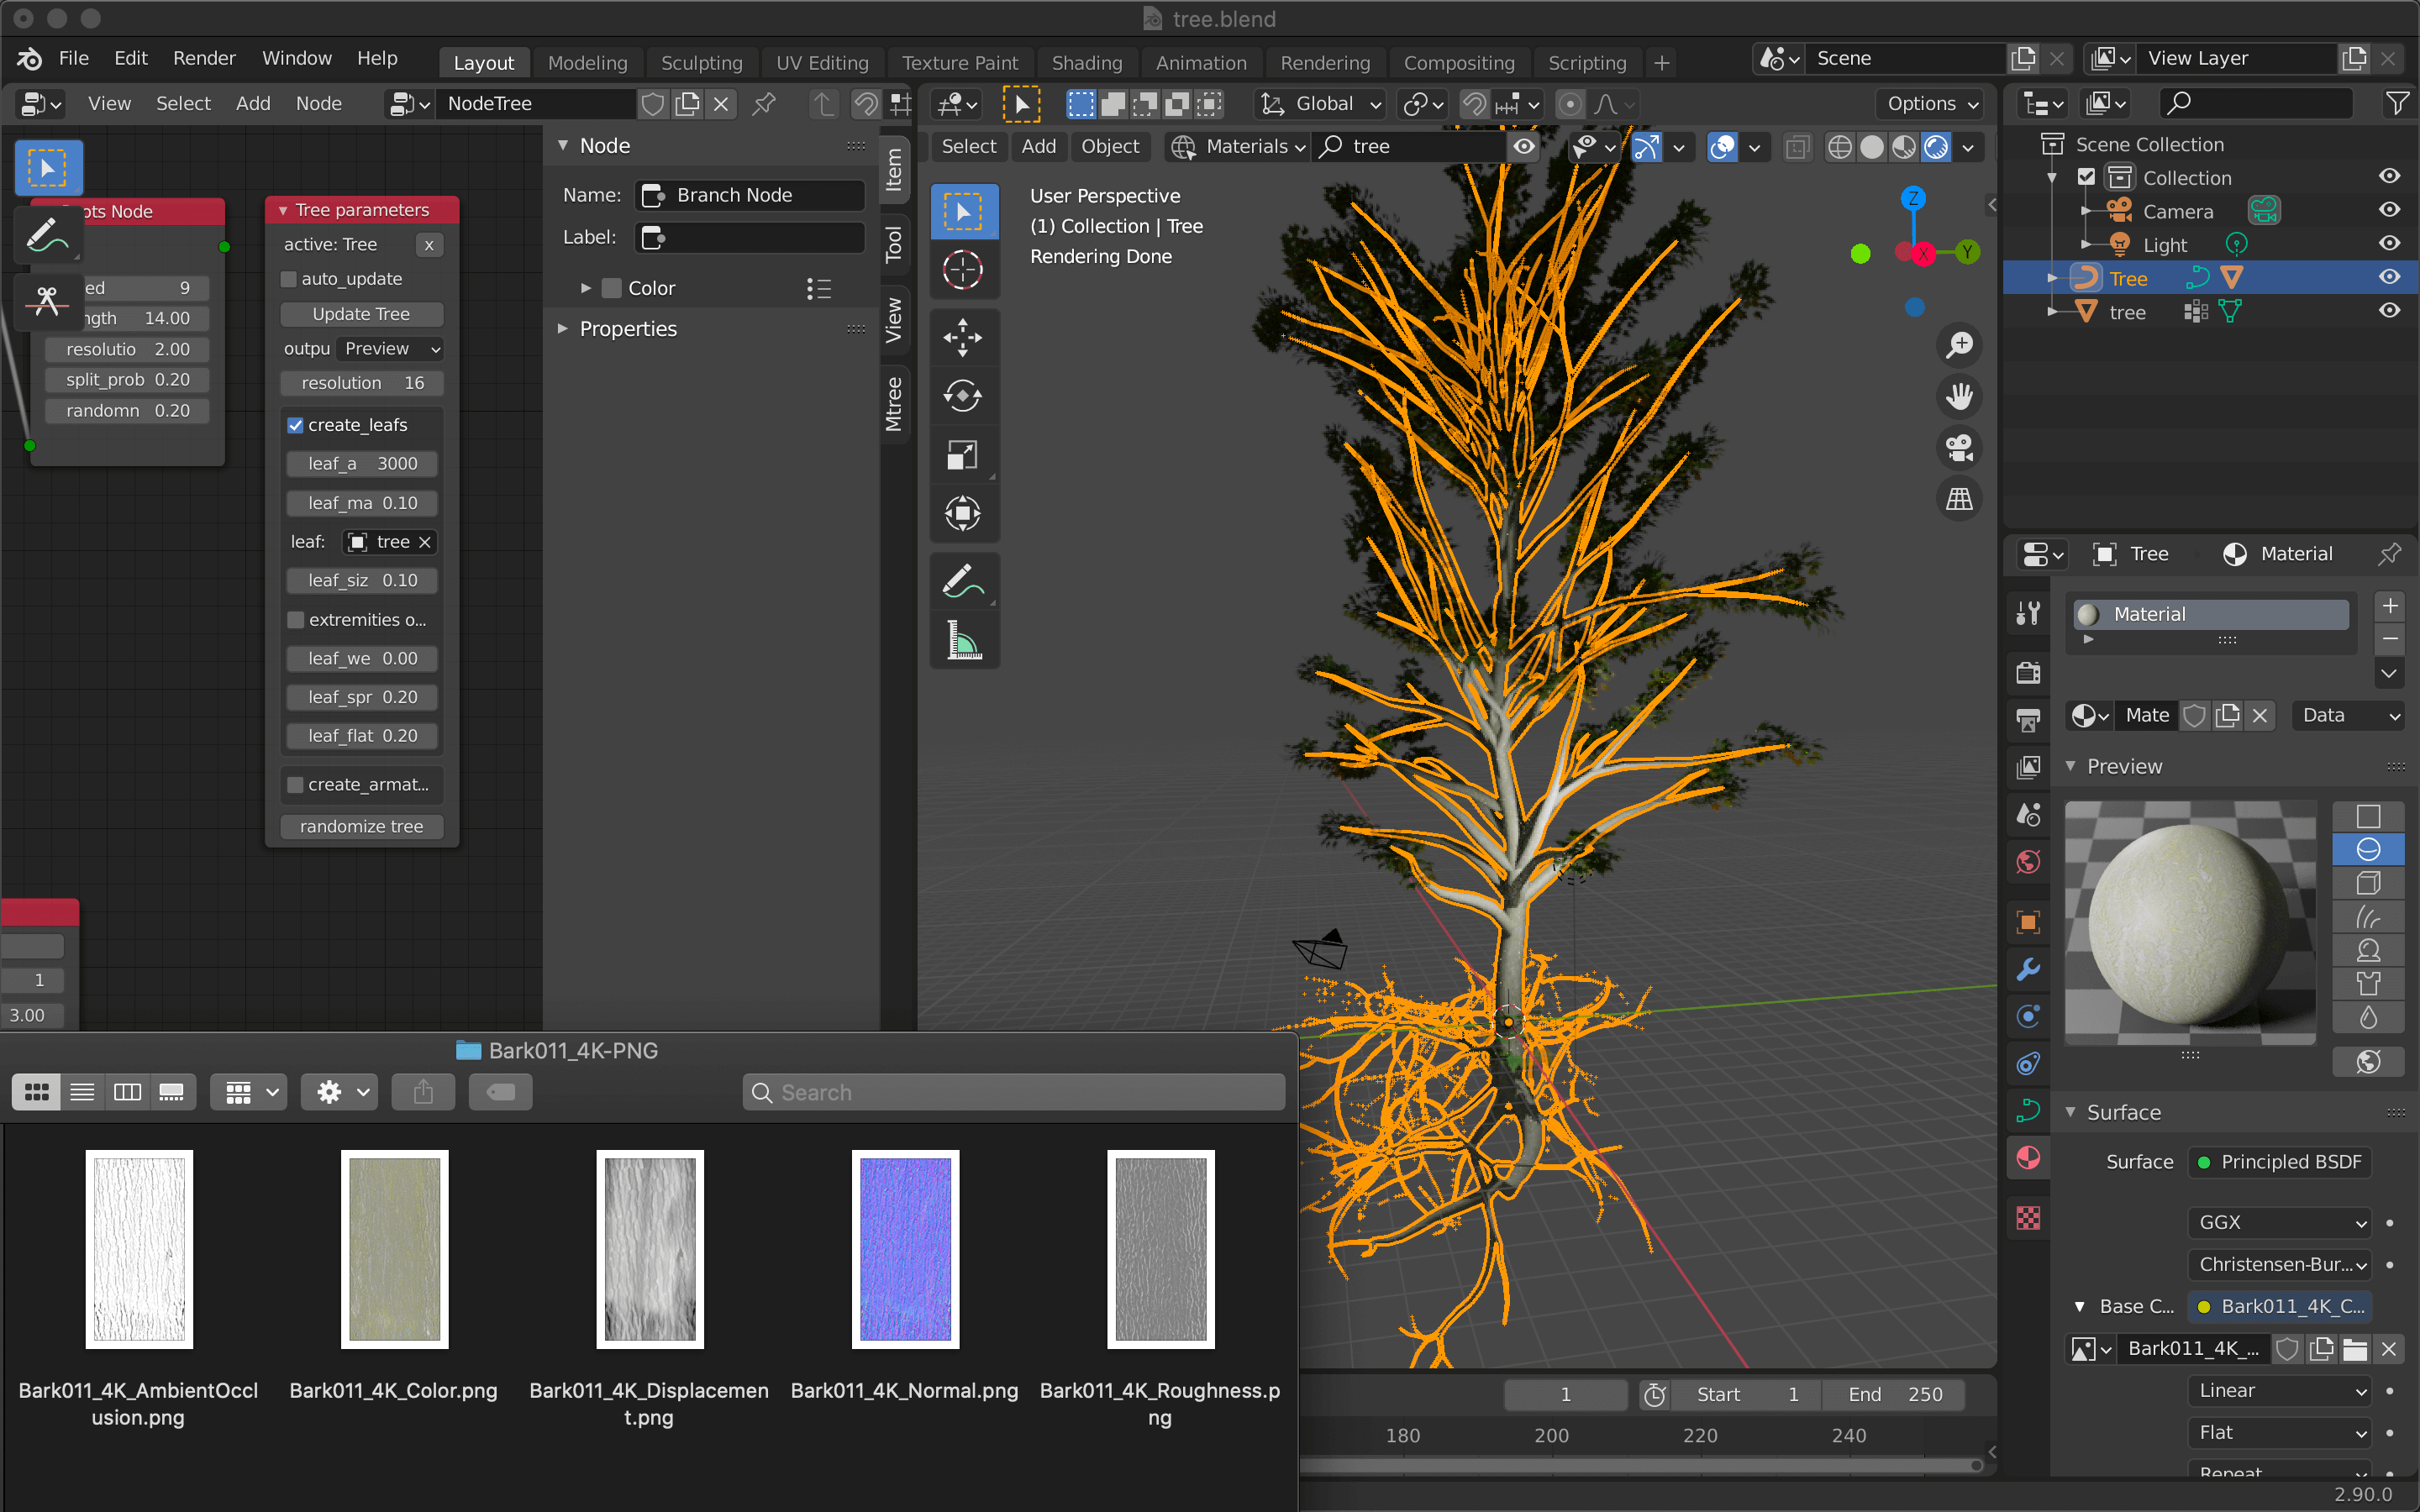
Material assignment
You can also save the texture from an external texture distribution site and create a new material using it.
Exporting for STYLY uploading
When uploading directly to STYLY from Blender or any other CG software, it is important to export with the correct extension for your work data.
| Extension | Description |
| FBX | Object + Material + Animation information |
| Blender | Data created in Blender |
| OBJ+MTL+JPEG | OBJ: Surface material + object shape MTL: Material information / set with OBJ Image format/texture information |
| glTF | Material + object information including PBR |
From STYLY Studio, select Assets→3D Model→My Models & Upload to load.

STYLY Studio
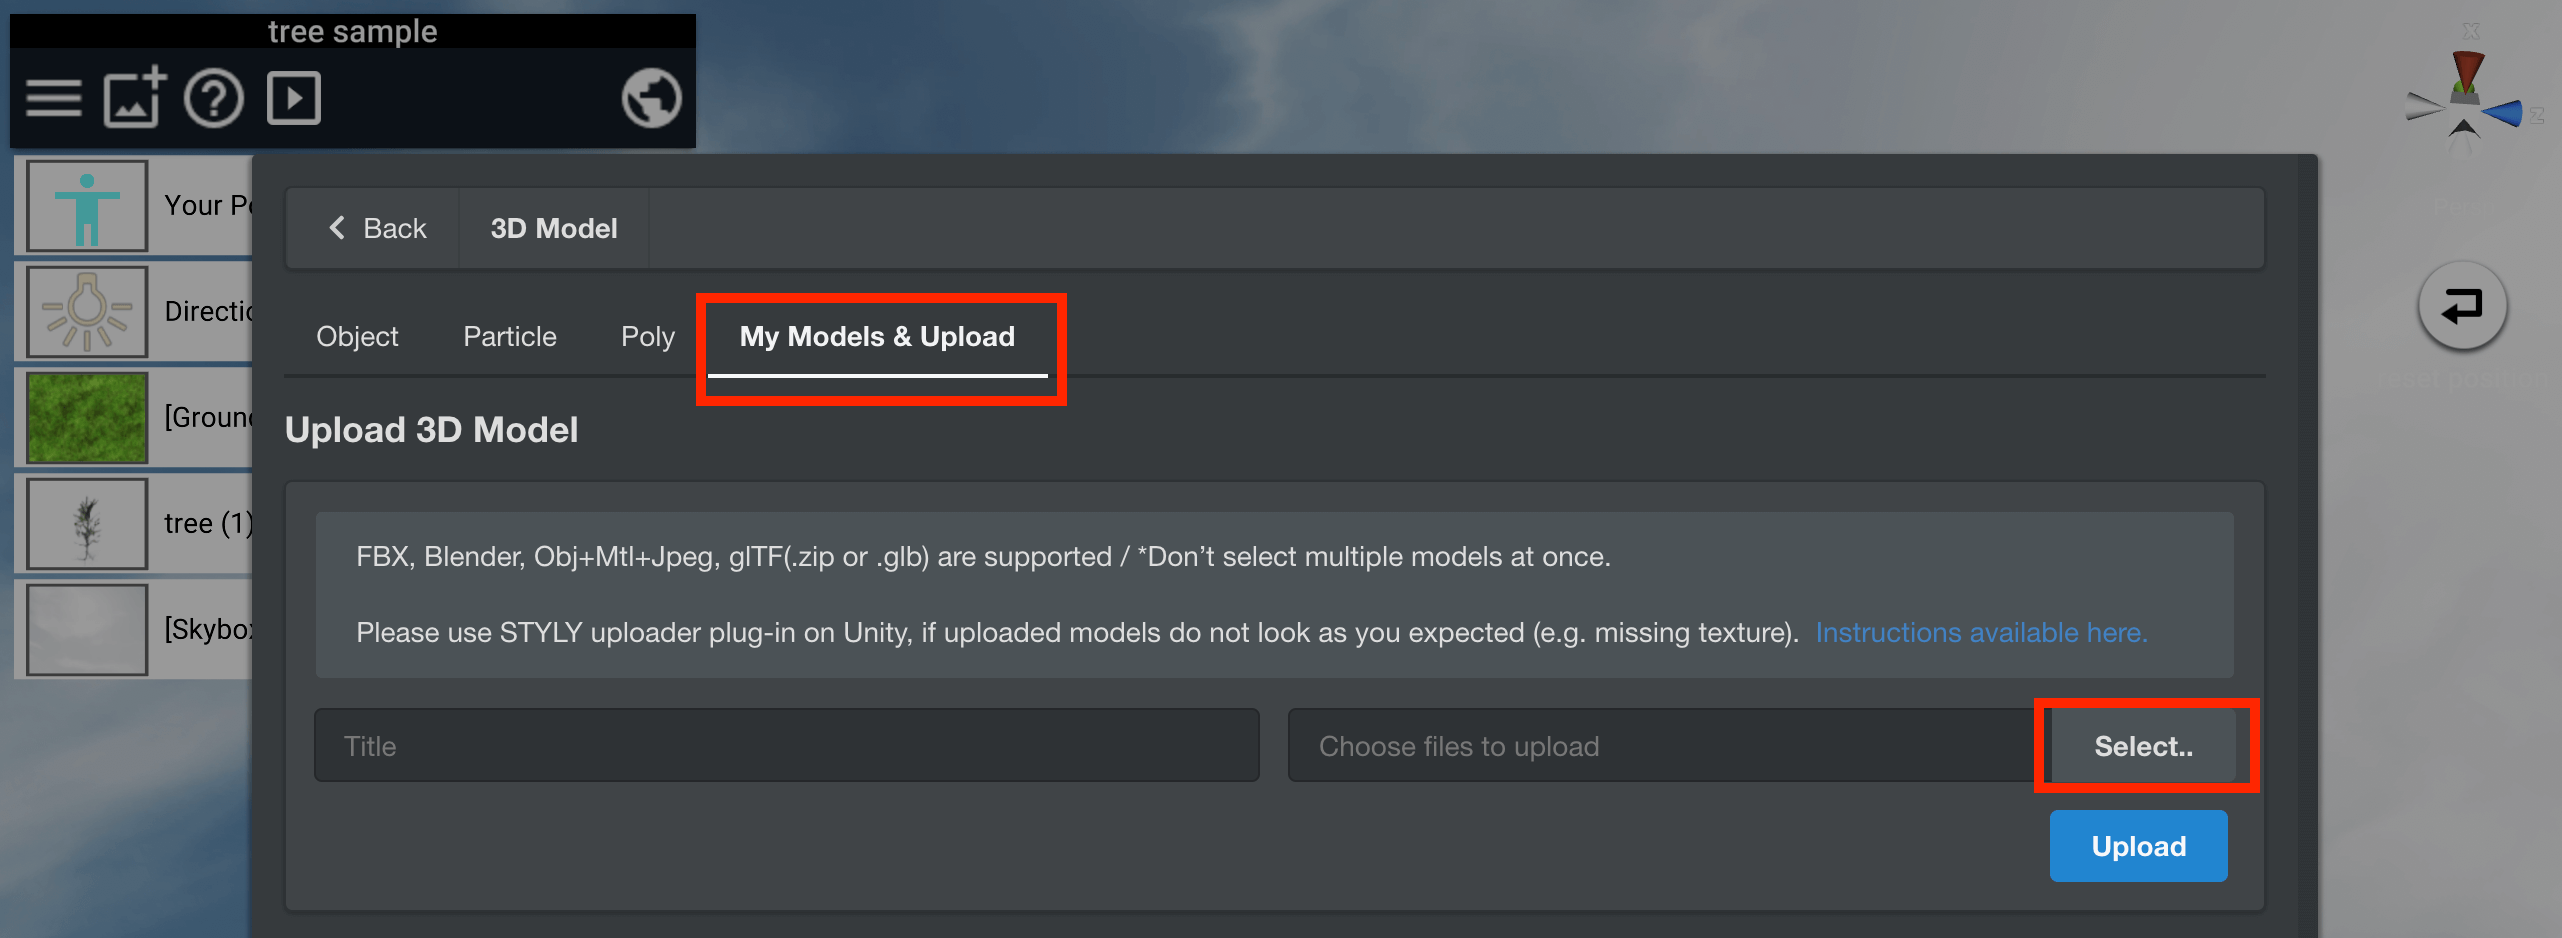
My Models & Upload
When exporting from Blender does not work
It may take a long time to upload the model, or the settings may not be reflected even if the model is uploaded.
In this case, please try one of the following methods.
Reduce the number of polygons in the object
This is effective when the data is large and takes a long time to load.
Select the object you want to reduce the number of polygons in Blender, and then select Modifier Properties→Add Modifier→Decimate.

Decimate
Adjust the Ratio value.

Decimate
Be careful not to collapse the object.
After setting the values, select Apply from the arrow next to the camera symbol to apply the settings.
Uploaded from Blender to Sketchfab once→Upload the downloaded file to STYLY.
There are a couple of steps you can take, but you can also upload your 3D model to Sketchfab, a site where you can share and download 3D models.
When you open the site, click UPLOAD in the upper right corner and upload the data you have just exported.
If you haven’t registered yet, go to SIGN UP to create an account.
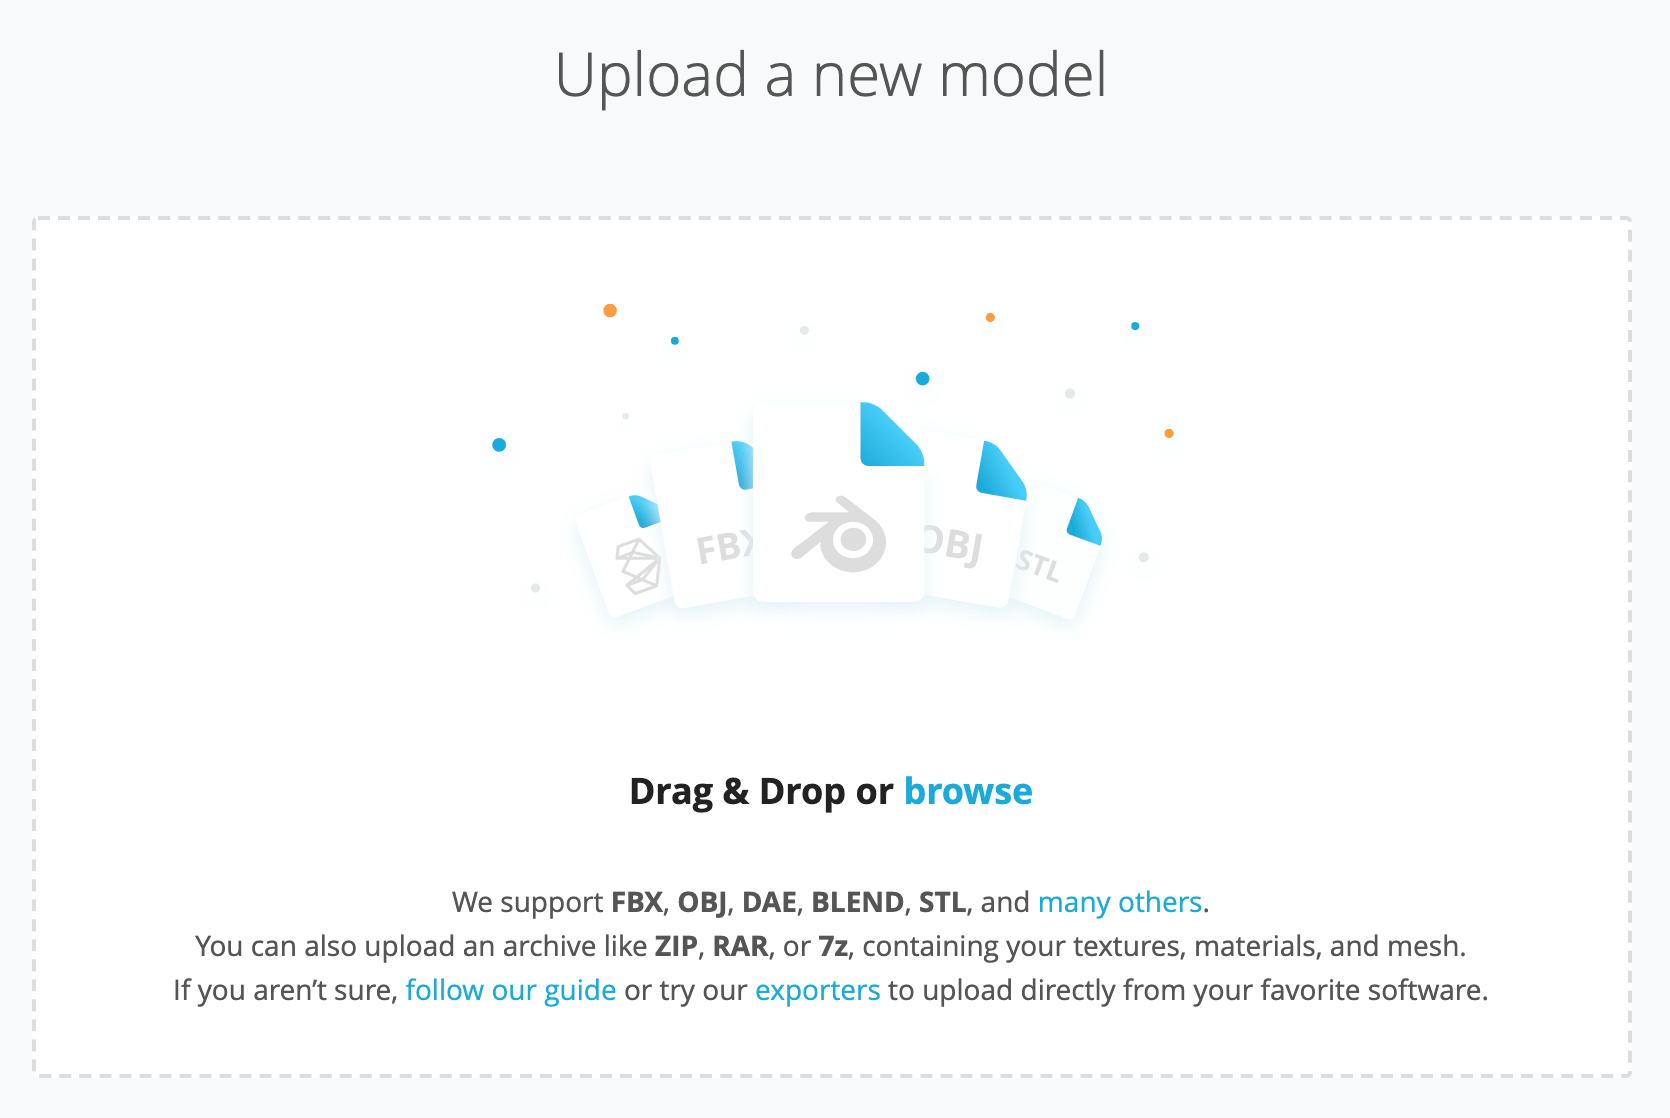
Scketchfab
Drag and drop the data or click browse to select the data from your own computer.
Scketchfab
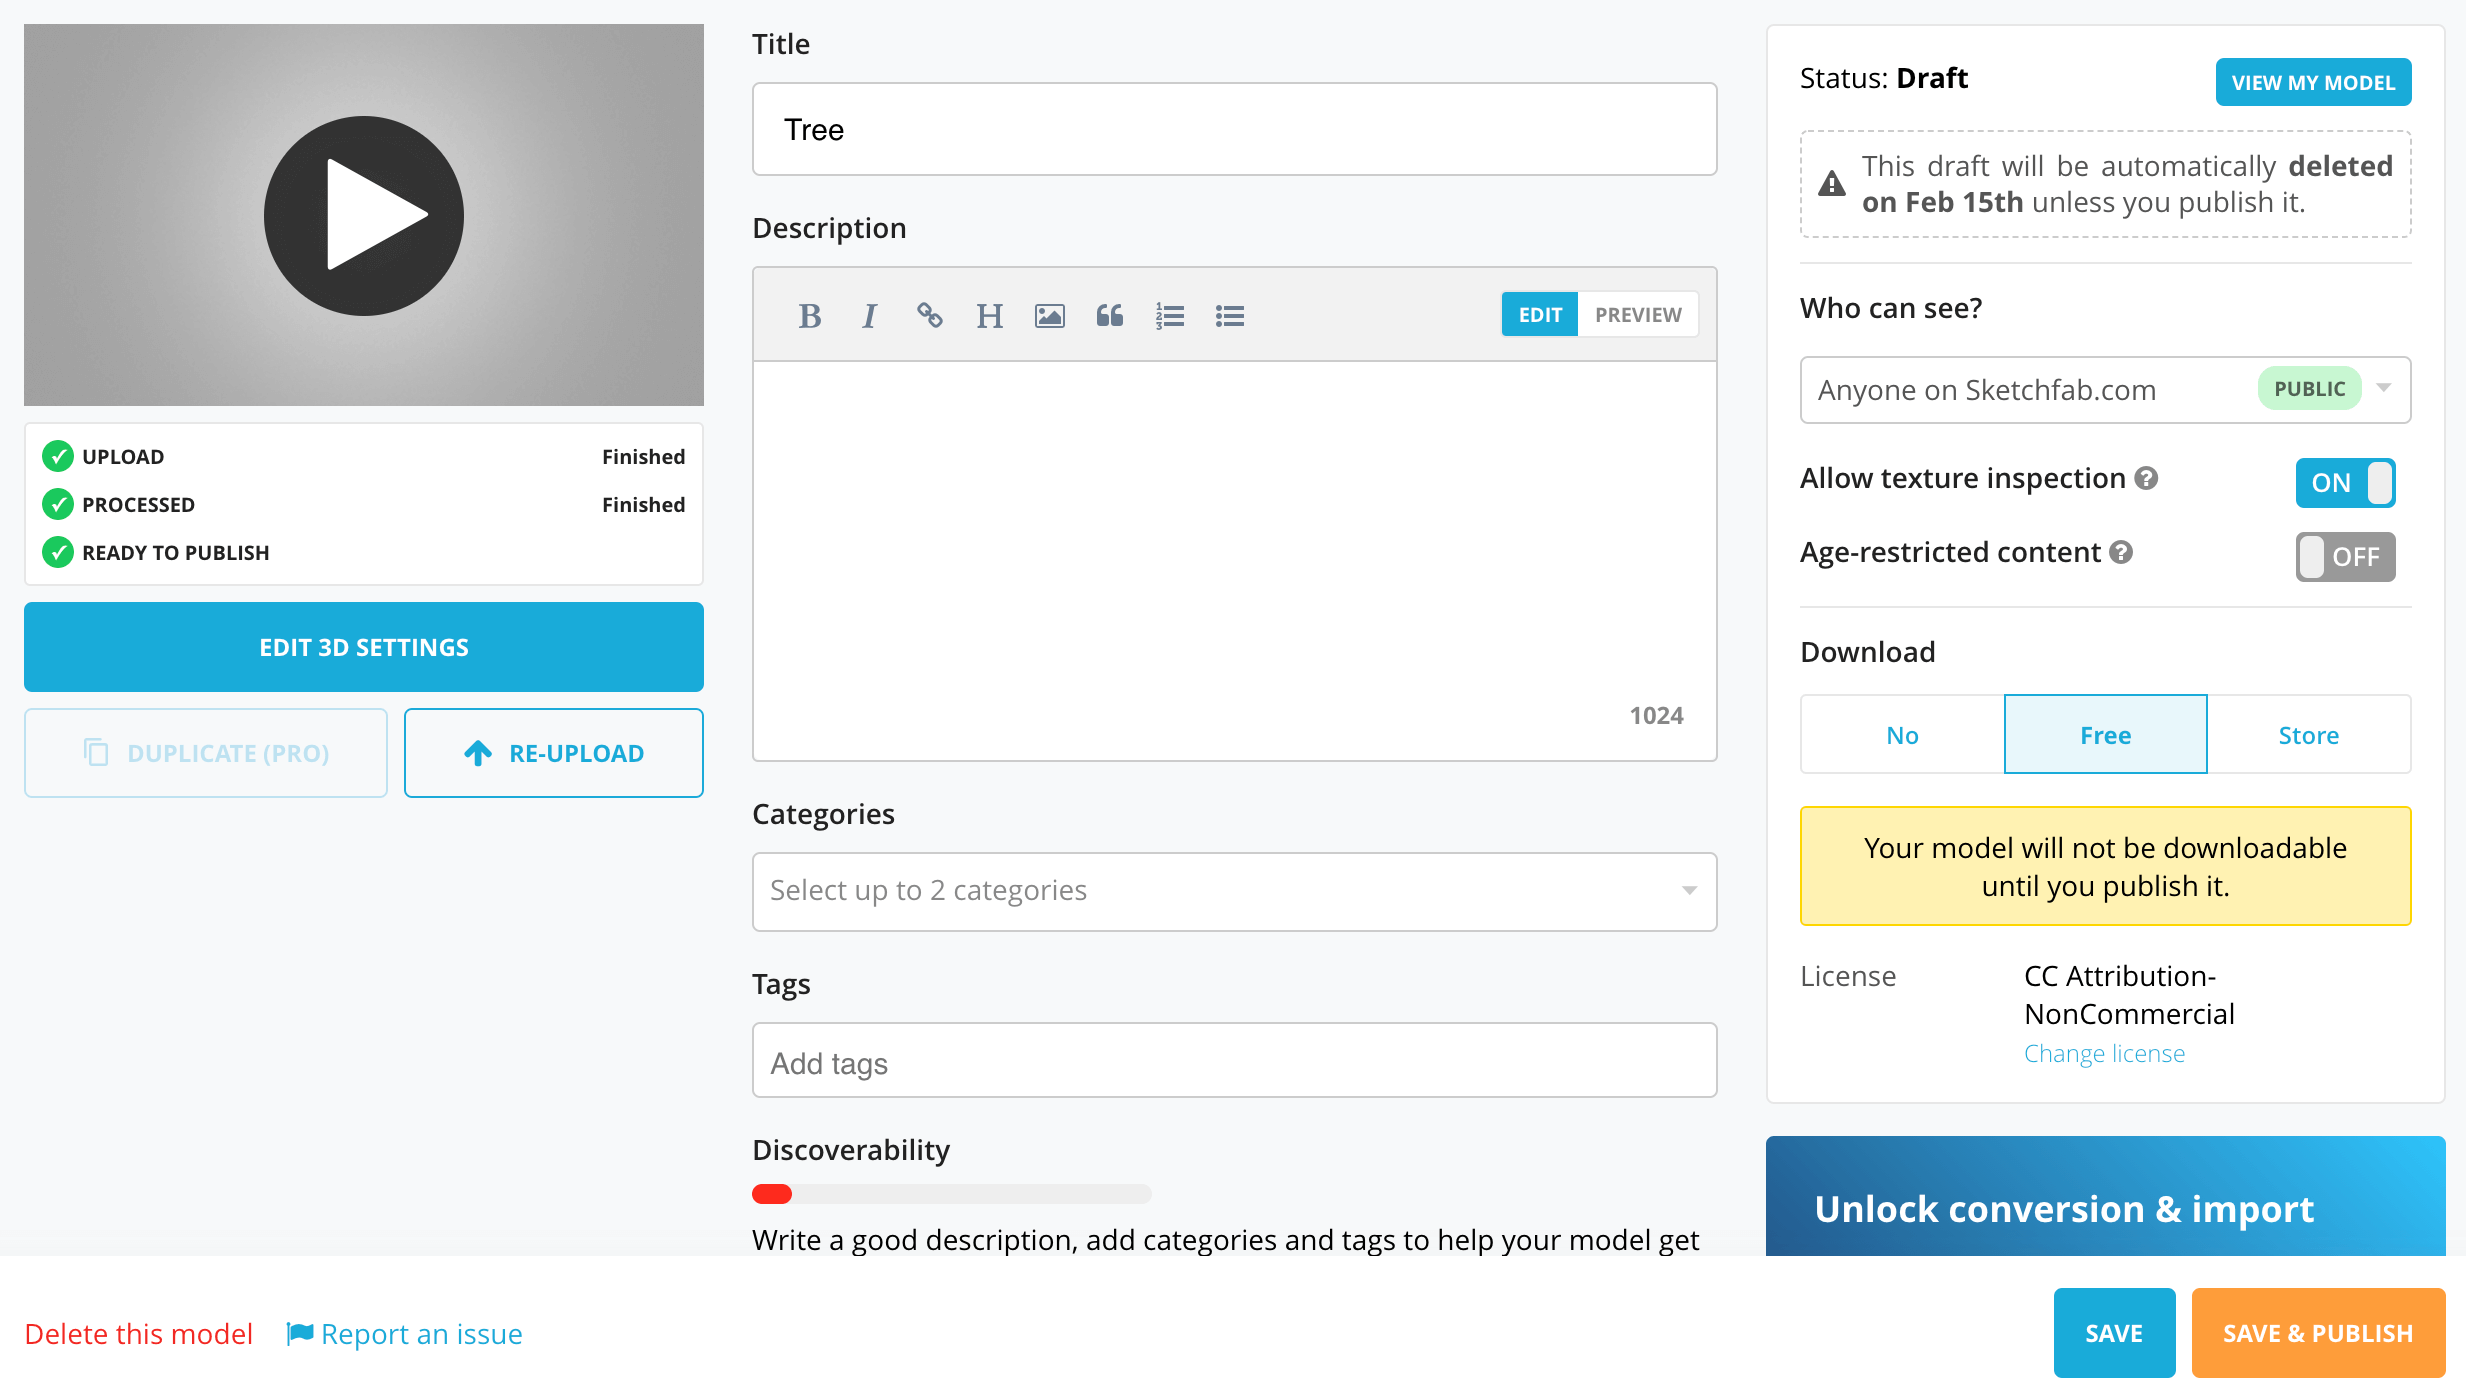
When READY TO PUBLISH is checked, click SAVE & PUBLISH.
(If you are a free member, you are limited to one upload per month, but if you set Download to Free, it will not count.)
Upload 3D Model
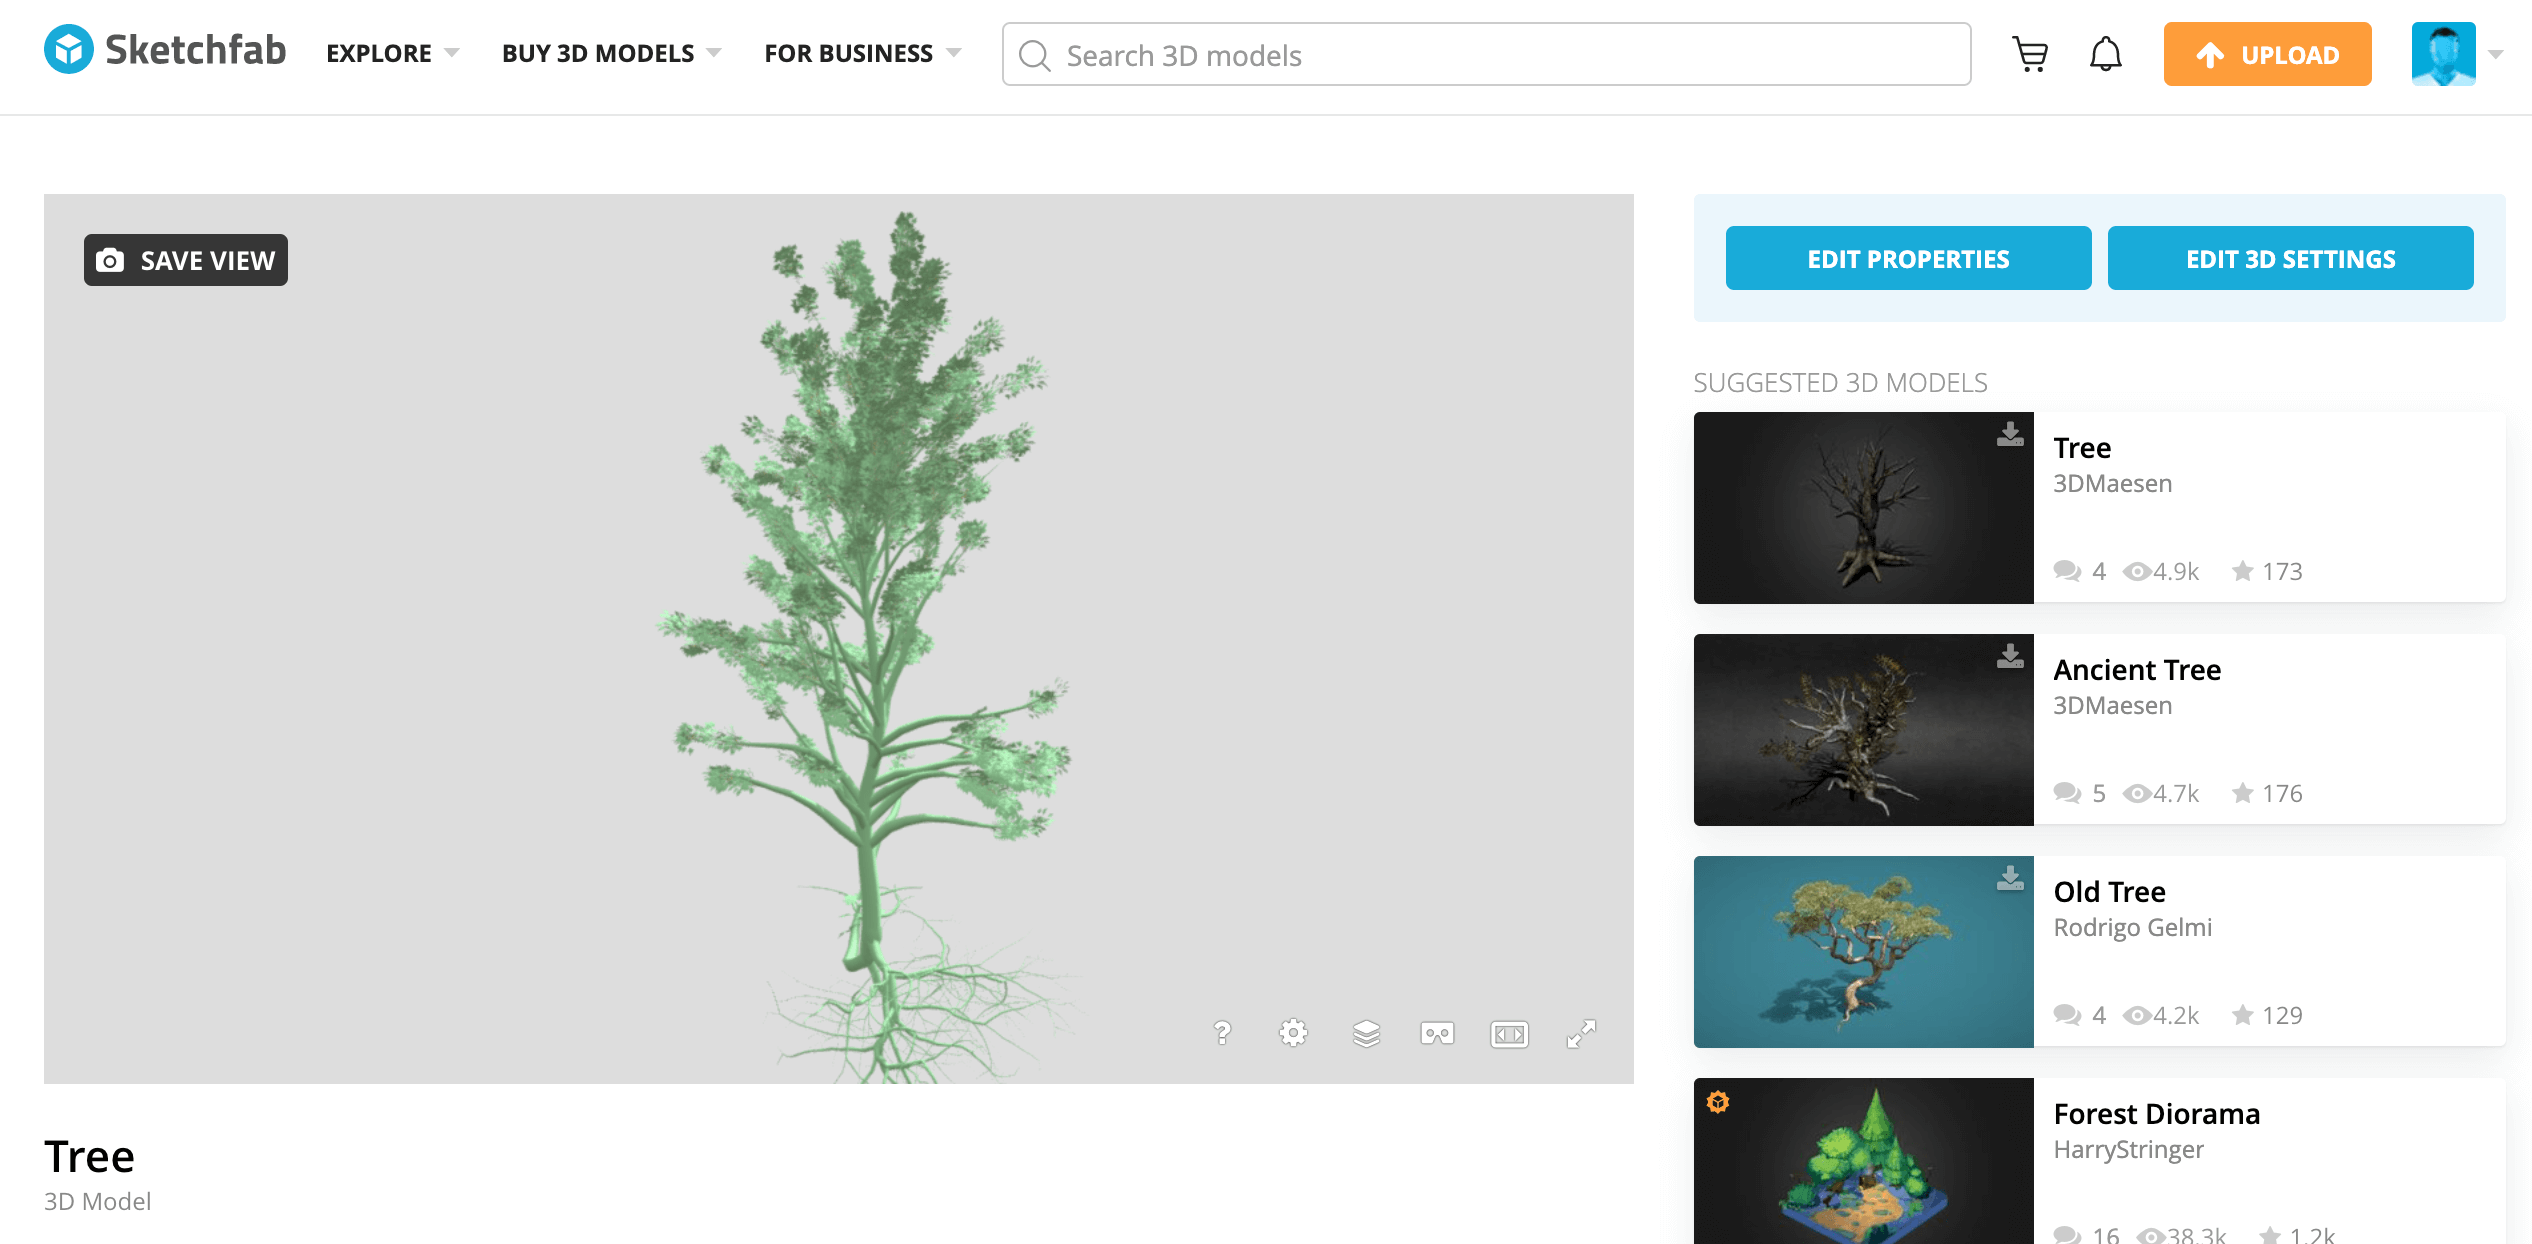
If you have uploaded a 3D model with a texture and it is not reflected in the model, you can set it from EDIT 3D SETTINGS on the upper right.
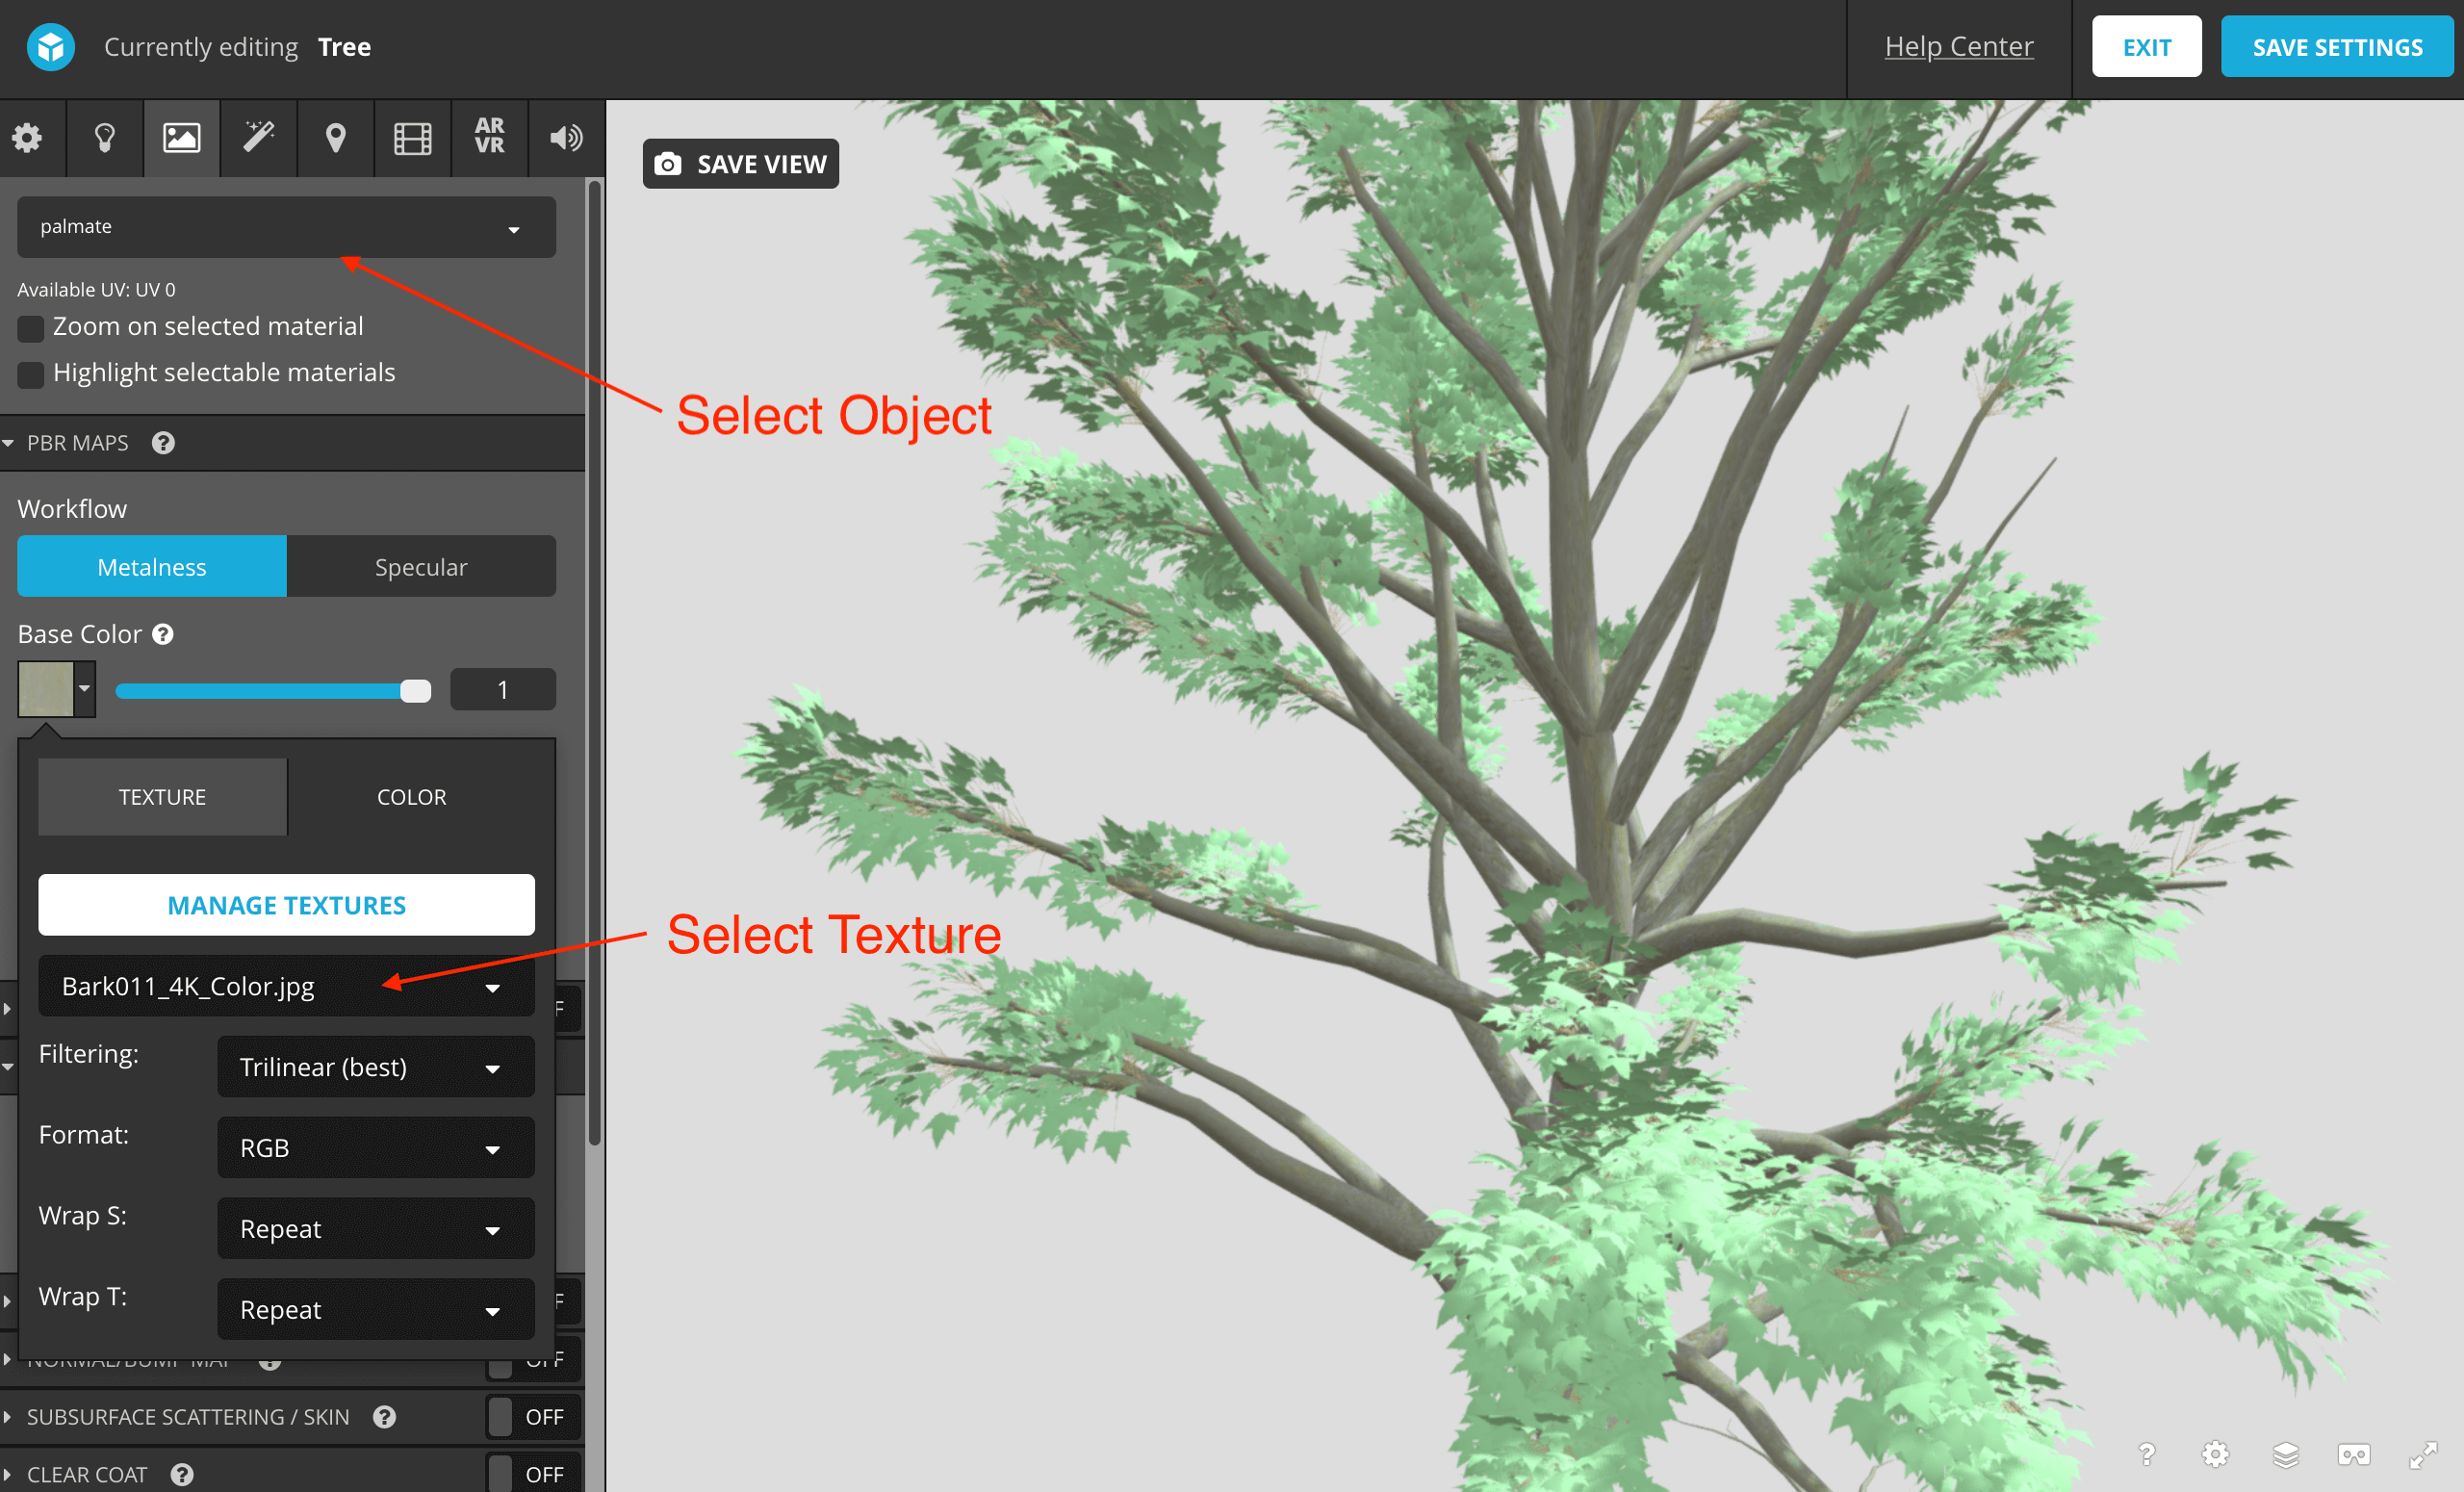
EDIT 3D SETTINGS
Remember to click SAVE SETTINGS when you are done, then EXIT to return to the page.
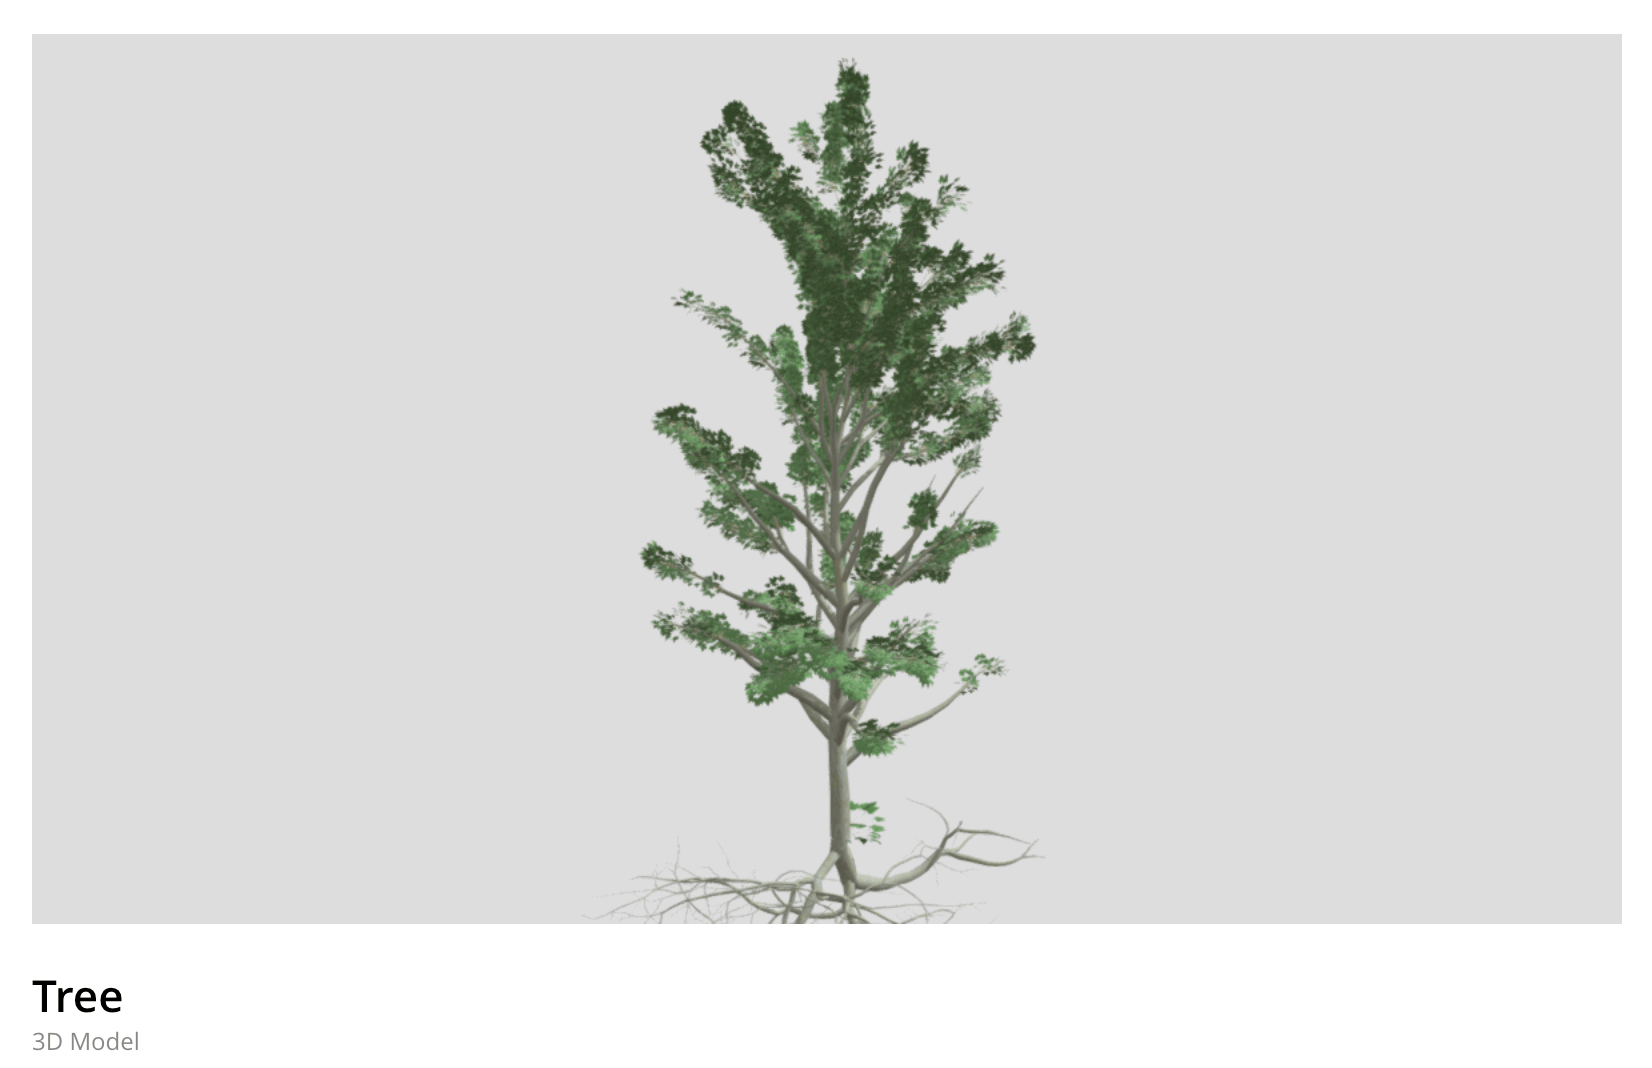
Updated Tree
For further instructions, please see this article.
Upload to STYLY
When you’re done, you can upload your project to STYLY.
How to upload assets from Unity to STYLY

You can easily create different kinds of trees with different combinations of things, so please give it a try!
Introduction to NEWVIEW SCHOOL ONLINE
NEWVIEW SCHOOL ONLINE is now open! Learn the basics of Unity and PlayMaker, necessary for creating VR/AR content, and learn the process (and creation techniques) for developing attractive content available on STYLY.
- Create VR/AR content without writing any programming code.
- Professionally supervised Unity courses available.
- Explore additional elements, such as photogrammetric production methods and content lightening.
- Learn the concept of creating VR/AR content.
