この記事では動画からフォトグラメトリを作成する方法を紹介します。
動画を利用することで、より短時間で撮影を行うことができます。
求めるクオリティに応じて写真と動画を使い分け、効率的にフォトグラメトリを行いましょう。

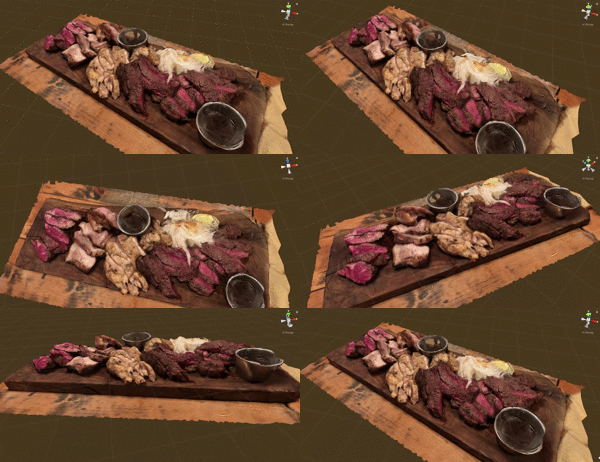
動画から作成した3Dモデルの例
フォトグラメトリとは?
フォトグラメトリとは、物体を様々な方向から撮影した写真をコンピューターで解析し、3Dモデルを立ち上げる技術です。
フィギュアのような小さなものから、建築や都市といった大きなものまで3Dモデルにすることができます。
Rocca Calascio – RAWscan by Spogna on Sketchfab
フォトグラメトリの解説や基本的な使い方については下記の記事でまとめています。
初めて挑戦する方はぜひこちらの記事を先に読んでみてください。
動画からフォトグラメトリを作成する
主要なフォトグラメトリ用ソフトは軒並み動画からの3Dモデル作成に対応しています。
動画をソフトに読み込むことで、動画から適切な写真を自動で切り出してくれるのです。
動画を利用することで、撮影時間を短縮することができますが、その一方で、動画を利用することにより3Dモデルのクオリティは幾分か落ちてしまいます。
アウトプットされる3Dモデルに求められるクオリティに応じて、写真によるフォトグラメトリと動画によるフォトグラメトリを使い分けましょう。
| フォトグラメトリソフト | 動画から作成 | 対応OS |
| 3DF Zephyr | ◯ | Windows |
| Reality Capture | ◯ | Windows |
| Meta Shape(旧Photoscan) | ◯ | Windows/Mac/Linux |
動画から作成する際の注意点
動画からフォトグラメトリを行う際は、気をつけなければならない点がいくつかあります。
| 注意点 | |
| 撮影時の注意点 | 可能な限りブレないように撮影する (ブレに強いカメラがオススメ) |
| 撮影時に急激にカメラを動かさない | |
| 一定の速度でカメラが動くように注意する | |
| 撮影範囲に動くものが映らないように注意する | |
| 反射や影ができるだけ写り込まないように注意 | |
| 写真切り出し時の注意点 | 切り出した写真の中にクオリティの低いものが含まれていた場合、その写真は使用しない |
3DF Zephyr無料体験版で動画からフォトグラメトリを行う
ここでは、3DF Zephyrの無料体験版を使用してフォトグラメトリを行う方法を紹介します。
動画撮影
動画撮影時はなるべくブレないようにカメラを動かしましょう。死角がないように満遍なく全体を写します。
今回はiPhoneで撮影しました。
3DF Zephyr以下のビデオファイル形式に対応しています。これ以外の形式の場合はあらかじめ変換しておきましょう。
[.mepg .wmv .avi .mp4 .mov .mpg]
(※下のGIF画像は動画の一部を切り取ったものです。実際は360度ぐるっと一周撮影しています)

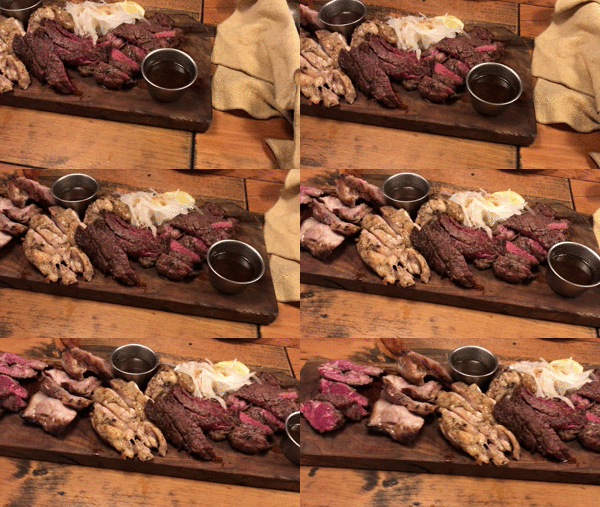
動画の撮影例(一部)
3DF Zephyrへの取り込み
メニューバーの「ワークフロー」から「新規プロジェクト」を選択します。

新規プロジェクトの作成
ウィザードが開いたら「次へ」を押します。すると下記の画面が現れるので、「ビデオから写真を入力」を選択します。

ビデオから写真を入力
「ビデオファイルからフレームを抽出」というウィンドウが開くので、「入力ファイル」(フォトグラメトリに使う動画)と「出力ファイル」(動画から切り出した写真が保存される場所)を指定します。
「抽出するFPS」は1秒あたりに切り出す写真の枚数を意味しています。
たとえば、30秒の動画で「抽出するFPS」を「1.00」に設定すると、30枚の写真が切り出されます。
3DF Zephyrの無料体験版では50枚しか写真を読み込めないため、切り出す枚数がだいたい50枚になるように調整しましょう。(50枚を超過した分については自動で間引いてくれるので、そこまで神経質になる必要はありません)

ビデオから写真を切り出す際の設定
「抽出するFPS」の設定が終わったら、「フレームの抽出とワークスペースの入力」を押しましょう。
これにて動画から写真を切り出す作業が始まります。

フレームの抽出とワークスペースの入力
切り出した写真を使ってフォトグラメトリを行う
ここまでの工程で、動画から写真を切り出すことができました。
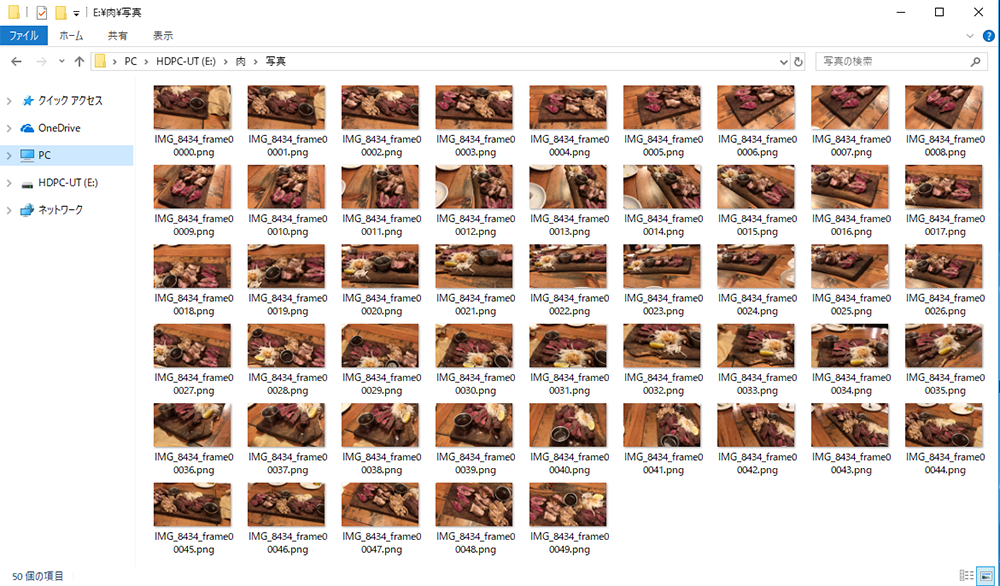
動画から切り出した写真がフォルダに保存され、3DF Zephyrにそれらが読み込まれた状態になっています。
もし極端にブレているなど質の低い写真がある場合は、抜いてしまった方が良いでしょう。

動画から切り出された写真の例
あとは写真を取り込んだ場合と同じ工程です。
▼3DF Zephyrで3Dモデルを作る工程はこちらの記事で詳しく解説しています▼
STYLYへのアップロード
フォトグラメトリで作成した3Dモデルは、UnityでUnlit Shaderを適用してアップロードした方が見栄えが良くなります。
Unlit Shaderの適用方法はこちらの記事で詳しく紹介しています。
UnityからSTYLYにアセットをアップロードする方法は以下の記事をご参照ください。
いかがだったでしょうか。
動画を使えば撮影時間を大幅に短縮することができます。
その一方で3Dモデルの質はどうしても下がってしまうので、求めるアウトプットの質に応じて使い分けていきましょう。

