In this article, we describe how to use STYLY to move animations that were created using Blender’s shape key and keyframe functions.

Completion Image
What is Shape Key?
Shape Key is a function that stores the shape of a mesh object (e.g., position information of vertices, edges, and faces). It is used to deform and move objects in animation.
How to Use Shape Key
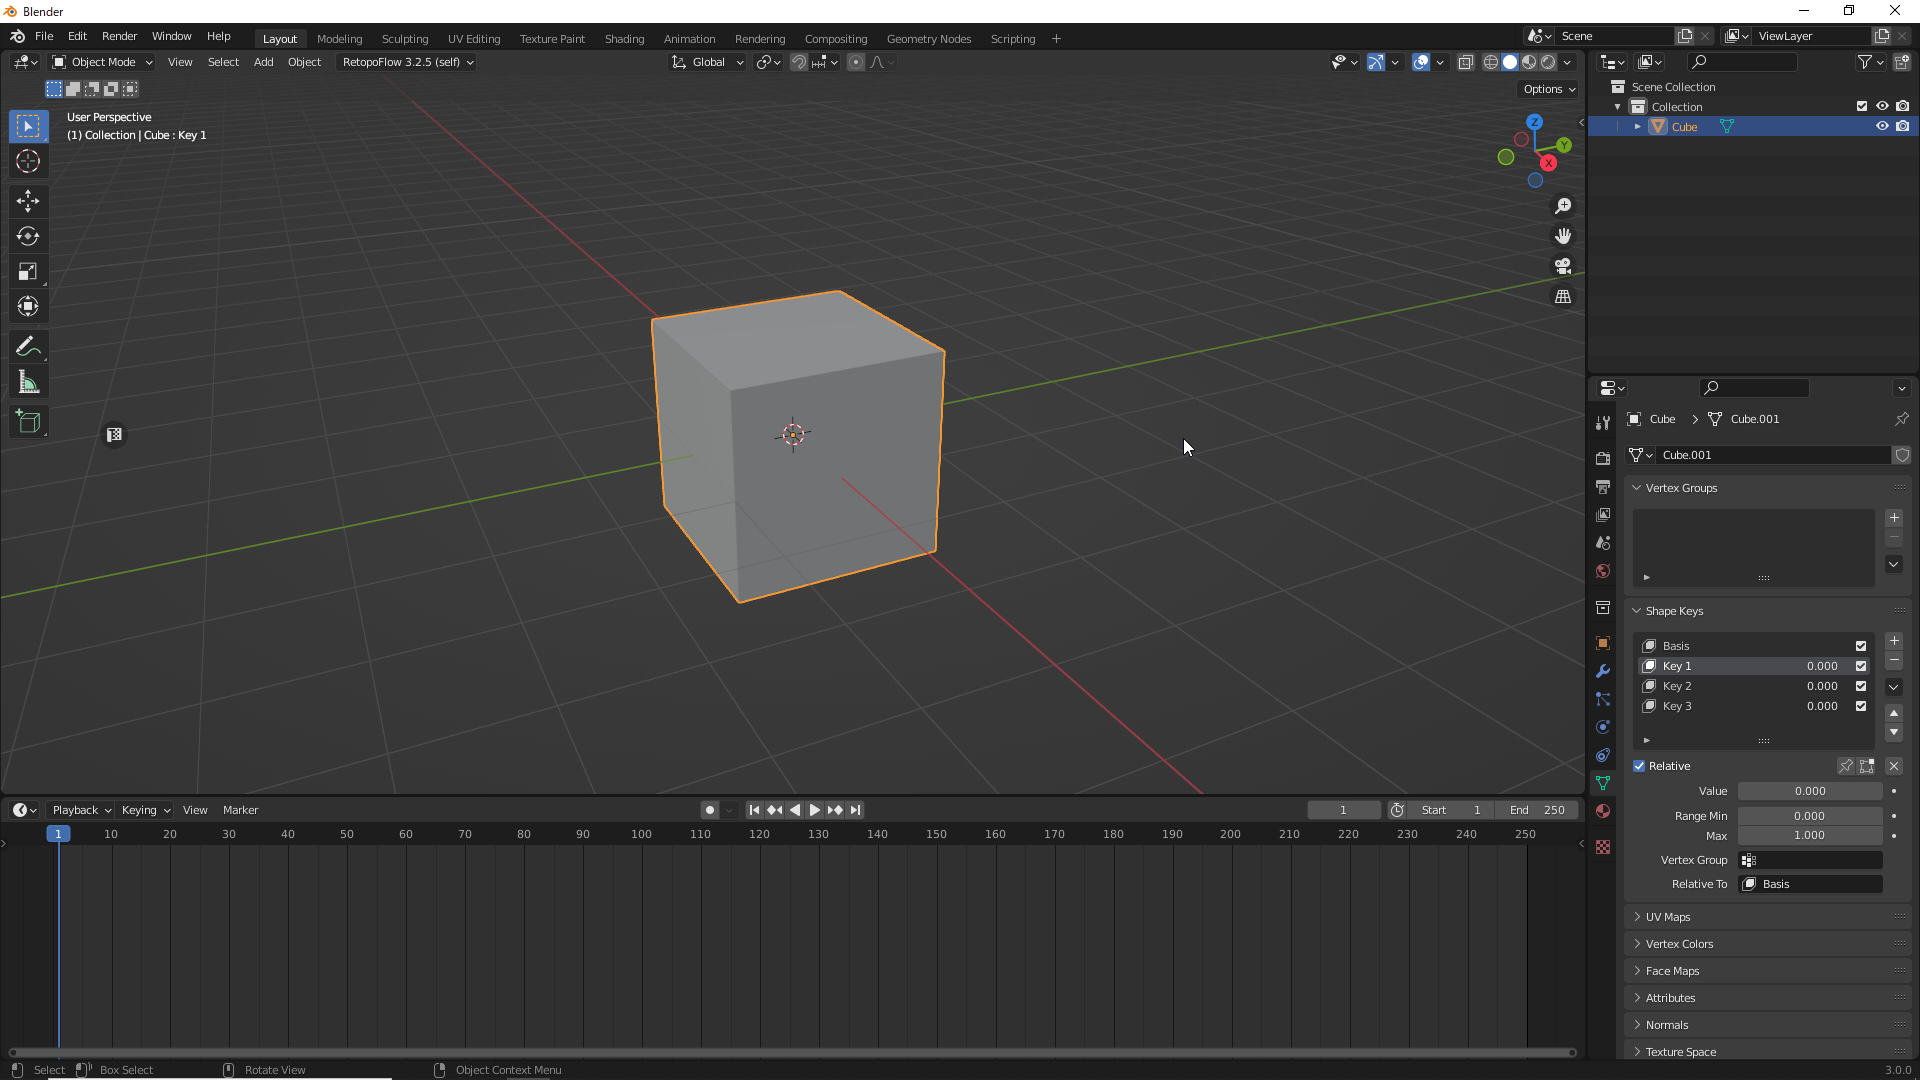
First, you will need to register an object’s shape to a shape key by selecting the object you want to register and clicking the Object Data Properties tab.
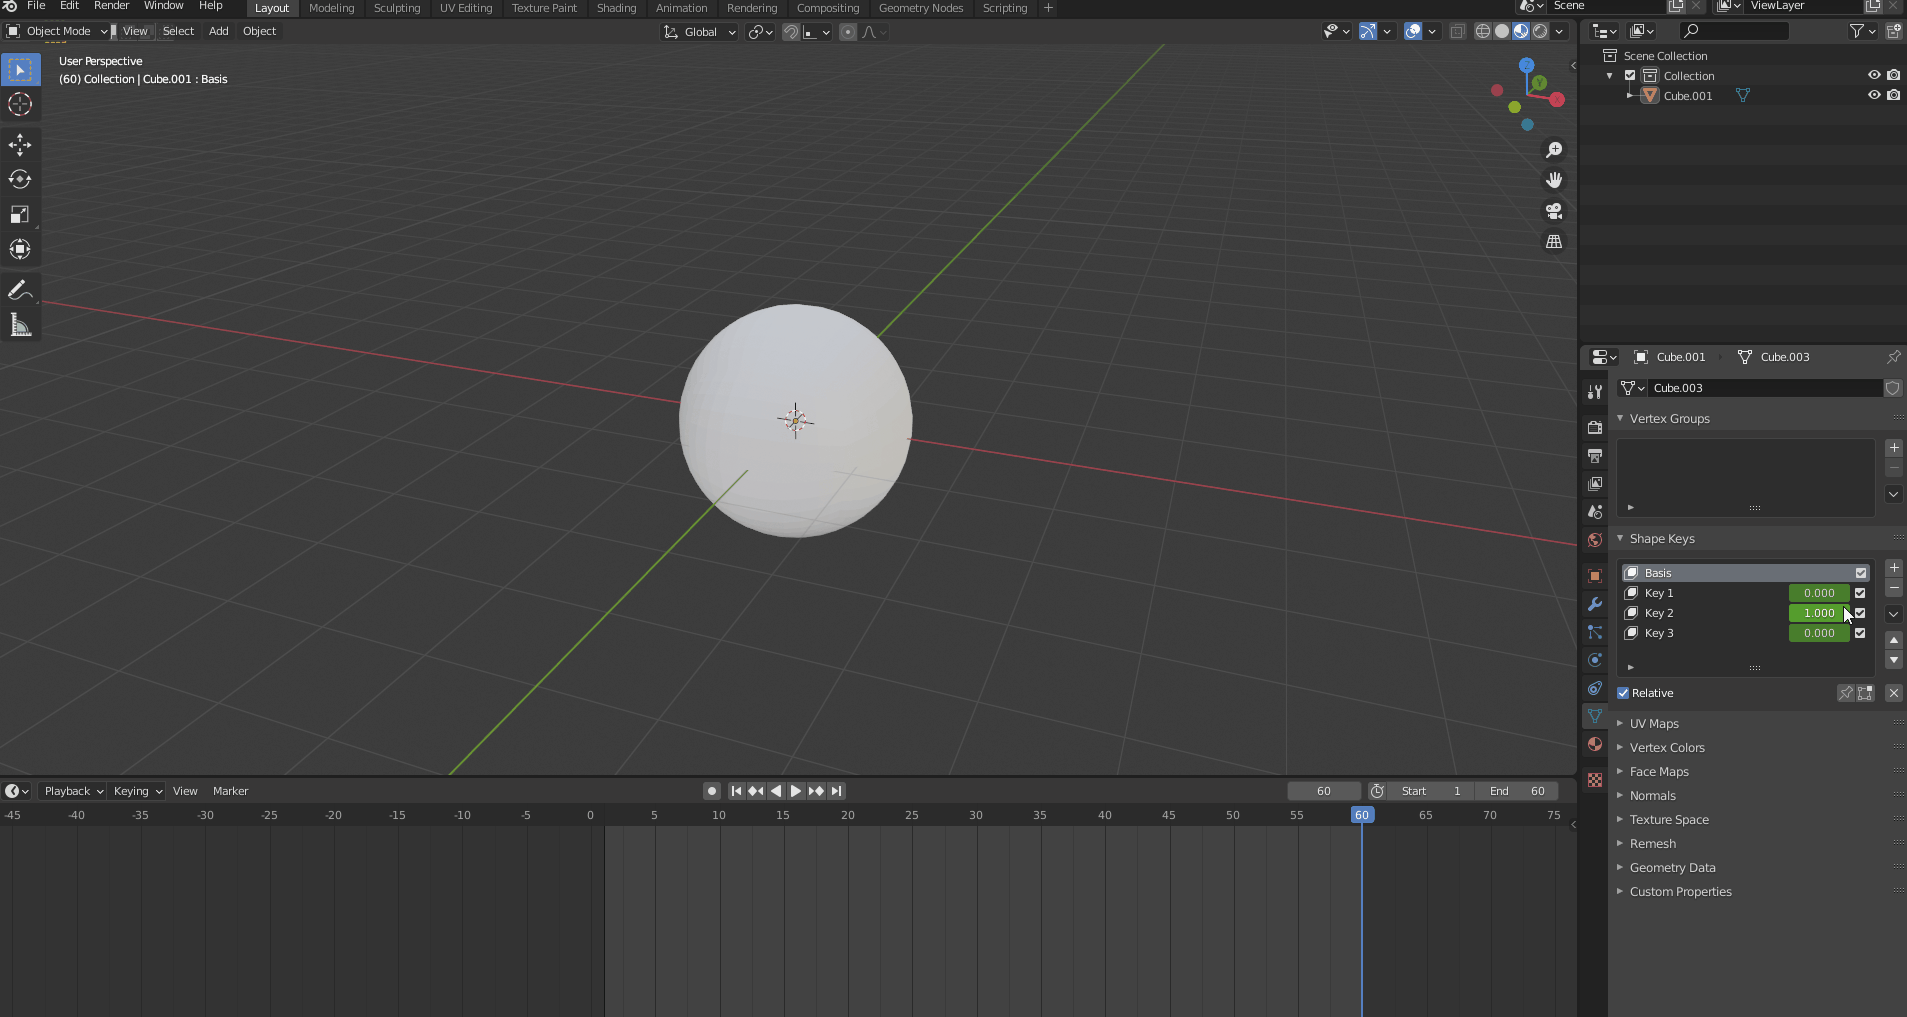
You can increase the number of shape keys by pressing the + button in the Shape Keys panel. In the example below, we want to register three shapes, so we will register three shape keys.
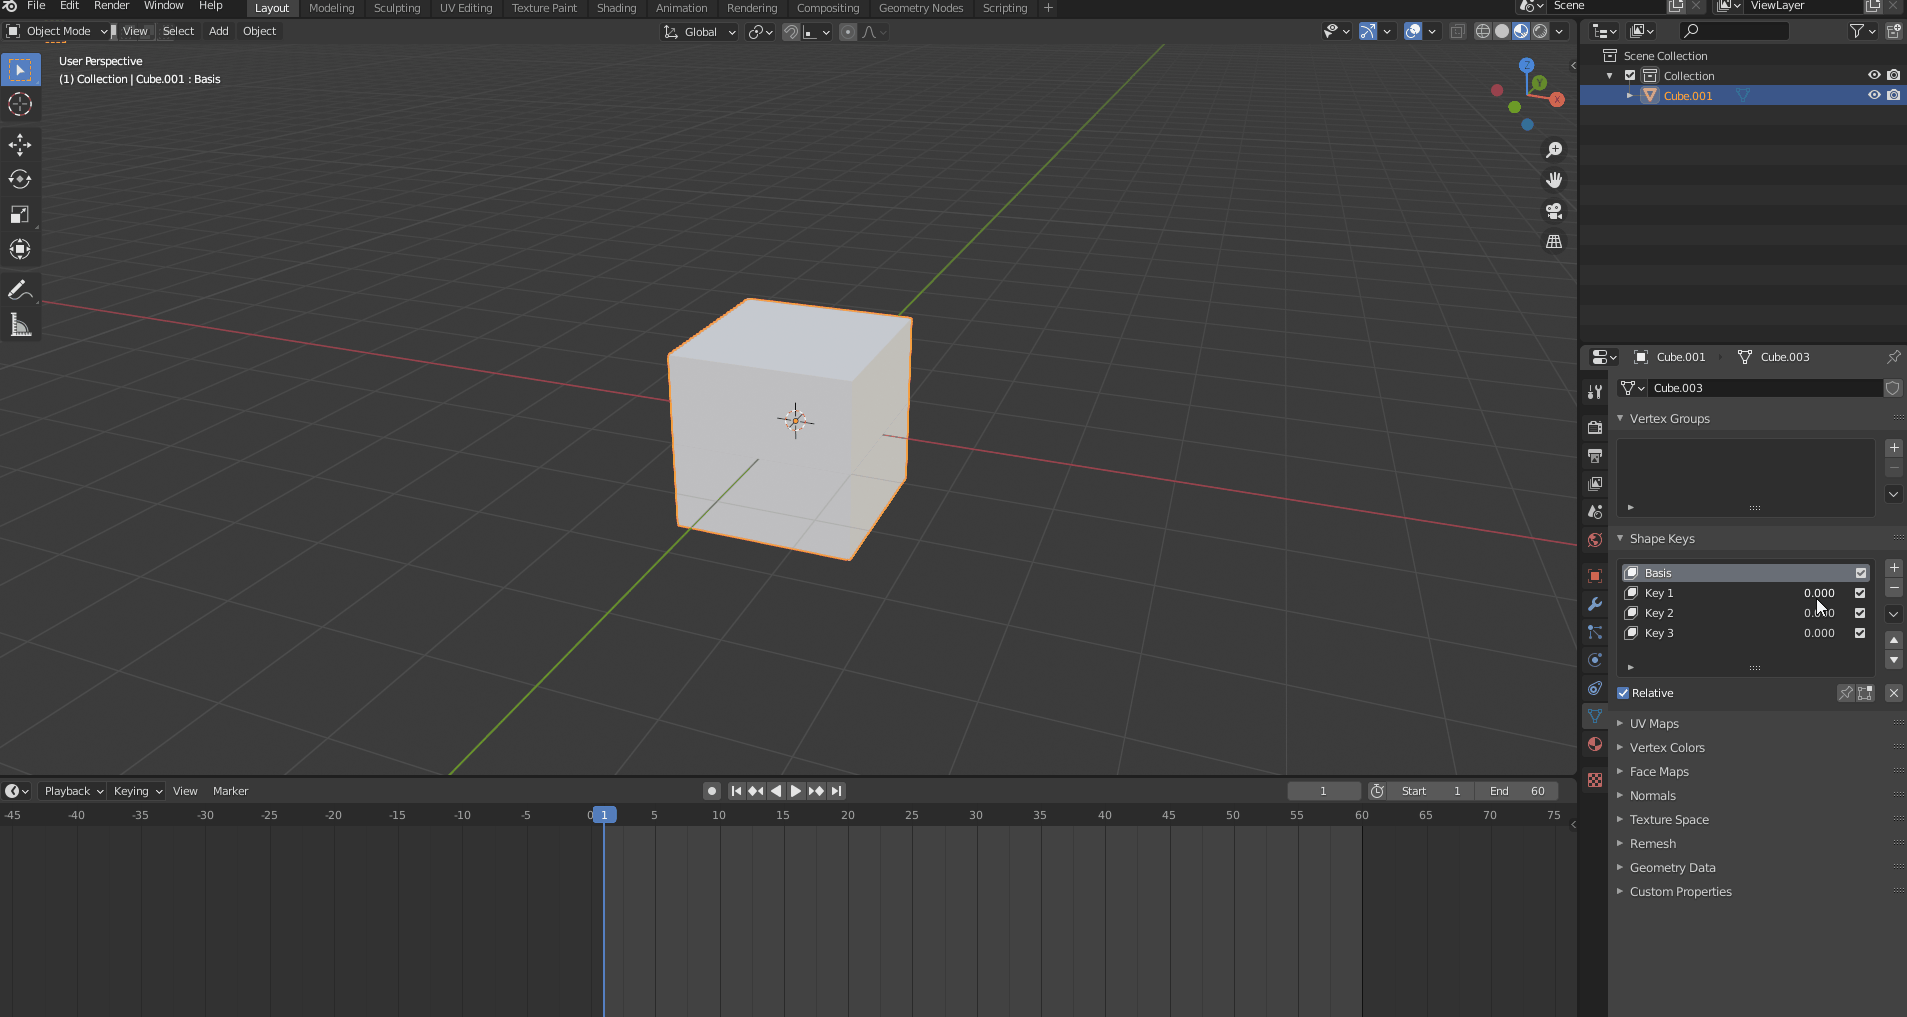
Register ShapeKey
Register Shape Key
For our example, we will create an object that can be transformed into three shapes: a triangular pyramid, a sphere, and an ellipse. First, we will register a triangular pyramid.
Select Key 1 and press the [TAB] key to go to Edit Mode.
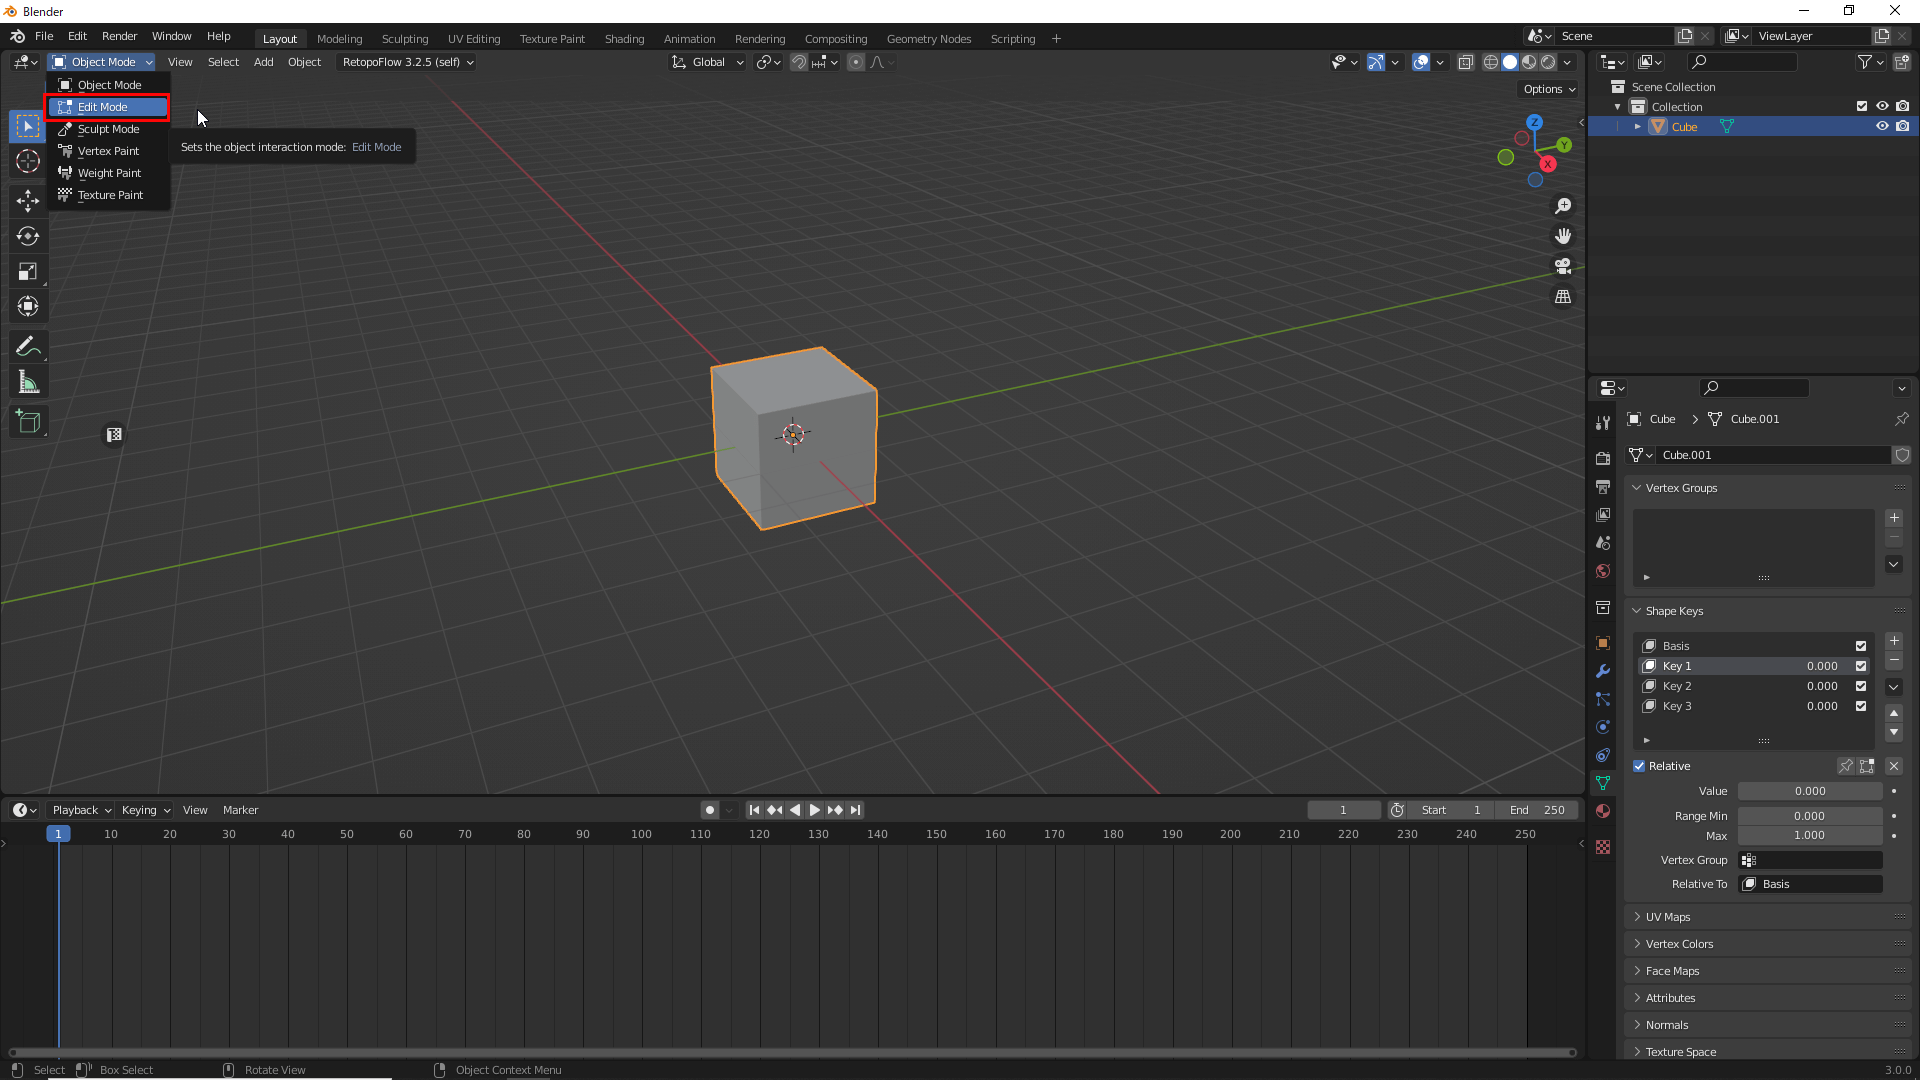
Press the [TAB] Key to Go to Edit Mode
Select the topmost surface of the object, press the [S] key, and then enter “0” to create the triangular pyramid.
Next, we will apply a subdivision surface to the triangular pyramid to make the mesh spherical.
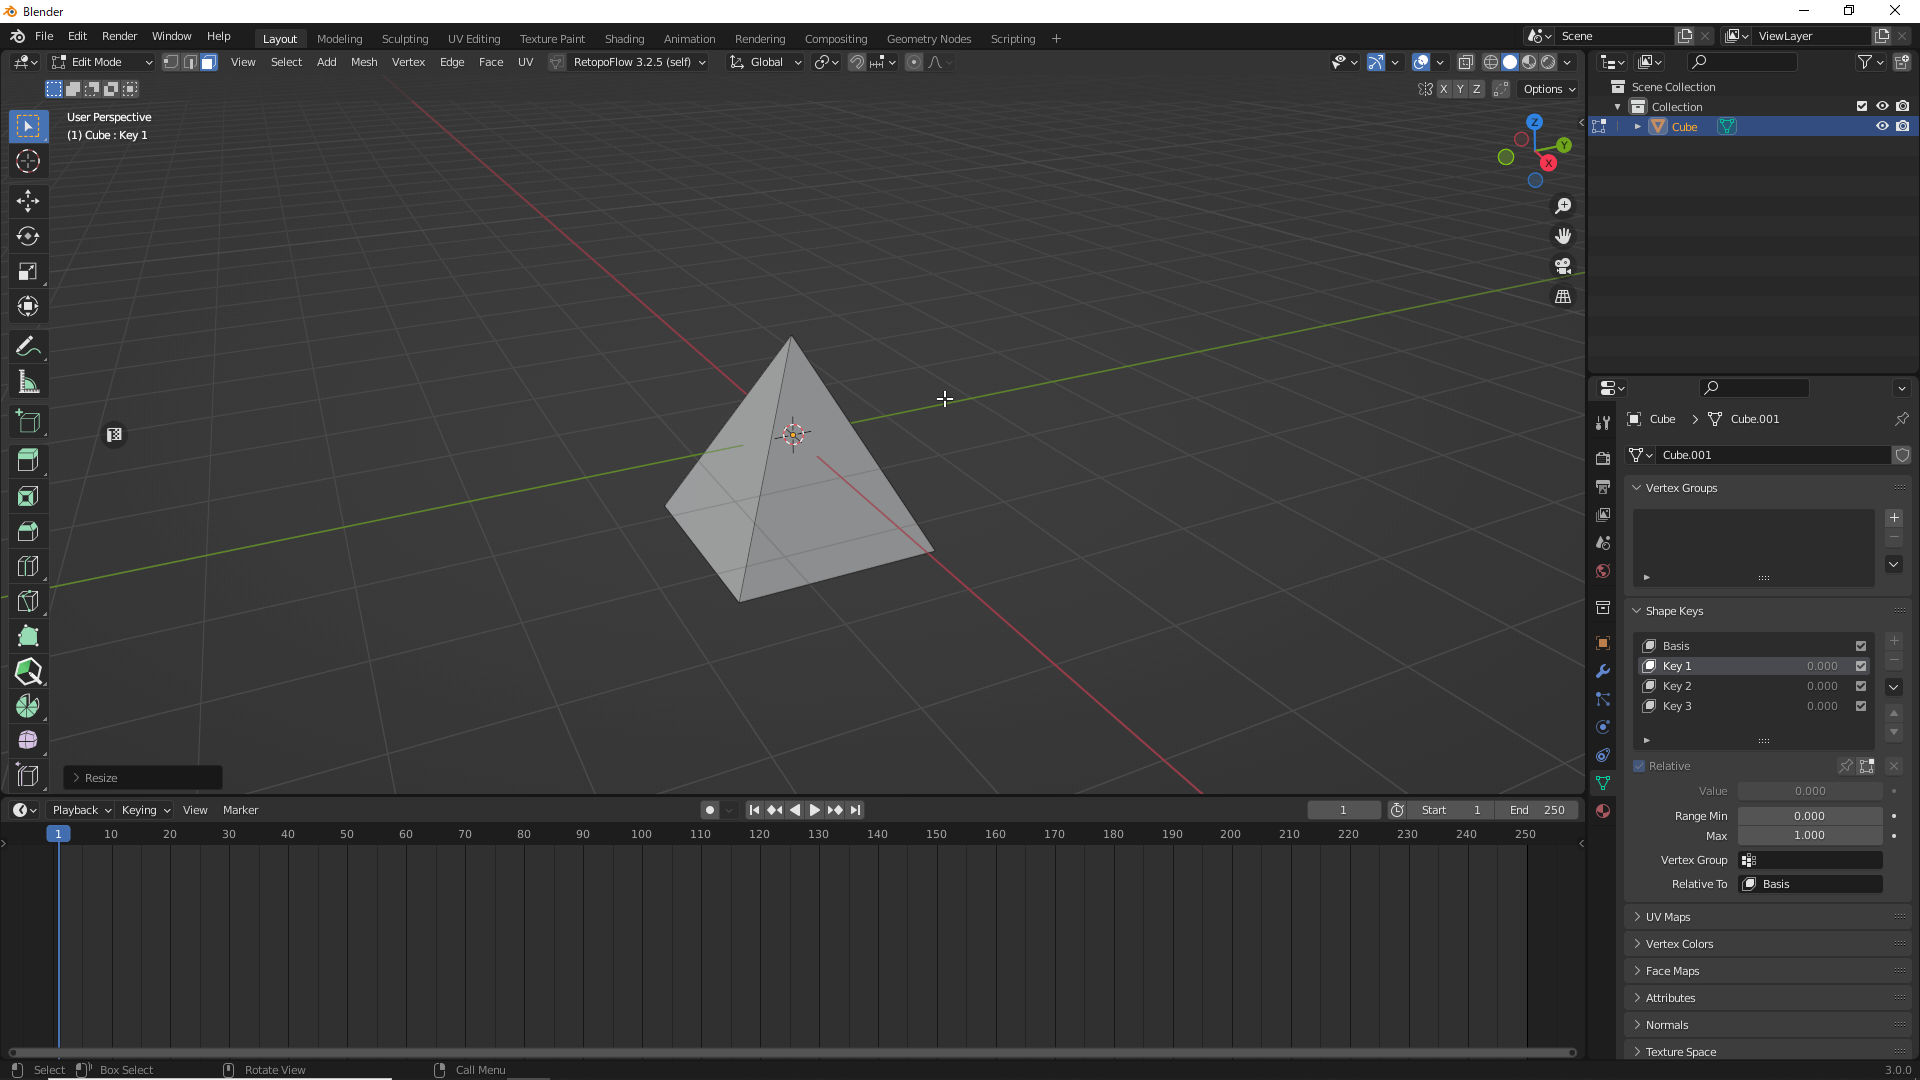
Press the [S] Key and then Enter “0”
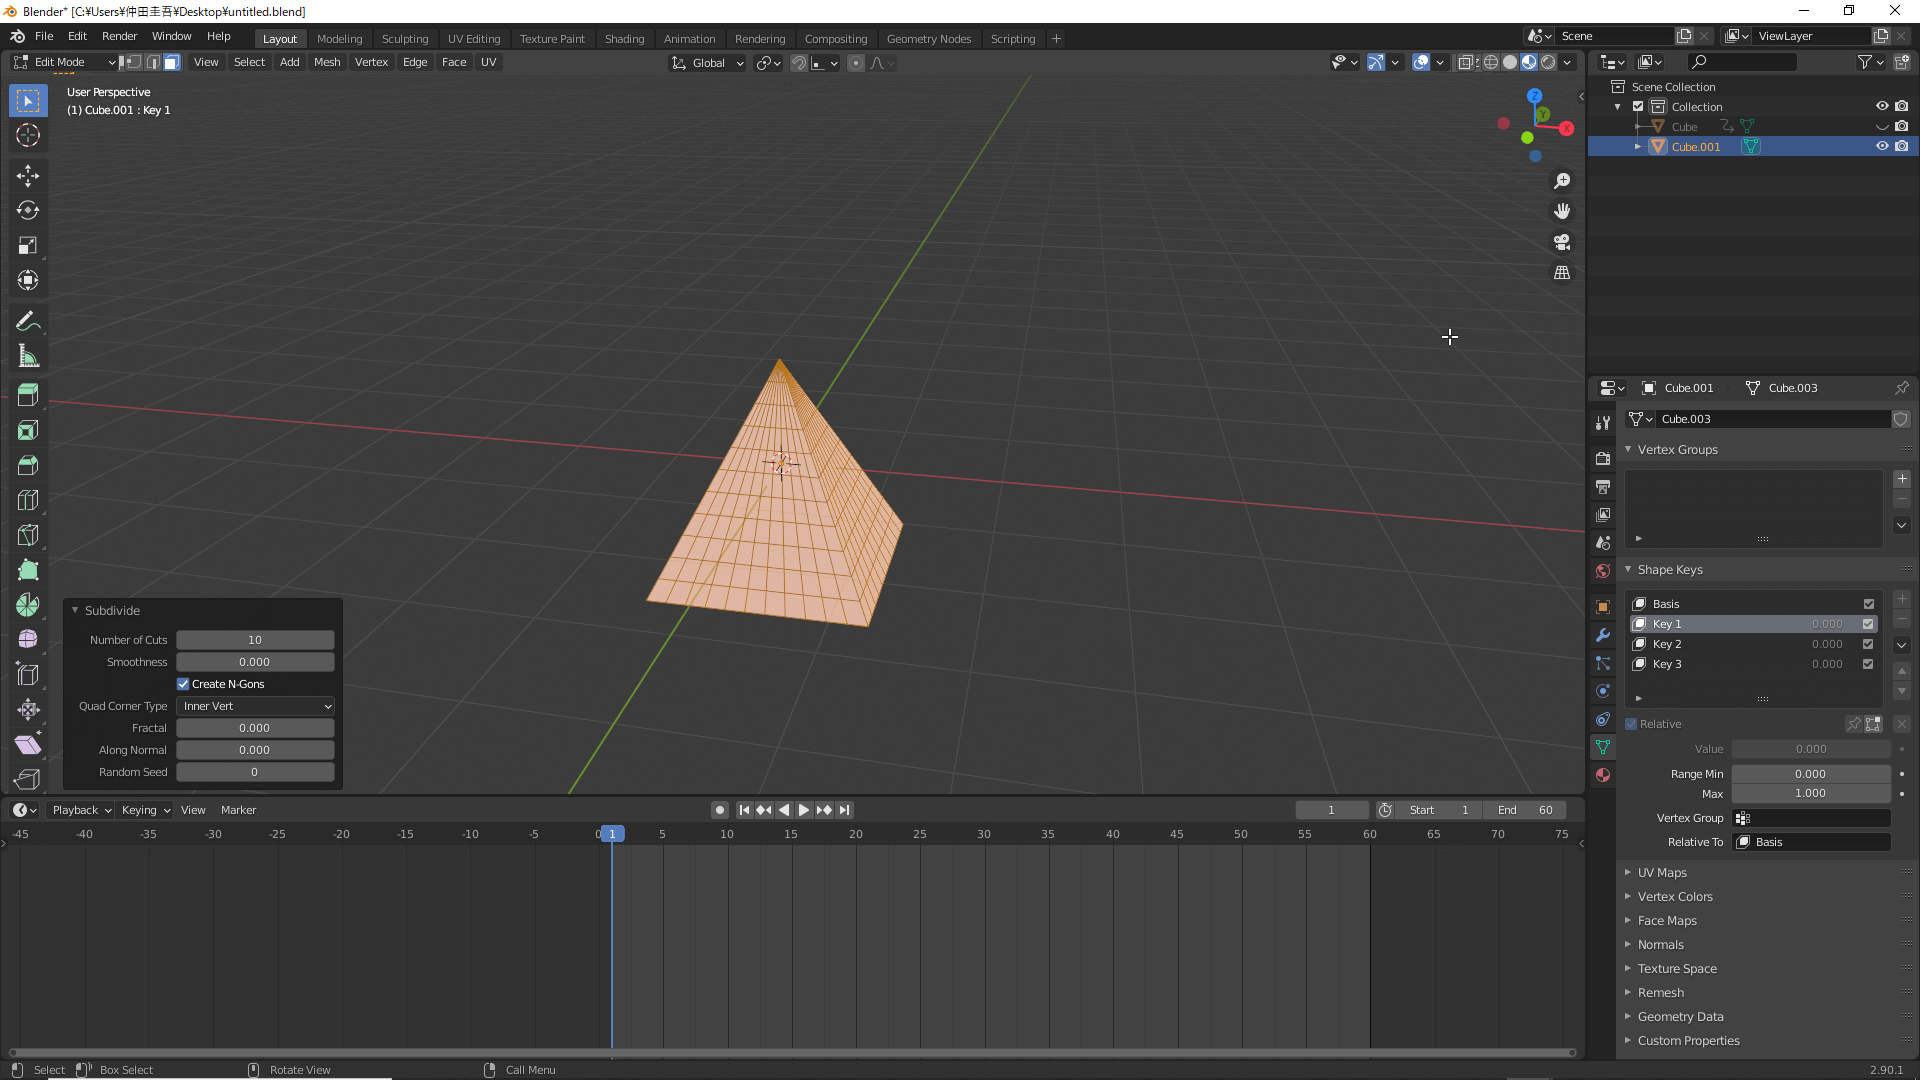
In Edit Mode, Right-Click on the Object and Select Subdivide
Next, return to Object Mode and your object will revert to its original square shape.
Return to Object Mode
Next, go to Key 2, click Object → Transform → To Sphere with the mesh selected, and move the mouse. The shape of the mesh will then change to a sphere.
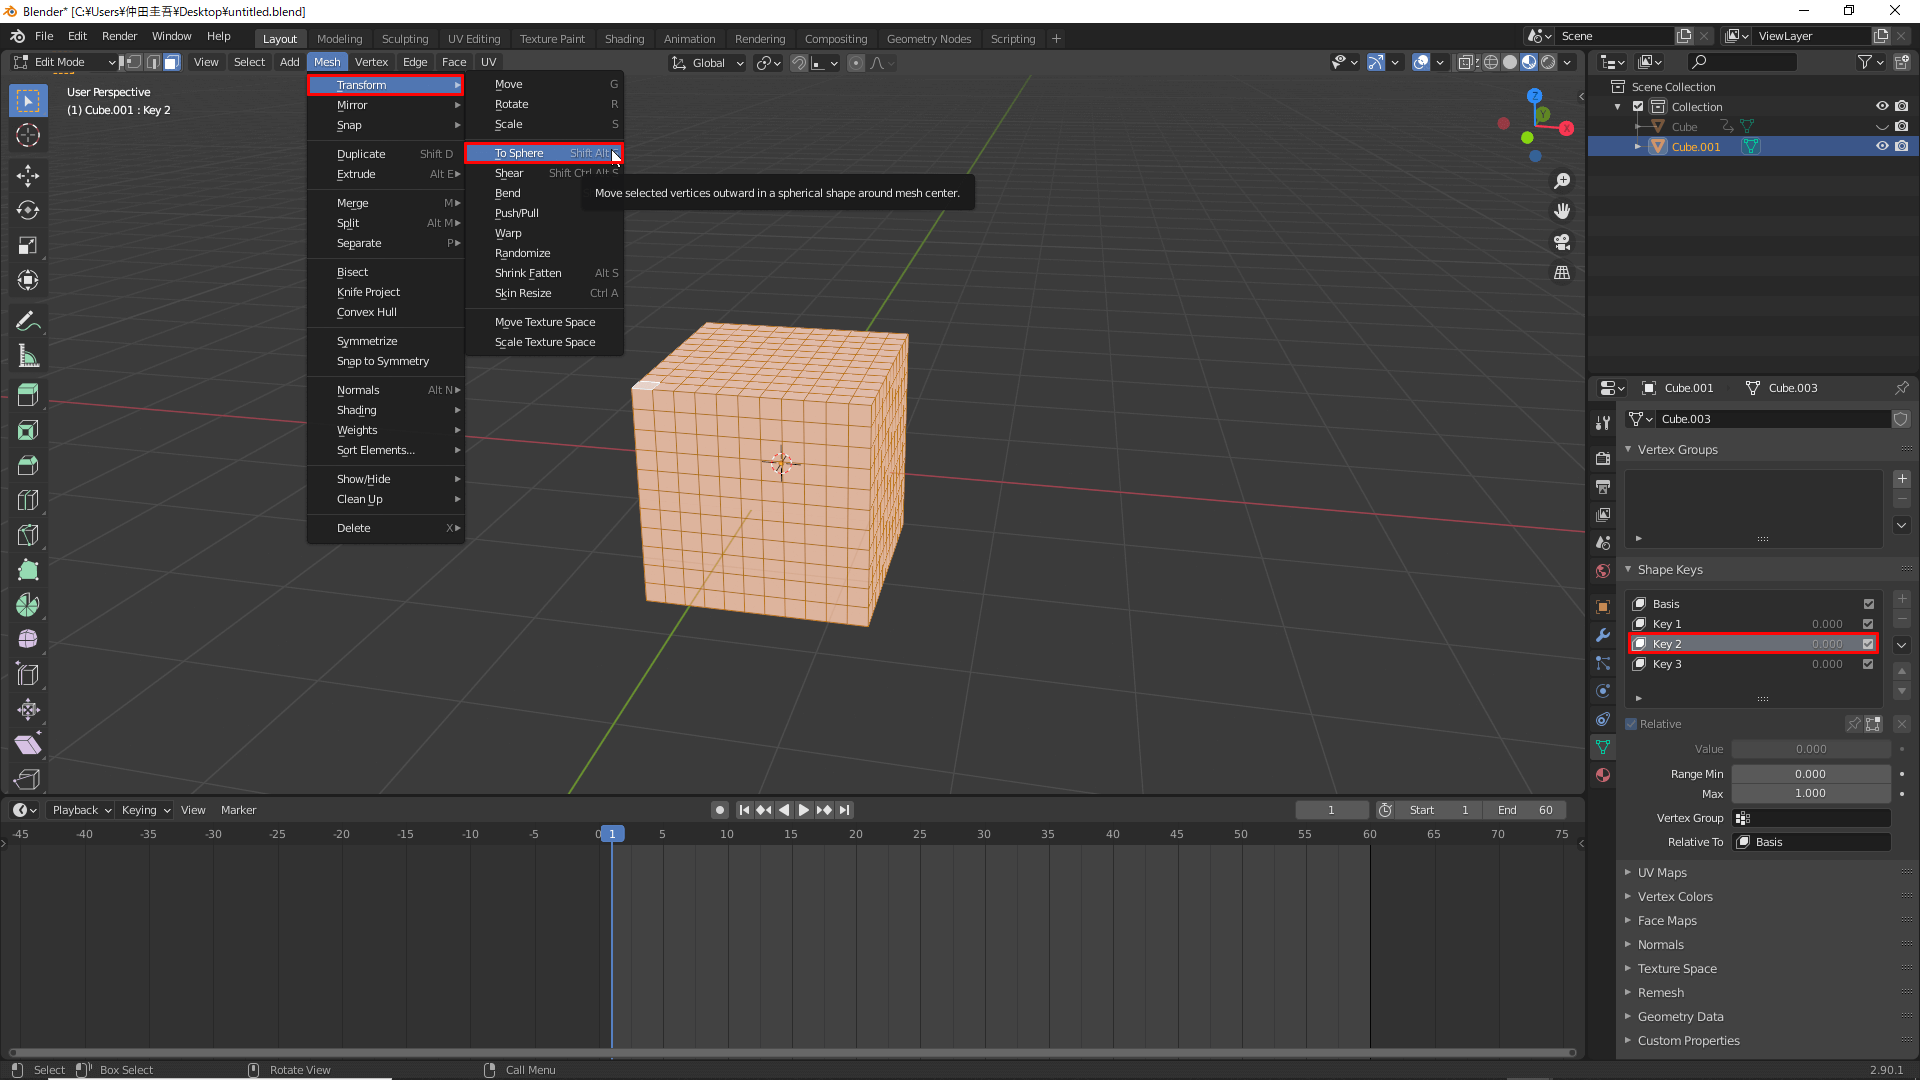
Click To Sphere
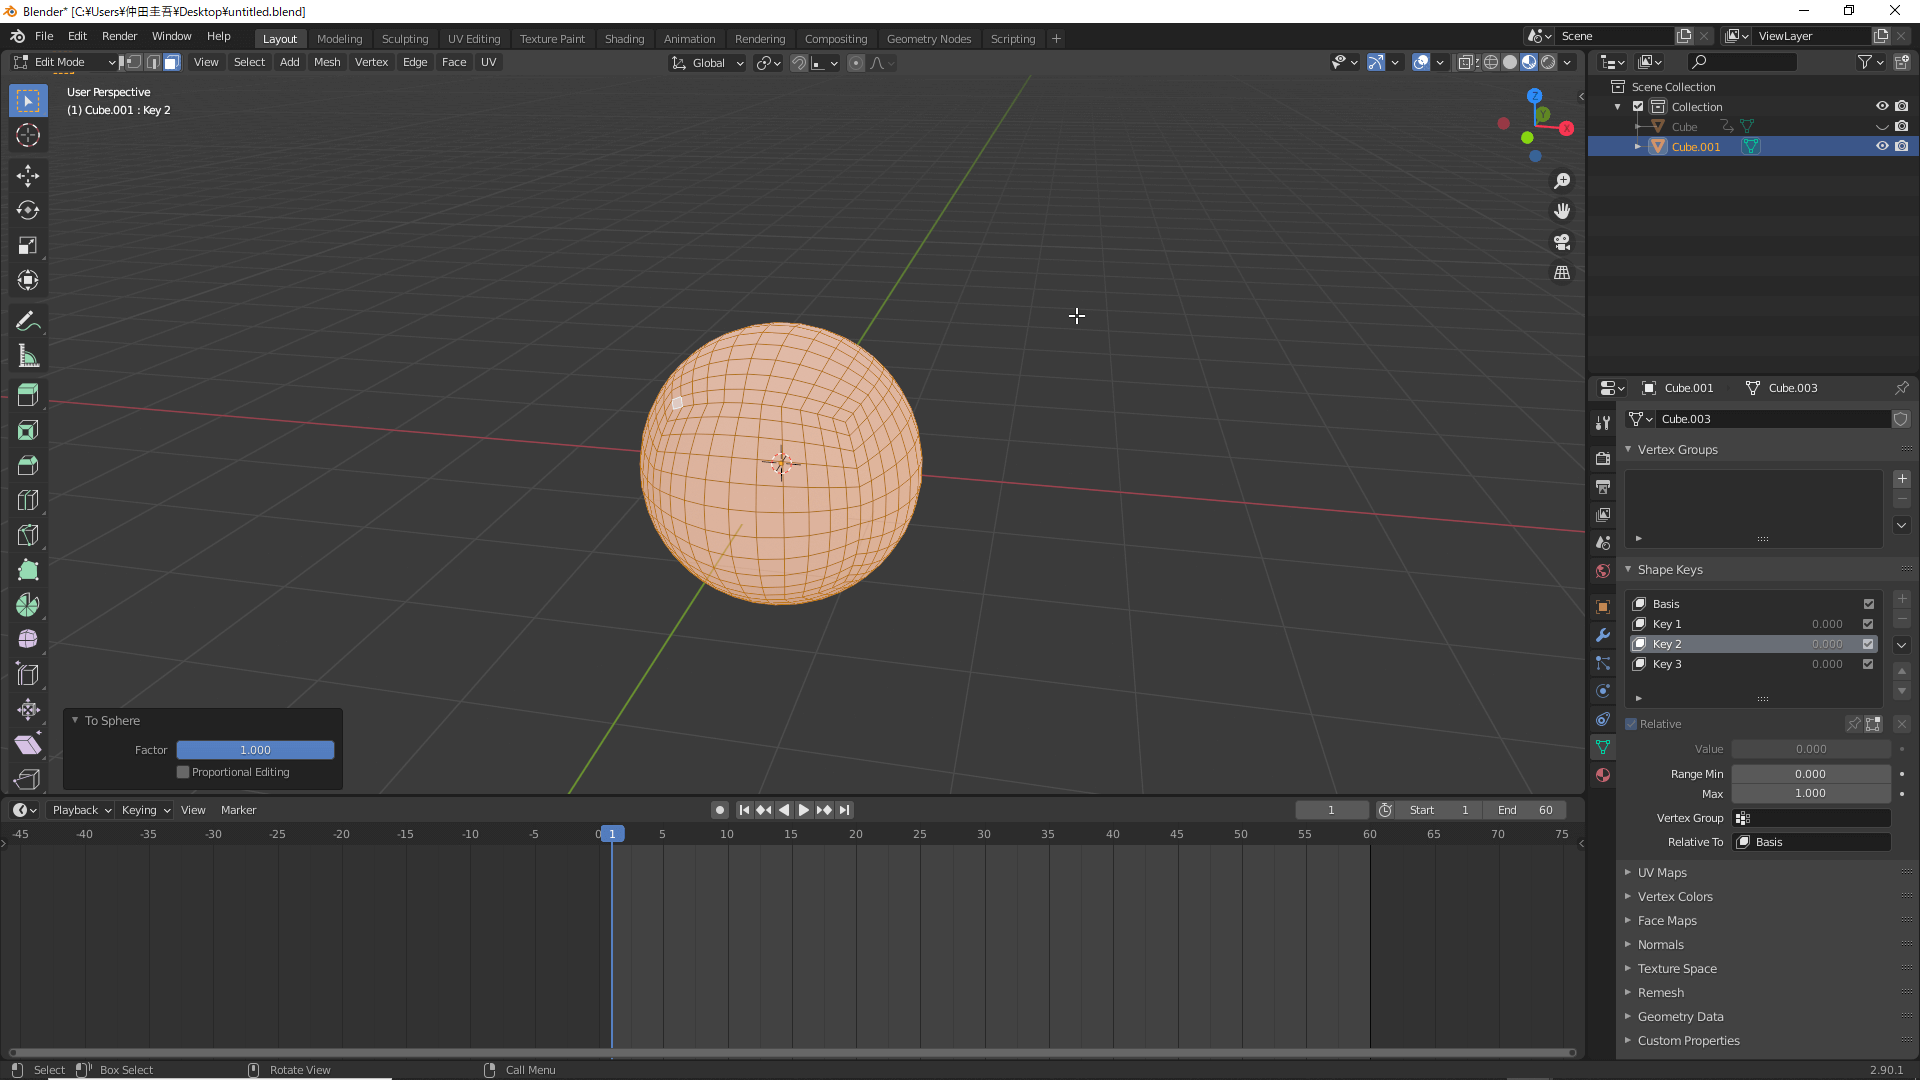
Now, Turn the Object to Create a Sphere
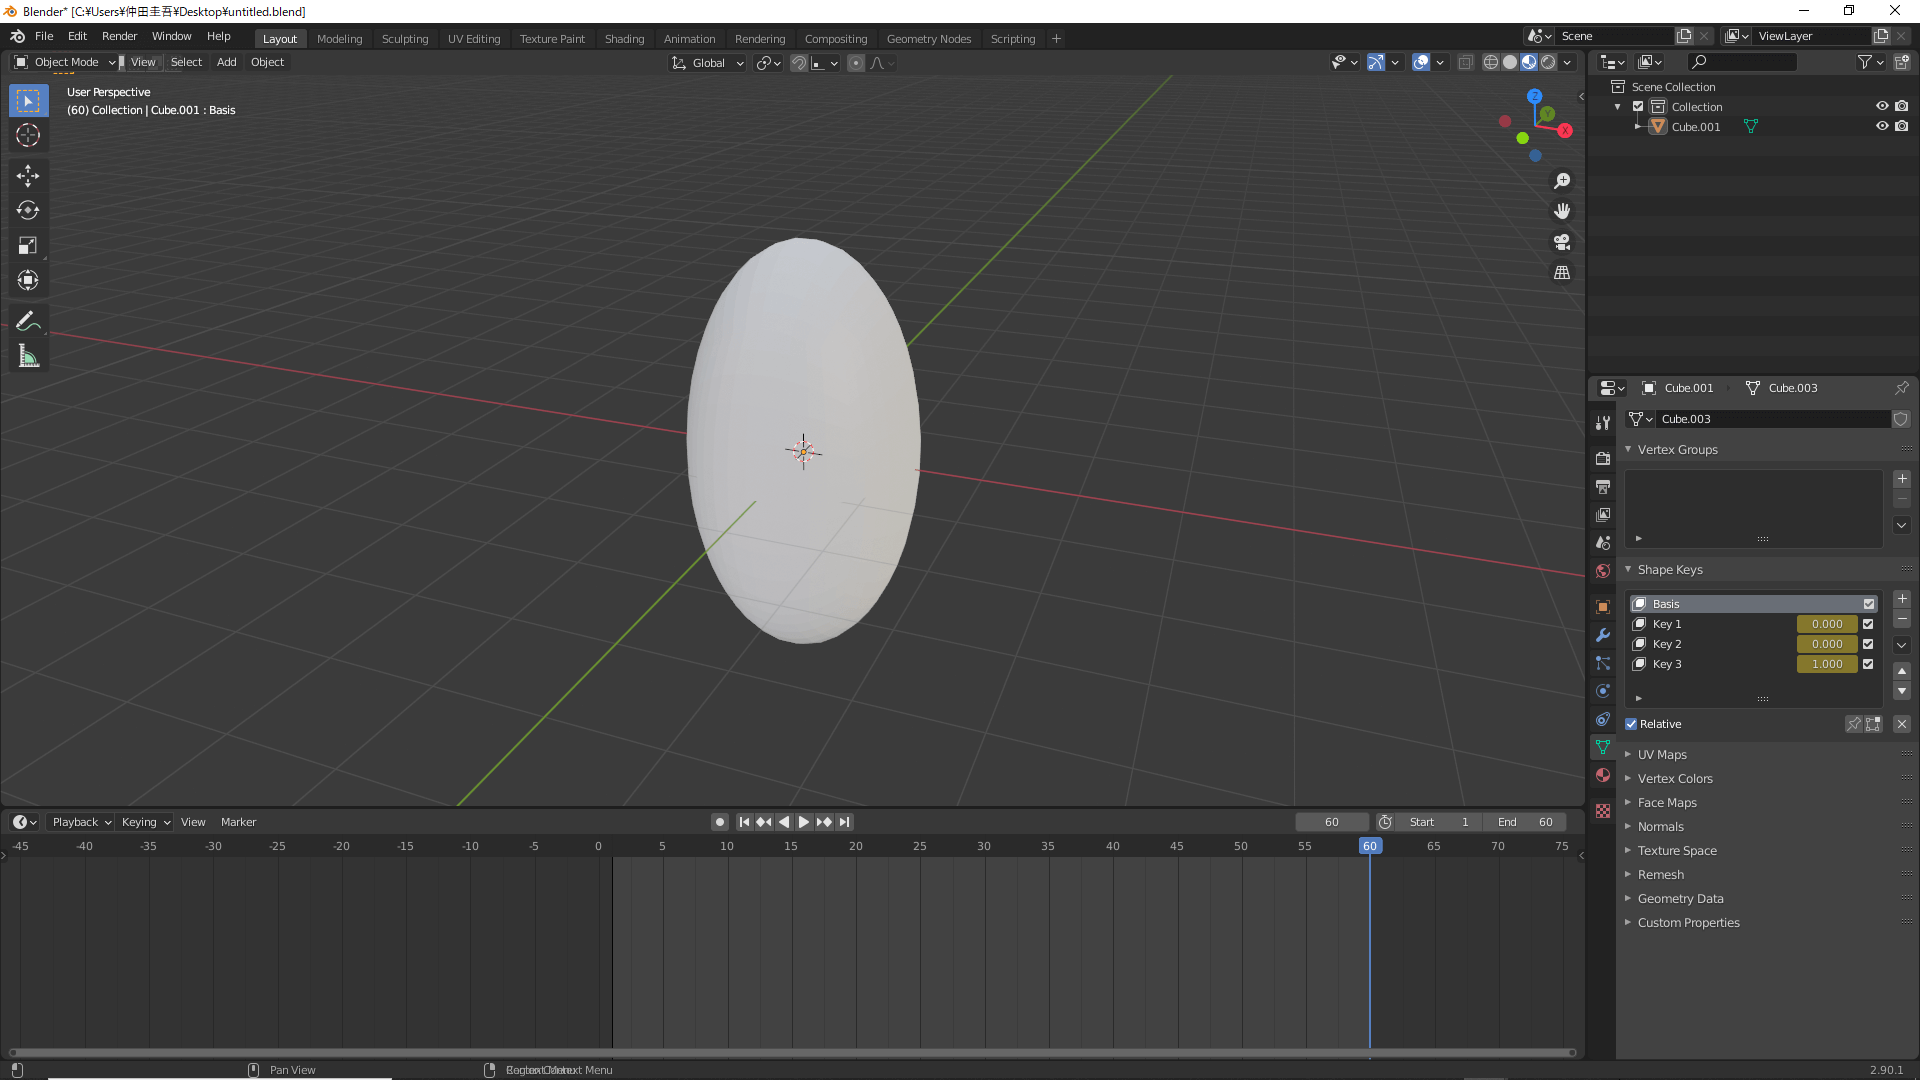
Since Key 3 creates an ellipse, deform the mesh vertically by pressing the [S] key. Then, press the [Z] key after deforming the mesh into a sphere with To Sphere, as in the Key 2 example.
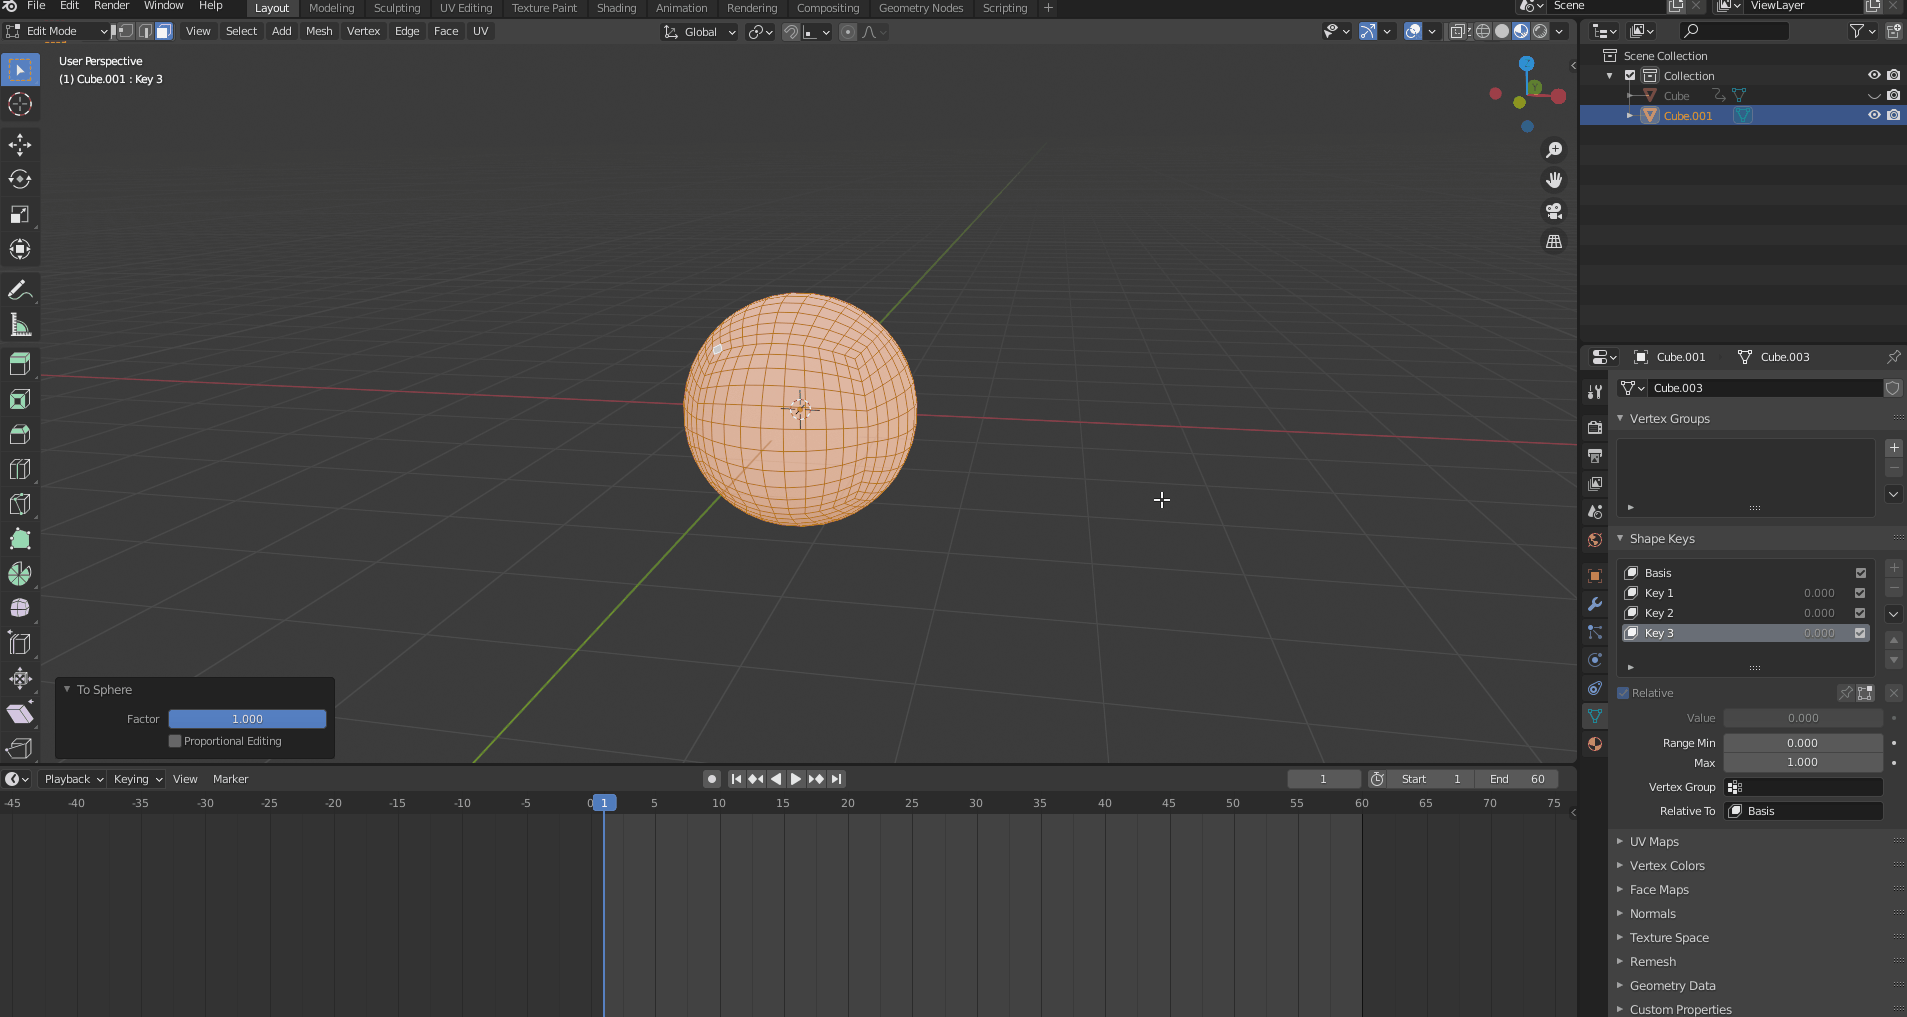
Press the [S] Key then the [Z] Key to Form a Vertical Line
The mesh is now ready.
Register Shape Key
For this example, we want to transition between the three shapes every 20 frames, so we set the keyframe End to “60″ for clarity.
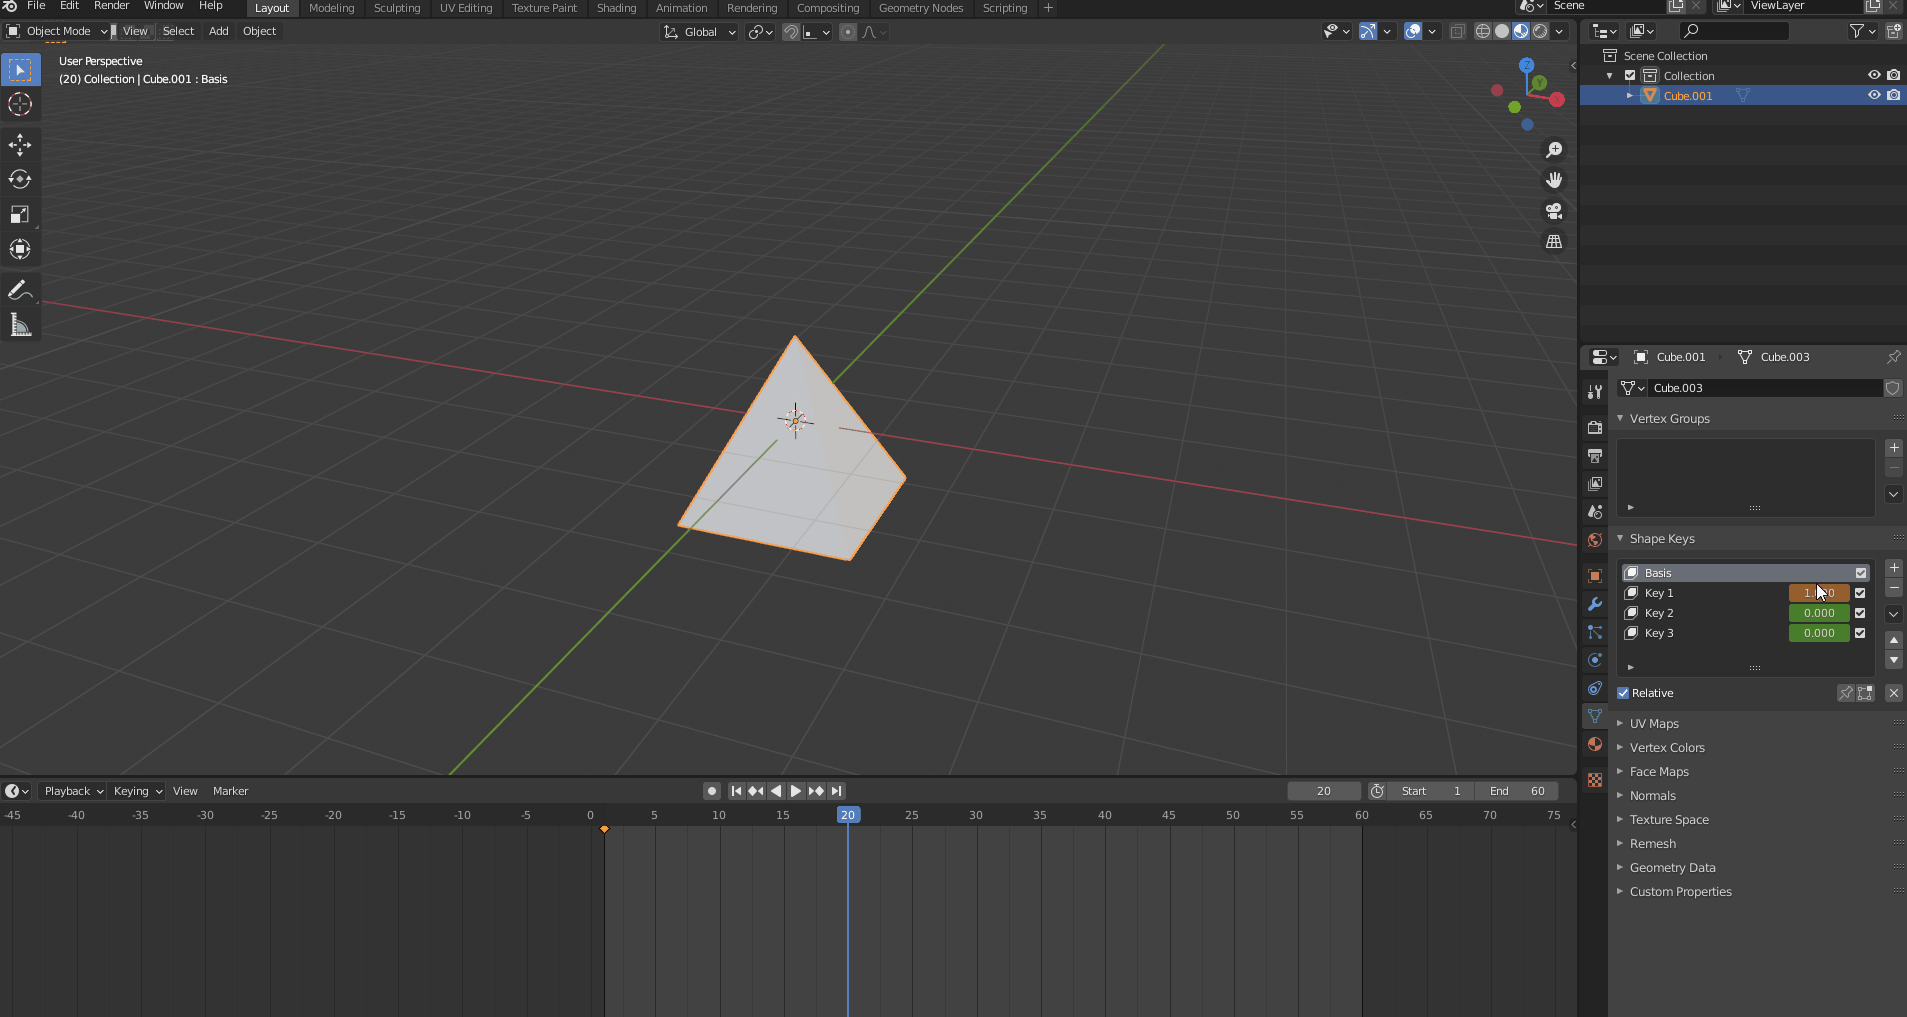
To start, move to the first frame, place the cursor over the numerical value of the shape key, and right-click. Select Insert Keyframe, which will change the color of the numerical value to yellow. Do this step for all three shape keys.
Register Shape Key
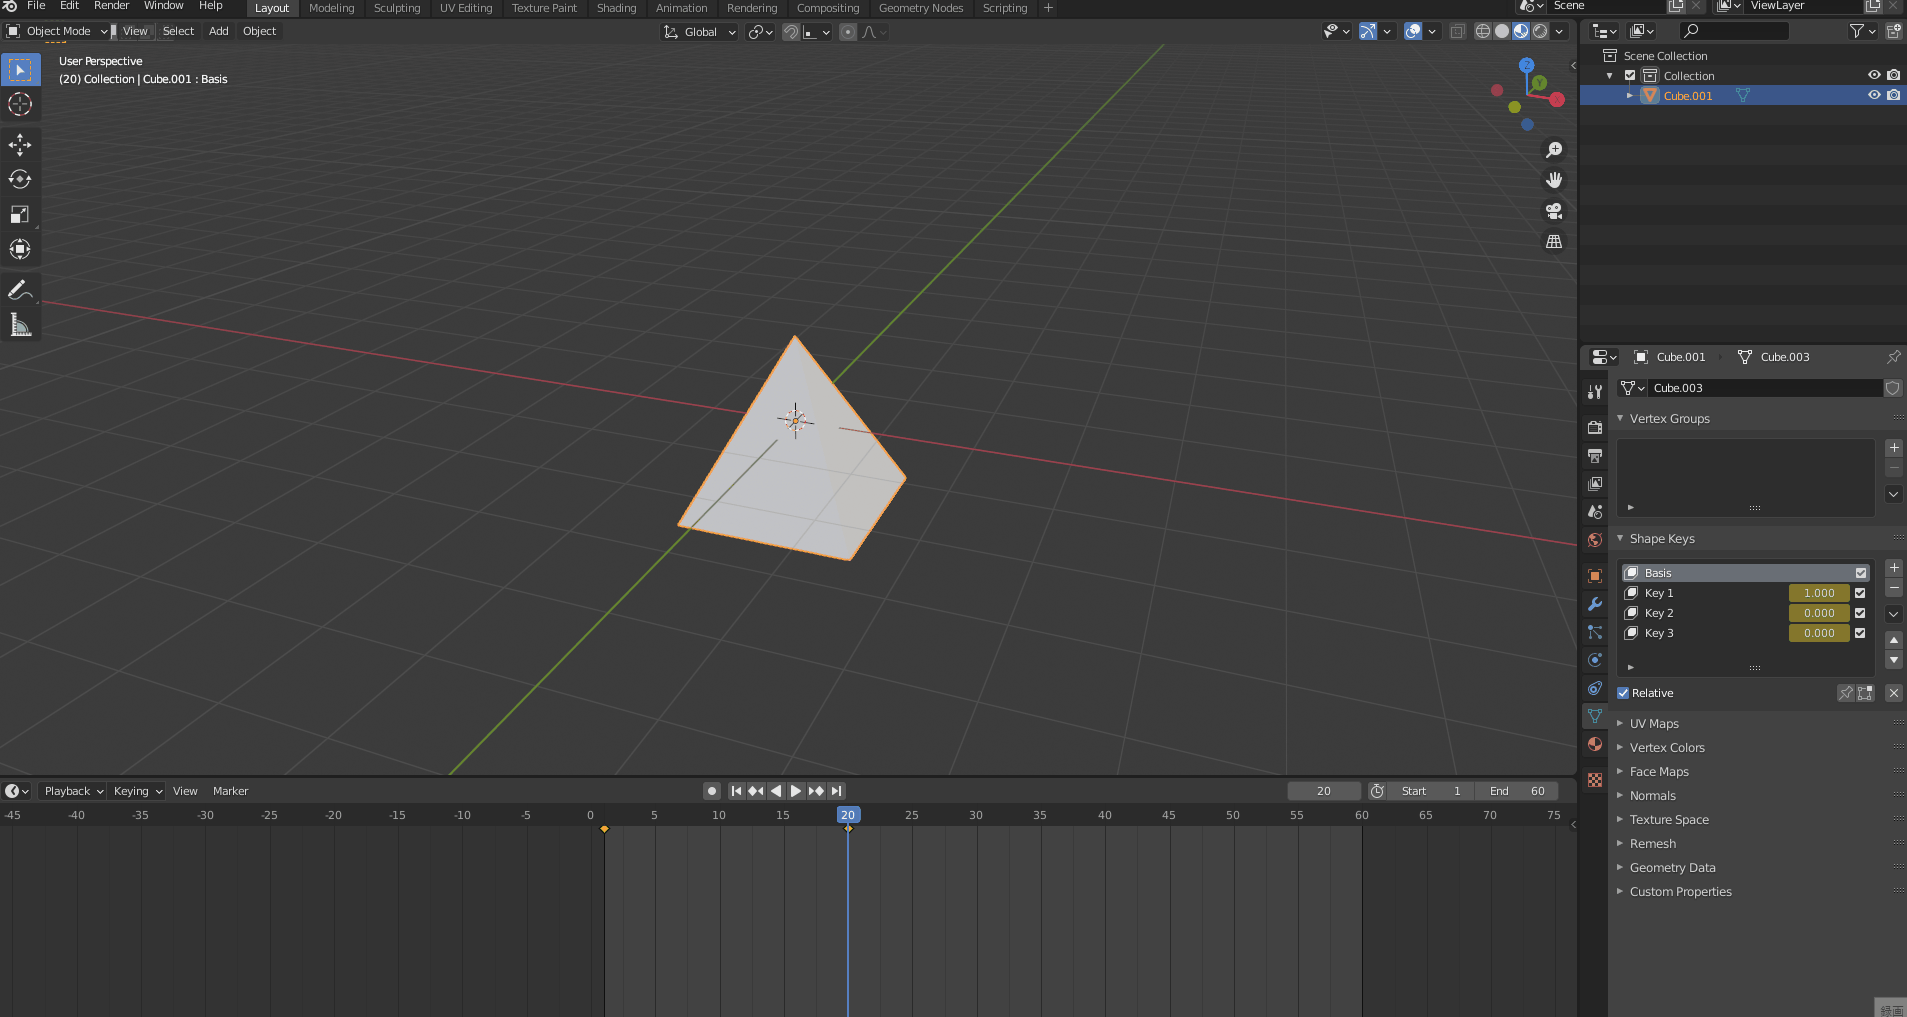
Next, set the number of frames to “20” and change the Key 1 value to “1.” The value will then turn orange and the object will be transformed into a triangular pyramid.
Press Insert Keyframe on All Shape Keys
Then, press Insert Keyframe on all shape keys and hit the key.
All Shape Keys are Now Yellow
You can see the object transforming from a square into a triangular pyramid between frames 1 and 20.
Square Transforming into a Triangular Pyramid
Next, change the number of frames to 40 to register the second key; change the value of Key 1 back to “0” and the value of Key 2 to “1.”
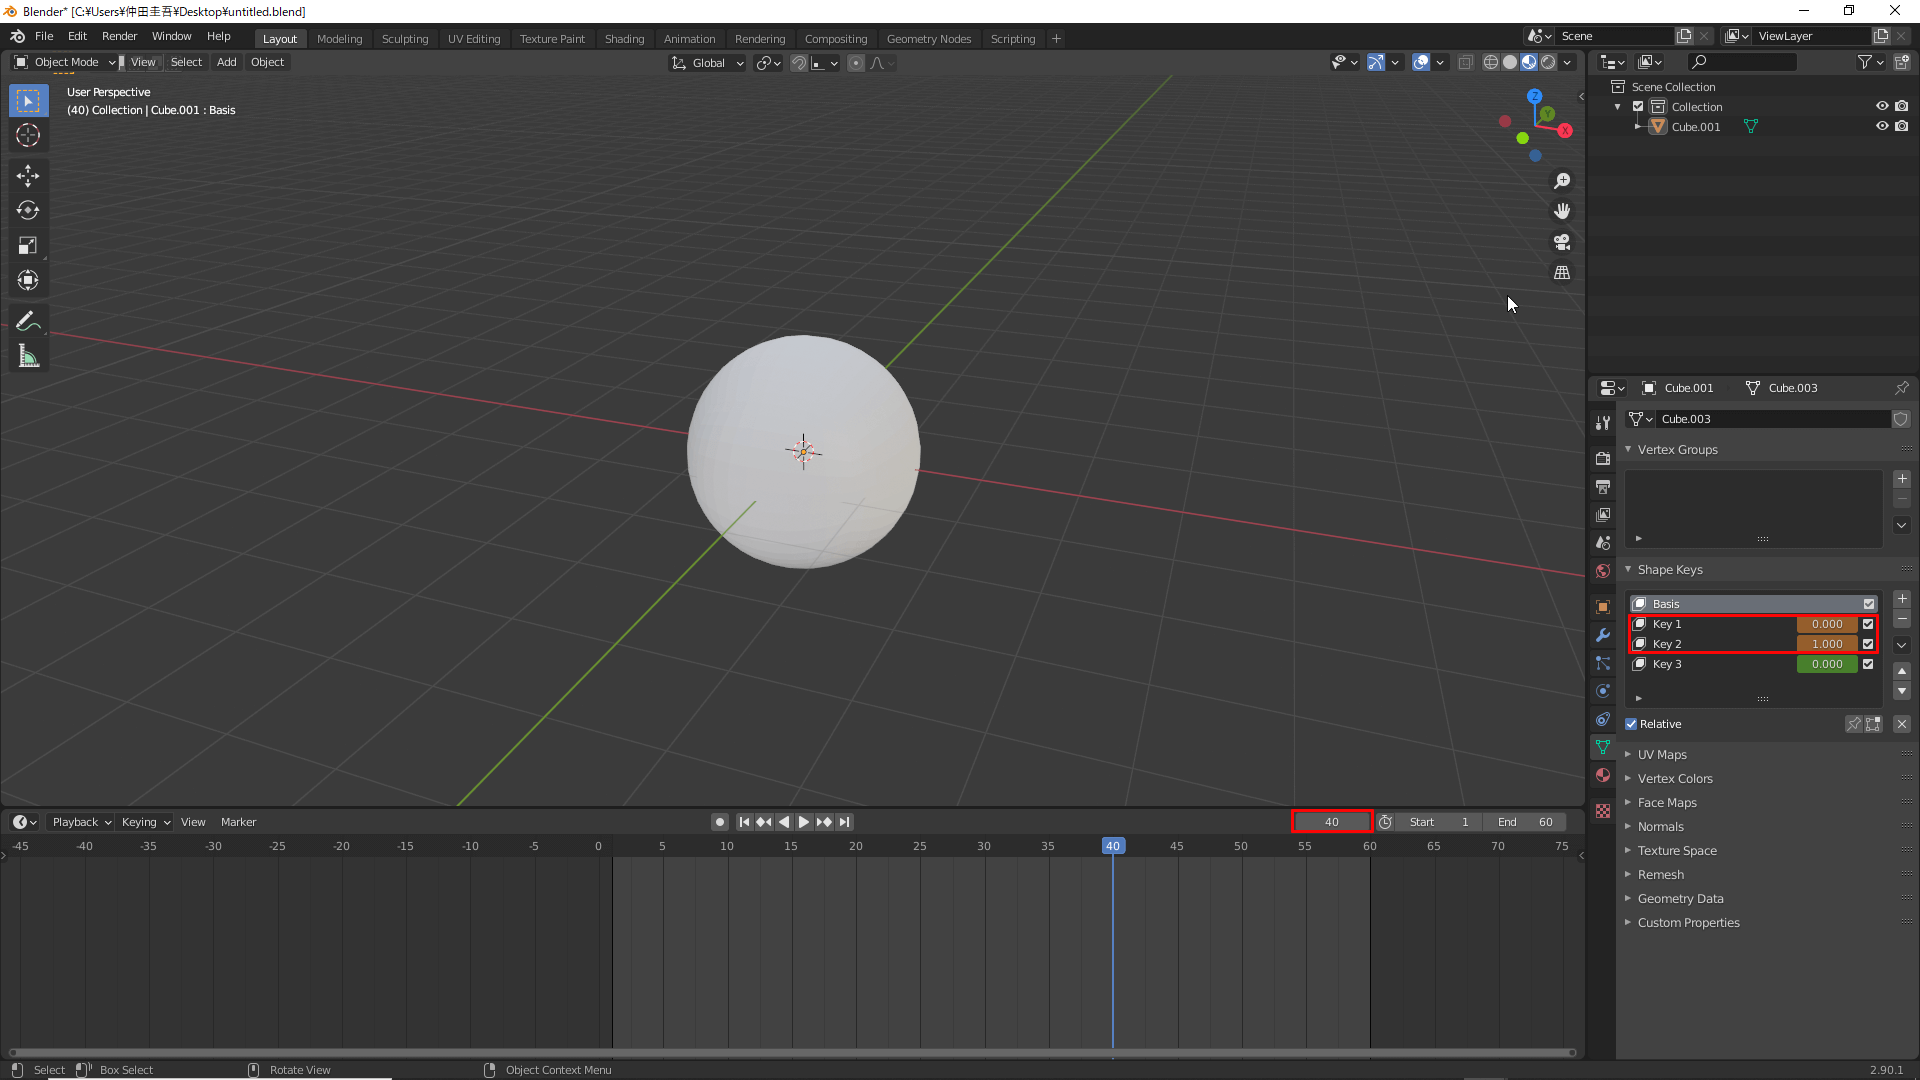
Change the Value of Key 1 Back to “0” and the Value of Key 2 to “1”
After making these changes, press Insert Keyframe on all shape keys as you did before.
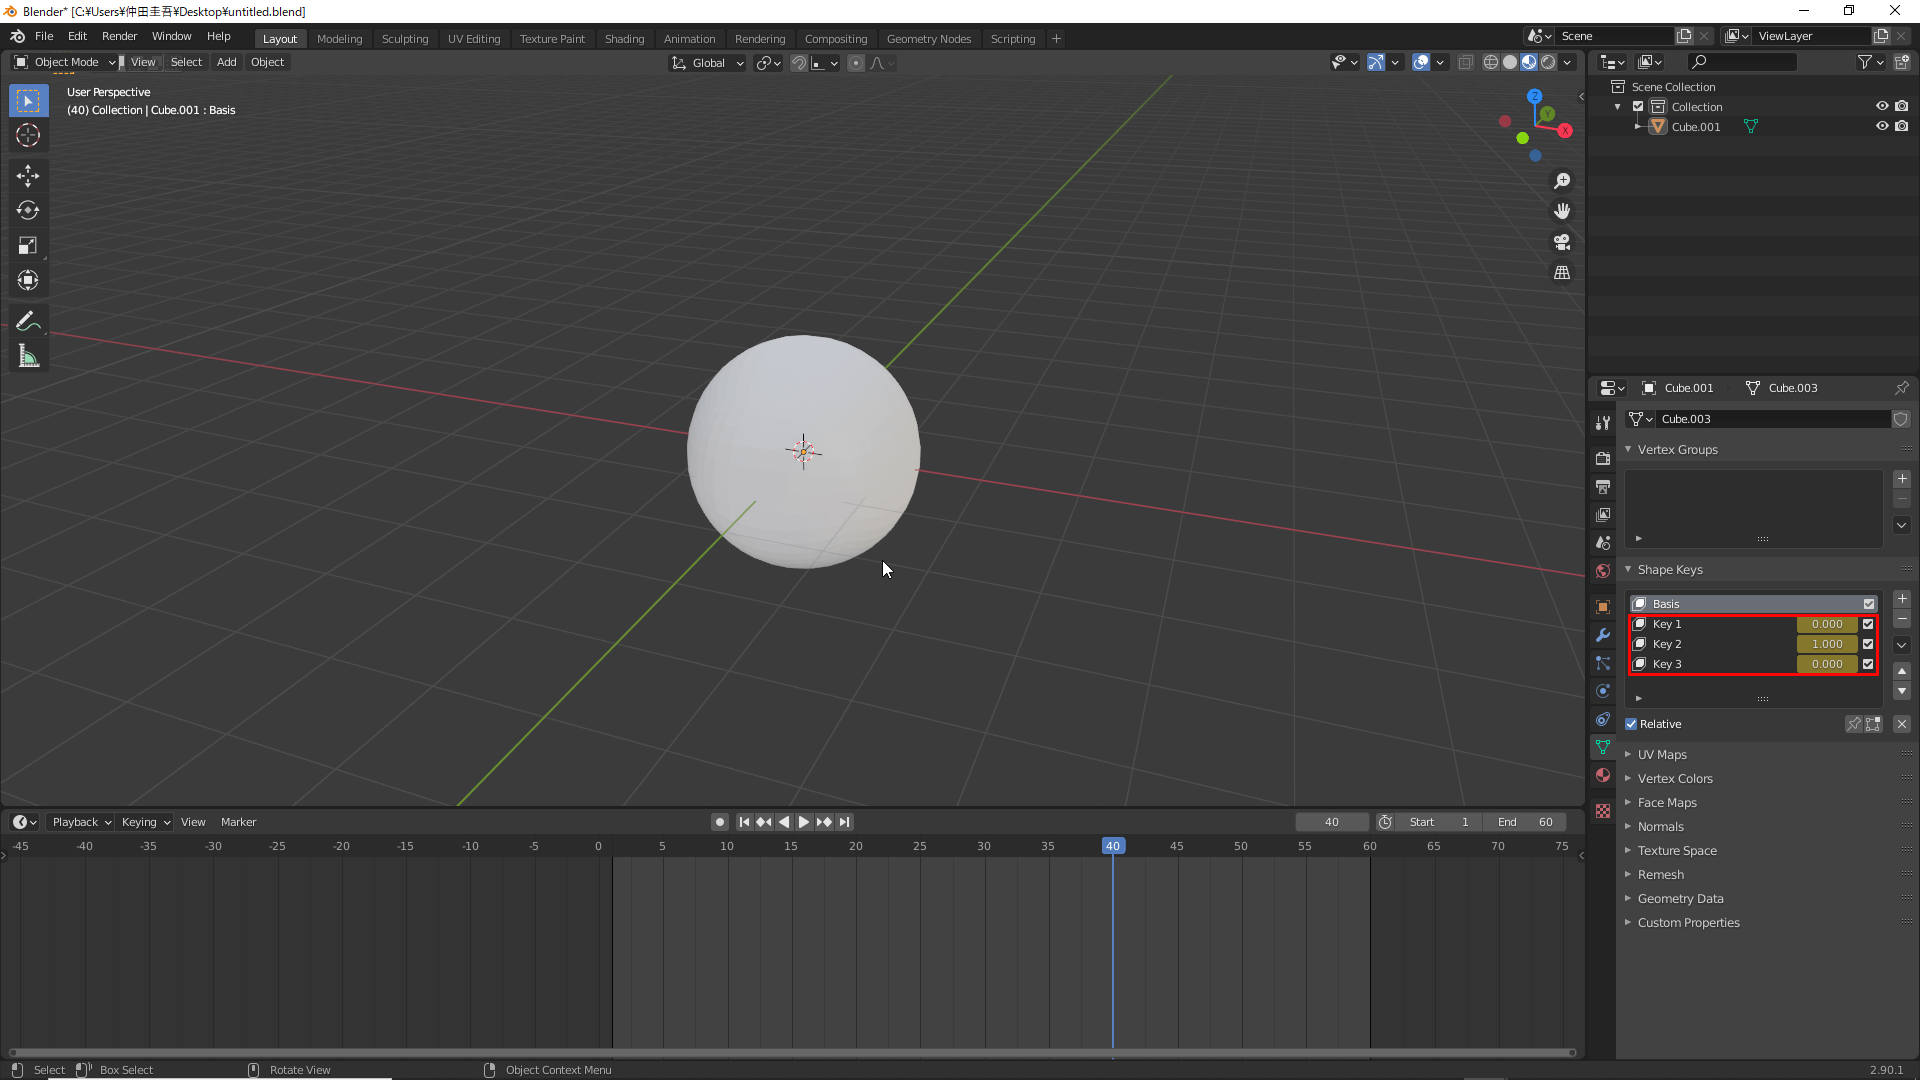
Press Insert Keyframe on All Shape Keys
Next, change the number of frames to 60 by setting the values of Key 1 and Key 2 back to “0” and changing the value of Key 3 to “1.”
Set the Value of Key 1 and Key 2 Back to “0” and Change the Value of Key 3 to “1″
Now, press Insert Keyframe on all shape keys as you did before to complete keyframe registration.
Next, right-click on Time Line at the bottom of the screen and set Interpolation Mode to Linear for smoother animation.
All Shape Keys are Now Yellow
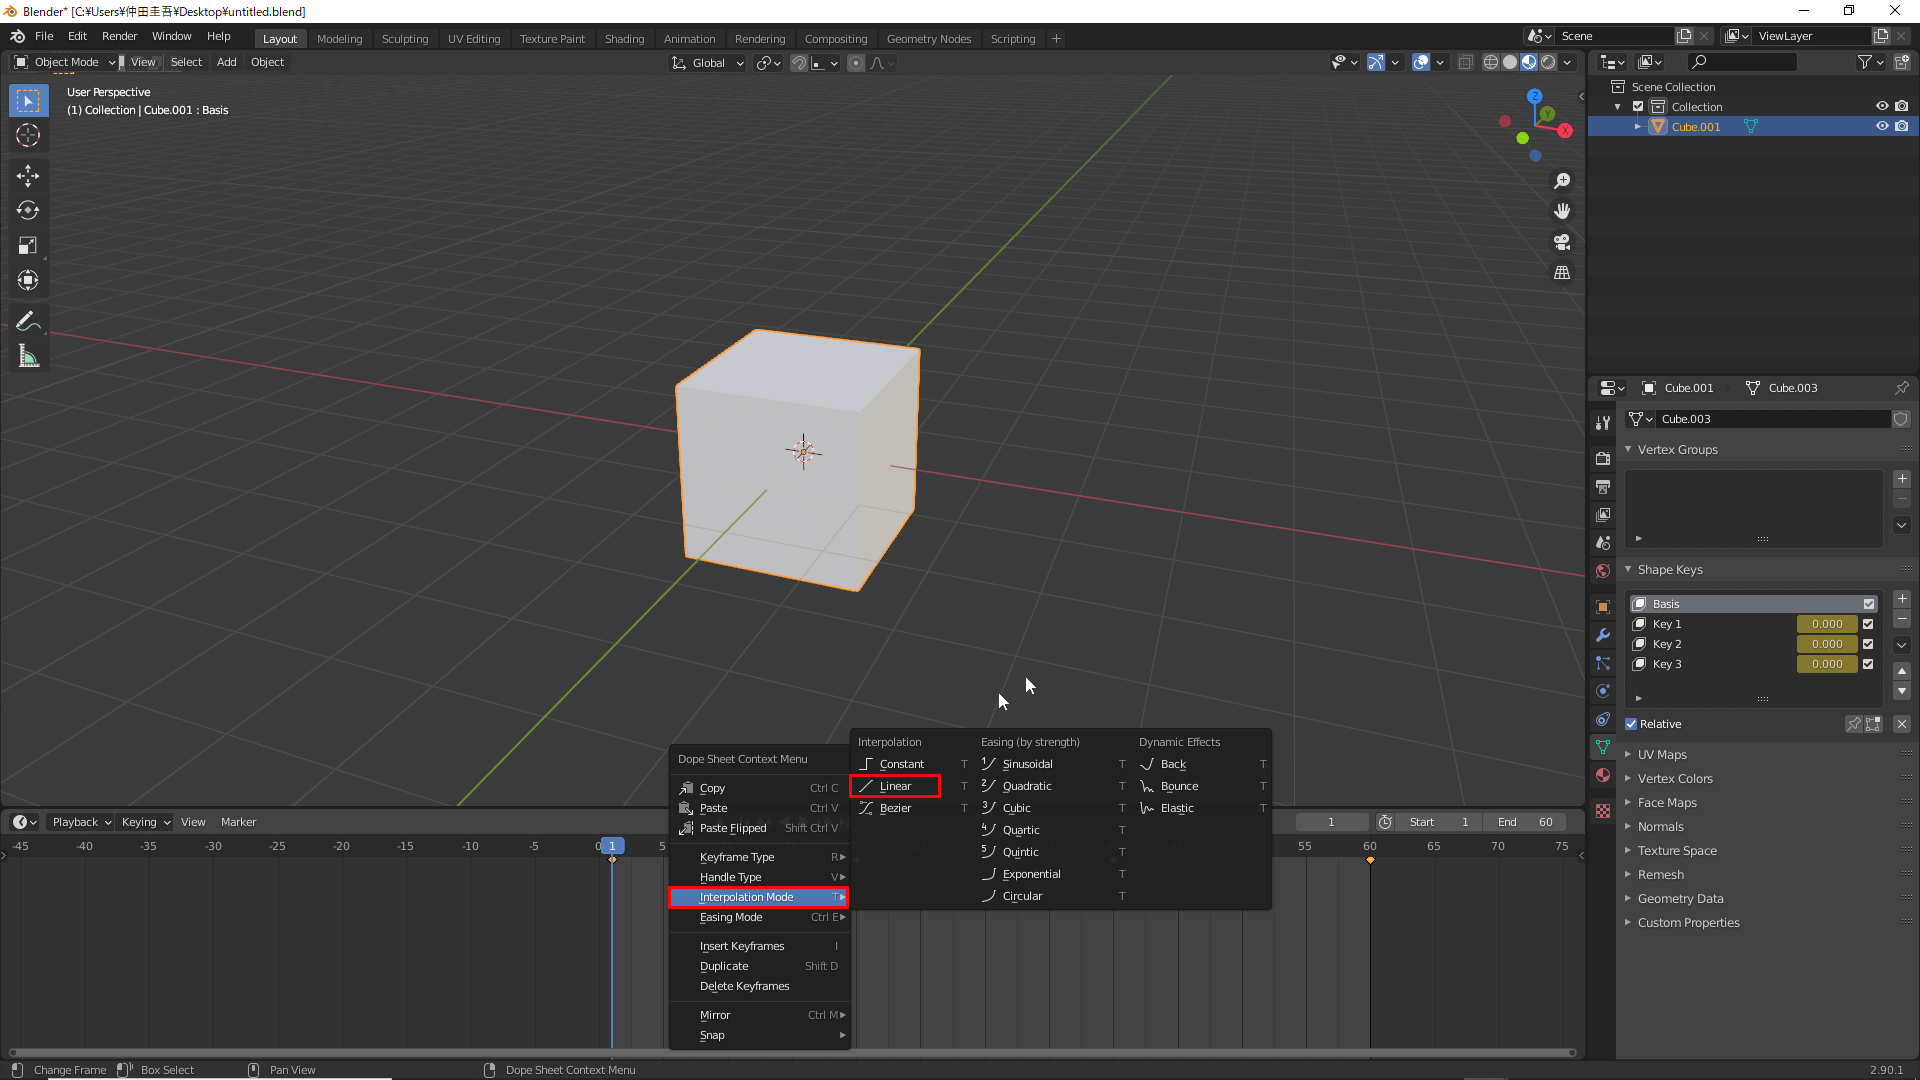
Set Interpolation Mode to Linear
Now, press the play button (space key in Blender’s default settings) to play the animation.

Playing the Animation
Export in glTF Format
For the next step, we will prepare to export the animation with shape keys in glTF format and import it into Unity or STYLY. It is best to turn off the camera and lights in the scene.
First, select the objects you want to export and click File→ Export→ glTF2.0.

File→Export→glTF2.0
To prevent problems such as “animations not playing in Unity or Blender,” make sure to set up the export correctly by setting the Format to glTF Embedded (.gltf). See the following image for other settings.
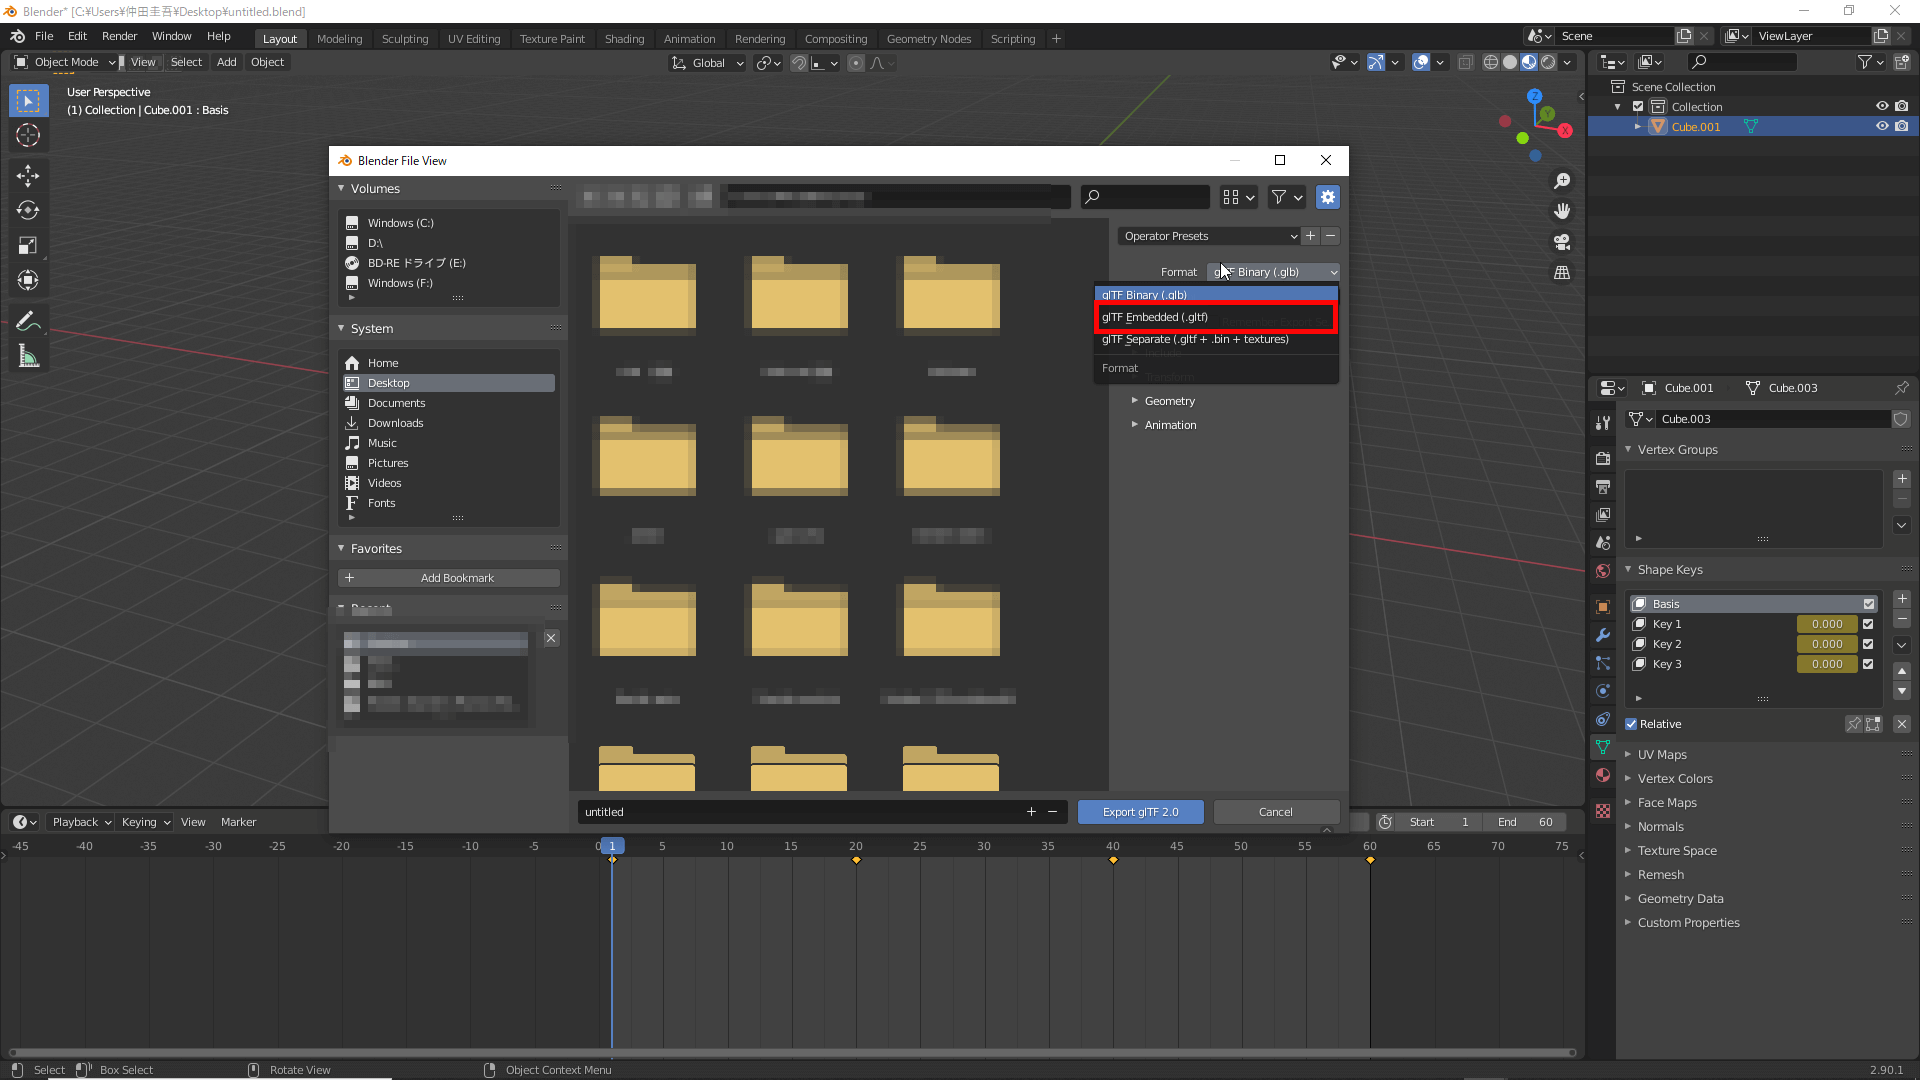
Format to glTF Embedded (.gltf)
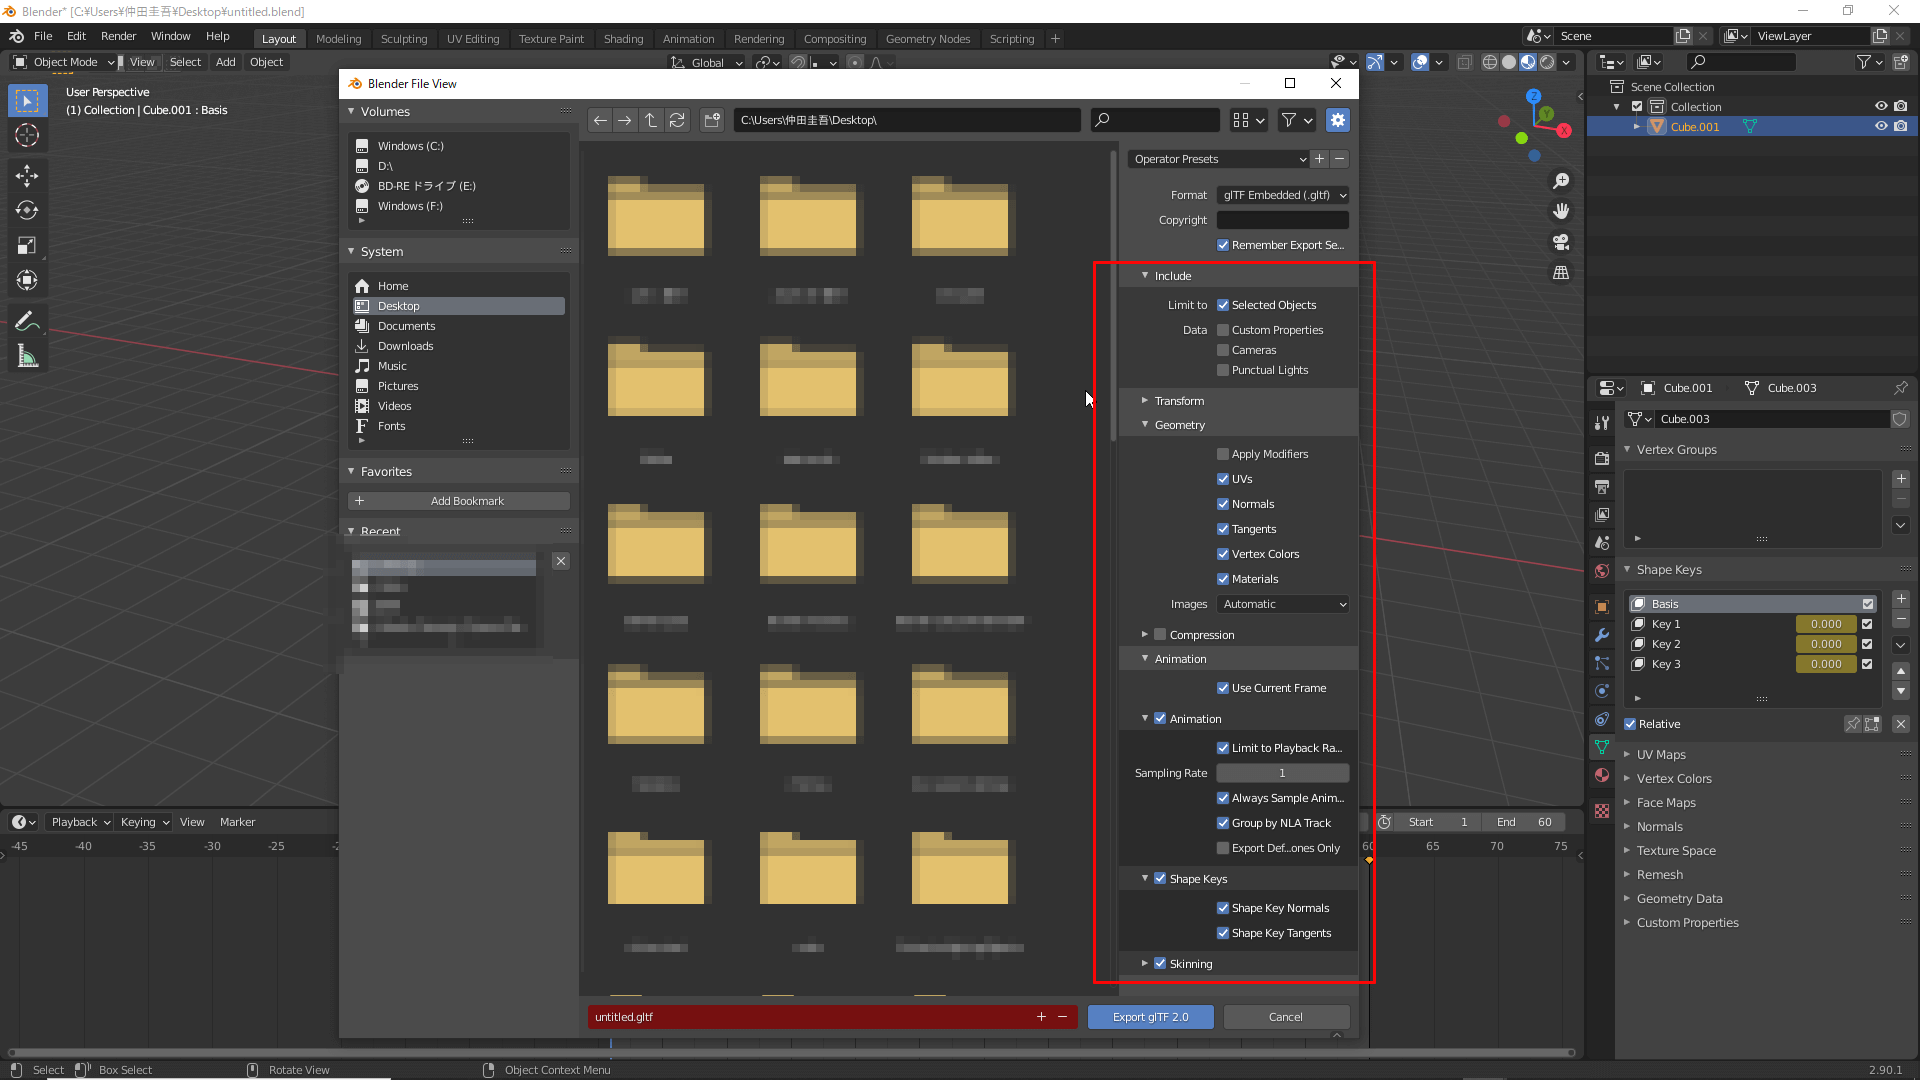
Incorrect Settings May Not Be Loaded by Unity
Next, specify the destination for the glTF file and click Export glTF2.0 to complete the export (the export may take a little time).
Preparing to Run glTF Files in STYLY
Install Unity Plug-ins
Unity does not support the glTF format by default, so you will need to download a plug-in.
Download UniGLTF from this link.
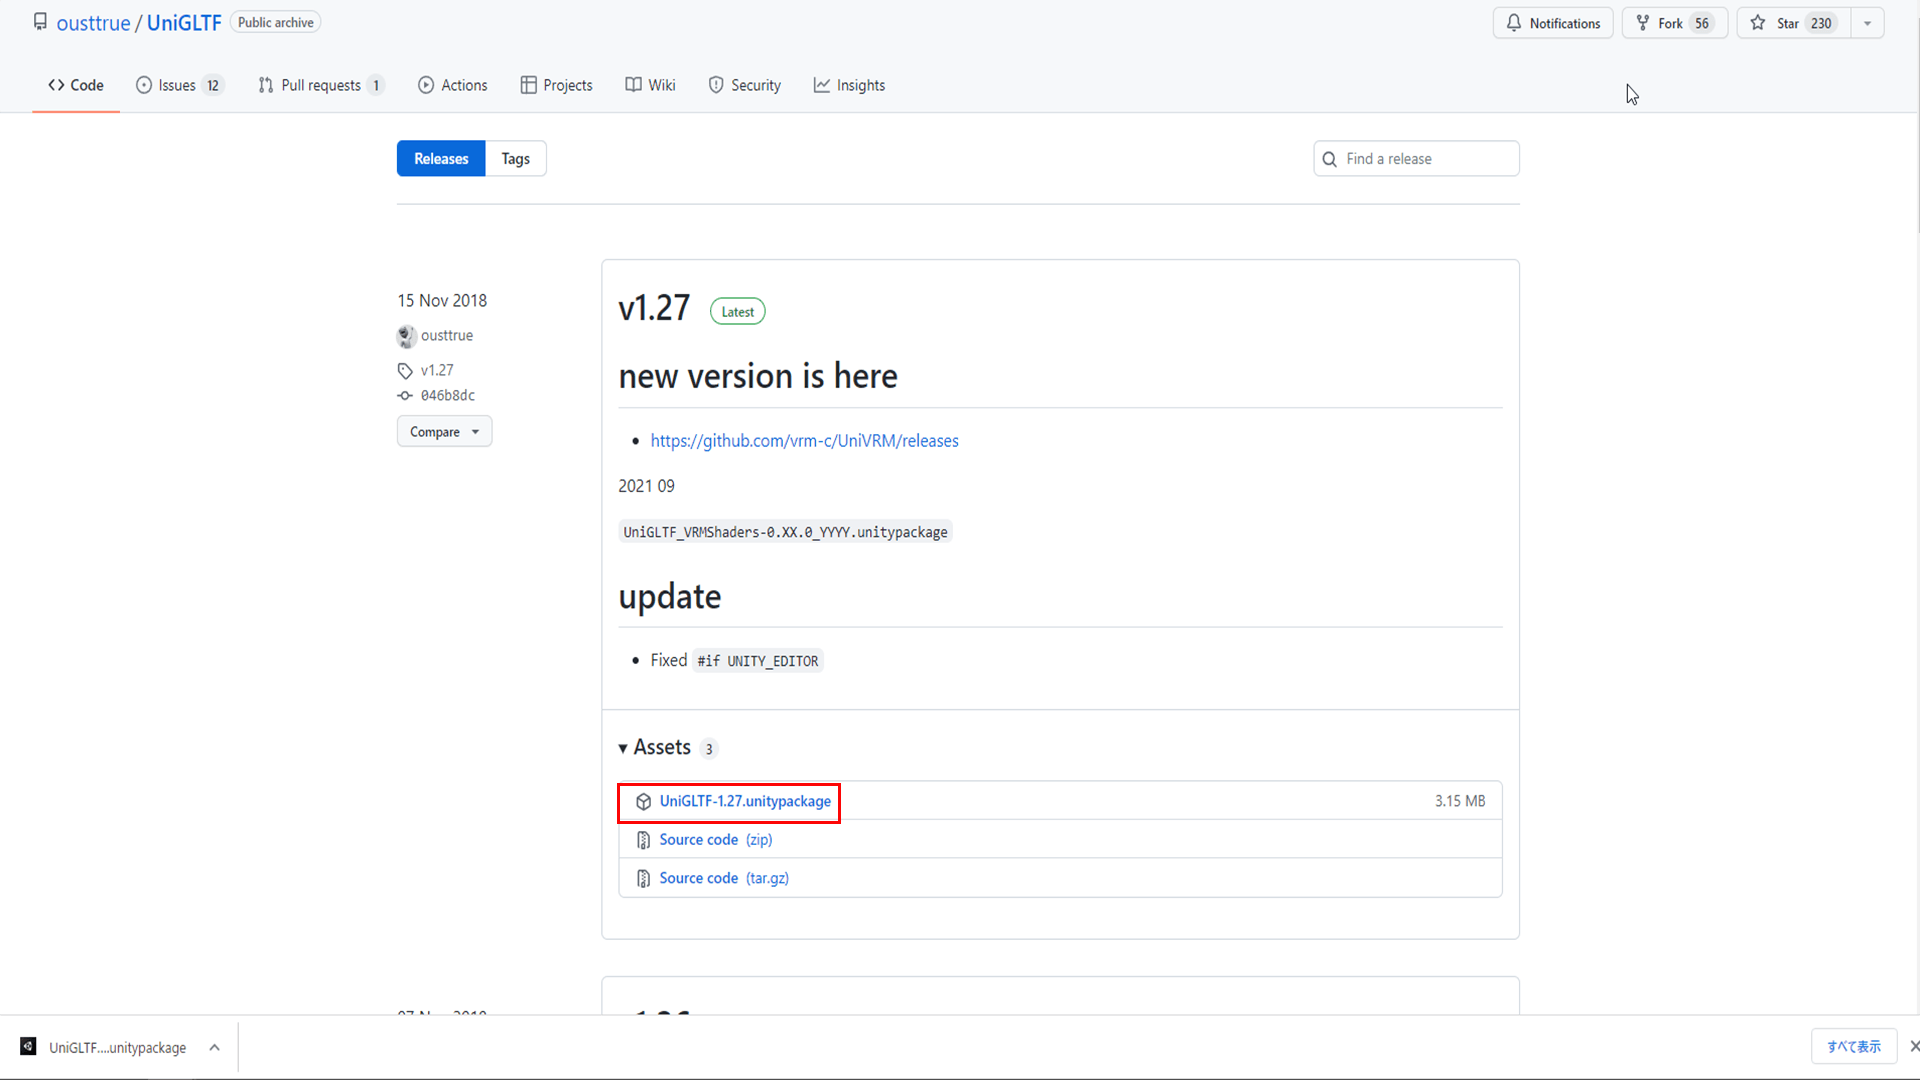
Download UniGLTF
Once the download is complete, import the package. If you use STYLY, be sure to import the STYLY Plug-in first because importing UniGLTF may cause an error.
Now, open Unity, select Assets→ Import Package→ Custom Package, and select the UniGLTF package.
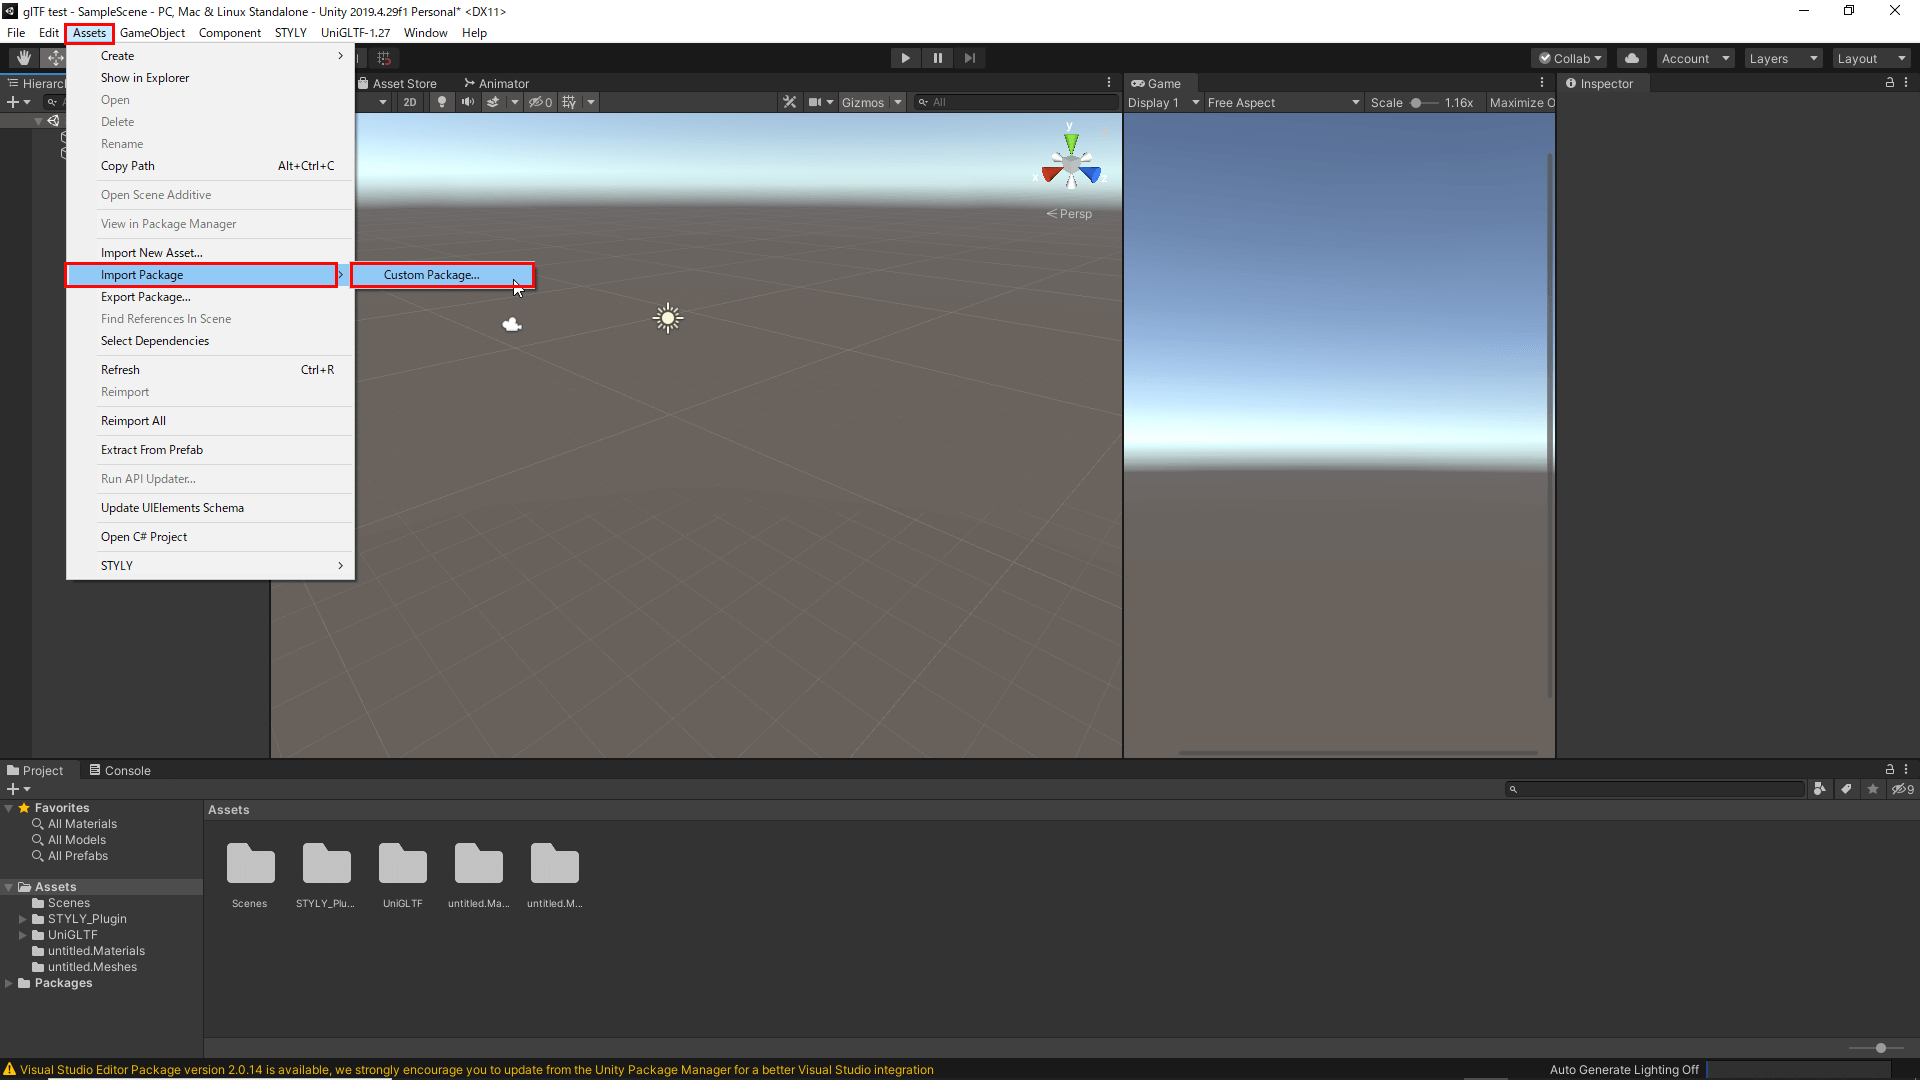
Assets→Import Package→Costom Packege
Once the package is loaded, go to Assets→ Import Package→ Custom Package.
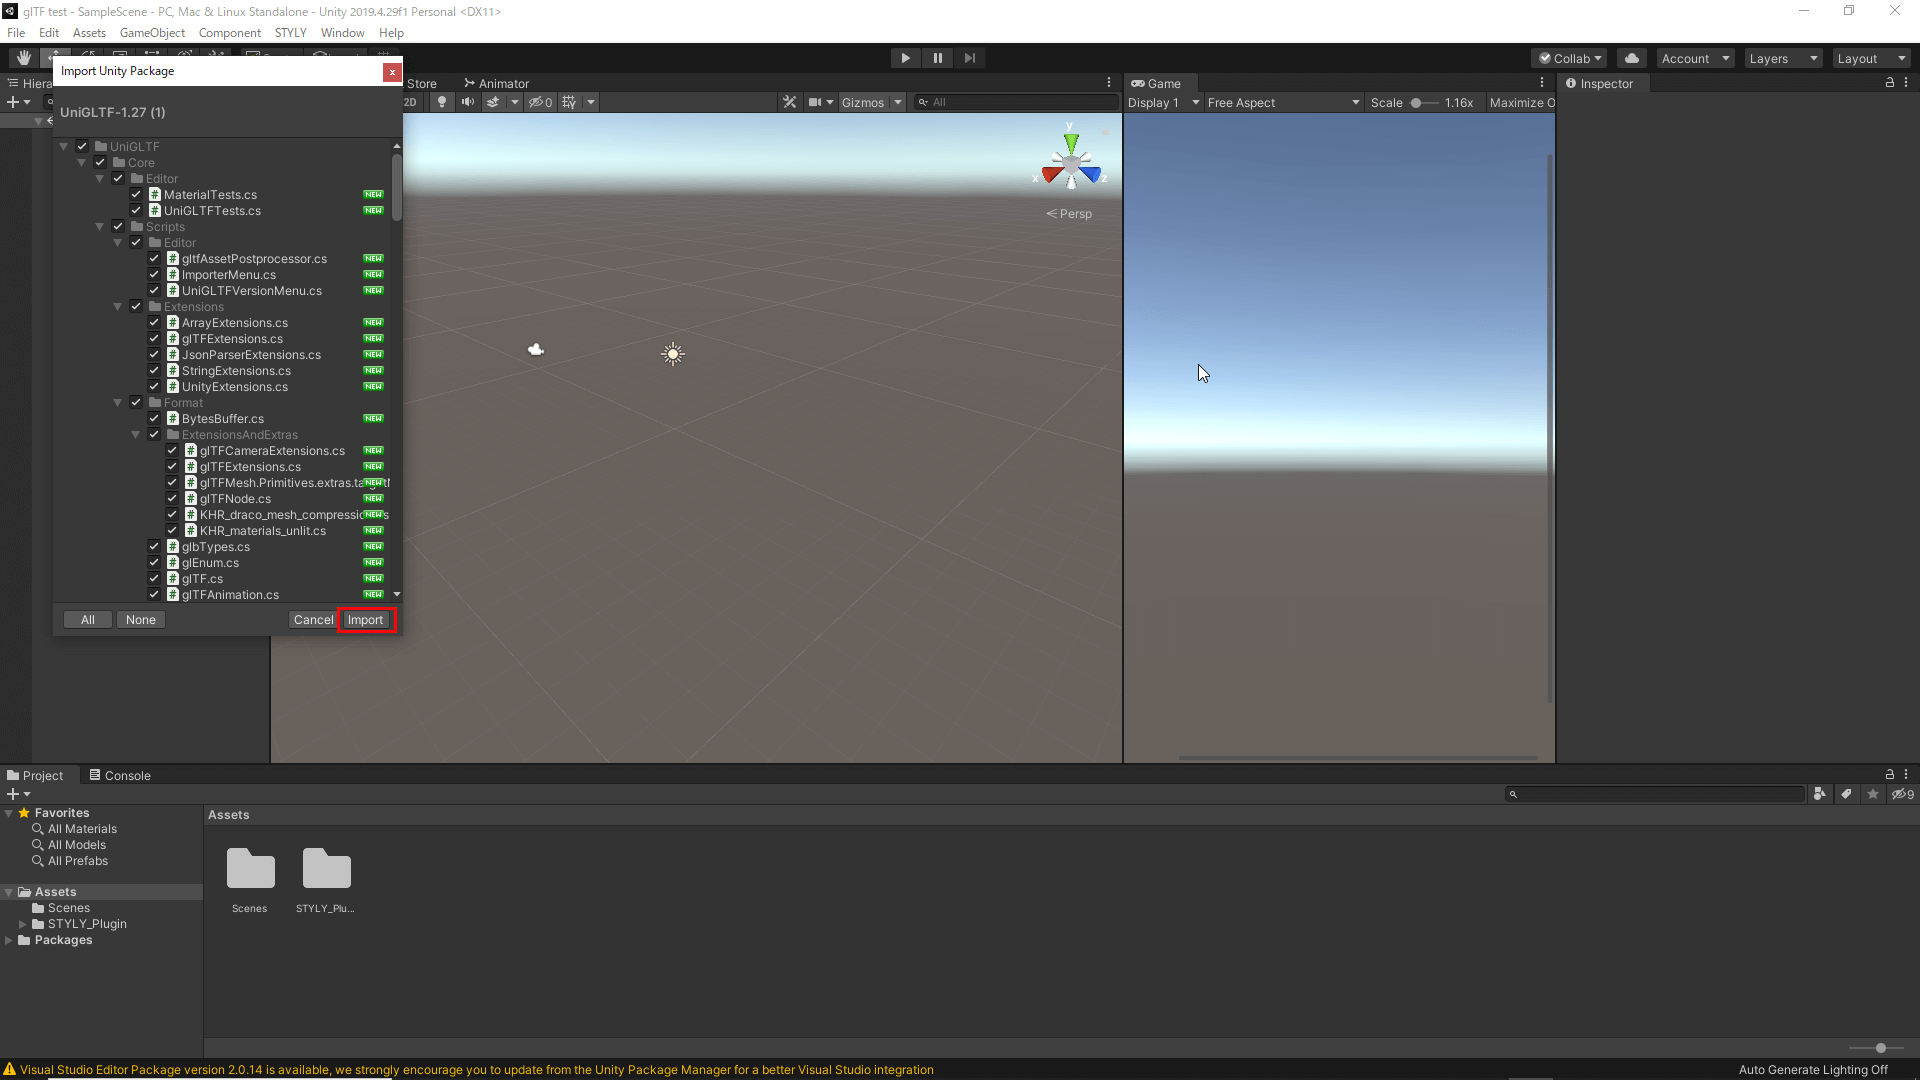
Assets→Import Package→Costom Packege
After the import is complete, a tab named UniGLTF-1.27 will appear at the top of the screen. Click on it, select import, and select the glTF file.
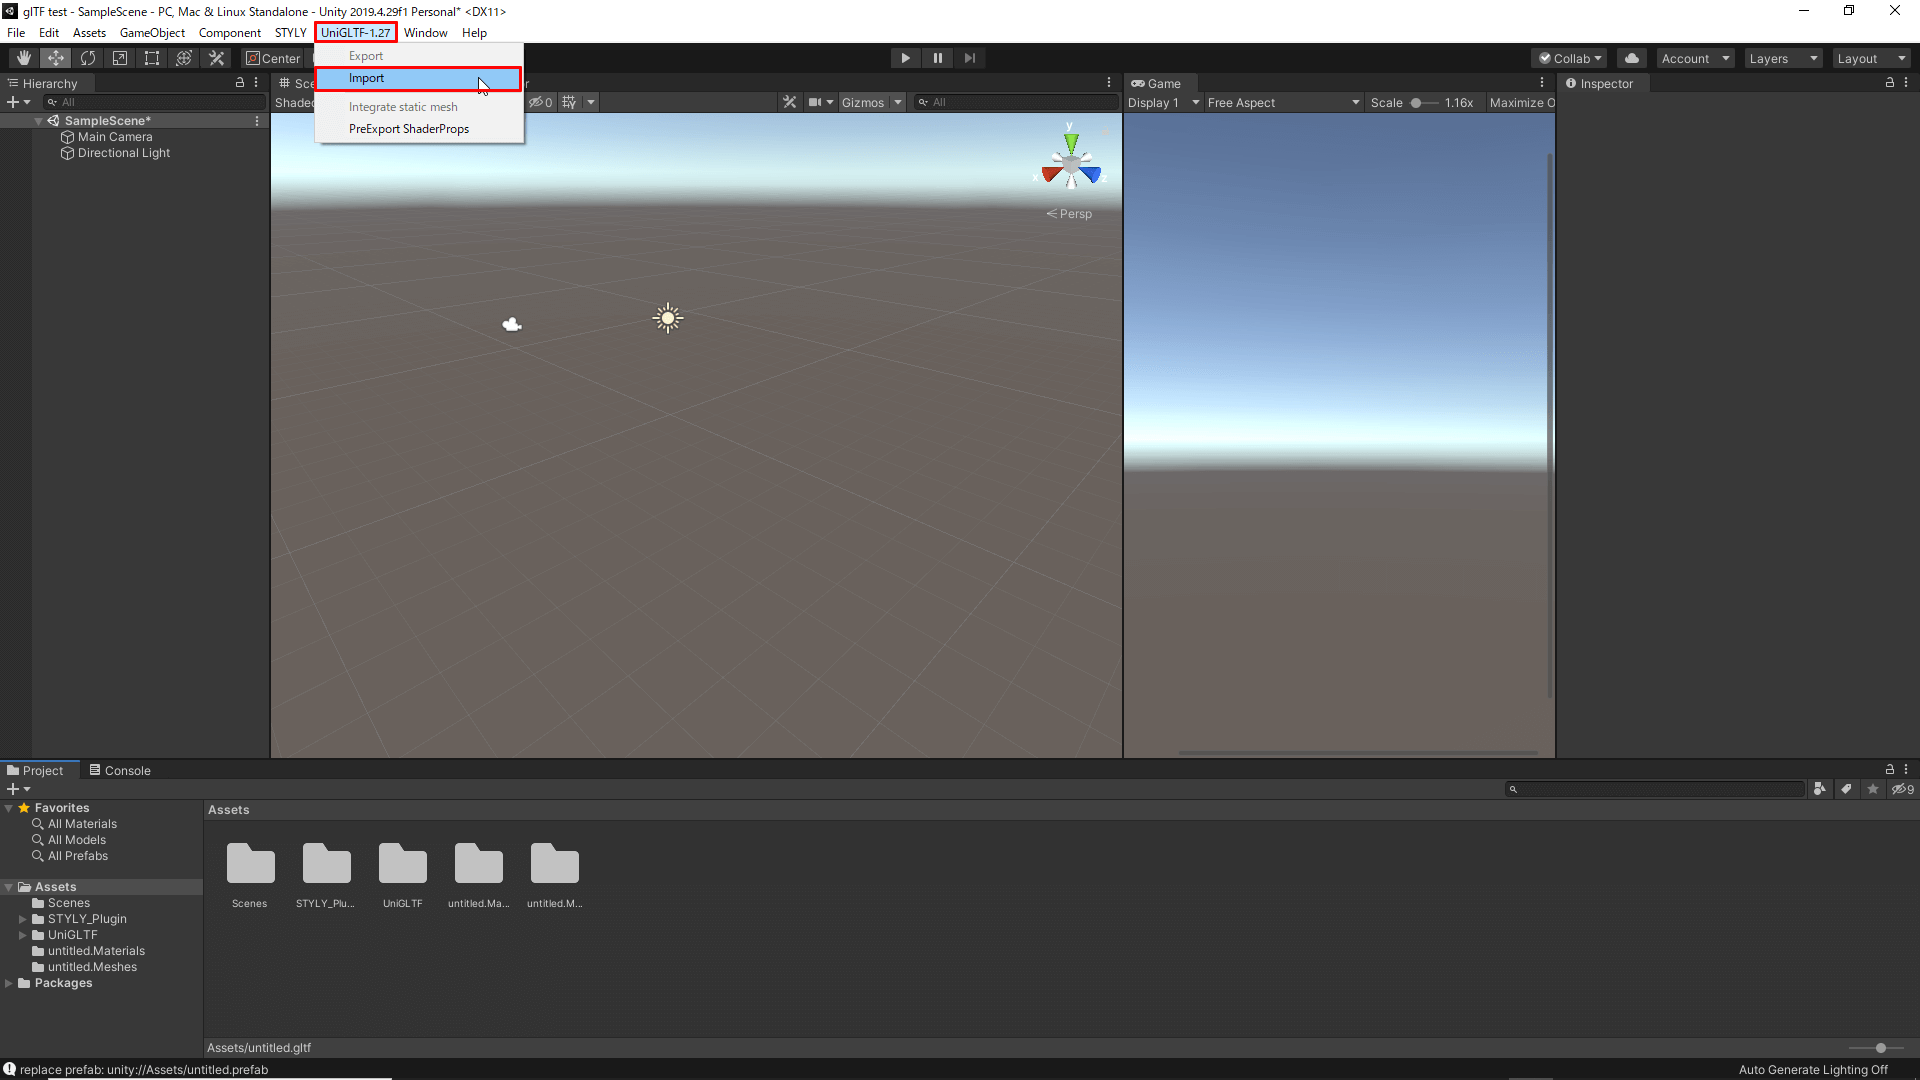
Click on UniGLTF-1.27, Select Import, and Select gITF File
Now, the file has been imported. If you receive an error message or no animation on the first import, re-import the file and it will display correctly.
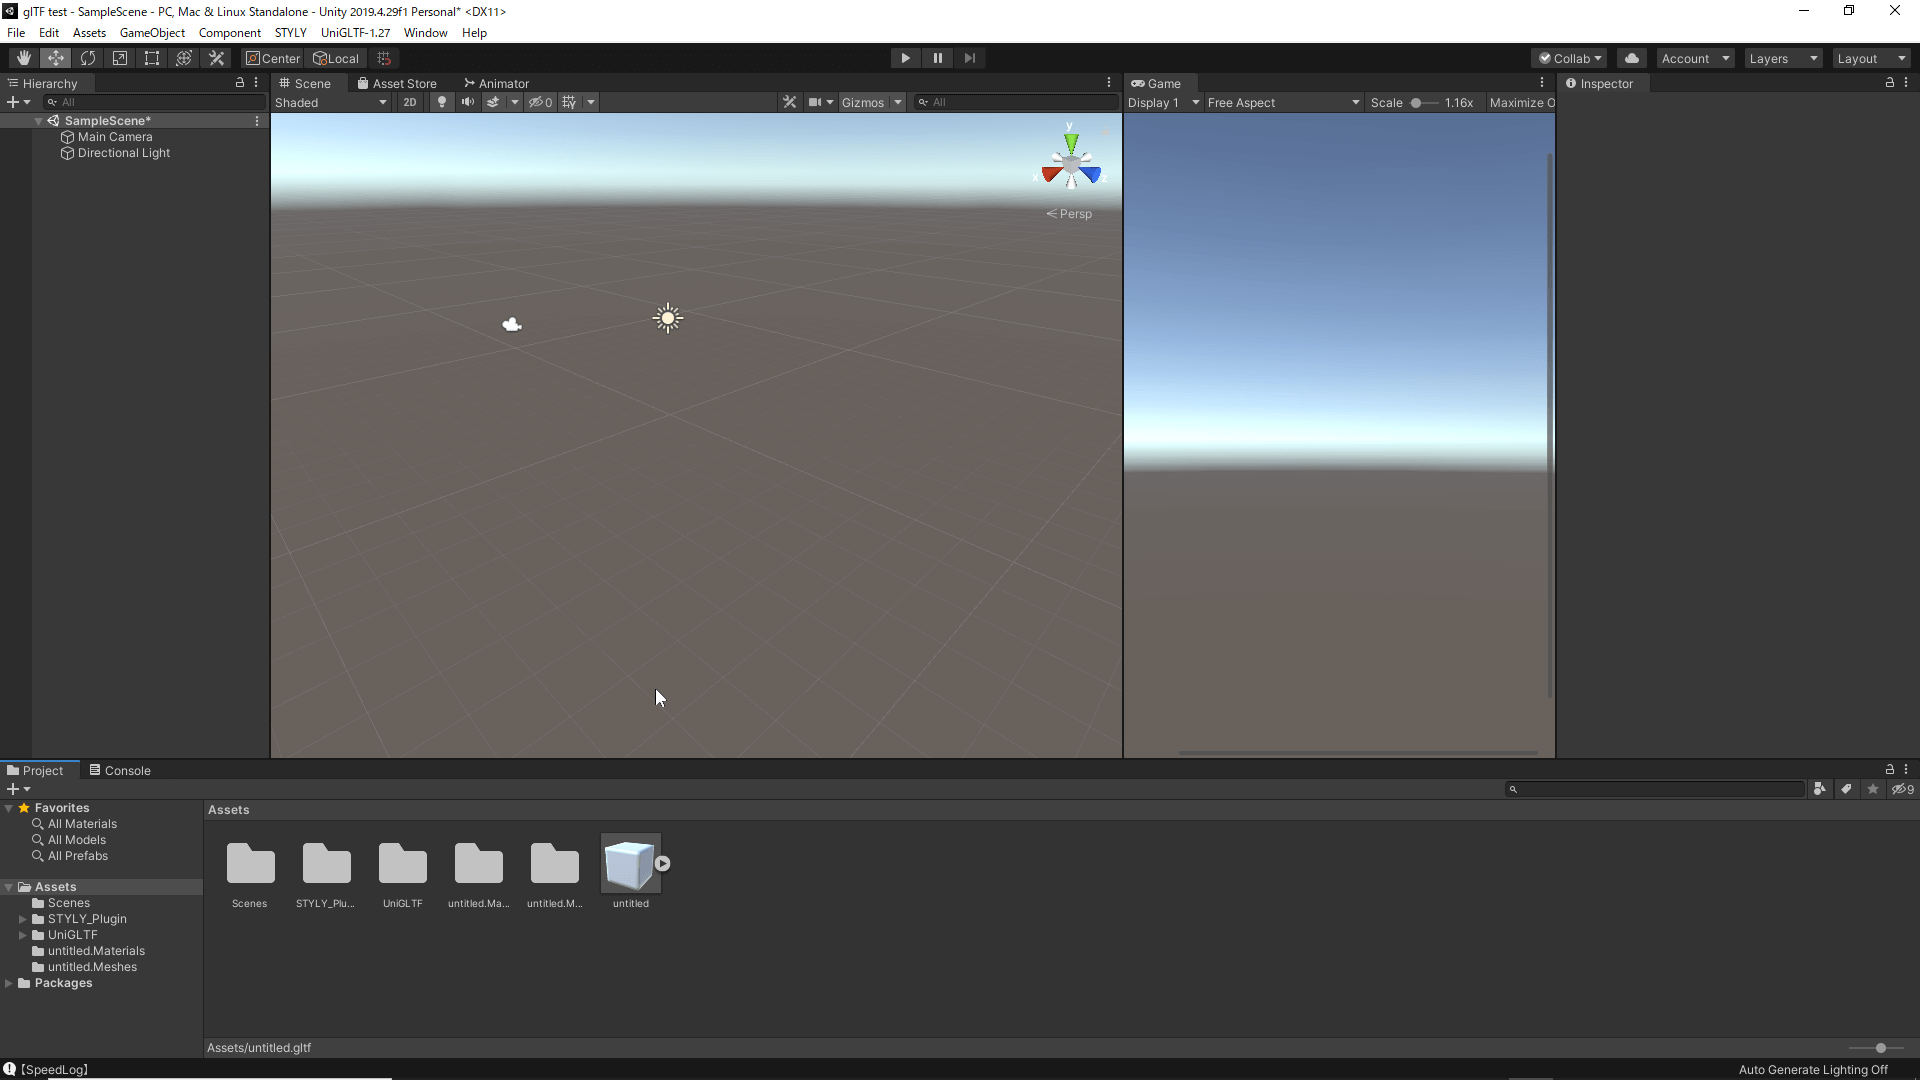
The File is Imported
Drag and drop the file into the scene and press play to play the animation. The object will appear messed up in the scene, but it will display correctly on STYLY.
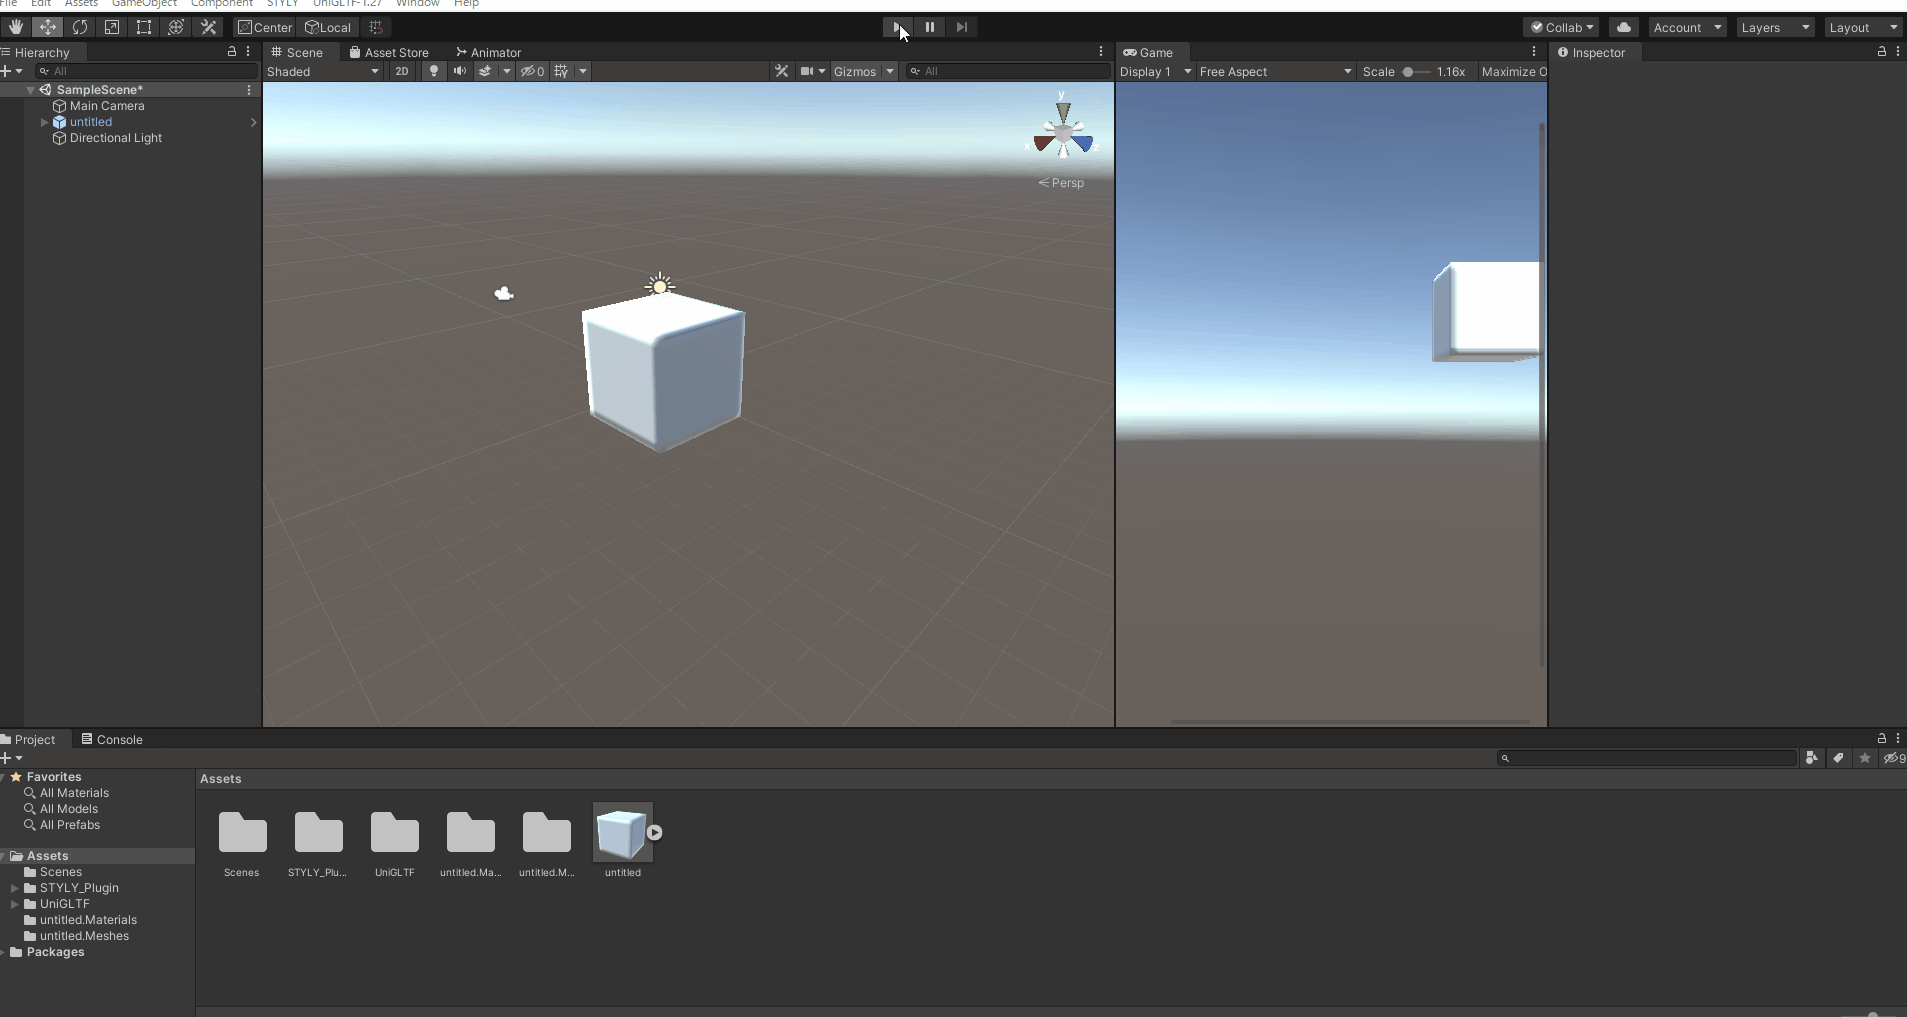
The Object Working Correctly in STYLY
Import into STYLY
You can upload objects to STYLY by right-clicking on the glTF file in Unity and selecting STYLY → Upload Prefab or Scene to STYLY.
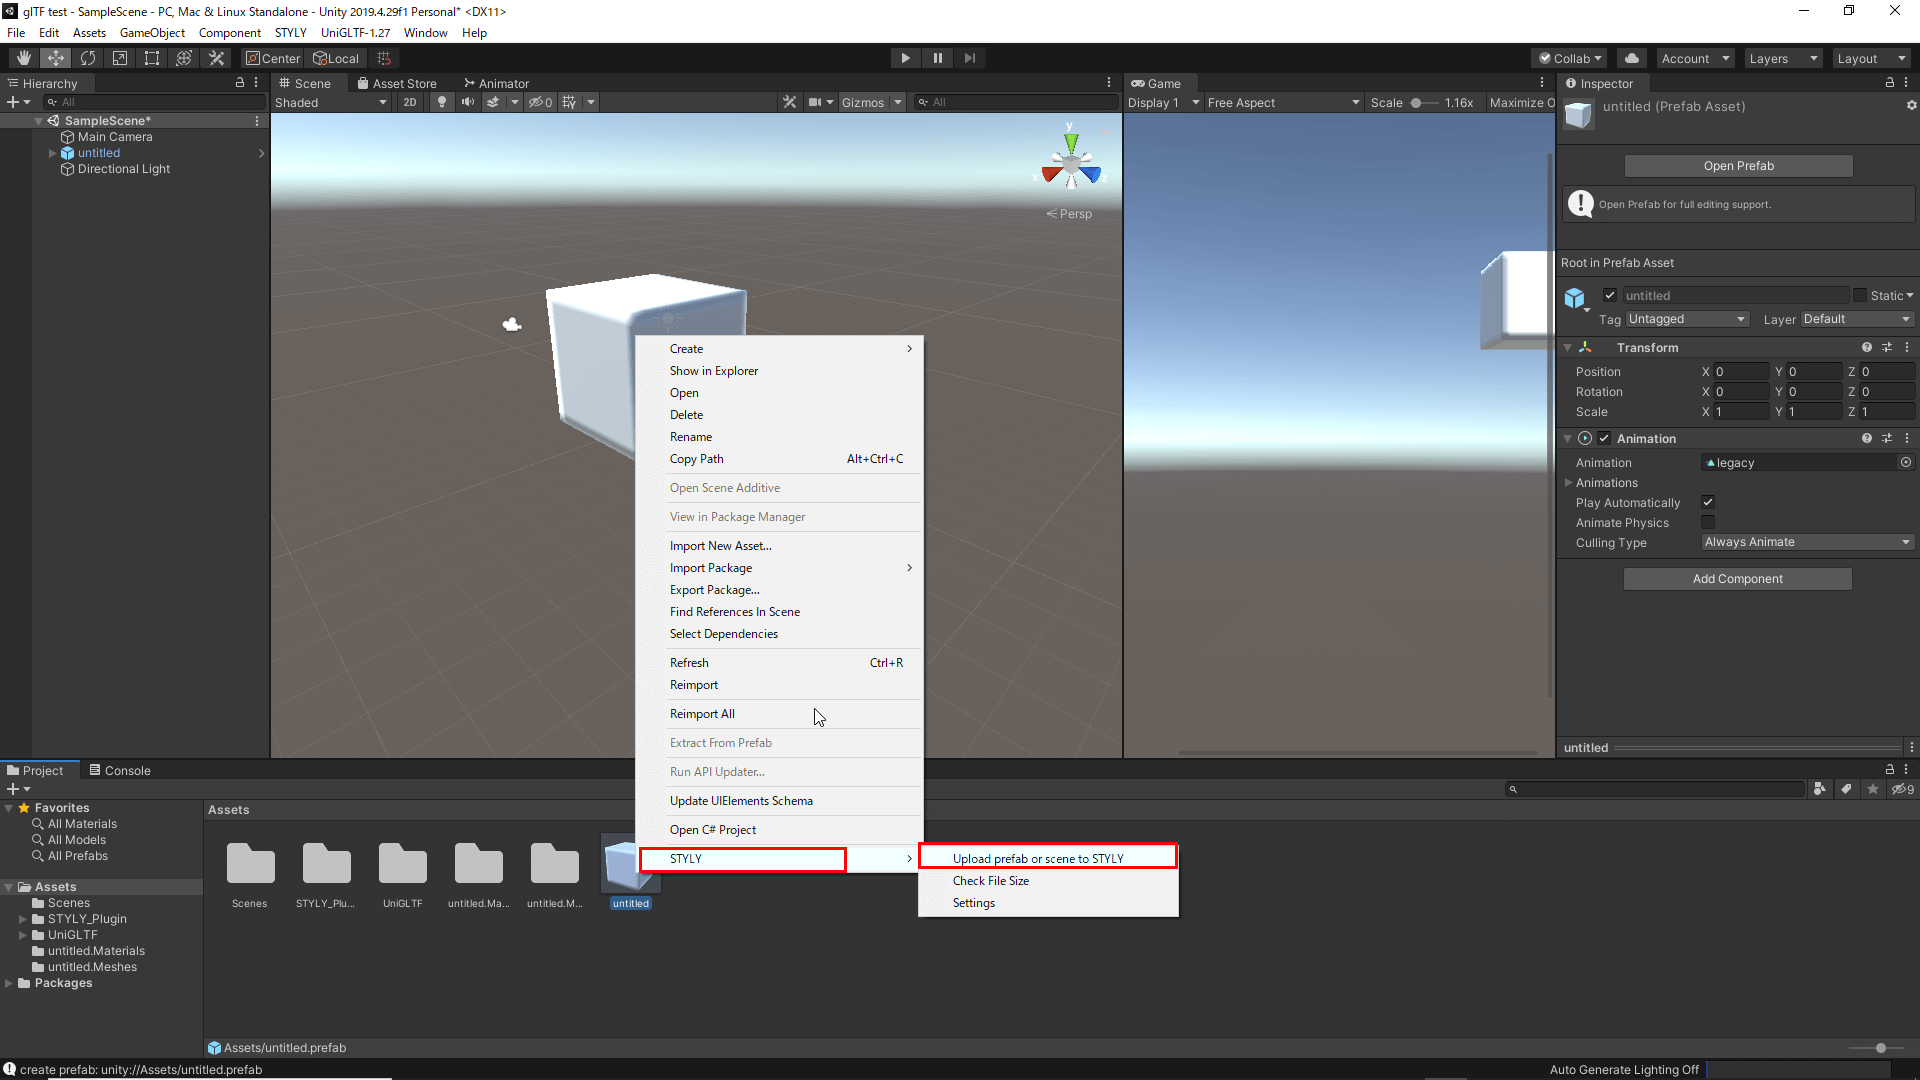
STYLY→Upload prefab or scene to STYLY

Animation is Working well on STYLY
Animation in STYLY Works Well
So far, we have explained how to animate by using shape keys, but objects animated with Blender’s keyframe functionality can also be moved to STYLY.
Let’s try to create an animation. This time, we will create an animation like the one below.

The Color of the Monkey is Changed to Green for Clarity
First, select Edit→ Preference→ Add-ons, then type “cell” in the search bar in the upper right-hand corner to see the add-on Cell Fracture. Then, click the check mark to activate the Cell Fracture add-on.
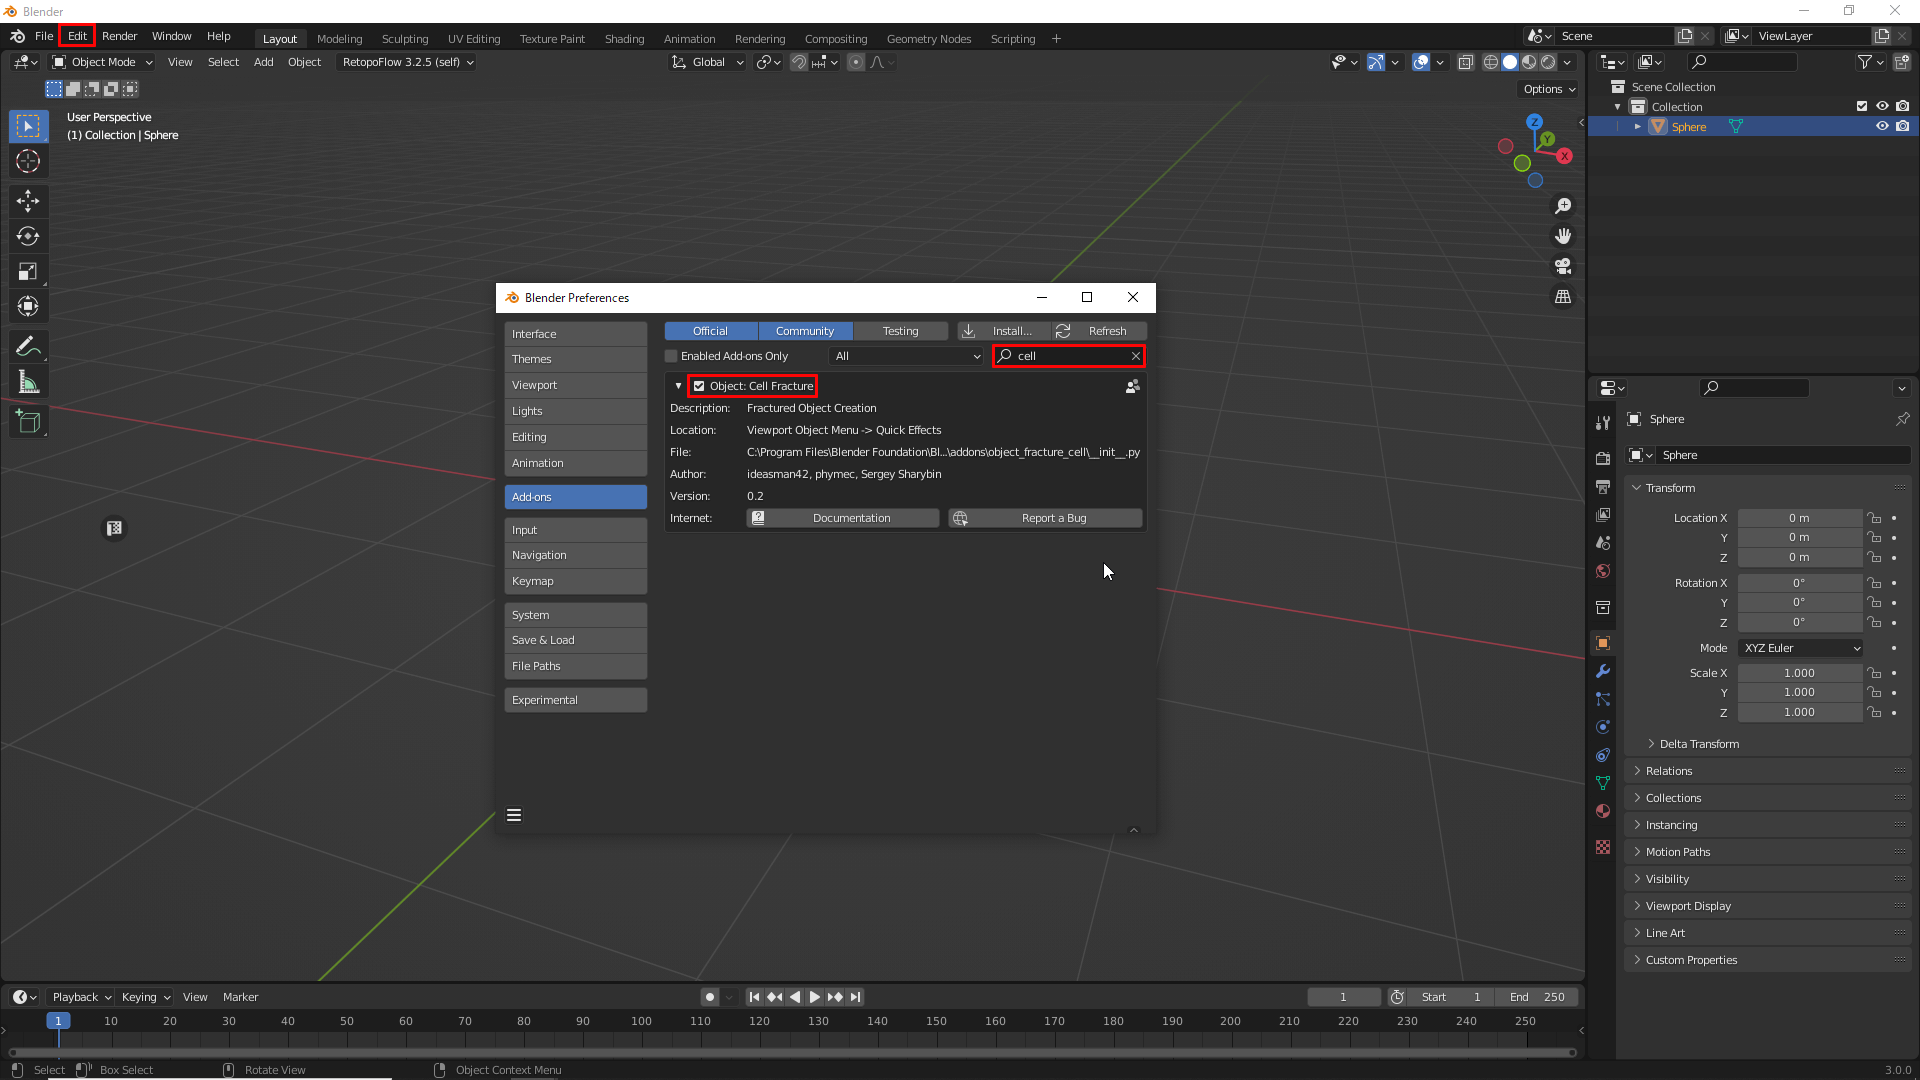
Edit→Prefarence→Add-ons→Cell Fracture
Next, place the UV Sphere by pressing [Ctrl]+[A]. Then, right-click the object in Edit Mode and select Subdivide to subdivide it.
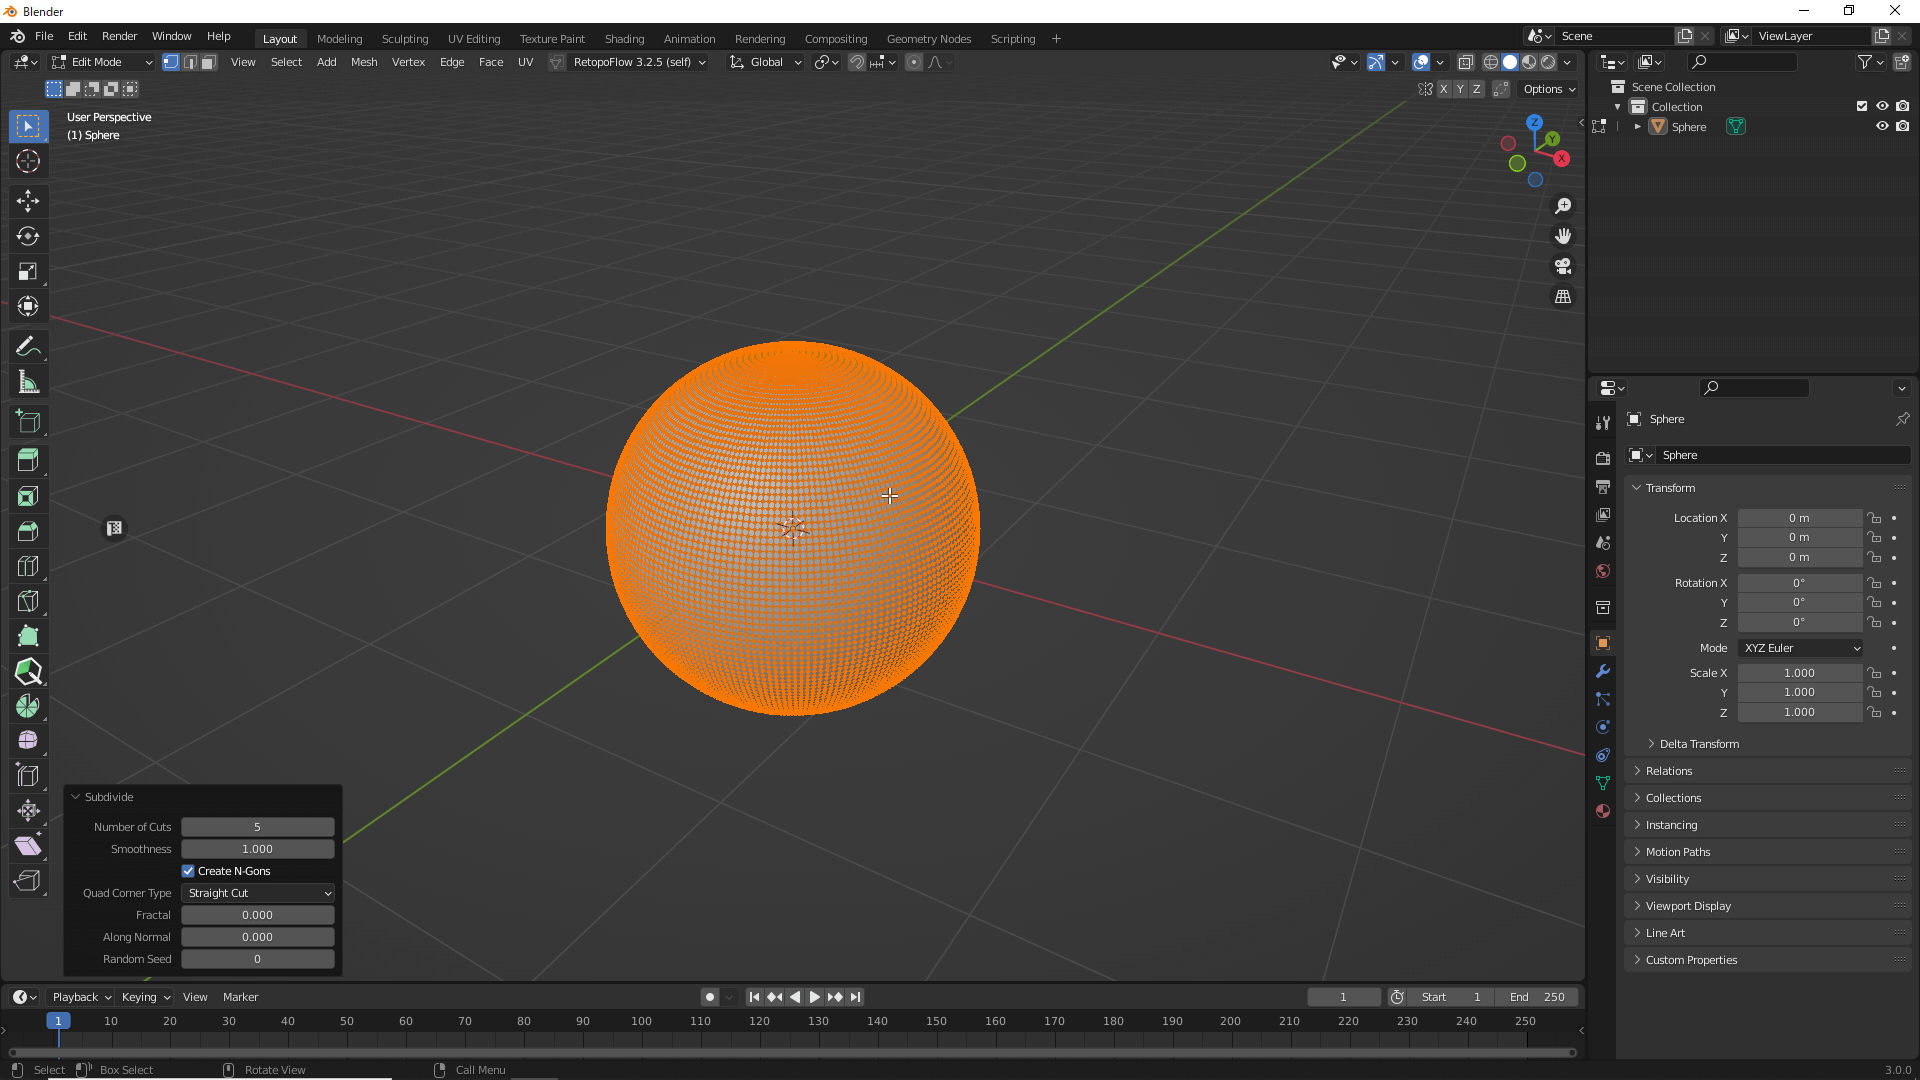
Subdivision
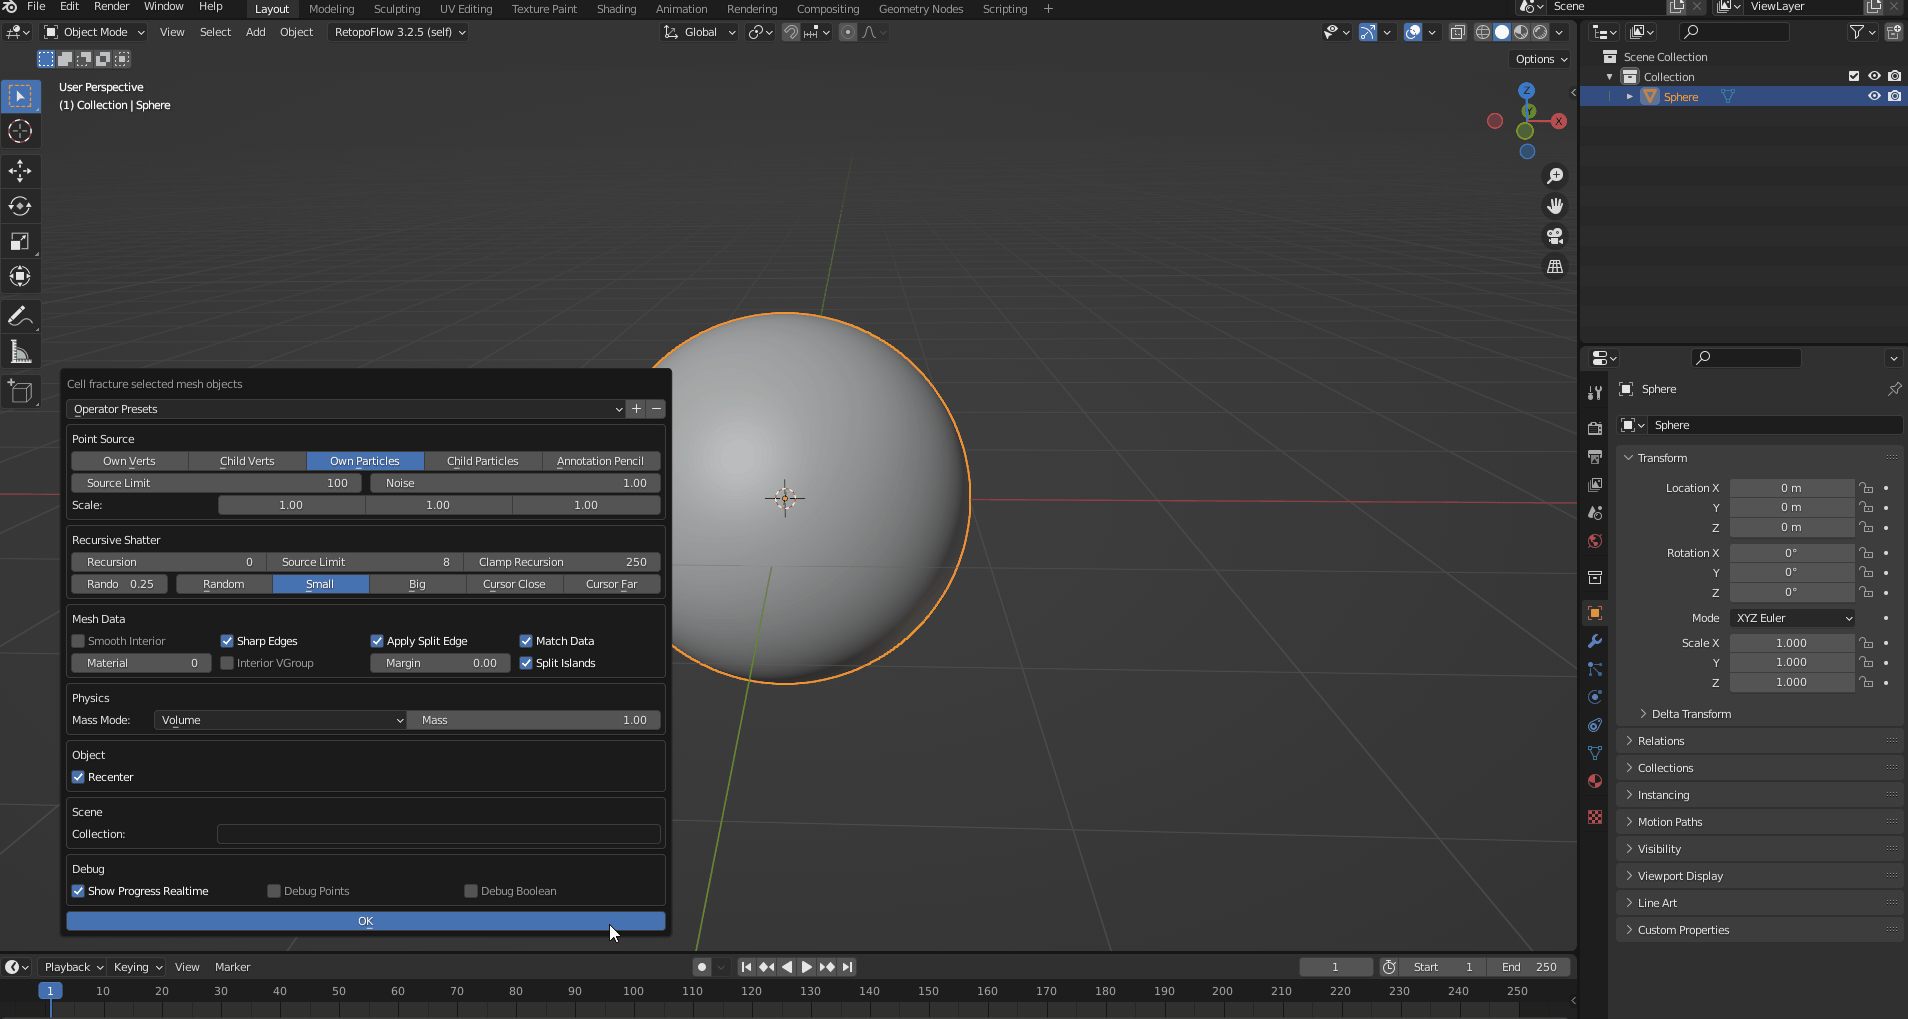
Next, select the object and click Object→ Quick Effects→ Cell Fracture.
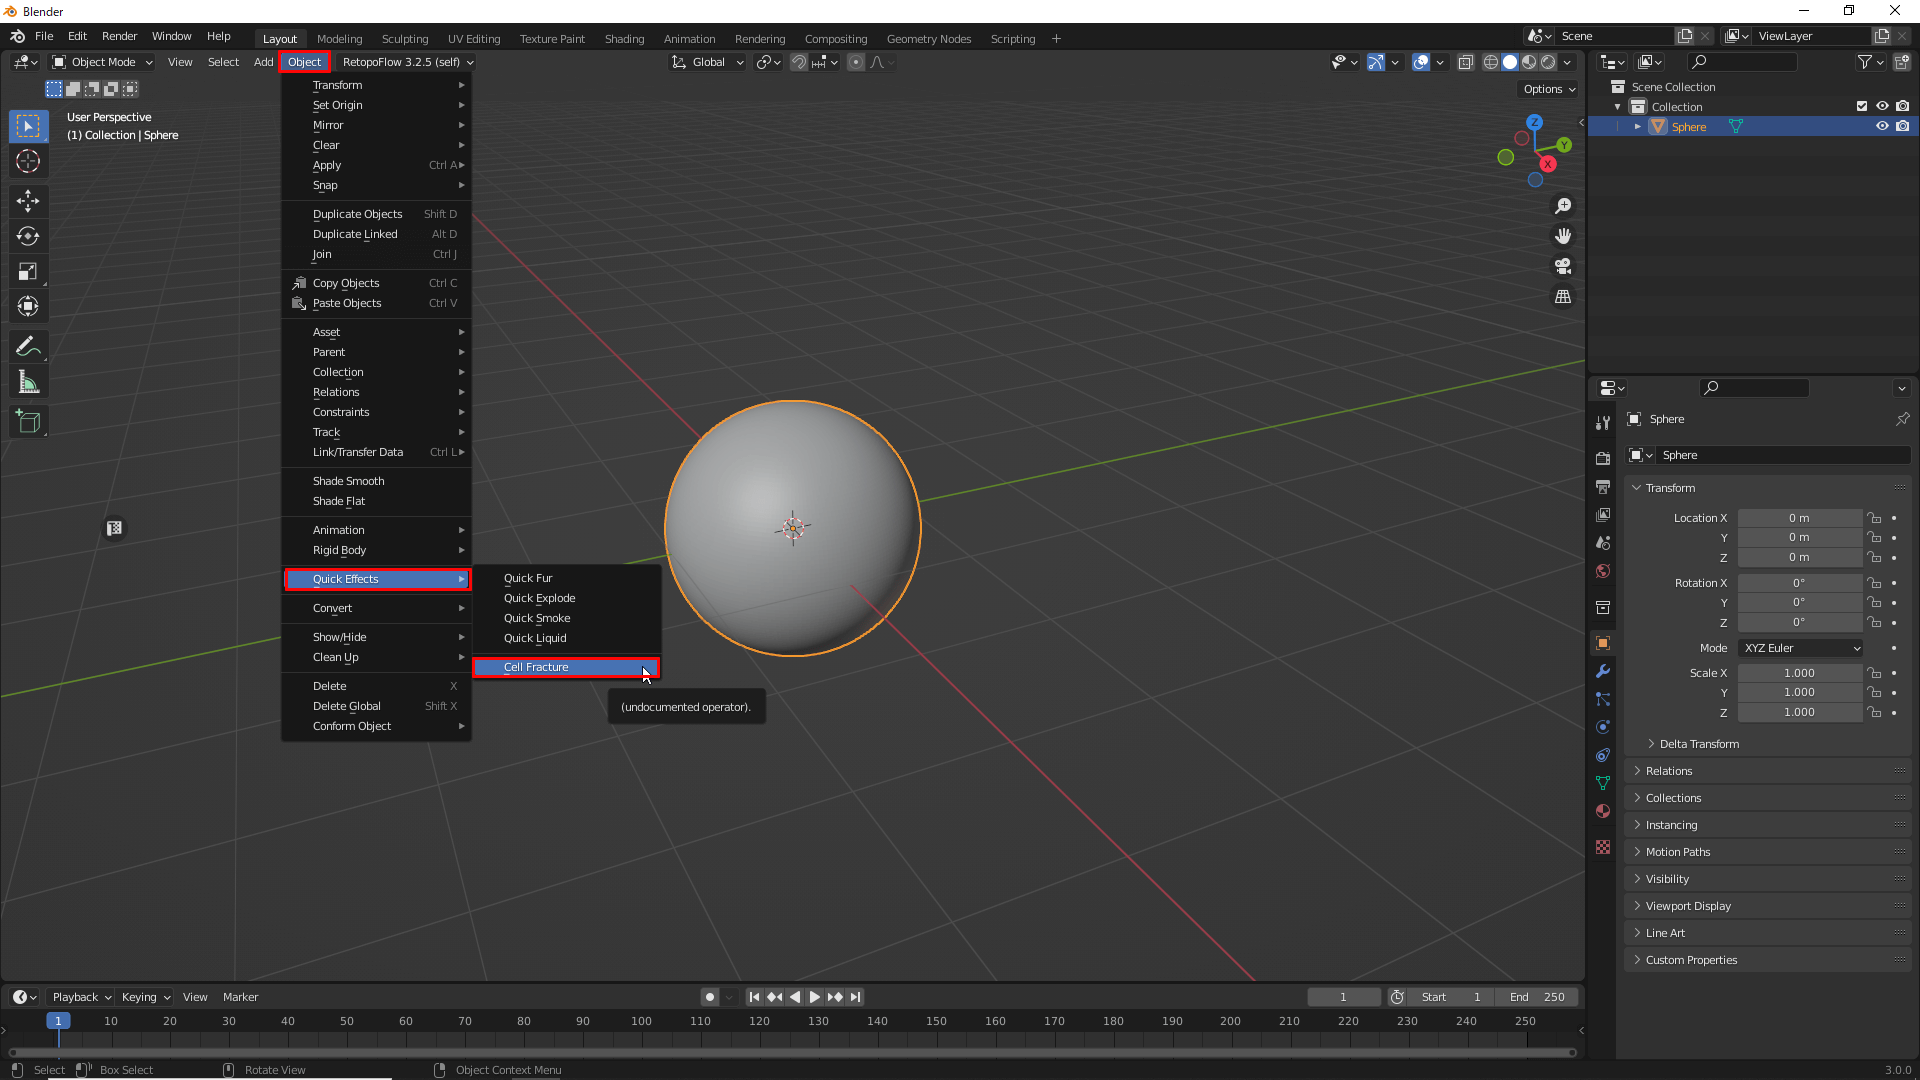
Object→Quick Effects→Cell Fracture
Then, a window for setting parameters will appear. In this case, we changed the value of Noise from “0” to “1.”
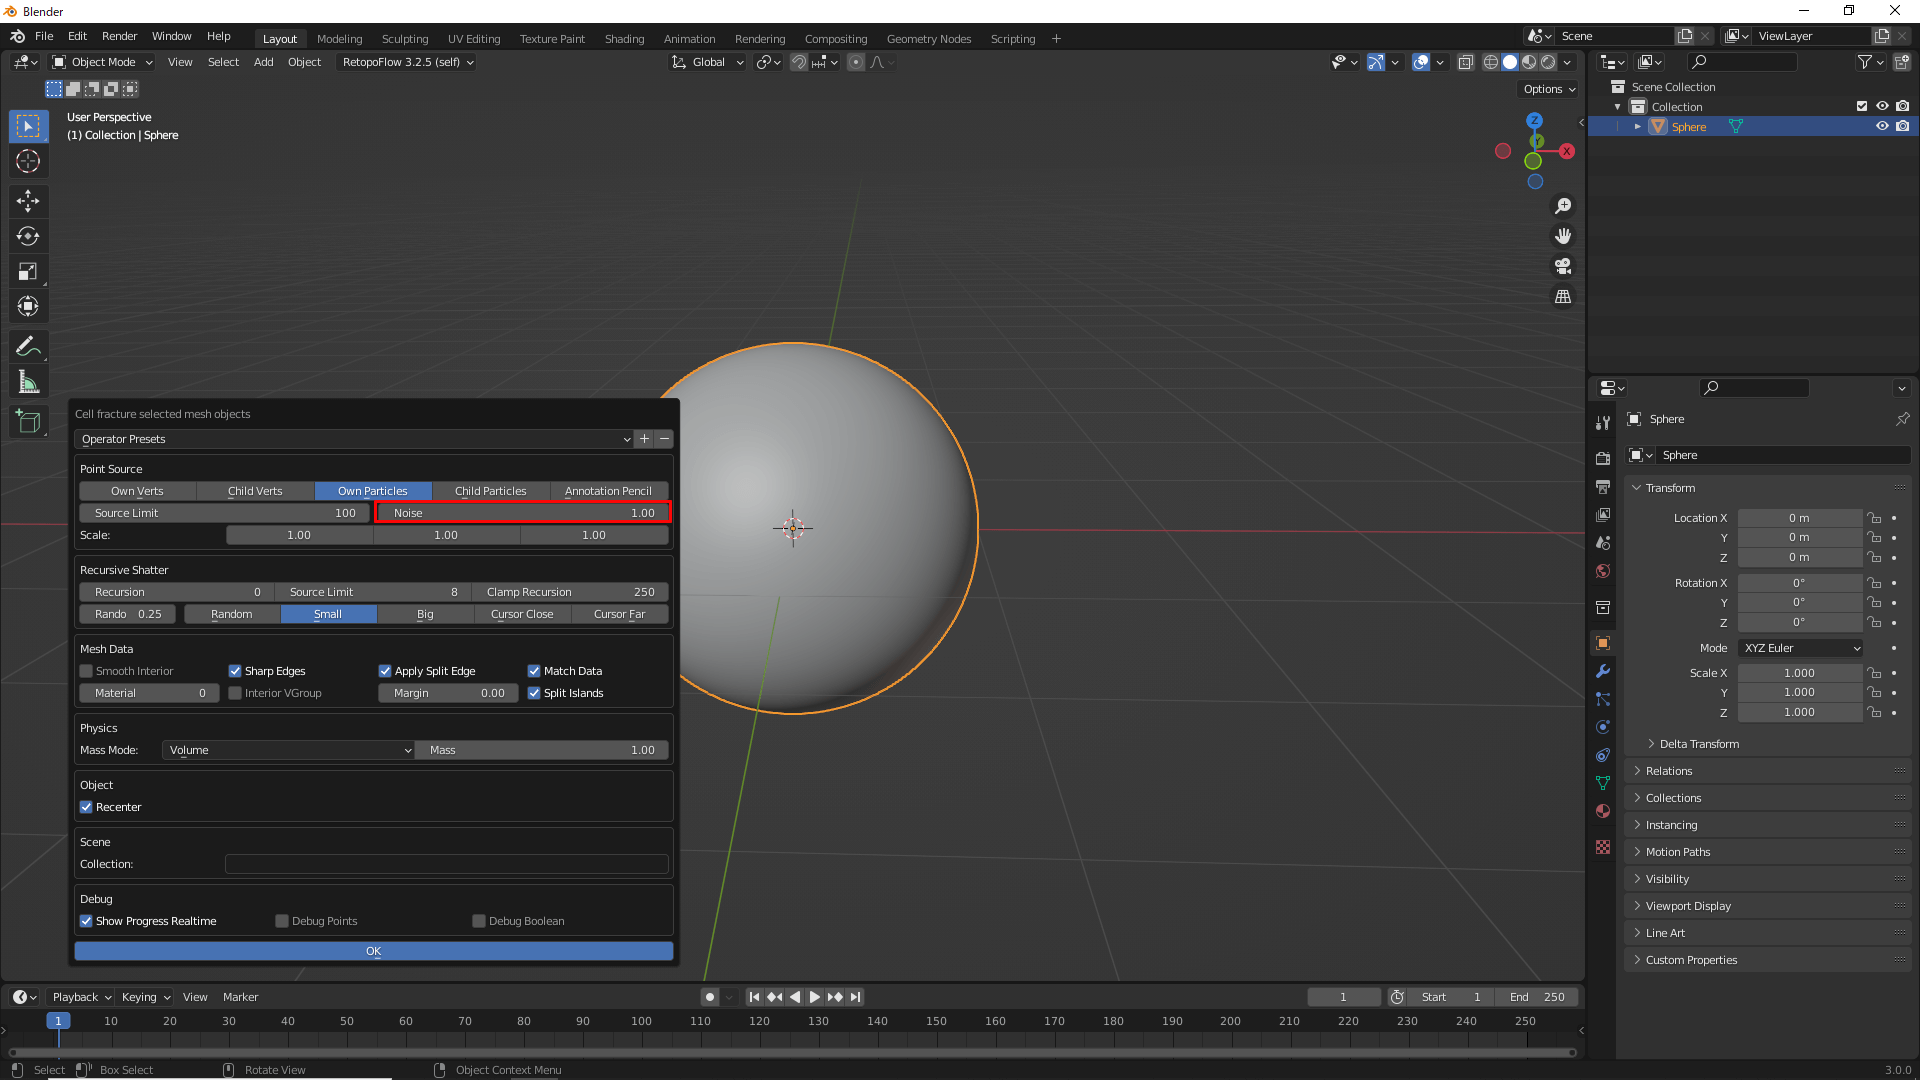
Change the Noise Value from “0” to “1”
If you press the OK button, this Noise value will create a disjointed sphere after the effect is displayed. You can then delete the original UV Sphere, as it is no longer needed.
Disjointed Effects
Next, click Object→ Apply→ All Transforms to set the current position of all debris to the default position. Be sure to set the Location and Rotation values to “0.”
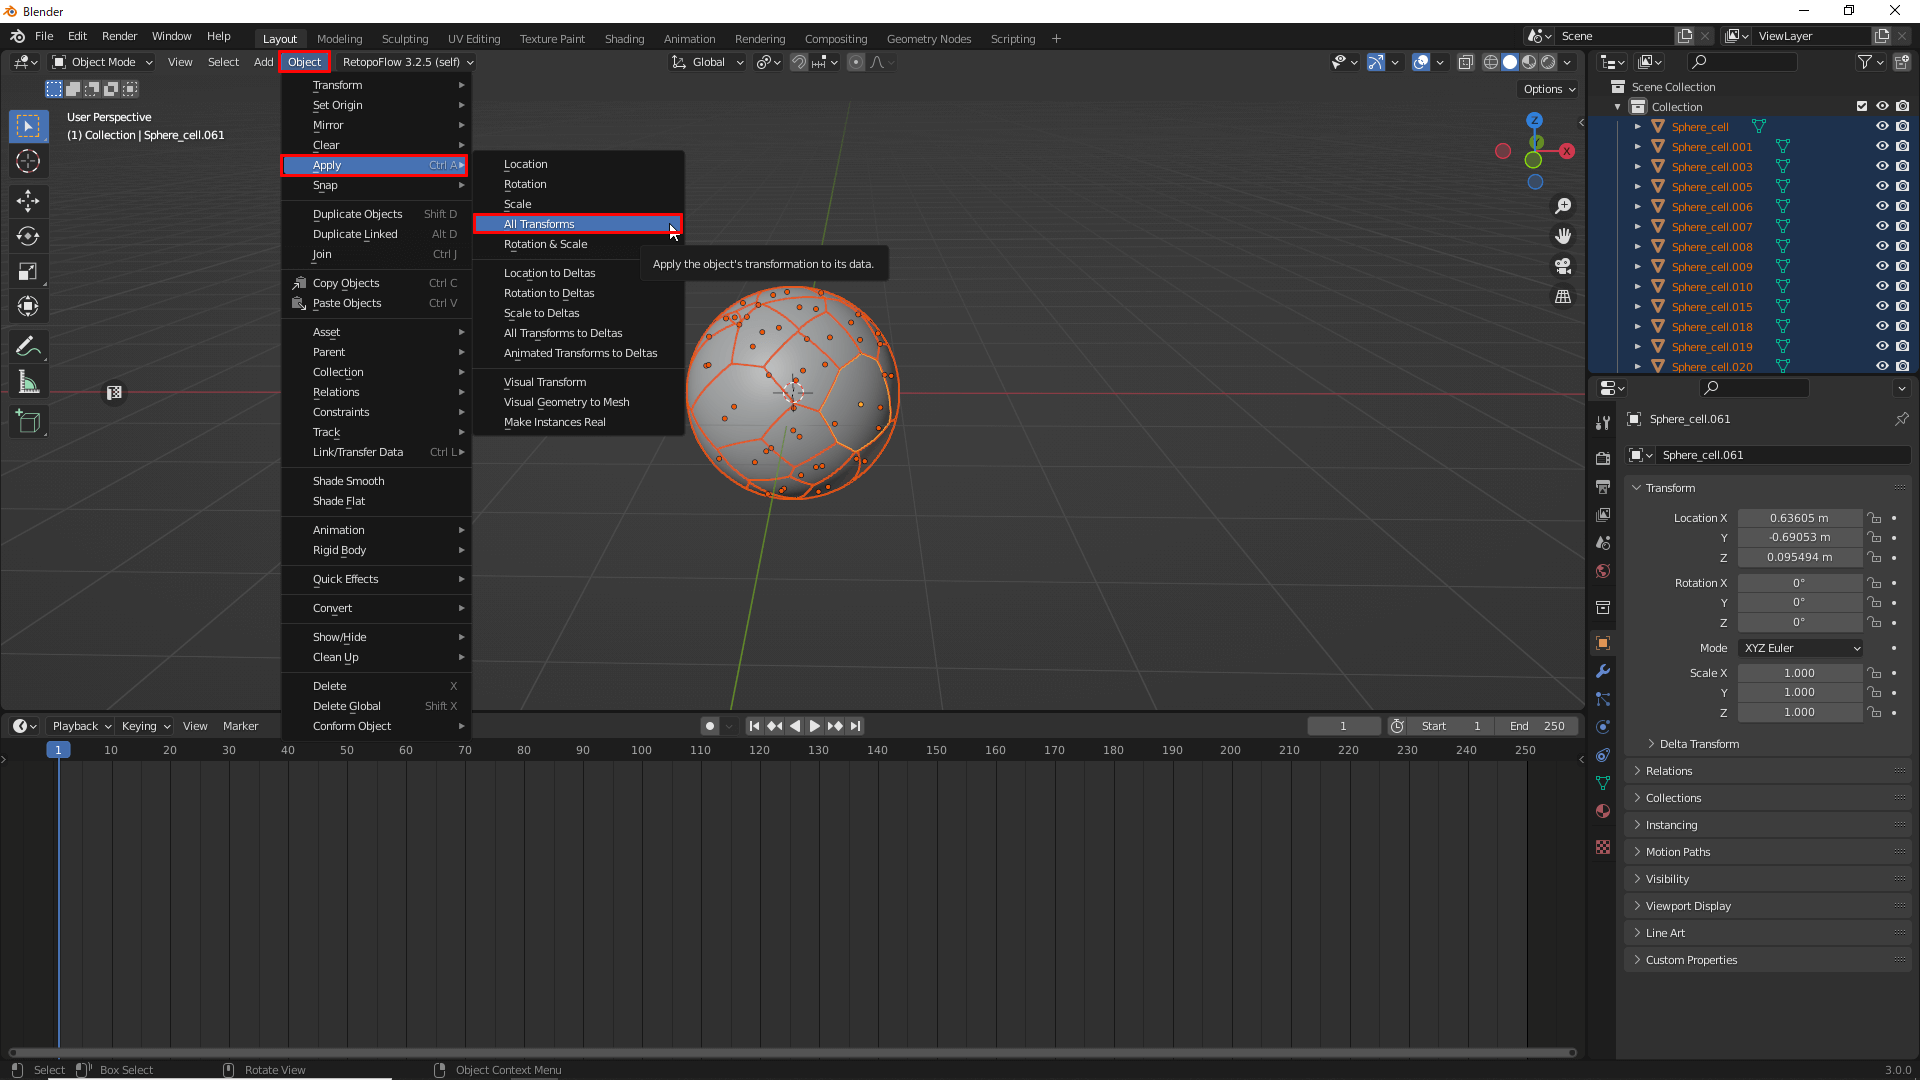
Obgect→Apply→All Transforms
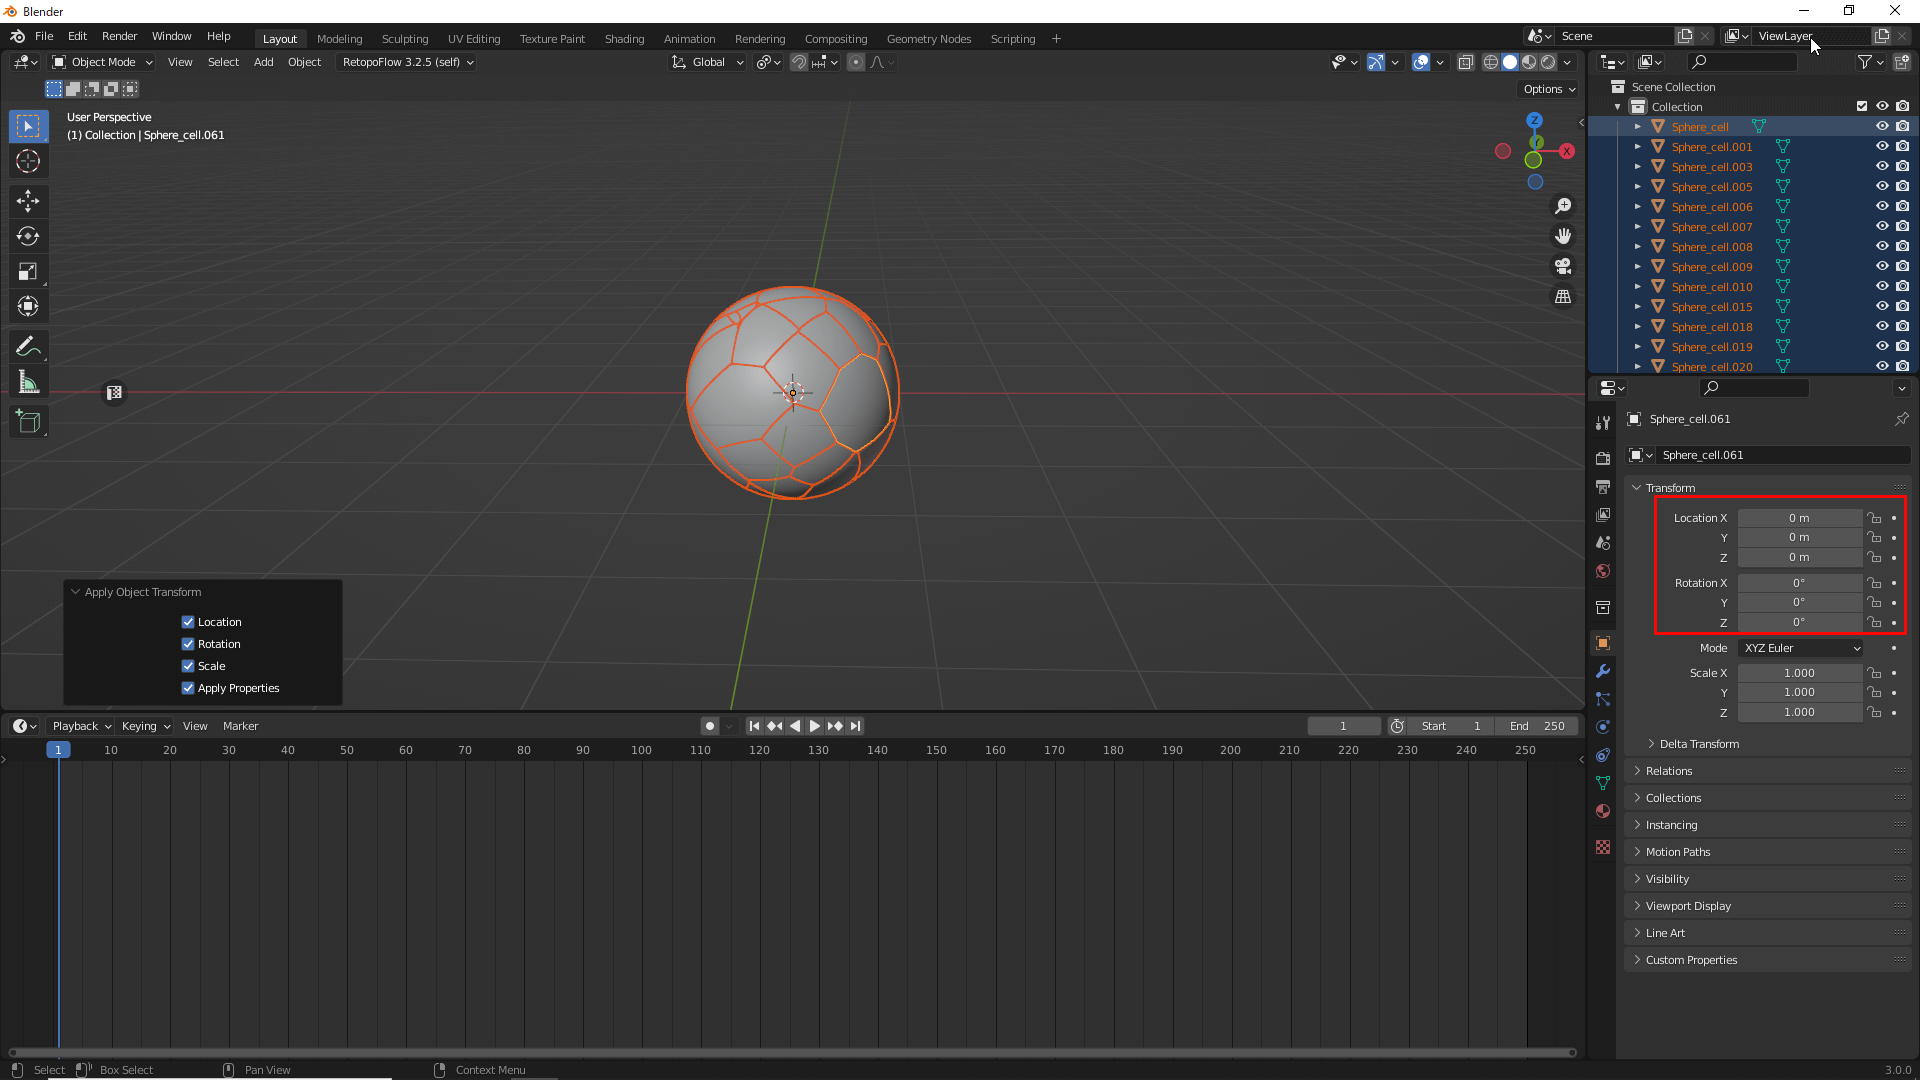
Location and Rotation Values Set to “0″
From here, we will hit the key, change End to “100,” and move to the first frame.
Press the [I] key and click on Location and Rotation to register these keys. Scale is not used in this case, as the animation may not displayed correctly in Unity or STYLY.

Scale is Not Used in this Case, as the Animation May Not Display Correctly in Unity or STYLY
Next, change the number of frames to “30” and select Object→ Transform→ Randomize Transform with all objects selected.
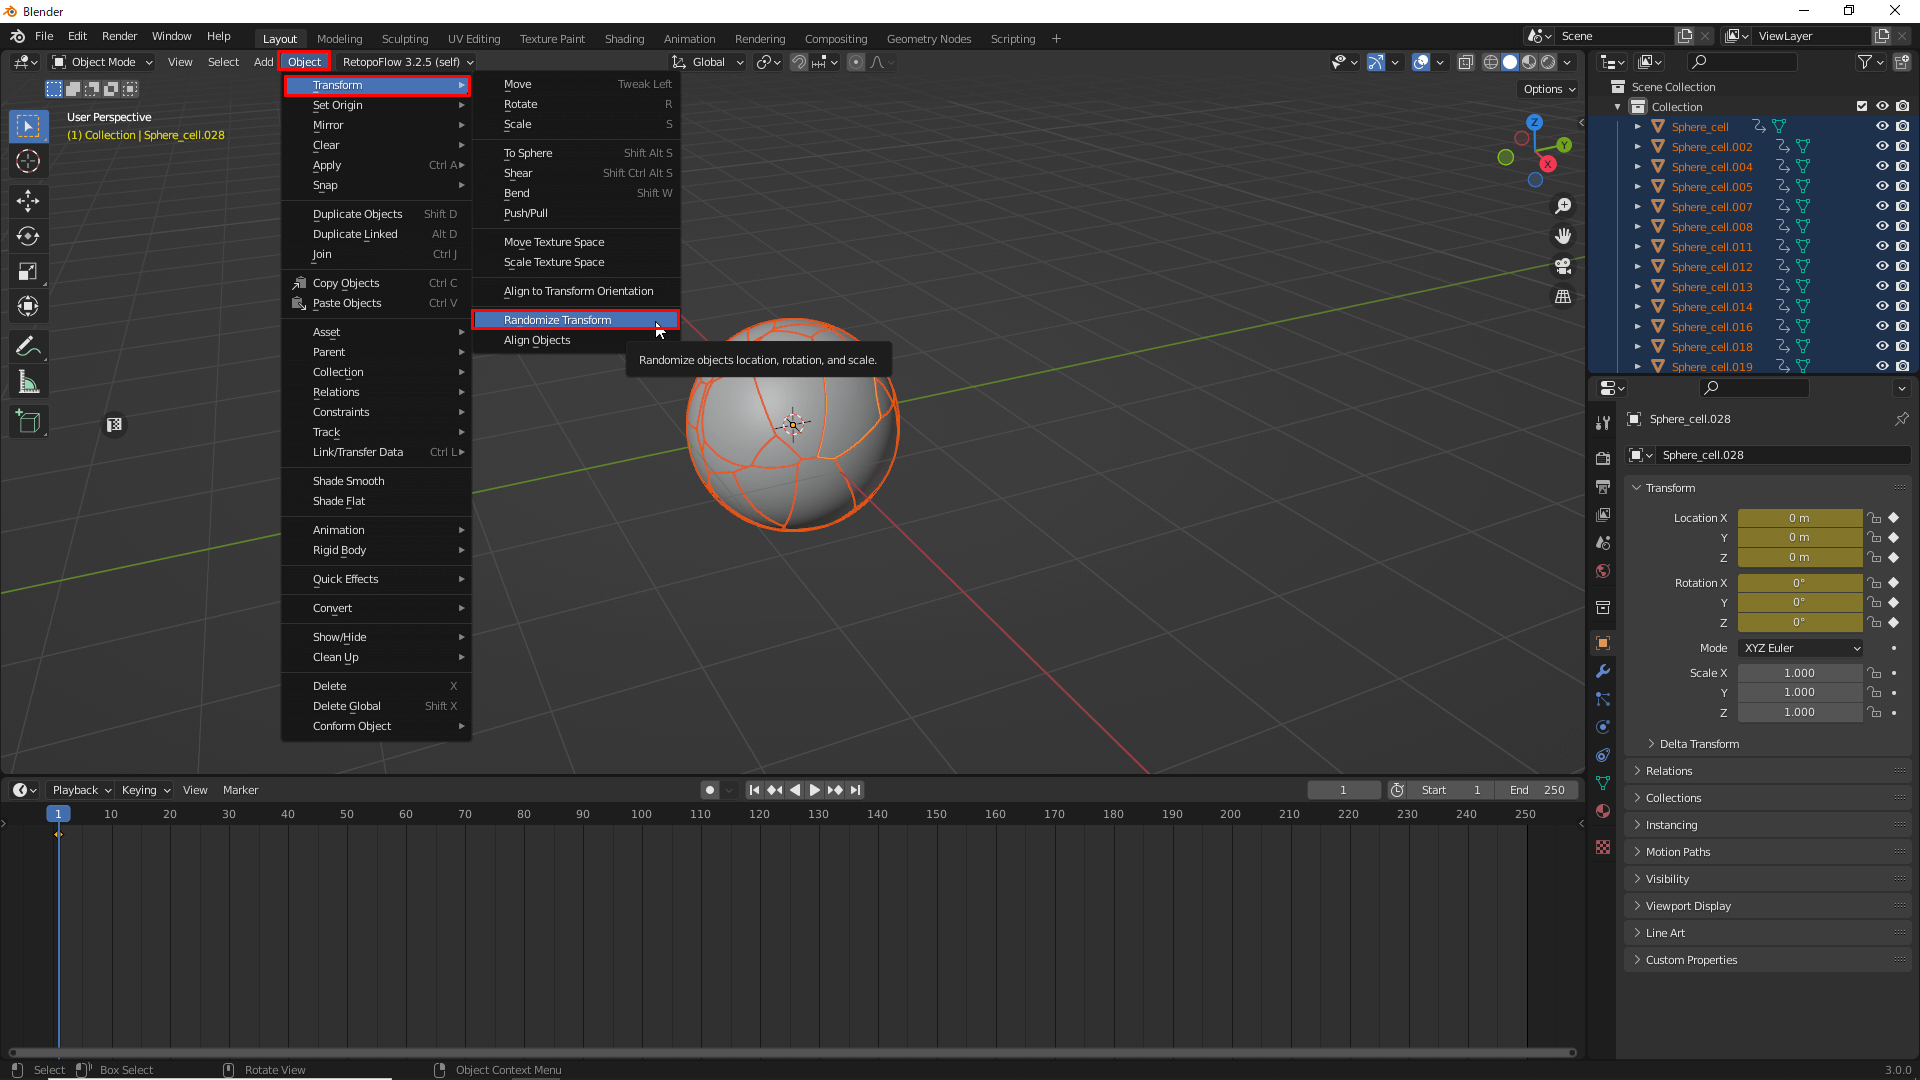
Object→Transform→Randomaize Transform
A window for changing values will appear in the lower left-hand corner, where you can determine the distance and angle for the object.

You can use any value you like
Once you determine the position, press the [I] key to register the Location and Rotation keys.
Register Location and Rotation Keys
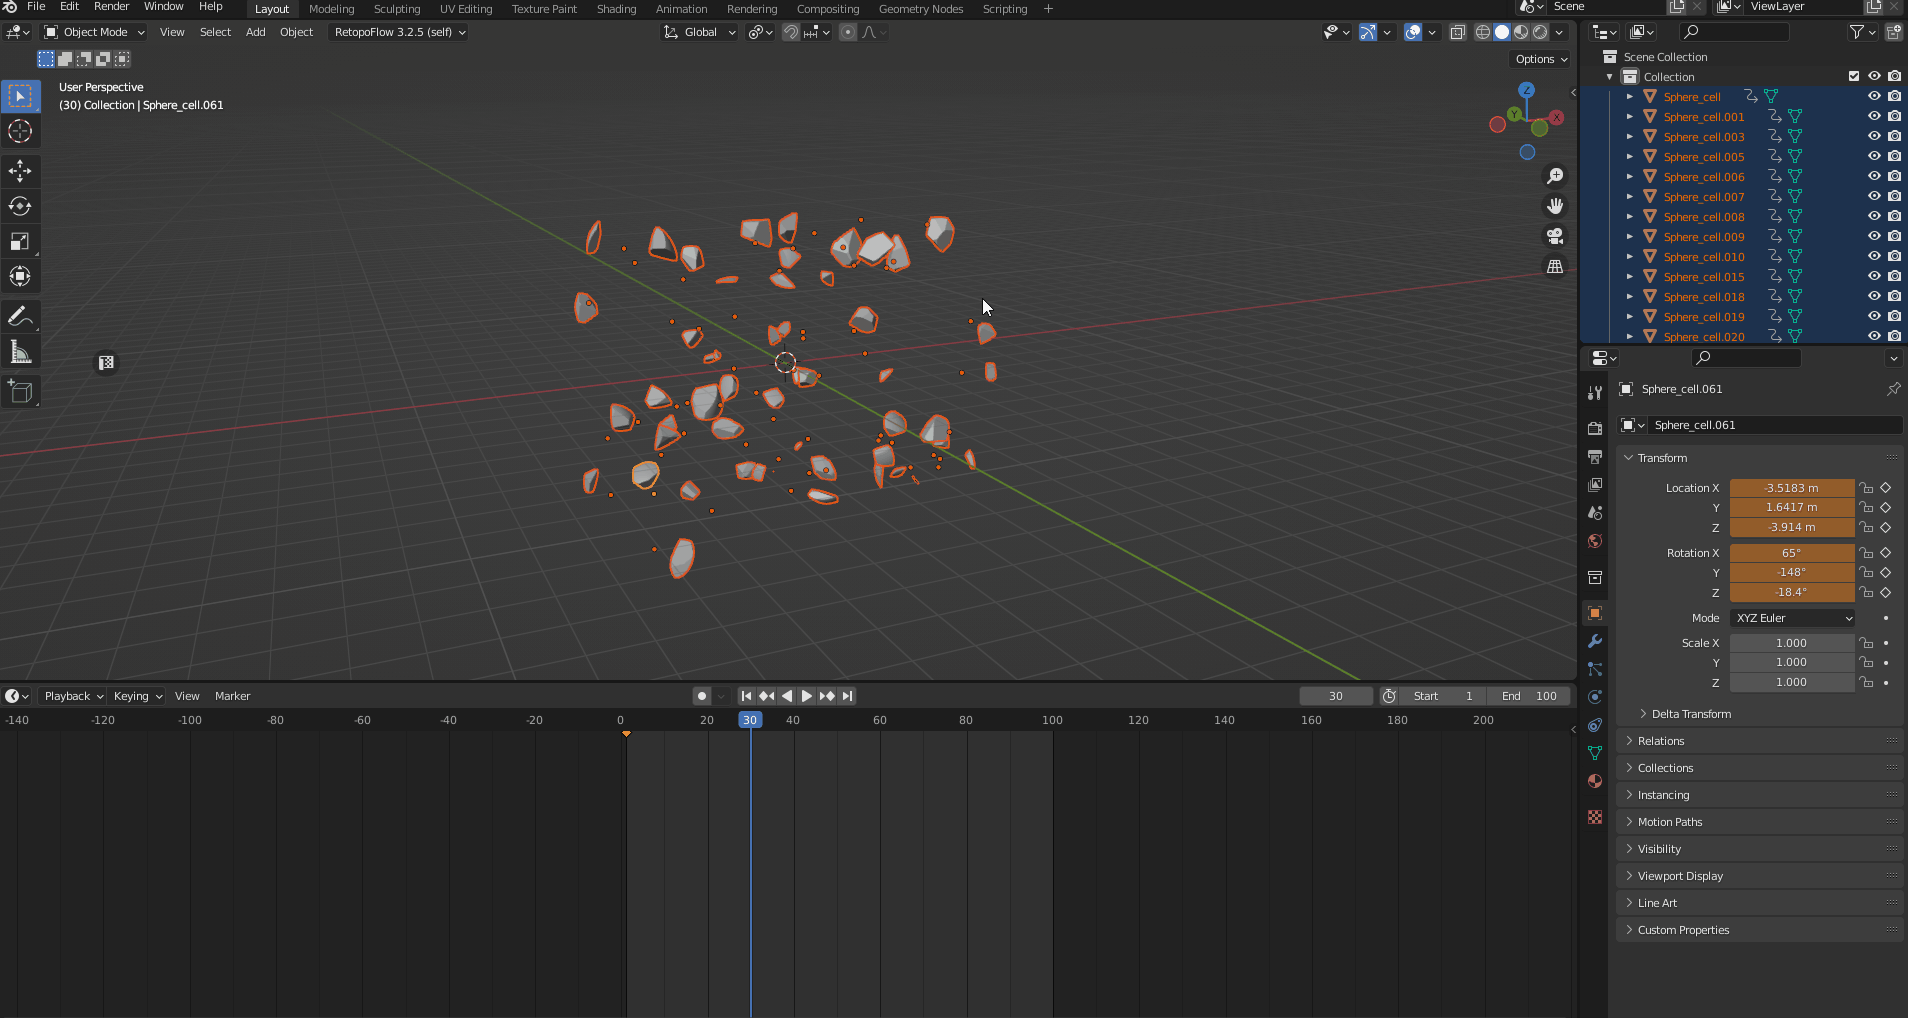
Since we want to keep the debris still between frames 30 and 70, we move to frame 70 and press the [I] key to register the Location and Rotation keys.
Move to Frame 70
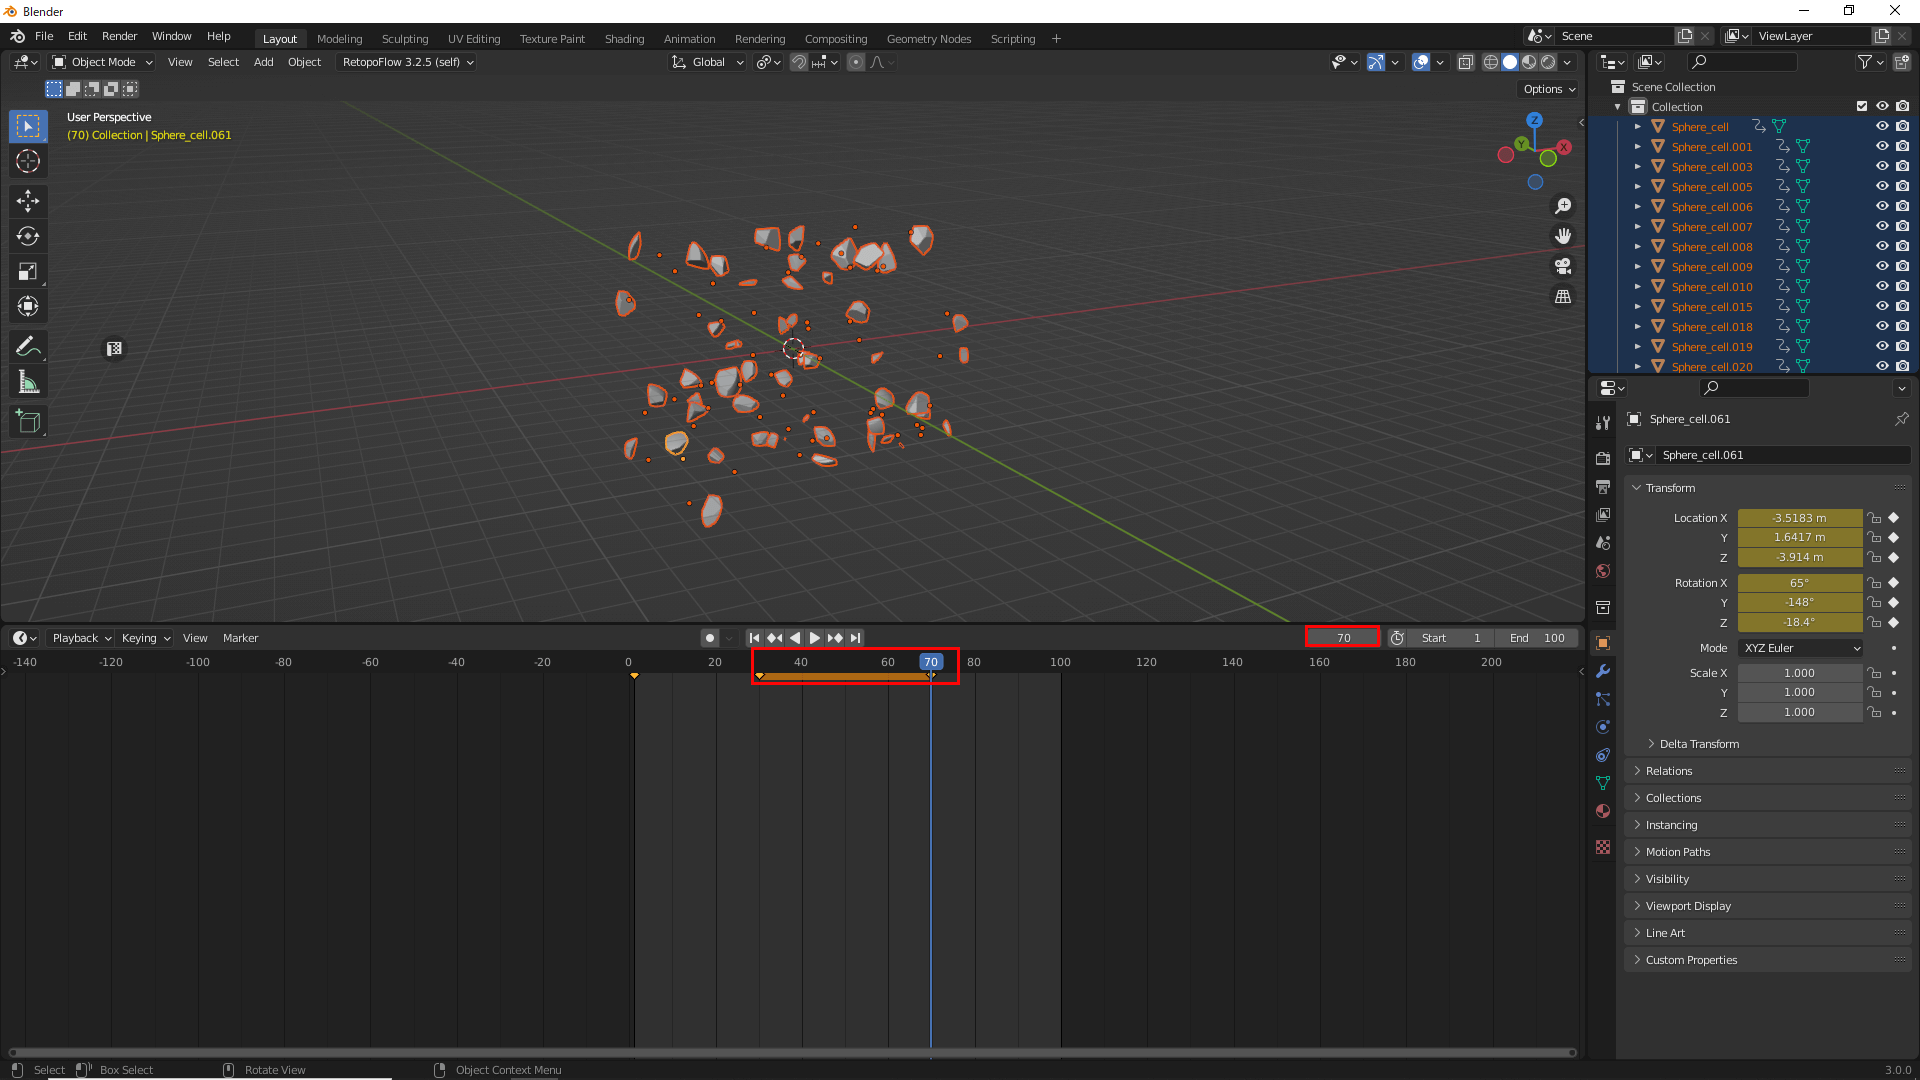
Next, move to frame 100 and, with the object selected, select Location and Rotation from Object→ Clear.
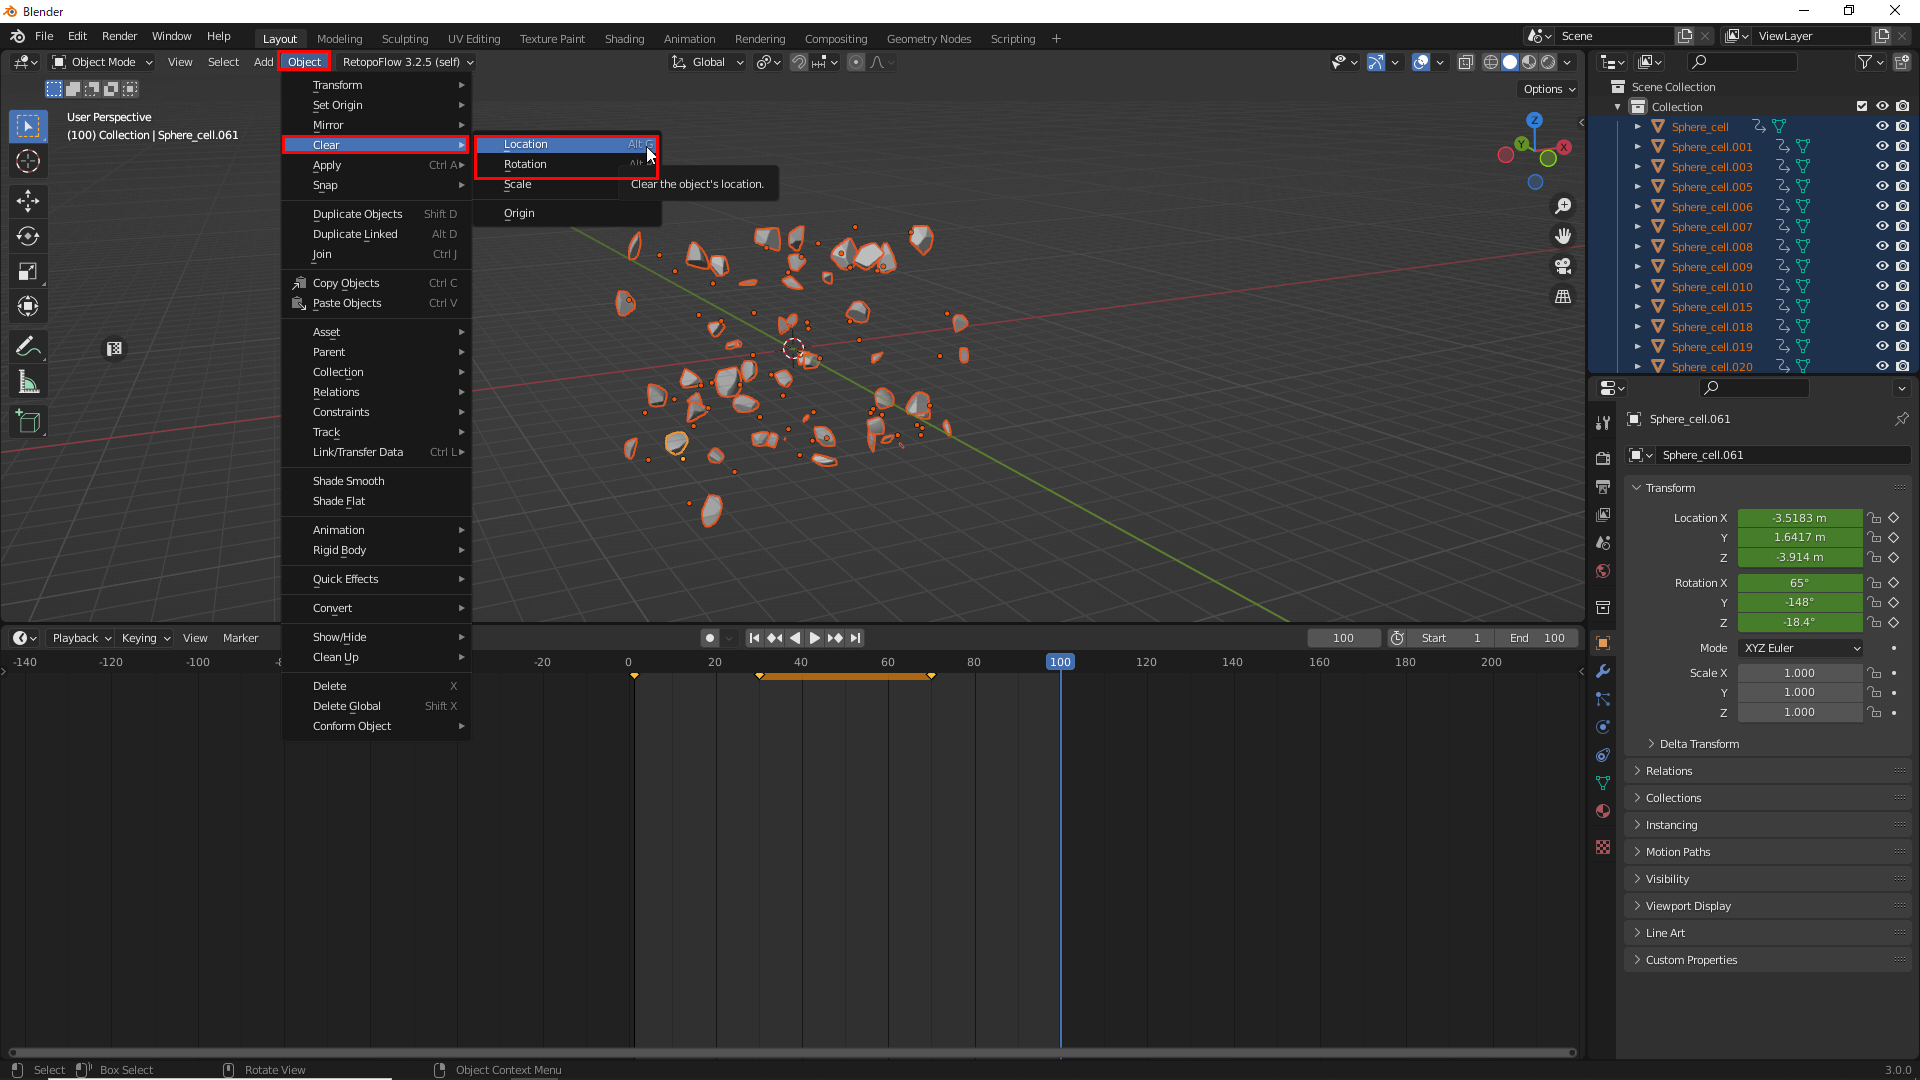
Select Location and Rotation from Object→ Clear
Then, the debris will return to its spherical shape. Press the [I] key to register the Location and Rotation keys.
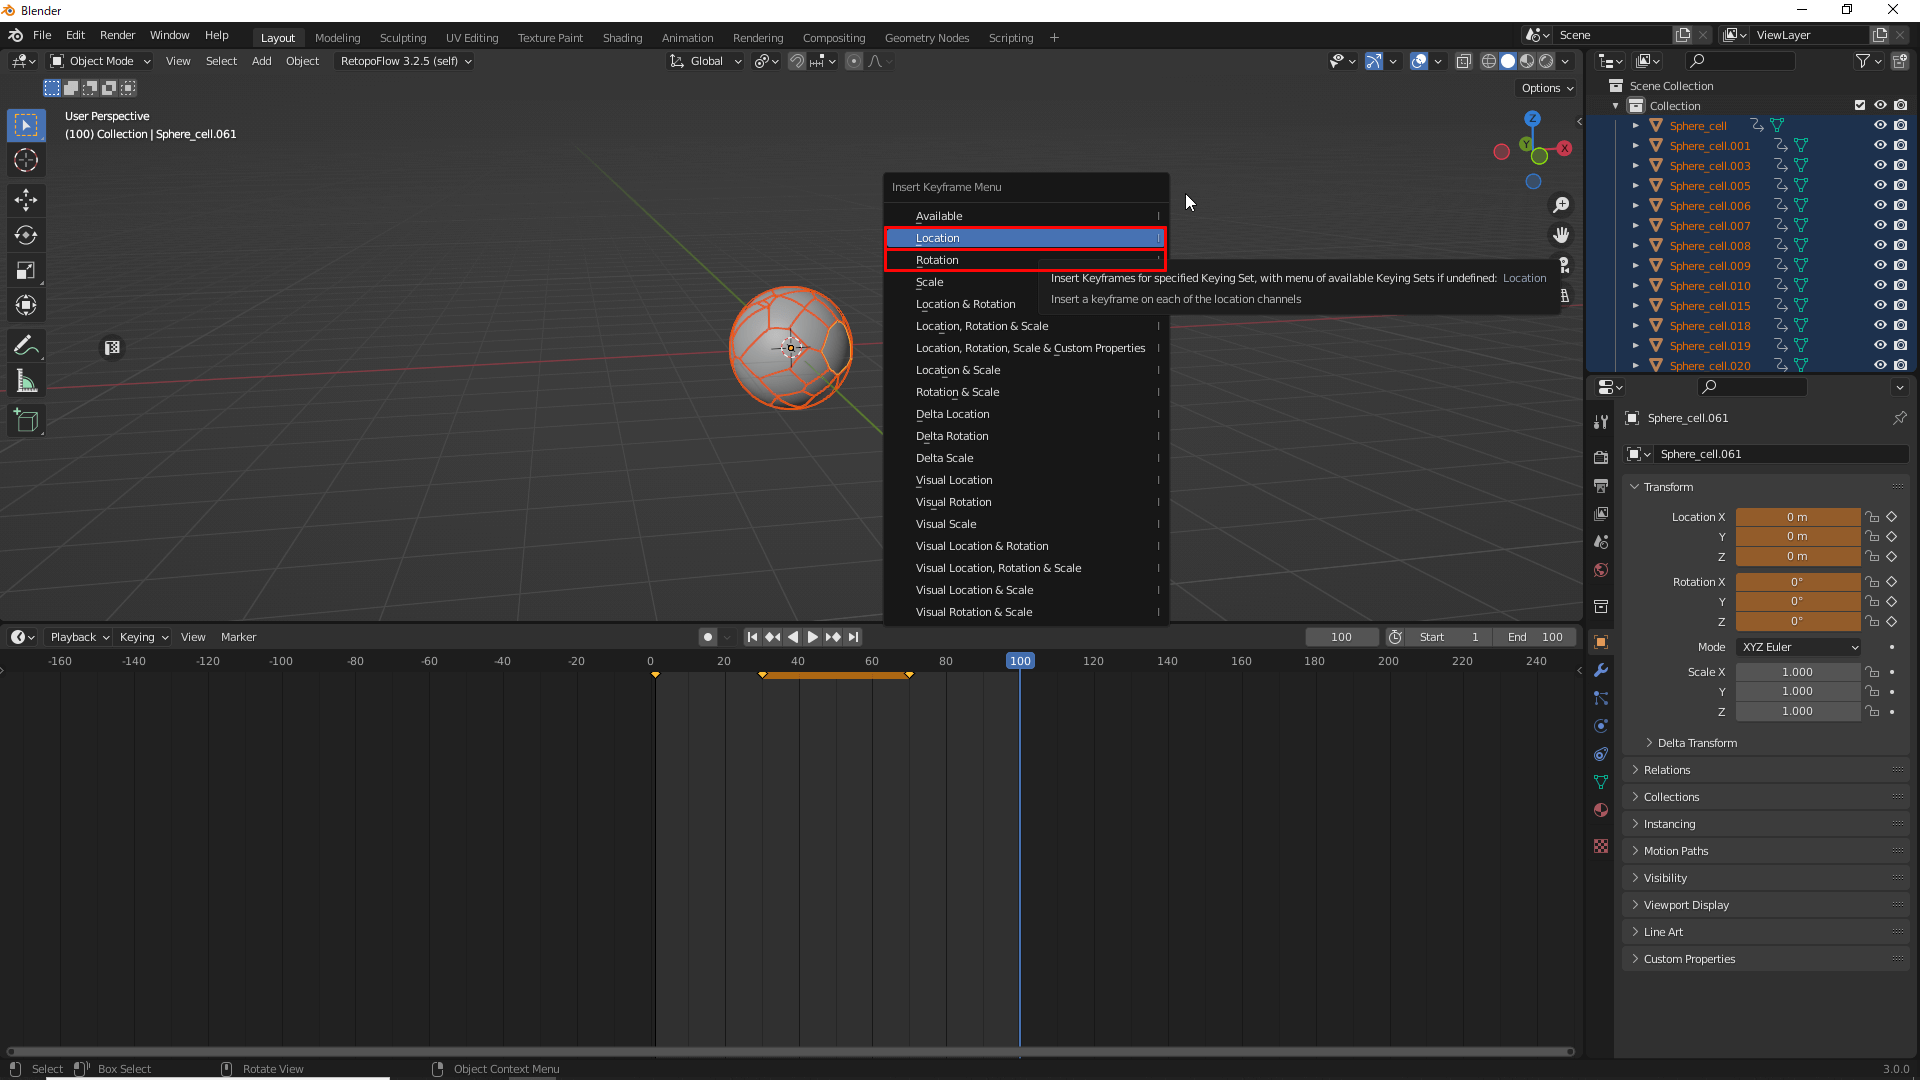
Debris Returning to its Spherical Form
Playback will produce an animation of the sphere collapsing and returning to its spherical form.

You have created an animation!
Next, add the Monkey that emerges from the center of the sphere to the scene.
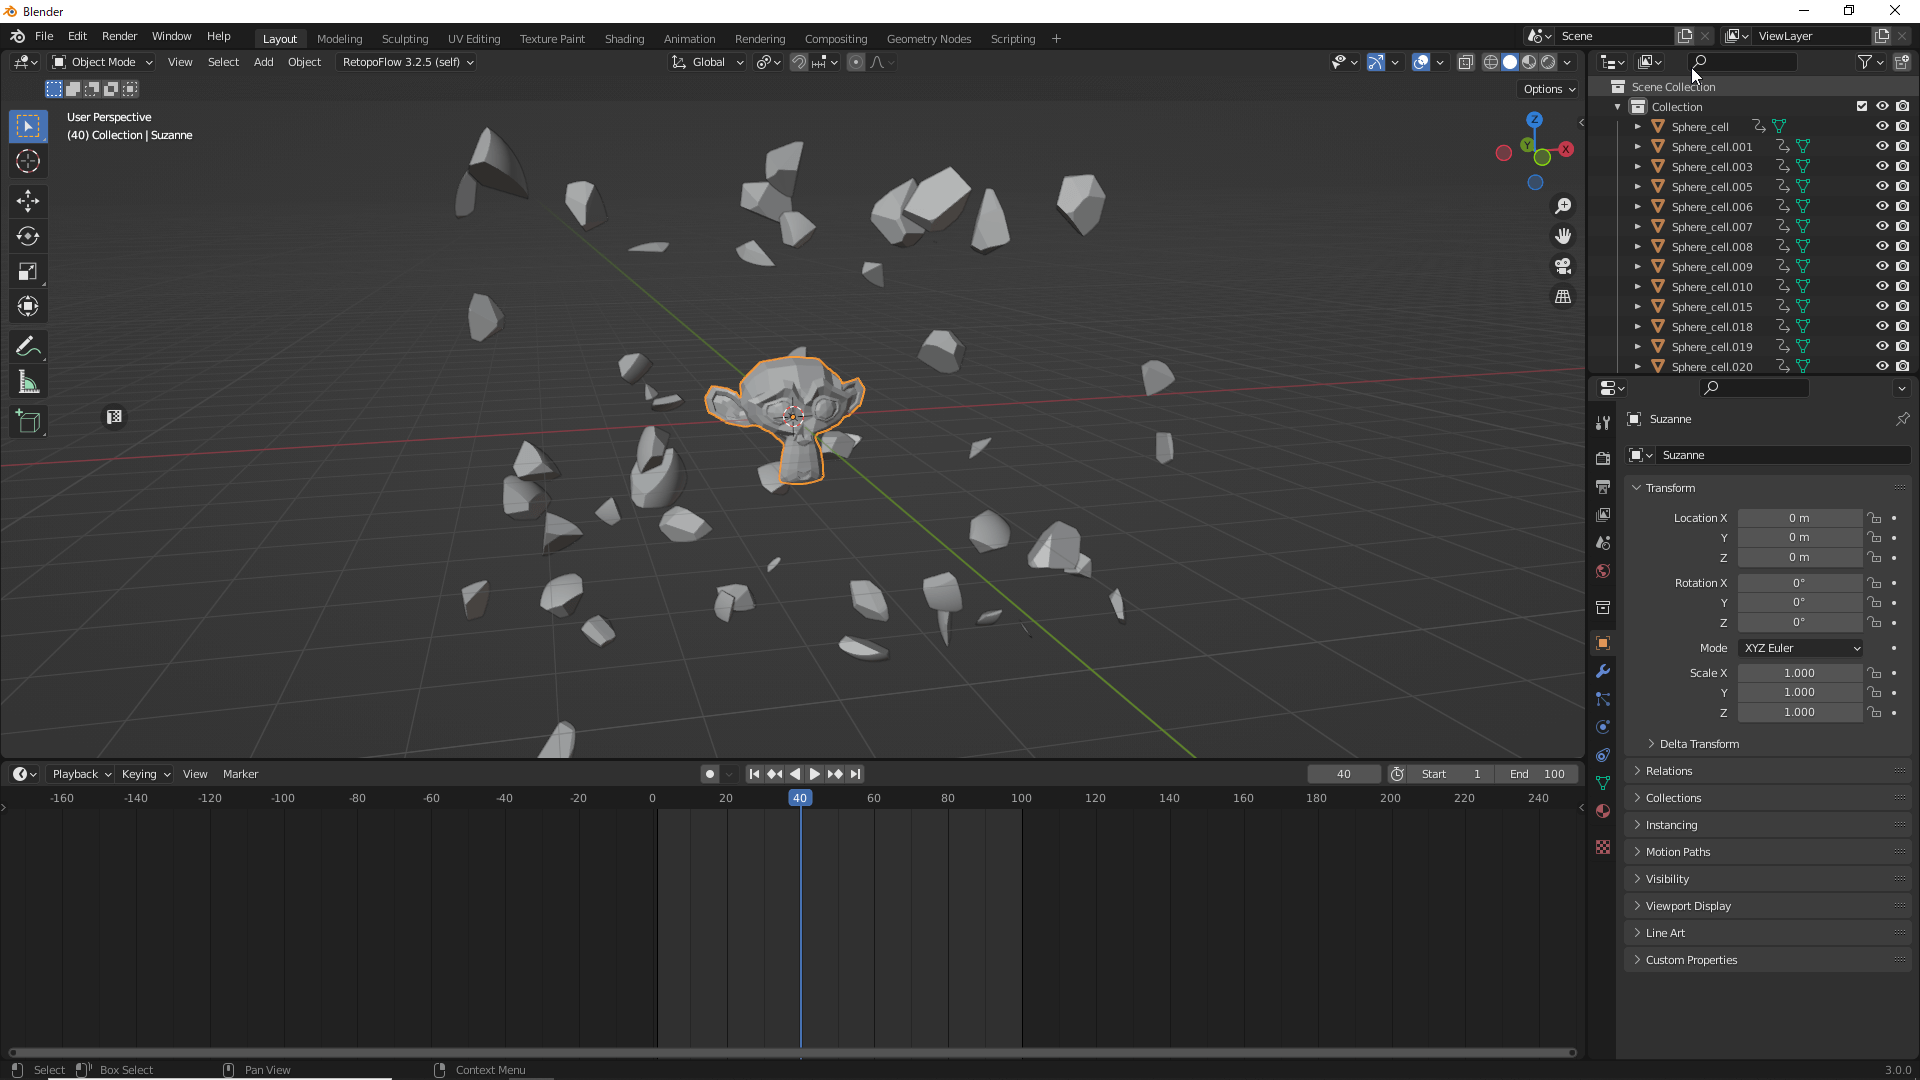
The Size is Set a Little Larger than a Sphere
After adding the Monkey, move to the first frame, set the Monkey’s Scale to “0,” and press the [I] key to register the Scale key.
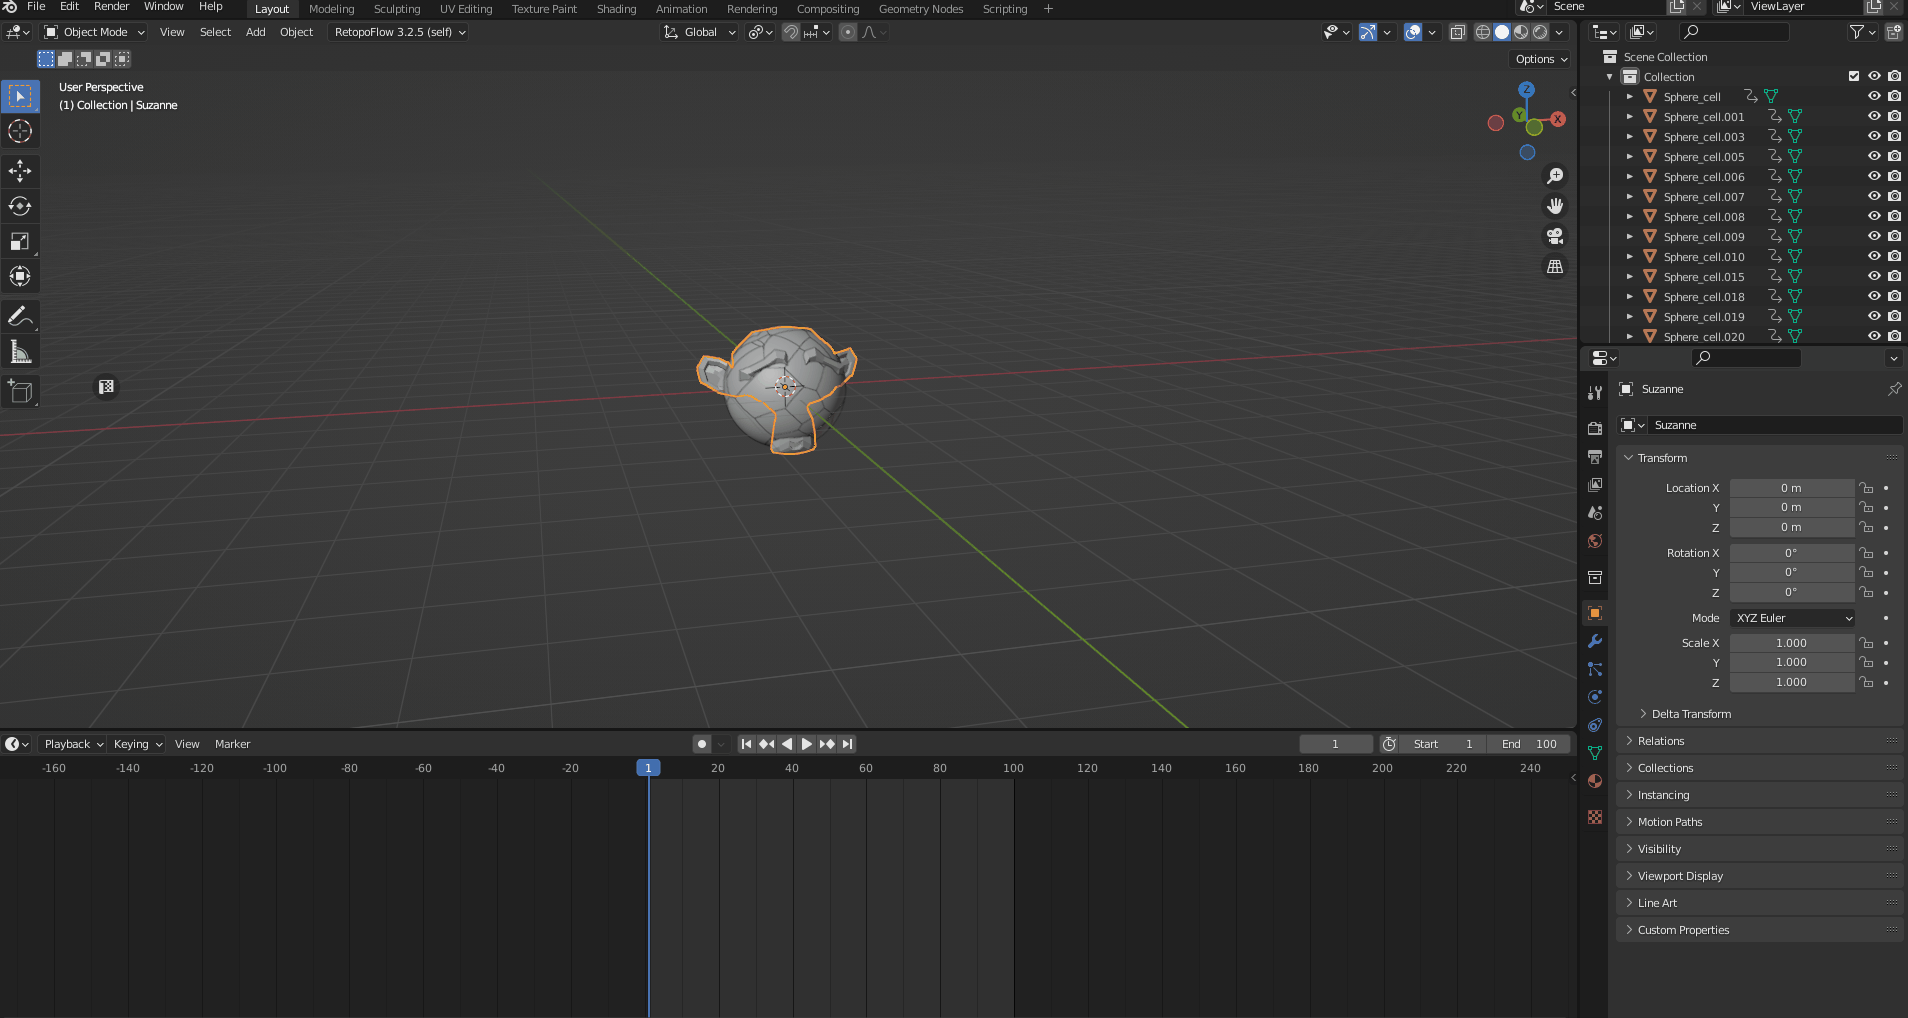
Keyframes can be Inserted with the [I] Key
Next, move to frame 30, reset the Monkey’s scale to “1,” and press the Scale key.
Move to Frame 30
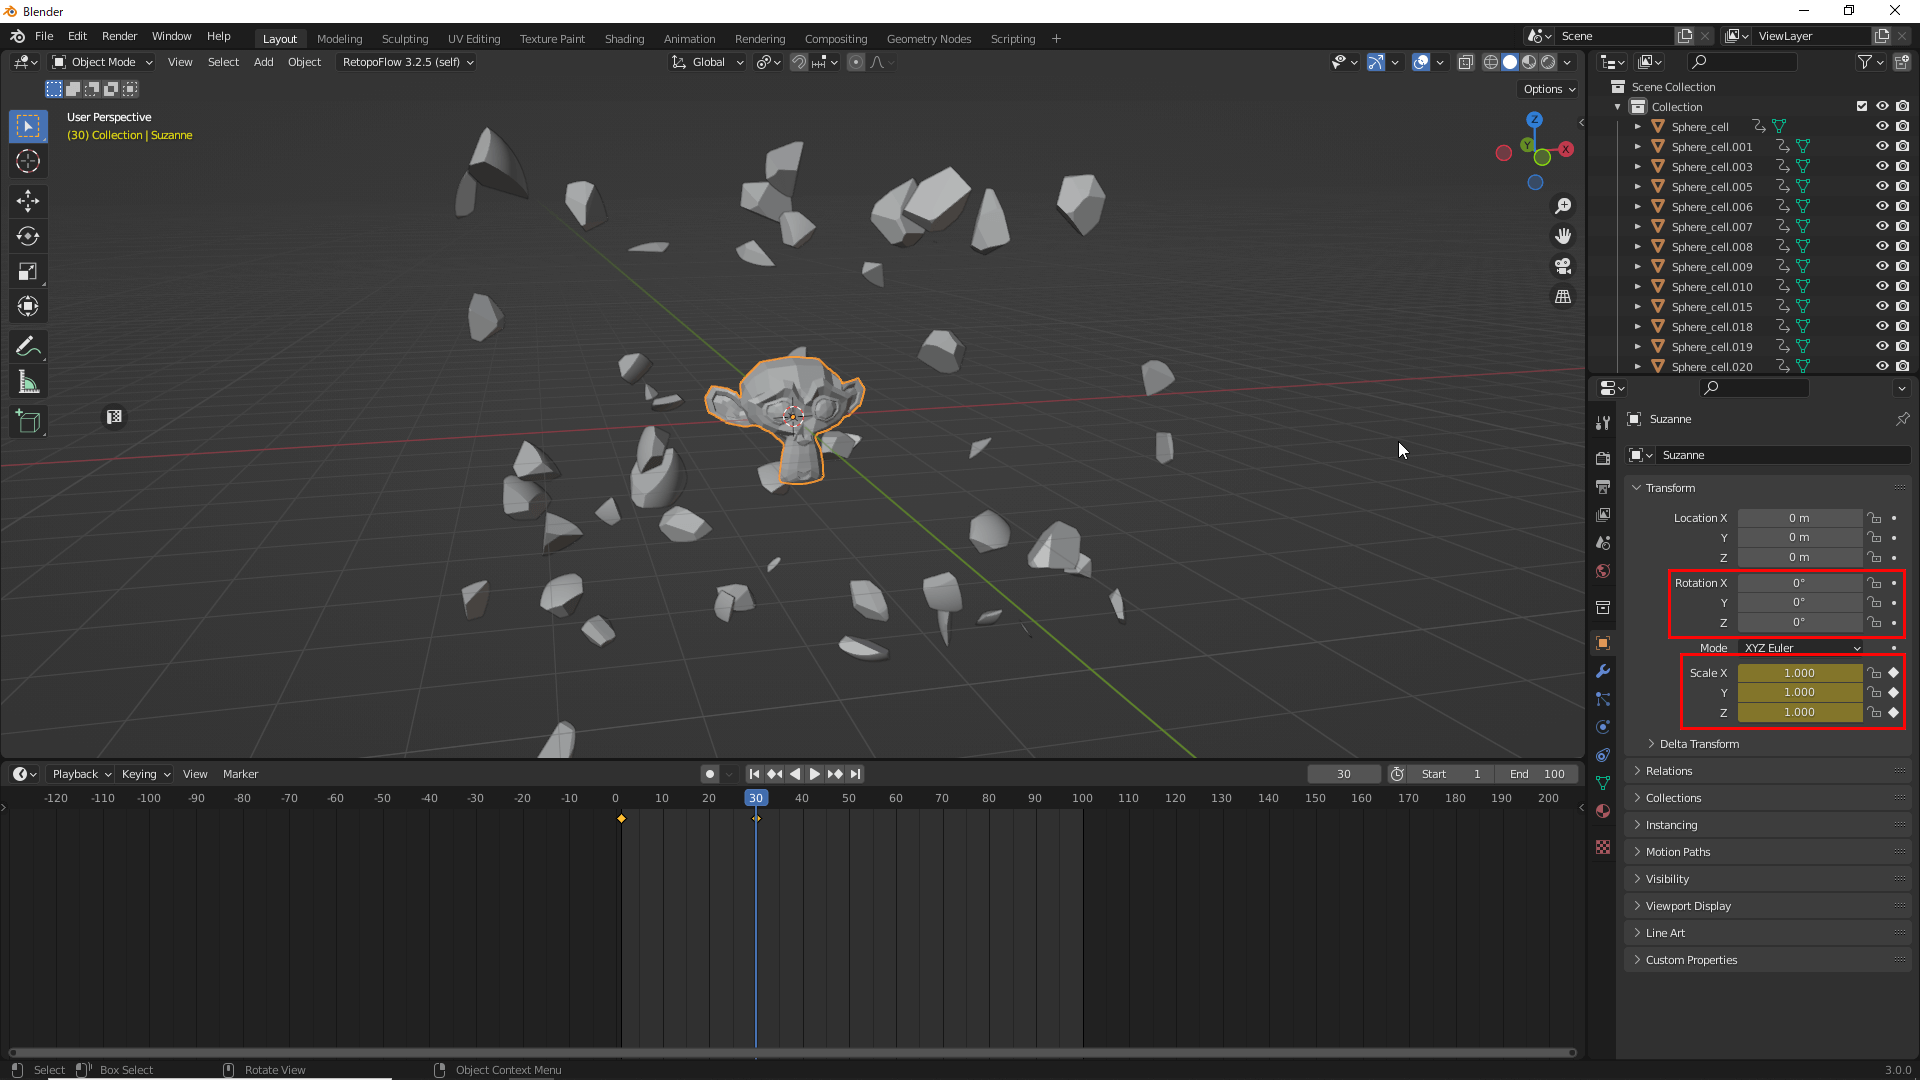
Next, move to frame 70, set the XYZ value of Rotation to “360,” and select Rotation and Scale.
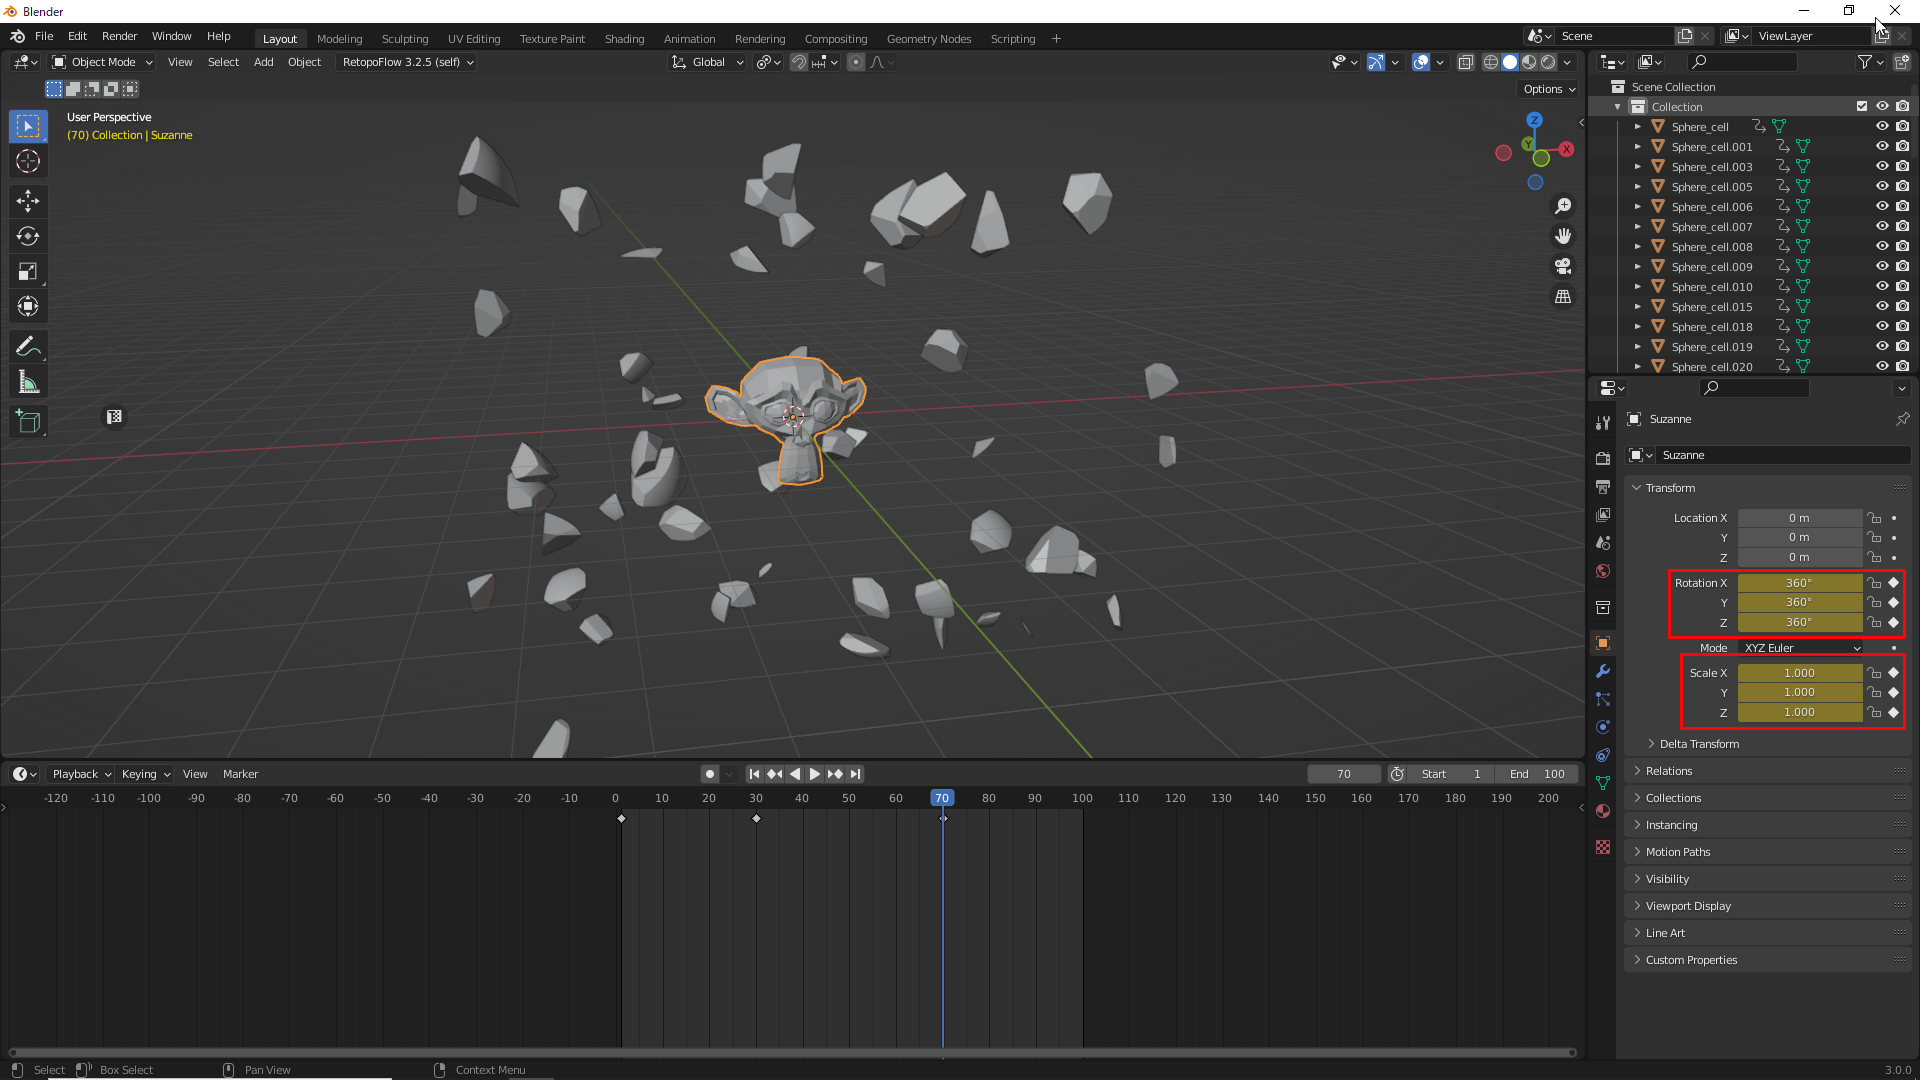
Move to Frame 70
Then, move to frame, change the Rotation and Scale values to “0,” and hit the key.
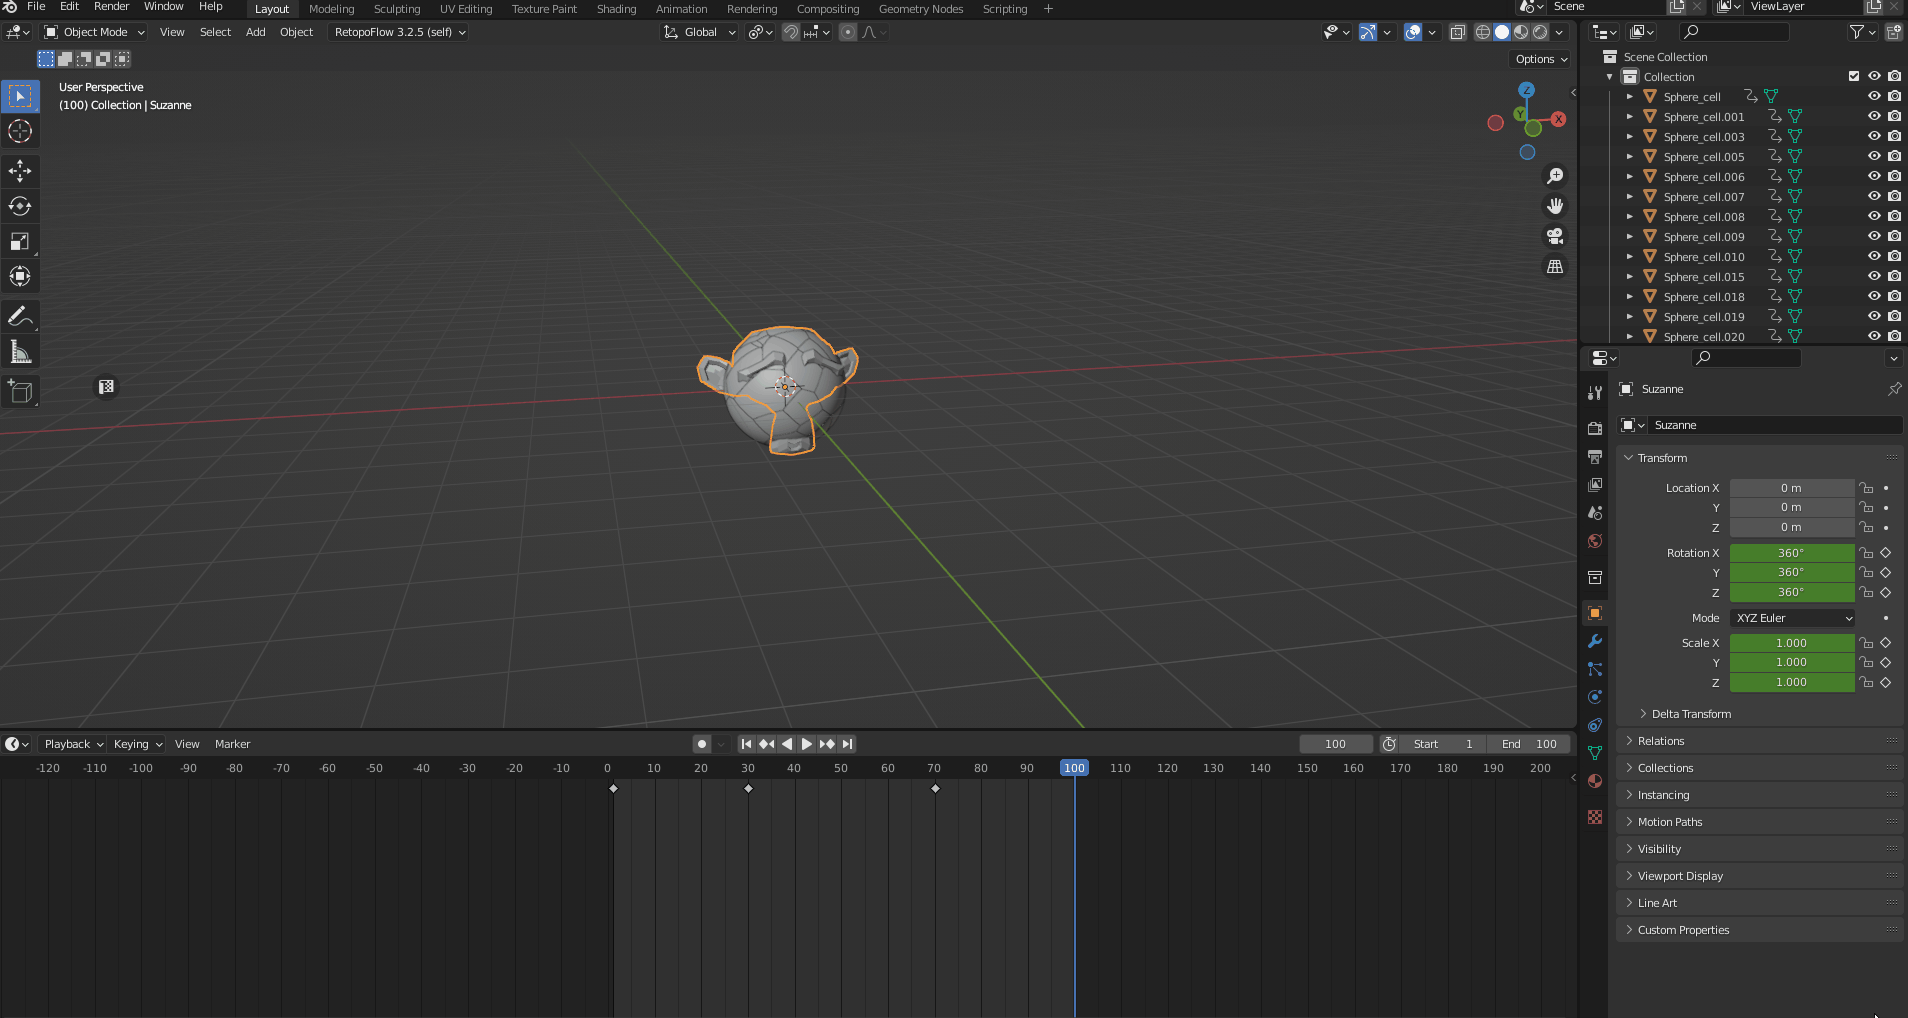
Move to Frame 100
The animation is now complete. Well done! The method for exporting and importing into Unity and STYLY is the same as described above.

Animation Playing Correctly
How To Upload to Styly
How to create an account:

How to upload to STYLY:

How to upload from Unity to STYLY:

Uploading to STYLY is now complete.

You can see it working correctly on STYLY
If you have any questions about STYLY, bug reports, or requests for improvements, please contact the STYLY FORUM.