In this article, I will describe a method to combine Unity’s ragdoll system with STYLY’s Interaction SDK to develop a system for killing enemies using weapons.
You can use humanoid characters/avatars from Unity or similar sources, or you could easily implement them using free assets.
Even beginners can create a simple action or battle game! Let’s take a look at the game-making reference.
We will use the Interaction SDK provided by STYLY. You may want to read through the following manual beforehand for a more detailed explanation.

Sample Scene
Here is a sample scene that describes defeating an enemy using the Interaction SDK with the ragdoll.
Preparing the character
Let’s prepare a character for use in Unity. This time, we will use Mixamo, a 3D character and animation creation tool provided by Adobe.
mixamo : https://www.mixamo.com/#/
If you are new to Mixamo, please refer to this article.
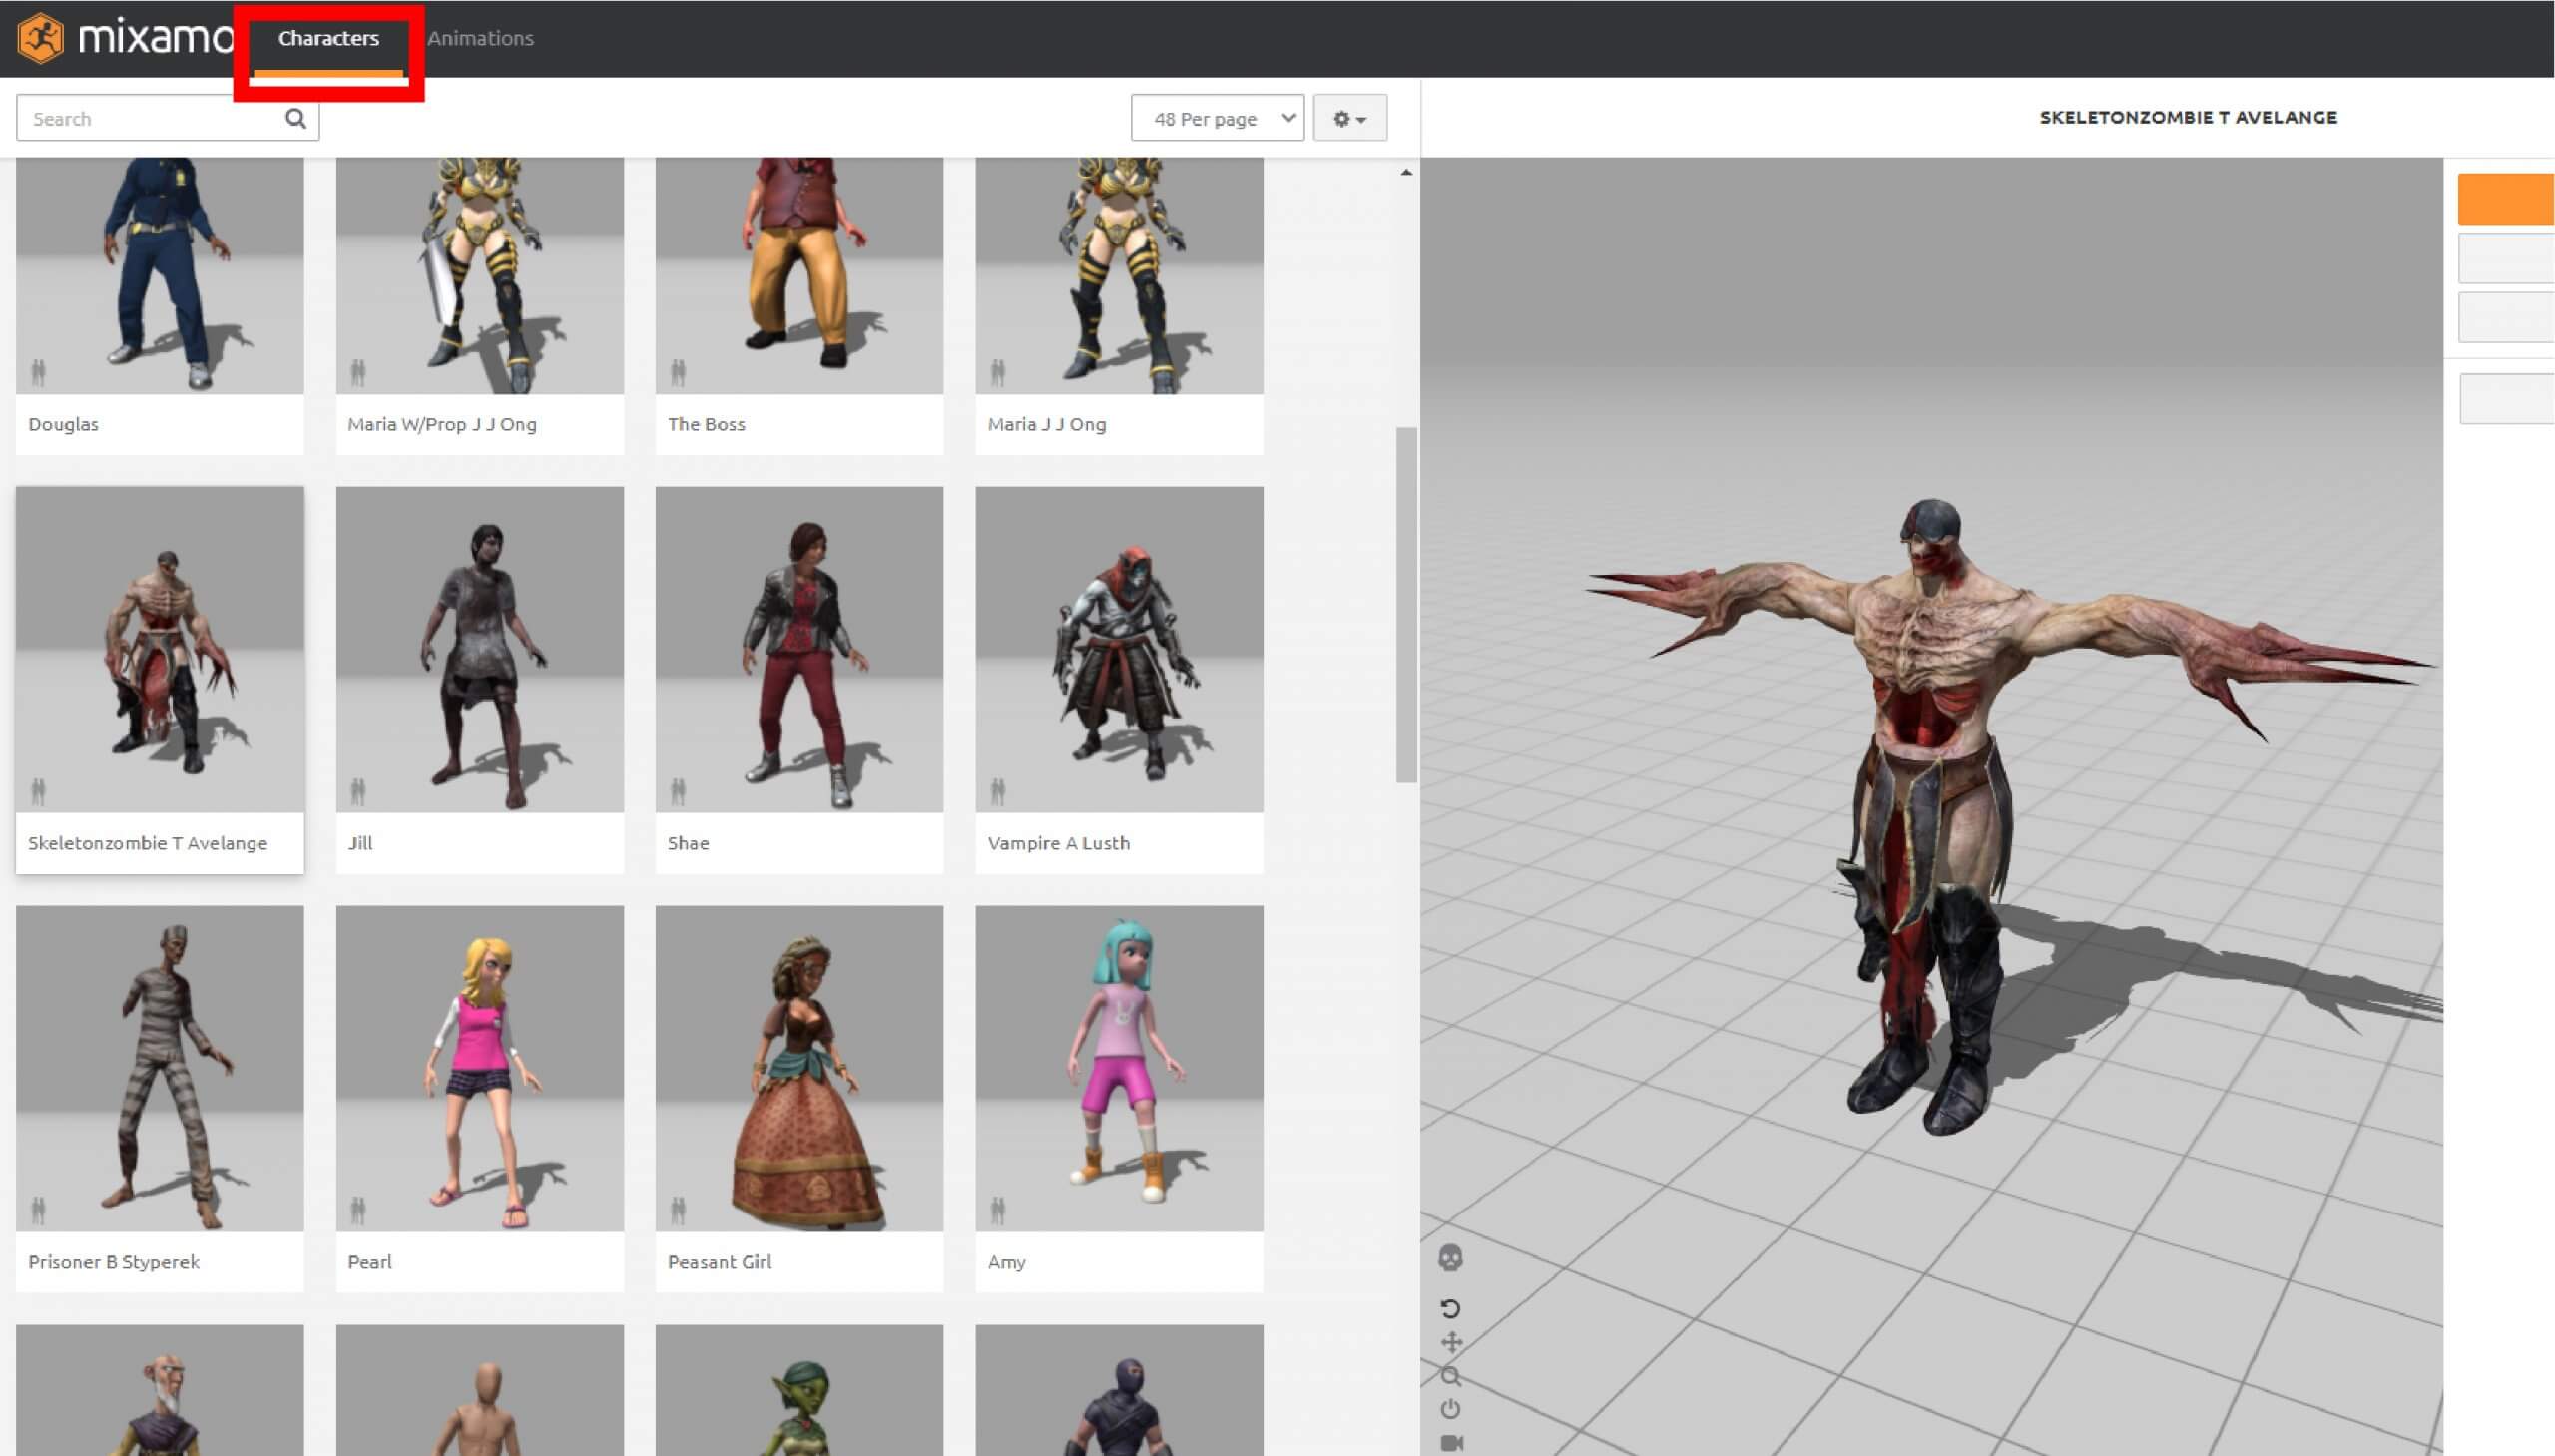
Mixamo
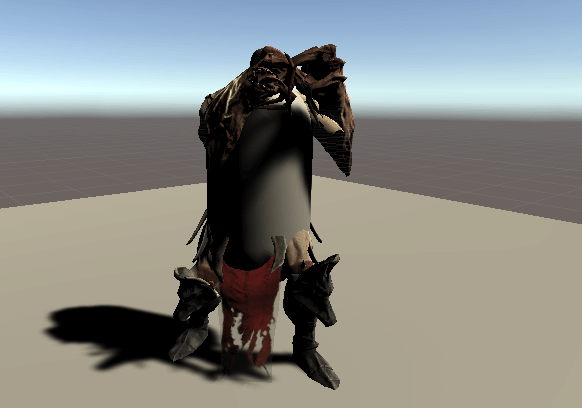
I created a character and a simple animation in Mixamo. In this case, I chose this strong-looking enemy character.
I added an animation to this enemy character. You can choose from a range of animations; this time, I chose [Taunt].

Animation
Let’s download the animation in the FBX format and import it into your Unity project.
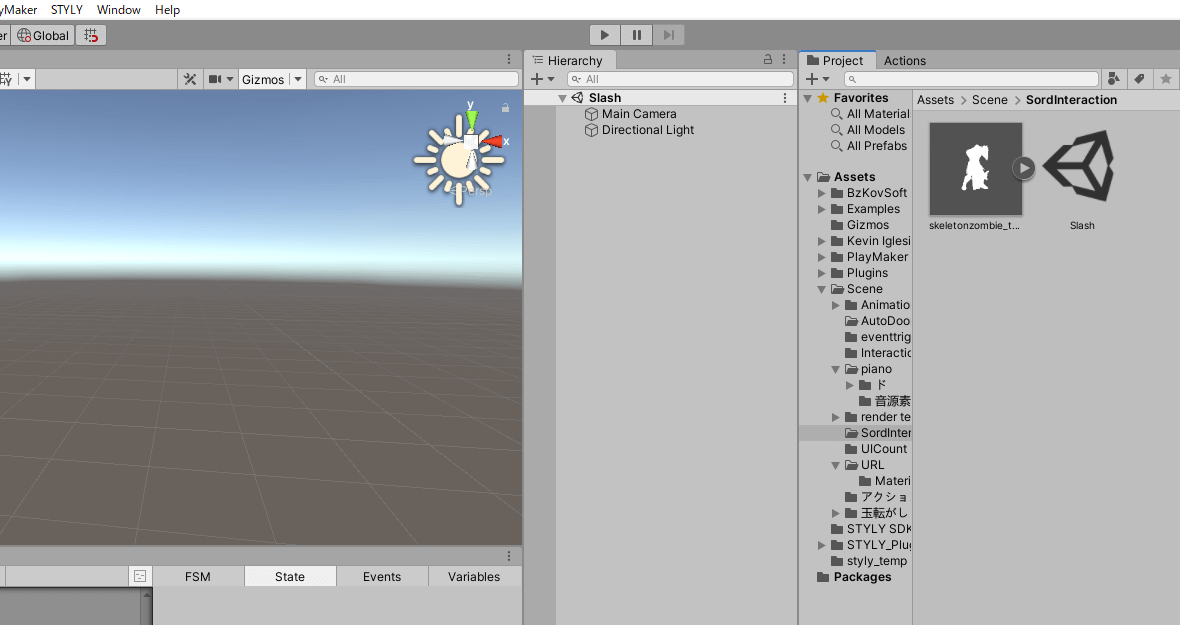
Import
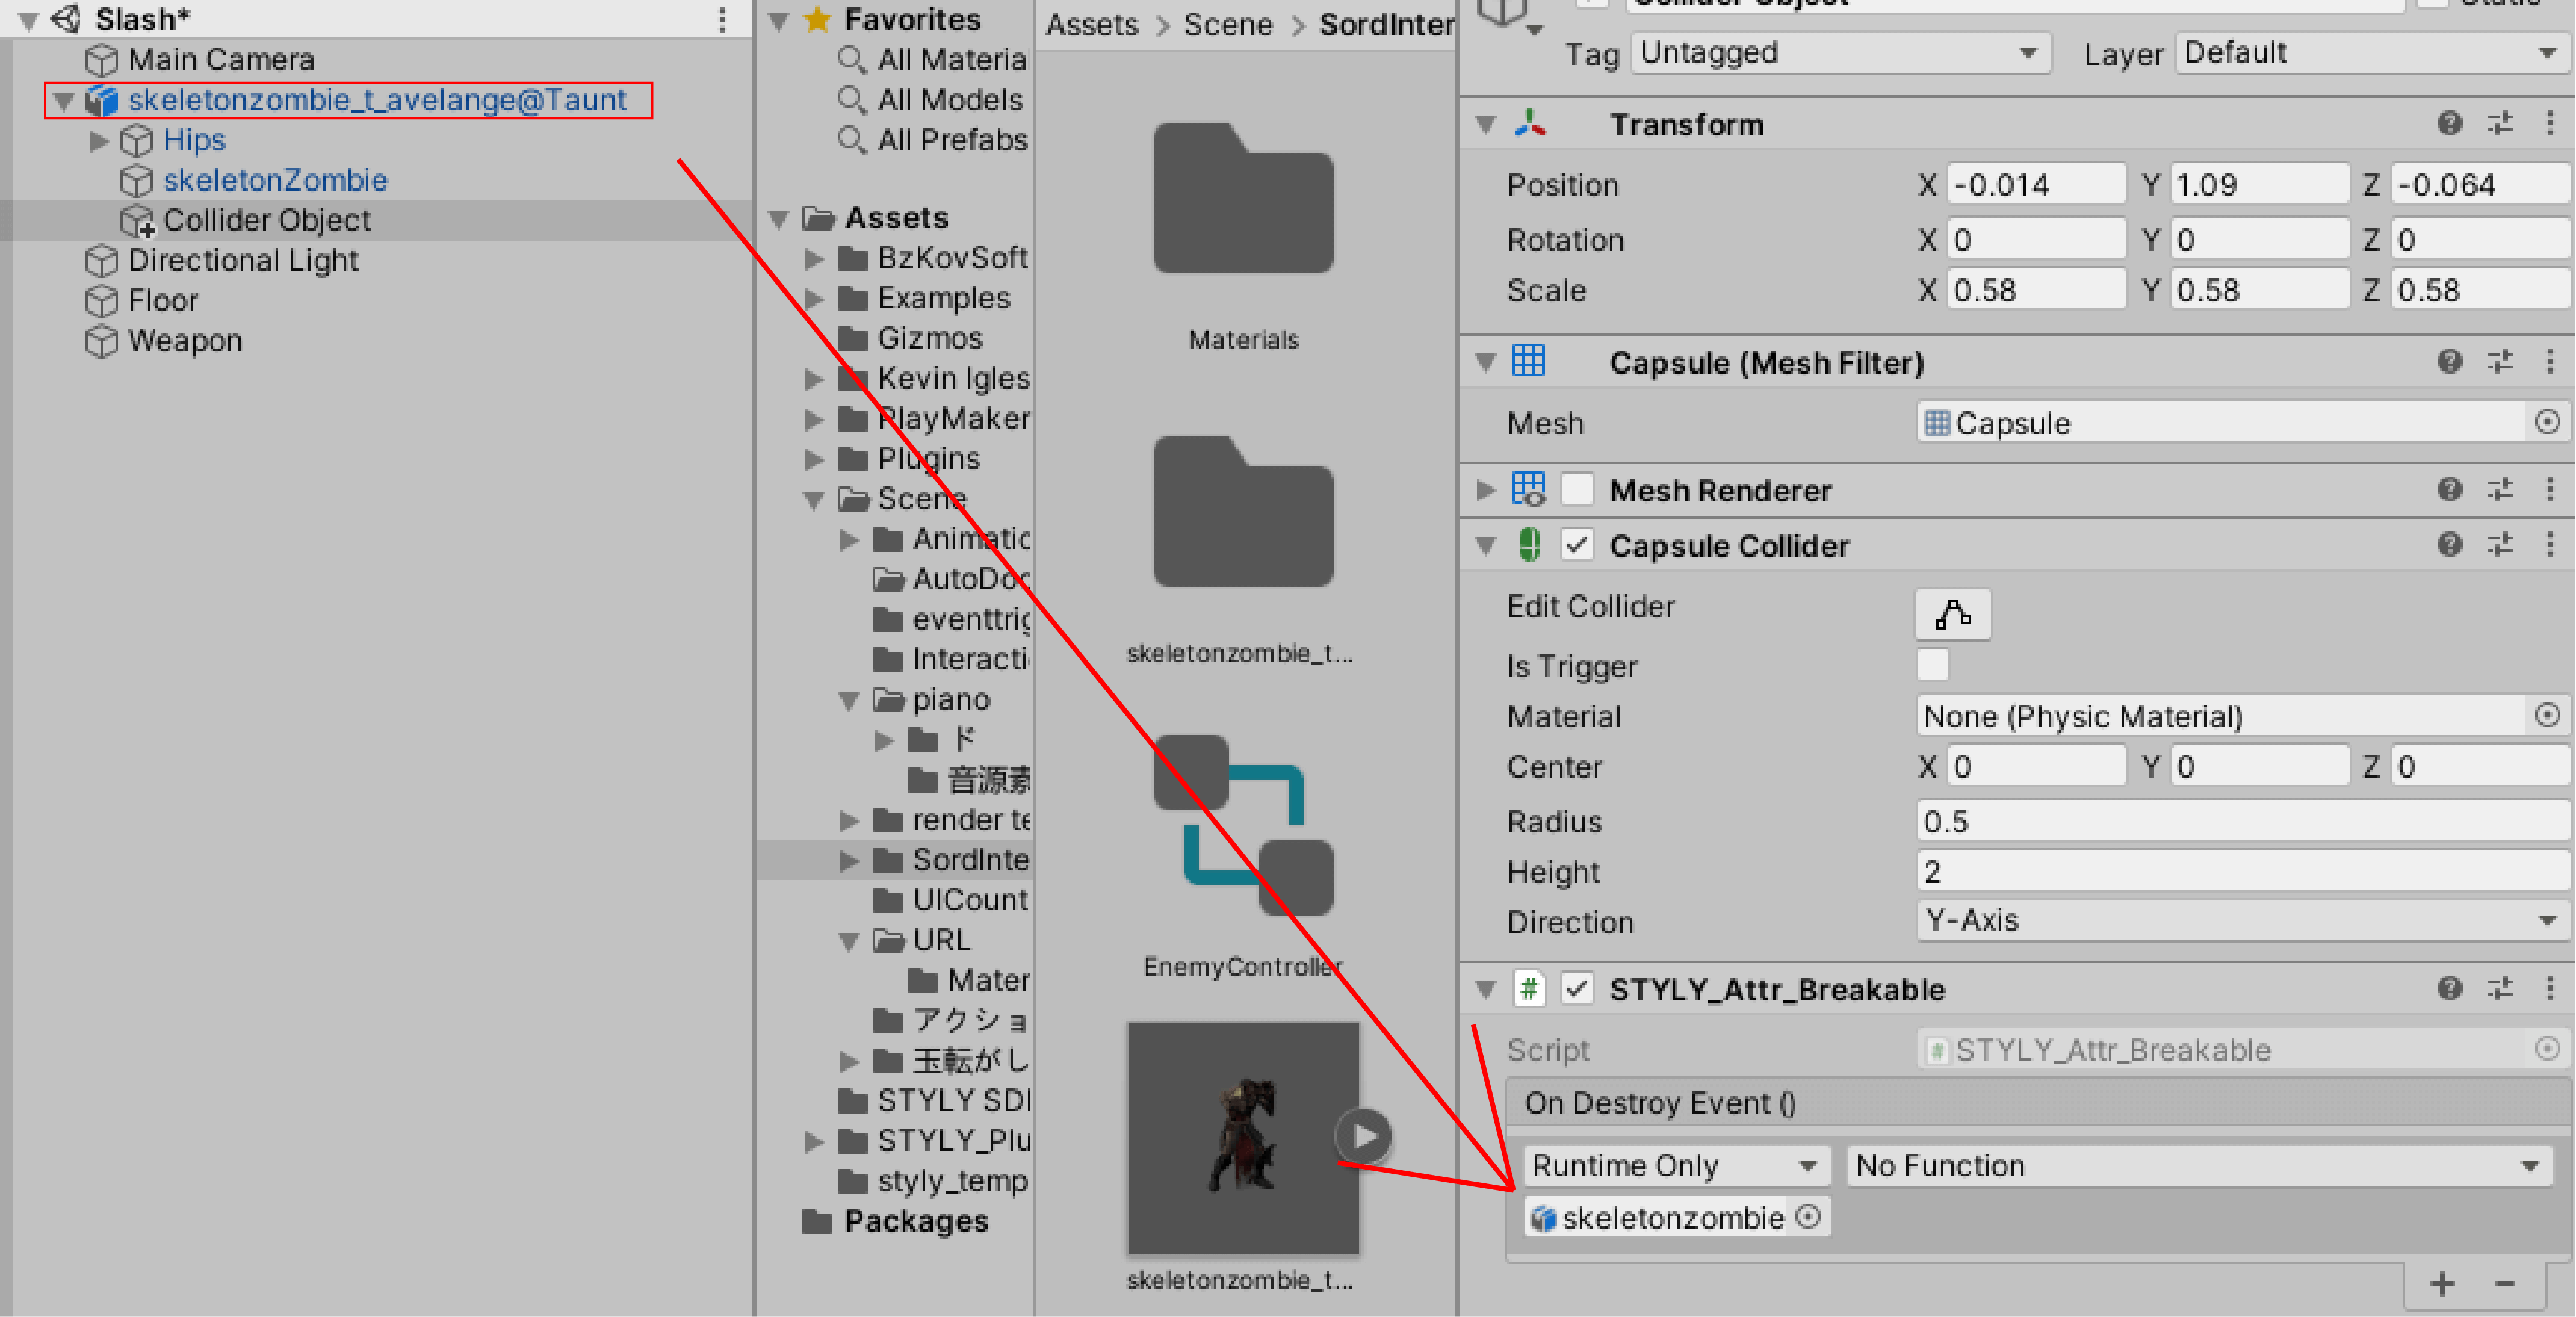
The character assets are FBX data, the character’s name is “Skeletonzombie T Avelange,” and the animation is “Taunt”.
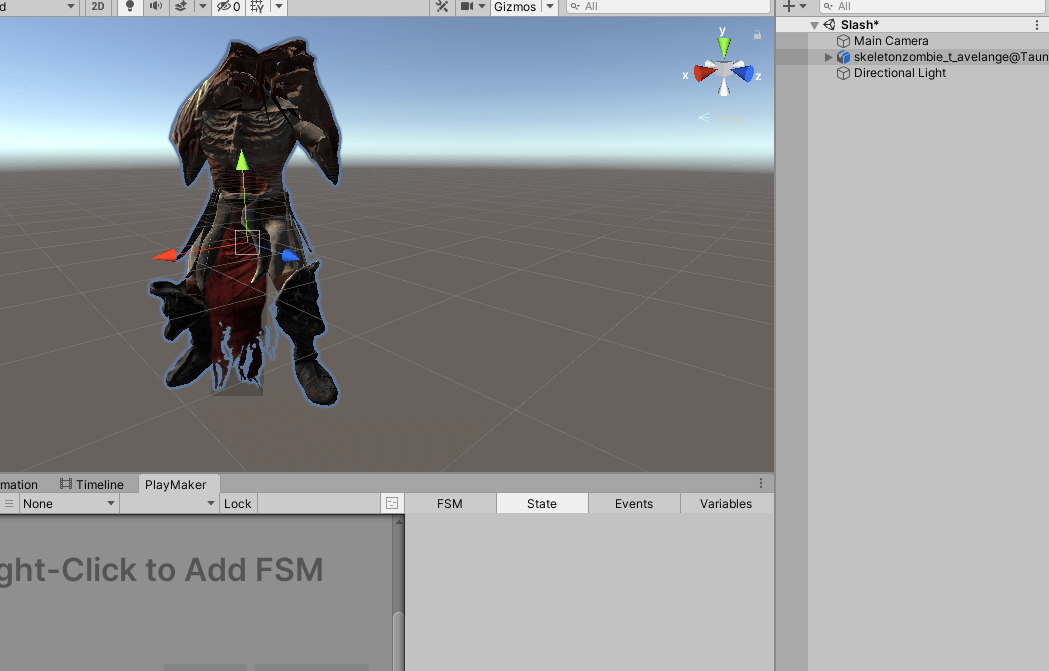
Once the import is complete, adjust the materials and the rig.
With the character’s data selected, select the Materials tab in the Inspector window.
Select the Location item from Use Embedded Materials to Use External Materials (Legacy).
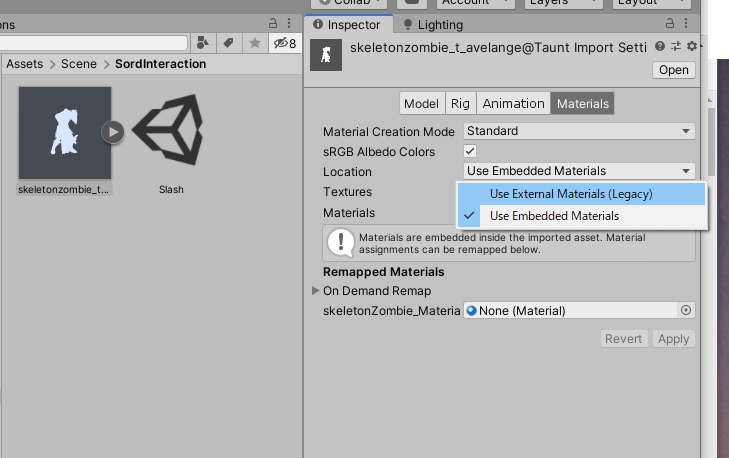
Select Legacy.
The appropriate material will now be attached.
Material
Next, let’s adjust the rig. Select the Rig tab in the Inspector window. Under Avatar Type, select Generic as Humanoid.
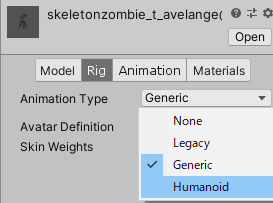
Humanoid
We are now ready to change to the Humanoid type.
Next, let’s prepare the animation. Right-click on the Assets folder in the Project window and select Create > Animator Controller.

Animator Controller
Let’s name it EnemyAnimator.
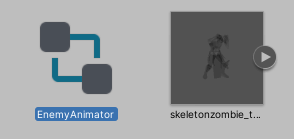
EnemyAnimator
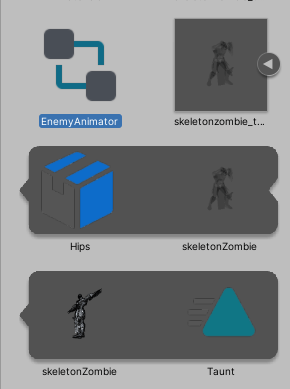
Select the FBX file “skeletonzombie_t_avelange@Taunt” to display the animation file.
Animation
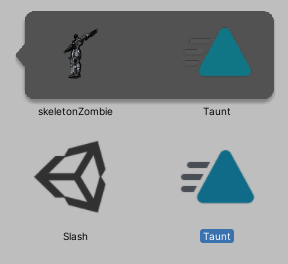
Select the Taunt animation file and copy and paste (or press [CTRL+D]) to duplicate it.
Duplicate
Select the duplicated Taunt animation file and check the “Loop Time” box in the Inspector window.
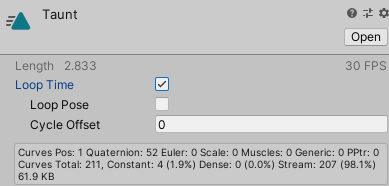
Loop Time
Double-click on the EnemyAnimator to display the Animator window.
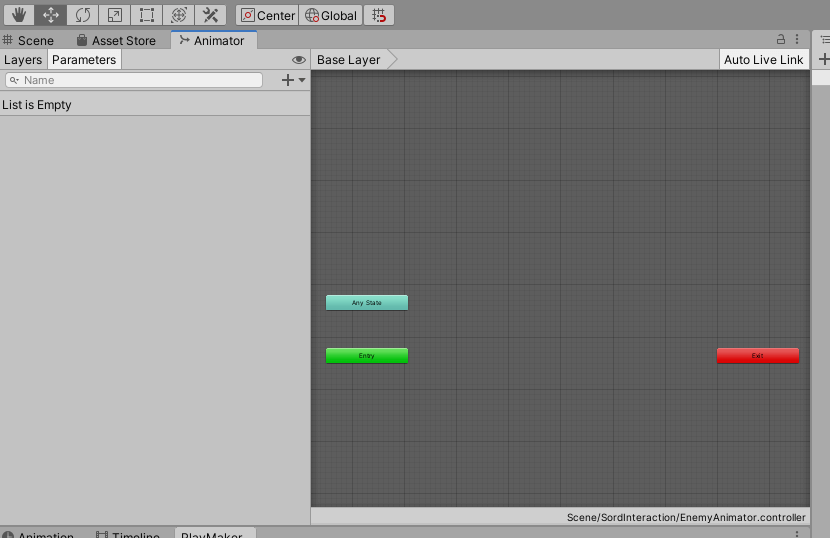
Animator Window
Animation
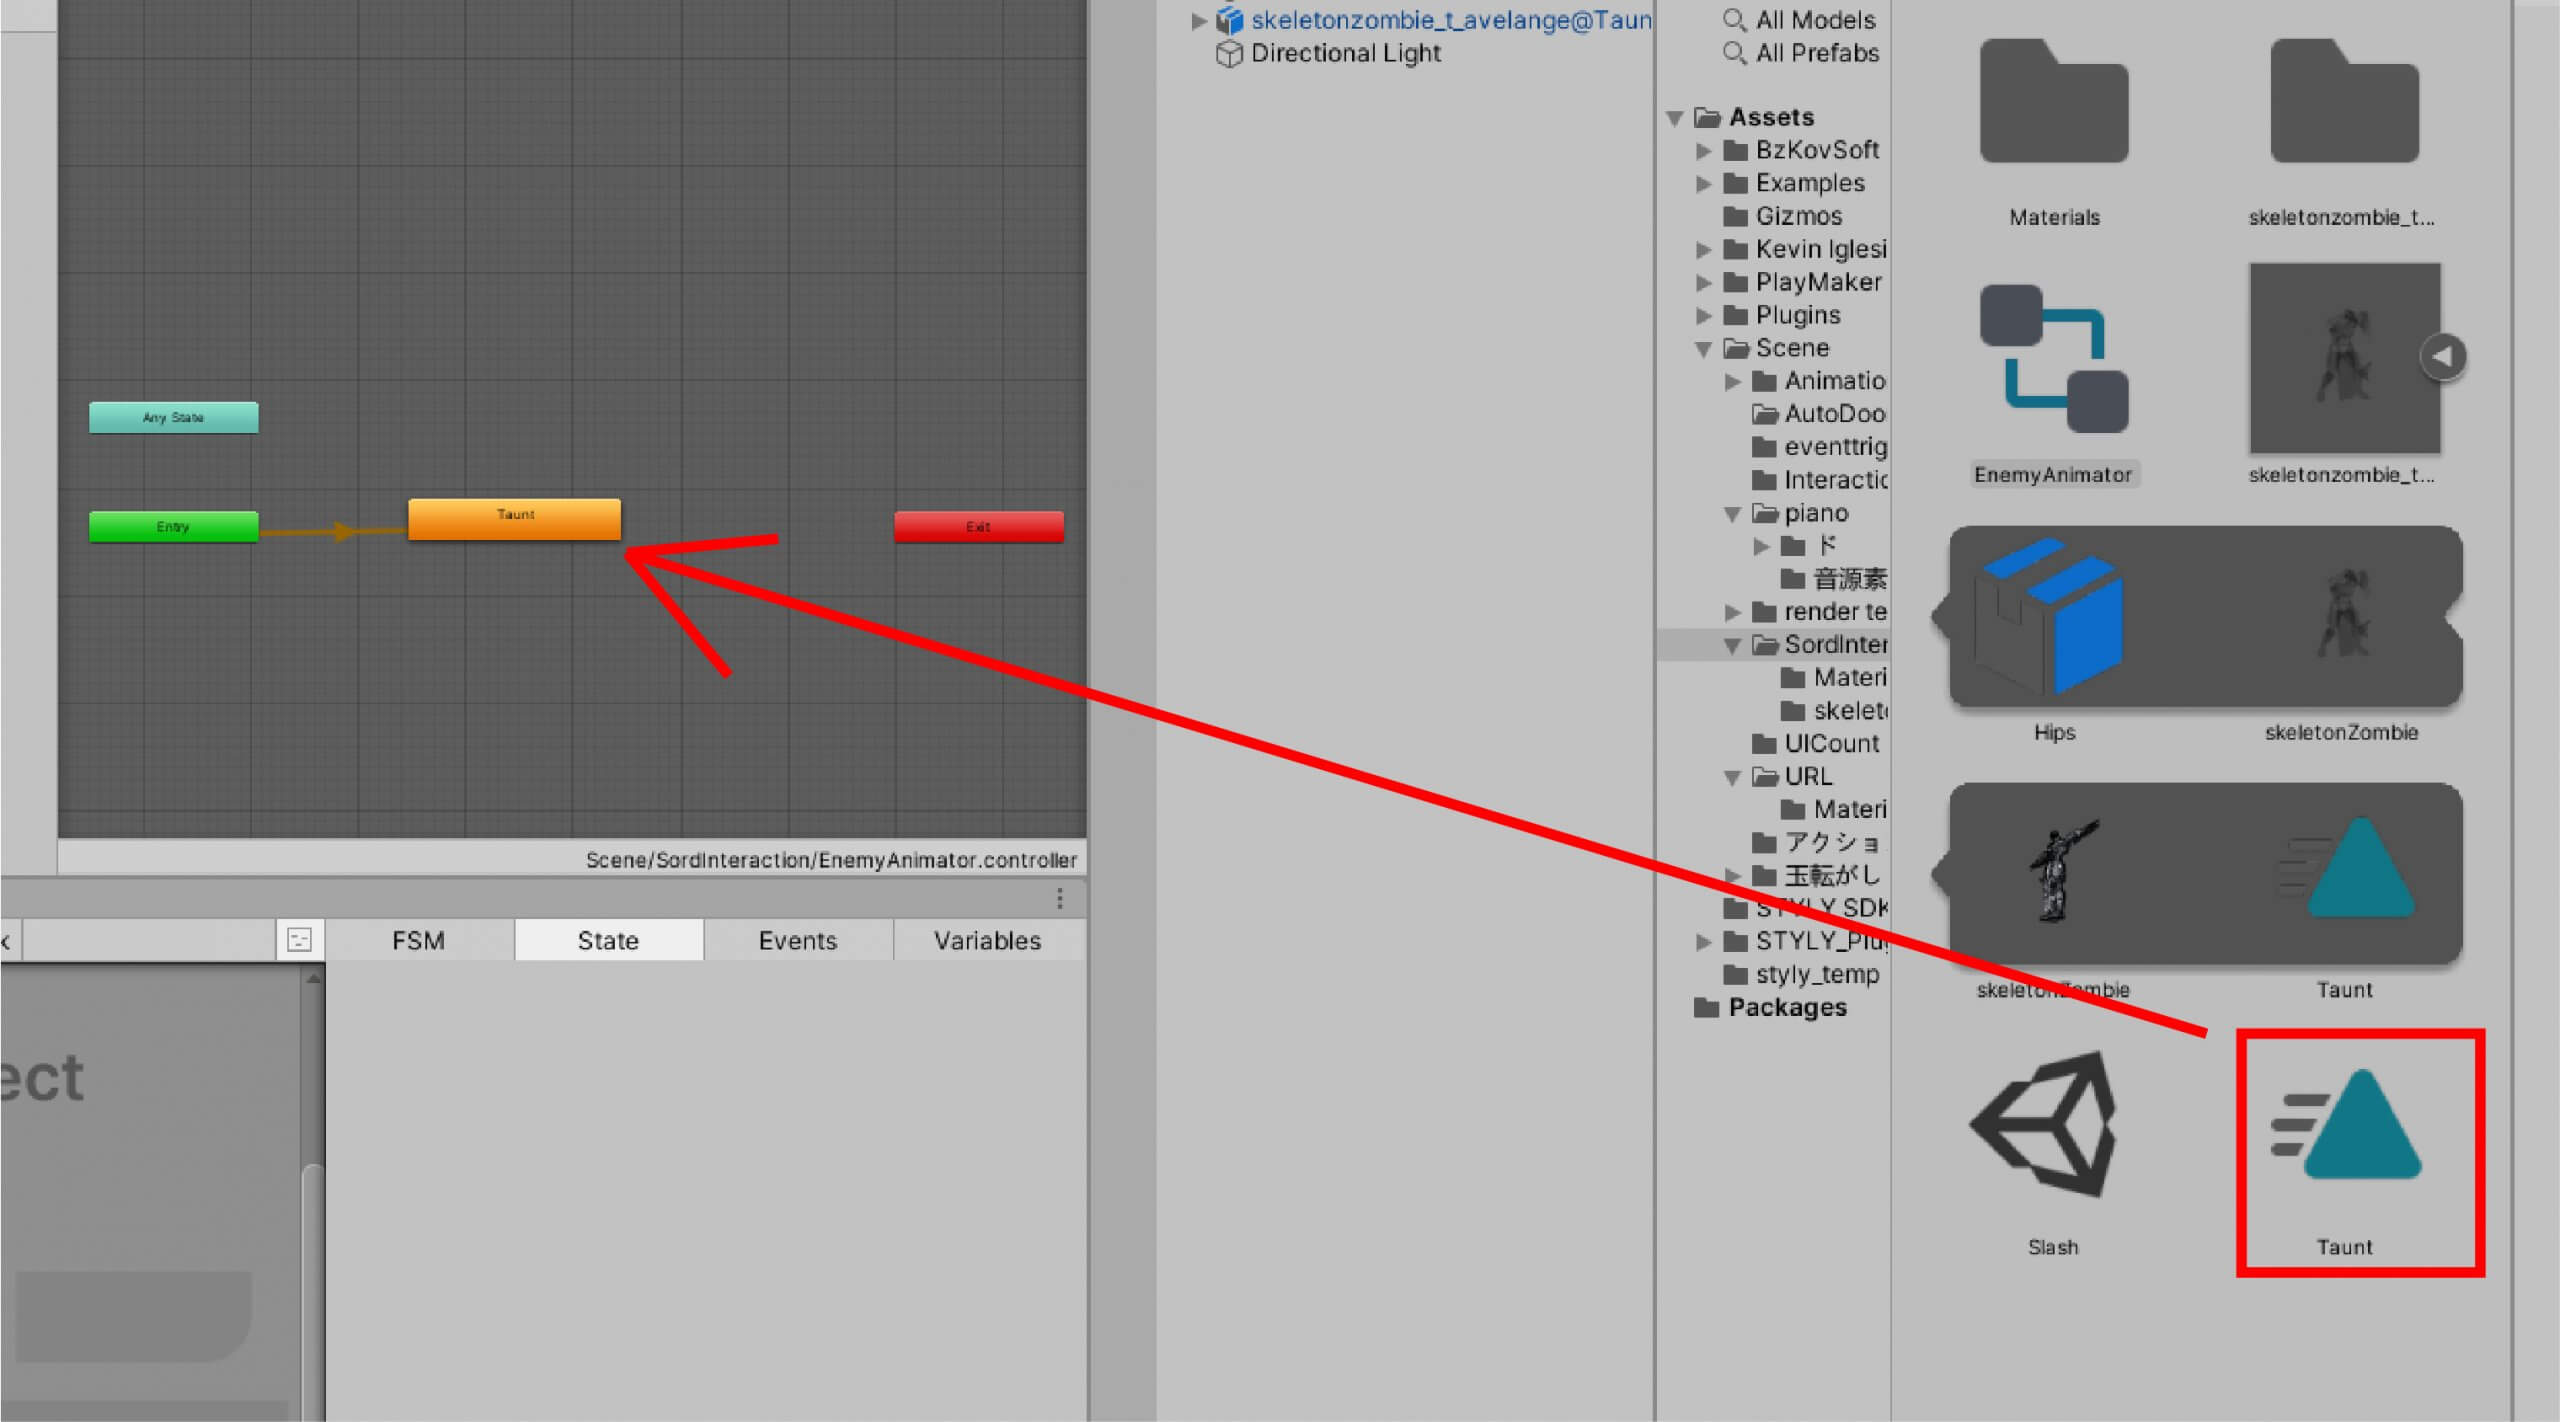
Drag and drop Taunt’s animation file into the Animator window.
Drag and drop the animator file into the “skeletonzombie_t_avelange@Taunt” object in the Hierarchy window.
An animator component will be added to the Inspector window as shown below.
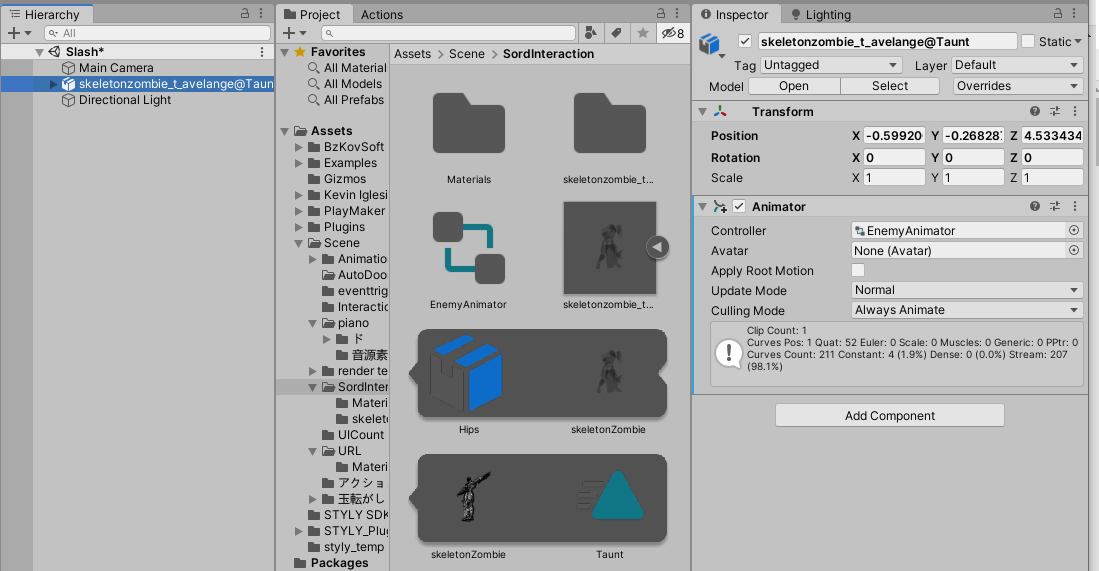
Animator Component

Animation
Let’s play it once in this state. The animation will play and loop. The character is now ready to be played.
Preparing the Ragdoll
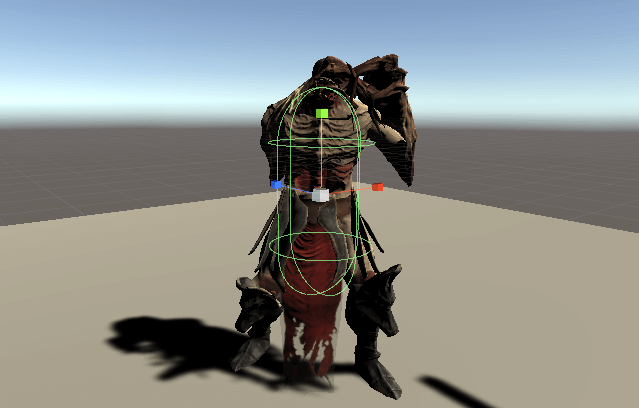
We now prepare a “Ragdoll” to represent the behavior of a character that has fallen down, just like a person when he or she topples.
A Ragdoll is a way to express behavior using physics operations such as colliders.
To set up the Ragdoll, we will use the Ragdoll Helper from the Unity Assets Store. Ragdoll Helper is a handy asset that converts humanoid avatars into a Ragdoll. Download it from the Assets Store and import it into your project.
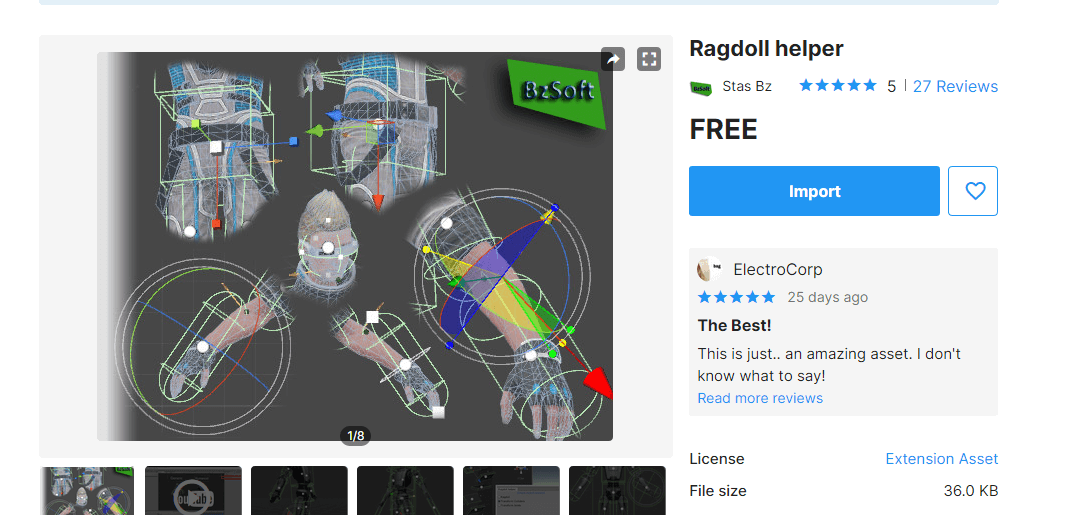
Ragdoll helper
When the import is complete, you will see “Window > BzSoft > Ragdoll Helper” in the top menu bar.
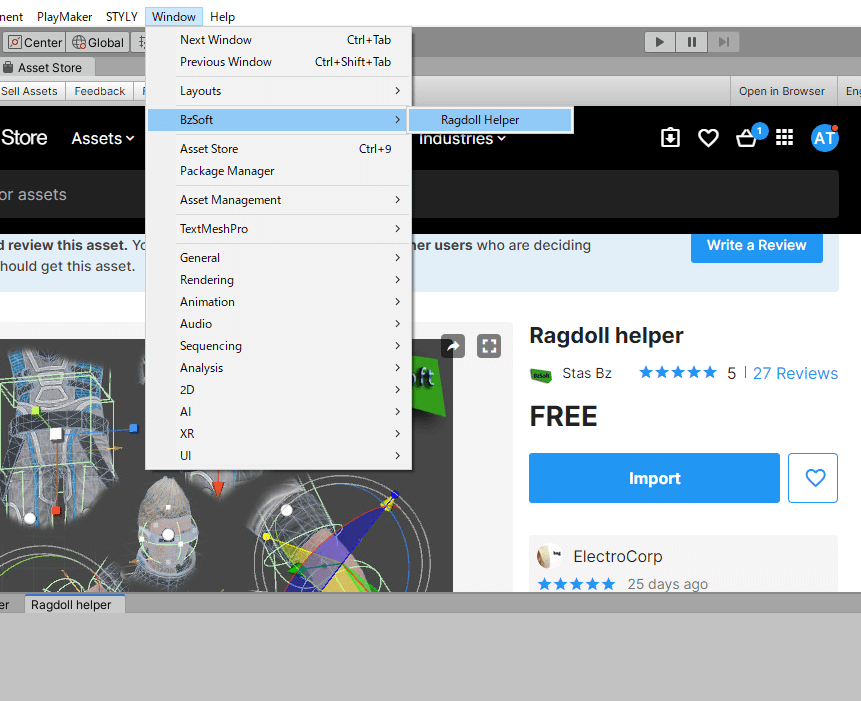
Ragdoll helper
Once the window is open, select the Skeletonzombie object on your scene.
The Ragdoll Helper window should now look like this:
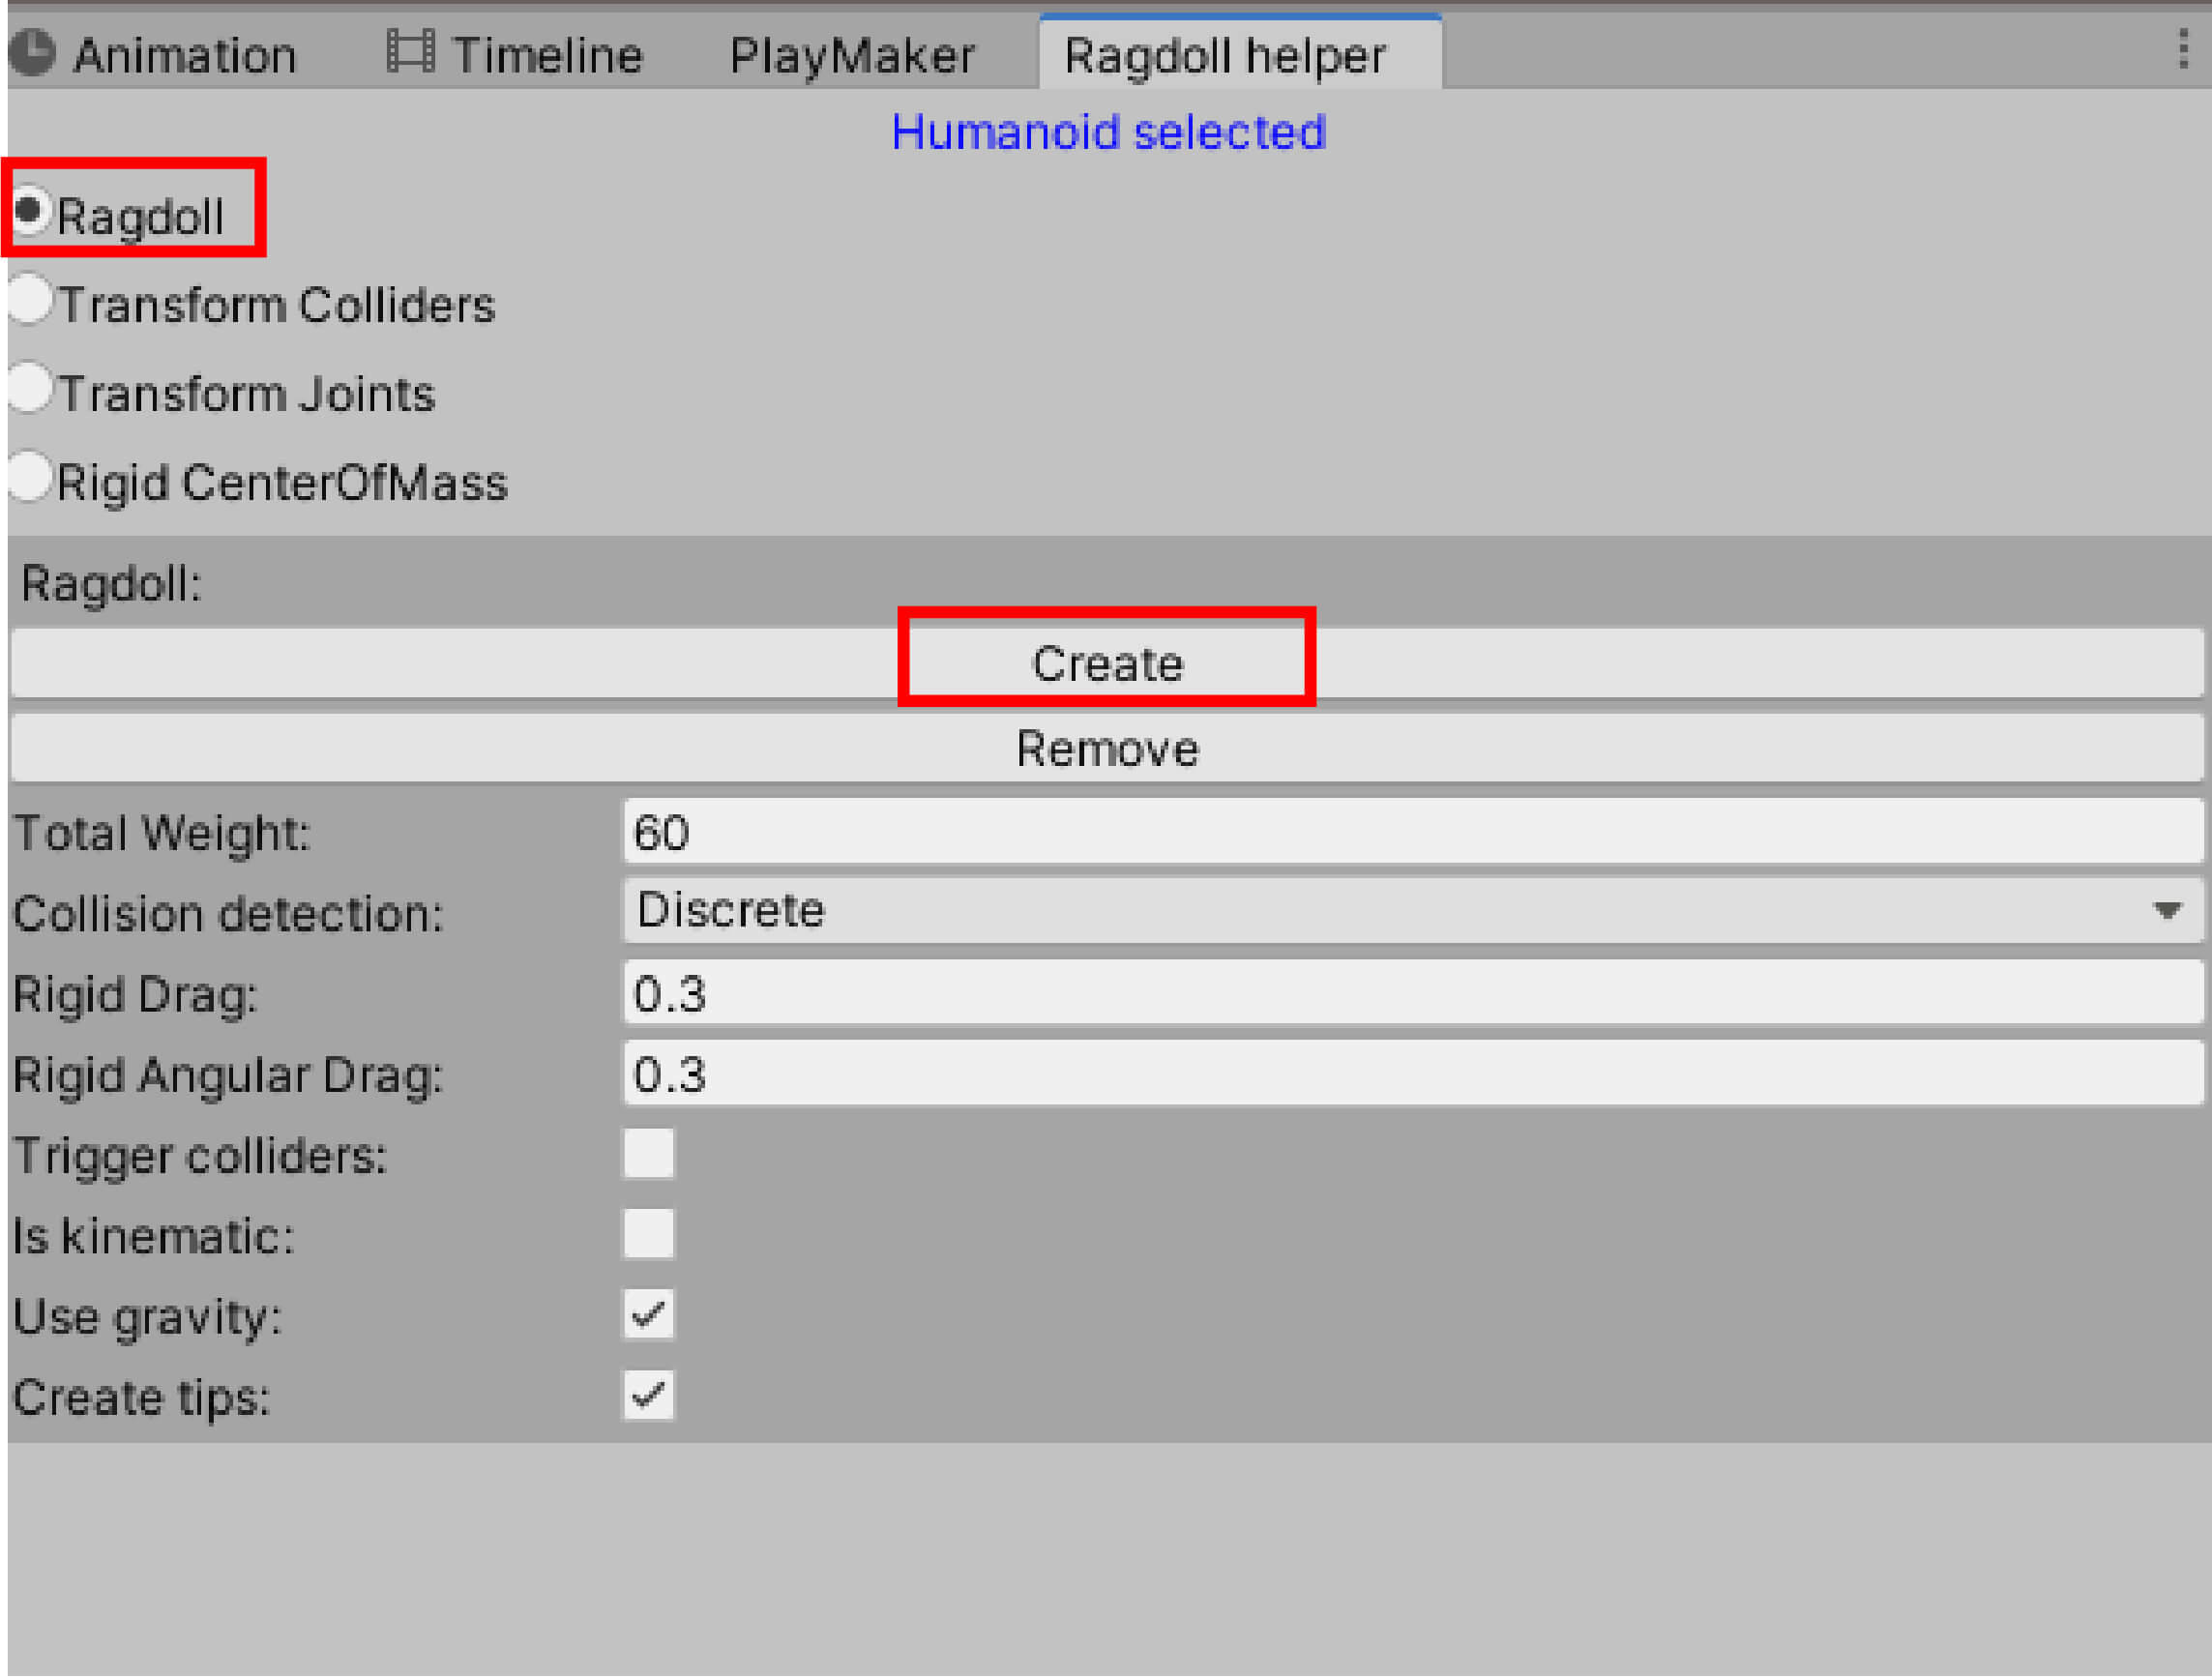
Ragdoll → Create
With “Ragdoll” selected at the top of the window, select Create. The Collider will now be attached along the body. It will look like this:
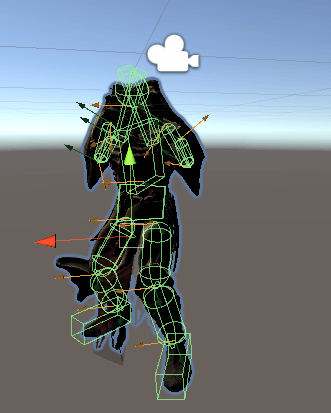
Collider
Ragdoll is now ready.
Prepare a ground object so that the character will land on the ground when it falls.
Create a Cube from the Hierarchy window and choose Create > Cube.
Name it “Floor” and transform it as follows:
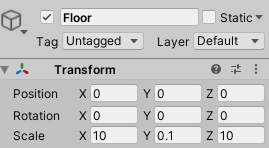
Transform
Let’s also set the Transform of the character’s objects. Do the following:
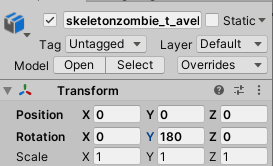
Transform
This is how it looks:
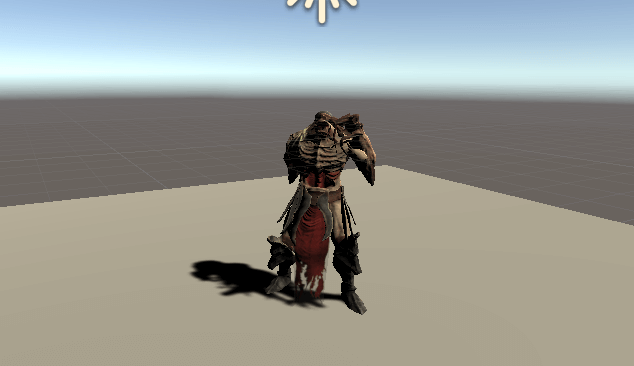
Neatly displayed
Finally, we’ll set up a collider to determine if a weapon is a hit.
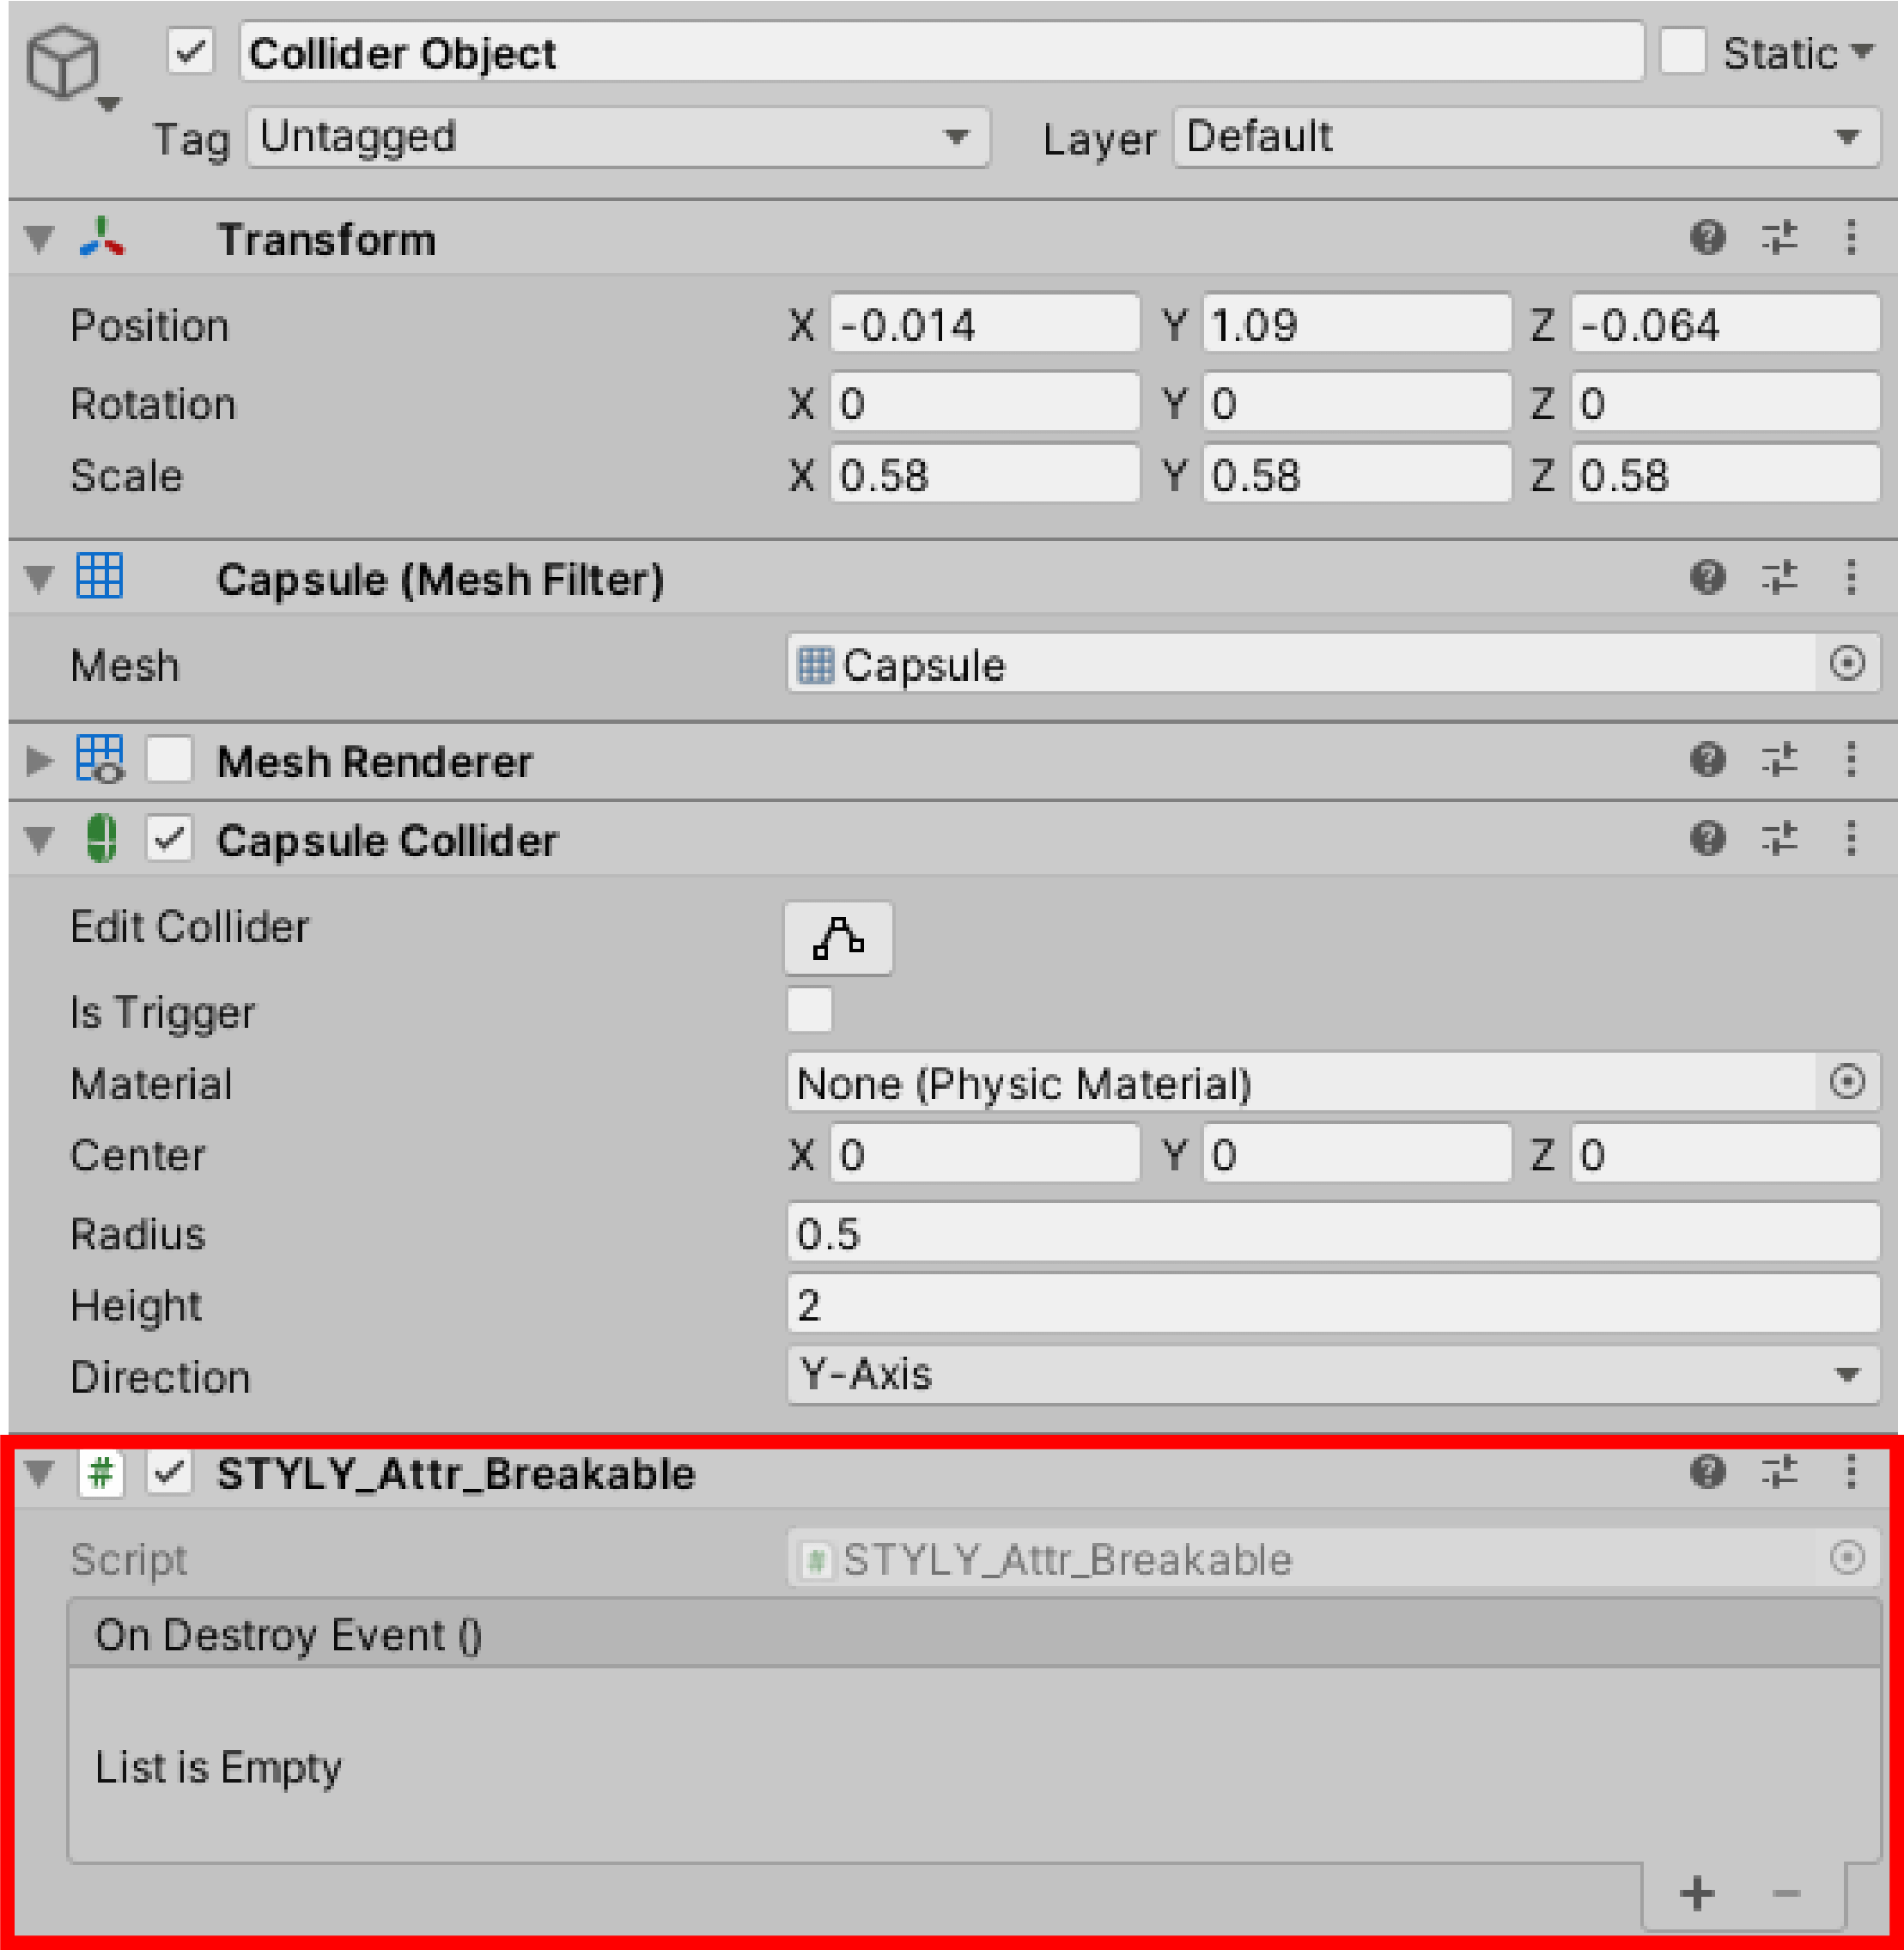
In addition to the Ragdoll collider, we will add a new Capsule to the scene. Let’s add it in the Hierarchy window by going to Create > Capsule.
Set its name to Collider Object and set its Transform as follows:
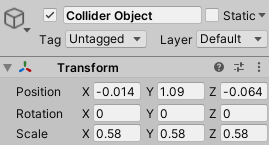
Transform
Make the Collider Object a child object of the enemy character.
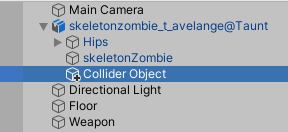
Child object
We now have the following:
Collider Object
Let’s hide the mesh, which will still be visible at this point. Select Collider Object and uncheck the Mesh Renderer in the Inspector window.
Mesh Renderer
Now, only Collider will be shown in the scene.
Meshes disappear from the scene.
Ragdoll preparation is now complete.
Ready for weapons
Next, we need to prepare our weapons. You can prepare a weapon from the asset store, but in this case, it is simplest to prepare a simple stick-shaped weapon via Create > Cube.
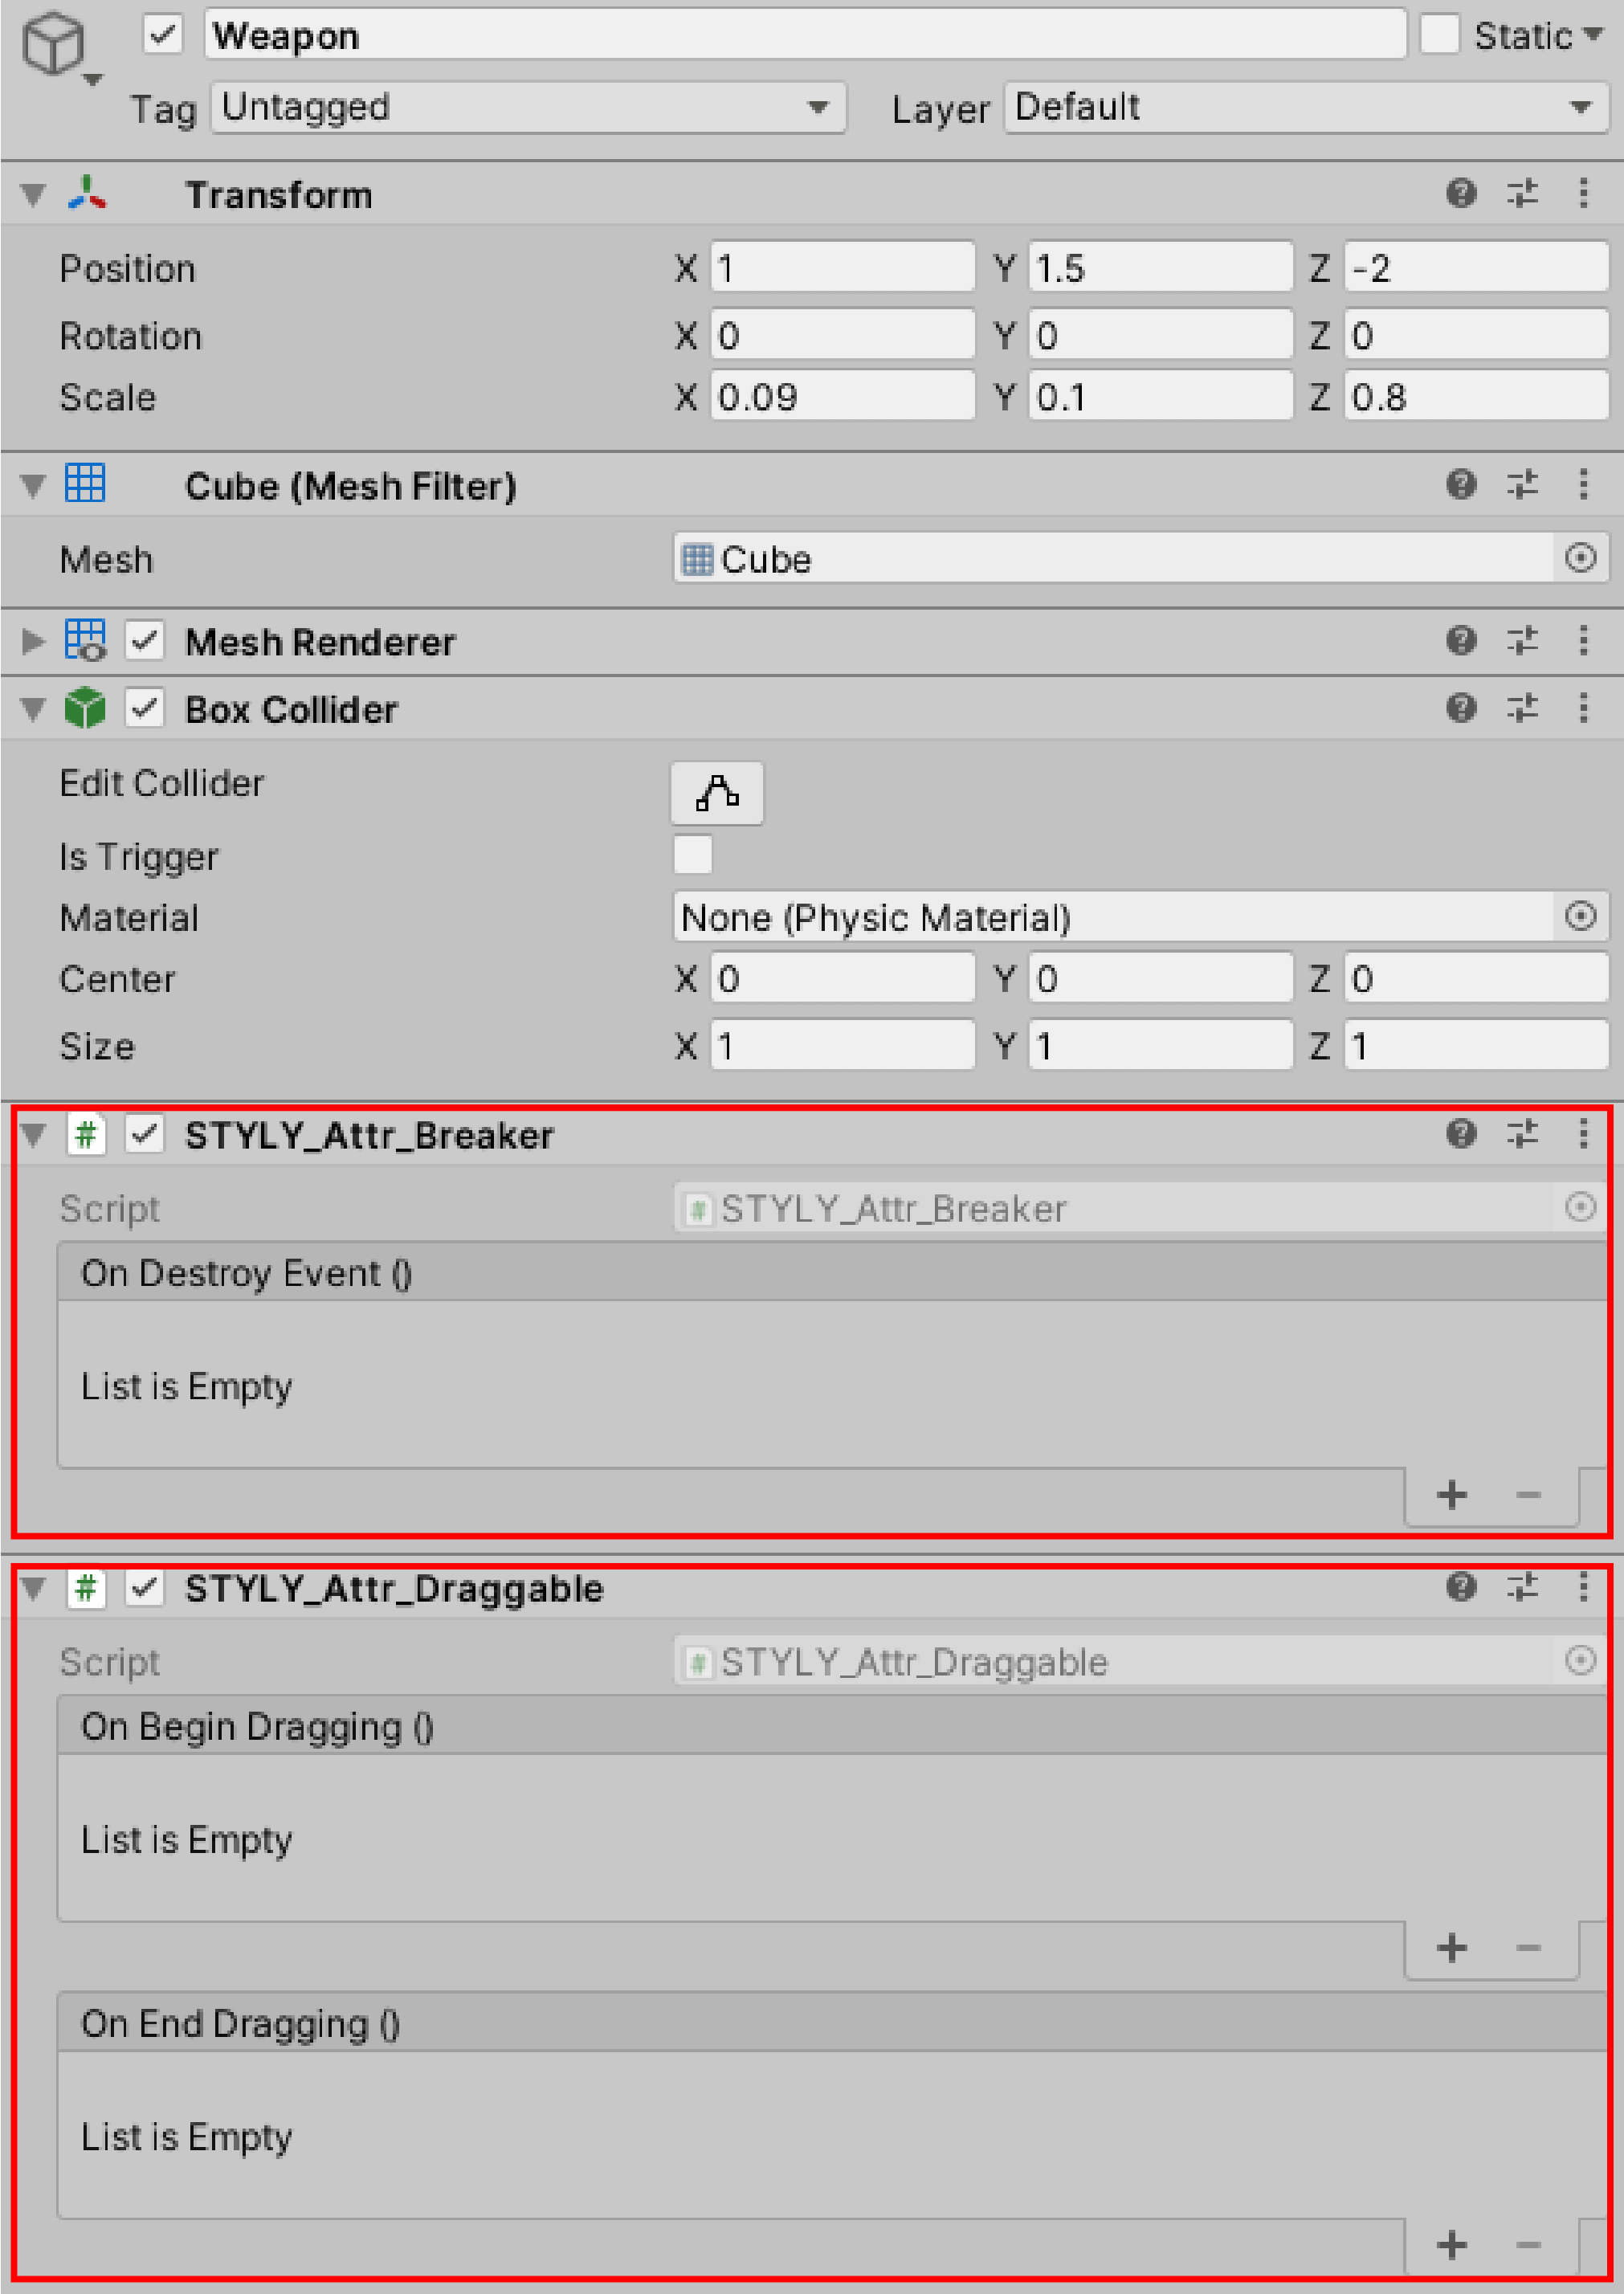
Go to Create > Cube and prepare a cube. Name it “Weapon” and Transform it as shown in the image:
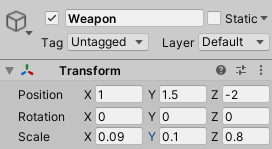
Transform
The image will look like this:
Weapons
Attach a rigidbody from Add Component. Set it up as follows:
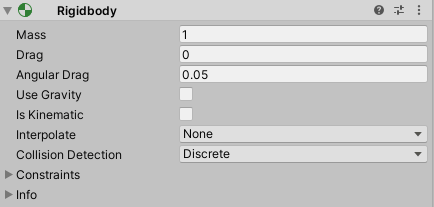
Rigidbody
All the objects are now ready. In the final step, let’s set up the Interaction SDK.
Setting up the Interaction SDK
I now set up the Interaction SDK.
STYLY_Attr_Breaker / STYLY_Attr_Draggable
First, set up the Weapon Interaction SDK. Attach STYLY_Attr_Breaker and STYLY_Attr_Draggable to the Weapon you just created.
STYLY_Attr_Breaker is a script that “destroys the object to which the STYLY_Attr_Breakable component is added”. STYLY_Attr_Draggable is a script that “allows you to grab the object with your pointer”.
You can now grab and move the Weapon object and destroy the STYLY_Attr_Breakable.
Next, we need to disable the animator of the enemy character.
STYLY_Attr_Breakable
Select the Collider Object and attach STYLY_Attr_Breakable from Add Component to the Interaction SDK.
STYLY_Attr_Breakable is a script that is “destroyed by the object to which the STYLY_Attr_Breaker component is added”. STYLY_Attr_Breaker and STYLY_Attr_Breakable are always used together.
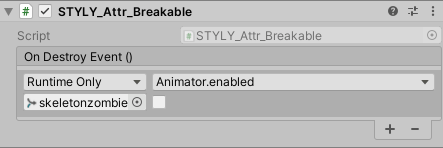
“Breakable” destroys the Collider Object and “On Destroy Event” makes the enemy character’s Animator.enabled false.
Add a List of On Destroy Events.

Add to List
Add the List by pressing the + button in the bottom right corner.
Drag & Drop
Drag and drop the skeletonzombie_t_avelange@Taunt object into the None (Object) field.
In the No Function field, choose bool enabled.
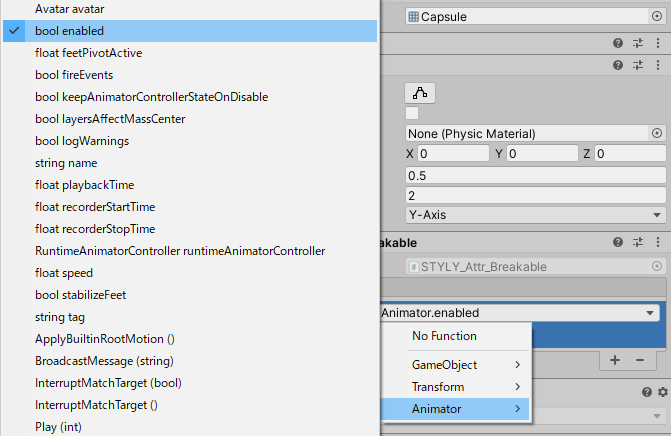
bool enabled
Once you have the settings as shown in the image, your task is complete.
Completed
Play and check
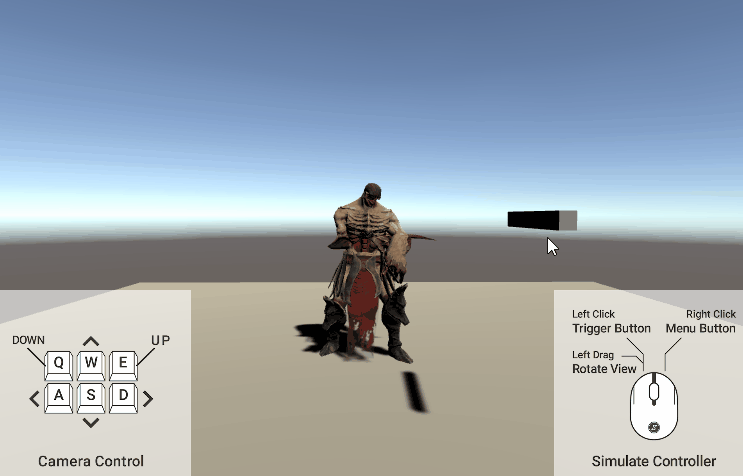
Let’s play the scene in Unity and check it out!
Check
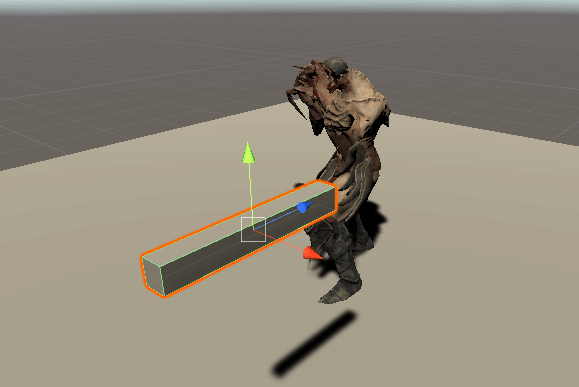
Drag the weapon and try to hit the enemy.
You’ve defeated the enemy! Your job is done.
Upload to STYLY
Upload to STYLY. This time, we’ll upload it in a scene.
If your scene is too large to upload to STYLY, please refer to this article.
Let’s upload the scene you’ve created in your timeline to STYLY.
How to create an account

How to upload a prefab from Unity to STYLY

Learn VR/AR content creation with no prior experience
Learn the basics of Unity and PlayMaker for creating VR/AR content, and learn the process (and creation techniques) of creating attractive content on STYLY. NEWVIEW SCHOOL ONLINE is now open!
- Create VR/AR content without writing any programming code.
- Officially supervised Unity courses available
- Additional elements such as photogrammetric production methods and content lightening
- Learn the concept of creating VR/AR content
