This article explains how to use the custom action Video Init in the Unity asset PlayMaker. This will be useful when uploading videos as a texture in STYLY, since Unity’s standard Video Player component is not compatible with STYLY.

Video Init

Comparison of videos uploaded from Unity to STYLY: Video Player Component vs. Video Init
When creating XR scenes with STYLY and Unity, PlayMaker will give you the flexibility to create interactive objects without any coding knowledge.
The STYLY Plugin comes with many custom actions that are compatible with PlayMaker, and is being updated on a daily basis.
In this article, we will show you how to use the custom action Video Init to create textures from video, so that the texture can be applied to an object and uploaded to STYLY.
Preparation
PlayMaker
To use Video Init, the paid Unity plugin PlayMaker is required. This article explains how to install and setup the plugin:
![[Unity Tutorial] Creating a Game Using Playmaker ① From Basic Introduction to Installing](https://styly.cc/wp-content/uploads/2019/06/1200px-160x160.jpg)
If it’s your first time using PlayMaker, we recommend reading this article to become familiar with the basic features:
![[Unity] Starting Playmaker from Scratch](https://styly.cc/wp-content/uploads/2019/09/PlaymaerCoreConcept-160x160.png)
STYLY Plugin for Unity
After PlayMaker is installed, make sure to install the STYLY Plugin for Unity if you haven’t already.
![[Unity / PlayMaker] How to use Video Init to Create Video Textures for STYLY](https://styly.cc/wp-content/uploads/2022/12/Tomo_VInit_Eye-160x160.png)
This article explains how to install, setup, and use the plugin:

Uploading your Video to a Cloud Storage Service
To use Video Init, your video needs to be uploaded to an external cloud storage service.
Below, we will explain the video formats you should use for STYLY and recommend some compatible cloud storage services.
Compatible Video File Formats
We recommend the following video format to ensure playback in all types of environments:
- File format: mp4
- Video encoding: H.264
- Audio encoding: AAC
- Resolution: Below 4K (3840x2160px). The recommended size is 1280x720px considering video playback lagging.
- Video length (recommended): Under three minutes
- Framerate: Approx. 30fps
- File size: Below 100MB
Note that videos recorded on a smartphone, digital camera, or computer are likely to be different to the recommended file format across the range of technical specifications mentioned above. Please reconfigure these videos with your preferred video editing software and export them to match the recommended file format.
Recommended Cloud Storage Services
Here are two external services that we recommend using for video cloud storage:
AWS S3
AWS S3 is a paid cloud storage service offered by Amazon.
AWS S3 provides quick access to uploaded videos and high performance with Video Init, making it a suitable service to upload videos for STYLY scenes.
Google Drive
https://www.google.com/intl/en_fj/drive/
Google Drive is a free cloud storage service provided by Google.
With a Google account, Google Drive is free to use and does not require any special settings, so it’s a simple and free alternative for AWS S3.
About Video Init
Video Init is a custom action in PlayMaker that allows you to use a video URL as a texture for an object.
The compatible video formats for Video Init are the same as the ones described above, with the addition of mp3 for sound data.
Video Init
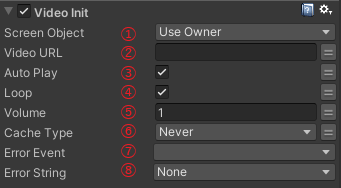
Below are explanations of each of the Video Init properties and what to do with each of them:
(1) Screen Object: Select the target object.
(2) Video URL: Enter the video URL.
(3) Auto Play: If checked, the video will be played immediately after Video Init is executed. If unchecked, the video will be played using the “Video Play” action explained below.
(4) Loop: If checked, the video will be looped.
(5) Volume: Enter the value of the video volume.
(6) Cache Type: Choose a video playback method—Never, Auto, or Always.
- Never: Streaming playback only
- Auto: If the video has already been downloaded, it will be used. If not, it will be streamed.
- Always: If the video has already been downloaded, it will be used. If not, it will only be played after it’s downloaded.
(7) Error Event: Choose what will happen when an error occurs.
(8) Error String: Choose the variable to where error messages are outputted.
Using Video Init
Preparing the Video URL
Via AWS S3
First, upload your video to AWS S3 and configure the publish settings so you can copy the video URL.
After the publish settings are complete, select the uploaded video file and click “Copy URL” to copy the URL to your clipboard.
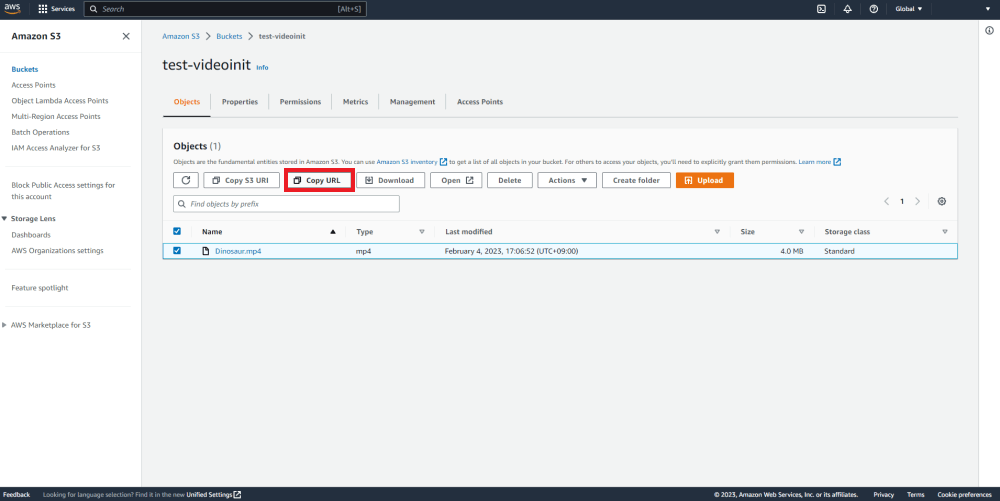
Select the uploaded video file and click “Copy URL”
Via Google Drive
First, upload your video to Google Drive.
Then, right-click on the uploaded video and select “Get link.”
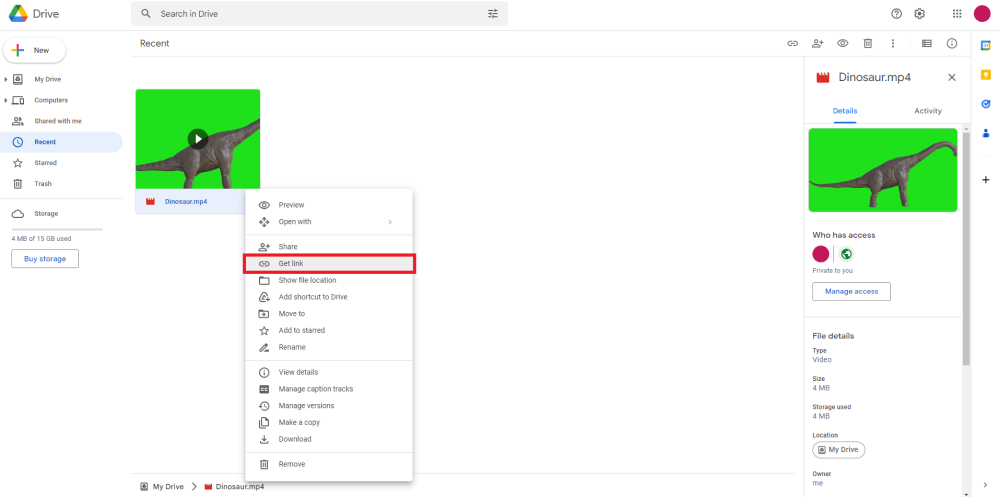
Right-click on the video thumbnail and select “Get link”
Change the access settings from “Restricted” to “Anyone with the link.”
Then, click “Copy link” to copy the URL to your clipboard.
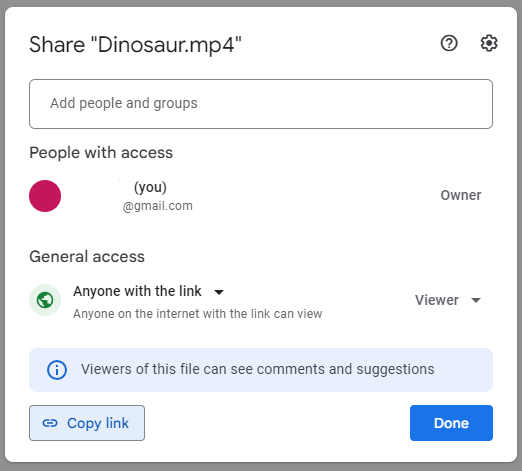
Click “Copy link”
Next, we will modify the URL to make it compatible with Video Init.
Paste the copied URL in a text editor and modify the URL as follows:
- Replace “file/d/” with “uc?id=”
- Delete “/view?usp=share_link”
Finally, copy the edited URL to your clipboard.

Modifying the Google Drive URL
Setting up Video Init
Now, with the plugins installed and the URL prepared, we will set up Video Init.
Open Unity and add a PlayMakerFSM component to the object you wish to apply the video texture to. In our example, we will be applying the video to a default quad object.
To use Video Init, the object must have a MeshRenderer property, with a main texture (_MainTex) shader such as Unlit/Texture.
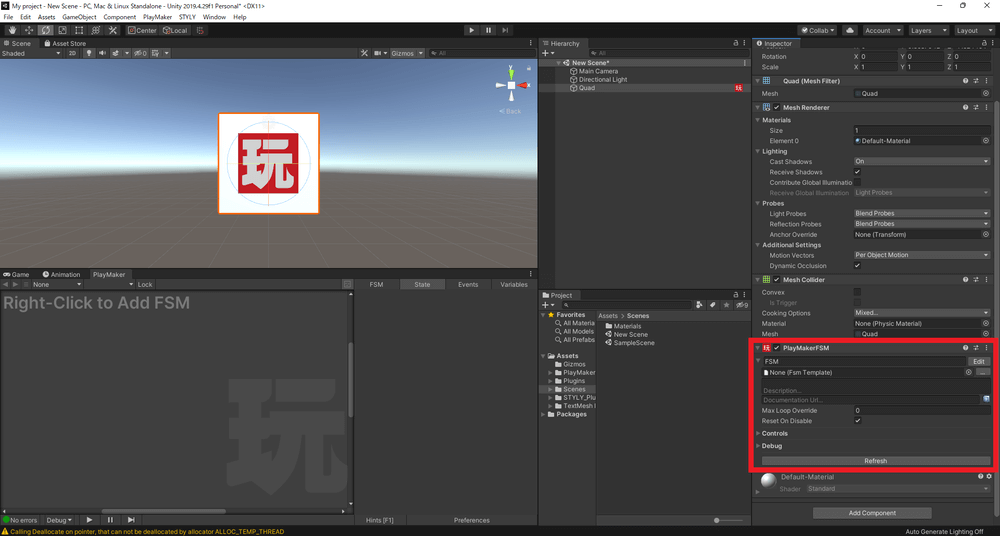
Add a PlayMakerFSM component to your object
Next, select the object and add the Video Init action to State 1 from the PlayMaker window.
Then, enter the video URL from the cloud storage service as shown in the following image:
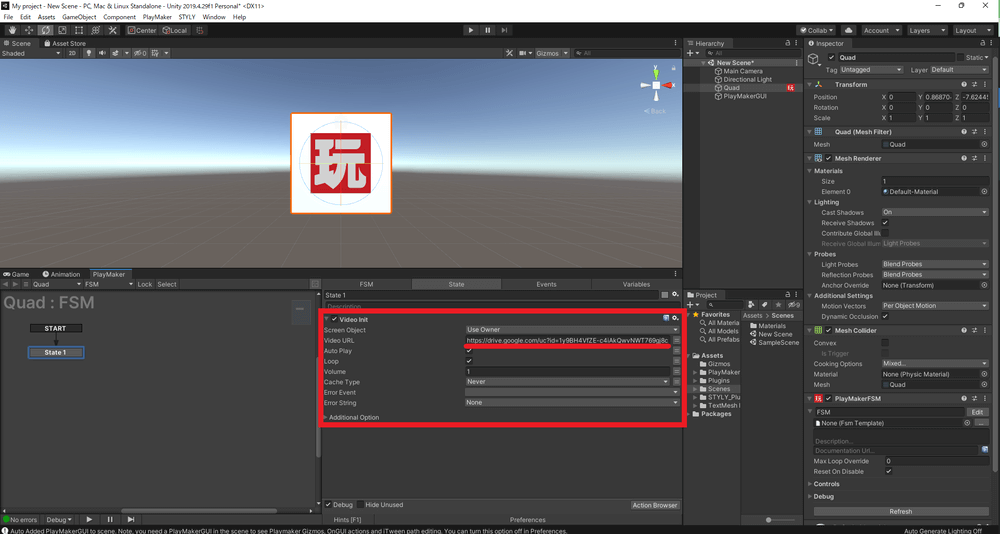
Enter the video URL
Finally, play the scene, and if the video texture plays back, you have set up your object successfully.
The object with the video texture successfully assigned to it
Other Related Custom Actions
Video Play
Video Play is a feature that plays the video texture created with Video Init.
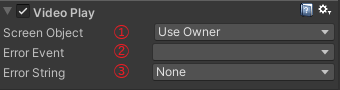
Video Play
(1) Screen Object: Choose the target object
(2) Error Event: Choose what will happen when an error occurs.
(3) Error String: Choose the variable to where error messages are outputted.
Video Pause
Video Pause is a feature that pauses the video texture created with Video Init.
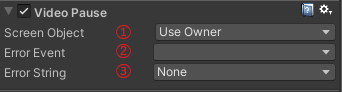
Video Pause
(1) Screen Object: Choose the target object
(2) Error Event: Choose what will happen when an error occurs.
(3) Error String: Choose the variable to where error messages are outputted.
Video Stop
Video Stop is a feature that stops the video texture created with Video Init.

Video Stop
(1) Screen Object: Choose the target object
(2) Error Event: Choose what will happen when an error occurs.
(3) Error String: Choose the variable to where error messages are outputted.
Video Seek
Video Seek is a feature that changes the playback position of the video texture created with Video Init.

Video Seek
(1) Time: Enter the time of the playback location
(2) Screen Object: Choose the target object
(3) Error Event: Choose what will happen when an error occurs.
(4) Error String: Choose the variable to where error messages are outputted.
* As of January 2023, this feature is not compatible with STYLY Studio
Video Set Volume
Video Set Volume is a feature that allows you to change the volume of the video texture created with Video Init.
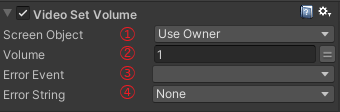
Video Set Volume
(1) Screen Object: Choose the target object
(2) Volume: Enter the value of the video volume.
(3) Error Event: Choose what will happen when an error occurs.
(4) Error String: Choose the variable to where error messages are outputted.
Conclusion
In this article, we explained how to use video as a texture with Video Init and introduced some of the related custom actions.
We look forward to seeing your STYLY scene creations using video textures!
Uploading to STYLY
Let’s upload your 3D model to STYLY.
How to create an account:

How to upload to STYLY:

How to upload from Unity to STYLY:
For questions about STYLY, bug reports, and improvement requests, please contact the STYLY FORUM:
https://en.forum.styly.cc/support/discussions
Certified (QA) by Shota Shawn Yoshizawa
Edited by SASAnishiki
Translated by cpnnn