Introduction
This series is created for beginners with little to no experience in modeling. We will go over the basics of Blender, create a simple 3D model, and upload it to STYLY.
In the Previous Articles
In Part 5, we explained how to manually add bones to your model, and in Part 6 we explained how to add bones using the Blender addon. Read Parts 5 and 6 below:
![[Blender for Beginners] Let’s start Modeling Part 5 – Adding Bones Manually](https://styly.cc/wp-content/uploads/2018/12/8-1.png)
![[Blender for Beginners] Let’s start Modeling Part 6 – How to Add Armatures (bones)](https://styly.cc/wp-content/uploads/2018/12/9-2-1.png)
What We Will Create
In this article, we will learn how to animate an object with bones and upload it to STYLY.
An Animation Example
Preparing the Armature
Renaming the Bones
First, we will rename the bones. This makes them easier to navigate and to work with later when we upload them to STYLY.
With a bone selected in Edit or Pose mode, click on the bone icon in the Properties tab to open the Bone settings, then double-click on its name to rename the selected bone.

Renaming a Selected Bone
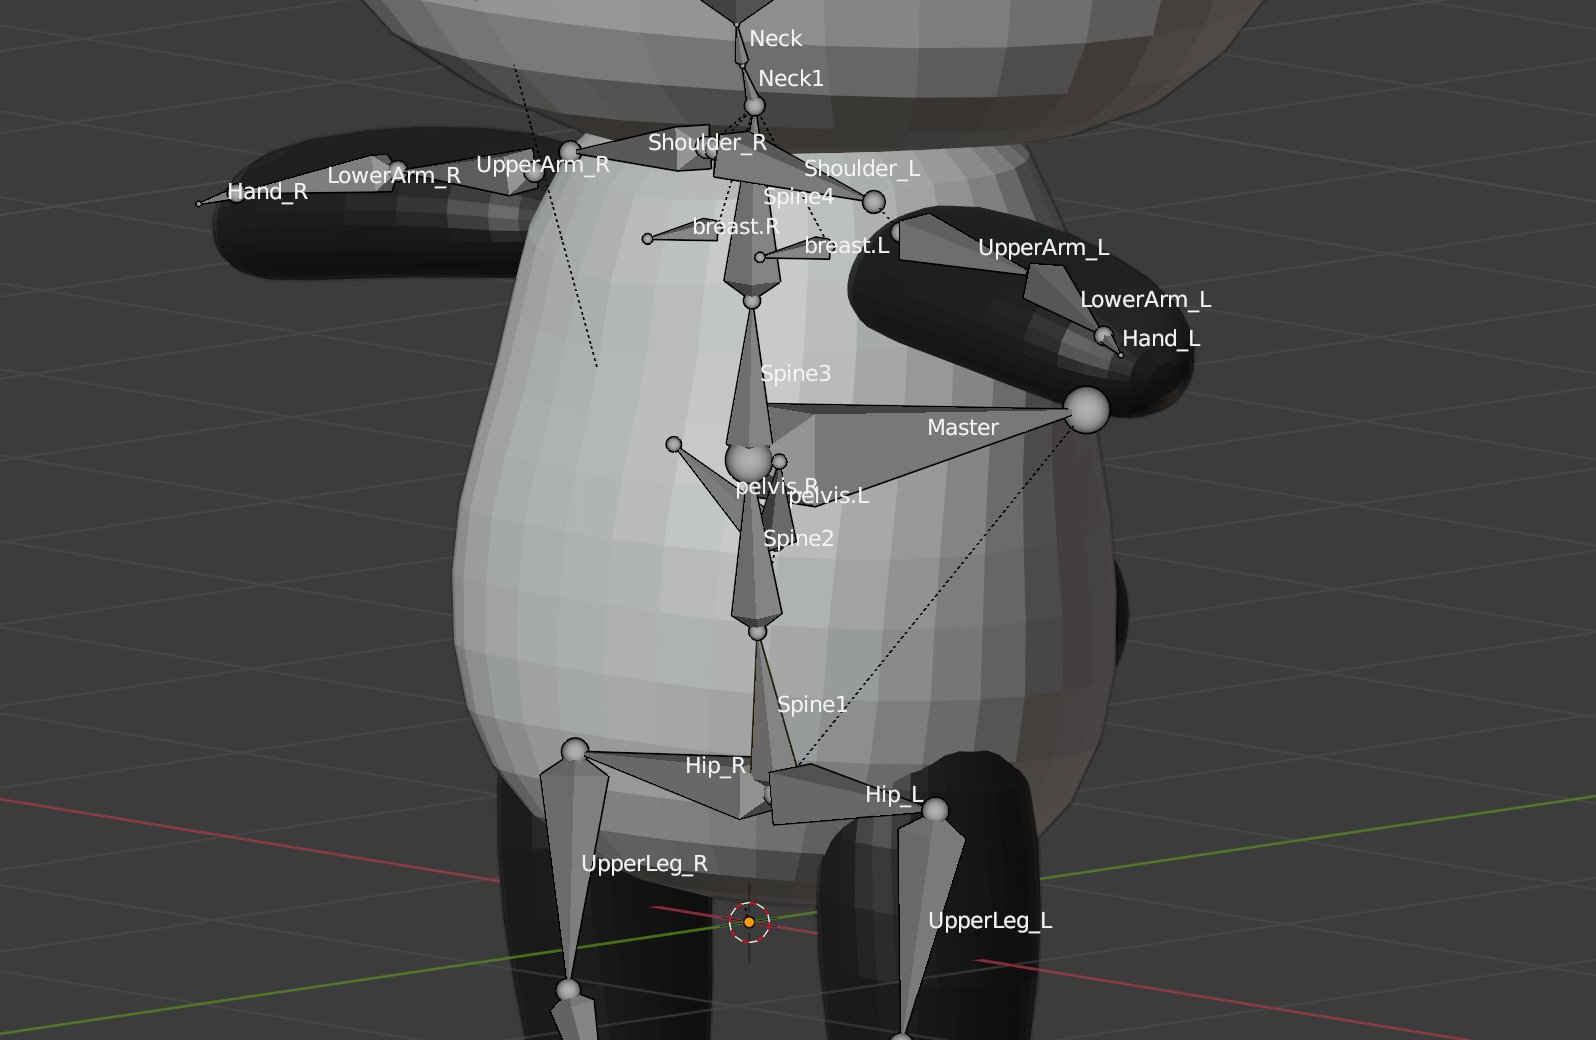
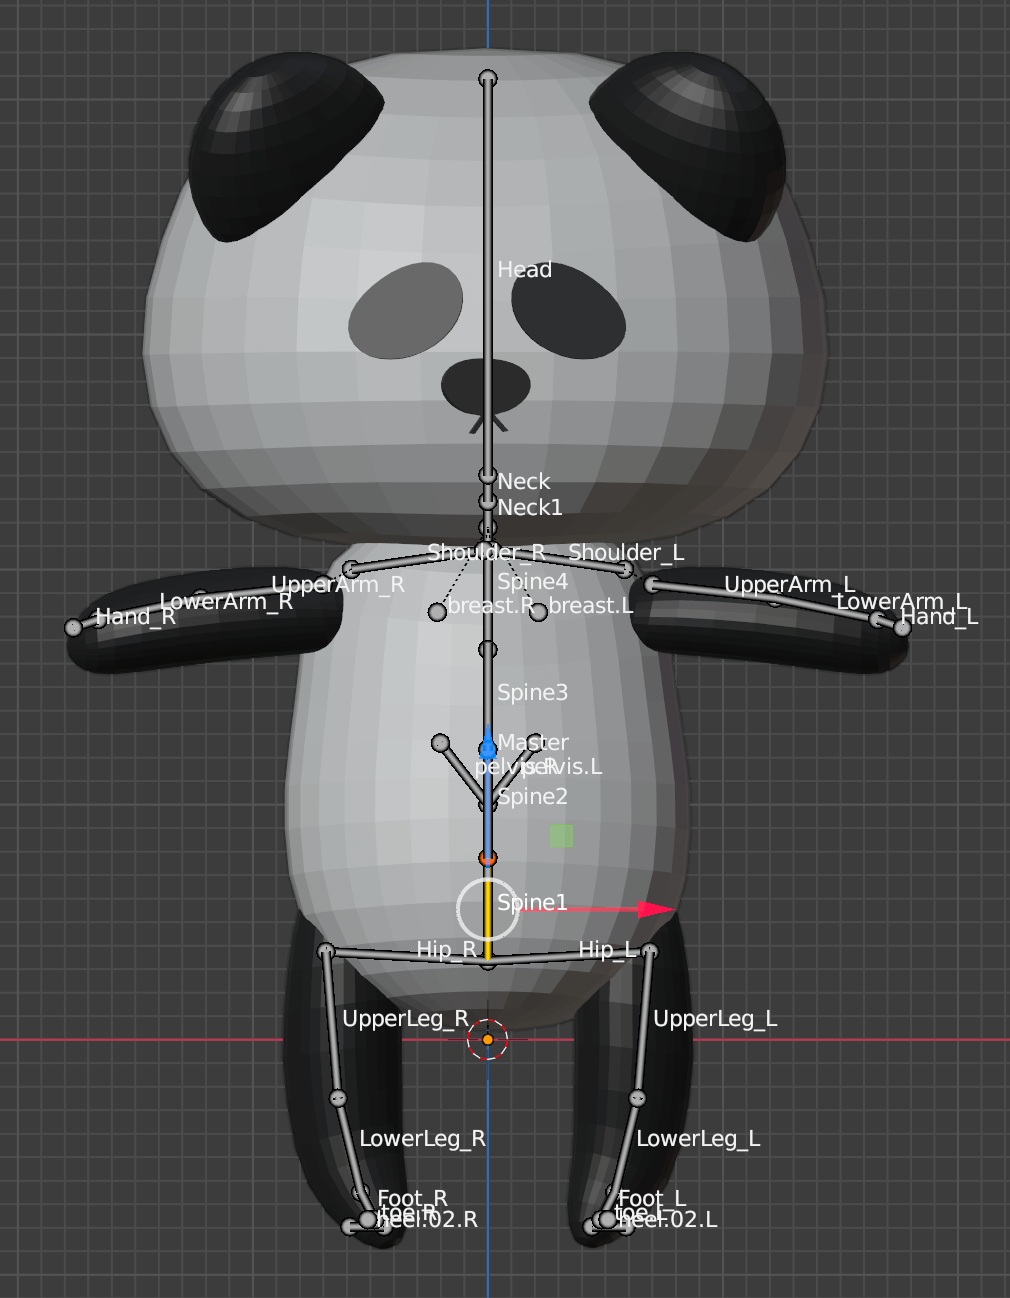
Select each of the bones, renaming them as they appear in the following diagram:
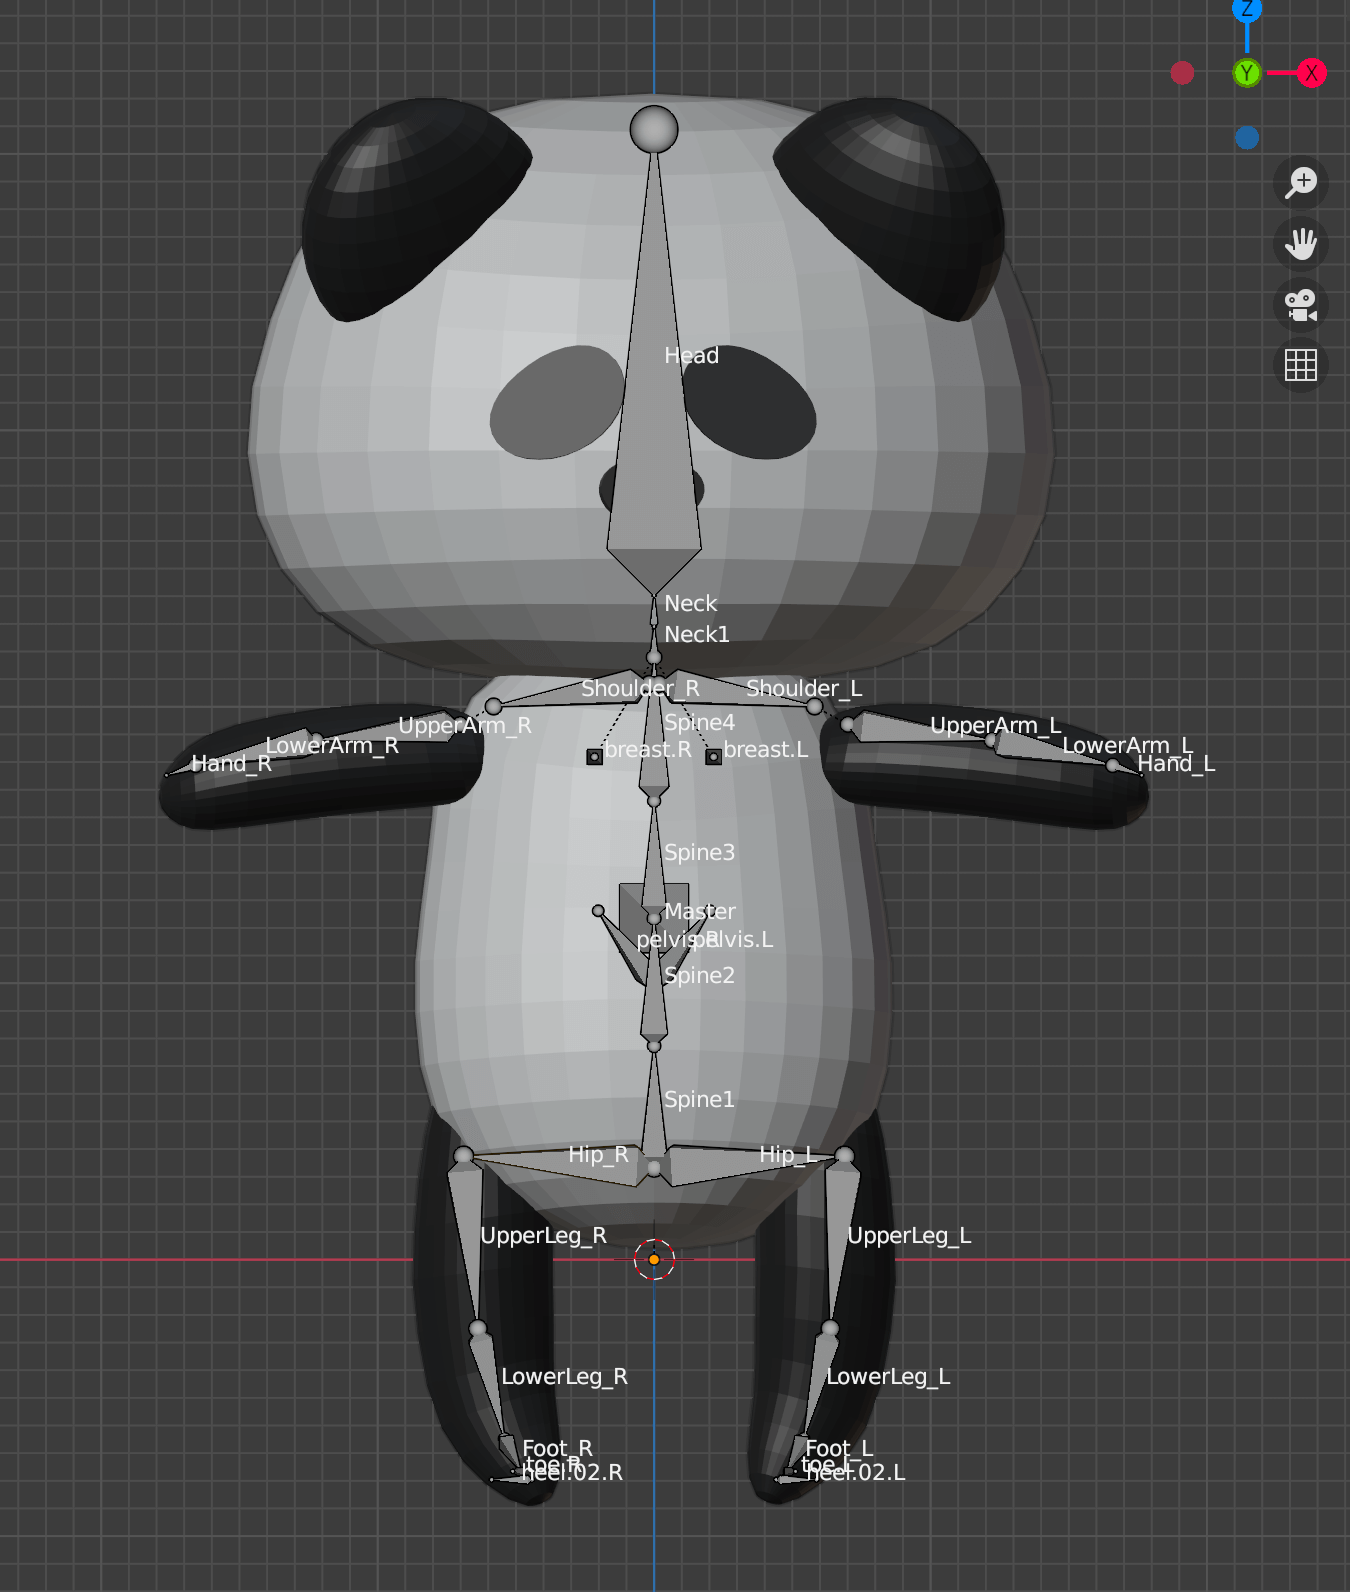
Diagram of Bone Names
Setting the Master Bone
The Master bone is the Parent bone of all the bones in an armature, and by using it we will be able to move the model without having to move each of the bones separately. Without a Master bone, you would have to move all the bones separately to move or rotate the whole character.
In Edit Bone mode, select the bone tip in the middle of the spine (between Spine2 and Spine3), and press [E] then [Y] to extend the bone in the direction of the Y-axis.

Creating the Master Bone
Rename the selected bone to “Master,” and then, in the Parent item in its Relations tab, remove its current Parent bone by clicking the X icon.

Removing the Current Parent Bone from the Master Bone using its Relations tab
Now, to make all the bones in the armature children of the Master bone, make the Master bone the Parent of the following bones:
- Spine1: which is at the top of the hierarchy for the upper-body bones
- Hip_L: which is at the top of the left leg
- Hip_R: which is at the top of the right leg
Once this process is complete, all the bones have become children of the Master bone. If you move the Master bone in Pose mode, all the bones will move with it.
The Master Bone as Parent of All Bones
A little tip: if you select a bone and choose “Display As Stick” in the Armature tab, the bones will be displayed as sticks, making the model easier to see when animating.
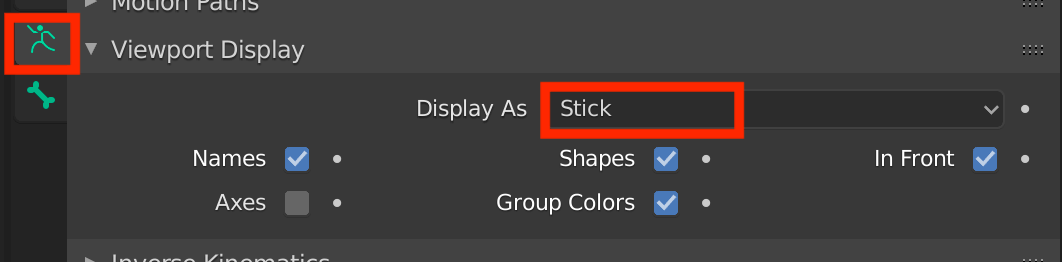
Choose Display Bones as Sticks
Displaying the Bones as Sticks
How to Animate your Model
Adding Animation
We will now add animation to the model. We manage animation in the Timeline, which is at the bottom of the screen.
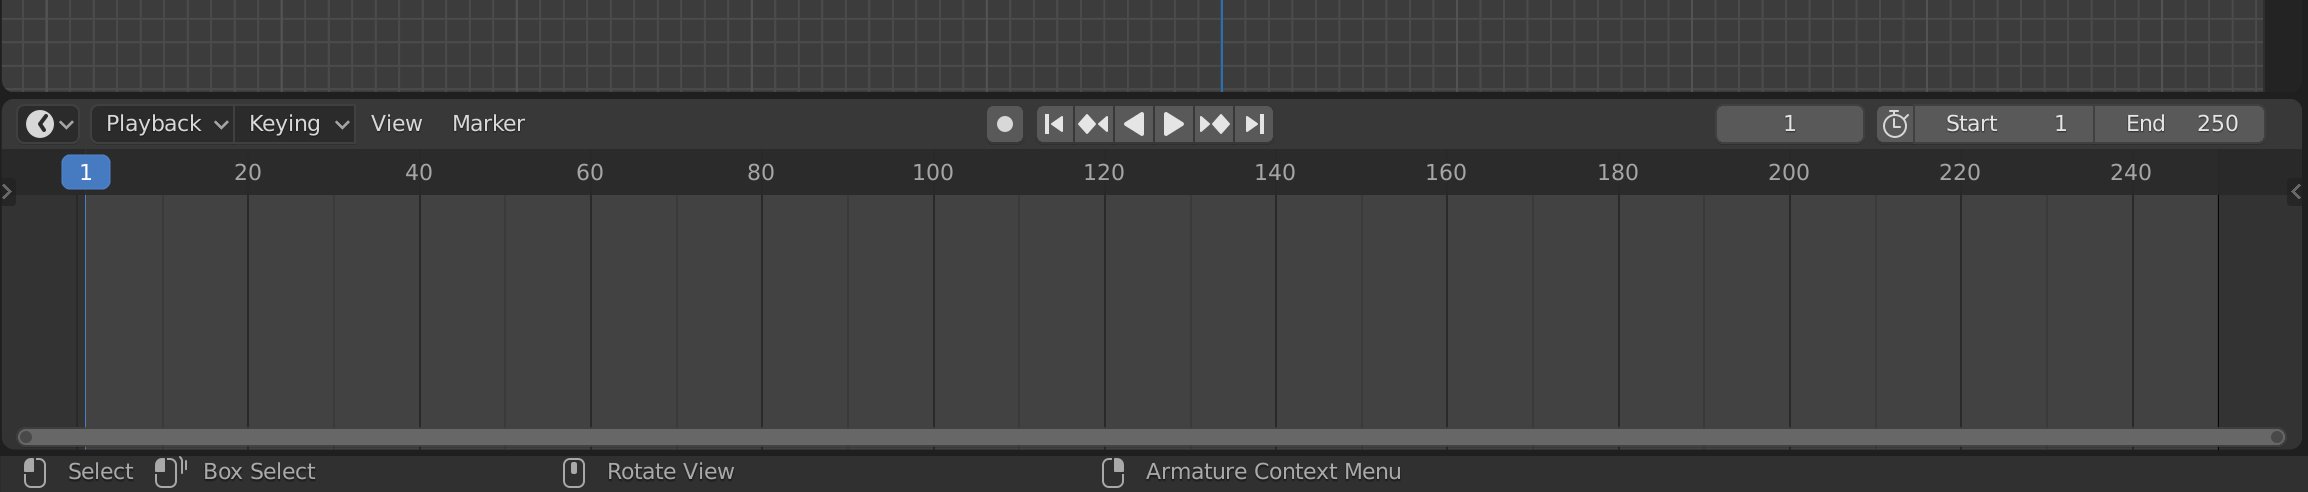
The Timeline
Click the pulldown arrow on the Playback button and click Playback > Sync to Audio.
With the playback set to Sync to Audio, the animation will be played back at its original speed even if there is a processing failure when it is animated.
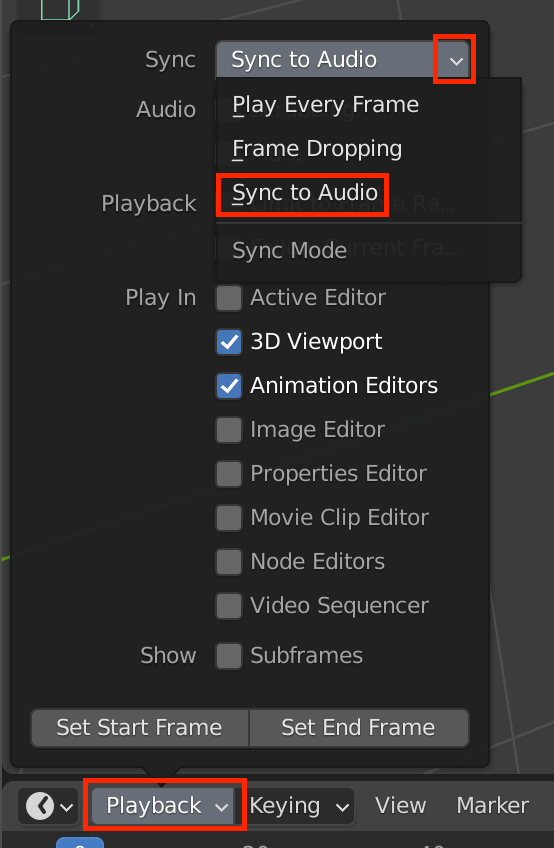
Selecting the Sync to Audio Playback Option
It is possible to register and manage each animation we make as a different action, such as running or walking.
Actions can be created in the Dope Sheet. Using the pulldown menu at the upper left corner of the screen, set the screen view to Dope Sheet. (We recommend splitting the 3D Viewport to see both the Dope Sheet and Timeline at the same time.)
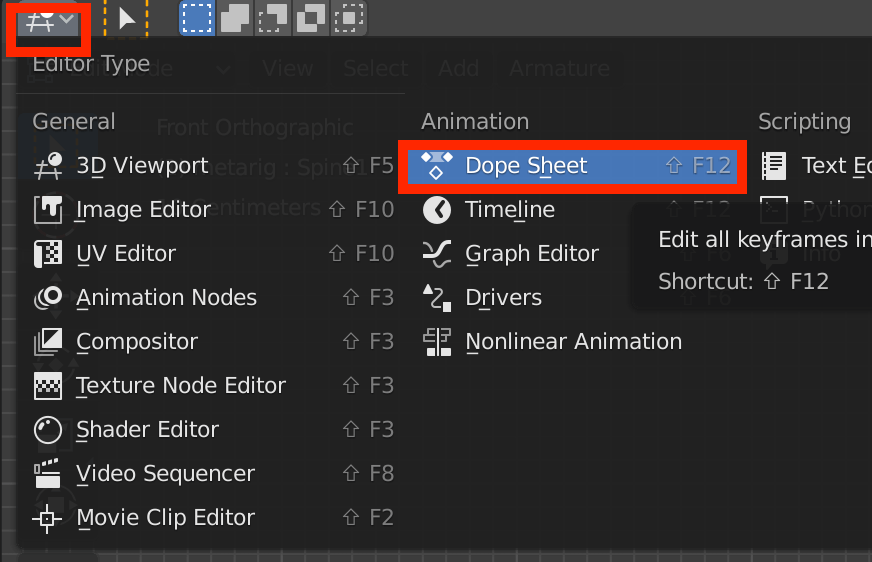
Set the Screen View to Dope Sheet
Now we will create the pose keyframes in the Dope Sheet and Timeline. Click +New in the Dope Sheet window to create a new Dope Sheet.
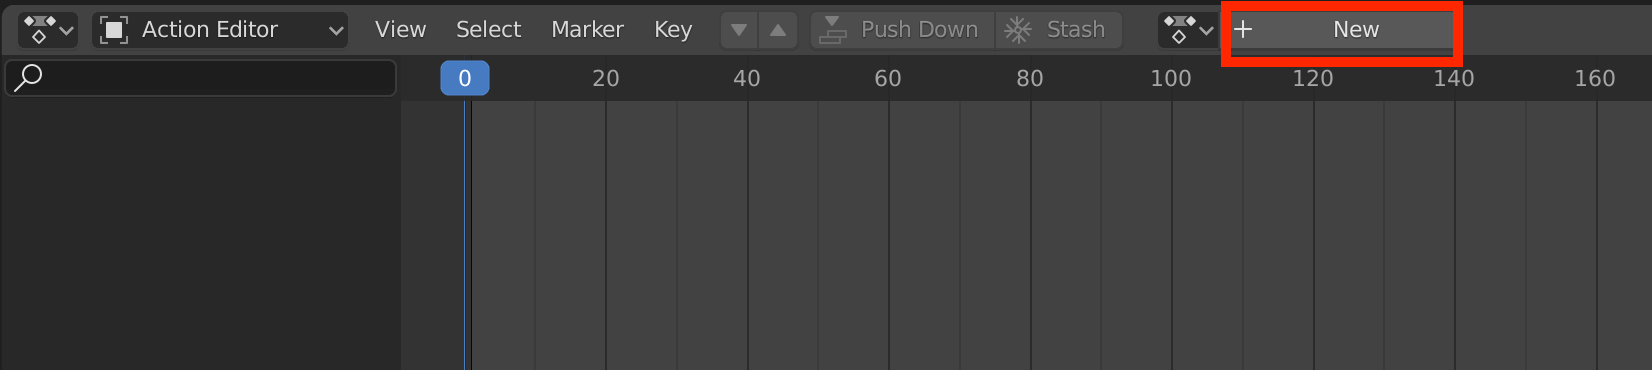
Click +New
- Rename the Dope Sheet here.
- Click on the shield icon to save the action.
- Select the action you created from the pull-down menu here.
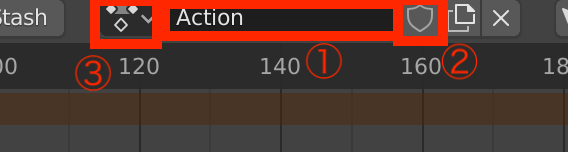
Creating a New Action
In this article, we will create a walking animation. Before we create our first pose, make sure the current frame is set to 1.
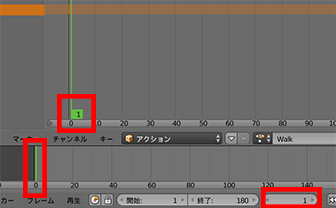
Set the Current Frame to 1
After selecting a bone, switch to Pose mode and create a pose by moving the bone. Since we are creating a walking motion, we will create a pose that looks like the panda is walking.
Once we have created the pose, select all the bones with [A], then press [I] (Insert Keyframe), and then select Location & Rotation in the Insert Keyframe Menu.
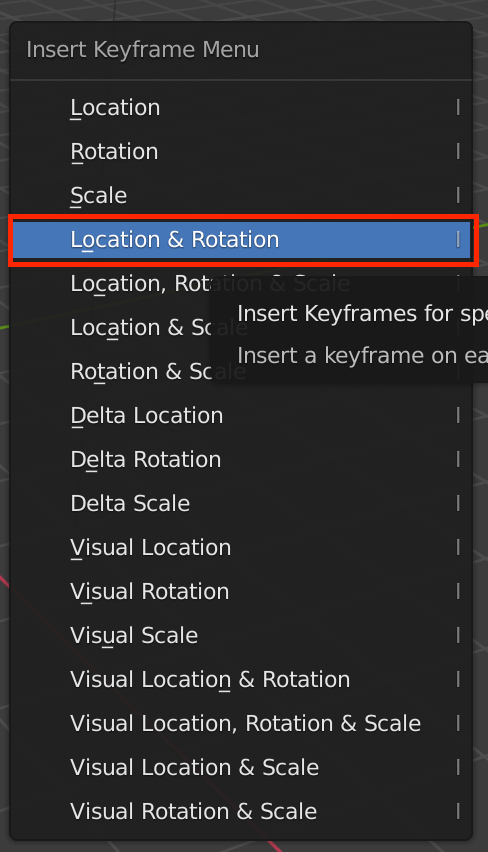
Select Location & Rotation in the Insert Keyframe Menu
Now the keyframes will be inserted. All the bones in the Dope Sheet will have keyframes, and the Timeline will have yellow bars at the locations of the keyframes.
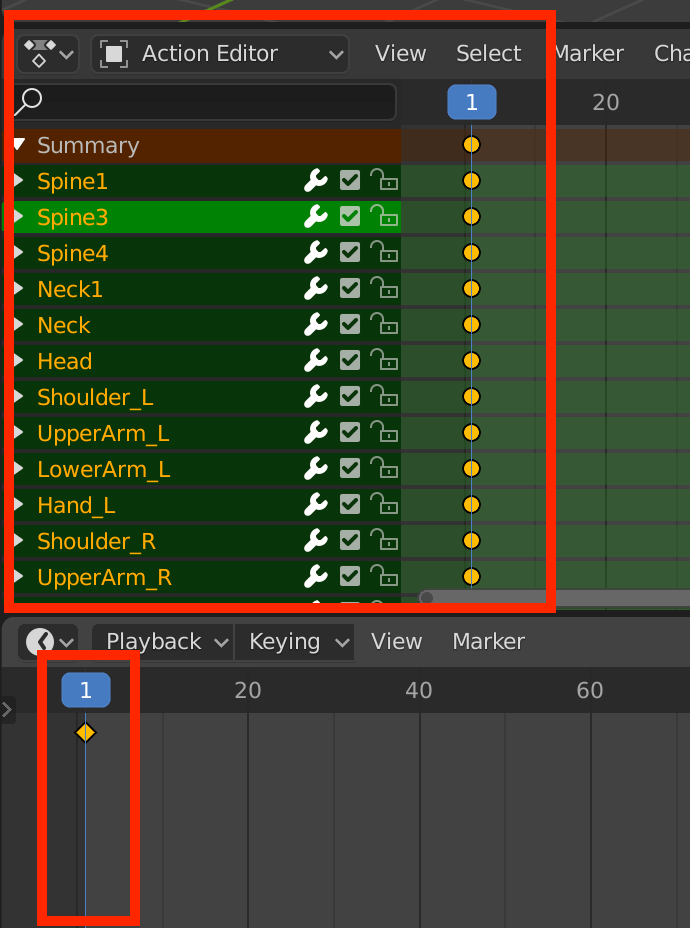
The Inserted Keyframes
To insert the next pose keyframe, select a frame a little further ahead.
In a walking motion, the hands and legs switch sides on each stride; therefore we can create it by copying and inverting the first pose.
Select the keyframe Summary at the top of the dope sheet, and press [Ctrl]+[C] to copy it. Then, select a frame a little further on and press [Ctrl]+[Shift]+[V] to paste an inverted copy of the original keyframe.
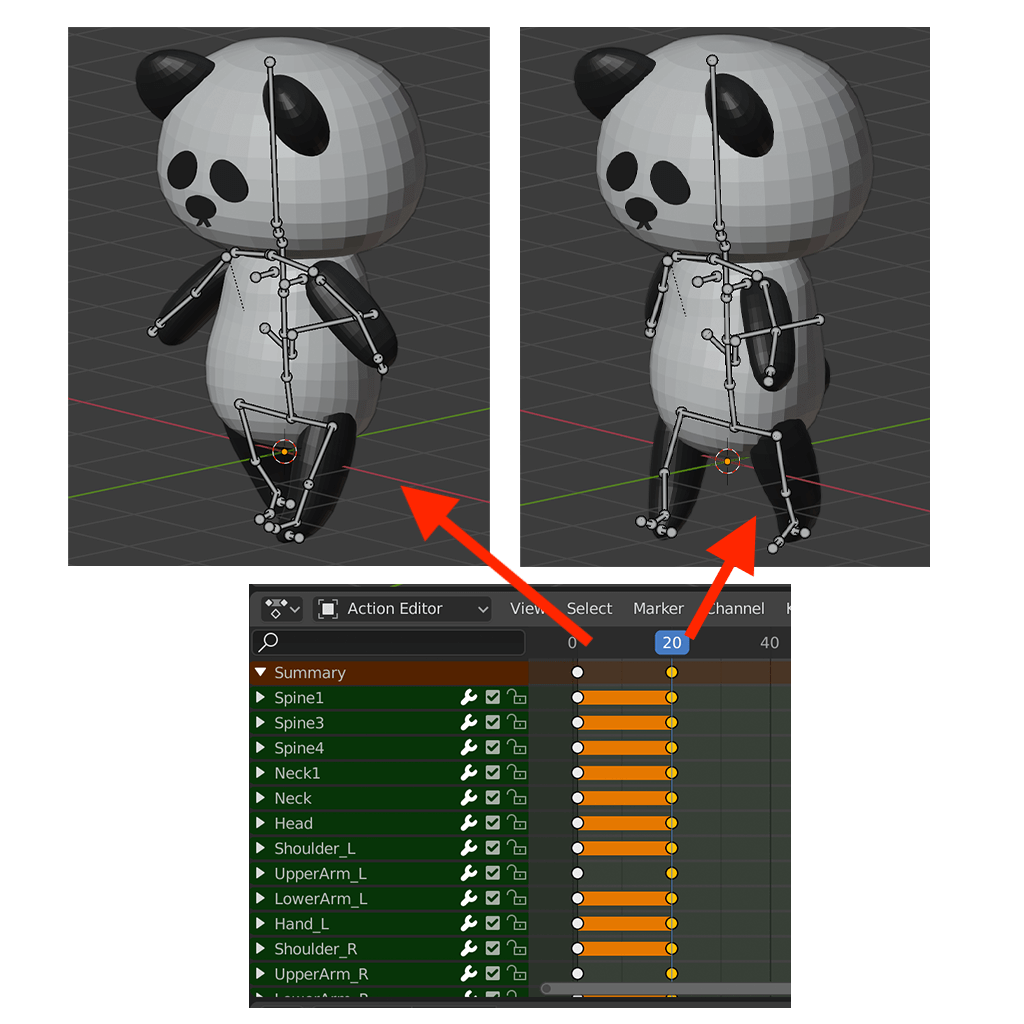
Create a Walking Step by Inverting the Pose
Now we will create another animated step by pasting the first pose a little further along in the animation. This time we do not want it inverted, so we will paste a copy identical to the original pose by pressing [Ctrl]+[V]. Once that is complete, go back to the Timeline and set the End frame to the frame of the last pose.
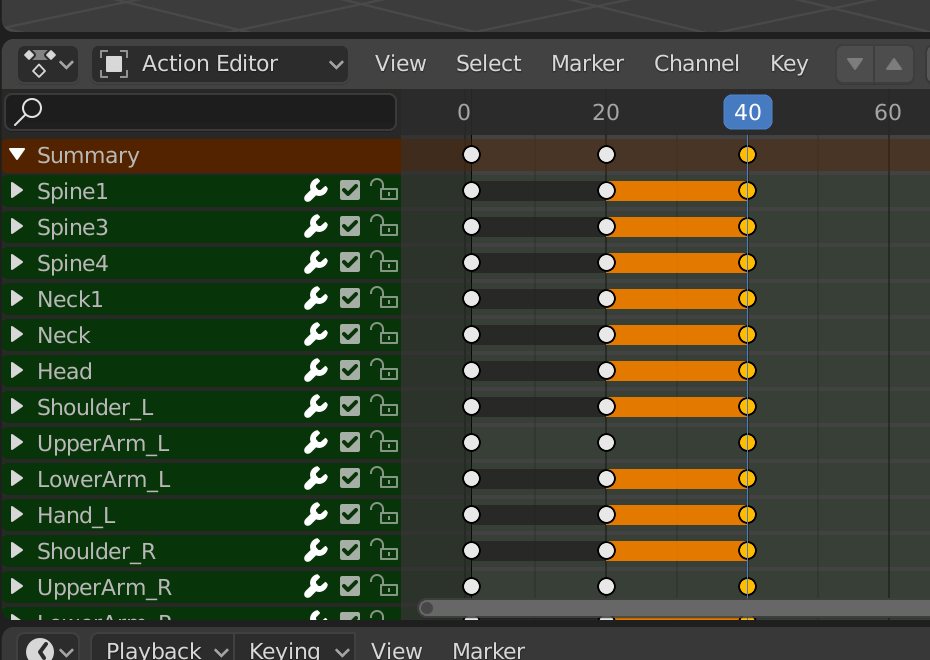
Pasting the Third Keyframe
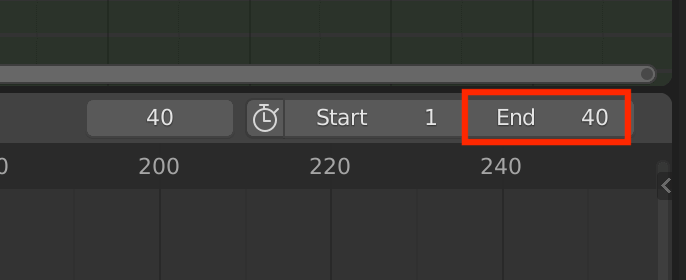
Setting the End frame
Now, let’s play it back.
Checking the Animation
Check the animation. If it looks jagged, add more keyframes between the keyframes to make the animation smoother, or adjust the placement of the keyframes on the Timeline to change the transition speeds.
If you want to add a new action, click on the X next to the action name to clear the existing keyframes, then click on +New to create a new action.

Click on the X and then click +New to create a New Action
Importing the model to STYLY
Export the Model
Now let’s export our animated model from Blender and upload it to STYLY. In most cases, you can upload your animated model directly from Blender to STYLY.
With both the object and its bones selected, select File > Export > FBX (.fbx).
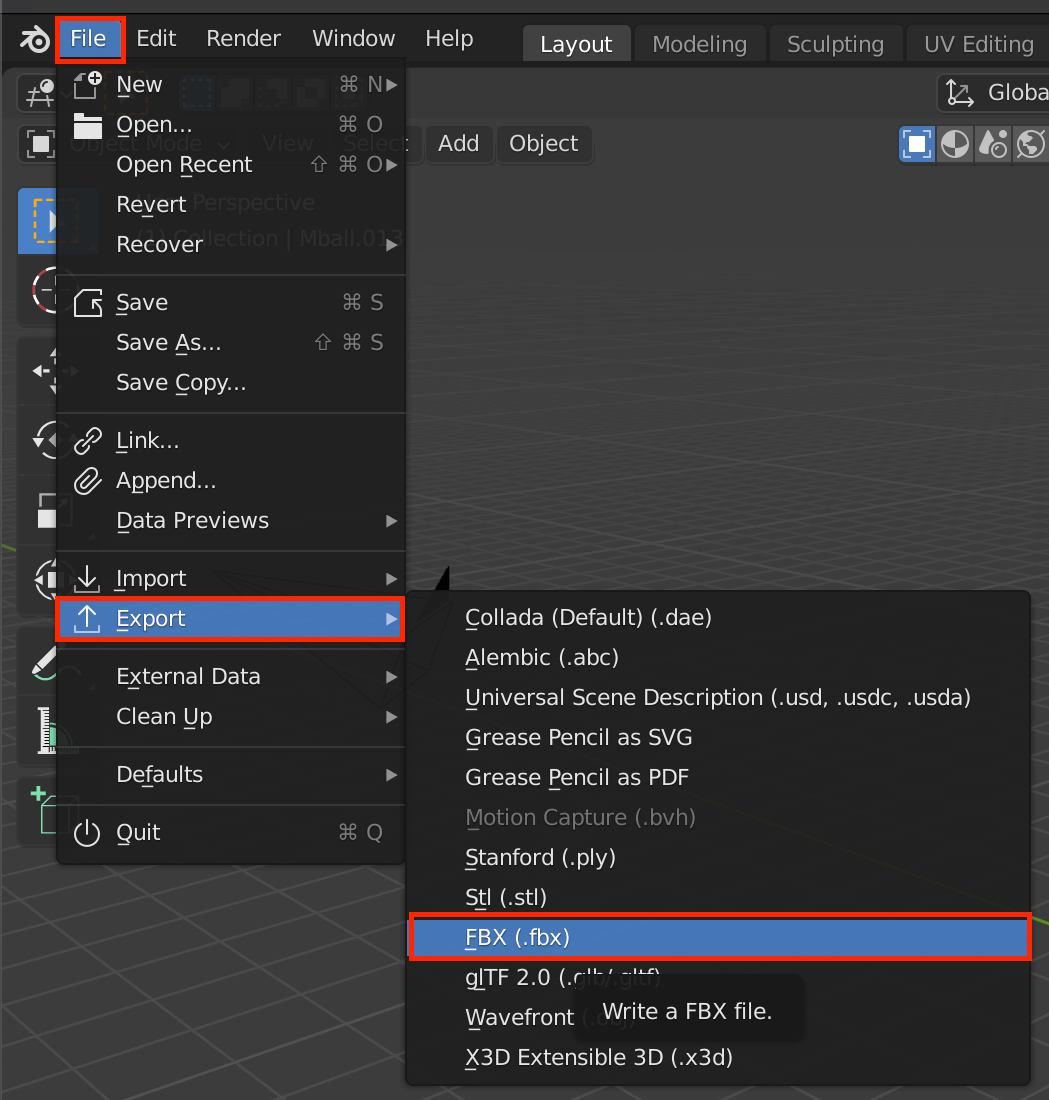
Choose Export as FBX
These are the export settings:
- Check Include > Selected Objects.
- To choose Object Types to include, select Armature, Mesh, and Other while pressing the [Shift] key.
- Check Bake Animation and all the items listed under it.
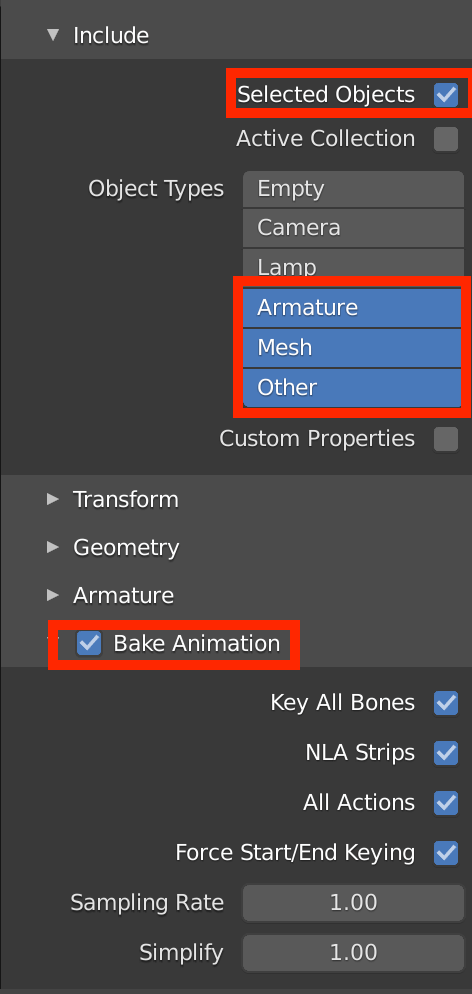
Export Settings
When you have done configuring the export settings, name your model and click Export FBX.
How to Upload to STYLY
Once we have created our animation model in Blender and exported it, we can upload it to STYLY.
Create a STYLY account:

How to upload to STYLY:

How to upload from Unity to STYLY:

Further Tips: Editing in Unity and Uploading from Unity
Although you can upload directly from Blender to STYLY in FBX format, it is also possible to edit in Unity and then upload to STYLY using a plugin.
First, make sure you are using Unity version 2019.3.x.
Next, download the STYLY plugin for Unity and import it into Unity.
After importing the plugin, the following window should pop up:

Enter your Email Address and API Key
Then, import the Blender model into the Assets folder, and place it in the scene.
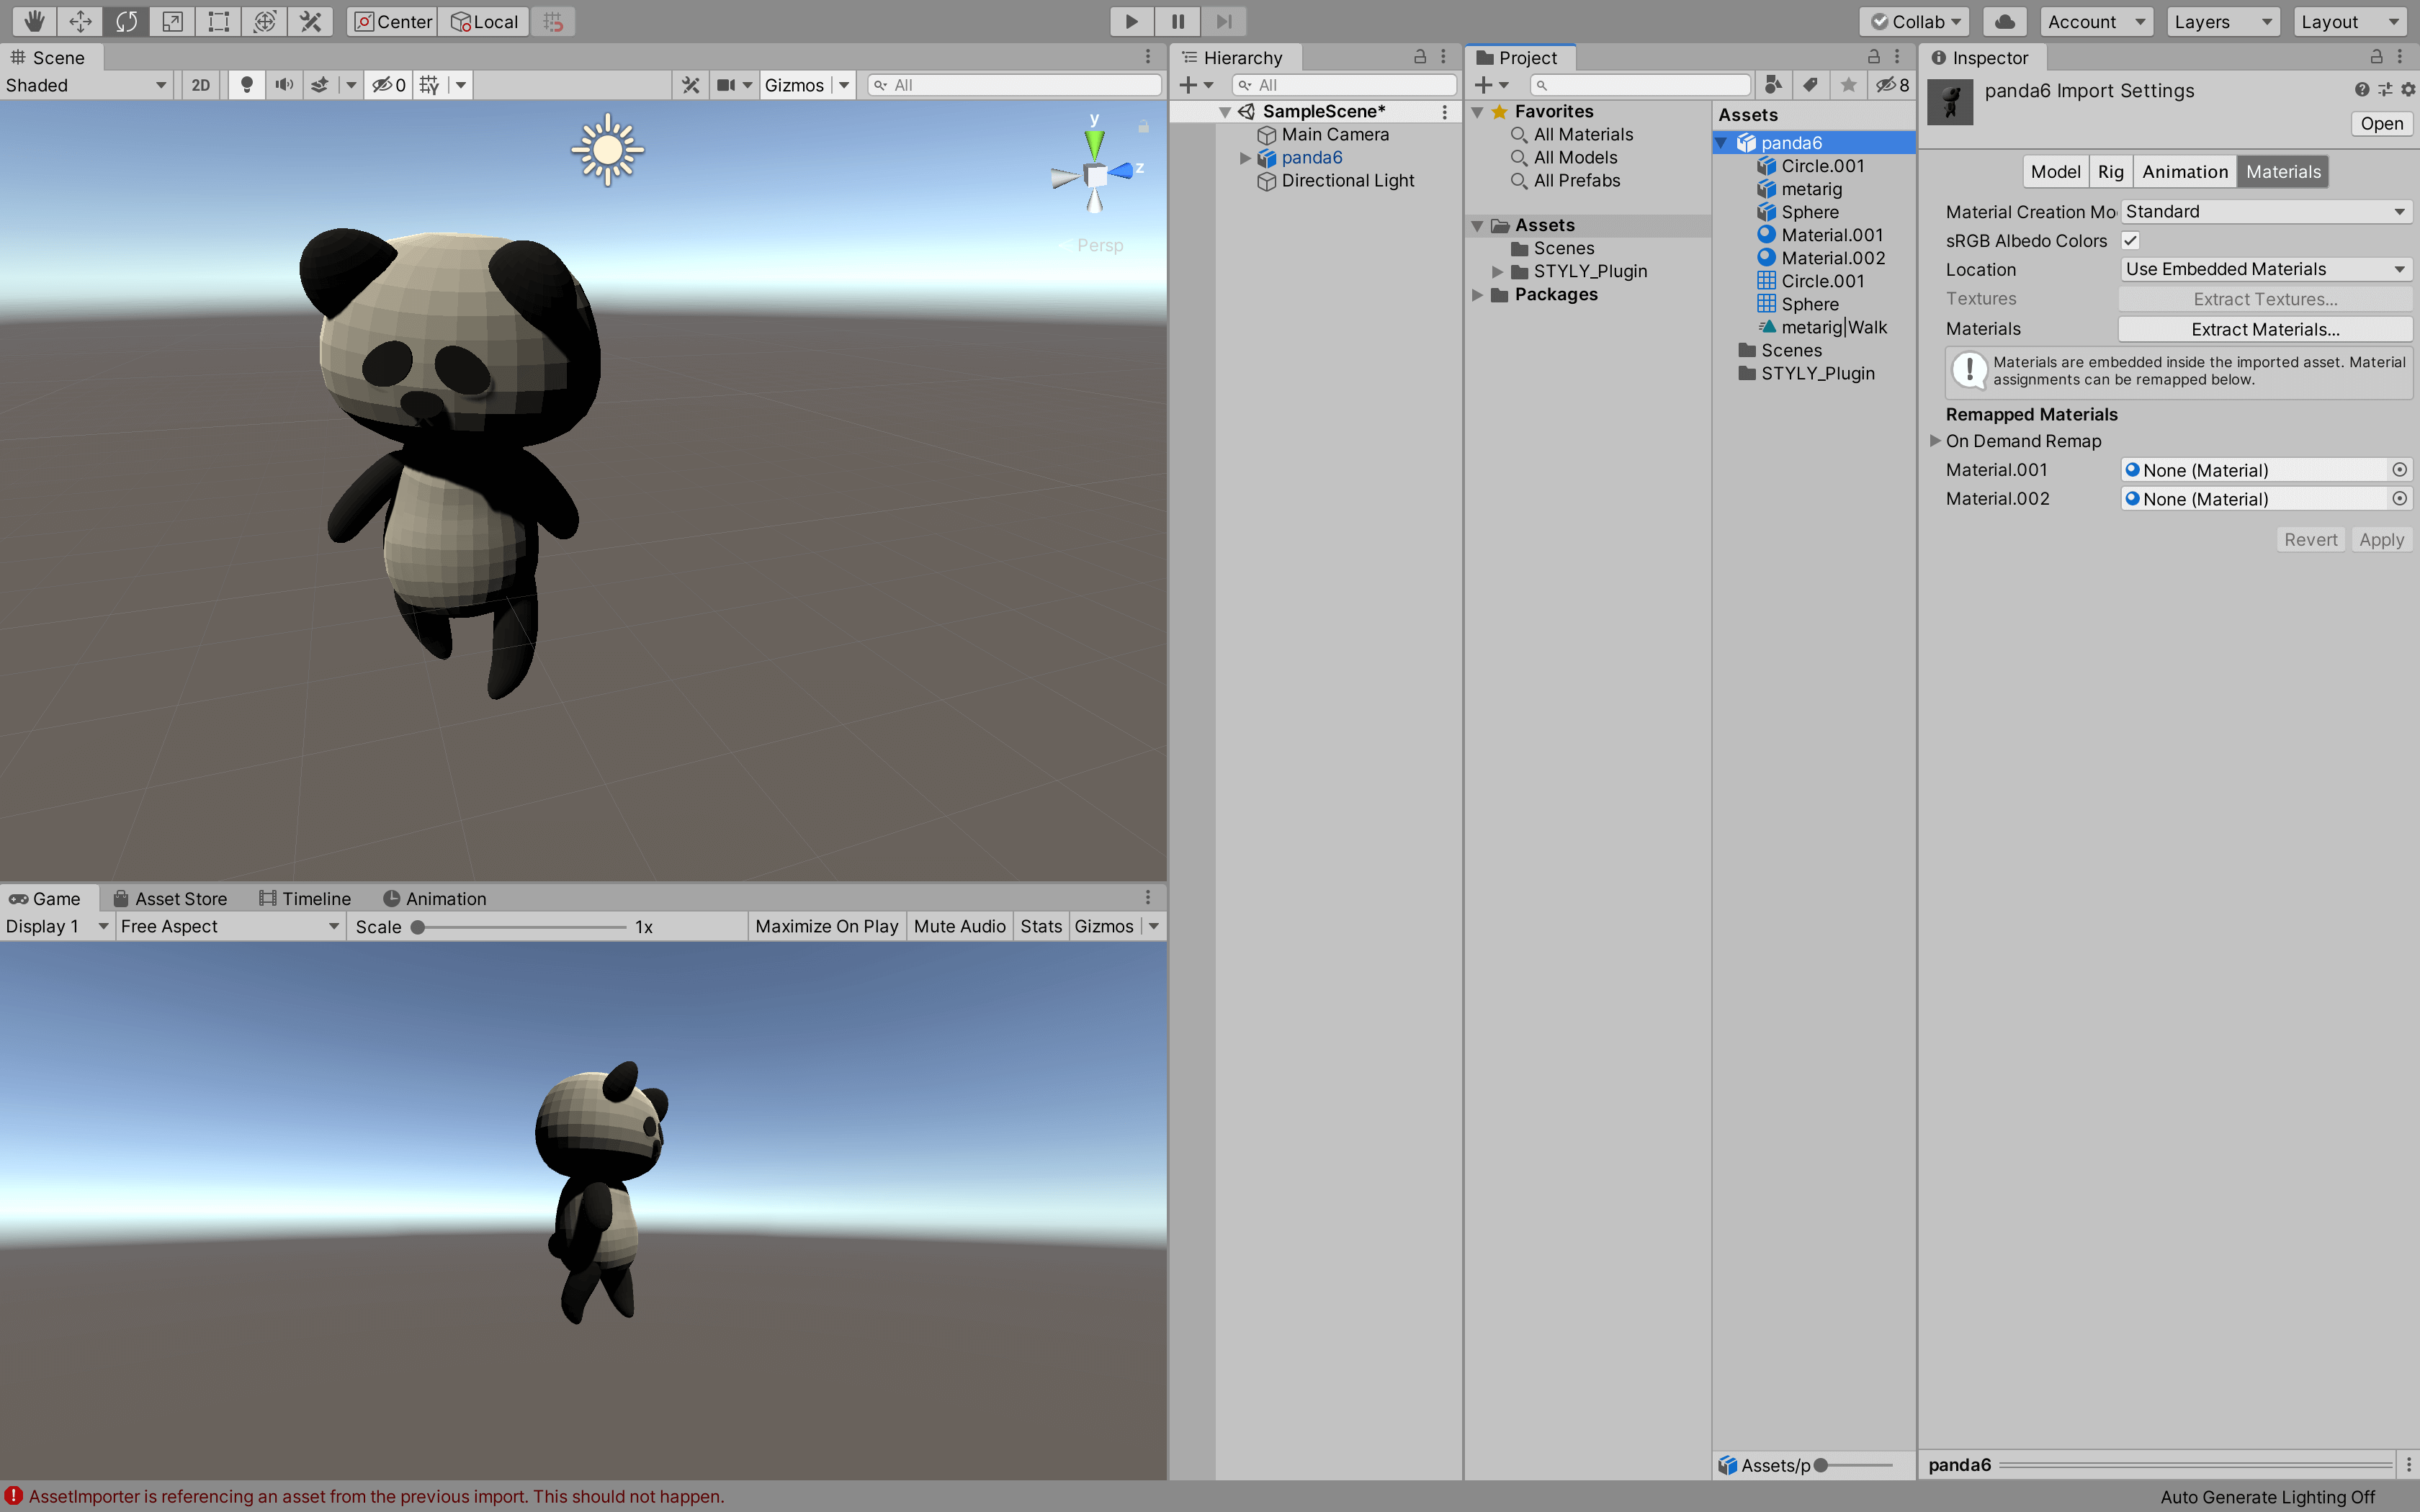
Place the Model in the Scene
Selecting the imported model file in Assets, use the following steps to change the Animation Type of your model to humanoid.
- Open the Rig tab in the Inspector tab
- Set the Animation Type to Humanoid
- Click Apply
- Click Configure
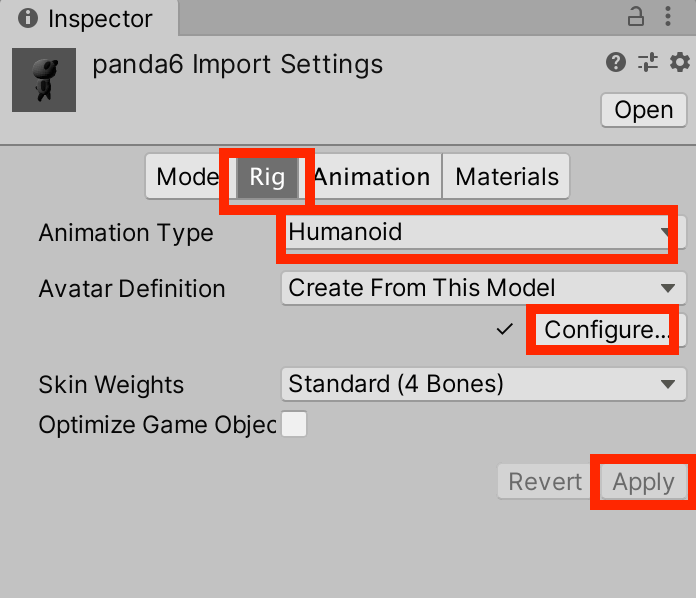
Changing the Animation Type to Humanoid
After clicking Configure, you will be taken to a window where you can check the bones. Make sure all the bones are green, and then click Done to return to the original scene.
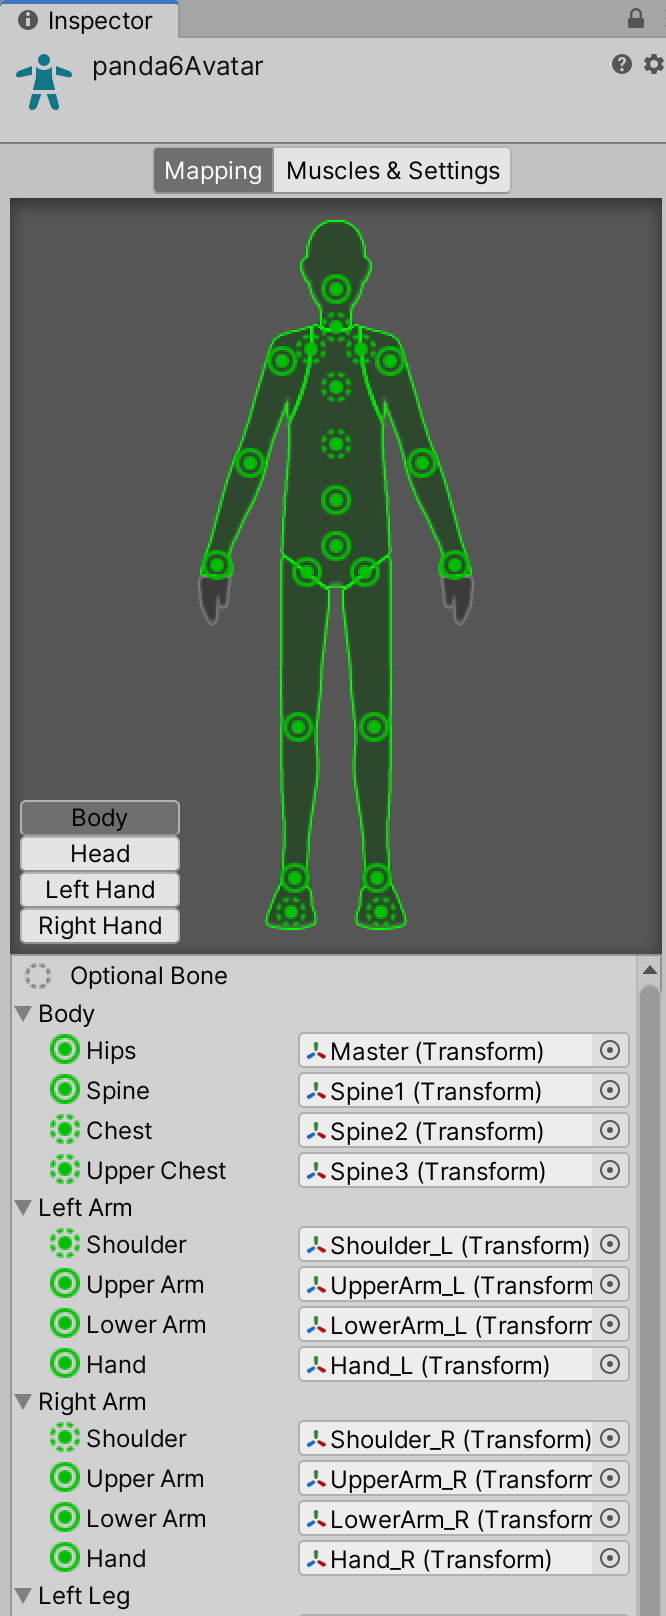
Check the Bones for Errors
If any of the bones are shown in red, you may need to reinsert the bones. This can be fixed by rotating the bones in Unity. You may also get an error if you did not name the bones properly in Blender.
Once you are back in the scene, select the animation file in the Assets panel, then drag and drop it onto your model in the scene.
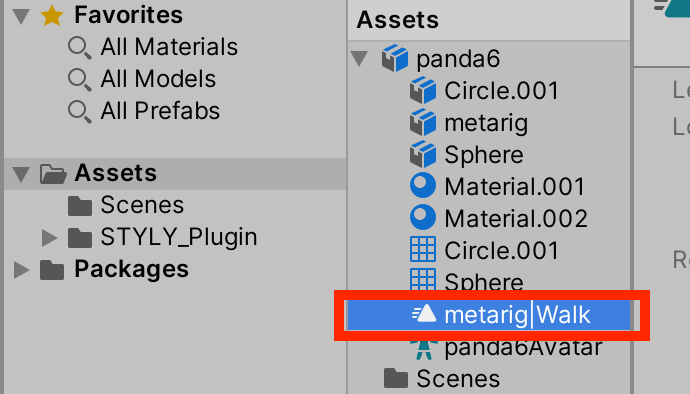
Select the Animation File in the Assets Panel
From the top menu, go to Window > Animation > Animator, then click on the hierarchy model to find the animation you just dropped into your model (shown as the orange rectangle in the image below).
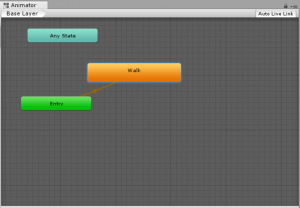
The Animator Window
If the name of your animation is blank, you can enter a name in the Hierarchy window.
If you want to add additional animations to your object, drag and drop the new animation into the Animator window, then right-click on the first animation and click Make Transition, then connect the arrow to the next animation.
Since we want our panda to keep walking, we will loop the animation.
Click on Edit… in the animation Inspector of the object, in the Assets panel.
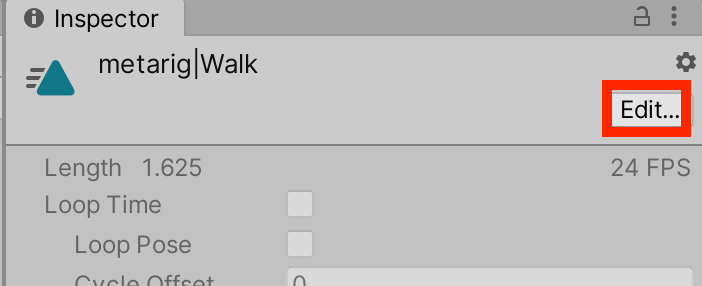
Click Edit…
Clicking Edit… will allow you to edit the animation. Check Loop Time and click Apply at the bottom.
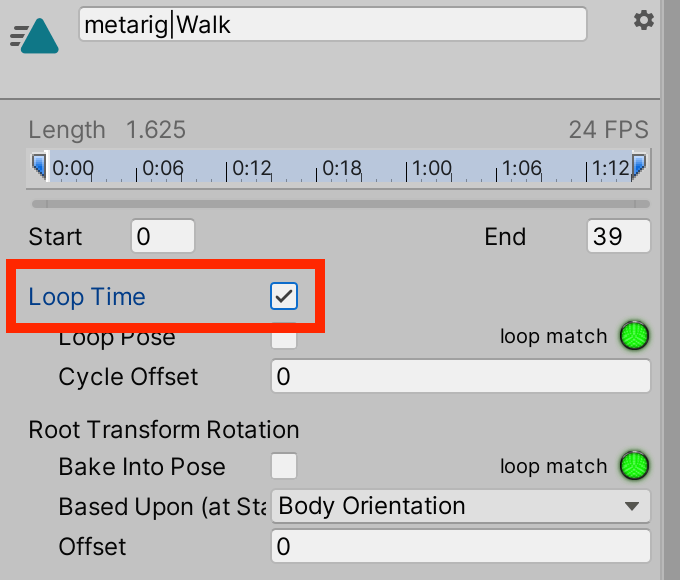
Loop Timeにチェック
If the animation loops when you play it, it is all set. If the animation does not loop, the setting may not have been applied properly, or Loop Time may not be checked.
When you are done, drag and drop the animated model into the Assets panel. This makes it into a Prefab which can be uploaded to STYLY.
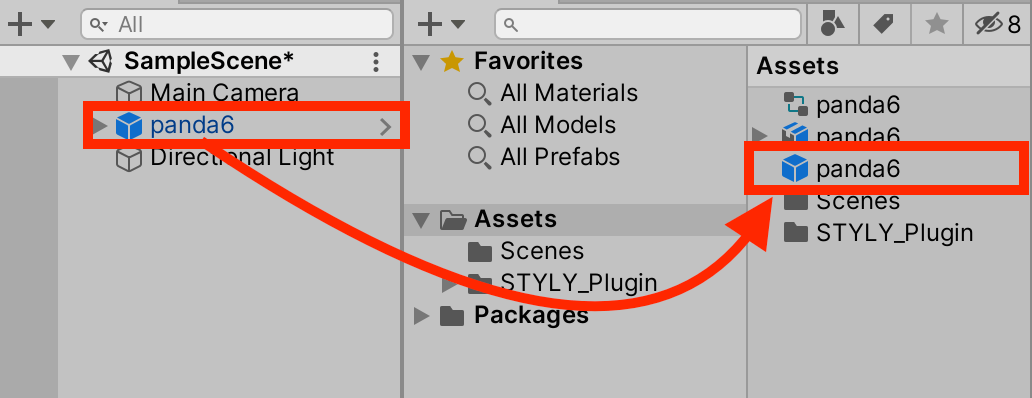
Making the Animated Panda a Prefab
Select the Prefab object in Assets, right-click, and select STYLY > Upload prefab or scene to STYLY. The upload to STYLY will begin, and after a few seconds or minutes, you will see a window saying, “Upload Succeeded.”
If you go to STYLY and open Assets > 3D Model > My Models, you should find the animated object uploaded there.
The Animated Model in STYLY
For questions about STYLY, bug reports, and improvement requests, please contact the STYLY FORUM
https://en.forum.styly.cc/support/discussions
Certified (QA) by Mayuko Kudo
Edited by SASAnishiki
Translated by cpnnn