In this article, I show you how to use BSurfaces, a standard add-on for Blender, to manually retopologize a 3D model with a large number of vertices, reducing the number of vertices.
What is Retopology?
Please refer to the following article for an explanation of retopology.
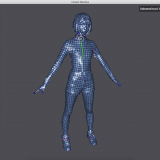
Although automatic retopology is convenient, it is not suitable for parts such as faces with moving expressions because it results in a uniformly ordered mesh. In this case, we need to do the retopology manually.
In this case, we will use an add-on called BSurfaces, which allows us to retopologize by repeatedly drawing lines and creating faces between the lines.
Activating BSurfaces
BSurfaces is a standard add-on installed in Blender 2.8, so you can use it immediately after activating it.
Go to “Edit” -> “Settings” -> “Add-ons” -> search for “BSurfaces” in the search window, and you will see “Mesh: Bsurfaces GPL Edition”.
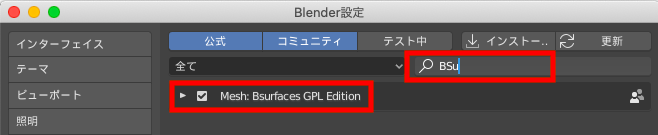
Activate BSurfaces
How to use
From the group of icons on the left side of the screen, click on the “Annotate” icon.
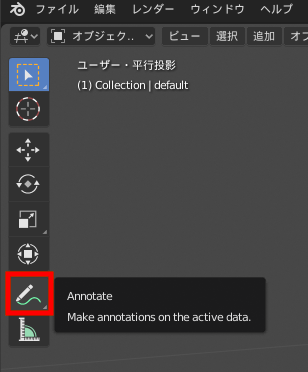
Annotate
In the “Tools” tab of the property shelf that appears when you press the N key, change “Arrange” to “Surface”. (Tab names such as “Tools” may vary depending on your environment.
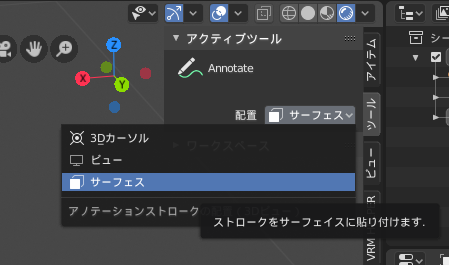
Placement to Surface
By setting the placement to Surface, the vertices will be placed as if they were attached to the surface of the original model and will not shift. The same applies if you increase the number of divisions by moving vertices or cutting loops.
Next, go to the “Tools” tab, find the “BSurfaces” setting, and click “Initialize”.
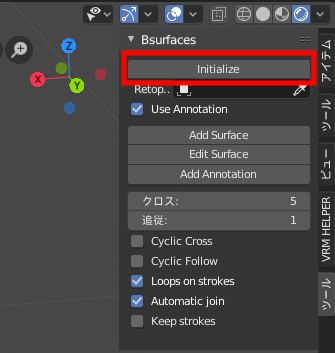
Click “Initialize”
You will see that a new mesh called “BSurfaceMesh” has been added.
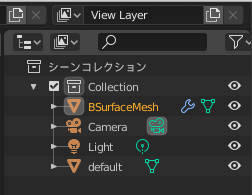
A BSurfaceMesh has been added.
BSurfaceMesh will automatically be placed in the box below the “Initialize” button.
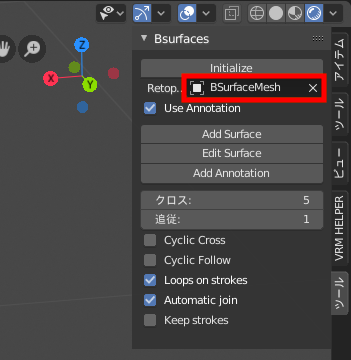
The BSurfaceMesh is inserted
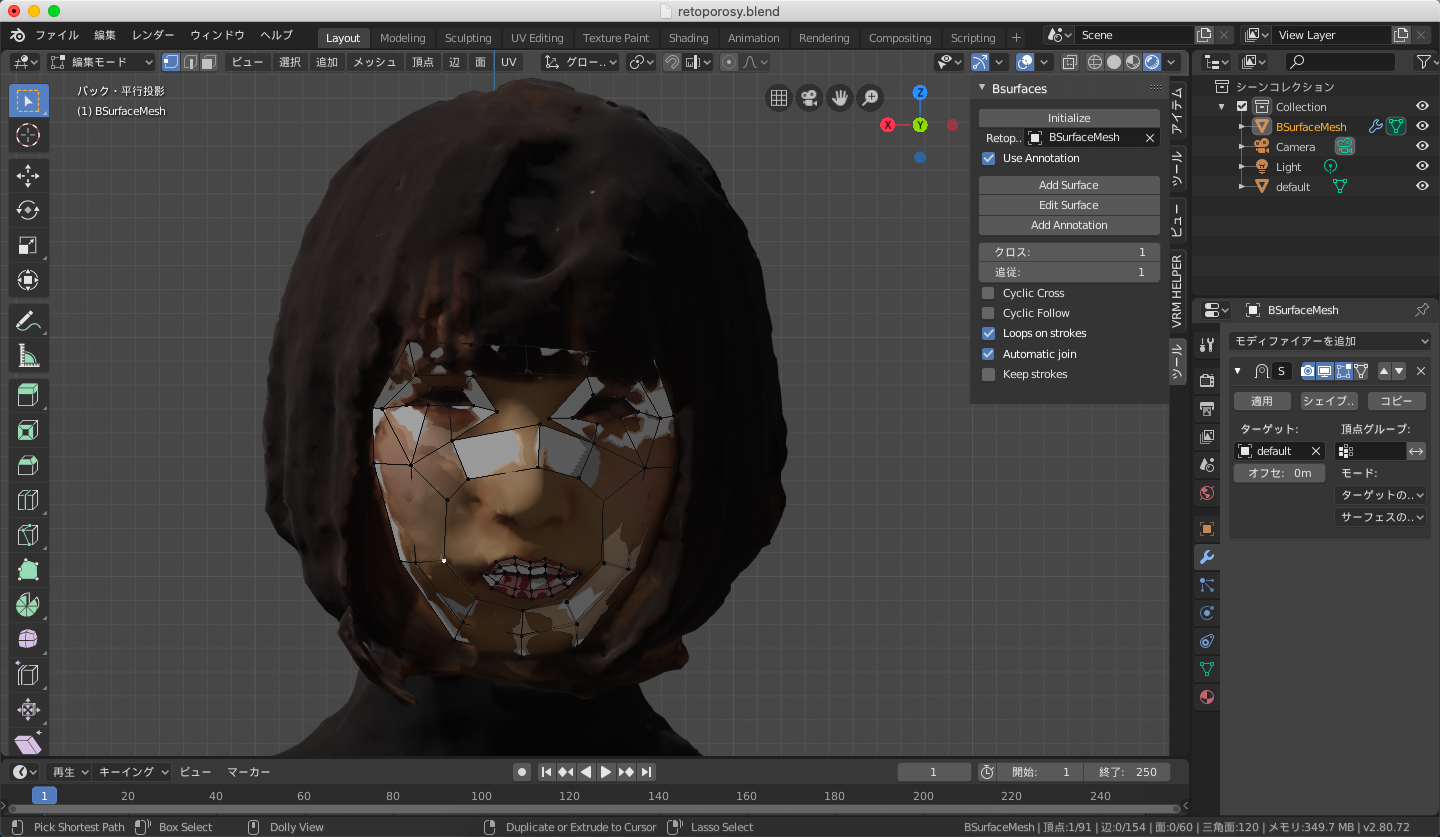
In this state, draw some lines to attach the surface to the model. In this case, we will draw lines around the eyes, from inside to outside.
Be sure to draw the lines in the rightward/leftward order. If you add more lines in between, the order will be lost and you will not be able to apply the surface properly.
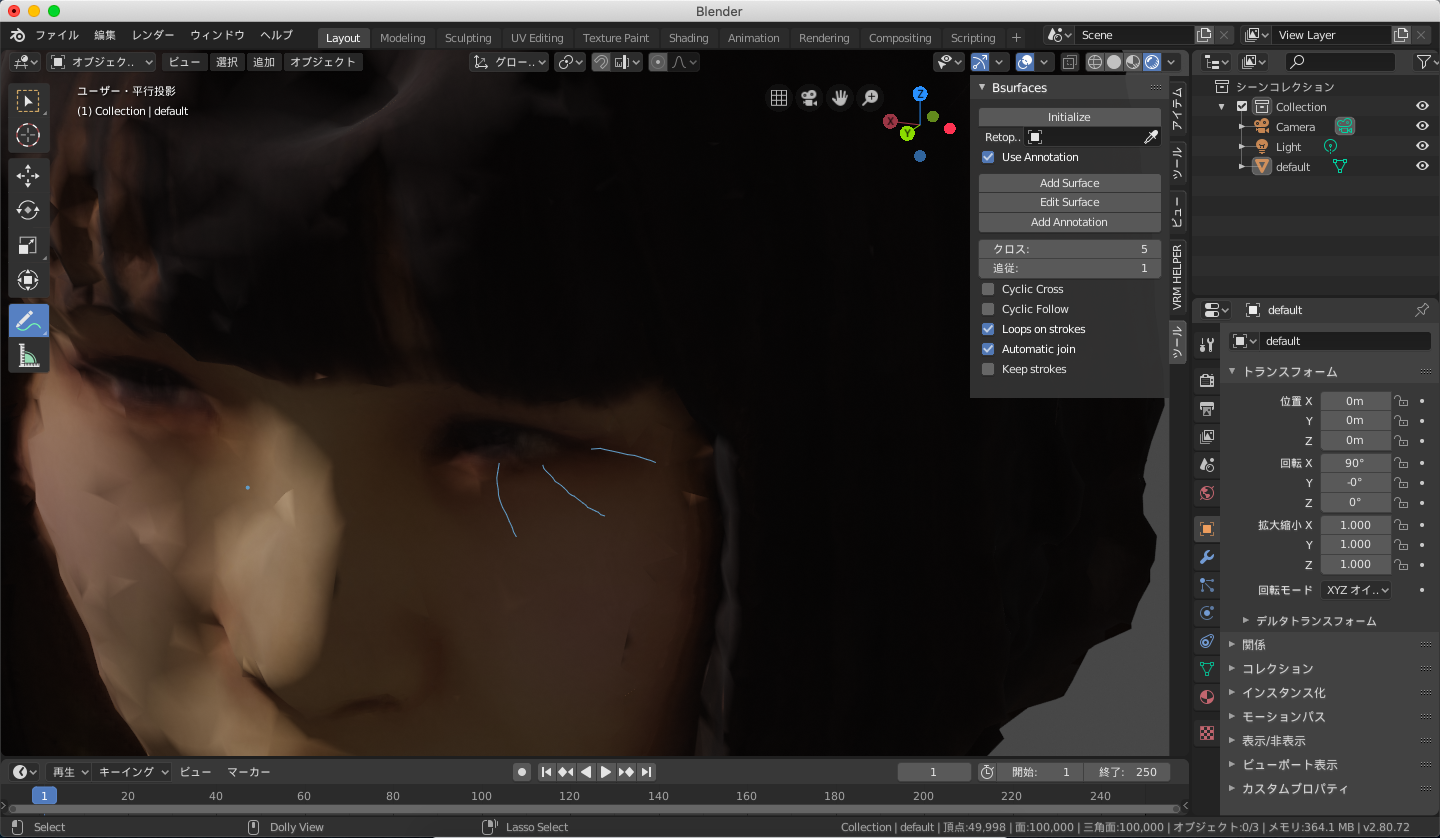
Draw a line around the eyes.
When you have finished drawing the lines, click “Add Surface”.
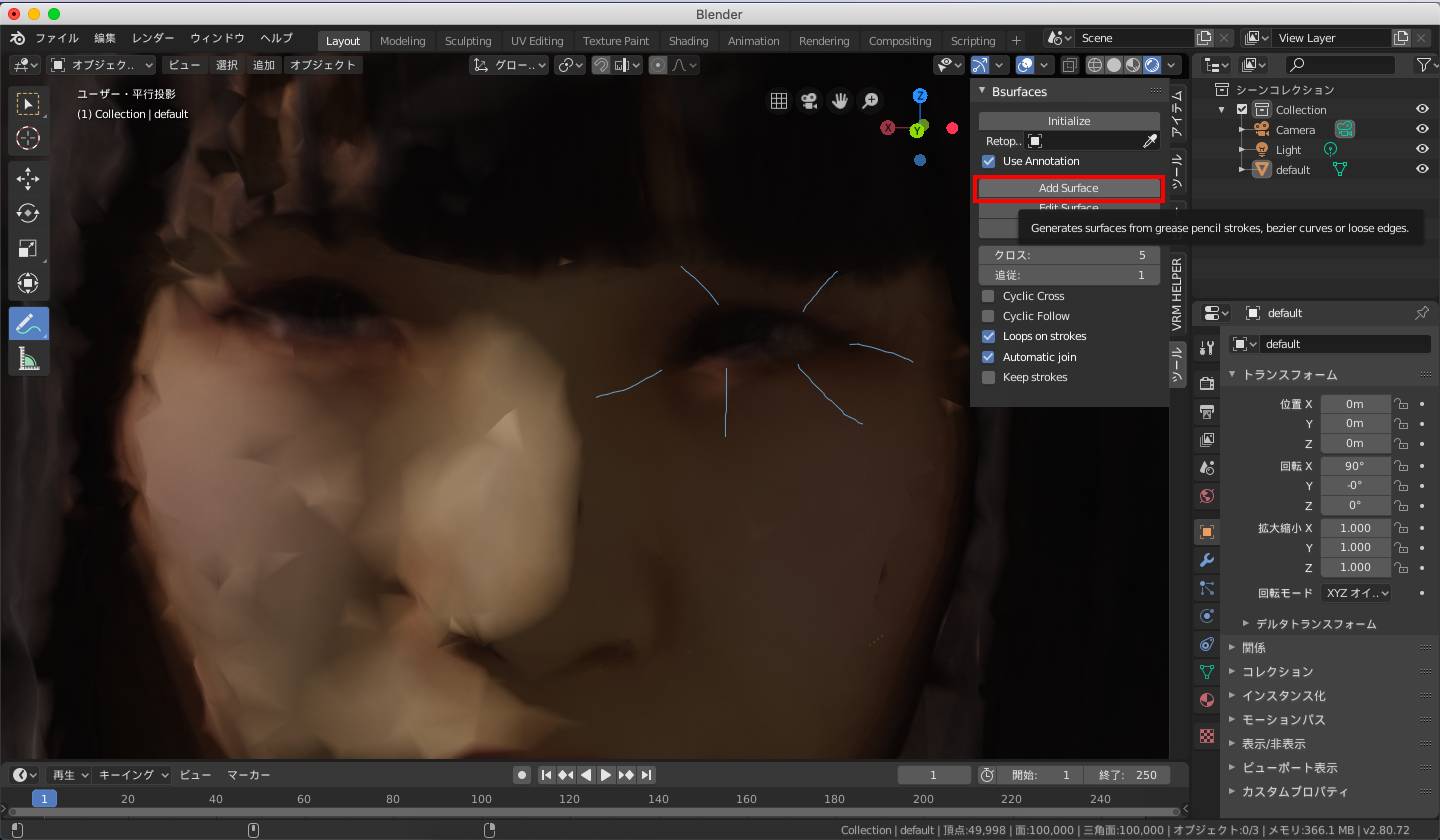
Add Surface
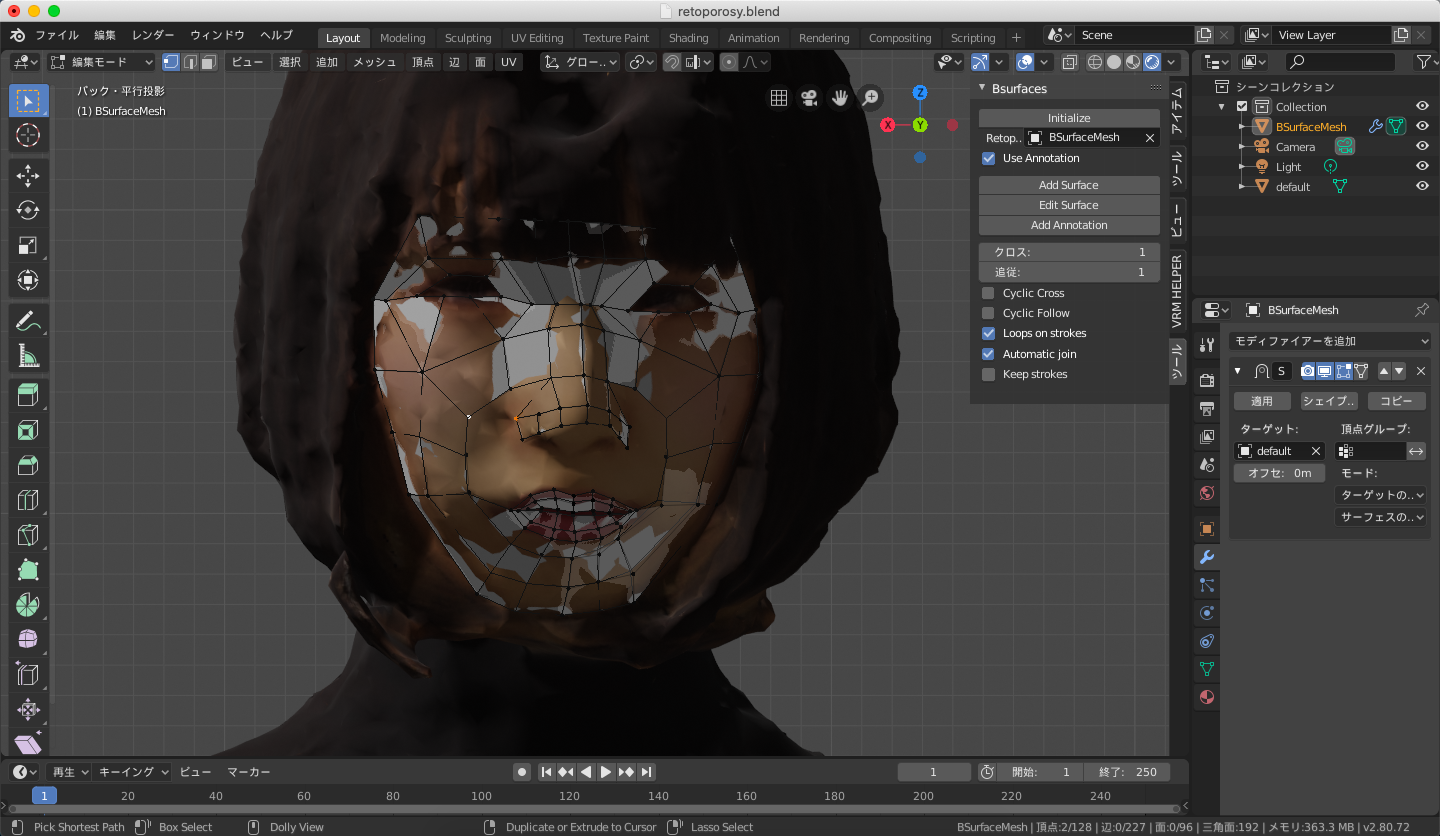
A surface is now automatically generated from the lines. You can adjust the number of divisions from the menu that appears in the lower left corner.
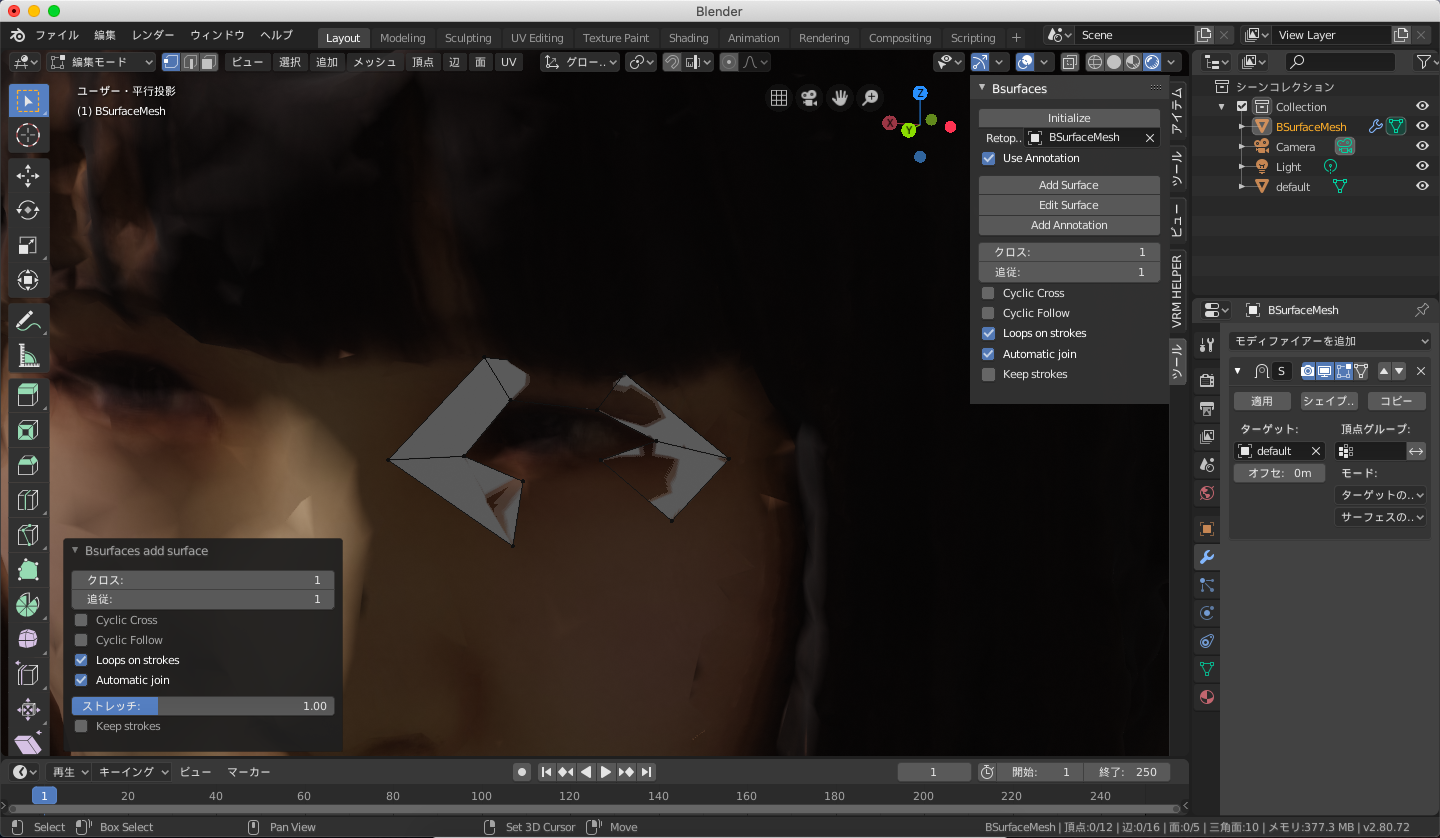
A surface has been automatically generated.
Select the four points where you want to generate the surface, and then select “Edge” and “Bridge Edge Loop” to fill in the open area.
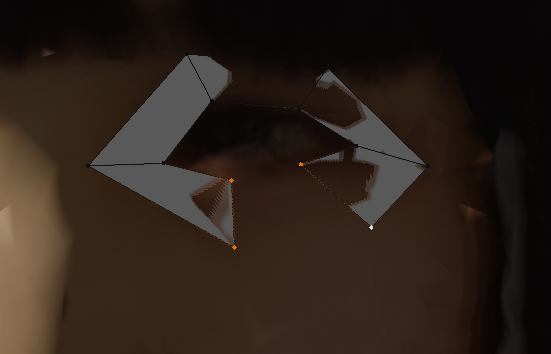
Select the four points
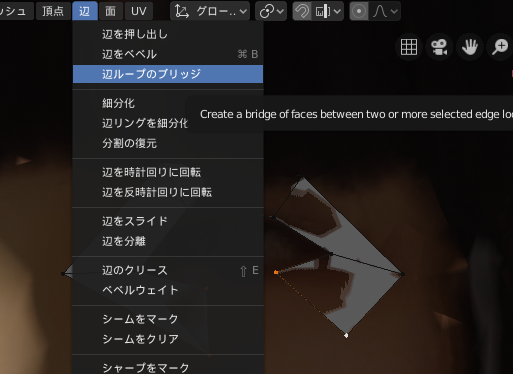
Bridge of edge loops
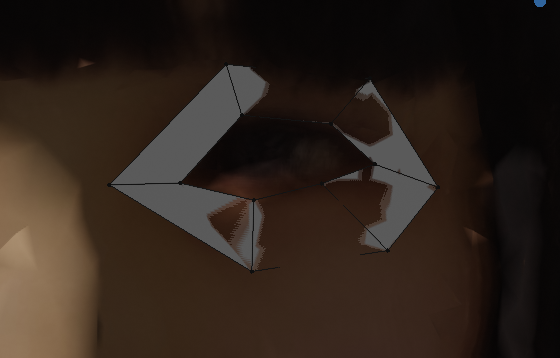
The empty space is now filled.
If you draw a line with a vertex of an already existing face selected, you can add more faces by following it.
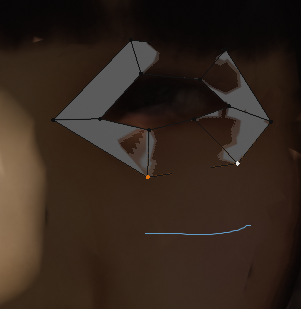
Draw a line under an already existing vertex

Connected faces have been created
Tips for face retopology
The general flow of the process is as follows: surround the eyes, surround the mouth, create the lips, surround the chin – outline, and fill in the gaps.
For more information on how to apply meshes specifically, it is easy to refer to tutorial videos that have been released.
https://www.youtube.com/watch?v=3L8eZAwmG2E&feature=emb_title
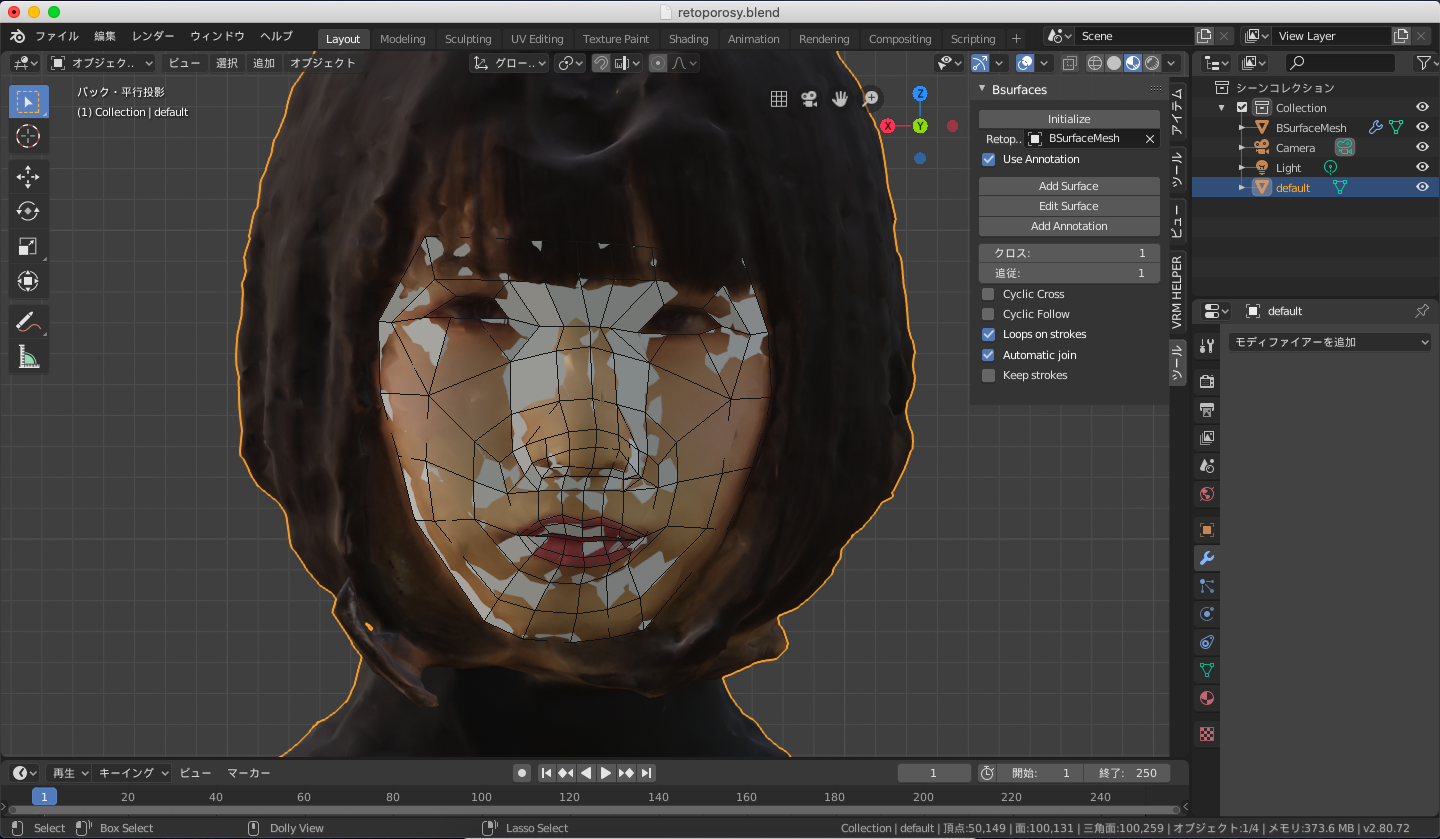
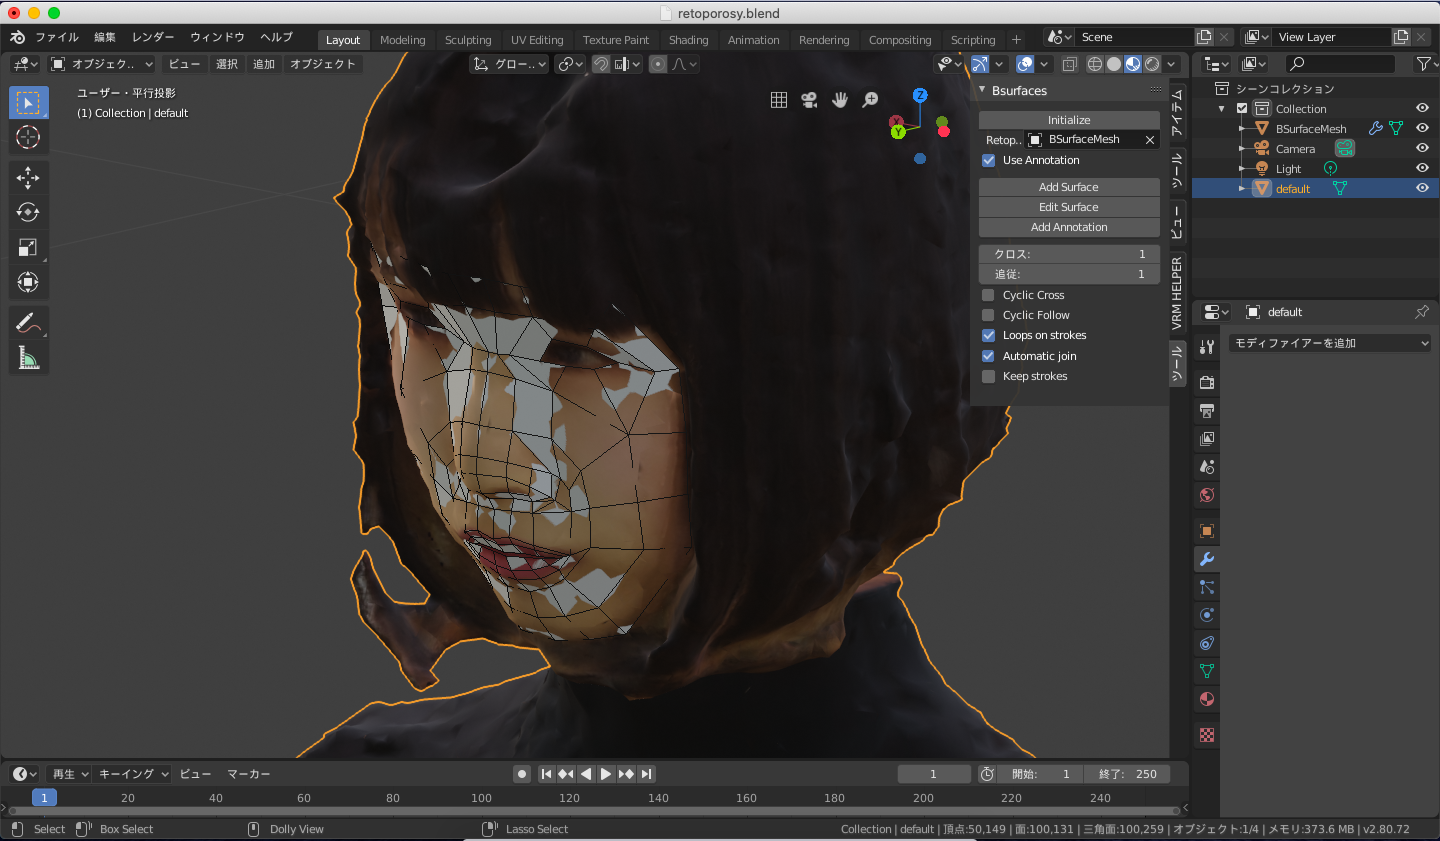
How to work with photogrammetric models
Photogrammetric models are different from normal 3DCG models in that the hair and skin are not separated as parts, and they are not symmetrical, but the basic flow is the same.
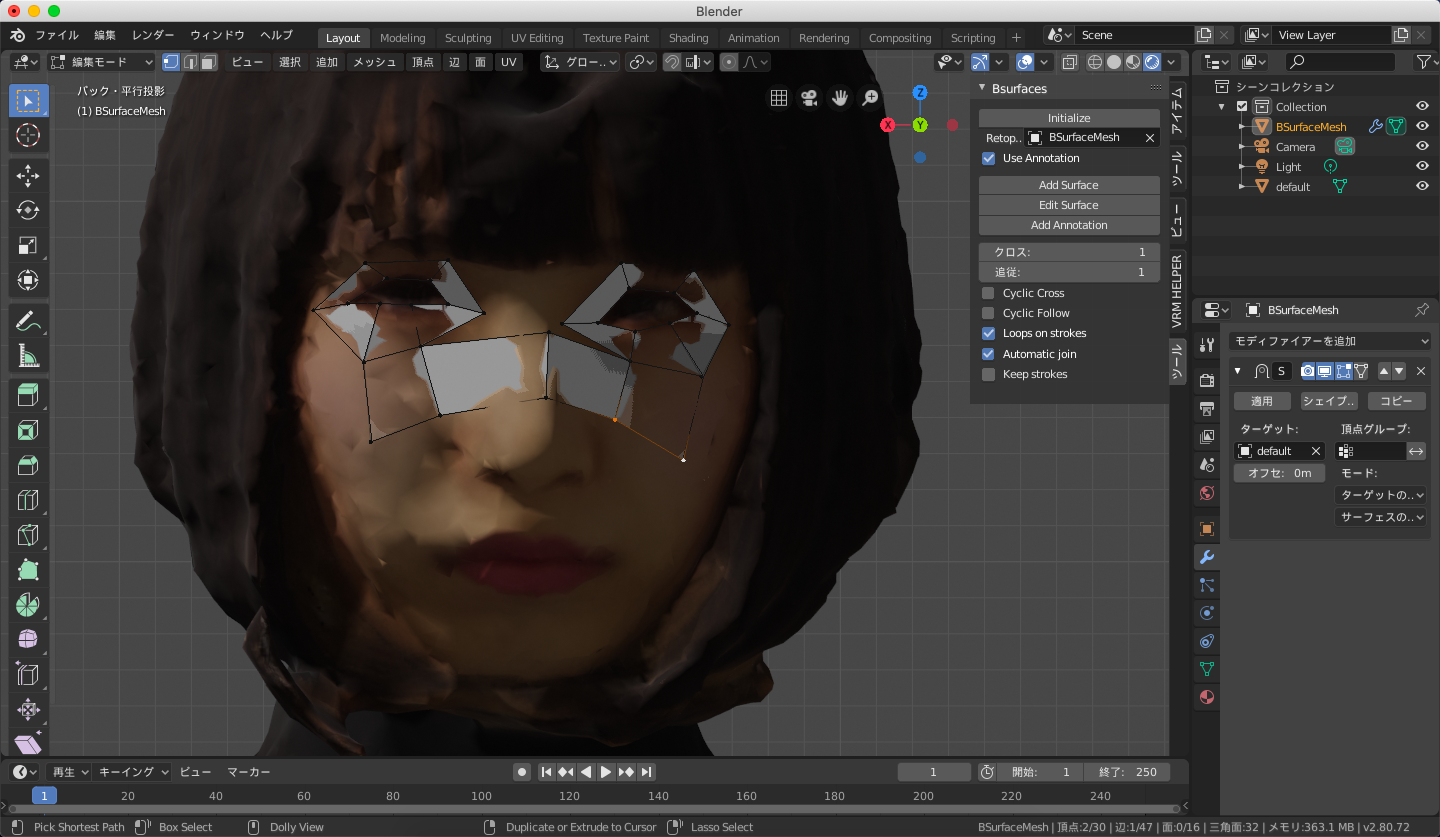
Surround the eyes and extend them downward
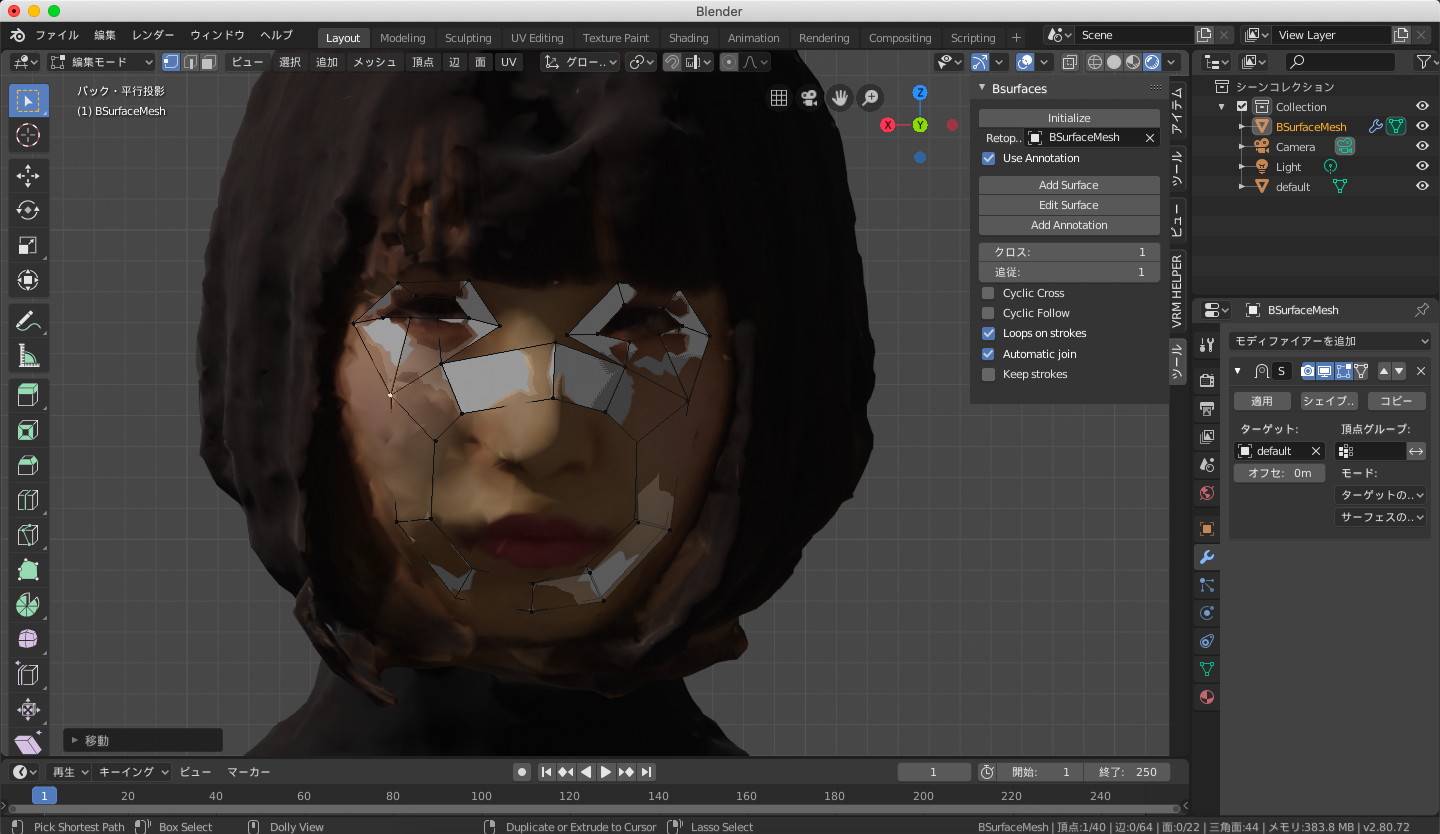
Surround the mouth
Put mesh on the lips
Create an outline and fill in the spaces between
Example of completion
Completed (from the front)
Finished (from diagonally opposite)
For other parts such as hair and clothes, you can use other tools to do automatic retopology and combine them.
Use both tools well to do the retopology efficiently.
Uploading to STYLY
To learn how to upload your retopologized 3D model to STYLY, please refer to the chapter “Importing your model to STYLY” in the following article.
Bake a texture on the 3D model after retopology
The model after retopology has no texture.
Since it will have a different UV placement than the original model, applying the original model’s texture as is will not work.
The following article explains how to bake the texture of the original model into the texture of the retopologized model using a function called baking.
![[Blender 2.81] Baking textures into retopology models](https://styly.cc/wp-content/uploads/2020/03/キャプチャ6-160x160.png)