How about creating a snowy landscape with the add-on “SnowFX”?
It can be used in a variety of ways, such as reflecting it in a STYLY scene, or changing the color to apply it as a material that is slightly different from snow.
In this article, I will show you how to use and arrange SnowFX.
Arrangement image
Download and install SnowFX
Download it from this page.
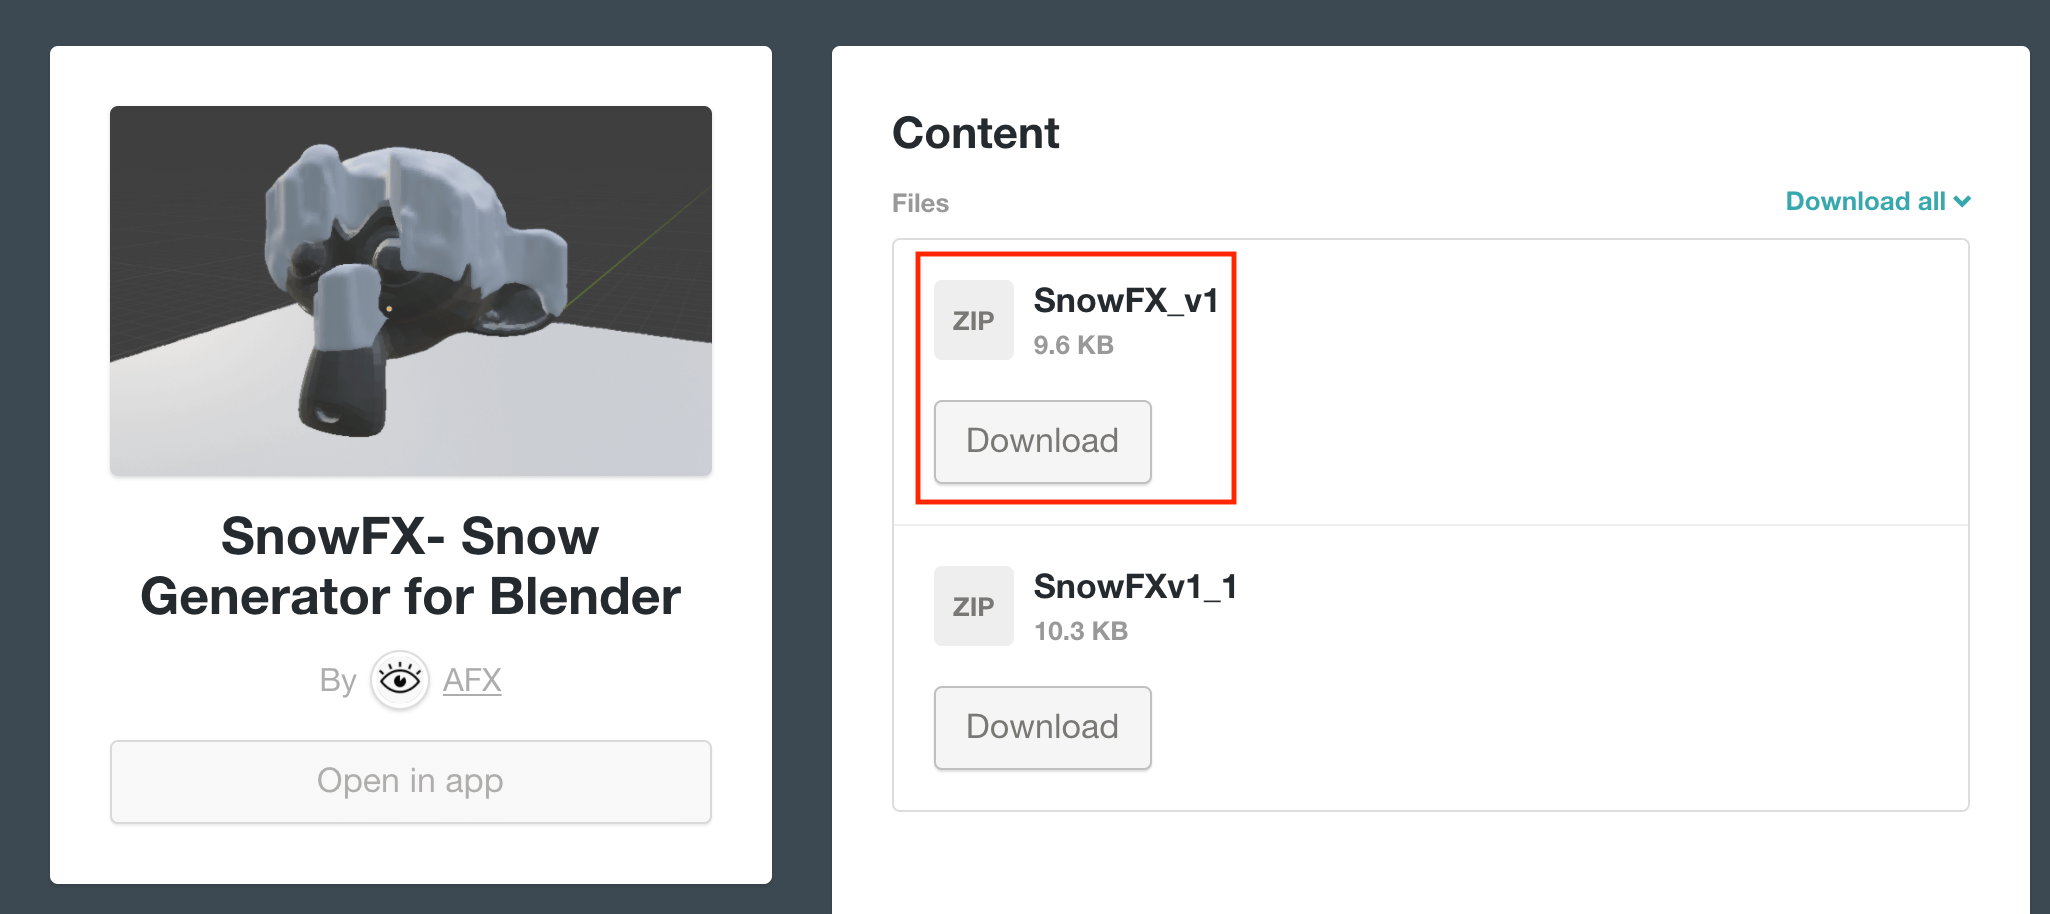
Download SnowFX_v1
After the zip download is complete, switch to “Preferences” from the icon at the top of the screen and install.
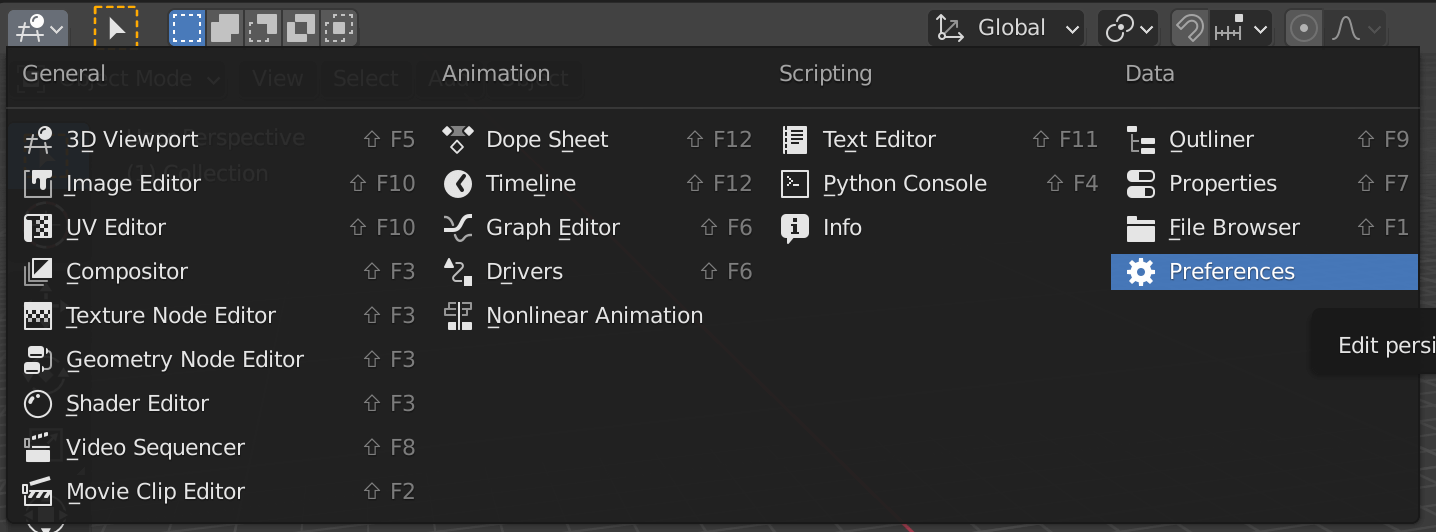
Preferences
Click “Install”, and select “SnowFX_v1.zip” from another window.
Click “Install Add-on” to install.
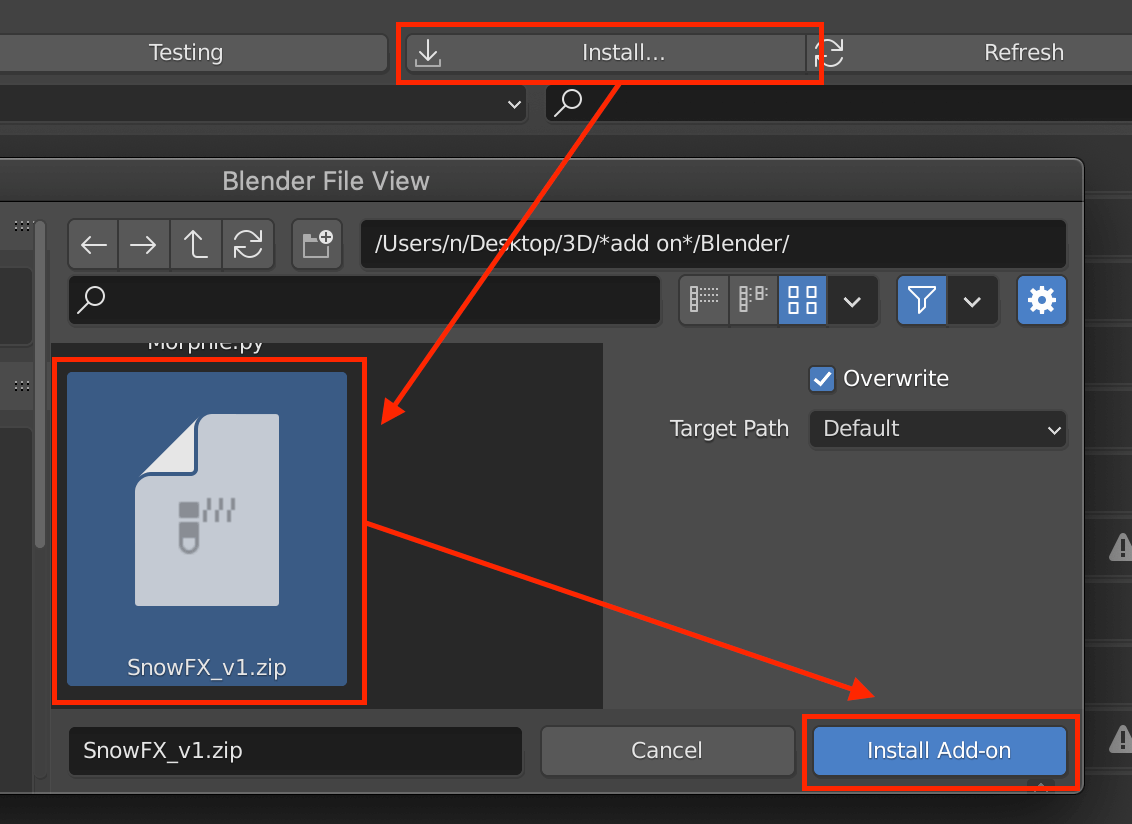
Install Add-on
After it is installed successfully, check the box and you are ready to go.

Mesh SnowFX
Basic Operation
Go back to the 3D viewport and select the object you want to make snow on in object mode.
You will see a SnowFX tab on the right side of the screen, click the Add Snow button and then the Paint button.
Trace the area where you want the snow to appear, and the snow will appear.

Add Snow
You can adjust the amount of snow with Snow Scale.

Snow Scale
Click “Press ESC to exit” to reset.

Press ESC to exit
Clicking “Apply Snow” will deform the snow to follow the shape of the object and reflect it.
The menu items will also change, allowing you to make more detailed settings.
Apply Snow
If you get an error, click the “Esc” key to switch to edit mode and check the “Scene Collection” in the upper right corner.
Click the ▼ button of the object that uses SnowFX, and select the mark in the SFX_Snow item (red frame in the image) to proceed to the detailed settings.
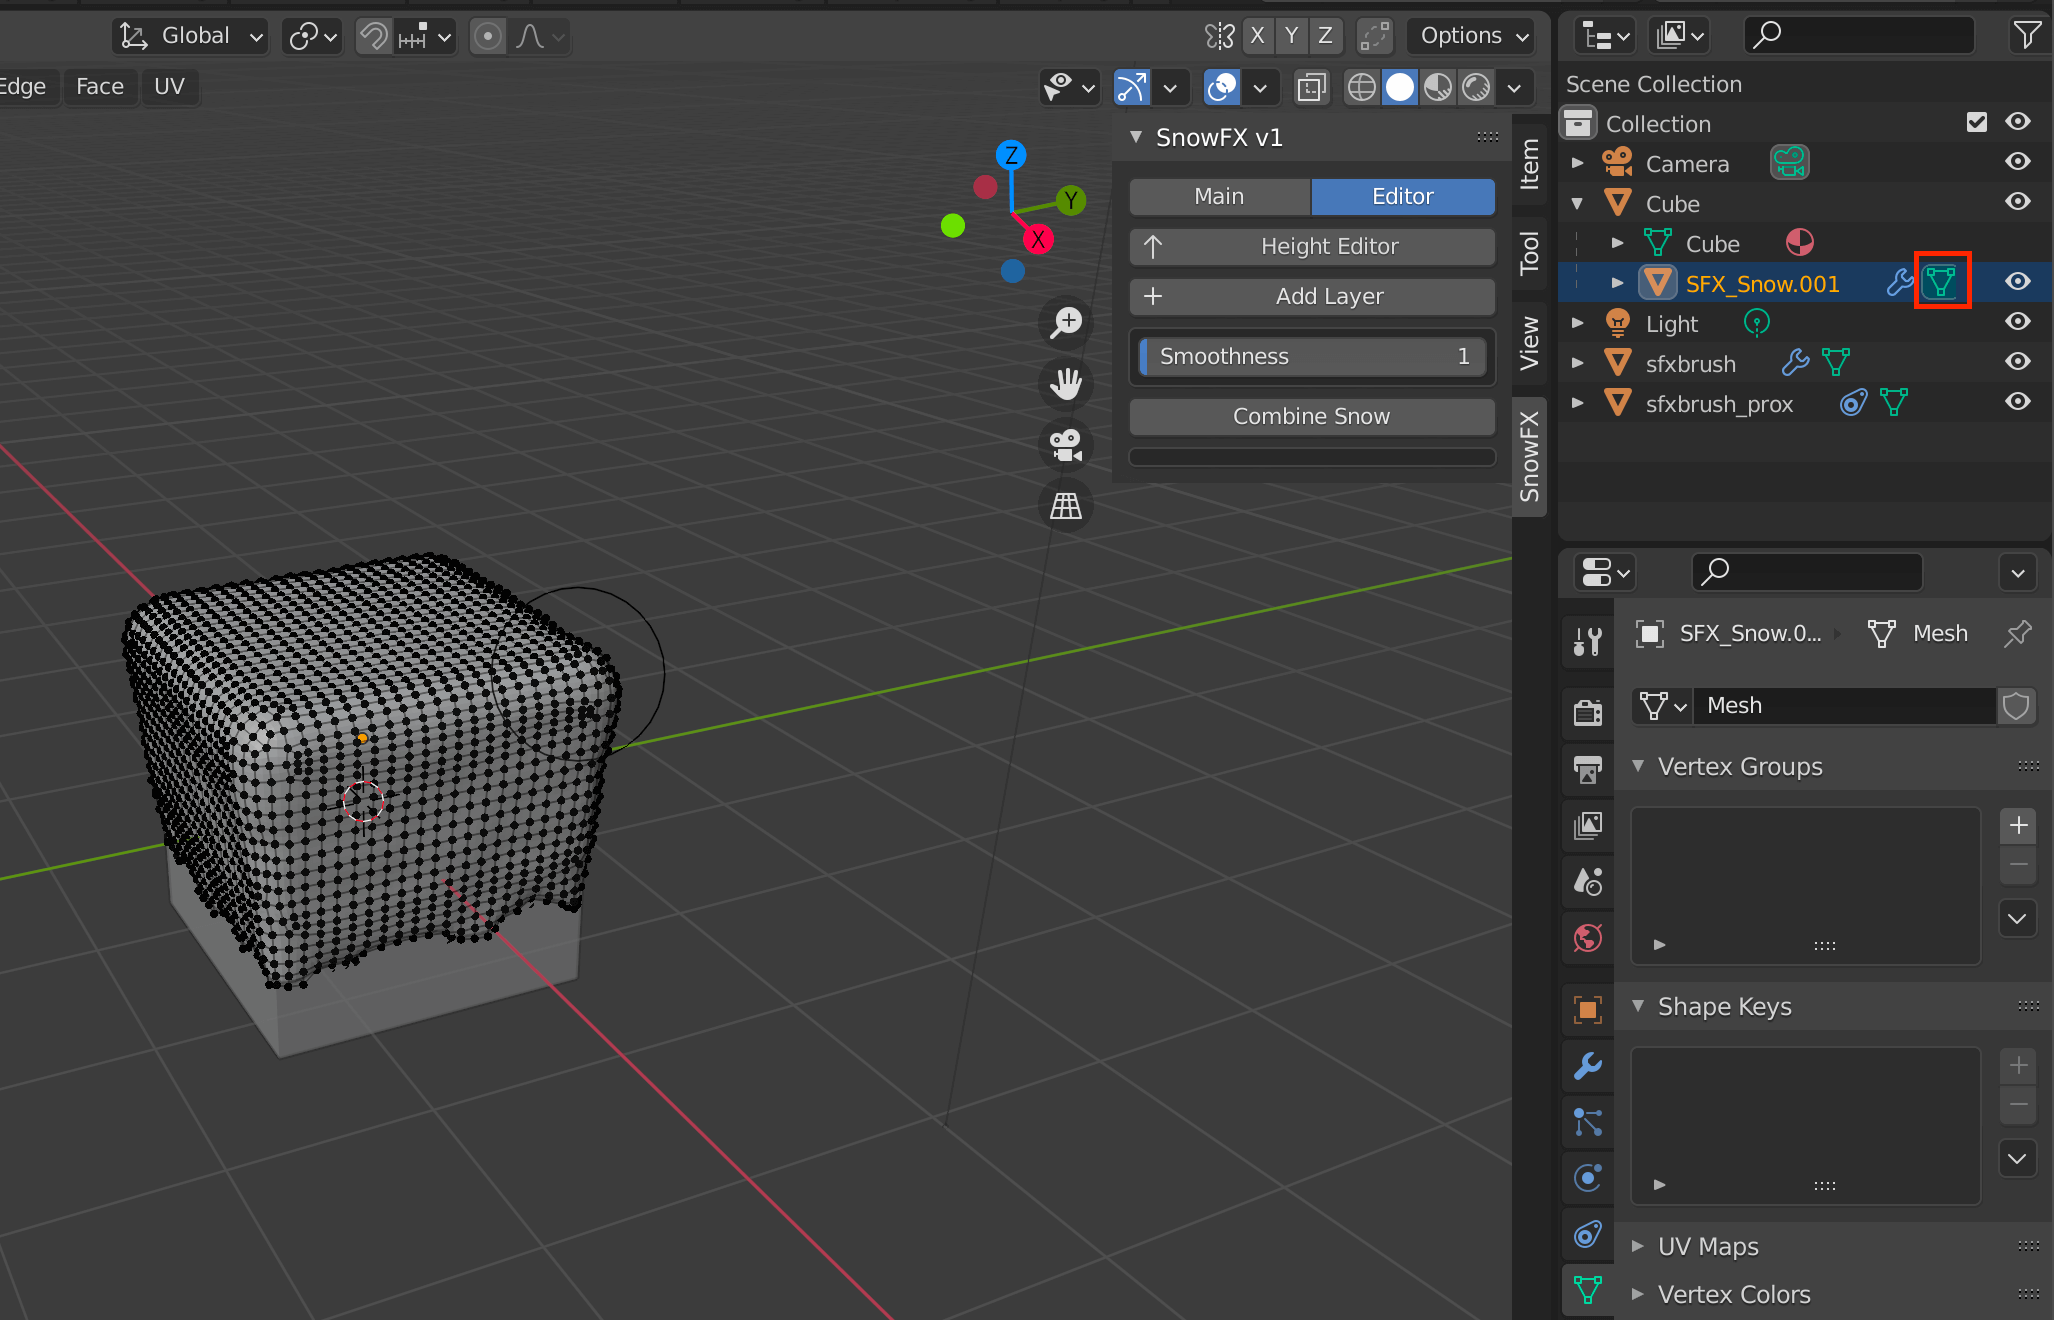
SFX_Snow
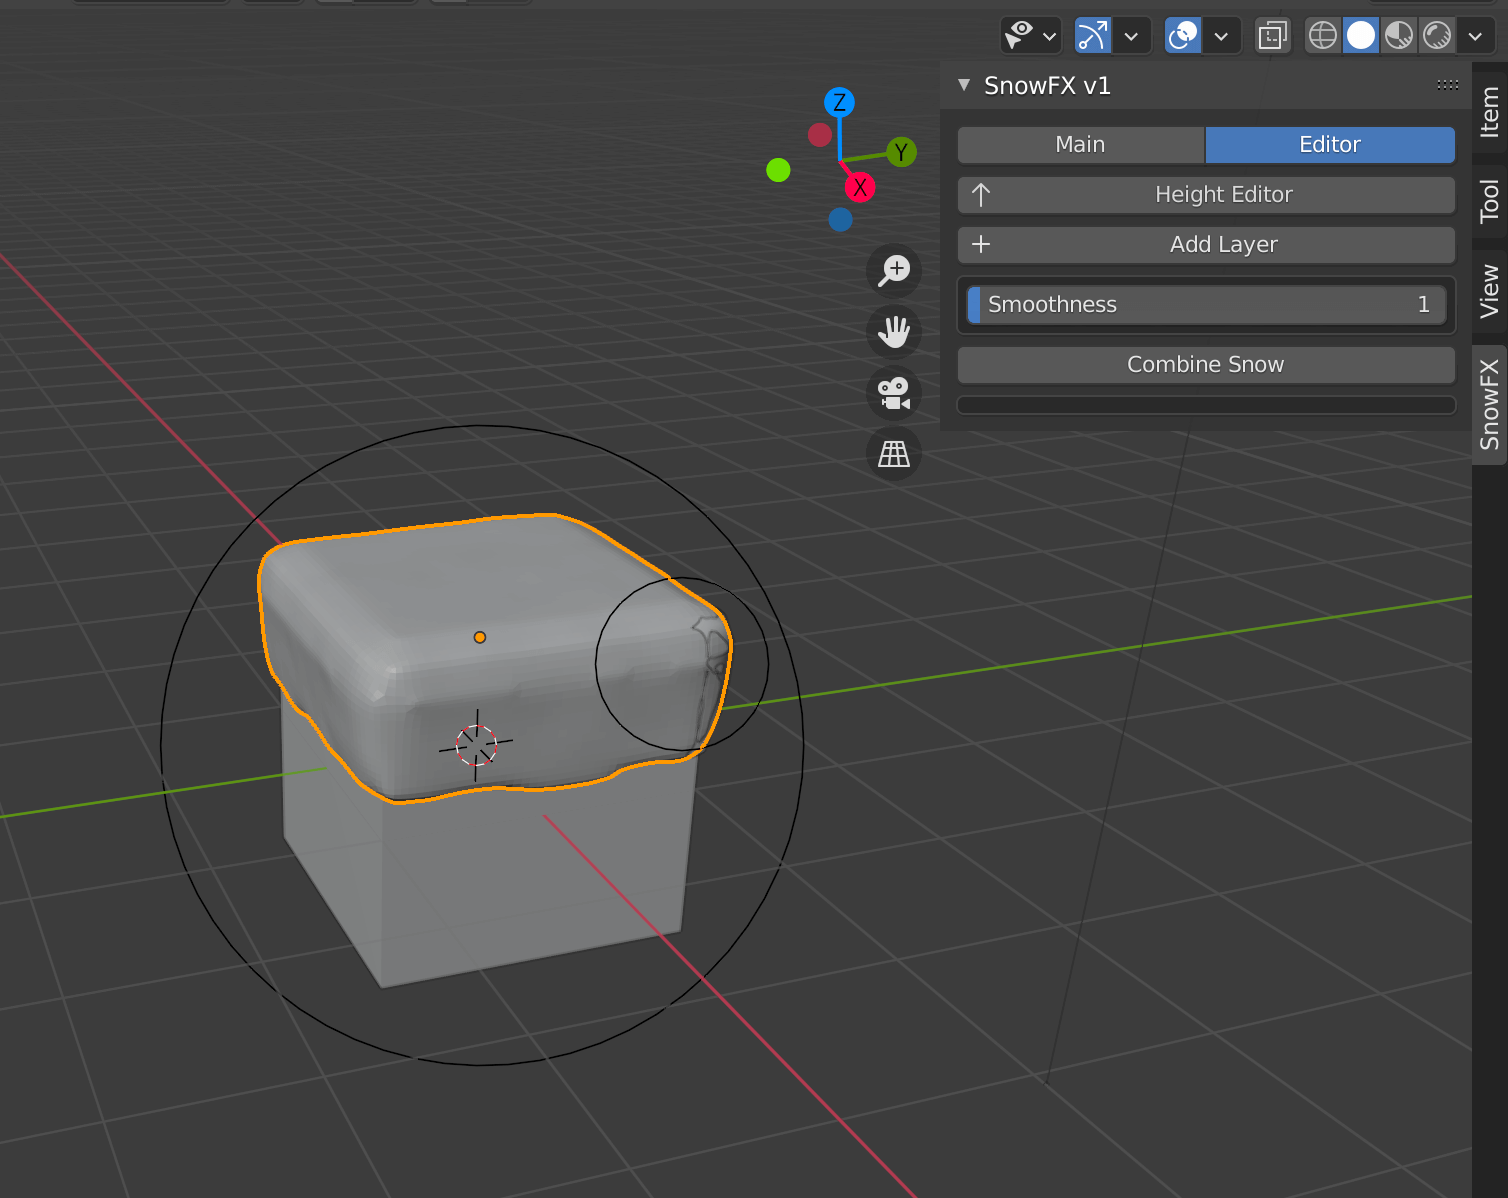
“Height Editor” is a function to add more snow on top of the snow that has just been added.
The amount of snow can be increased with “Strength”.
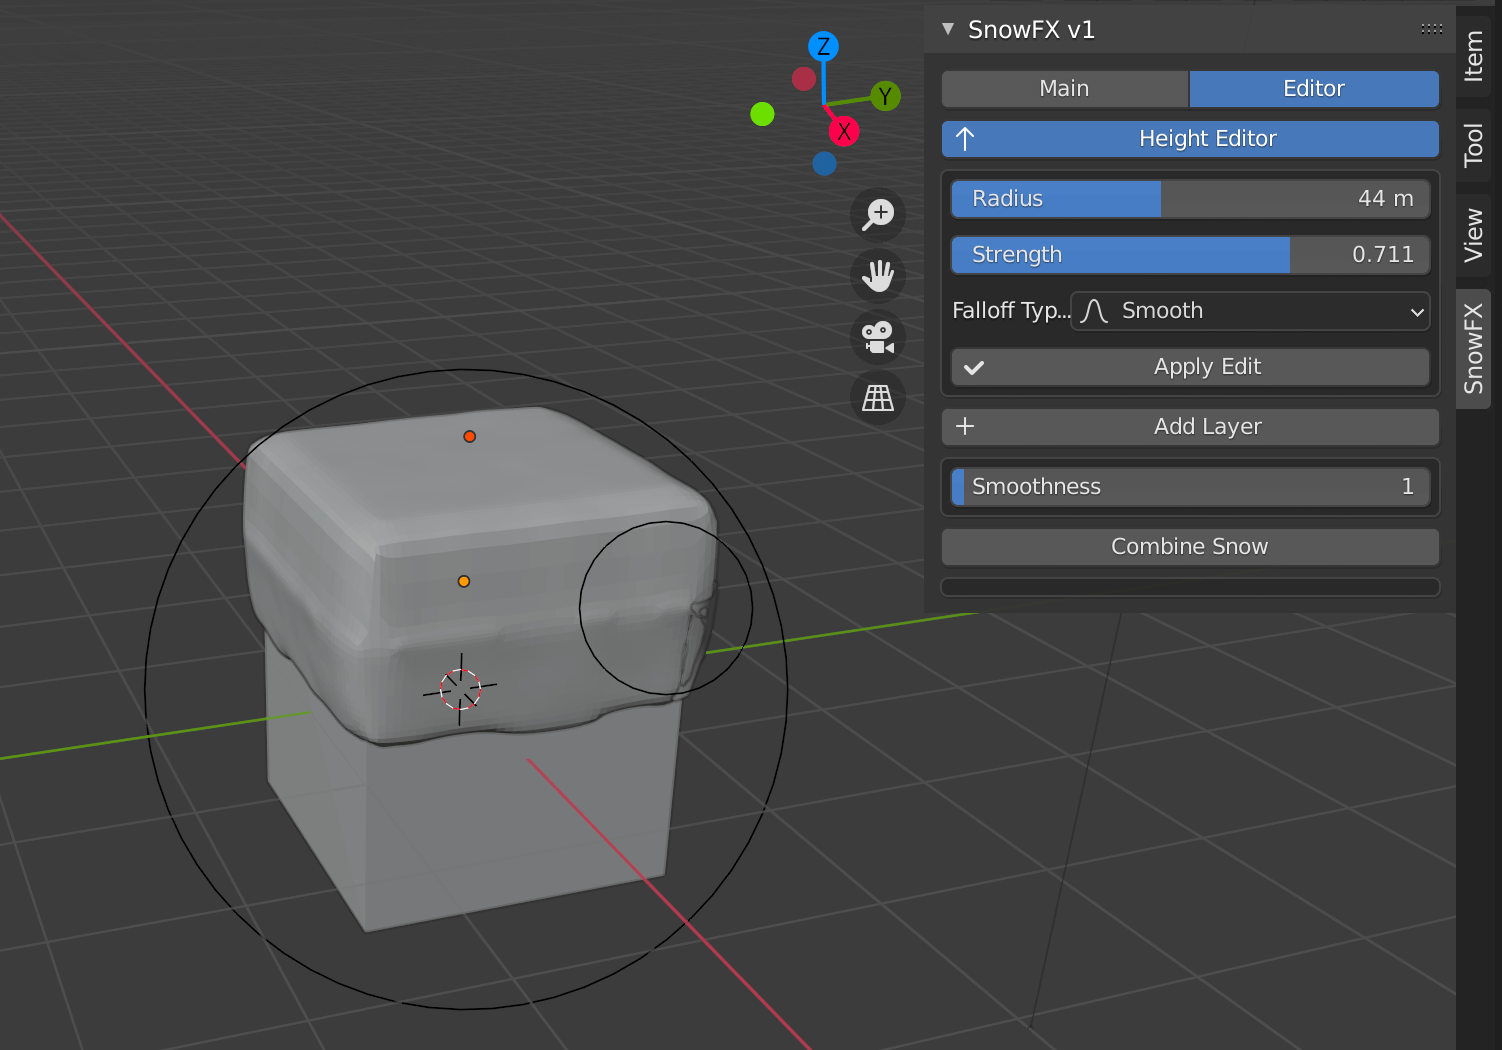
Height Editor
“Add Layer” is a function to add the upper part of the piled snow.
Thickness can be used to add thickness, while Melting can be used to represent freshly piled or melting snow.
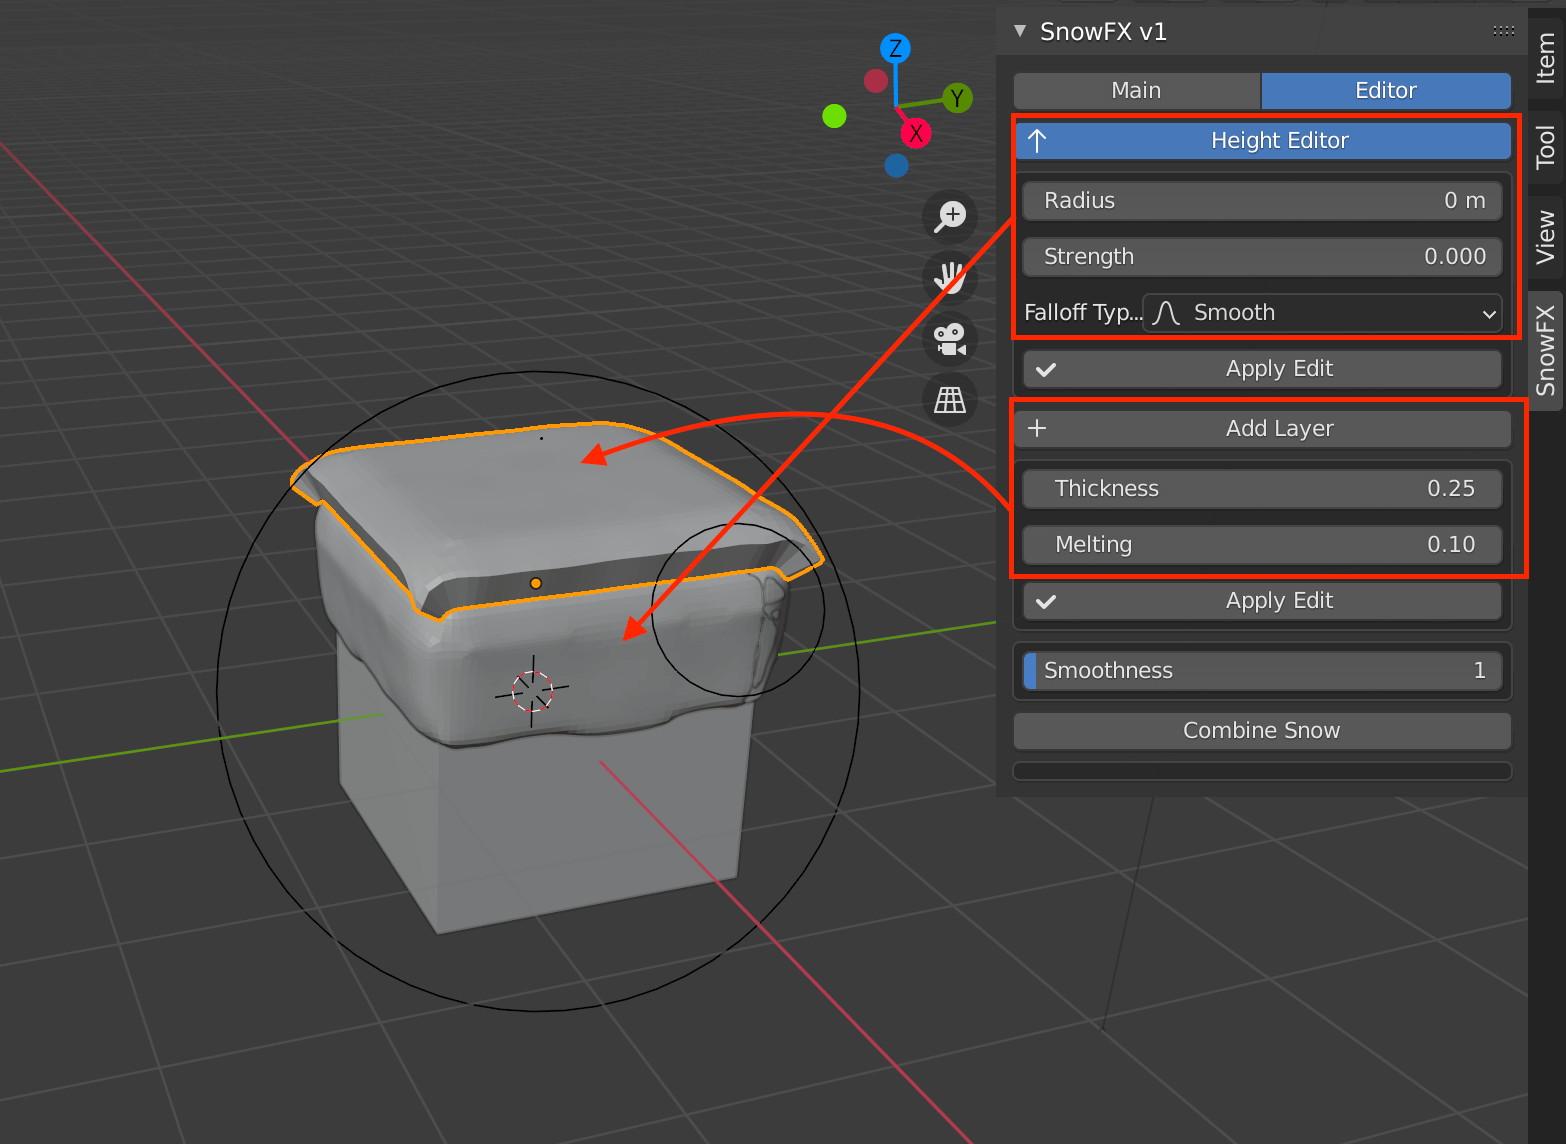
Use the Height Editor to set the height, and Add Layer to add the top part.
You can select multiple snowflakes and combine them naturally with “Combine Snow”.

Combine Snow
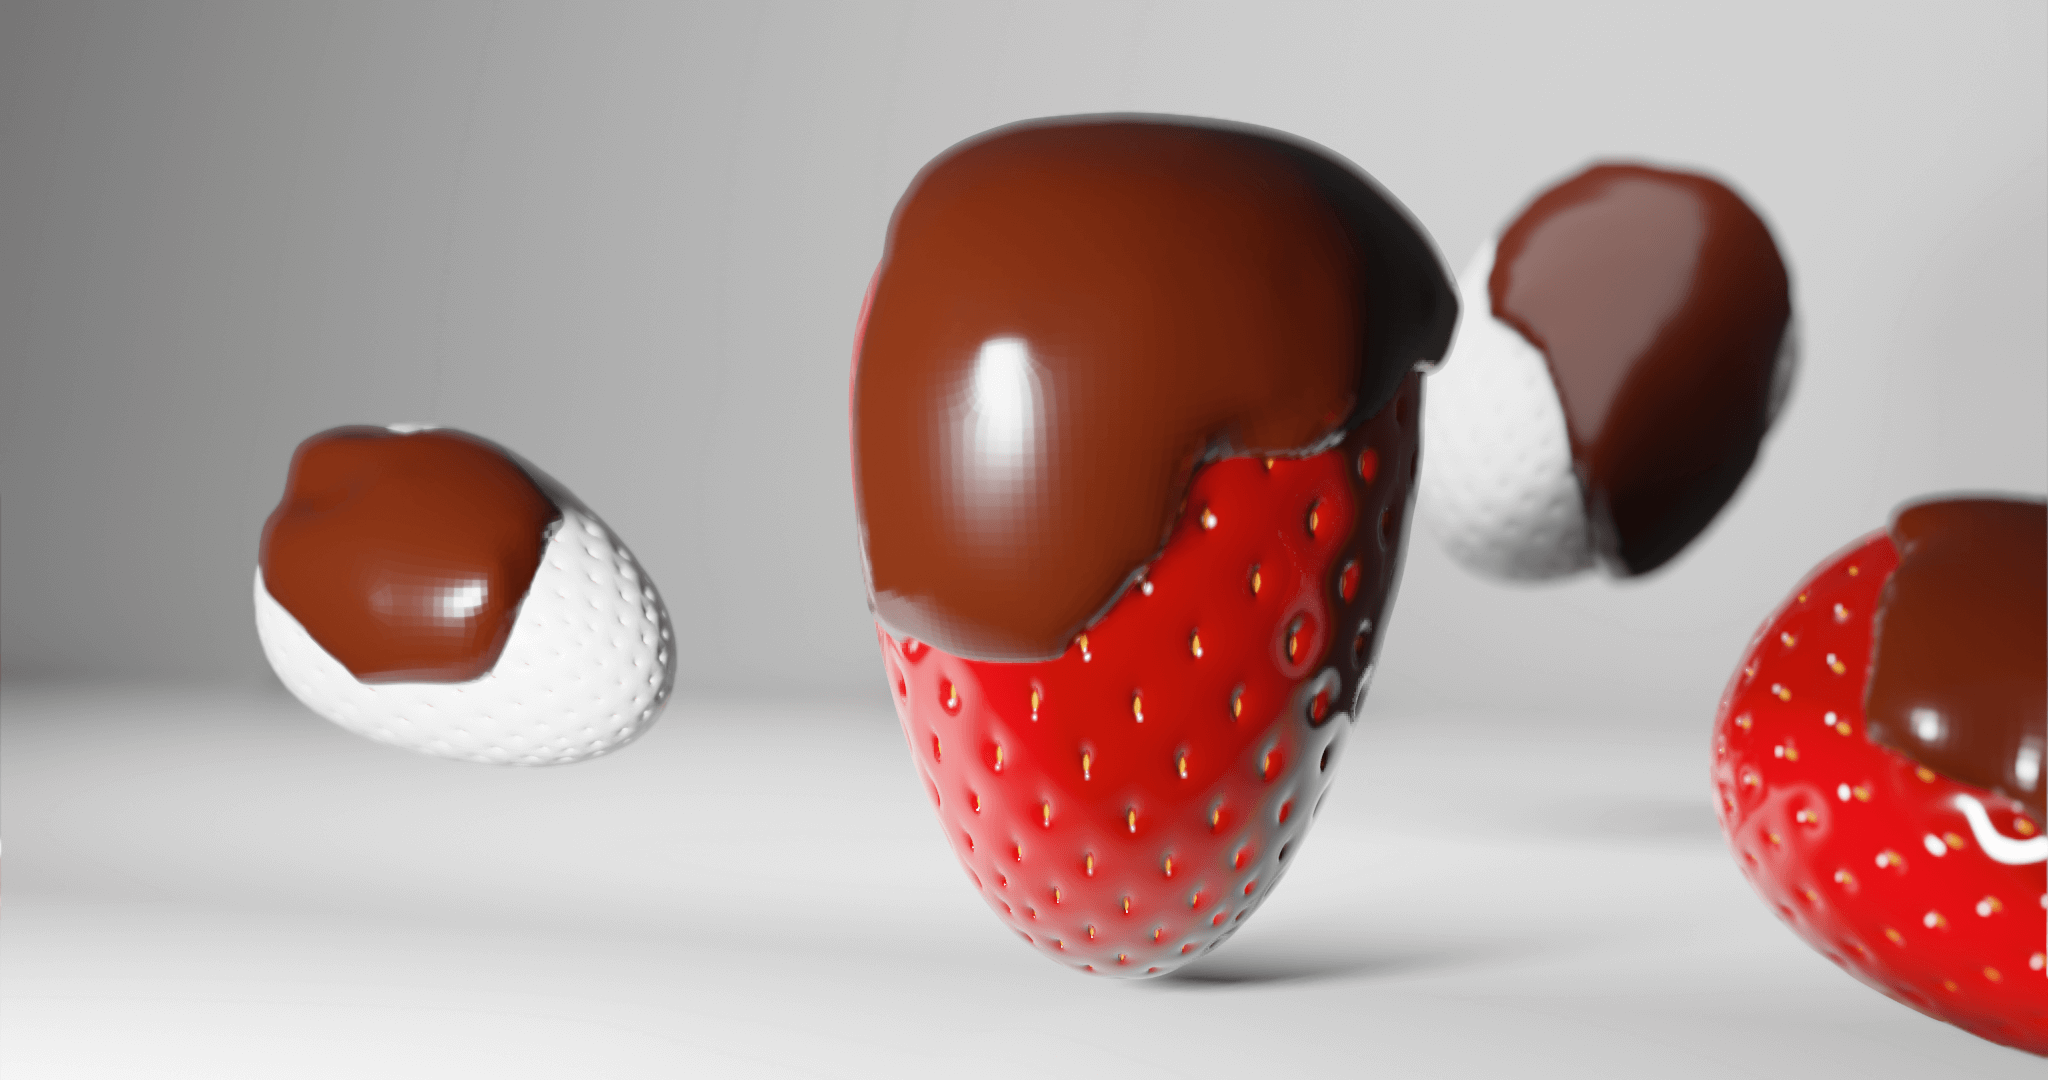
Arrange (Strawberry Chocolate)
Let’s try to create something other than snow with this add-on.
Using this CG model, I set the snow to brown and added chocolate.
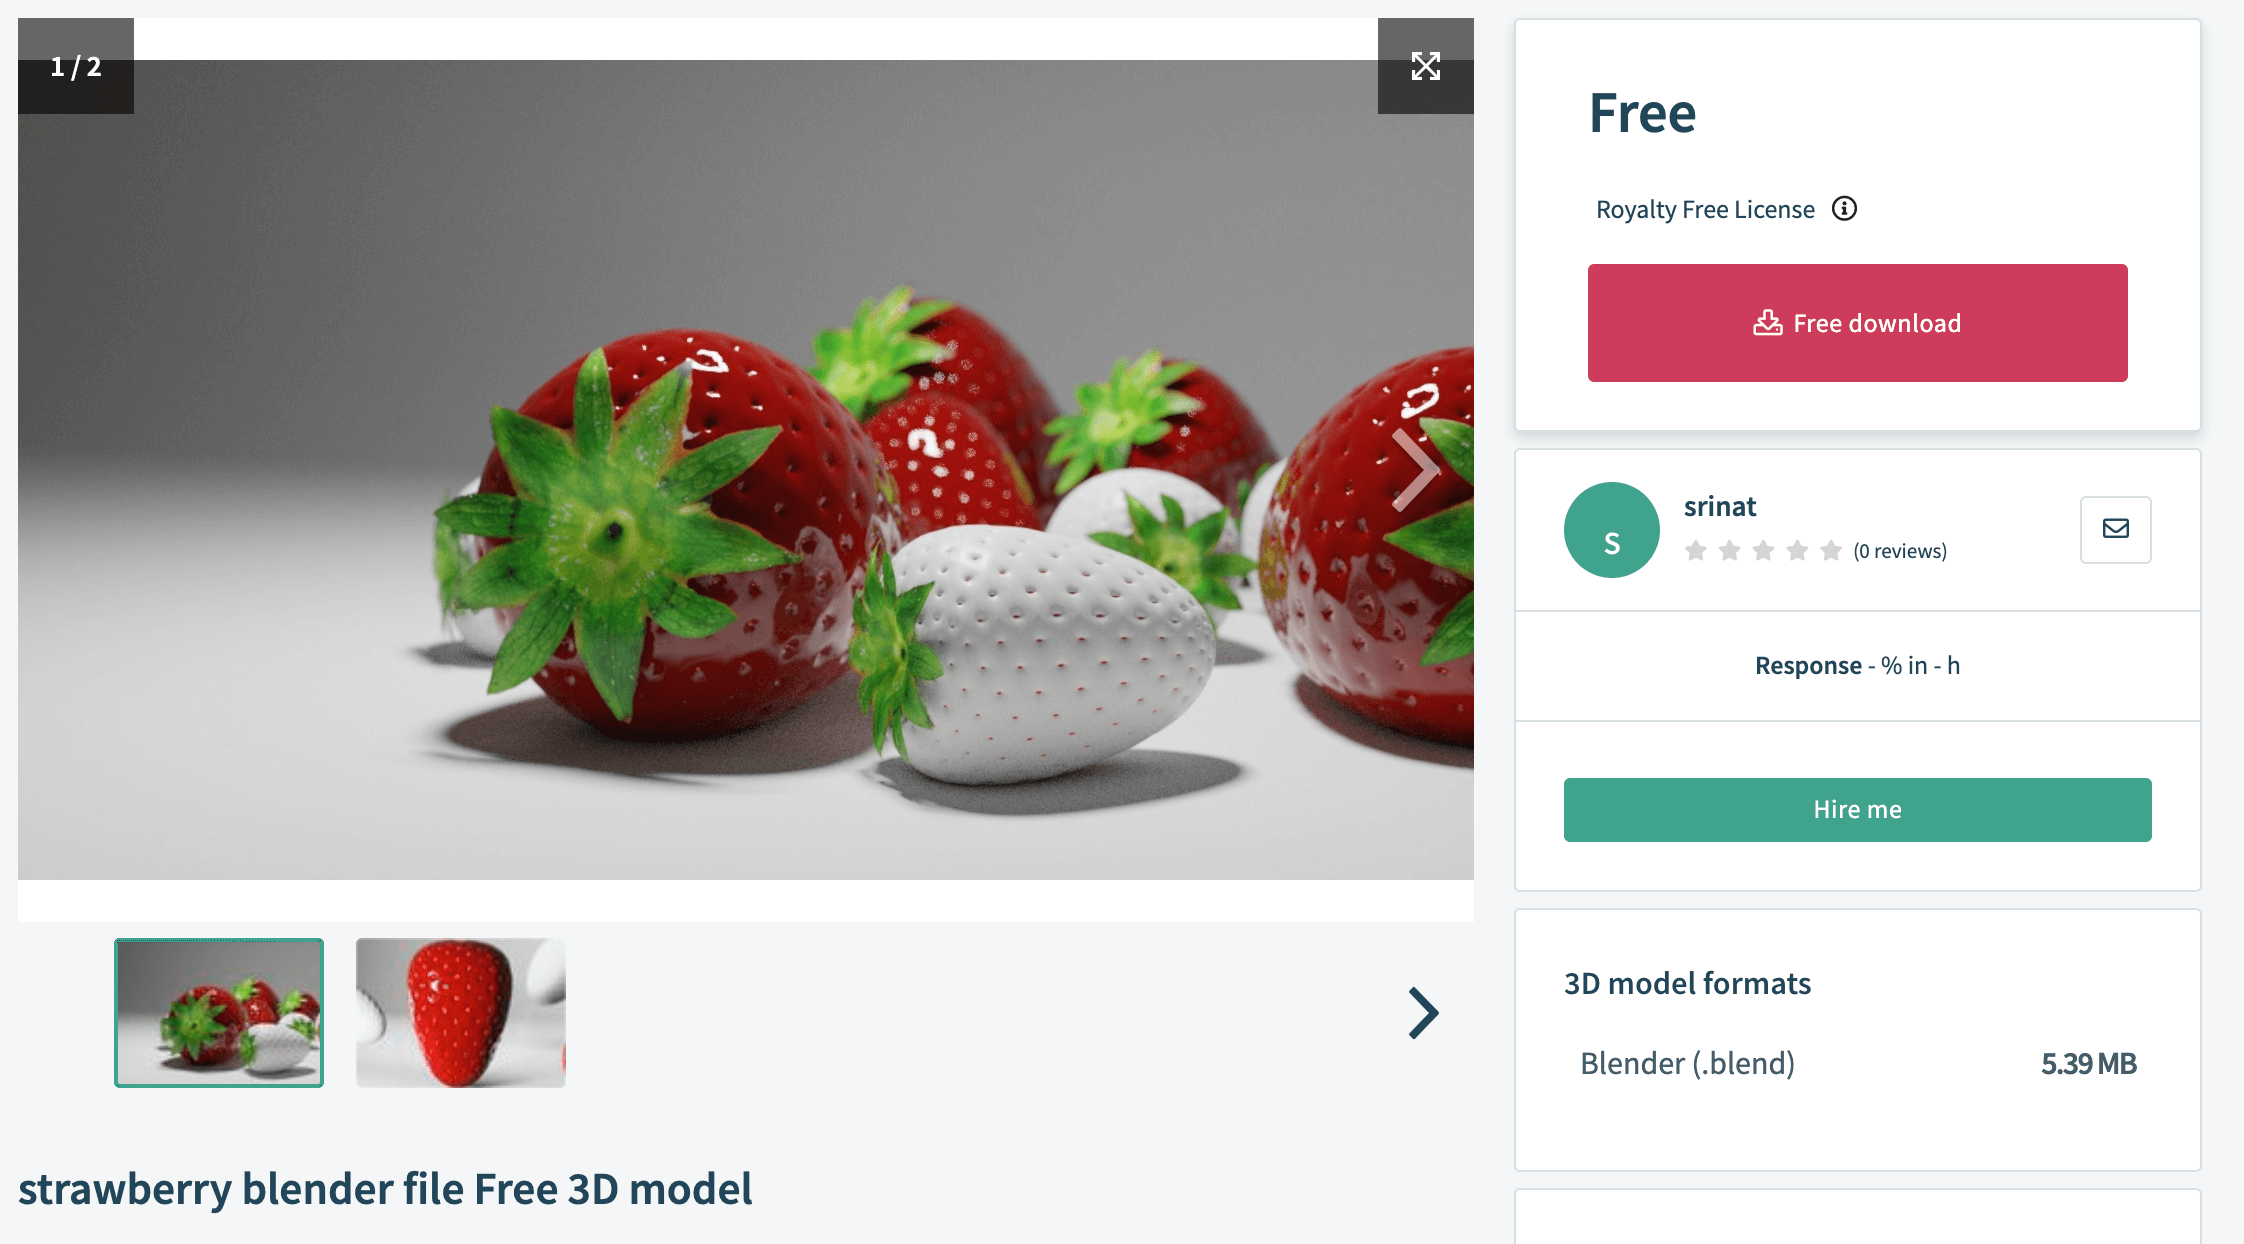
Download the model from Free download.
Wait for about 20 seconds and the data list will come up.
When the download is complete, double click to open it.
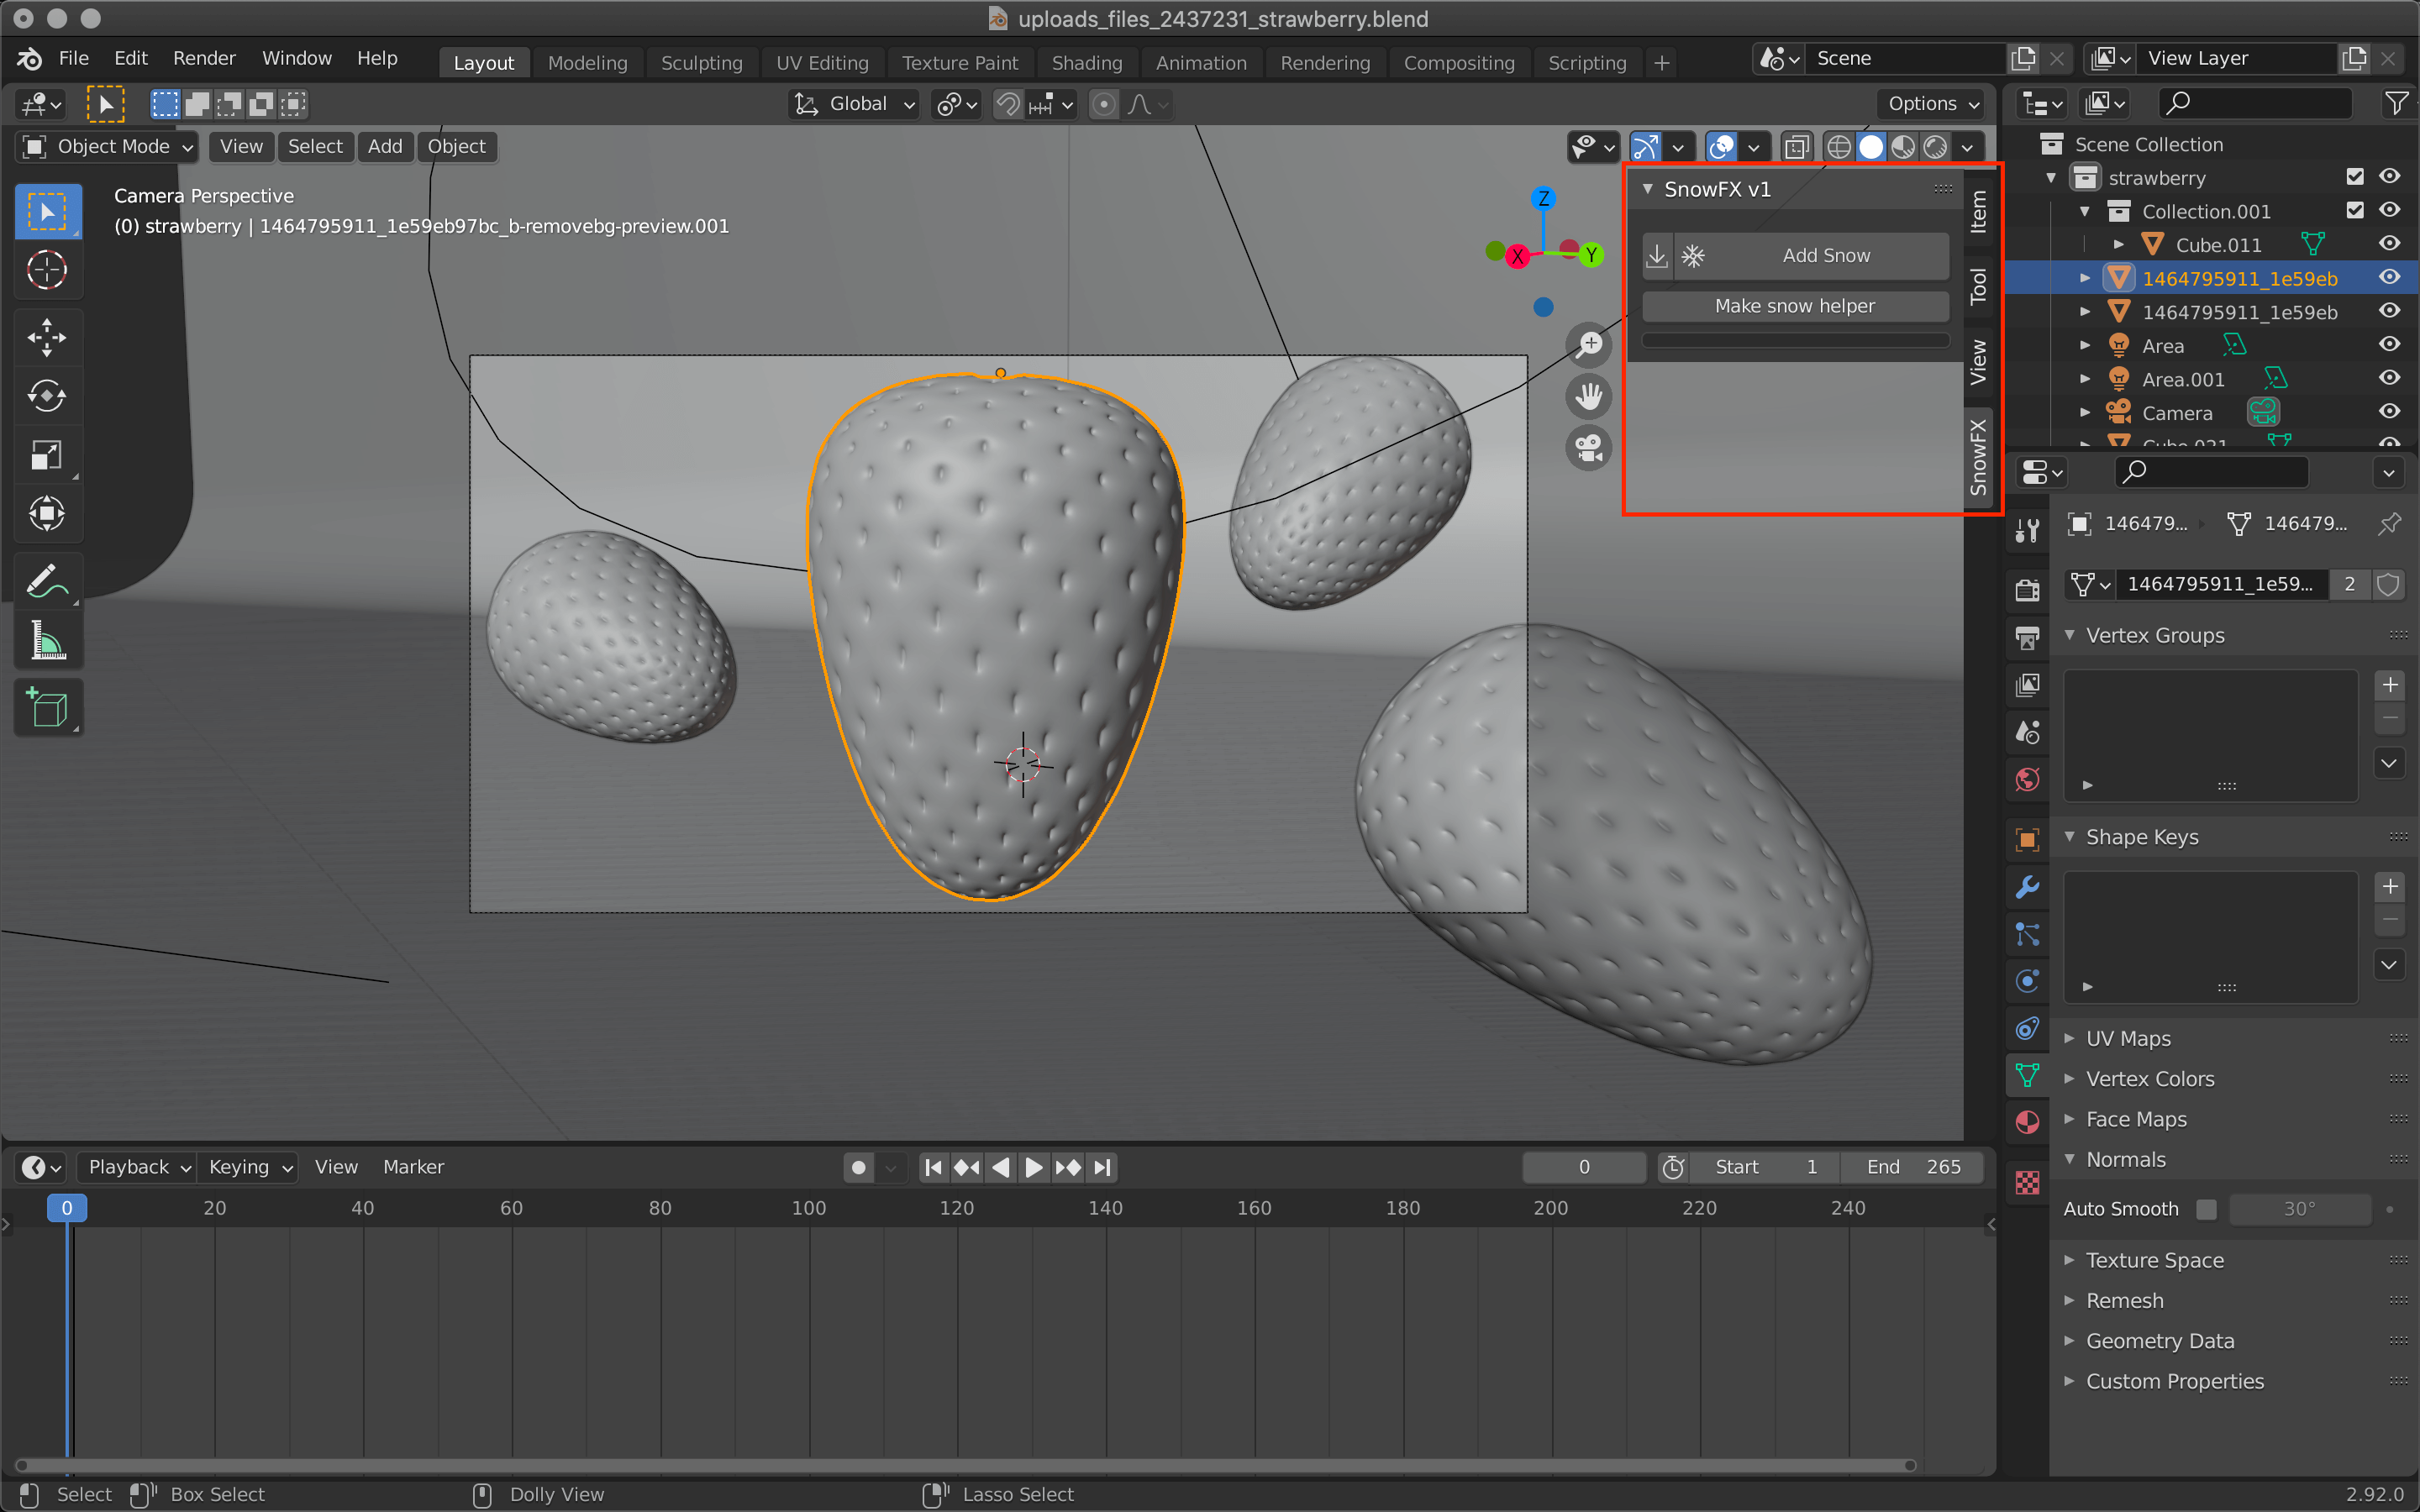
“Add Snow” in the same way as explained above

Dragging to add
If you want to use SnowFX on more than one model, apply it with “Apply Snow”, click “Remove Snow System”, and then “Add Snow” again.

Remove Snow System
When you are done, click the “New” button in the material properties with the added snow selected to create a new material.

The round icon on the right side of the screen (Material Properties)
Then adjust the following values
- Change the Base Color to brown
- Change Specular
- Change the Roughness
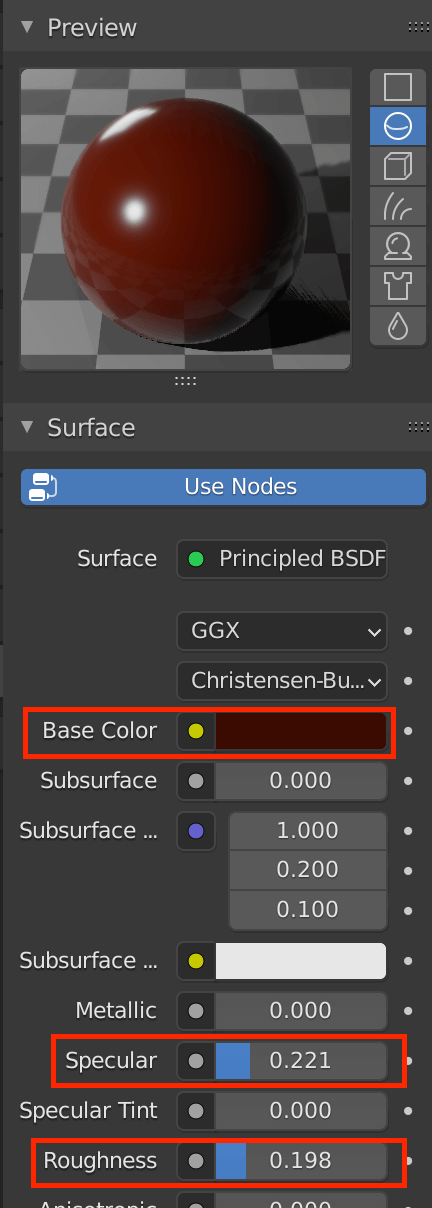
Base Color、Specular、Roughness

After rendering
You can make more than just snow in a short time by just changing the colors and materials, so try it out!
How to upload to STYLY
Let’s upload your 3D model to STYLY.
Create a STYLY account
How to create an account

How to upload to STYLY

How to upload from Unity to STYLY
