In this article, I will show you how to create a 3D model using Meshroom, an application for photogrammetry, and upload it to STYLY.
Install STYLY Mobile
You will need STYLY Mobile to experience your uploaded work.
Sample
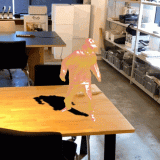
This is a sample of a work that reflects the contents of this article.
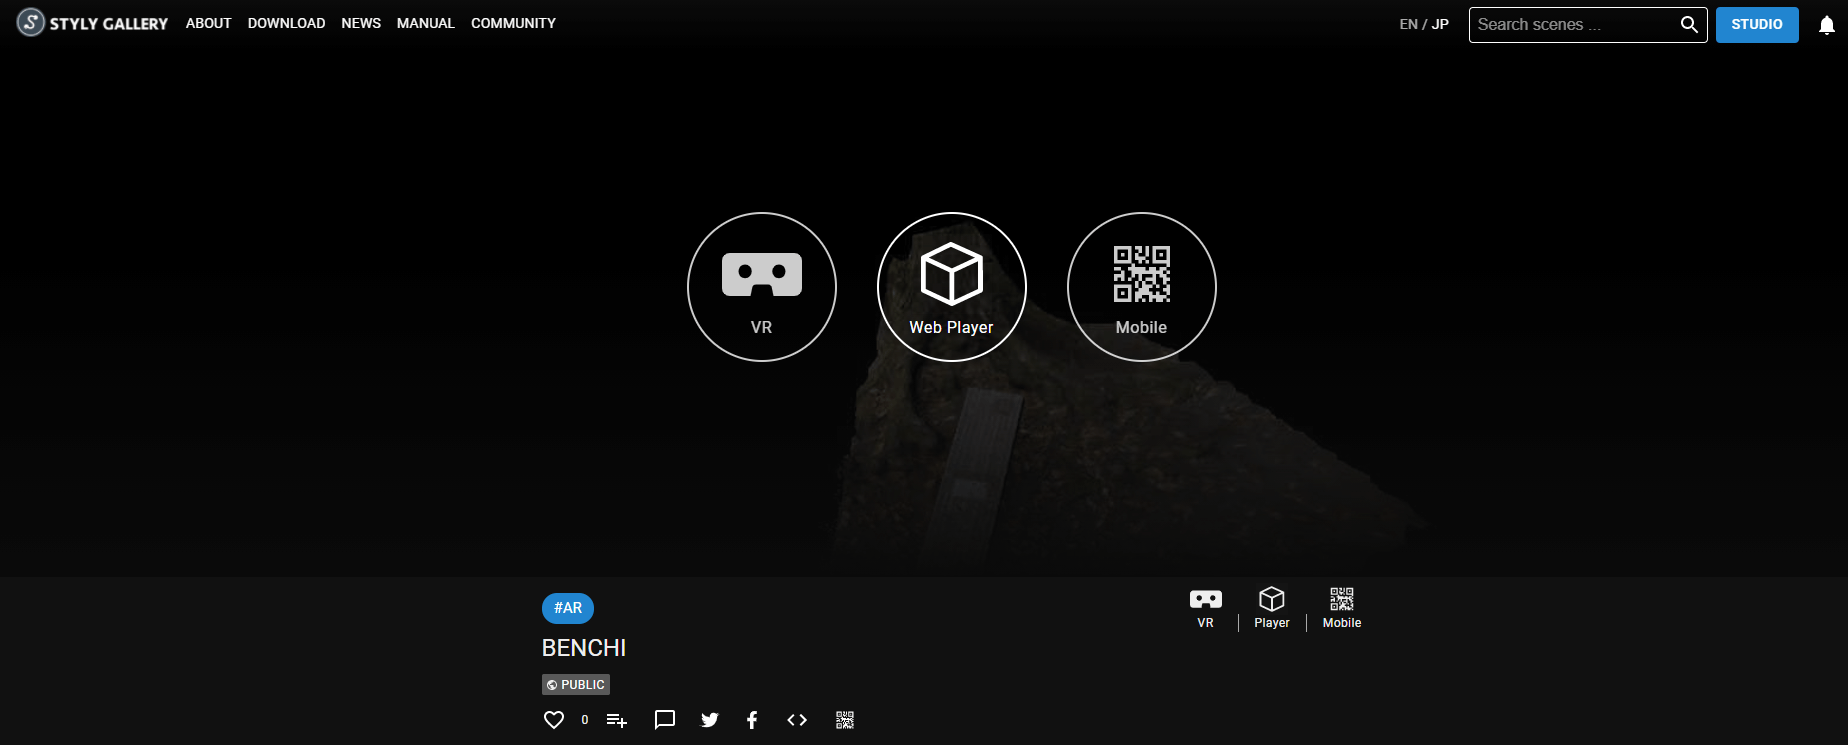
Finished image
As this is created in AR scene, we recommend you to check it out from STYLY GALLERY with STYLY Mobile using your smartphone.
As you can see, STYLY allows you to create scenes by uploading 3D models from Meshroom and various 3DCG software.
What is Meshroom?
Meshroom is a photogrammetric application based on the open source AliceVision.
Meshroom is free and relatively easy to use, even for beginners, so why not take this opportunity to try photogrammetry?
Let’s start with some advance preparations.
Advance preparations
Meshroom download link:
https://github.com/alicevision/meshroom/releases
The “2020.1.1” at the top of the link has a problem with the Load model not appearing, so we will use “2019.2.0”.
Please select the appropriate type (“for Linux” or “for Windows”) from the column under Download.
Select the version “2019.2.0
Material shooting
From here, you will probably start taking materials. Please read the following article for reference on how to take materials and notes.
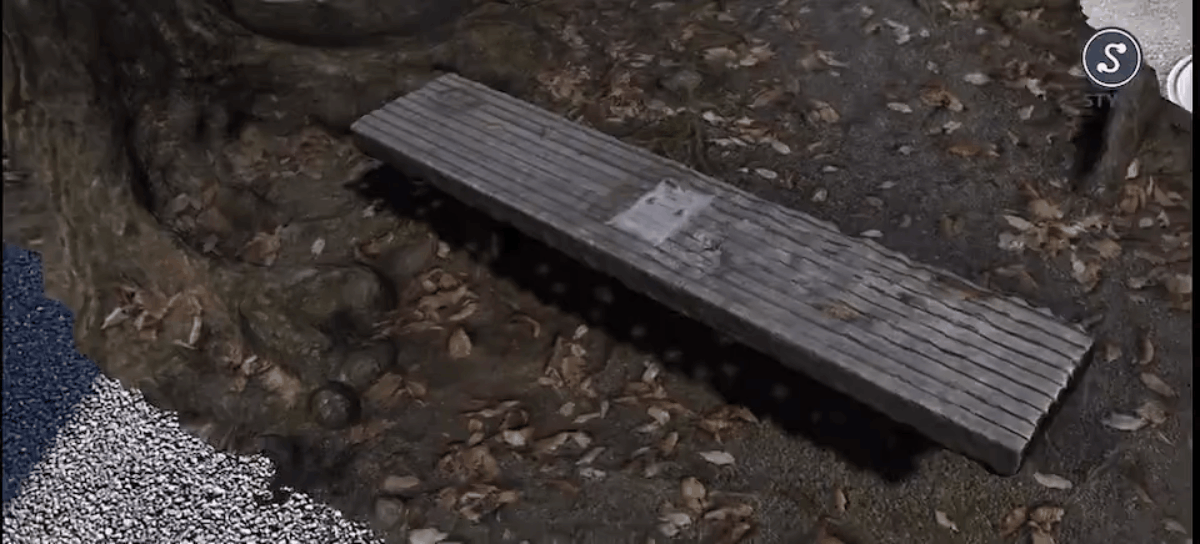
The object to be used as a material this time is the bench shown in the image below. We will create a 3D model of this bench. Also, the equipment used is an iPhone 11 Pro.
I took pictures of the bench while shifting the angle a little at a time. After taking the first week’s photos, crouch down a little and start taking the second week’s photos.
I took about 60 pictures. I took about 60 pictures. At first, choose a bench that is not complicated in shape and try to take pictures of it.
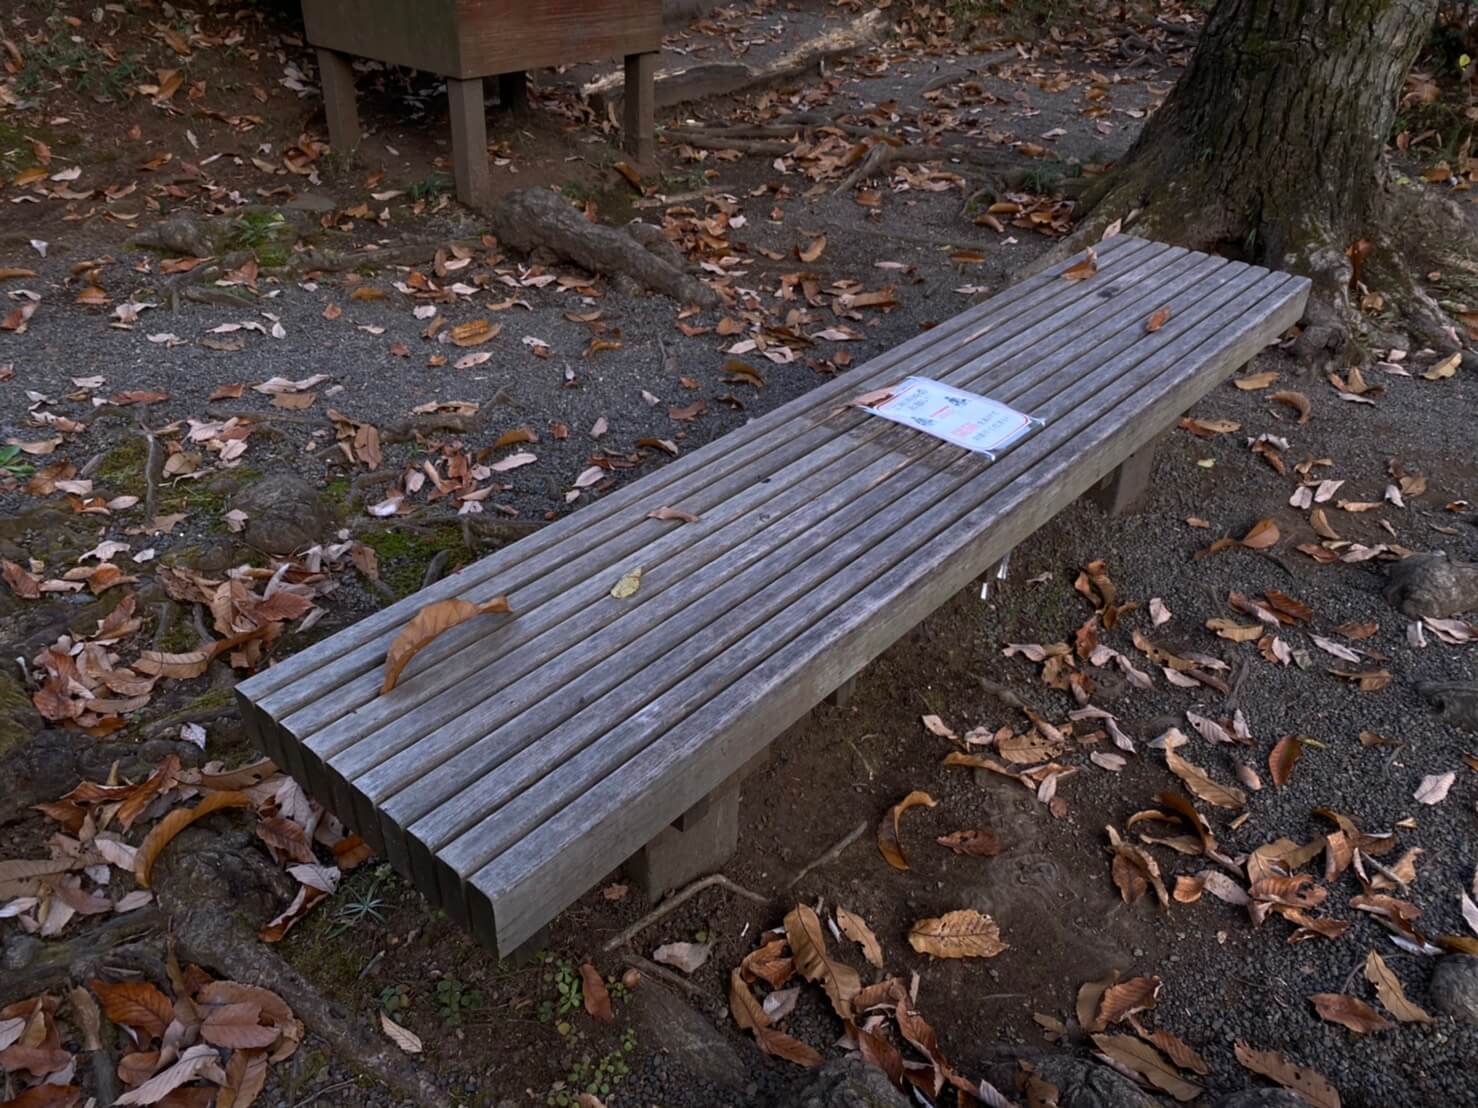
Bench used as a material
How to use Meshroom
After downloading Meshroom, open Meshroom.exe.
In the UI, the left side is the photo import area, the middle is the preview of the imported photo, and the right side is the 3D Viewer.
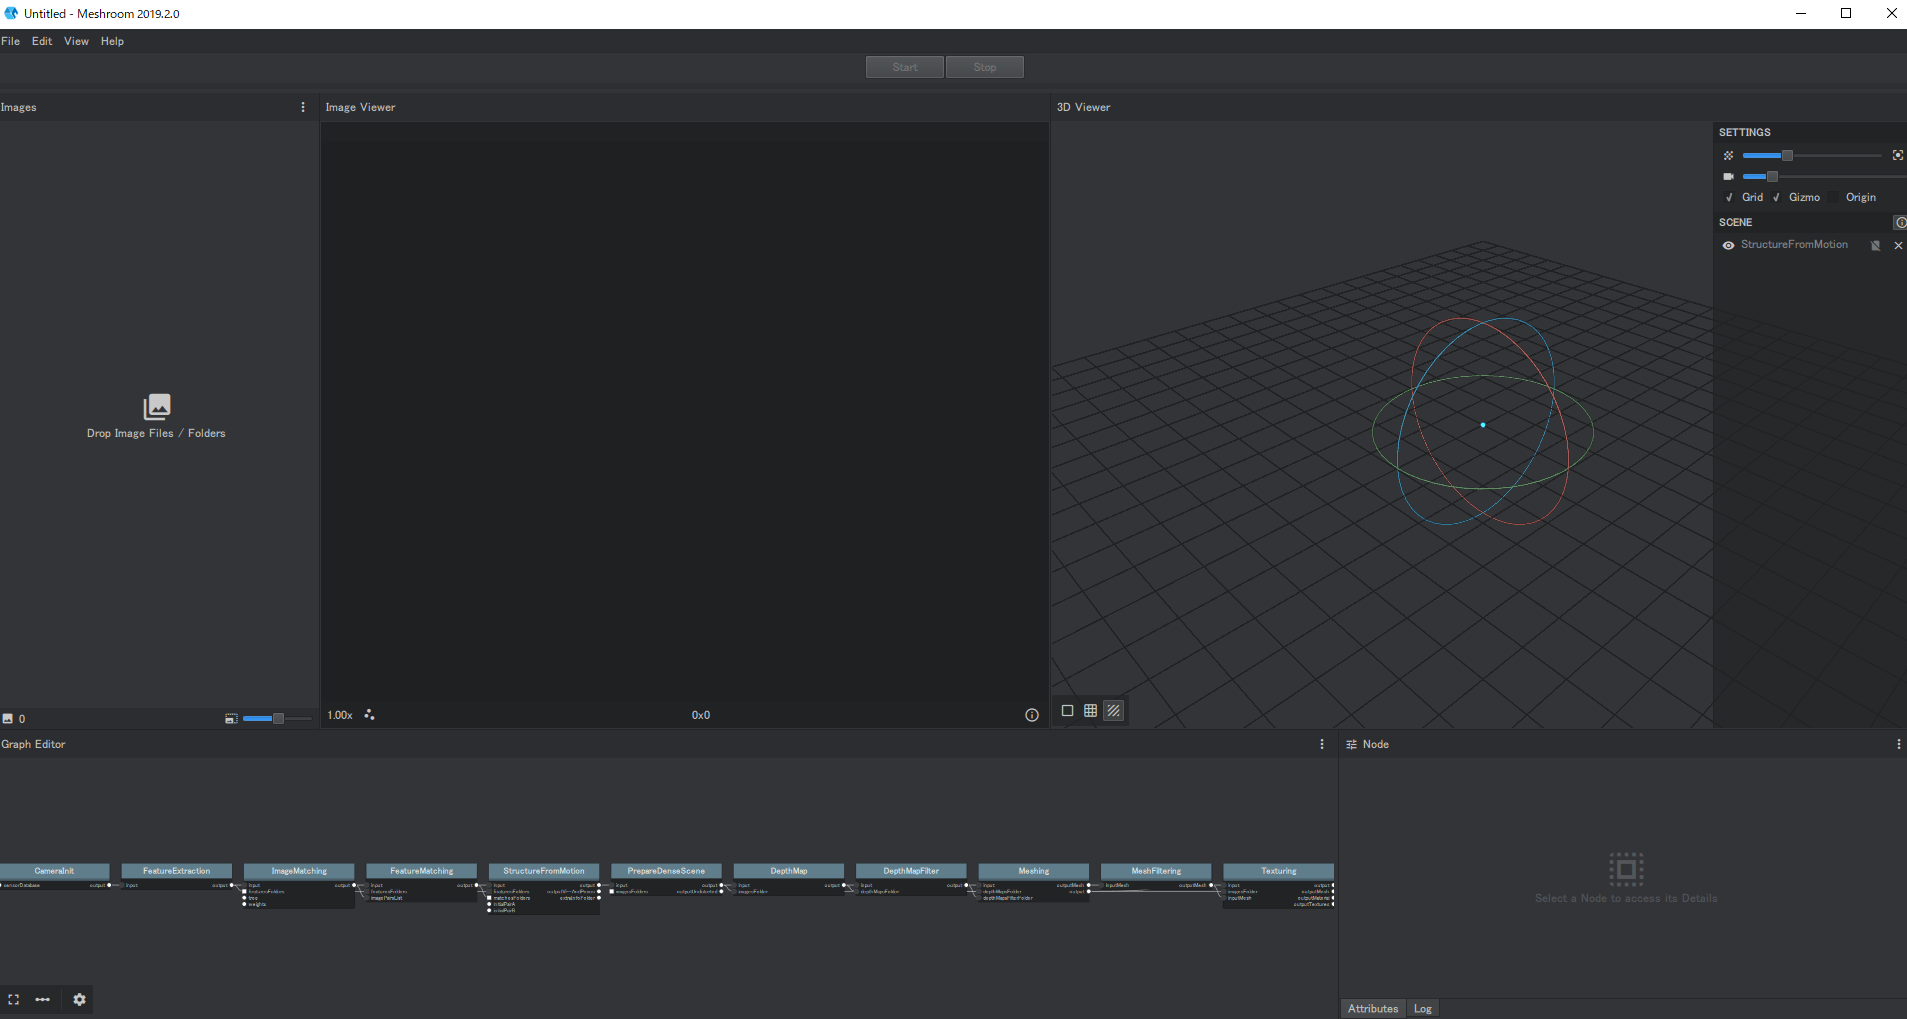
Launching Meshroom.exe
First, select a batch of photos and drag and drop them to the left side to import them. Then you will see the following screen.
If you want to edit them in detail, you need to adjust them from the Graph Editor.
After completing this series of operations, click the green Start button at the top center to start generating the 3D model.
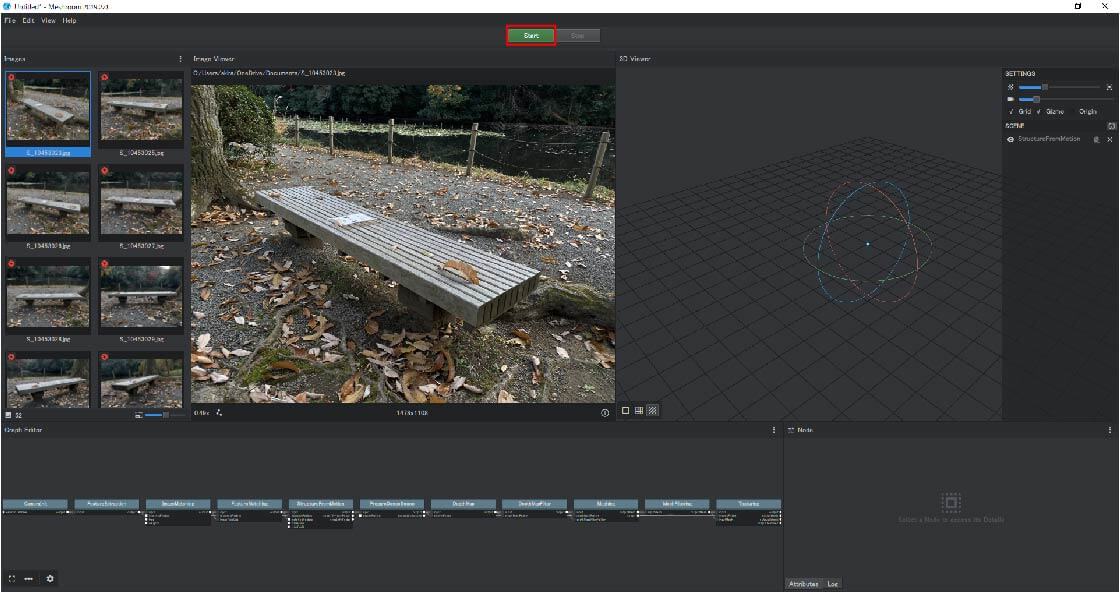
After importing, select the green Start button.
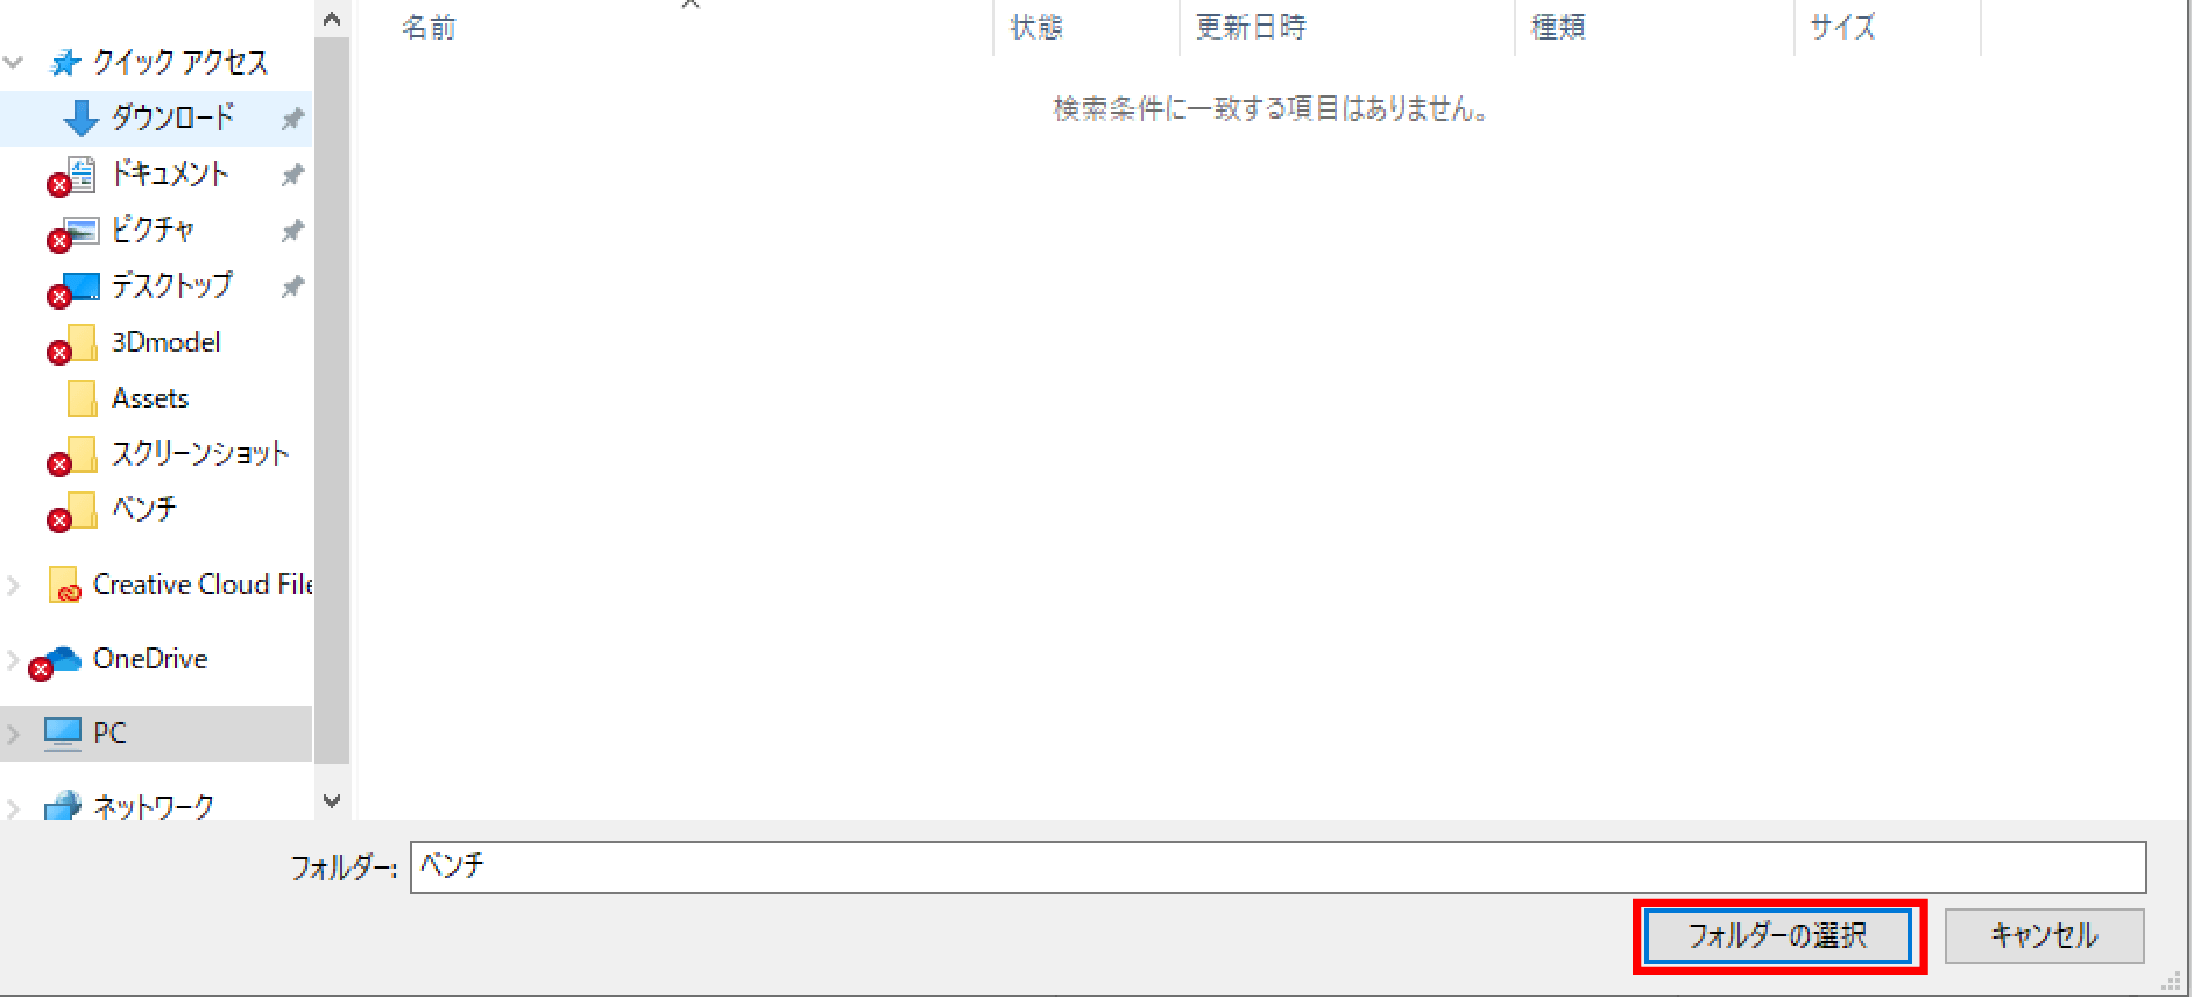
After selecting the Start button, select “Save” as shown in the image below, and specify the location where you want to save the project data.
This will be the location where the 3D model data to be created later will be stored.
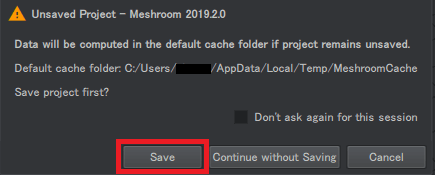
Select “Save”
One of the most common mistakes you can make at this point is to not recognize the material properly. In this case, there is a place where you can check if it is recognized or not.
Let’s take a look at the Images panel on the left. If the camera symbol in the upper right corner of the photo is green, it means that the model is recognized.
The more of them there are, the more accurately the model will be generated. If it is red, you will not be able to create an accurate model, so be sure to check it.
It is recommended to take as many pictures as possible during the shooting stage to avoid such mistakes.
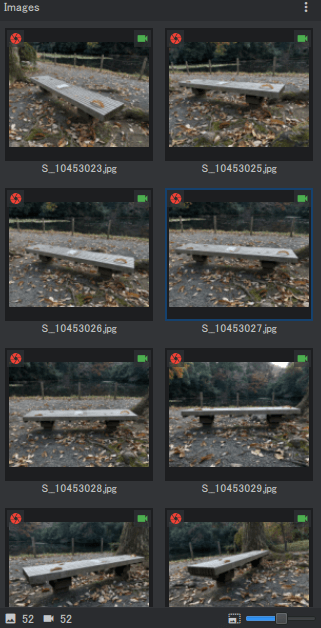
Check the camera mark
After the 3D model generation is complete, select “Load model” under the 3D Viewer to display the 3D model.
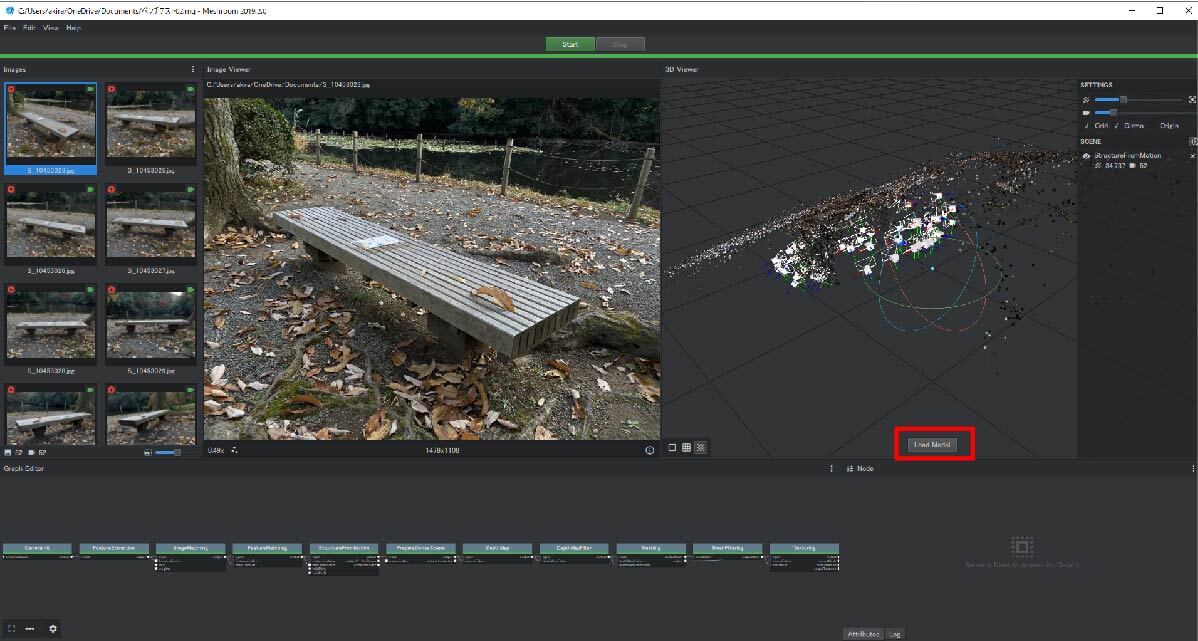
Select “Load model
If the Load model does not appear at this time, check the version of the software, as the latest version (2020) may not display the Load model.
Check on the 3D Viewer
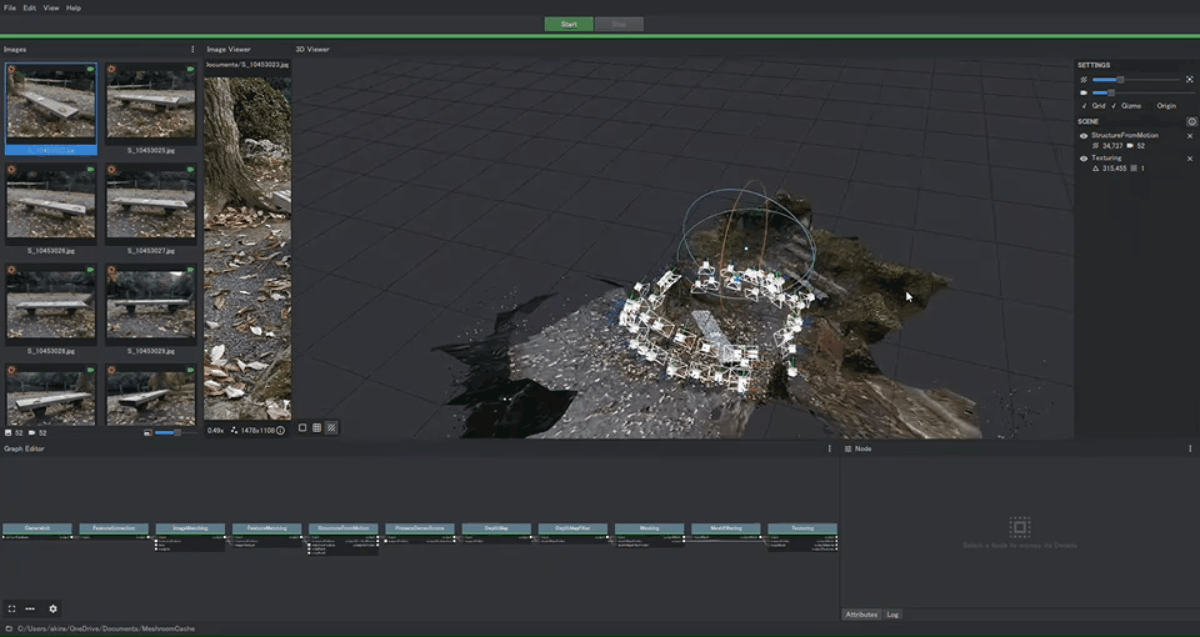
Once the 3D Viewer is displayed, move the mouse around to make sure that the 3D model data is properly captured.
At this point, you may need to re-shoot the material, so re-shoot the material depending on the situation.
After the load model is complete
When the load model is completed, Meshroom will automatically create a folder and save the 3D model.
Select the “Texturing” folder in the “MeshroomCashe” folder that was created under the folder you specified earlier.
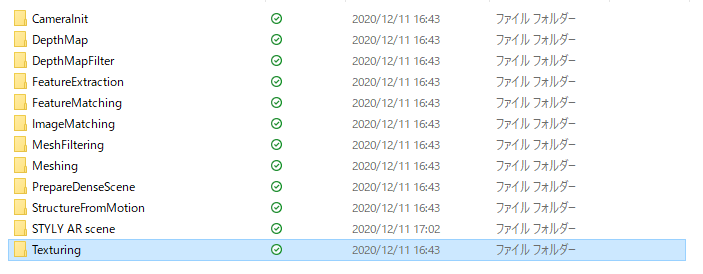
Open MeshroomCashe and select Texturing
When it opens, you will see a folder with a list of numbers and English. This is the model that you just created, so we recommend naming the folder so that it is easy to find.

Name the corresponding folder
This is the end of the process in Meshroom. Next, I’ll show you how to remove unnecessary parts using Blender and how to make the 3D model appear in the real world using STYLY’s AR scene.
Removing unwanted parts using Blender
Next, let’s remove unnecessary data using Blender. open Blender and select File > Import to import obj files. object files exported by Meshroom can be found in MeshroomCashe > Texturing. Select it.
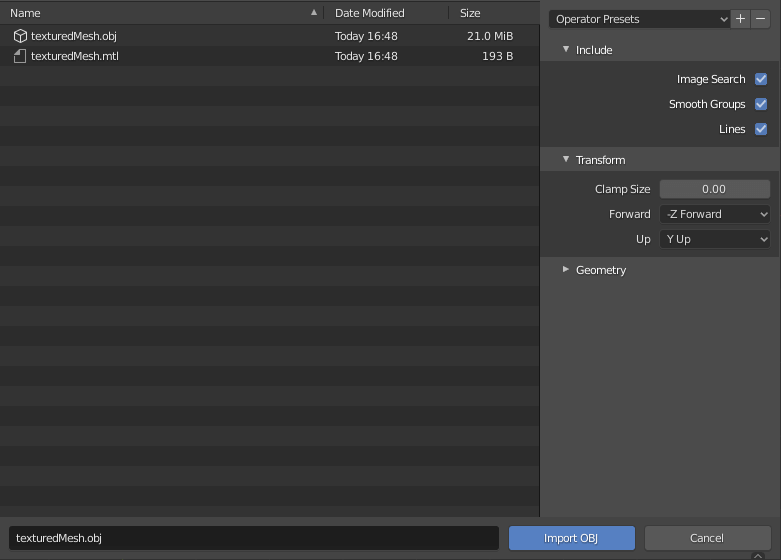
Select the obj file from MeshroomCashe>Texturing
Then the obj file will be imported. First, select the object and set the angle and position in the object properties.
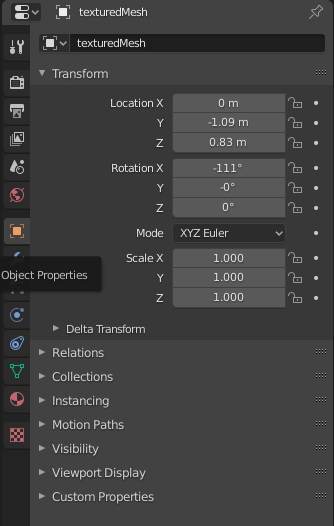
Select the object properties
Once you have adjusted the position and angle, press the Tab key to enter edit mode.

Select the area to be deleted in the box
Once you have made your selections, press Delete to select the vertices, and repeat the process to delete all but the part you want to show.
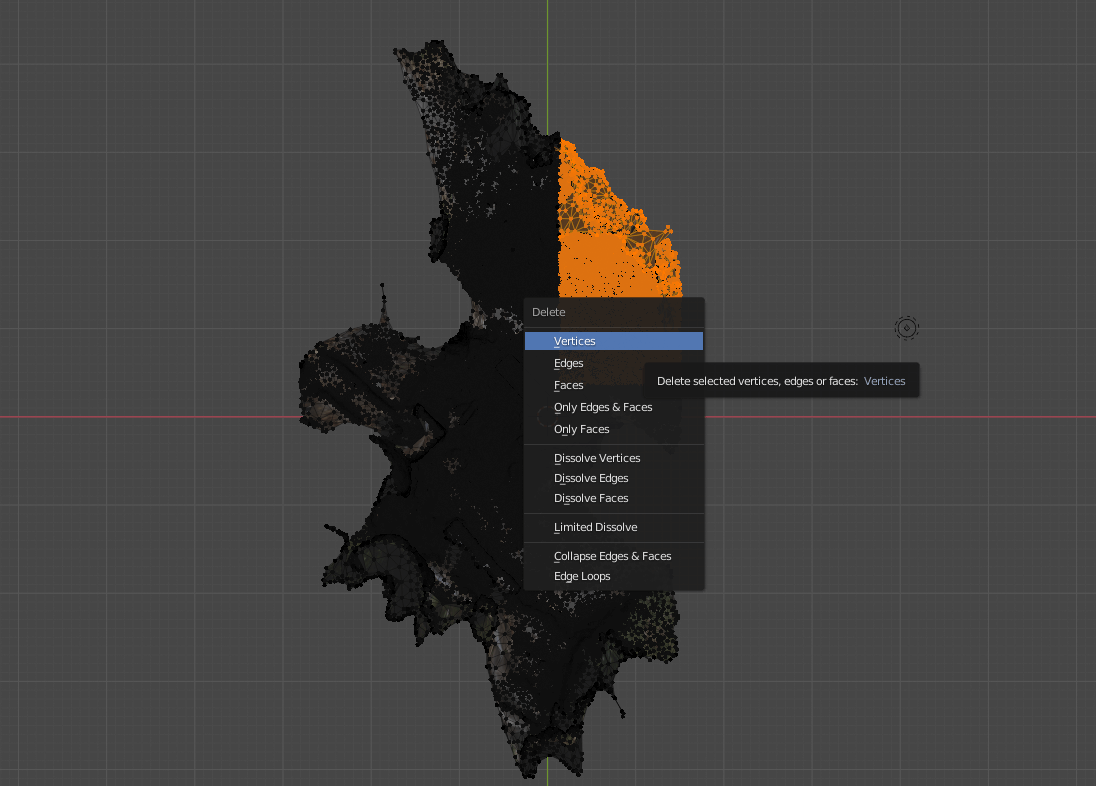
Select vertices from Delete
When you are done editing, select File > Export > FBX to export your work.
This is the end of the editing process in Blender. Next, let’s use STYLY AR Scene to actually upload your work to STYLY.
Uploading your work using STYLY AR Scene
Finally, we will show you how to upload the 3D model you created to STYLY.
Open STYLY STUDIO, select CREATE, and then select the AR Scene Template at the top.
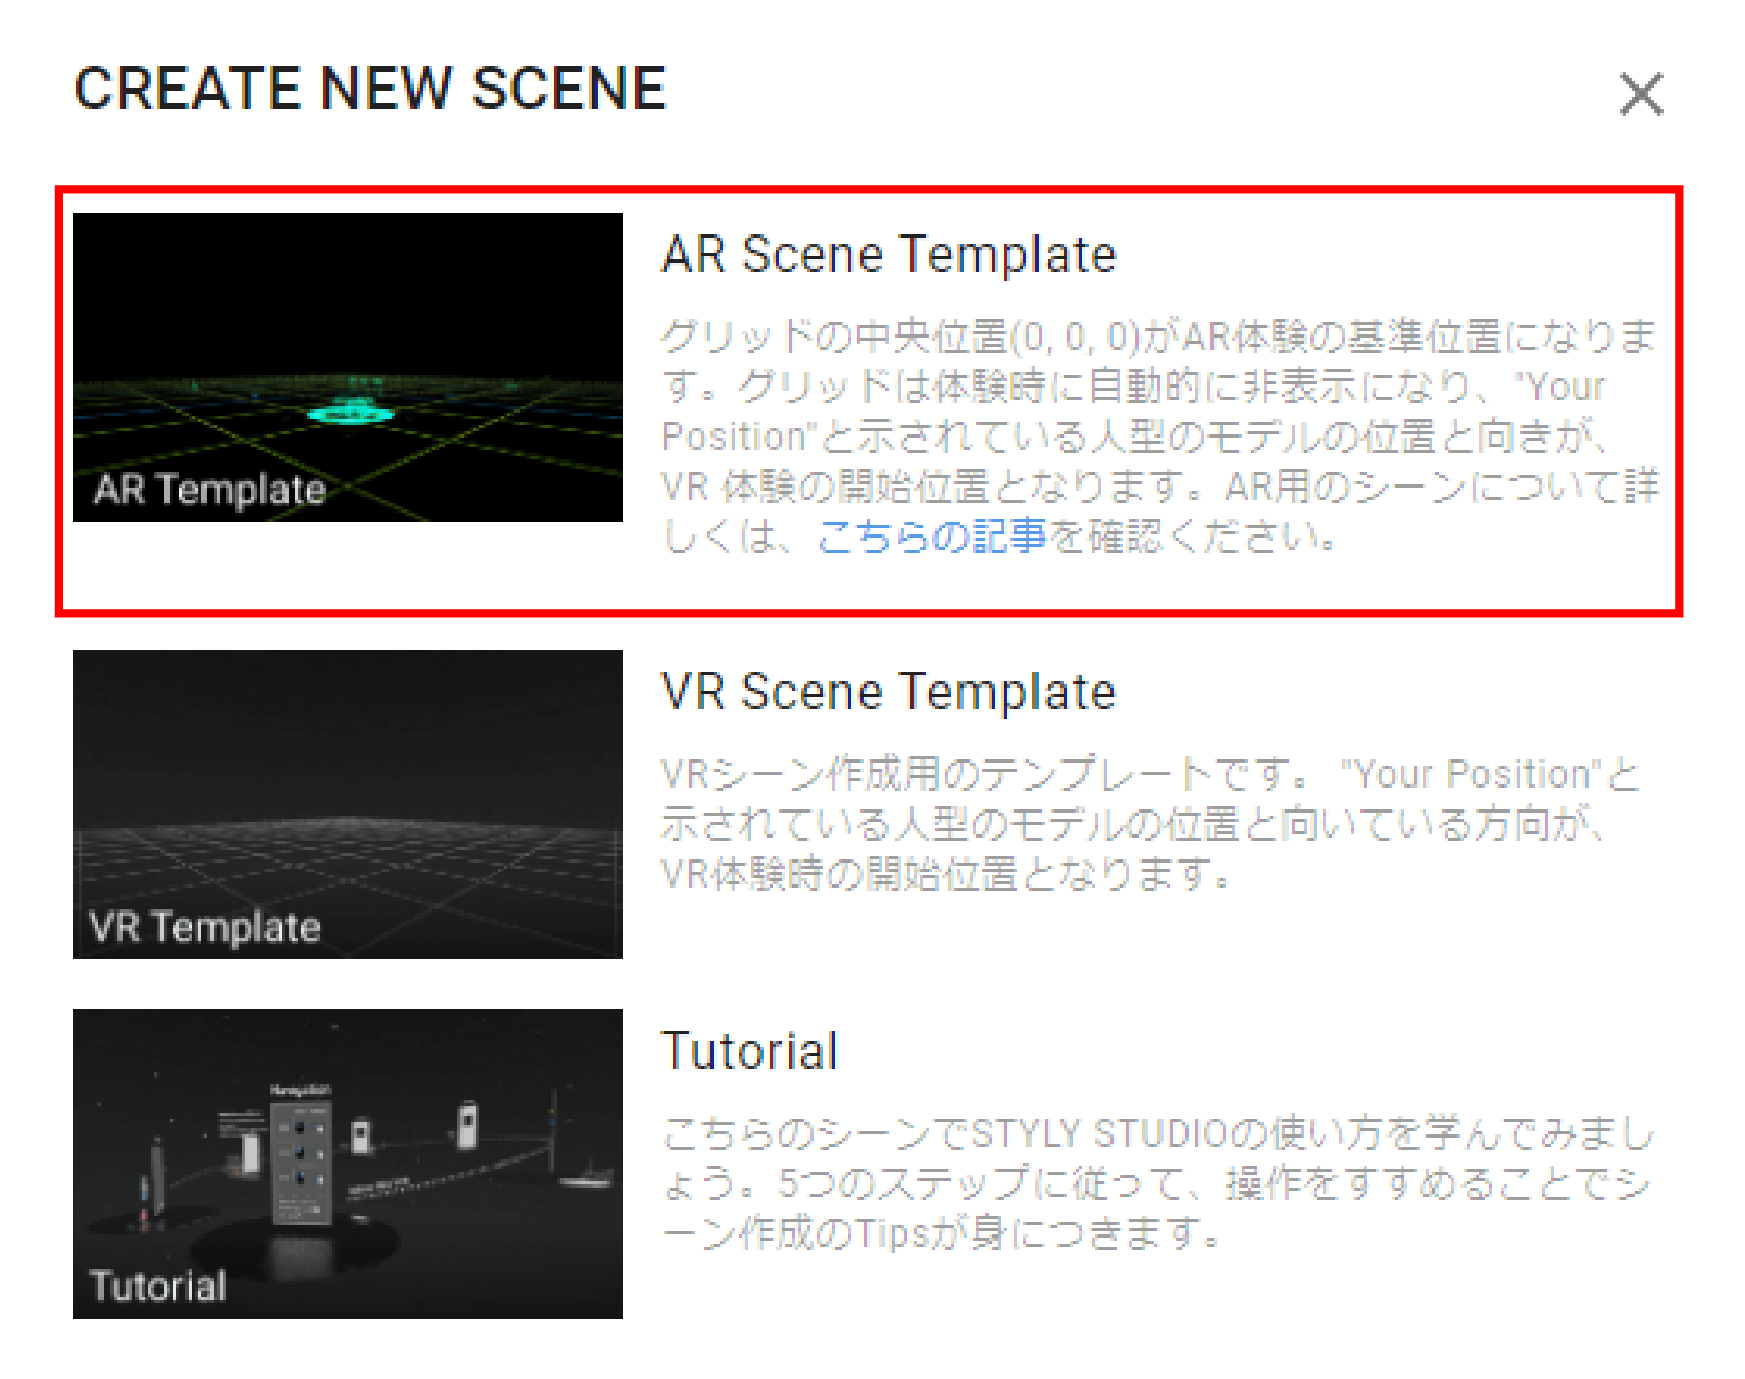
Select AR Scene Template
Then you can upload the materials. Select Assets in the upper left corner.
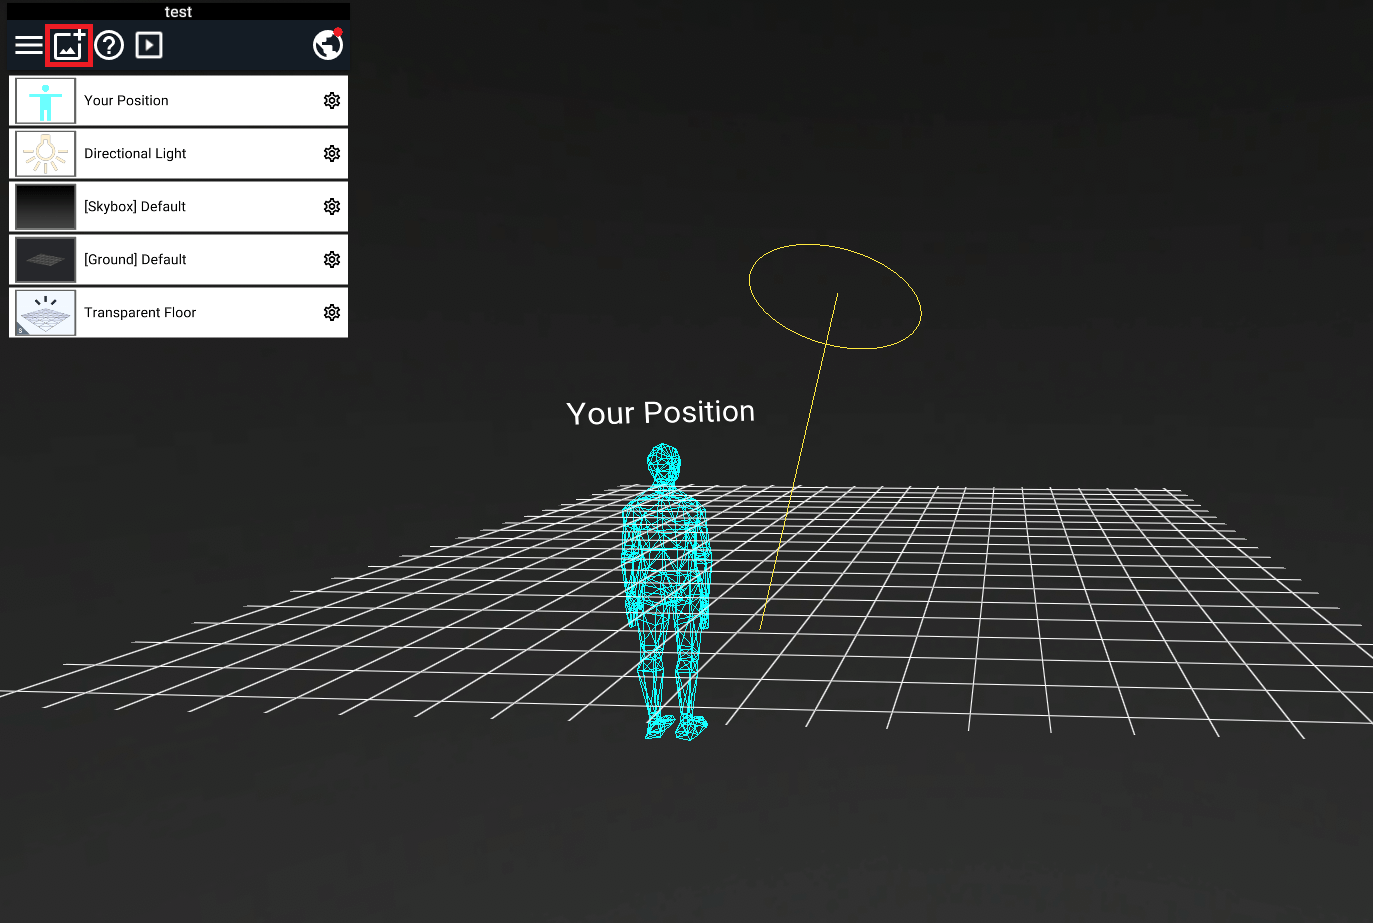
Select the Assets button on the STYLY STUDIO screen
Select the 3D Model button, and then click the Select button to upload any file.
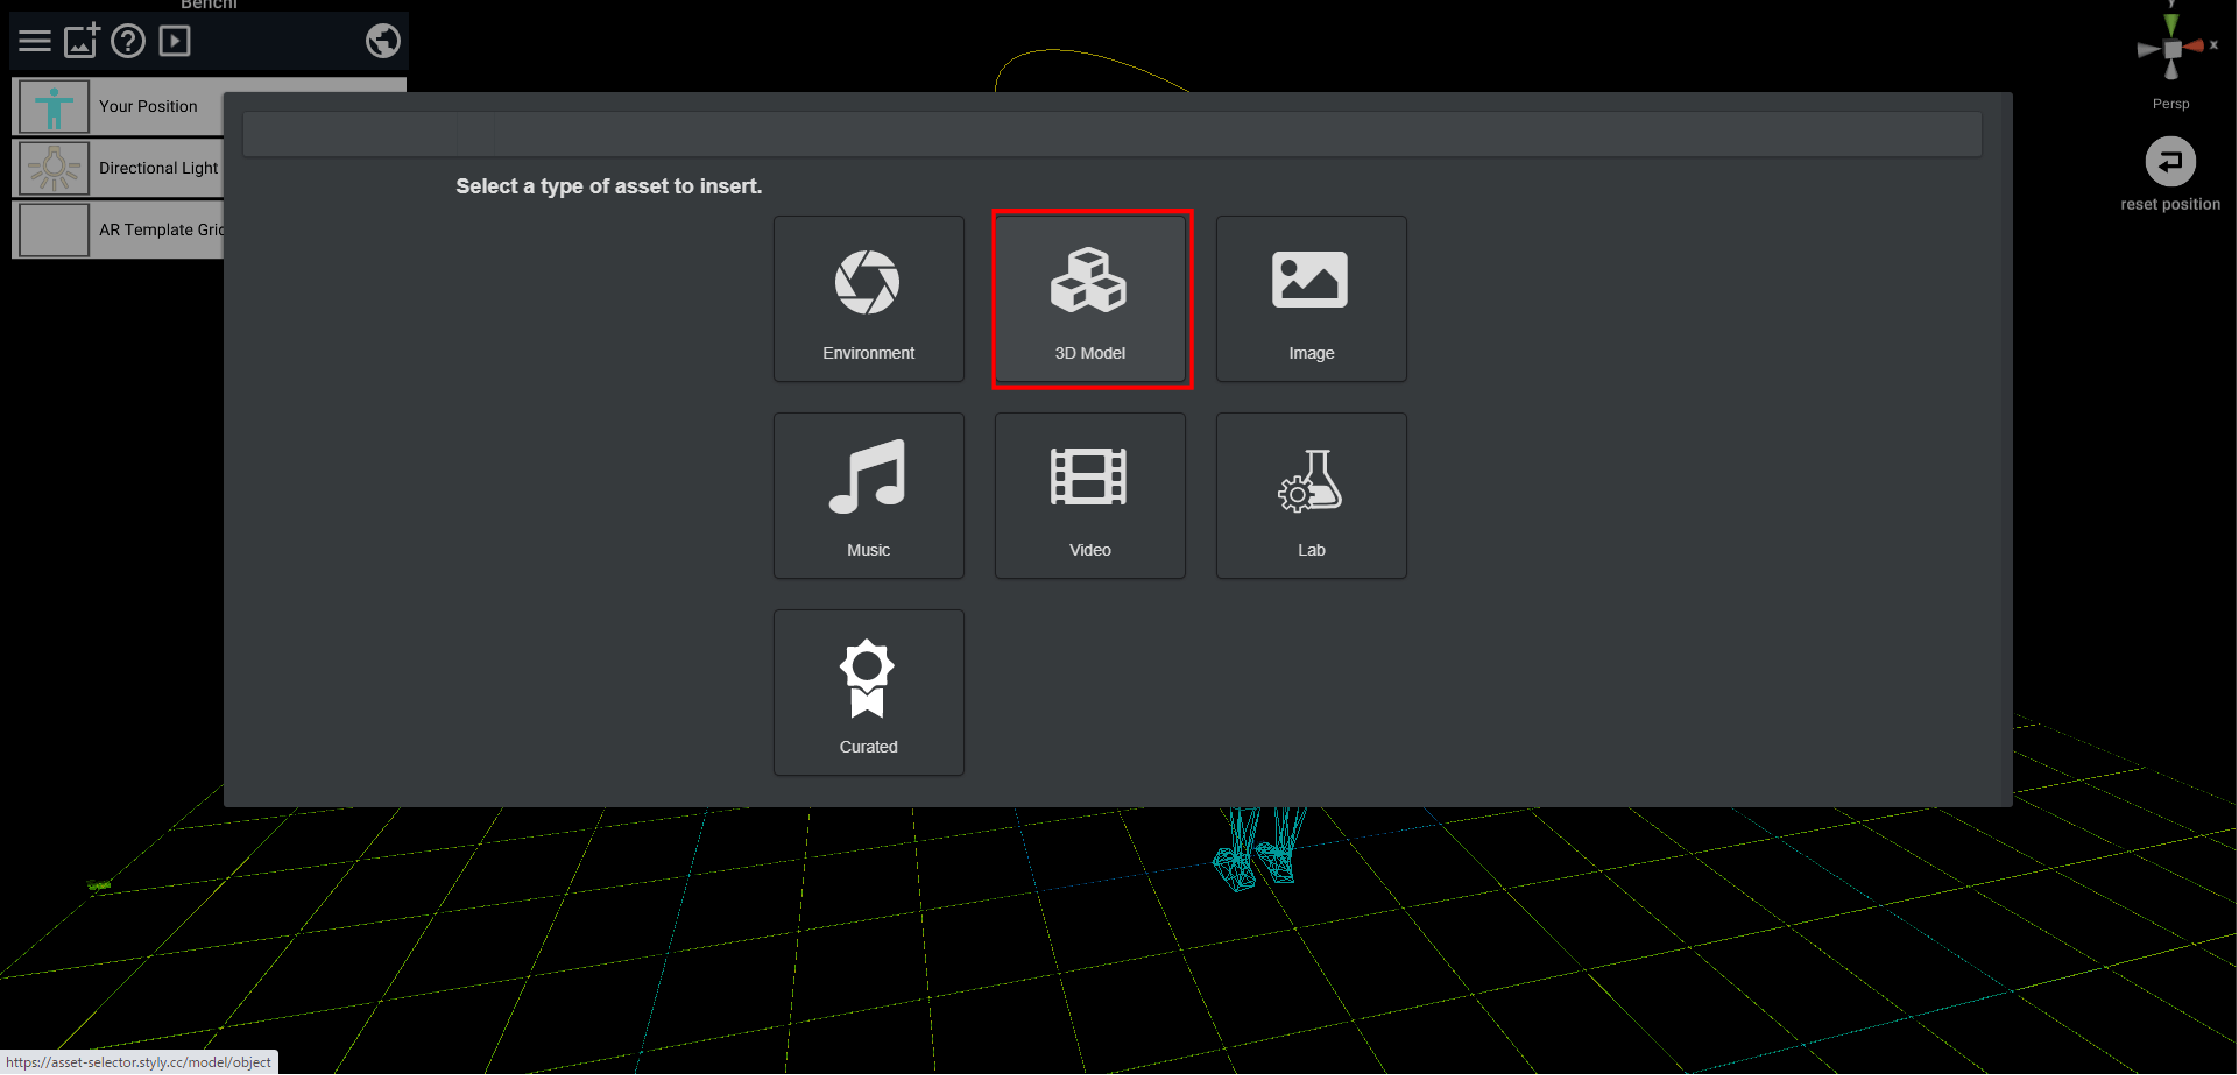
Select 3D Model
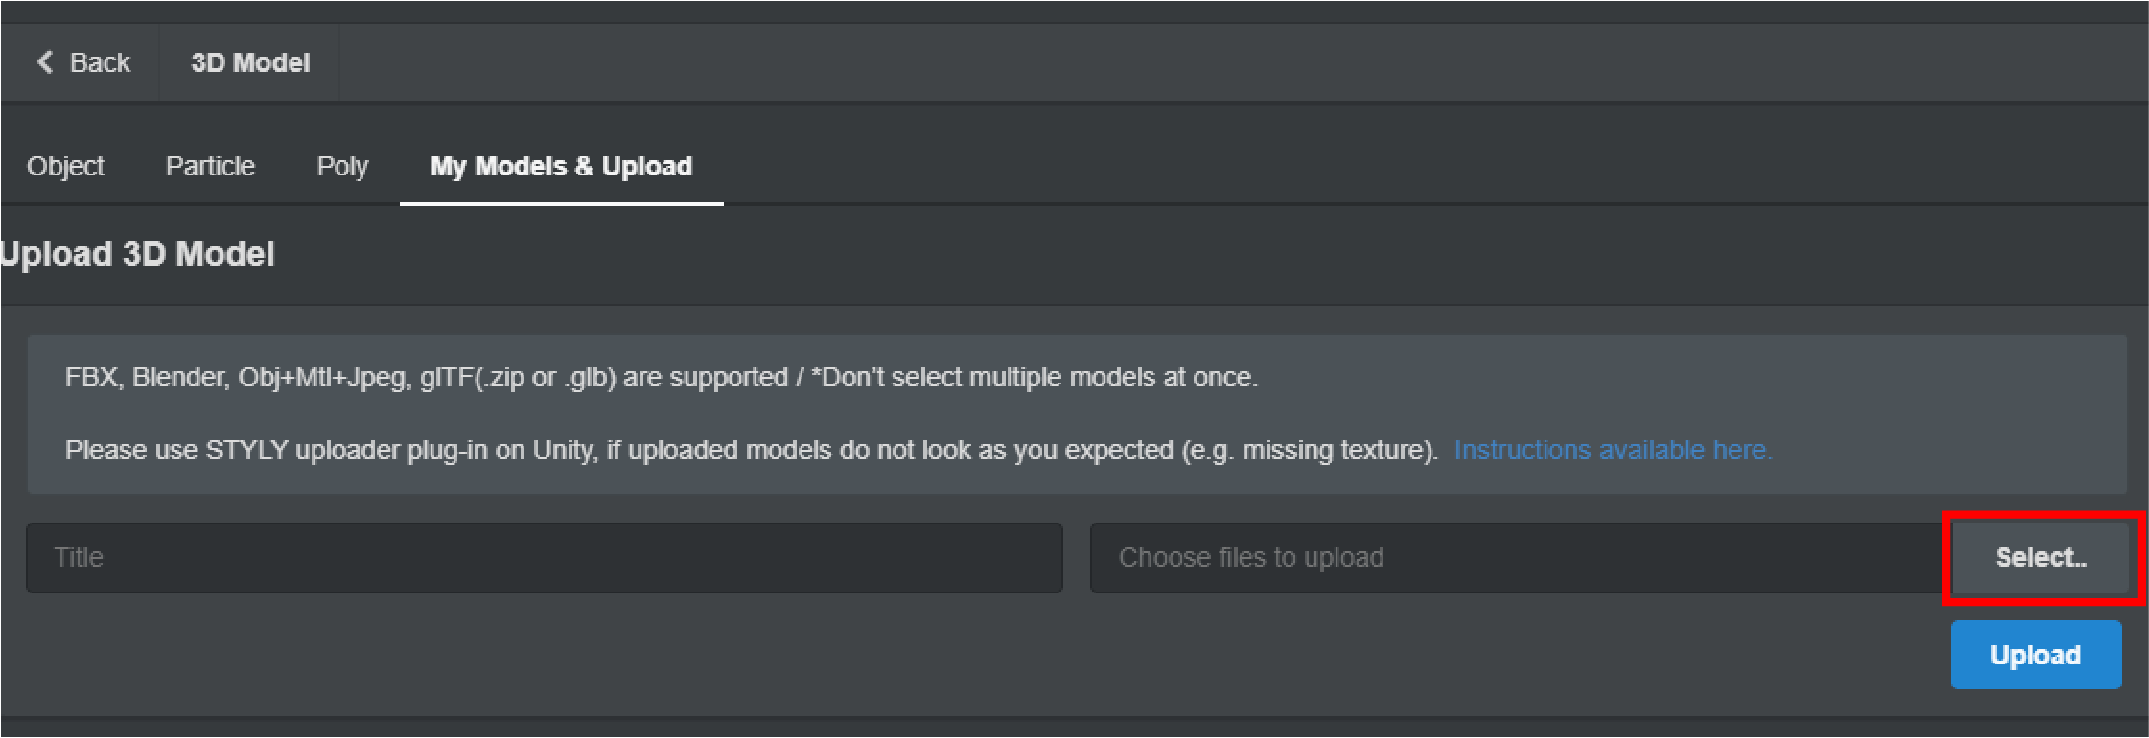
Select the Select button from My Models & Upload
Select the 3D model that has been uploaded.
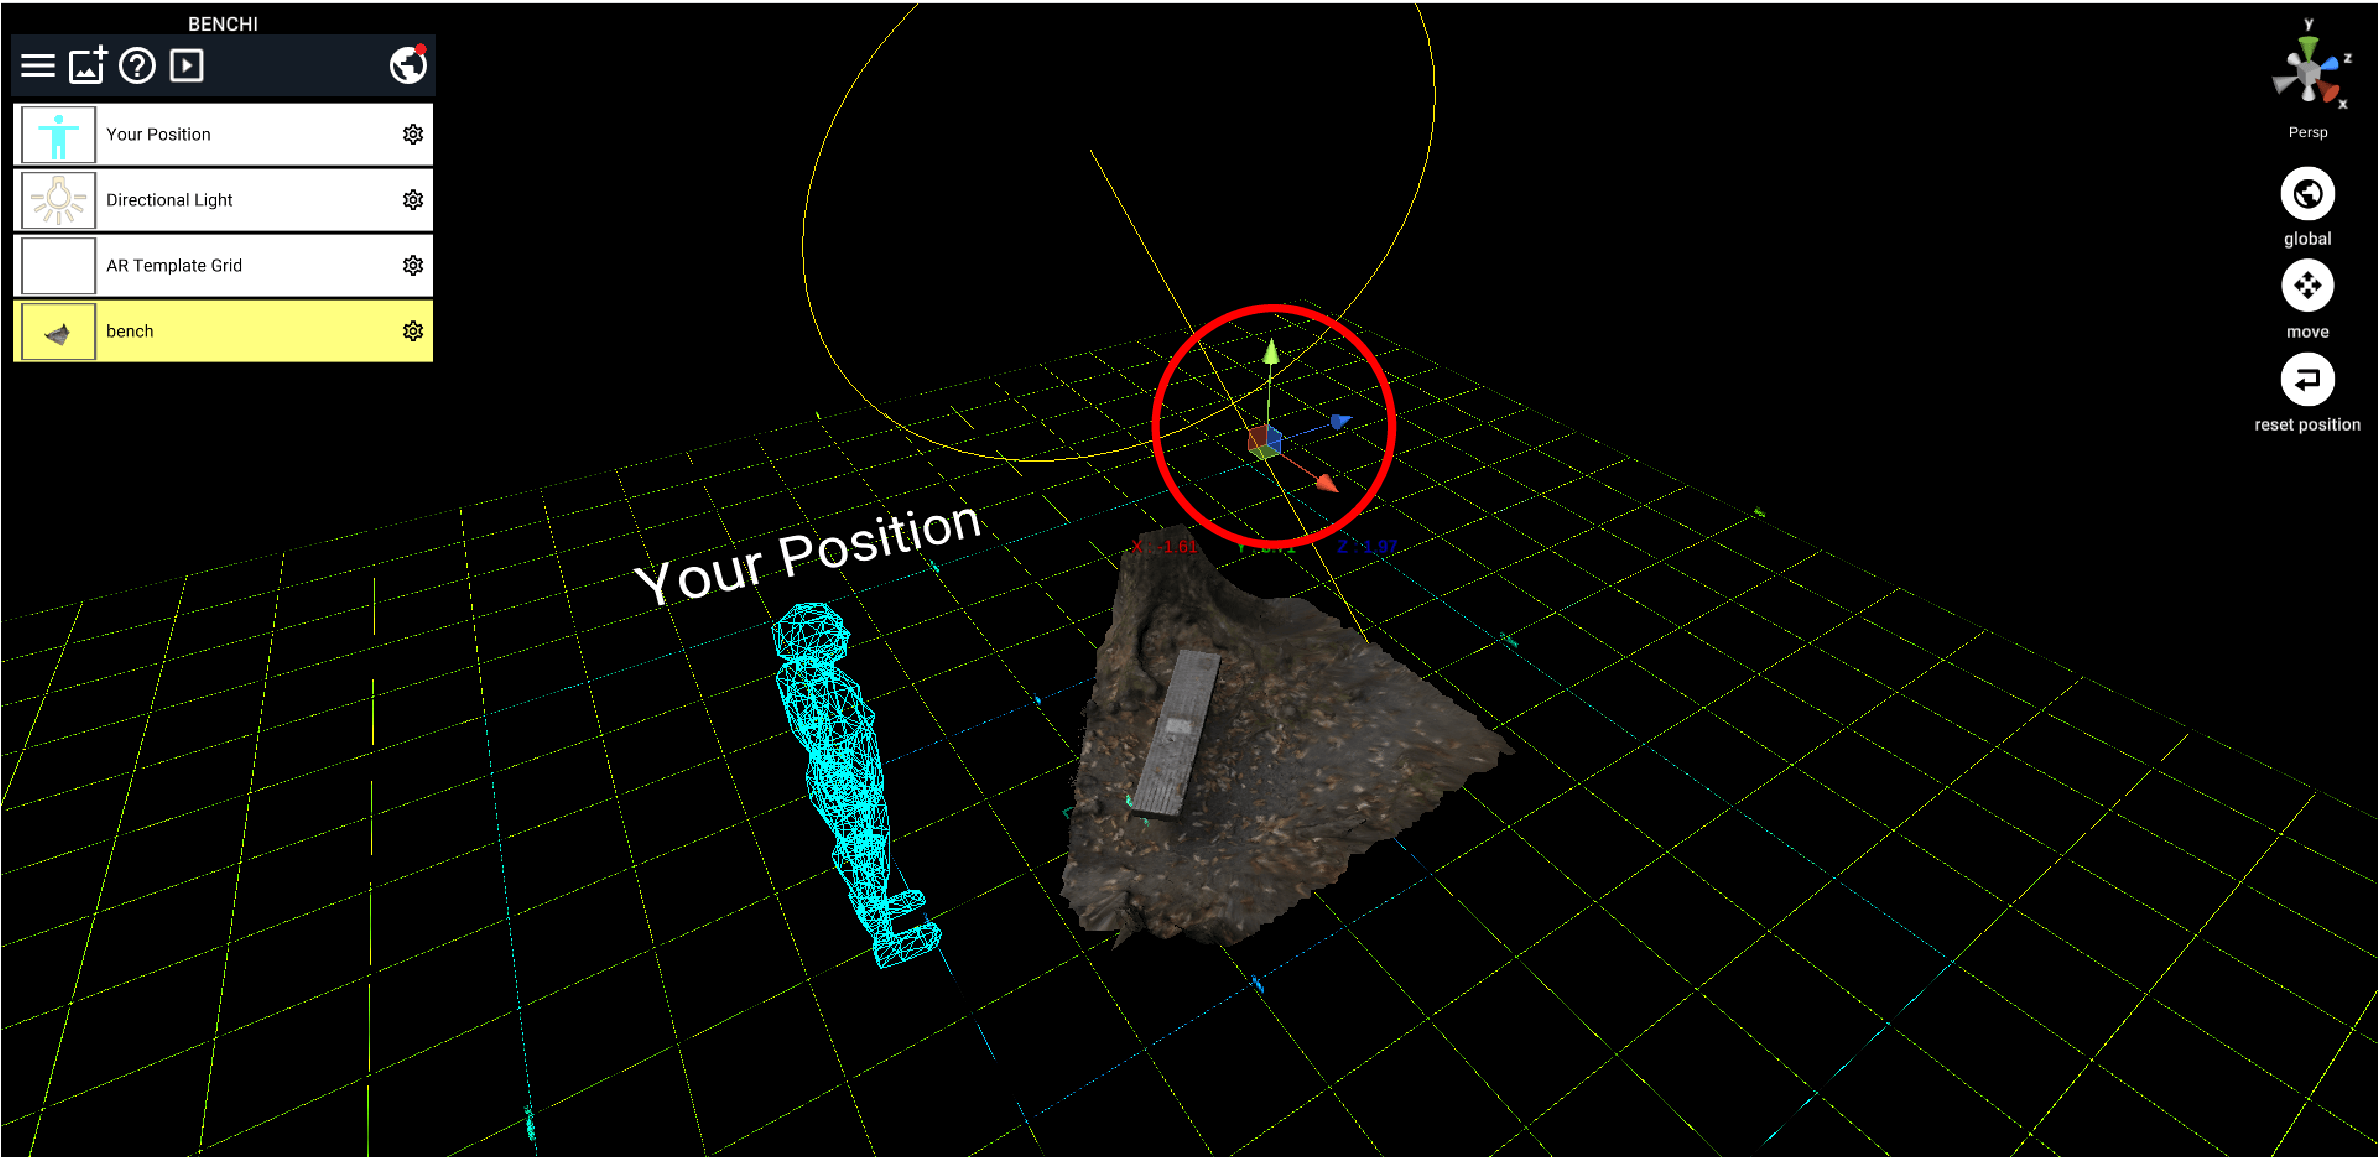
Adjust the position
When the adjustments are complete, select the globe symbol and select the Publish button to complete the upload to STYLY.
At this point, make sure that the “AR” tag is added to the “Featured Tags”.
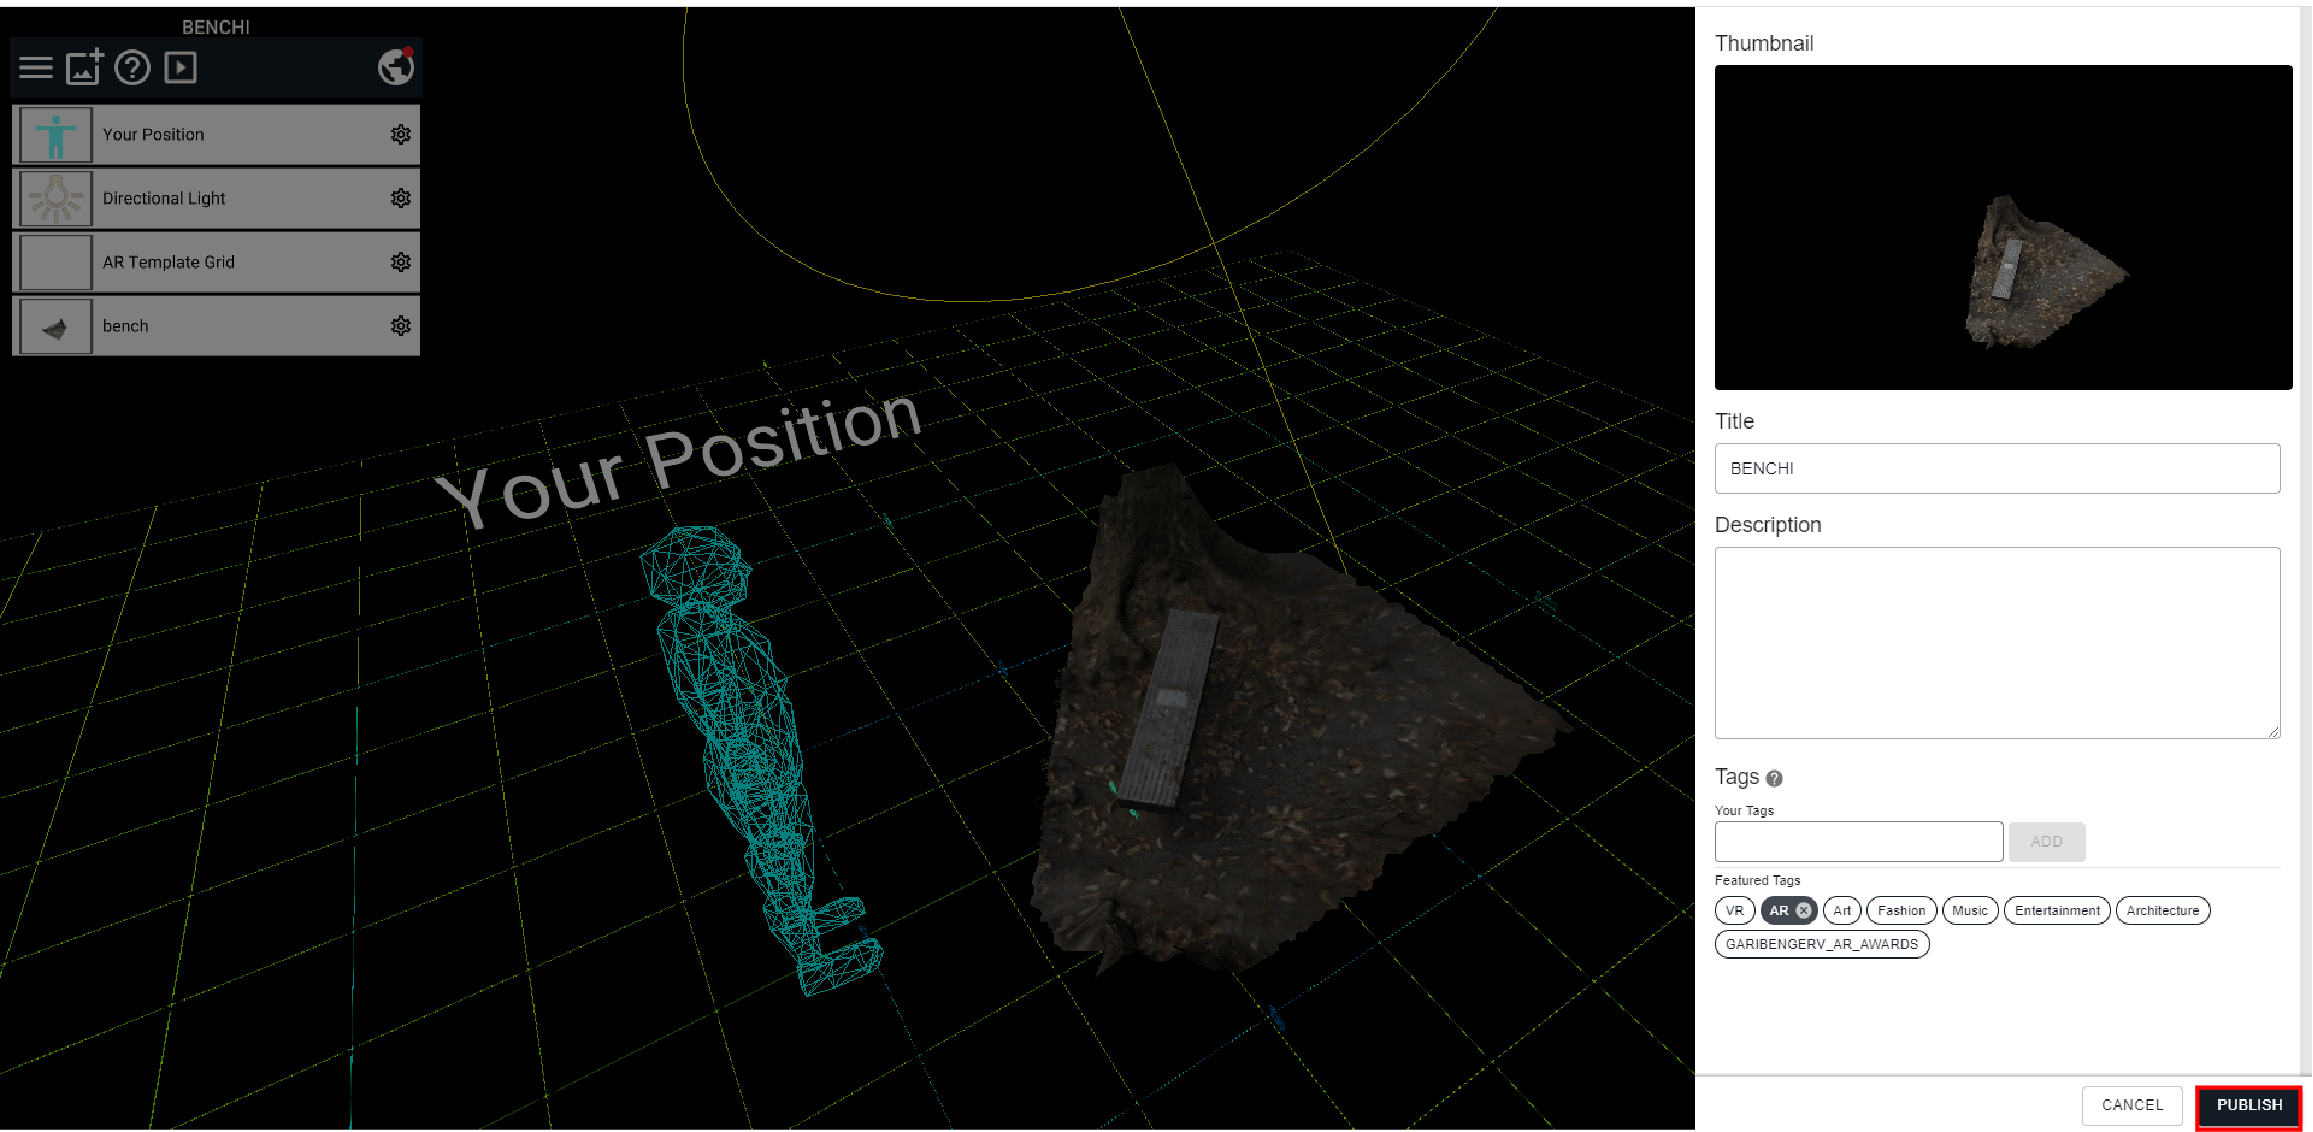
Select the Publish button
Once completed, you can check your work in “Open in Gellary”.
Check your work in STYLY GALLERY
If you have downloaded the STYLY app on your smartphone, you can project your work in real space by selecting Mobile and reading the QR code.

App Marker for STYLY Mobile
What to do when textures are not reflected
As shown in the figure below, when you upload a model exported by Blender to STYLY STUDIO, the textures that you have set may not be reflected.
In this section, we will show you how to apply the texture using Paint 3D (a standard Windows 10 application).
Textures are not reflected in STYLY STUDIO
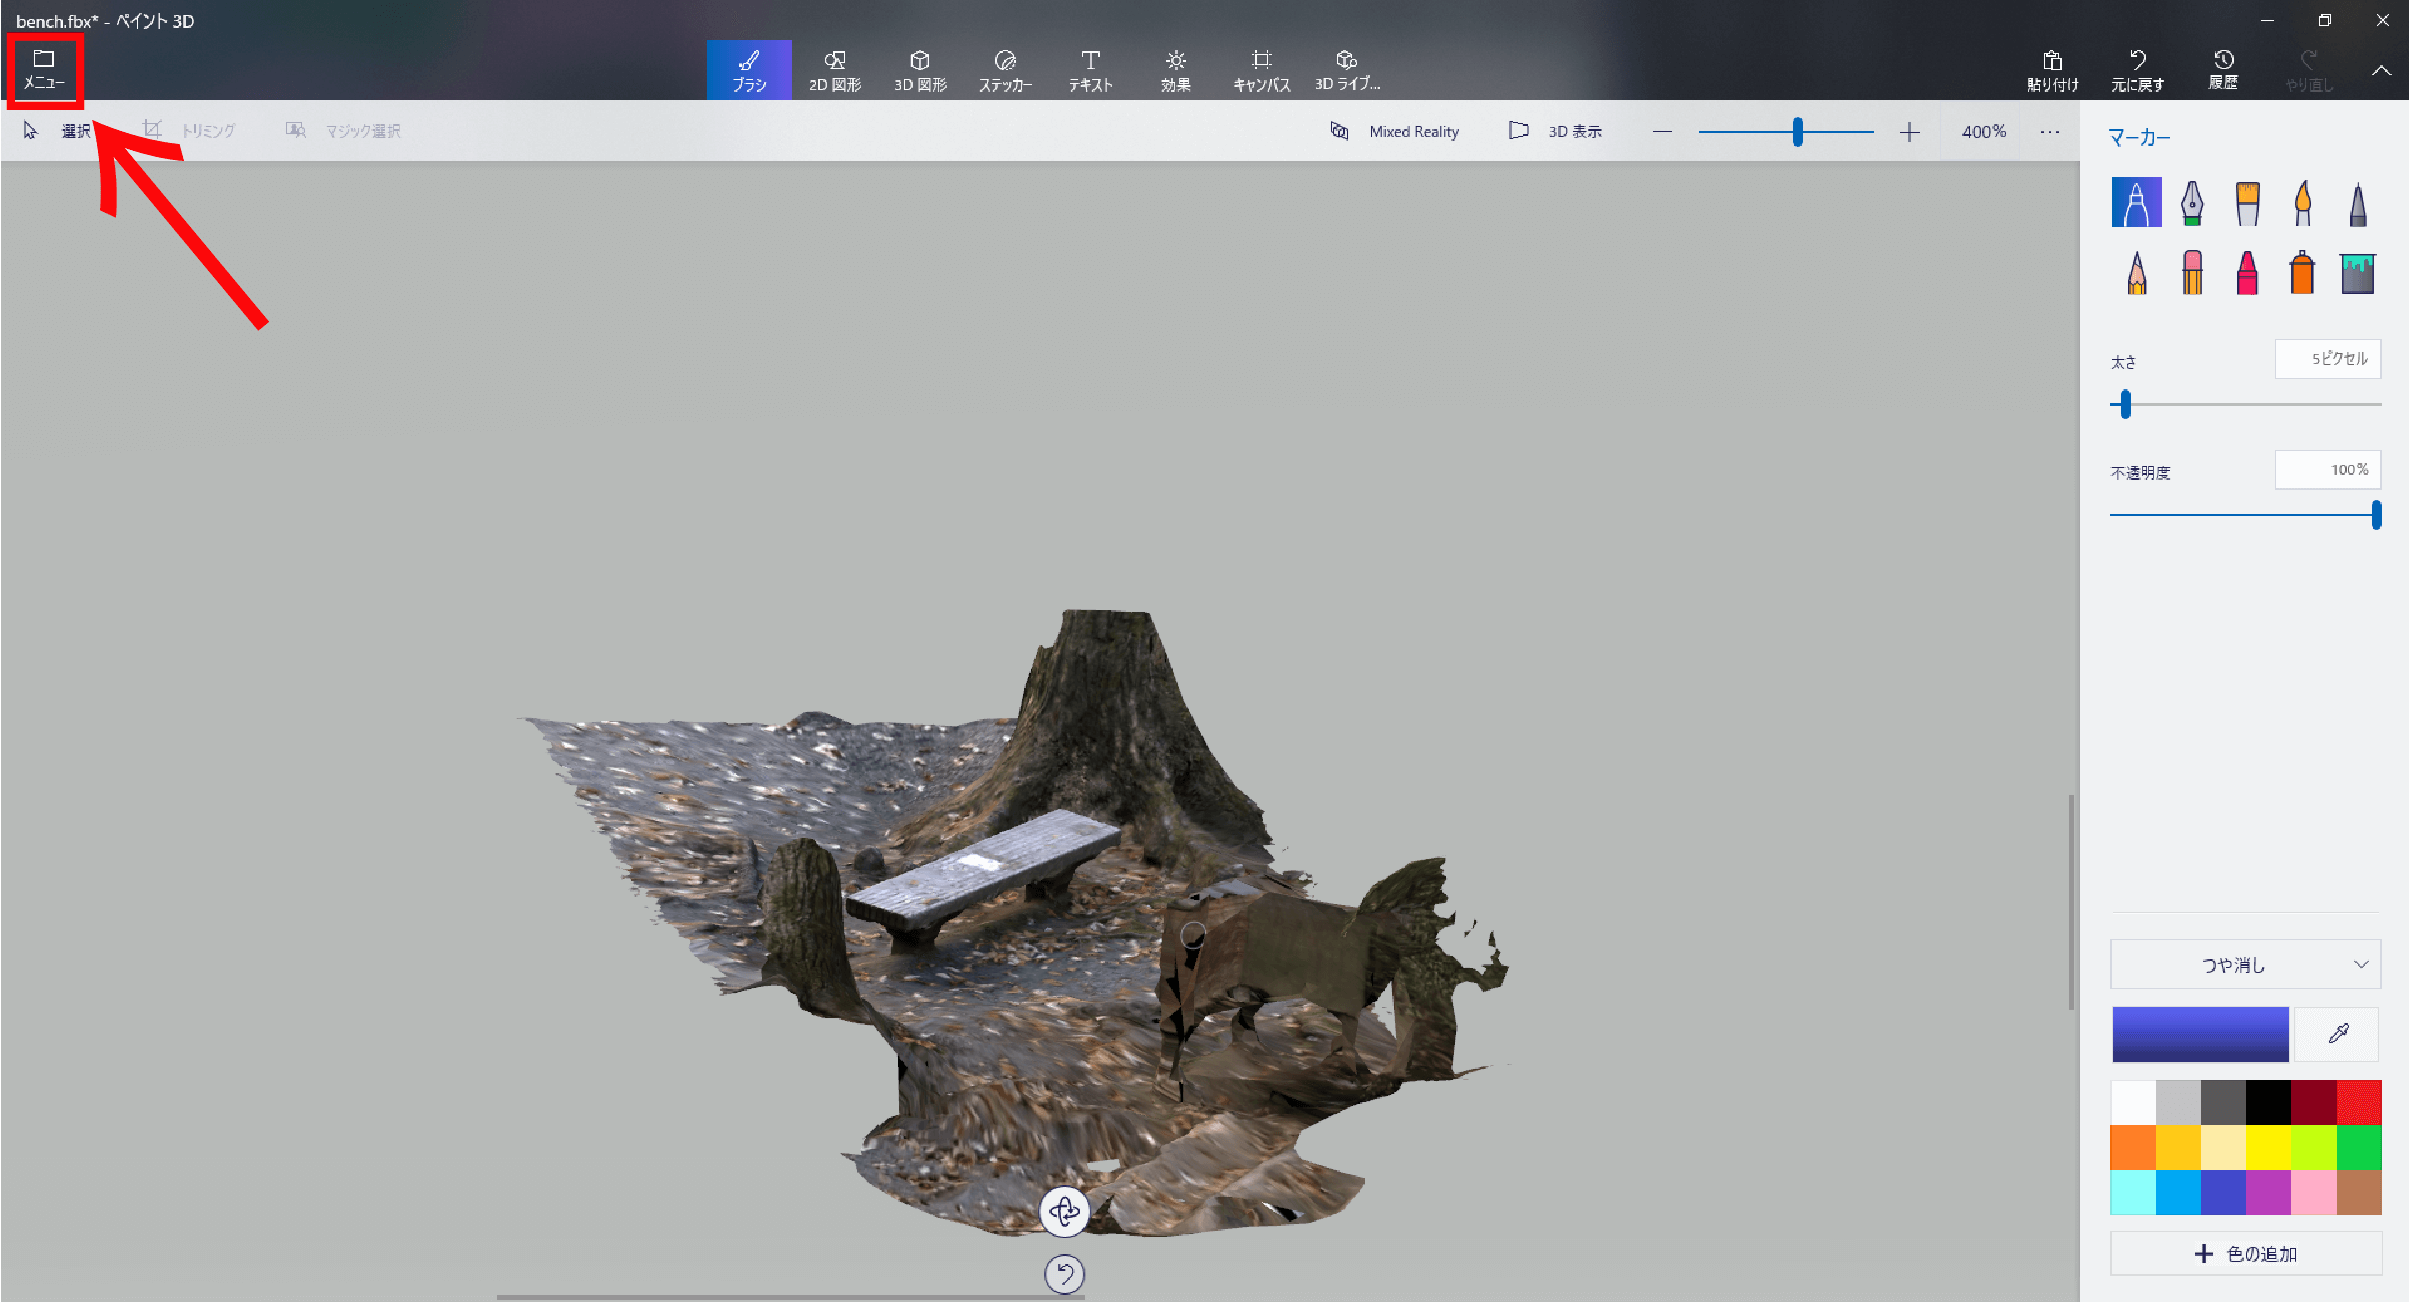
First, select the FBX exported by Blender and open it in Windows Paint 3D.

Right click > select Edit in Paint 3D
After opening the FBX in Paint 3D, you will be asked if you want to import the texture as shown below.

Select Import
After selecting import, select the folder where the texture files are saved.
(Nothing will appear in the folder, but just click on Select Folder.)
Click Select Folder
Once the texture has been successfully attached to the model, select the menu and save the model.
Select the menu
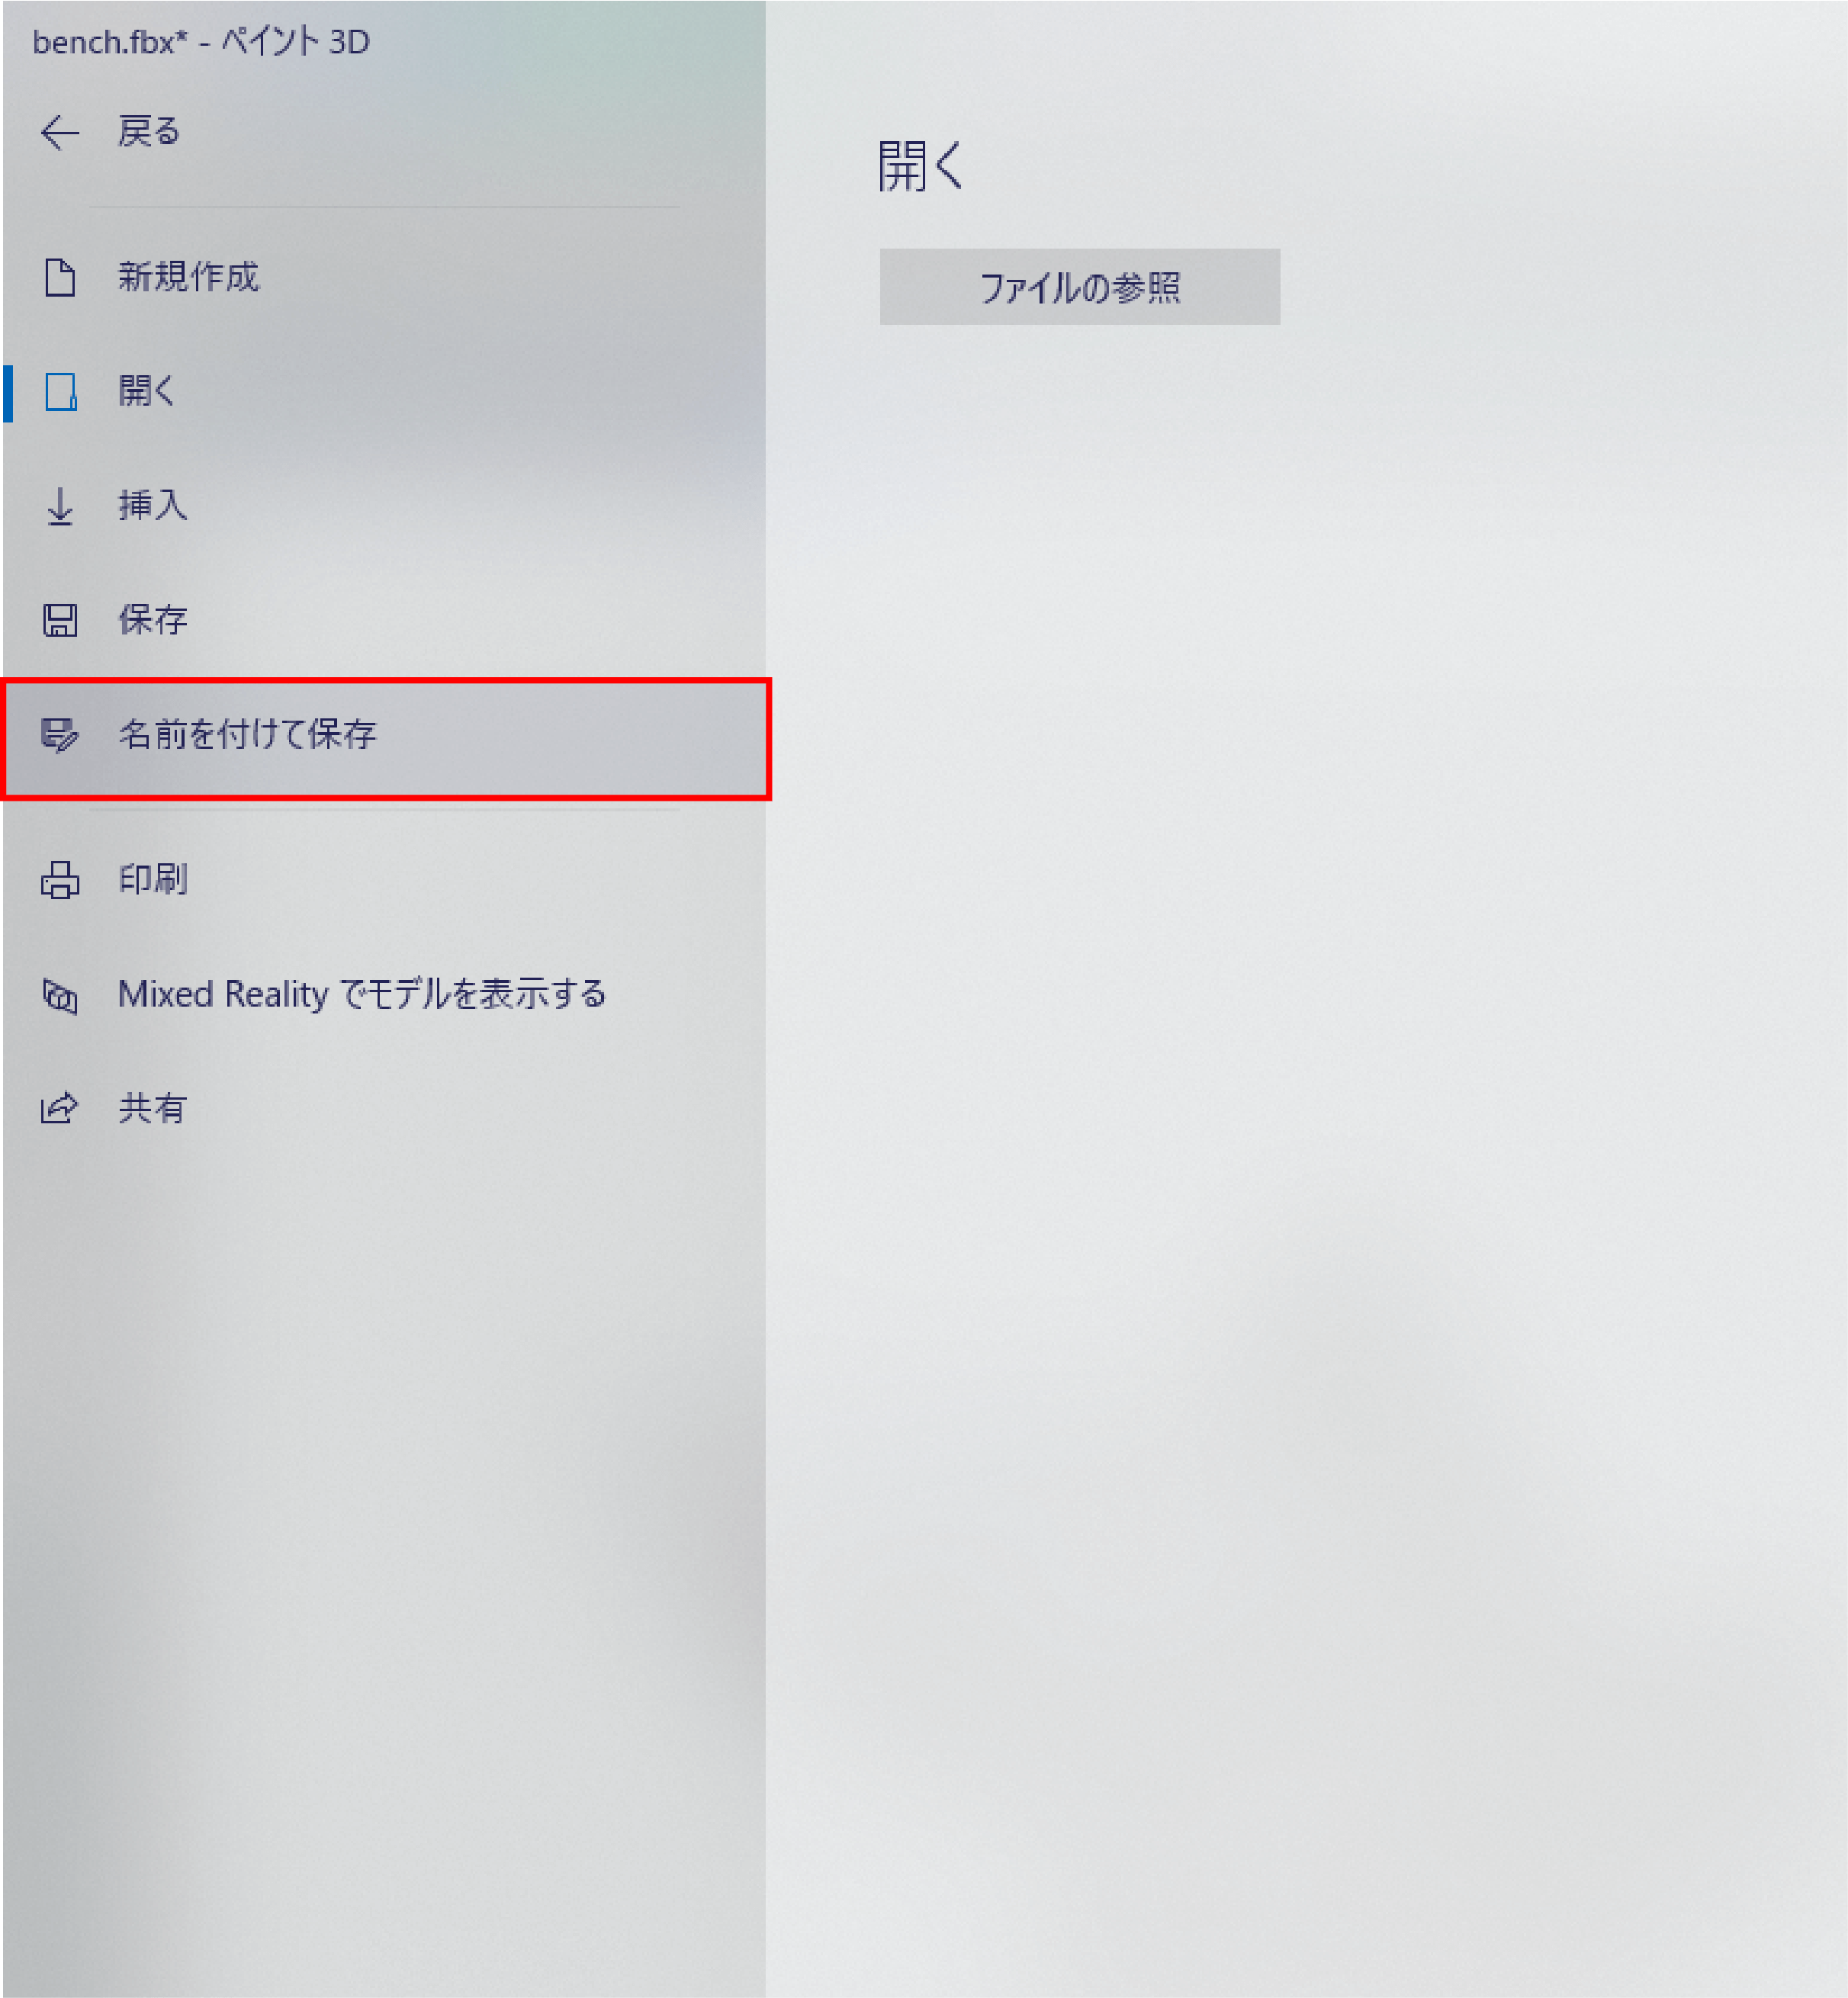
Select Save As
After selecting the 3D model and saving it as a name, the pasting process is complete.
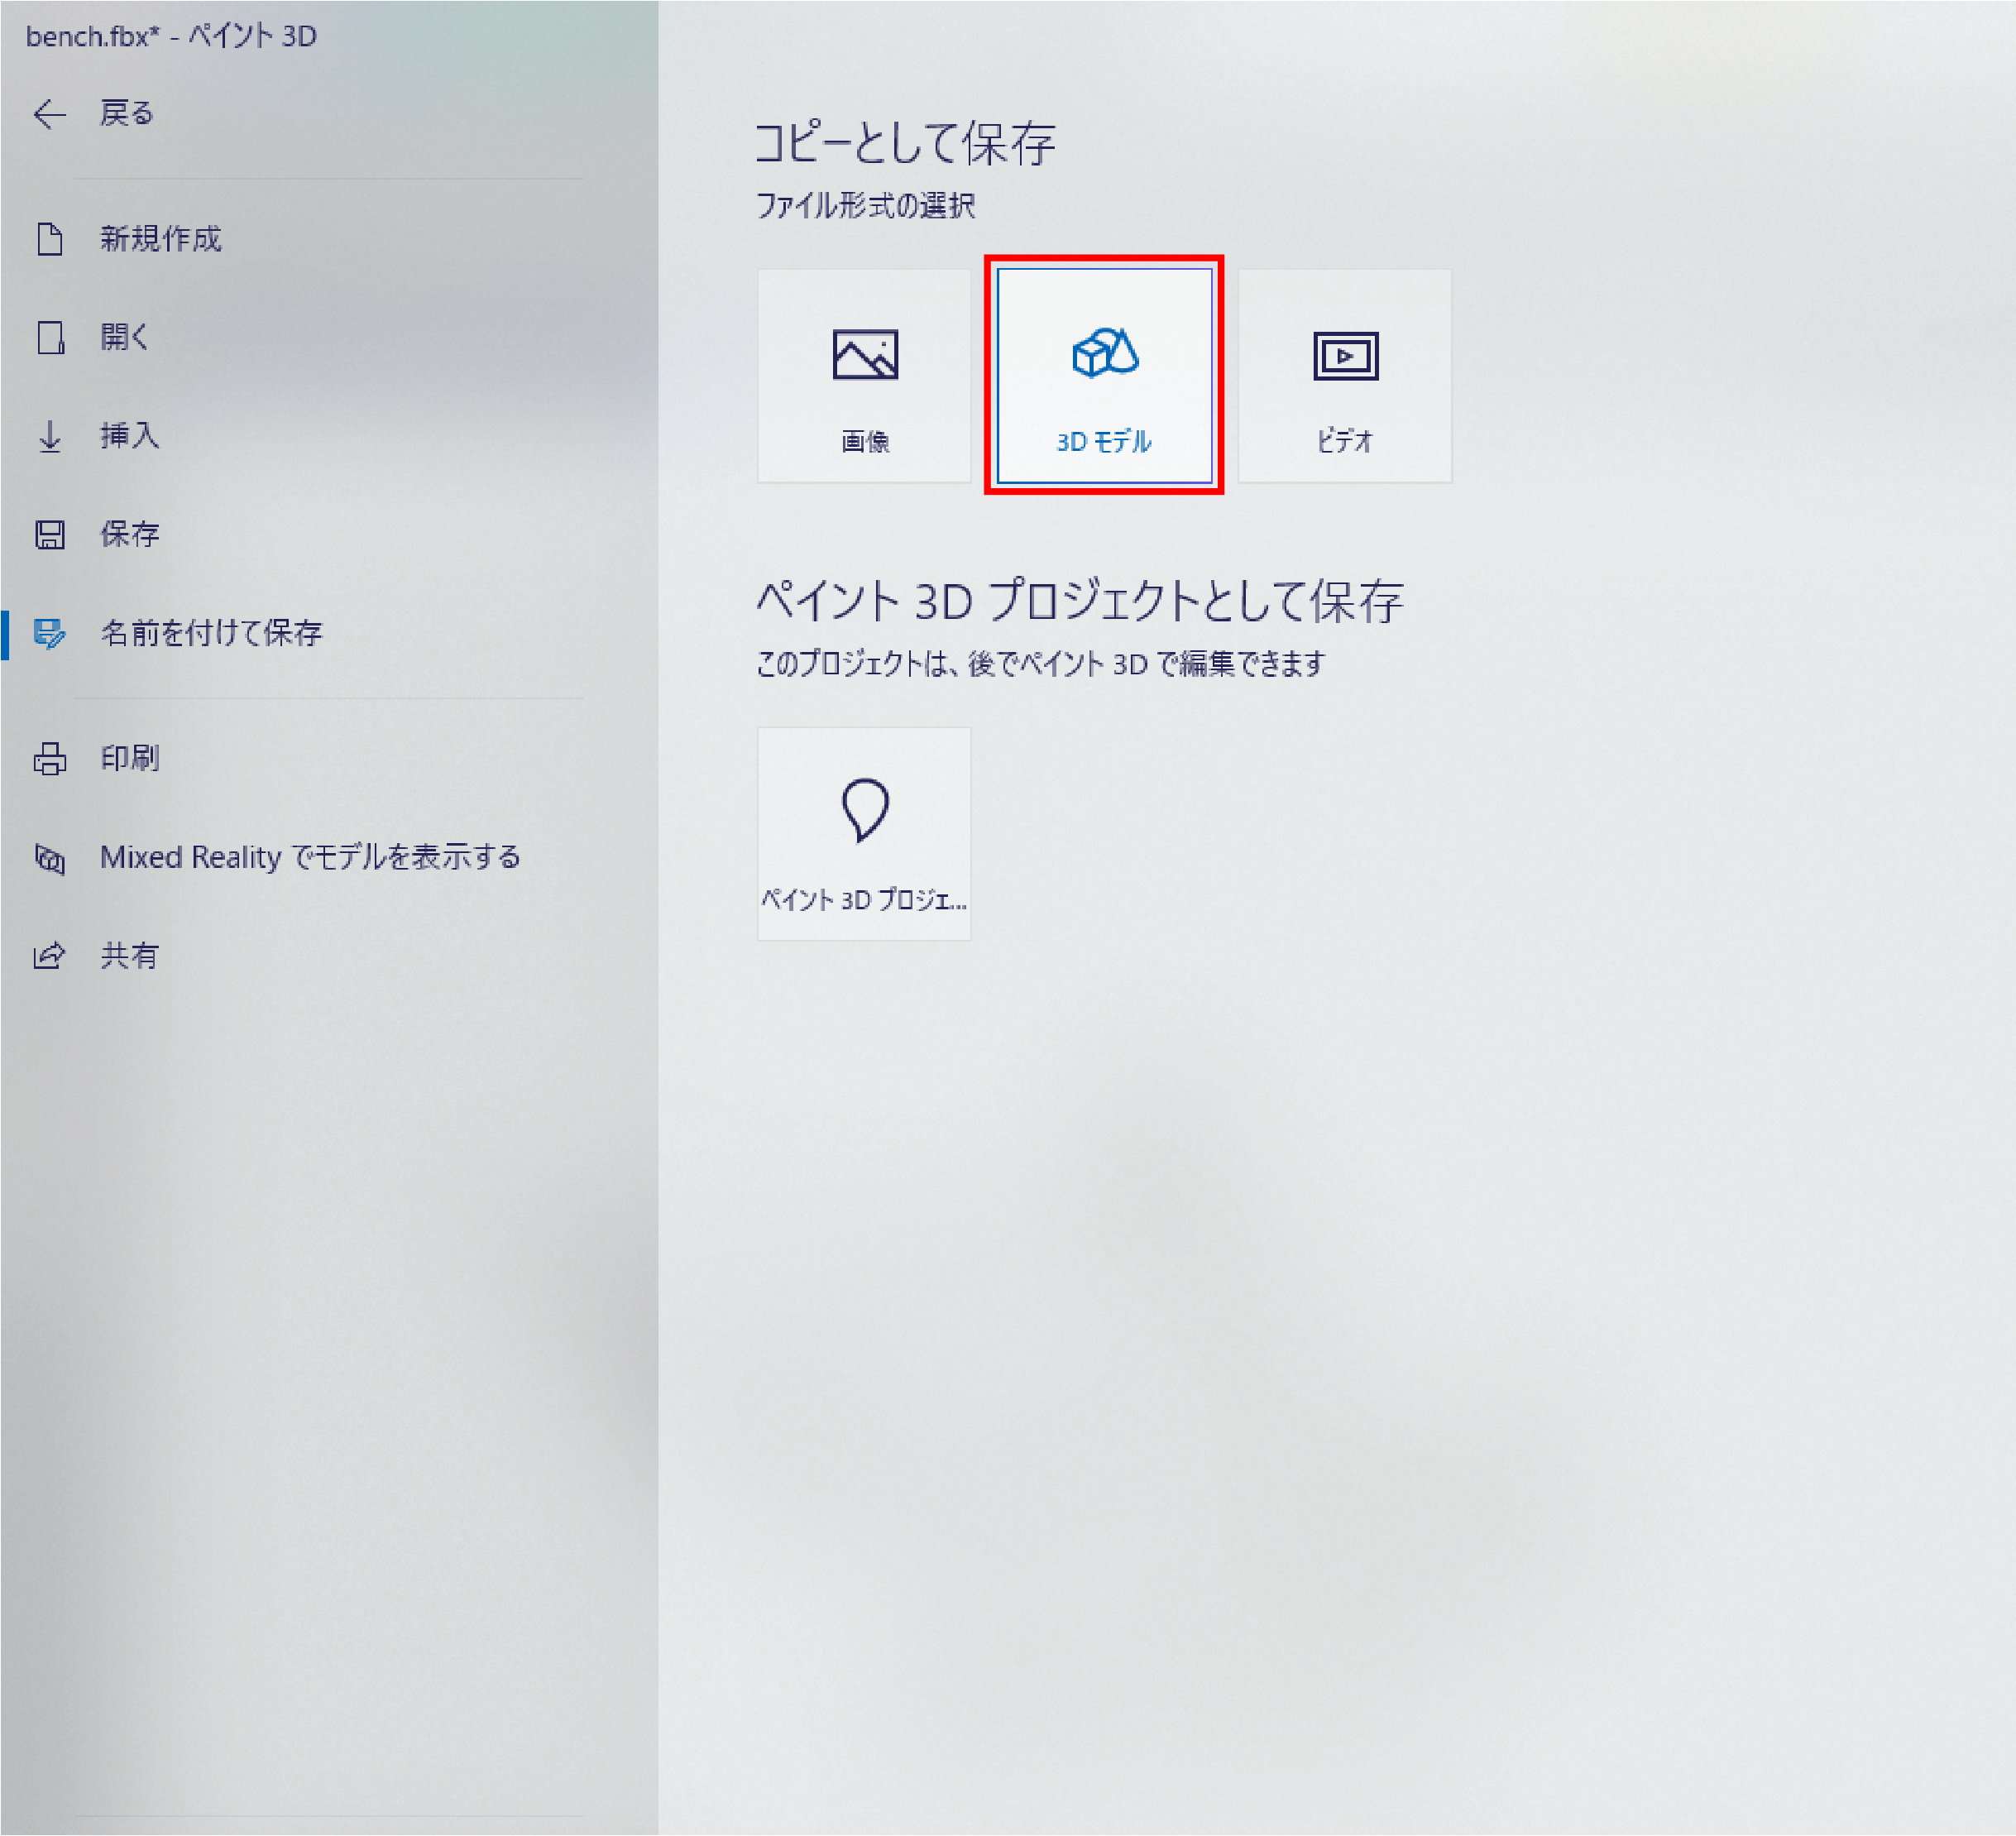
Select the 3D model
After pasting the texture in the above way and uploading it to STYLY STUDIO, there is a phenomenon that you cannot see it when you place it.
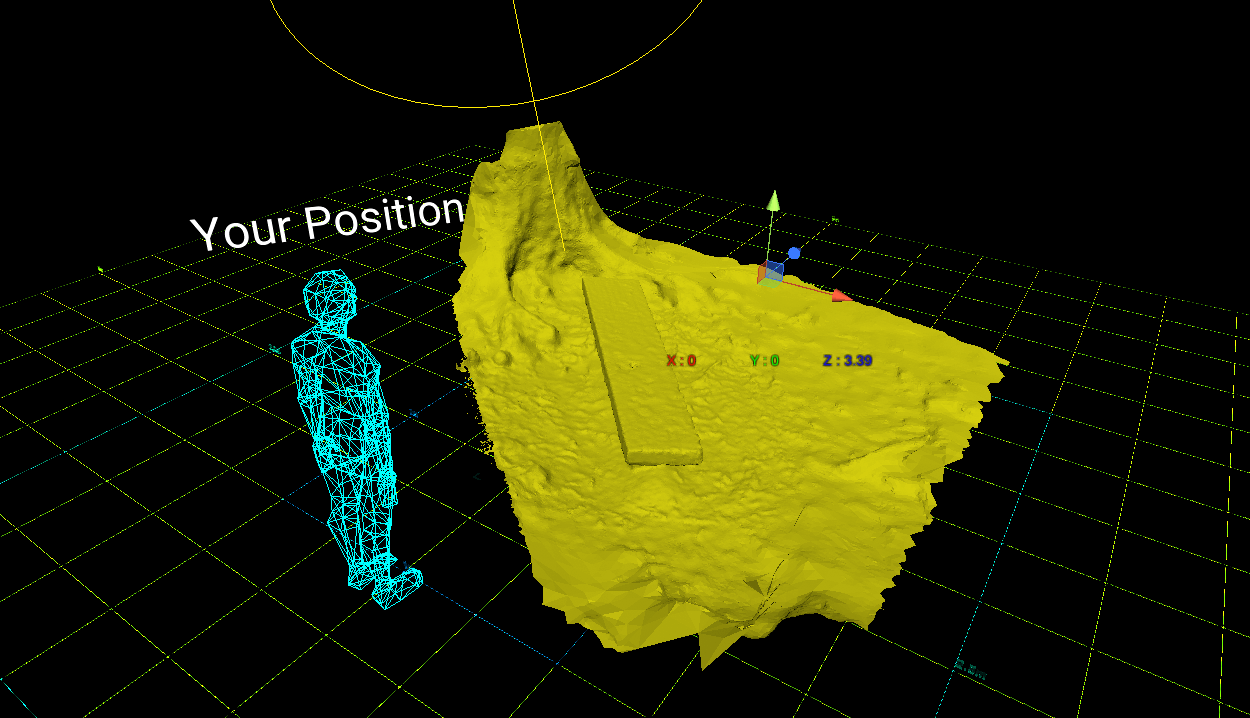
This is just because they have been scaled down to the point where you cannot see them, so switch the mode in STUDIO to scale and change the size of XYZ. I set XYZ to 1000 and it returned to the original size.
I can’t see the model I placed

Switch the mode to scale
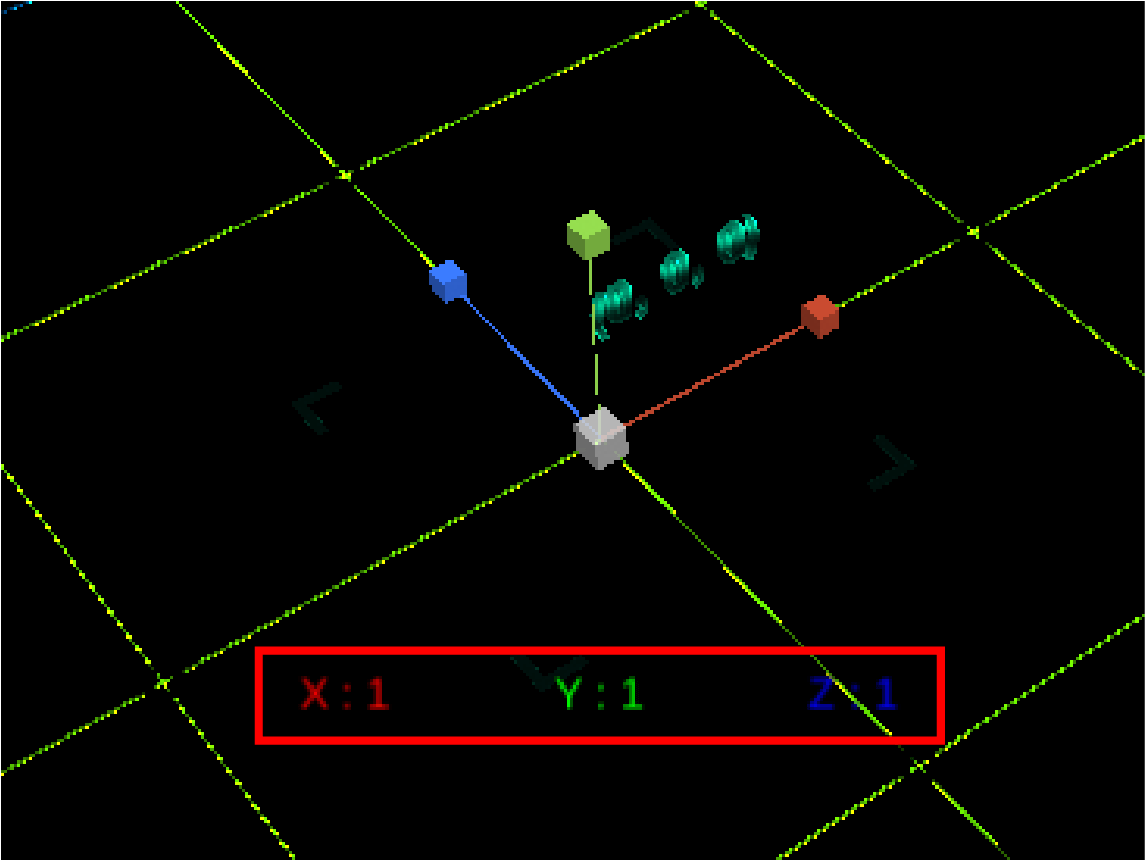
Set XYZ to 1000
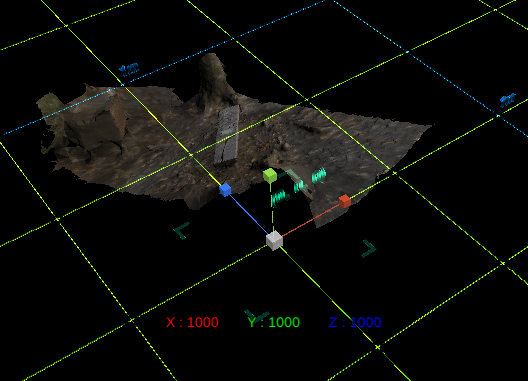
The model is visible
Introduction to NEWVIEW SCHOOL ONLINE
NEWVIEW SCHOOL ONLINE is now open! Learn the basics of Unity and PlayMaker, necessary for creating VR/AR content, and learn the process (and creation techniques) for developing attractive content available on STYLY.
- Create VR/AR content without writing any programming code.
- Professionally supervised Unity courses available.
- Explore additional elements, such as photogrammetric production methods and content lightening.
- Learn the concept of creating VR/AR content.
