In this article, I introduce how to create photogrammetry from a movie.
You can scan objects more quickly by using a movie.
Select photo-based photogrammetry or movie-based one according to the required quality to use photogrammetry efficiently.
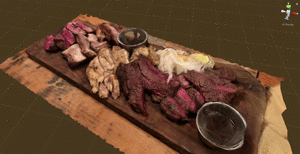
Example of 3D model created from movie
What is Photogrammetry?
Photogrammetry is a technique to generate 3D model by the computational analysis of the photos taken from various angles.
You can generate 3D model from various objects, a small object like a figure doll to a large object like building or city.
Rocca Calascio – RAWscan by Spogna on Sketchfab
In the article below, I summarised the explanation of photogrammetry and the basics to use it.
Please read this article first if you use photogrammetry for the first time.
Introduction to photogrammetry – taking photo & generating 3D model
Apply photogrammetry to movie
All major photogrammetry software supports the function to create 3D-model from movie.
By importing a movie into software, the software picks up appropriate frames automatically.
You can save the time to take photos by using movie. But, on the other hand, the quality of the 3D model is compromised.
Choose photo-based photogrammetry or movie-based one according to the required quality of the 3d model.
| Photogrammetry Software | support move-based photogrammetry? | Supported OS |
| 3DF Zephyr | ◯ | Windows |
| Reality Capture | ◯ | Windows |
| Meta Shape (was Photoscan) | ◯ | Windows/Mac/Linux |
Notes for move-based photogrammetry
There are several points you need to be aware of when applying photogrammetry to a movie.
| Notes | |
| Notes for taking photos | Avoid the blurred image as possible (The camera with anti-blur capability is recommended). |
| Avoid sudden move when taking photos. | |
| Move the camera at a constant speed. | |
| Avoid moving objects in the picture. | |
| Avoid reflection and shadow in the picture as possible. | |
| Notes for extracting frames | Exclude the low-quality photos. |
Use photogrammetry with the free trial version of 3DF Zephyr
I introduce how to use photogrammetry with the free trial version of 3DF Zephyr here.
Record movie
When recording the movie, move the camera so that the image is not blurred. Record the whole object thoroughly without any blind spot. I recorded the movie with iPhone this time.
3DF Zephyr supports the following movie files. If your movie file is not on this list, convert it to one of them beforehand.
[.mepg .wmv .avi .mp4 .mov .mpg]
(※The GIF animation below is a part of the move recorded. The actual movie recorded the objects from every angle around them).
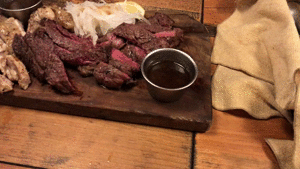
The example of the recorded movie (a partial movie)
Import into 3DF Zephyr
Select ‘Workflow > New Project’ in the menu bar.
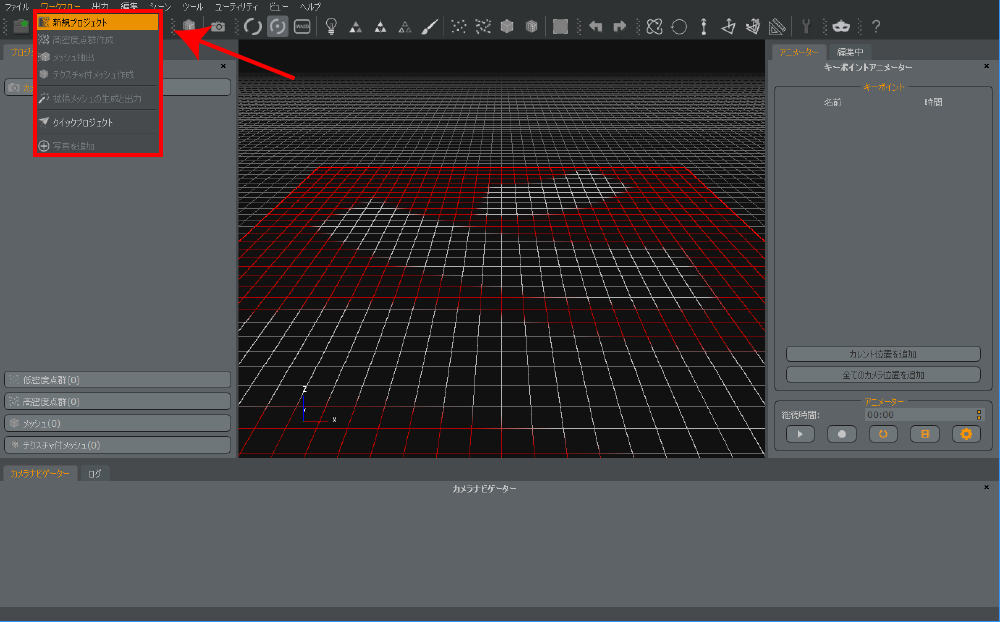
Create a new project
When the wizard opened, press ‘Next’. Then the window shown below will appear. Select ‘Import Pictures from video’.
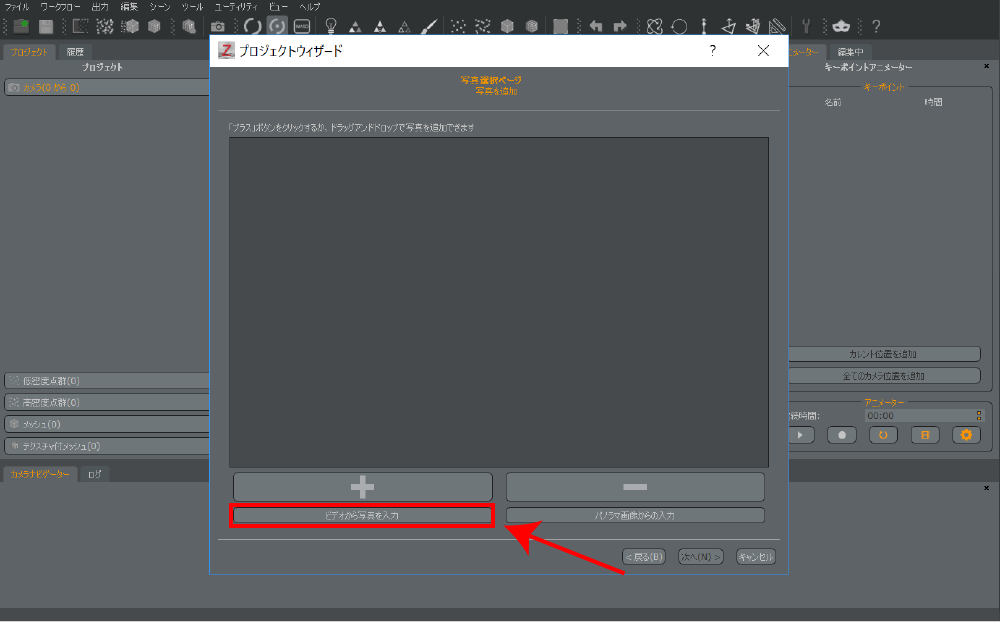
Import pictures from video
It brings up the ‘Extract frames from video file’ window, so select the input file (the movie file for photogrammetry) and specify the destination folder (the directory where the extracted pictures are saved).
‘FPS to extract’ is the number of frames extracted per second.
For example, if you set ‘FPS to extract’ to ‘1.00’ for a 30-second movie, 30 pictures would be extracted.
The free trial version of 3DF Zephyr can import only 50 photos, so adjust ‘FPS to extract’ so that the extracted pictures come to 50 approximately (Since 3DF Zephyr automatically reduce the number to 50, you don’t need to worry about it too much).
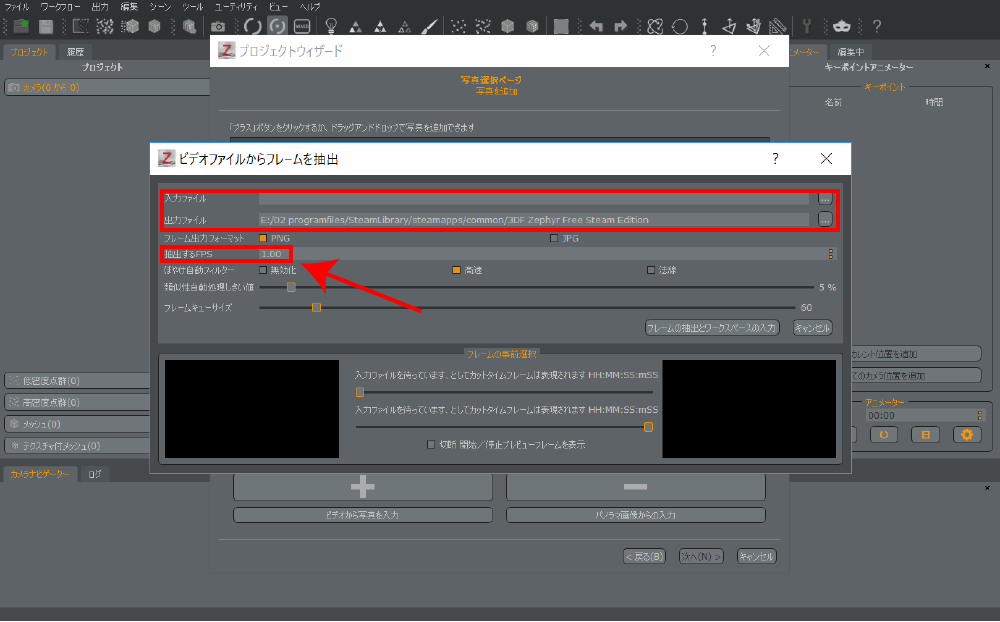
The setting to extract pictures from video
After setting up ‘FPS to extract’, press ‘Extract frames and import in workspace’ to start extracting frames from the movie.
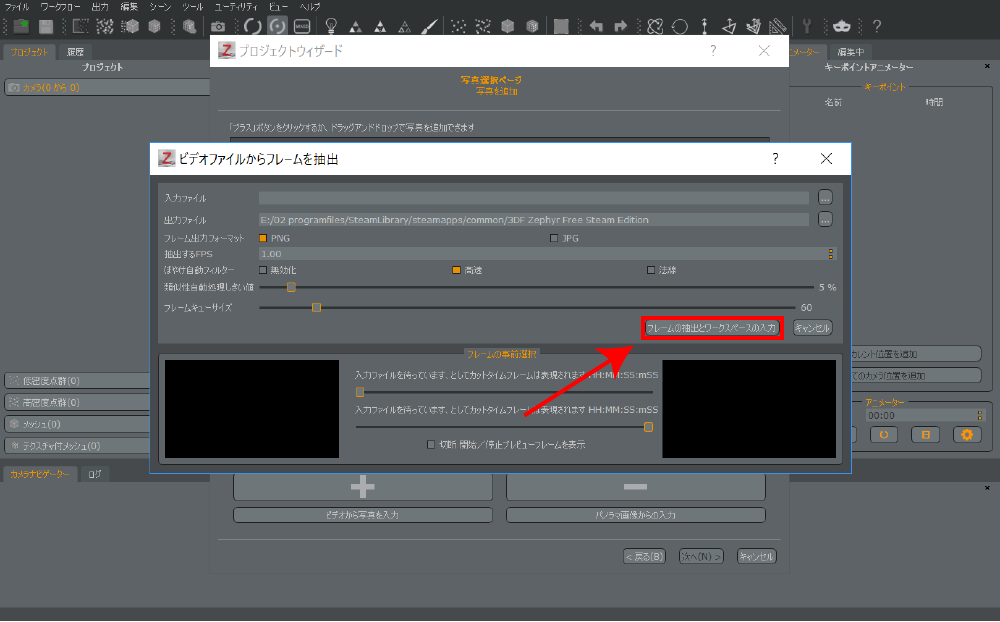
Extract frames and import in workspace
Apply photogrammetry to the extracted pictures
Now you have extracted pictures from the movie.
The pictures extracted from the movie have been saved and imported into 3DF Zephyr.
I recommend excluding the low-quality photos such as the photo blurred too much.
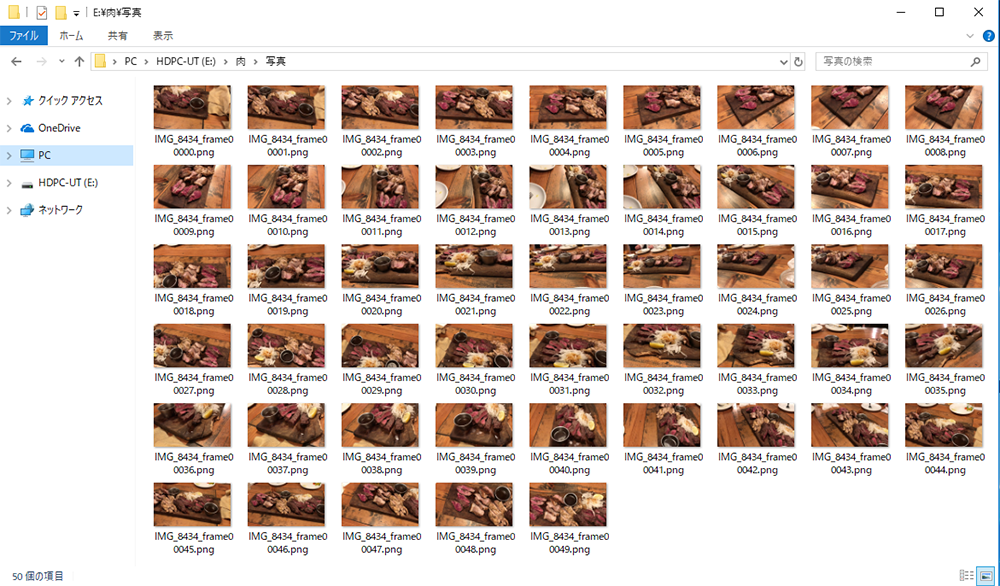
Example of the extracted pictures
The remaining tasks are the same as photo-based photogrammetry.
This article explains how to create a 3D model with 3DF Zephyr in detail.
Upload to STYLY
The 3D model created by photogrammetry would look better if you applied Unlit Shader in Unity before uploading.
This article explains how to apply Unlit Shader in detail.
Please refer to this article to learn how to upload an asset from Unity to STYLY.
Read the article
How did you find this article?
You can save time significantly by using movie-based photogrammetry.
On the other hand, it compromises the quality of the 3D model essentially, so use it properly according to the required quality.