In this article, I’ll explain how to use PlayMaker to create a function that displays an effect around the goods by overlapping the mark displayed on the screen with the mark printed on the goods and pressing a button.

Completed image
Advance preparation
Install PlayMaker in Unity beforehand.
![[Unity Tutorial] Creating a Game Using Playmaker ① From Basic Introduction to Installing](https://styly.cc/wp-content/uploads/2019/06/1200px-160x160.jpg)
If you are new to PlayMaker, please read following articles for a better understanding of this article.
![[Unity] Starting Playmaker from Scratch](https://styly.cc/wp-content/uploads/2019/09/PlaymaerCoreConcept-160x160.png)
How to implement
Changing the aspect ratio of the game view
Click on the aspect ratio in the game view.
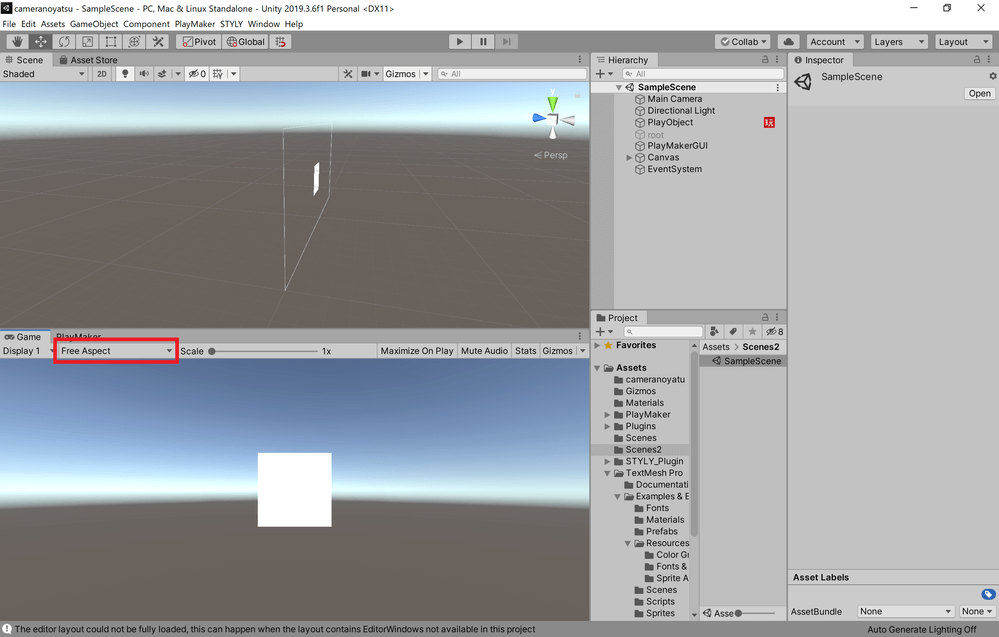
Click the aspect ratio in the game view.
Click the [+] button at the bottom.
![Click the [+] button at the bottom](https://styly.cc/wp-content/uploads/2021/08/2_AspectRatio2_1000.png)
Click the [+] button at the bottom
Change the Type to Aspect ratio, and enter 1 or 2 from the left for Width & Height.
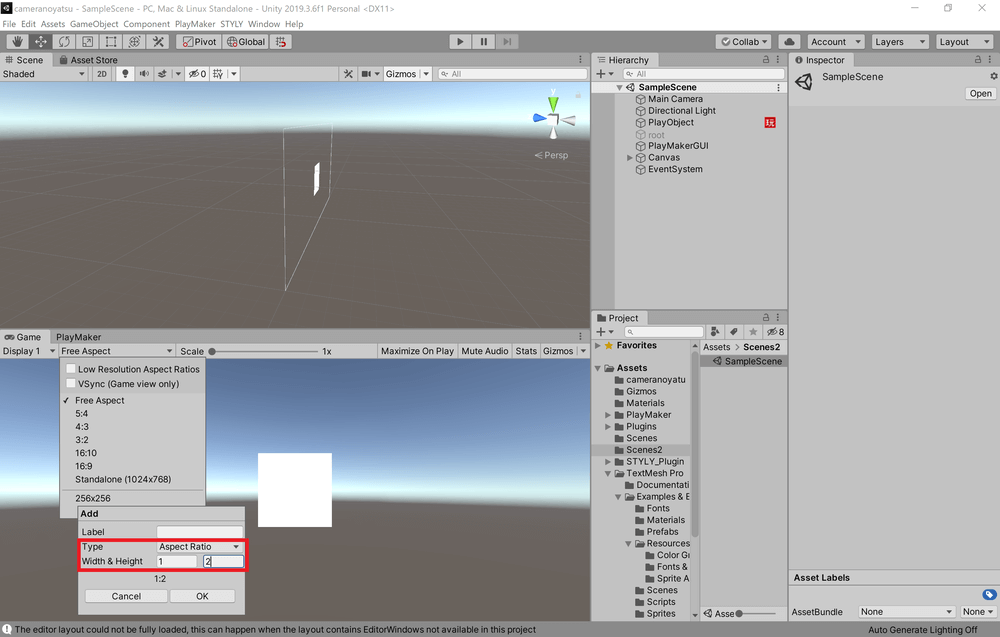
Change the Type to Aspect ratio, and enter 1 and 2 from the left for Width & Height.
Finally, click OK, and the aspect ratio of the game view will be roughly the same as that of a smartphone.
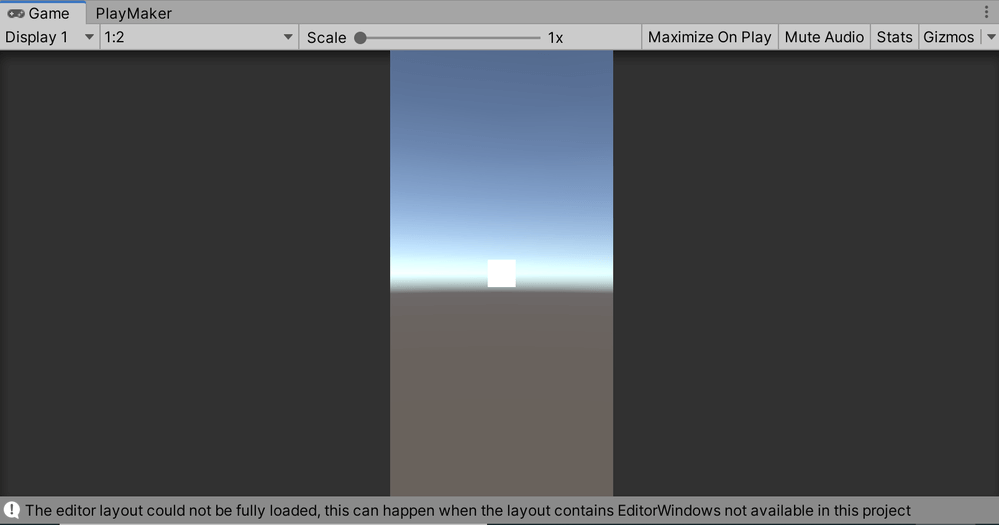
The aspect ratio of the game view is 1:2.
How to move an object in front of the Main Camera
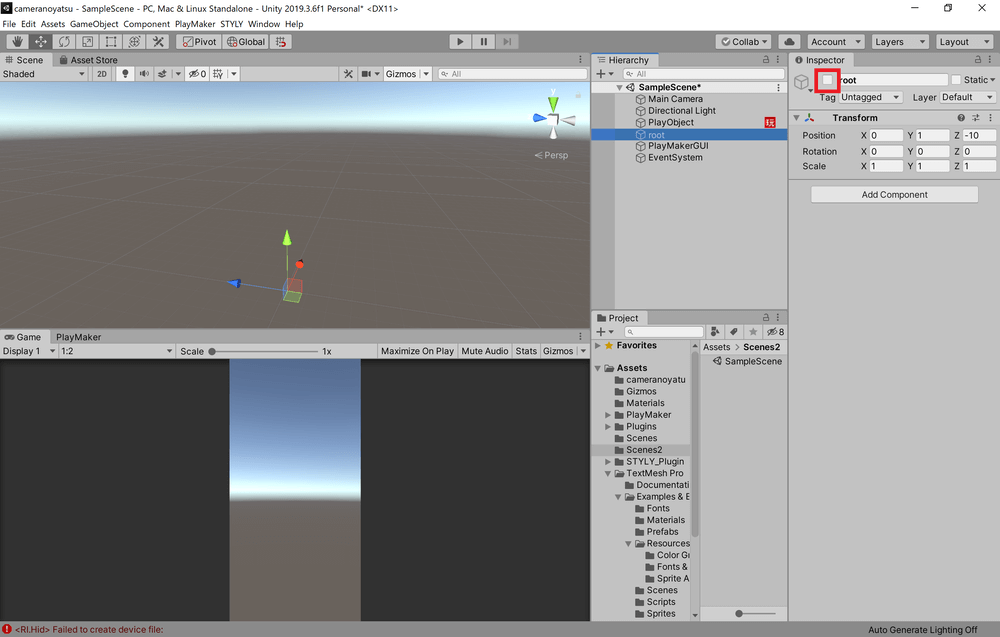
Create an empty object
Click on the GameObject from the tab at the top of the screen and select Create Empty, repeating the process once.
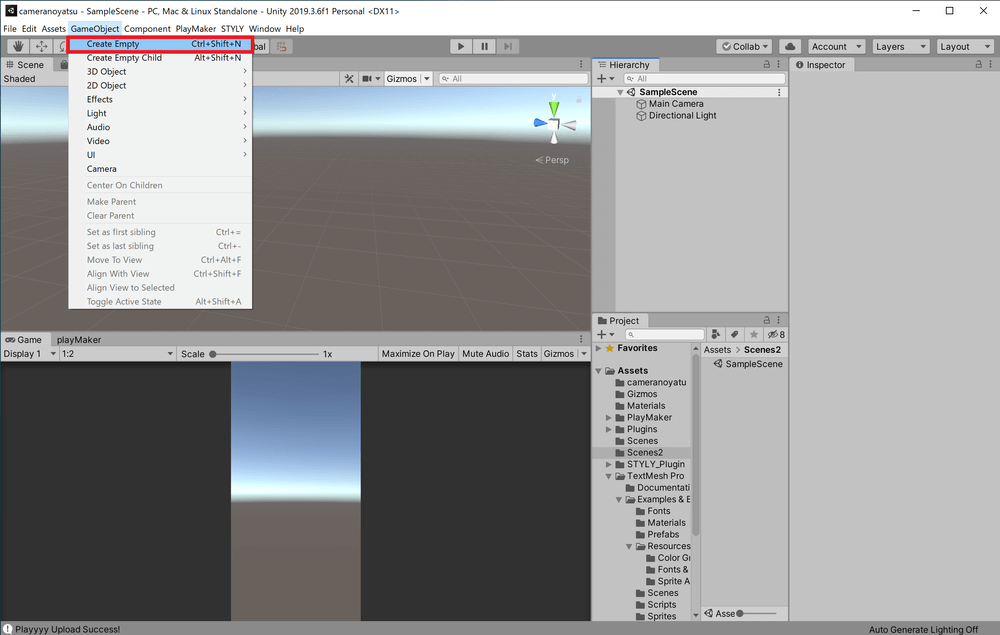
Click on GameObject from the tab at the top of the screen and select Create Empty
This will create a GameObject and a GameObject (1) in the Hierarchy window.
You can rename them as you like, and I use “root” and “PlayObject”.
Adding PlayMakerFSM to a PlayObject
Next, select the PlayObject and click Add Component in the Inspector window.
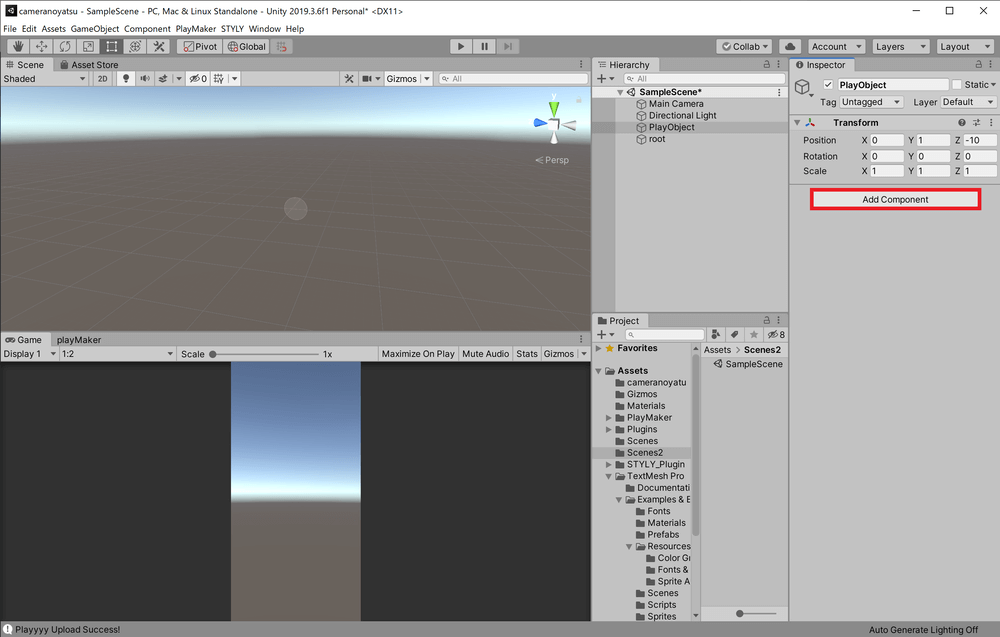
Select Add Component in the Inspector window
Type “PlayMaker” in the search window and the PlayMakerFSM will appear, select it.
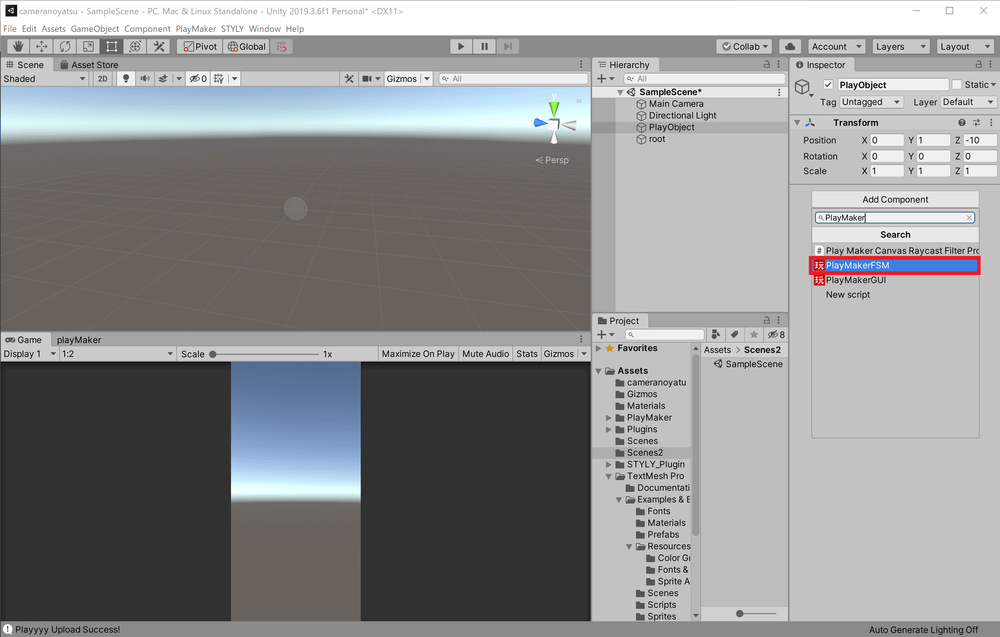
Adding the PlayMakerFSM
The PlayMakerFSM will then be added to the Inspector window.
Editing the PlayMakerFSM
Click on the Edit button in the PlayMakerFSM in the Inspector window.
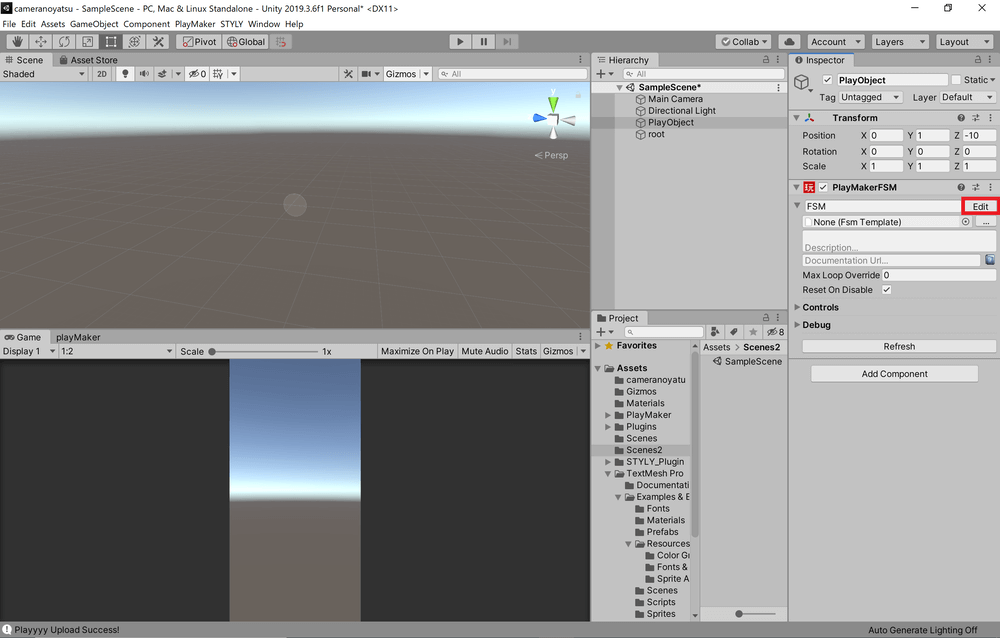
Click on the Edit button
This will open the PlayMaker Editor, where you can edit the PlayMakerFSM.
The PlayMakerFSM editing window
*If PlayMaker Editor is open from the beginning, you can select an object with a PlayMakerFSM in the Hierarchy window and edit it directly in PlayMaker Editor.
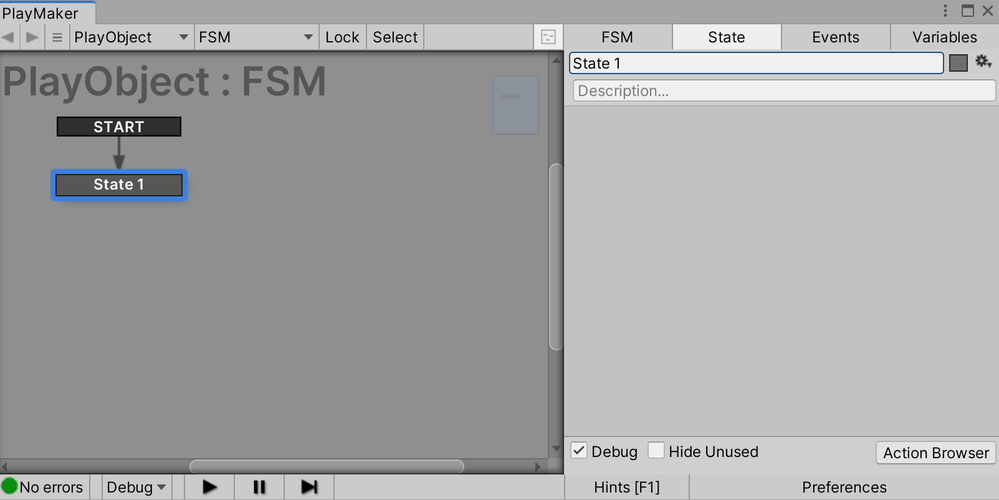
For clarity, let’s rename State 1 to “Get Camera”.
Click on the Action Browser in the lower right corner of the PlayMaker Editor.
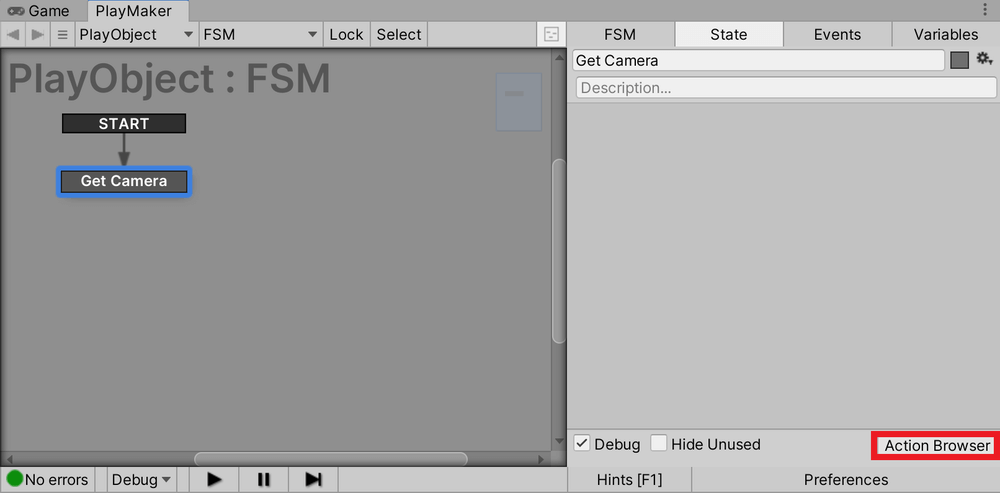
Click on the Action Browser
In the Action Browser that opens, type “main” in the search window to add Get Main Camera.
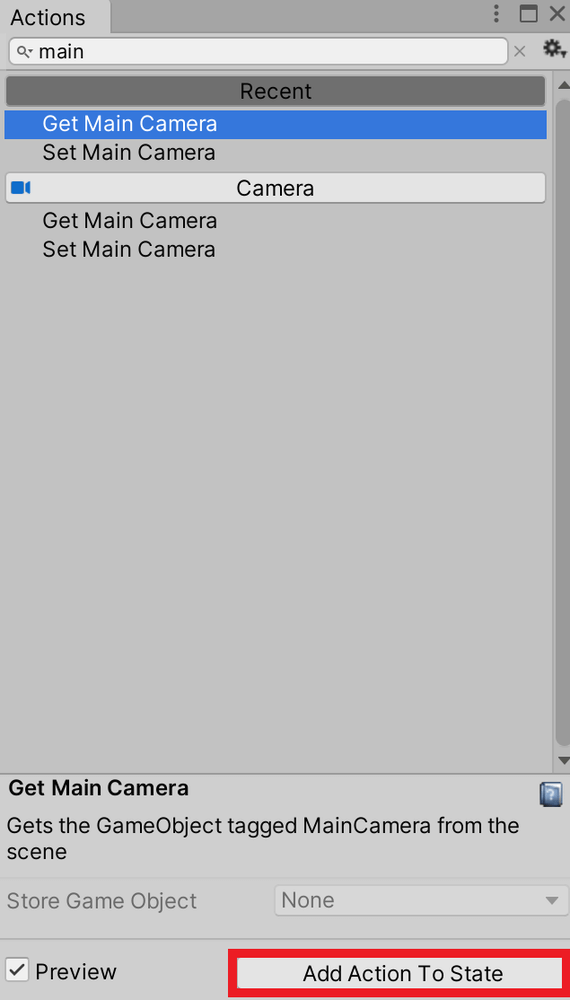
Add Get Main Camera
Change the Store Game Object of the Get Main Camera added in the State from None to New Variable…. and create a new parameter value “MainCamera”.
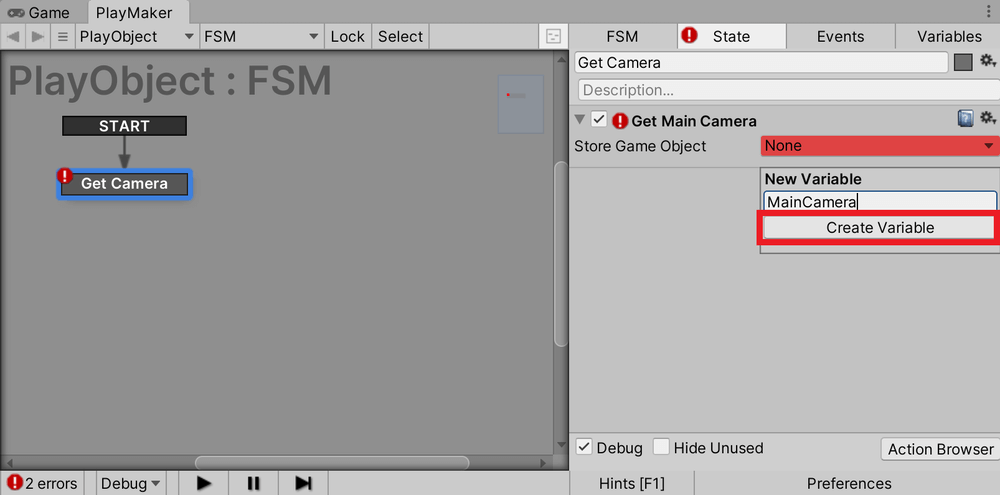
Enter a name for the parameter value and click Create Variable.
Right-click Get Camera in the left frame of the PlayMaker Editor, and click Add Transition→FINISHED.
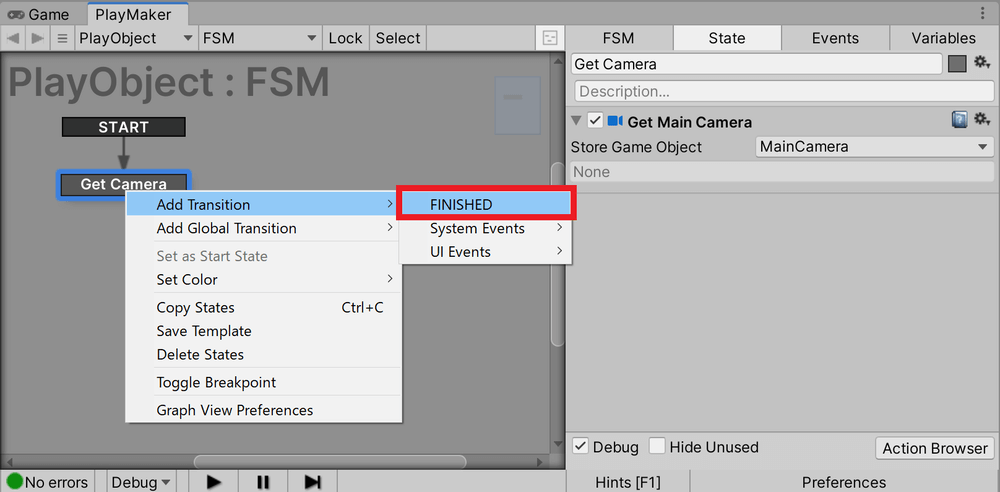
Click Add Transition→FINISHED
Right-click on an empty space in the left frame of the PlayMaker Editor and click Add State, repeating the process once.
Rename one of the newly created States to “Move root” and the other to “Tapped”.
Drag and drop the arrow from FINISHED to Move root just below Get Camera in the left frame of the PlayMaker Editor, and attach it to Move root.
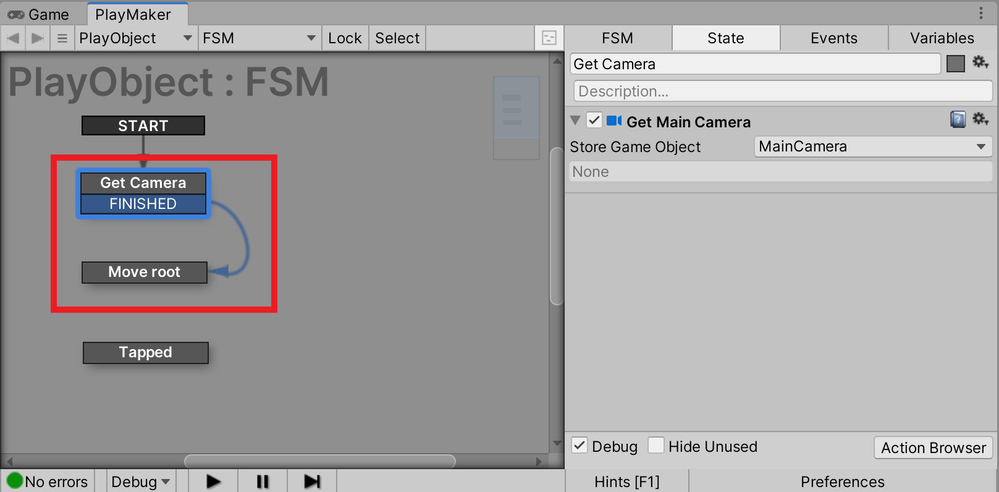
Drag and drop from FINISHED to Move root
Next, select the Move root and add Set Position, Set Rotation, Get Position, and Get Rotation from the Action Browser.
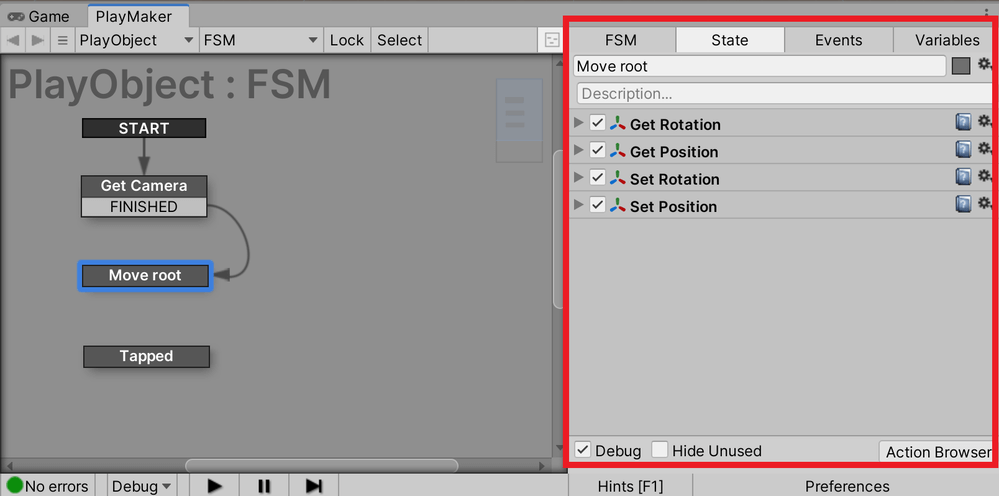
Add Set Position, Set Rotation, Get Position, and Get Rotation
Change the Game Object of Get Rotation from Use Owner to Specify Game Object, and change the None to MainCamera after clicking the Equal button below it.
Change the Y Angle in Get Rotation from None to New Variable… and create a new parameter value “RotY”.
Check the Every Frame checkbox in Get Rotation.
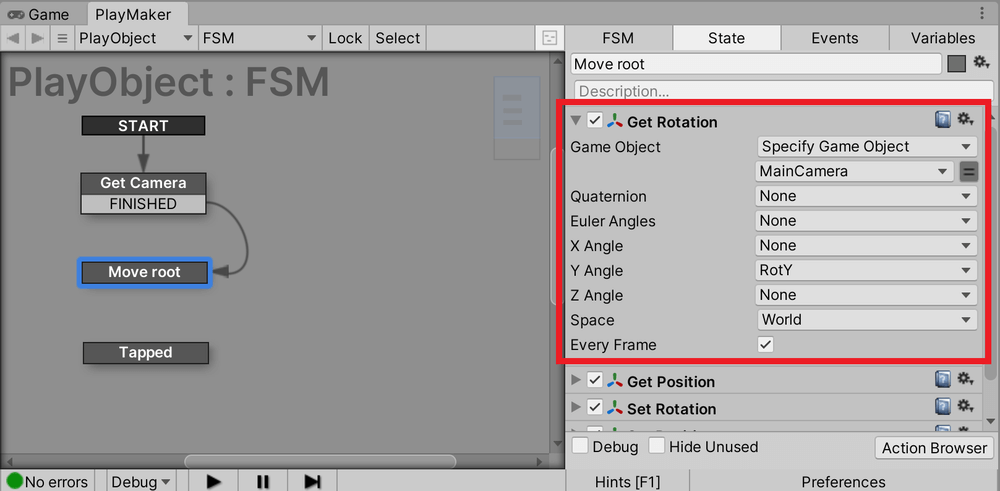
Modify the inside of Get Rotation
Change the Game Object in Set Rotation from Use Owner to Specify Game Object, and change None to root.
Change the Y Angle in Set Rotation from None to RotY.
Check the Every Frame checkbox in Set Rotation.
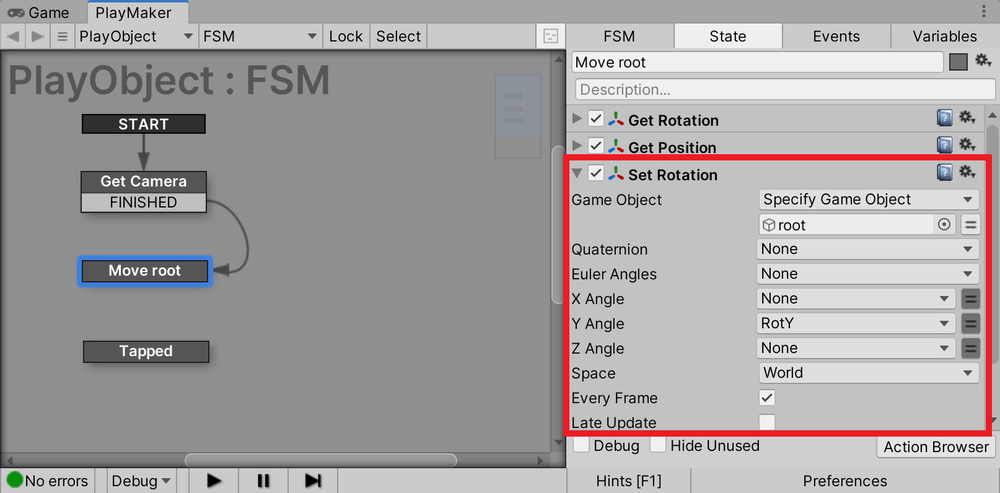
Change the settings in Set Rotation.
*When you actually experience the AR scene created with this method in STYLY Mobile, the effect will always be displayed perpendicular to the ground.
If you want the effect to appear in front of you even when you point your phone diagonally down, set the X Angle and Z Angle in the same way you set the Y Angle.
Change the Game Object of Get Position from Use Owner to Specify Game Object, click the Equal button below it, and change the None to MainCamera.
Change the Vector of Get Position from None to New Variable…. and create a new parameter value “CamPos”.
Check the Every Frame checkbox in Get Position.
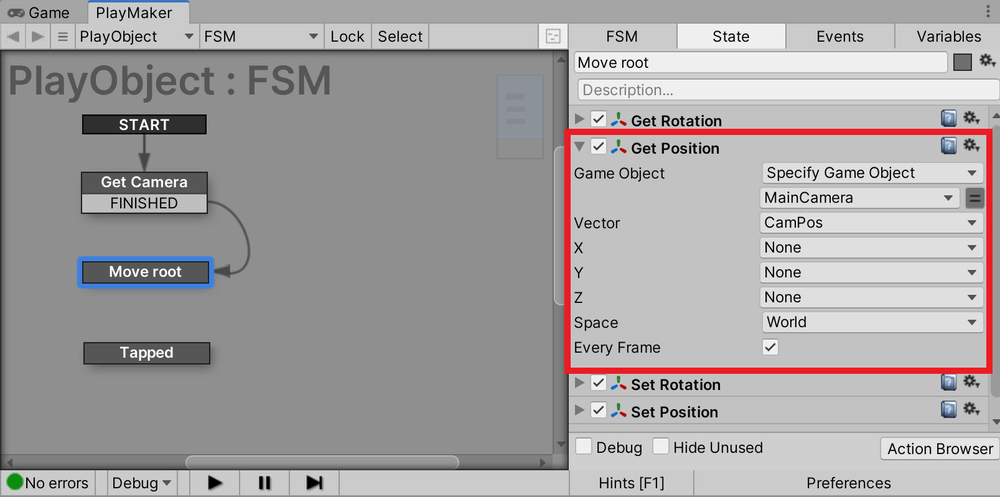
Make changes in the Get Position
Change the Game Object in Set Position from Use Owner to Specify Game Object and change None to root.
Change the Vector of Set Position from None to CamPos.
Check the Every Frame checkbox in Set Position.
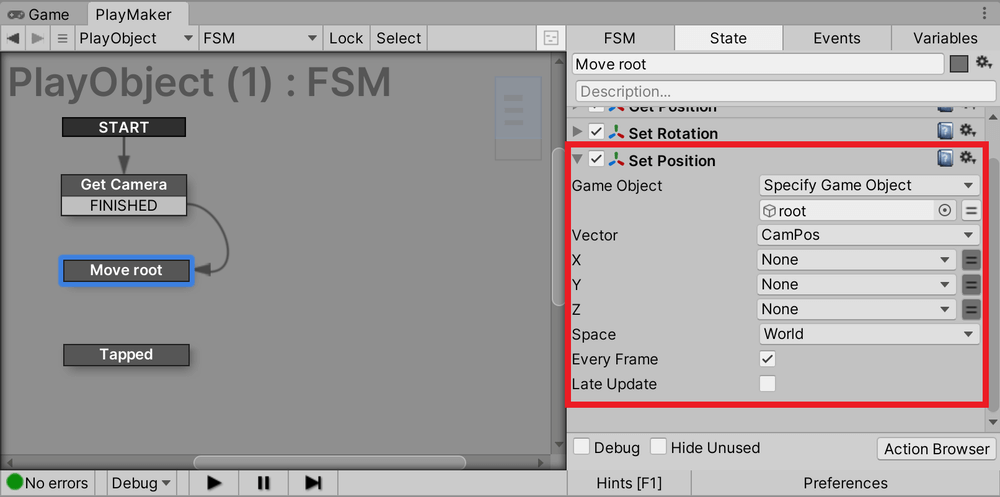
Make changes in the Set Position
Now we have created a mechanism where the root object will keep moving in the direction that the Main Camera is facing during the Move root State.
Deactivating root
Select root, and uncheck the checkbox at the top of the Inspector window.
Deactivate by unchecking the box
The root will then be deactivated.
Click on GameObject from the tab at the top of the screen and select UI→Canvas.
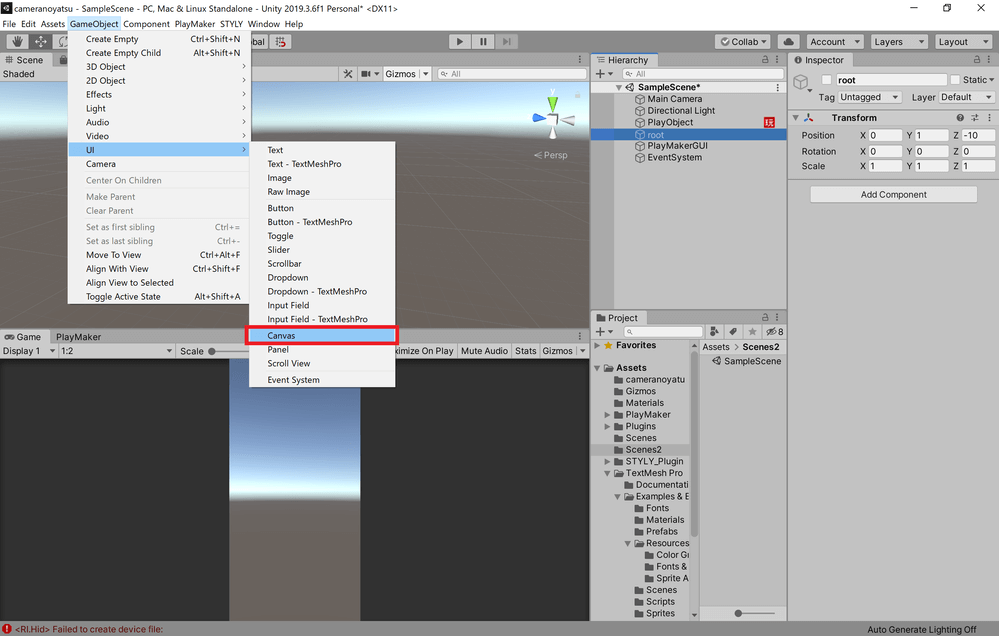
Select UI→Canvas
Select the created Canvas and change the UI Scale Mode under Canvas Scaler in the Inspector from Constant Pixel Size to Scale With Screen Size.
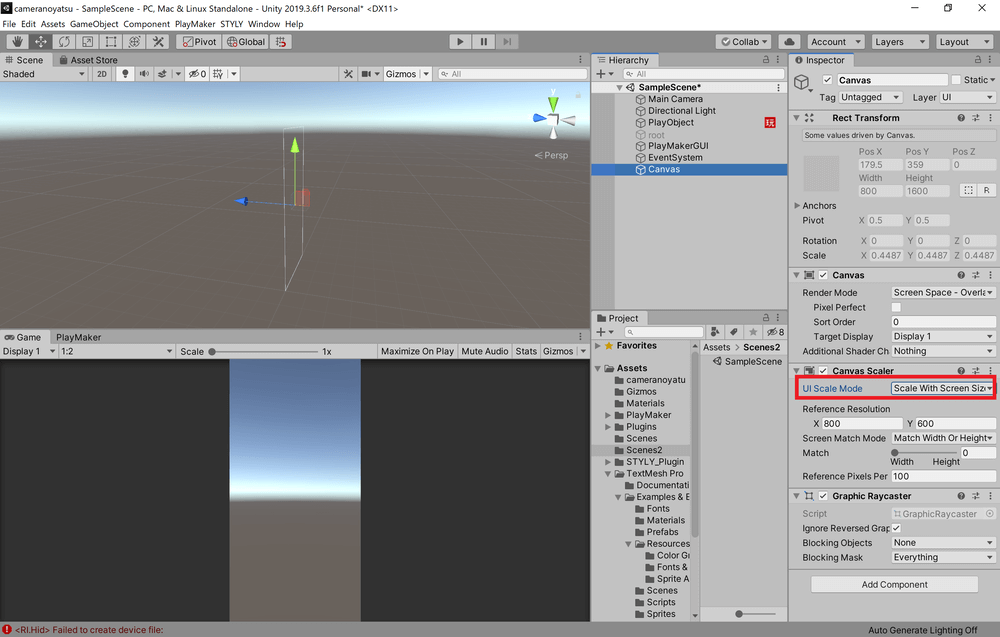
Change to Scale With Screen Size
Right-click on Canvas in the Hierarchy window and select UI→Image.
Rename the created Image to “Marker”.
*We will add an image of the mark drawn on the goods to the Marker later.
Have the user manually overlap the Marker displayed on the AR screen with the mark on the goods, so that the user can adjust the position where the effect is generated.
Right-click on the Canvas in the Hierarchy window and select UI→Button-TextMeshPro.
The first time you create a Text Mesh Pro text, you will see a window like the one below.
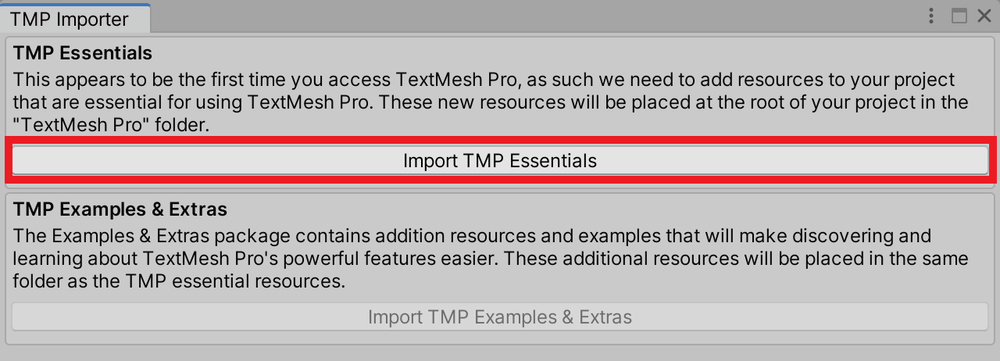
Click “Import TMP Essentials”.
Click “Import TMP Essentials” in the red frame to use Text Mesh Pro.
Use the Move Tool to move the Button downward, and use the Scale Tool to adjust the size of the Button.
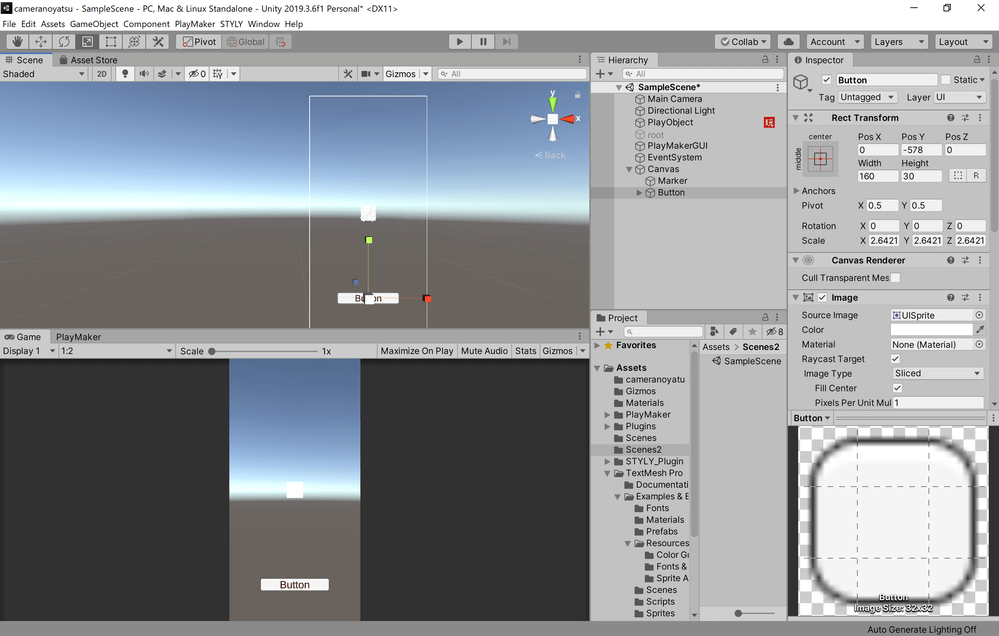
Adjusting the Button Position and Size
Edit the PlayMakerFSM
Select the PlayObject and edit the PlayMakerFSM with the PlayMaker Editor.
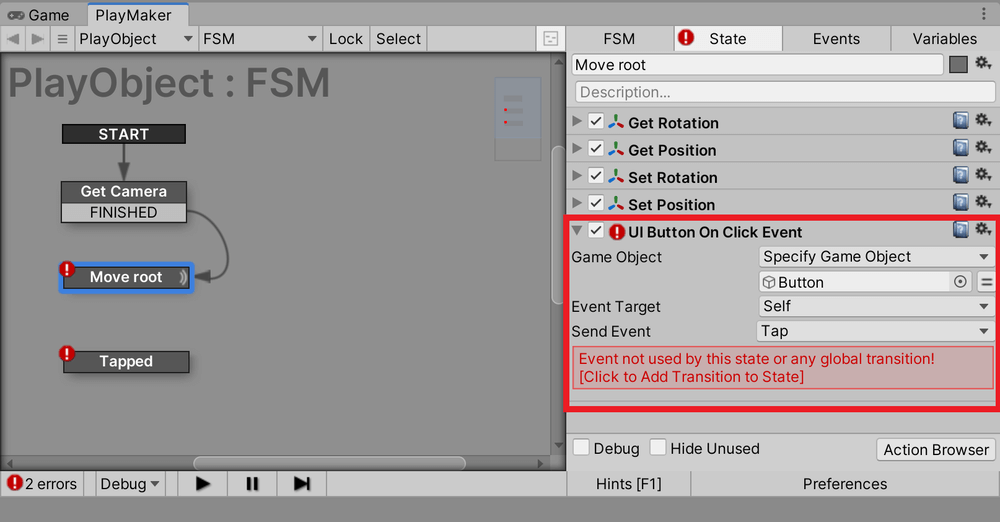
Select Move root and add a UI Button On Click Event from the Action Browser.
Change the Game Object in the UI Button On Click Event from Use Owner to Specify Game Object and from None to Button.
Change the Send Event in the UI Button On Click Event from blank to New Event… and create a new Event as “Tap”.
Setting up the Move root
Right-click on the Move root in the left frame of the PlayMaker Editor, and click Add Transition→Tap.
Drag and drop from Tap to Tapped just below the Move root in the left frame of the PlayMaker Editor, and attach the arrow to Tapped.
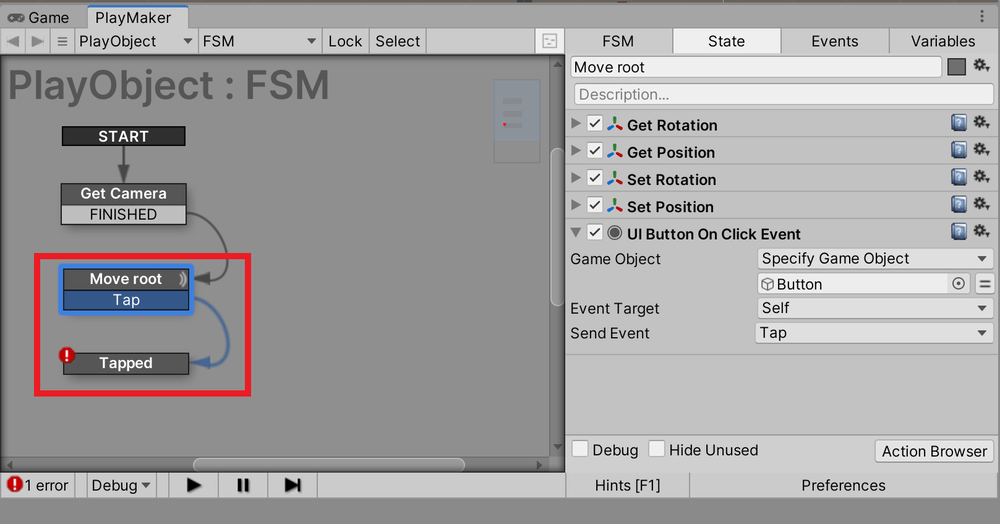
Drag and drop from Tap to Tapped
Next, select the Tapped and edit the PlayMakerFSM.
Add two Activate Game Objects from the Action Browser.
Uncheck the Activate checkbox in one of the Activate Game Objects.
Change the Game Object in the two Activate Game Objects from Use Owner to Specify Game Object, change the one with Activate checked from None to root, and change the one with Activate unchecked from None to Canvas.
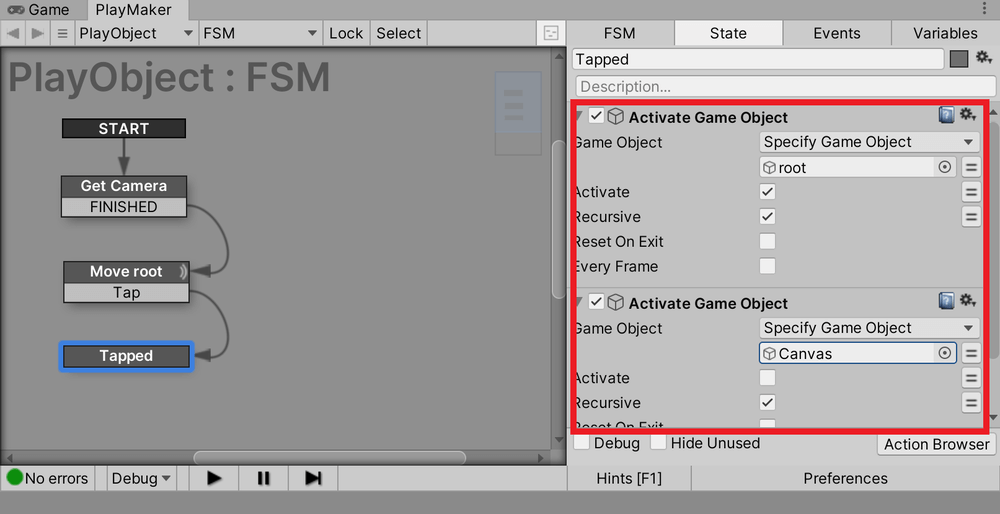
Set the Tapped inside
Now, when you tap the Button, the Canvas will disappear and the root will appear in the direction the Main Camera is facing and will be fixed in place.
Finally, under the root, place the effects you want to display around the goods in the positive direction of the Z axis in local coordinates, and you are done.
Example usage
Using the scene in the sample GIF image at the beginning of this article as an example, we will explain how to use the scene created in this article.
Adding a description
We will create a description to tell the experiencer to press the button by superimposing the mark on the screen and the mark drawn on the goods.
Add a Text-TextMeshPro under the Canvas.
The contents can be changed from the Inspector window.
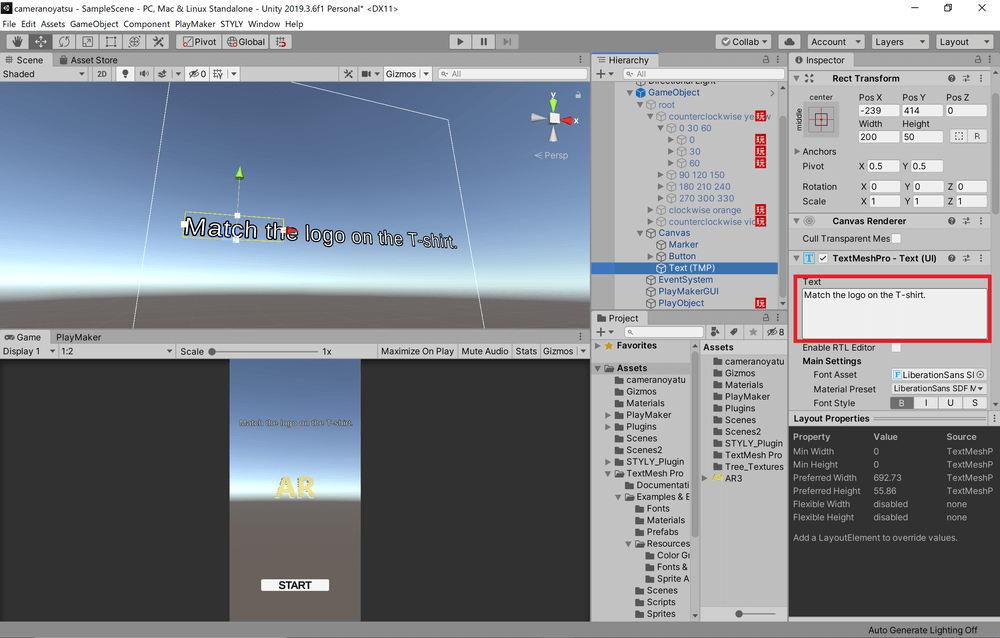
Enter the description you wish to display in Text.
Add an image to the Marker.
This time, we will add the same image as the mark printed on the T-shirt to the Marker.
First, drag and drop the image into the right frame of the Project window.

Drag and drop the image into the right frame of the Project window.
Select the added image, change the Texture Type from Default to Sprite (2D and UI) in the Inspector window, and click Apply.
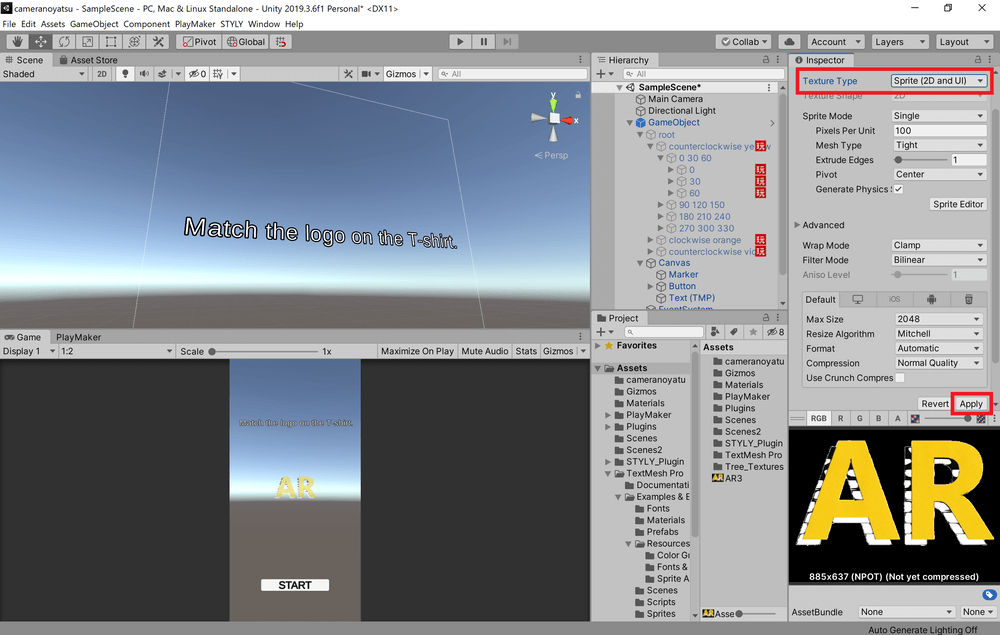
Setting up the image from the Inspector
Select Marker in the Hierarchy window, and drag and drop the image on the Project window to the Source Image.

Drag and drop the image in the Project window to the Source Image
Reduce the transparency a little from the Color in the Inspector.
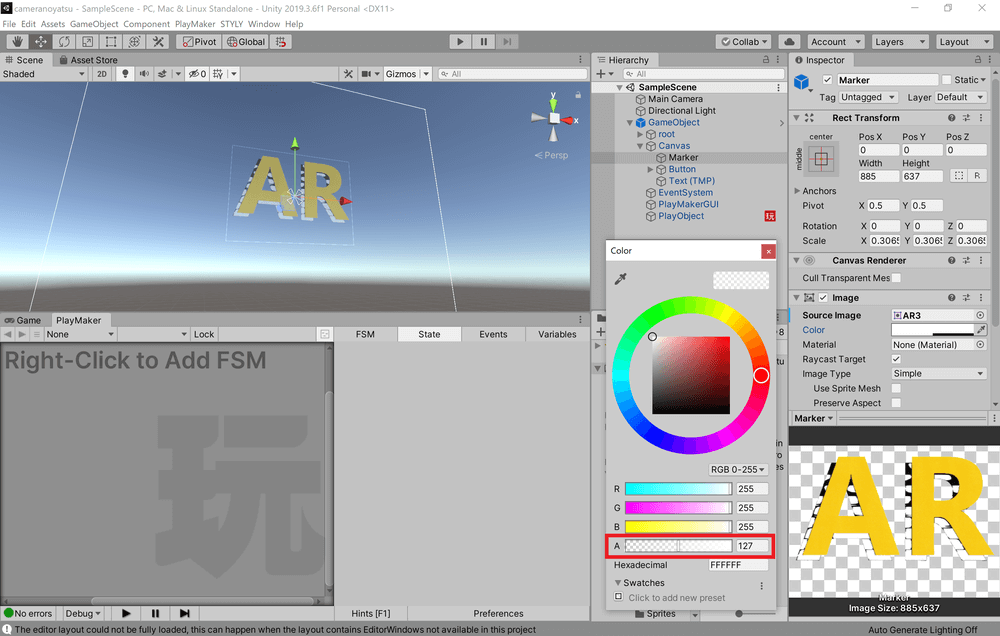
You can change the transparency from the Color in the Inspector.
Add an effect to the root
We have added an effect at 1 meter in the z direction based on the root.
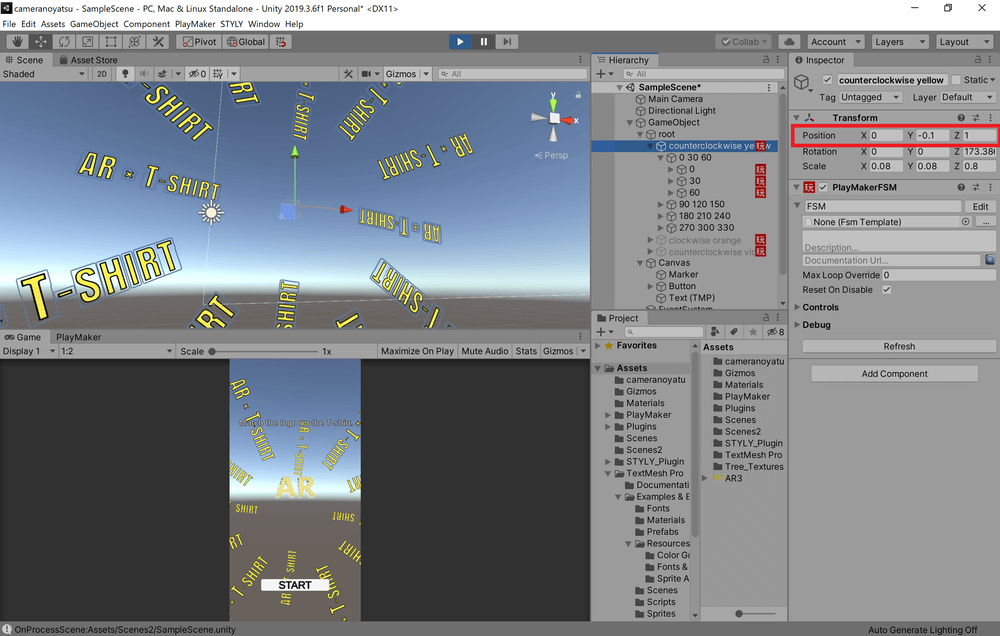
The effect is placed at 1 meter in the z direction
Using PlayMaker to rotate a radially aligned Text – TextMeshPro with a certain straight line as the axis.
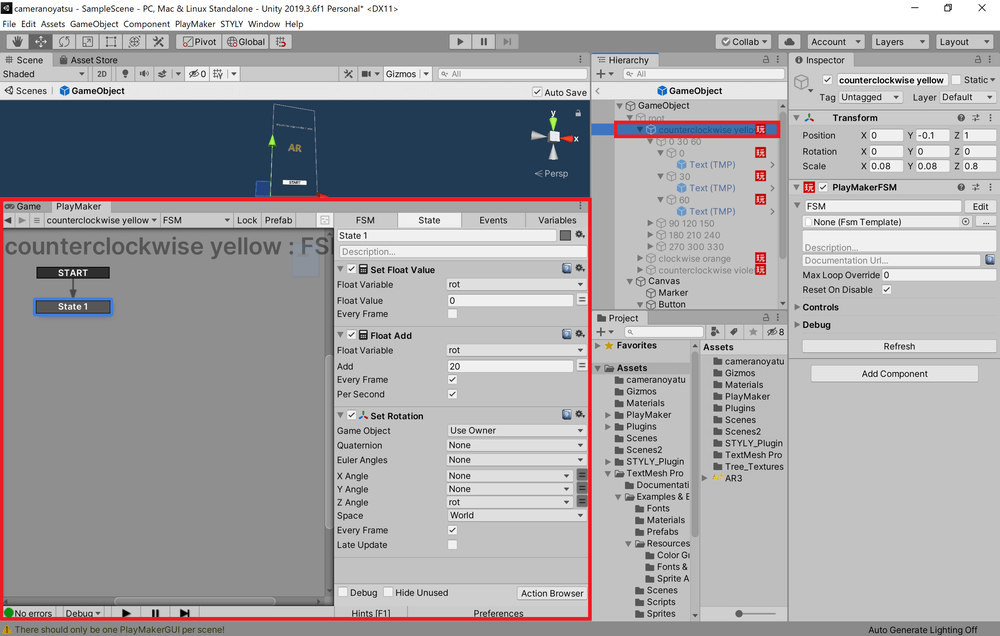
State that rotates the radially aligned Text – TextMeshPro
In addition, the Text itself is expanded for a certain period of time with three time differences and three magnification rates.
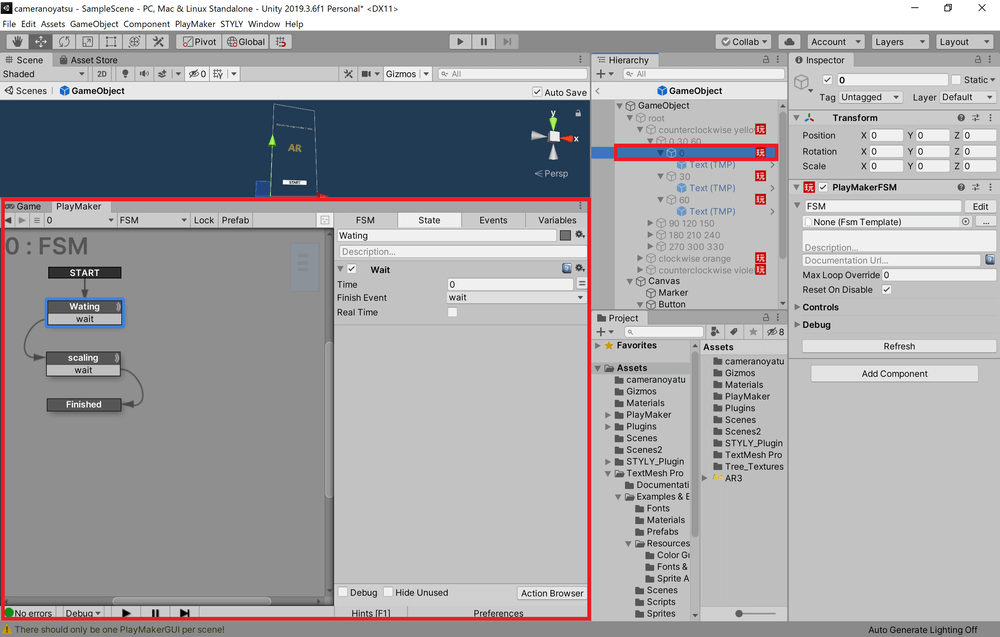
State that creates a time difference
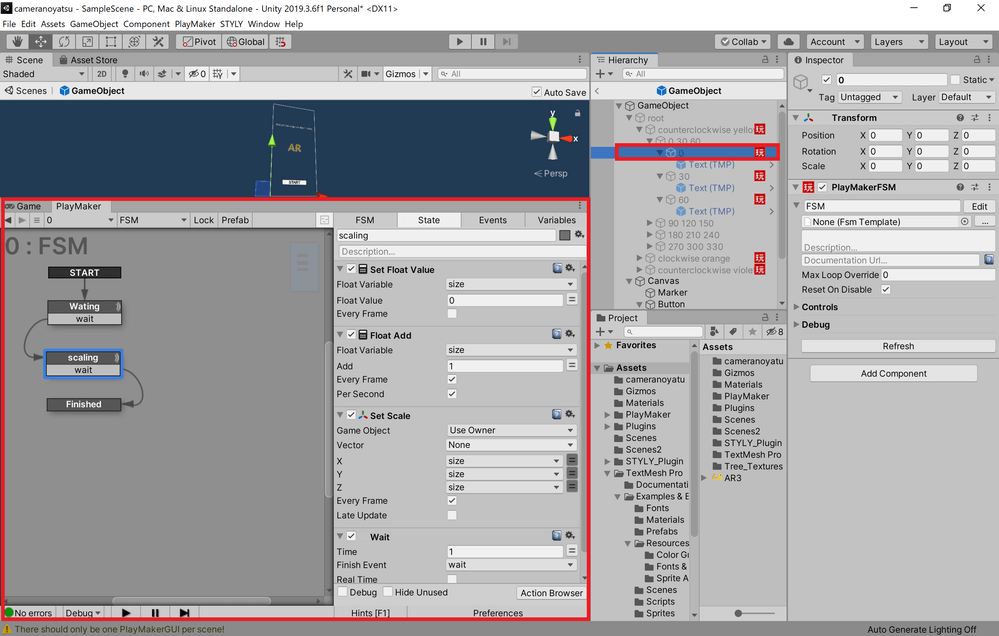
State that expands the size for a certain amount of time at a certain magnification rate
The scene in the sample GIF at the beginning of this article was created with the above changes based on the functions created in this article.
It is easy to make detailed adjustments while actually checking on STYLY Mobile.
We hope you will use this as a reference to create your own AR scenes that link AR and goods.
*Note
When you upload this scene from Unity to STYLY as an AR scene, please change the Skybox Material from Lighting Settings to None (Material).
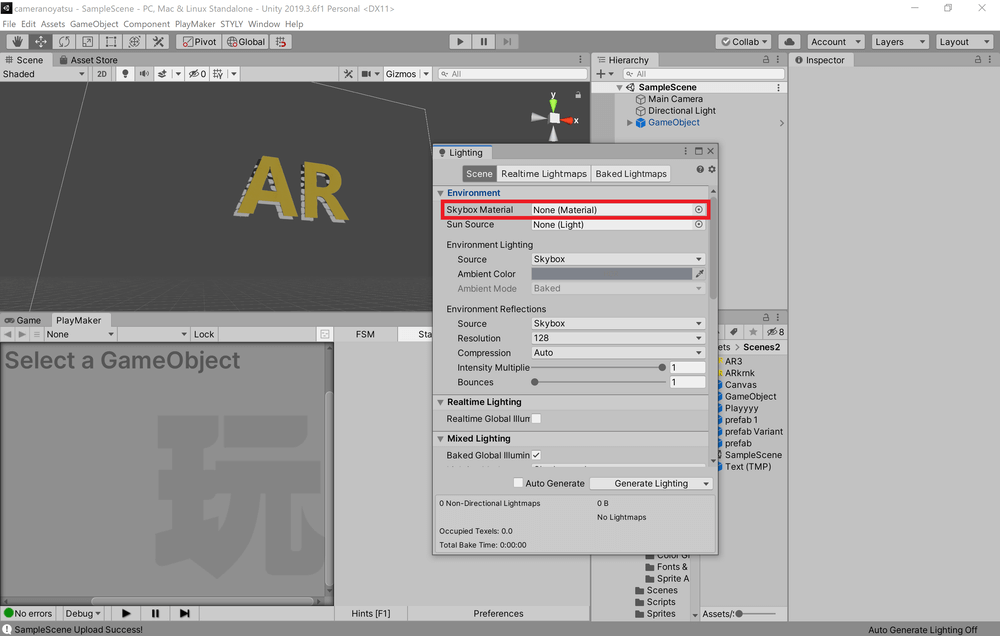
Change Skybox Material to None (Material) from Lighting Settings
How to upload to STYLY
Let’s upload your 3D model to STYLY.
How to create a STYLY account

How to upload a 3D model to STYLY

How to upload to STYLY from Unity

STYLYに関する質問、バグ報告、改善してほしい要望はSTYLY FORUMまで
https://jp.forum.styly.cc/support/discussions