Summary
The ‘Domain Warping’ effect
Samples
The sample project in GitHub:
The sample VR space in STYLY Gallery I published a sample VR space that has the boards with the domain-warping effect applied.
What is ‘Domain Warping’?
‘Domain Warping’ is a way to render something like clouds or water by computing a certain type of noise, which is called fbm(Fractional Brownian motion).
Domain warping
Domain warping
How ‘Domain Warping’ works
I explain how domain warping generates a pattern.
Calculate the fbm associated with the pixel coordinate p
A cloud-like pattern is generated by calculating the fbm associated with the pixel coordinate p.
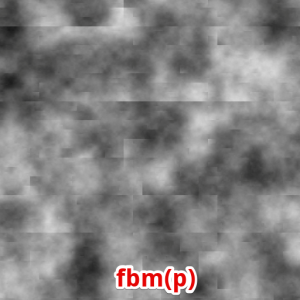
fbm(p)
It can be described as a shader code like this:
float2 p = i.uv * 8;
return fbm(p + 1.7);
Additional note
The visualizations of the X coordinate(p.x) and the Y coordinate(p.y) are shown below.
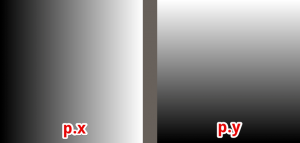
Visualization of p.x and p.y
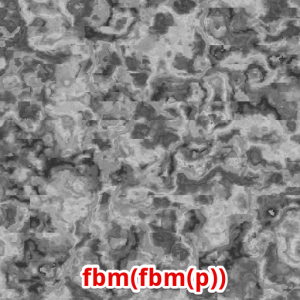
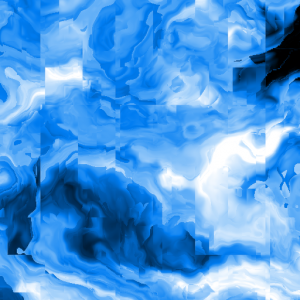
Calculate fbm(fbm(p))
By applying another fbm to fbm(p), the pattern is ‘distorted’ more and results in the shown below. Iterative application of fbm to the pixel coordinate p to generate a complicated pattern is called ‘Domain Warping’.
fbm(fbm(p))
It can be described as a shader code like this:
float2 p = i.uv * 8;
p = float2(fbm(p + 1.7), fbm( p + 9.2));
p = p * 8.0;
return fbm(p + 8.3);
Animate a domain warping
You can animate the pattern by adding ‘Time’ to the argument of the domain-warping function.
float2 p = i.uv * 4;
p = float2(fbm(p + _Time.y), fbm(p));
p = p * 8.0;
return fbm(p);
Add ‘Time’ to the argument
In the same way, I animated the domain-warping effect shown in this tutorial.
How to create the effect shown in this article
Create a pattern by domain warping
Create the pattern shown below by using domain warping.
Domain warping
Apply the Mosaic effect
Apply the mosaic effect to the pattern created by domain warping.
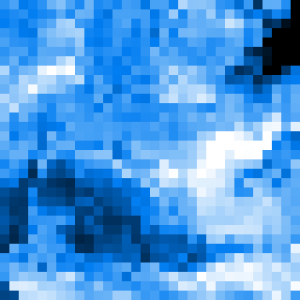
The mosaic effect
Mask with a polka-dot pattern
Mask with a polka-dot pattern.
Mask with a polka-dot pattern
In order to improve visual impression, I increased the contrast by making the dot lager where the colour is bright and making the dot smaller where the colour is dark.
Animate the pattern ~ Completion
Animate the pattern by add ‘Time’ to the argument of the fbm function. It completes the visual effect to create this time.
Animate the pattern
How to create it with Unity
I explain how to make this domain-warping effect by using Unity’s shader. Regarding the mouse operation, I assume Windows is used.
Create a shader
Firstly, select Create > Shader > Unlit Shader in the Project window to create a shader file.
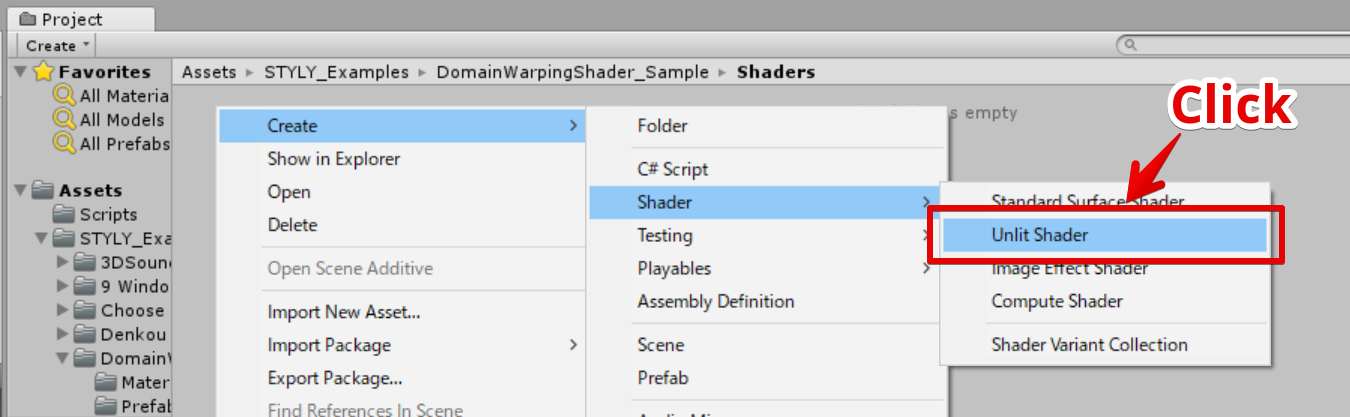
Create a shader file
Name the shader file ‘DomainWarpingShader’.
Edit the shader file
Open the created shader file and paste the below code in it.
Shader "Unlit/DomainWarpingShader"
{
    Properties
	{
		_GradientTex("Gradient Texture", 2D) = "white" {}
		_GridNumber("Grid Number", Float) = 64.0
		_EllipseSize("Ellipse Size", Float) = 1.0
		_Speed("Speed", Float) = 1.0
		_Fbm_ScaleFactor("Fbm Scale Factor", Vector) = (1.0, 1.0, 4.0, 4.0)
	}
    SubShader
    {
        Tags { "RenderType"="Opaque" }
        LOD 100

        Pass
        {
            CGPROGRAM
            #pragma vertex vert
            #pragma fragment frag
            // make fog work
            #pragma multi_compile_fog

            #include "UnityCG.cginc"

            struct appdata
            {
                float4 vertex : POSITION;
                float2 uv : TEXCOORD0;
            };

            struct v2f
            {
                float2 uv : TEXCOORD0;
                UNITY_FOG_COORDS(1)
                float4 vertex : SV_POSITION;
            };


            //////////////////////////////////////////////////////////////////////////////
            float random(float2 st) {
                return frac(sin(dot(st.xy,
                                    float2(12.9898,78.233)))*
                            43758.5453123);
            }

            //////////////////////////////////////////////////////////////////////////////
            // Based on Morgan McGuire @morgan3d
            // https://www.shadertoy.com/view/4dS3Wd
            float noise (float2 st) {
                float2 i = floor(st);
                float2 f = frac(st);

                // Four corners in 2D of a tile
                float a = random(i);
                float b = random(i + float2(1.0, 0.0));
                float c = random(i + float2(0.0, 1.0));
                float d = random(i + float2(1.0, 1.0));

                float2 u = f * f * (3.0 - 2.0 * f);

                return lerp(a, b, u.x) +
                        (c - a)* u.y * (1.0 - u.x) +
                        (d - b) * u.x * u.y;
            }

            //////////////////////////////////////////////////////////////////////////////
            #define OCTAVES 6
            // based on : https://thebookofshaders.com/13/?lan=jp
            float fbm (float2 st) {
                // Initial values
                float value = 0.0;
                float amplitude = .5;
                float frequency = 0.;
                // Loop of octaves
                for (int i = 0; i < OCTAVES; i++) {
                    value += amplitude * noise(st);
                    st *= 2.;
                    amplitude *= .5;
                }
                return value;
            }

            //////////////////////////////////////////////////////////////////////////////
            // domain warping pattern
            // based on : http://www.iquilezles.org/www/articles/warp/warp.htm
            float pattern (float2 p, float4 scale_1, float scale_2, float4 add_1, float4 add_2) {
                // first domain warping
                float2 q = float2(
                                fbm( p + scale_1.x * add_1.xy ),
                                fbm( p + scale_1.y * add_1.zw )
                                );

                // second domain warping
                float2 r = float2(
                                fbm( p + scale_1.z * q + add_2.xy ),
                                fbm( p + scale_1.w * q + add_2.zw )
                                );

                return fbm( p + scale_2 * r );
            }

            //////////////////////////////////////////////////////////////////////////////
            sampler2D _GradientTex;
            float4 _GradientTex_ST;
            float _EllipseSize;
            float _GridNumber;

            v2f vert (appdata v)
            {
                v2f o;
                o.vertex = UnityObjectToClipPos(v.vertex);
                o.uv = TRANSFORM_TEX(v.uv, _GradientTex);
                UNITY_TRANSFER_FOG(o,o.vertex);
                return o;
            }

            float2 remap(float In, float2 InMinMax, float2 OutMinMax)
            {
                return OutMinMax.x + (In - InMinMax.x) * (OutMinMax.y - OutMinMax.x) / (InMinMax.y - InMinMax.x);
            }

            float ellipse(float2 UV, float Size)
            {
                float d = length(2 * UV - 1);
                return step(d, Size);
            }

            fixed2 posterize(fixed2 In, fixed Steps)
            {
                return floor(In * Steps) / Steps;
            }

			//////////////////////////////////////////////////////////////////////////////
			float _Speed;
			float4 _Fbm_ScaleFactor;
			float _EllipseContrast;

            fixed4 frag (v2f i) : SV_Target
            {
                #define TIME_1 (_Time.y * (-0.1) * _Speed)
                #define TIME_2 (_Time.y * (-0.3) * _Speed)
                #define TIME_3 (_Time.y * (0.15) * _Speed)
                #define SIN_TIME_3 (4.0 * sin(TIME_3))

				//#define ScaleFactor_1 float4(1.0, 1.0, 4.0, 4.0)
				#define ScaleFactor_1 _Fbm_ScaleFactor
                #define ScaleFactor_2 4.0
                #define AddFactor_1 float4(TIME_1, TIME_2, 5.2, 1.3)
                #define AddFactor_2 float4(SIN_TIME_3, 9.2, 9.3, 2.8)

                #define GRID_N _GridNumber
                #define UV_Repeat frac(i.uv * GRID_N)
                #define UV_Posterized posterize(i.uv, GRID_N)

                // get domain warping value
                float domainWarping = pattern(UV_Posterized, ScaleFactor_1, ScaleFactor_2, AddFactor_1, AddFactor_2);

                // remap value
				domainWarping = remap(domainWarping, float2(0.39, 0.83), float2(0, 1));

				return ellipse(UV_Repeat, domainWarping * _EllipseSize) * tex2D(_GradientTex, domainWarping);
            }
            ENDCG
        }
    }
}
Create a material
Right-click the shader file and select Create > Material.
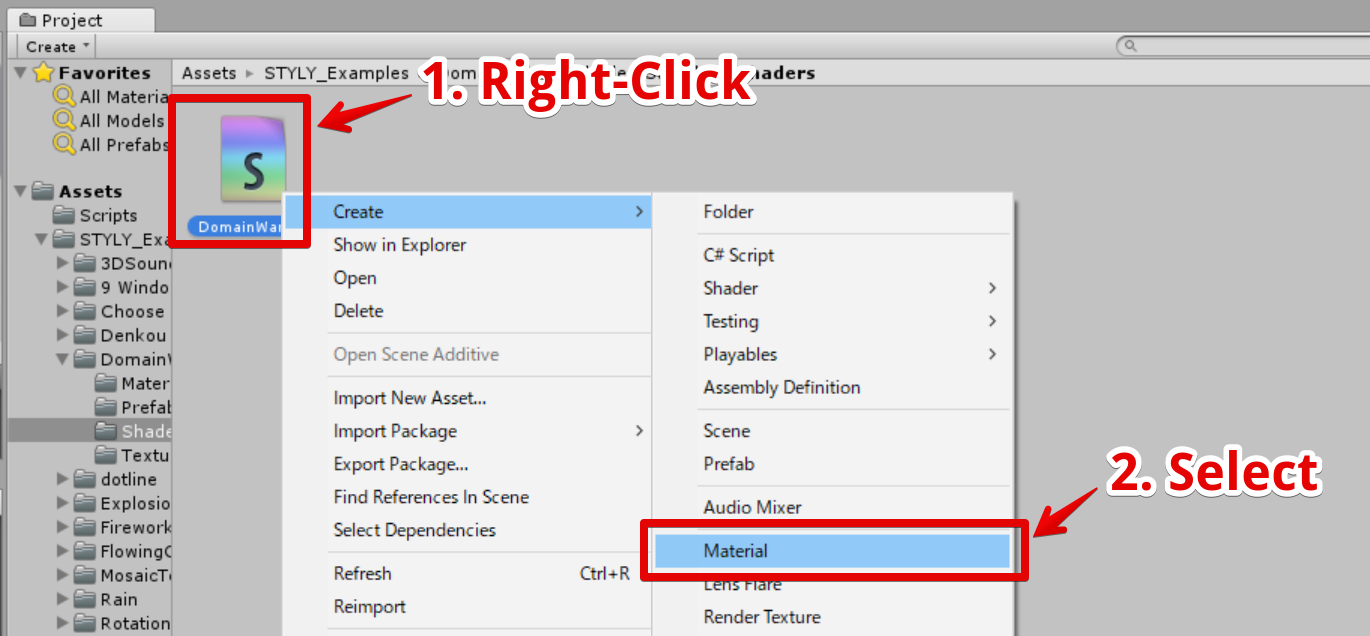
Create a material
The material created
Create a board object
I explain how to create a board object to attach the created material to.
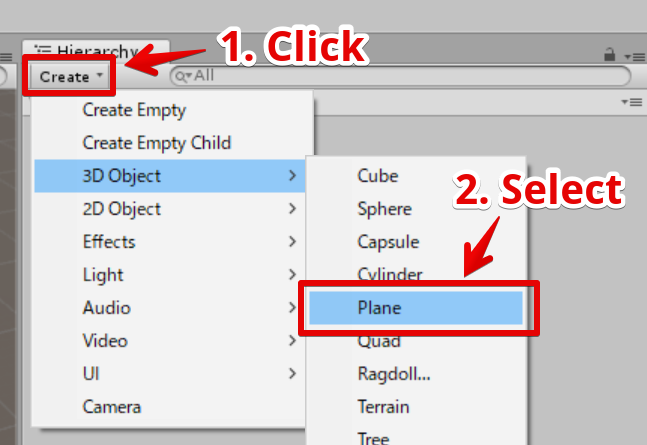
Create a Plane object.
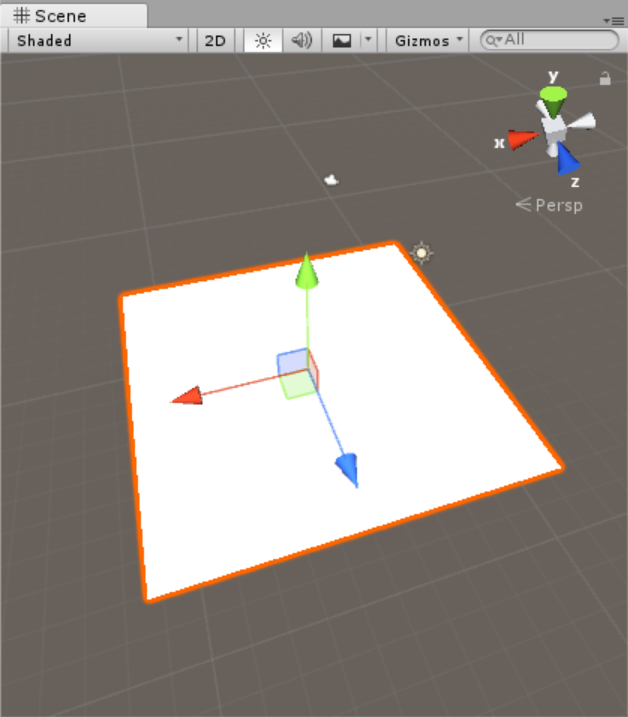
The Plane object created
Assign the material to the board object
Drag the material into the created Plane object to assign.
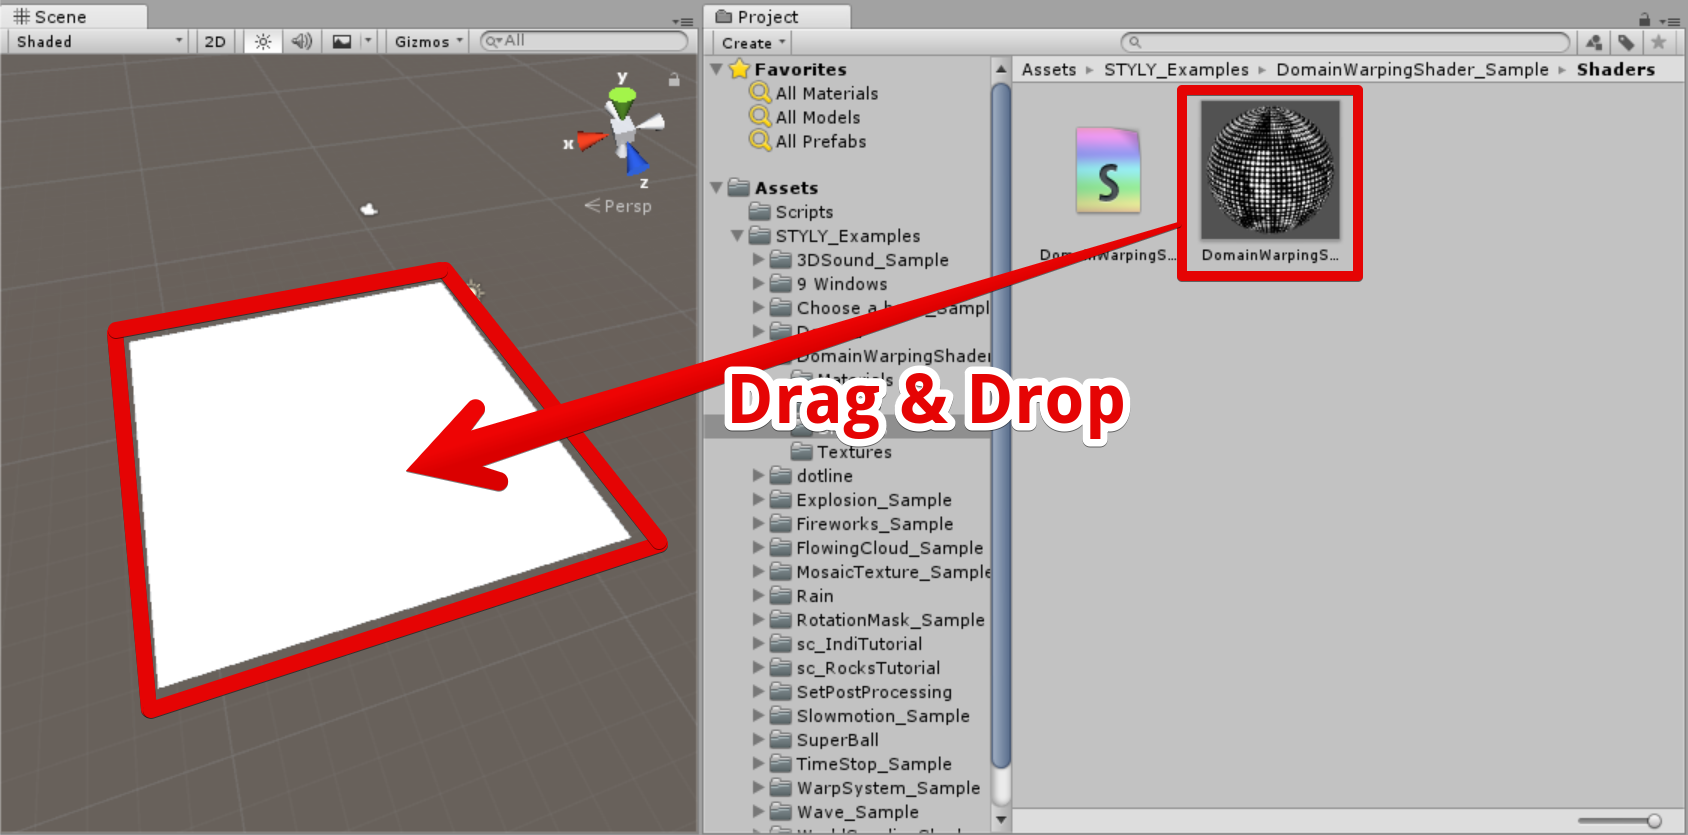
Assign the material to the Plane object.
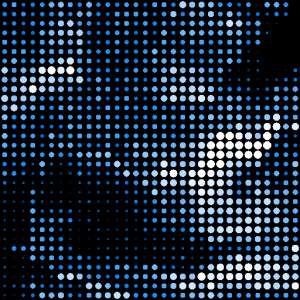
The domain-warping effect has been applied to the board. It should look like the shown below.

How it looks after the material is applied.
Colour the domain-warping effect
Next, colour this domain-warping effect. You can colour this shader by specifying a gradation texture.
Gradation texture
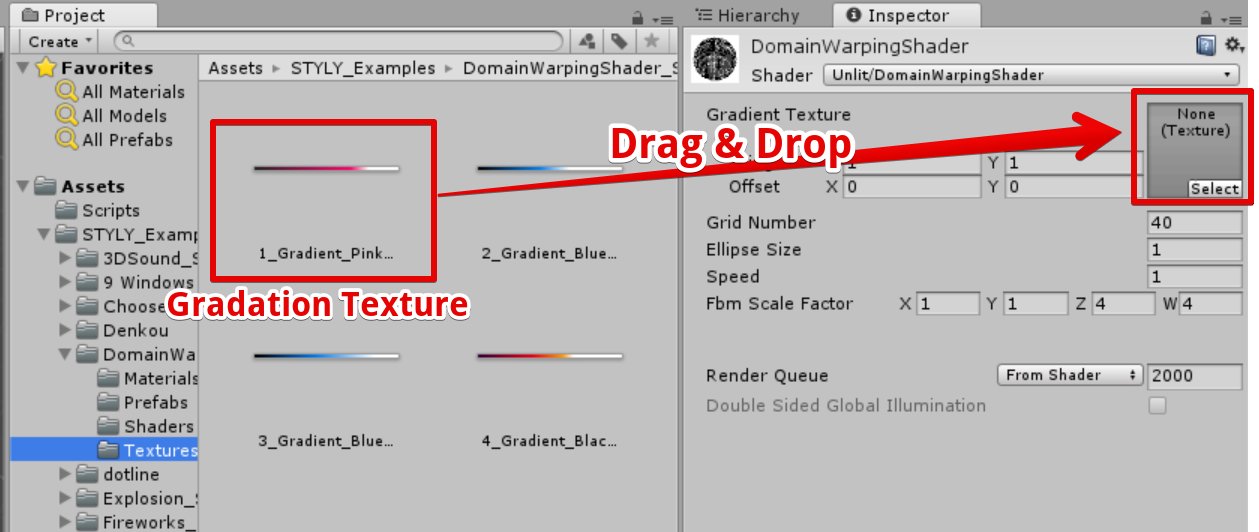
Assign the gradation texture to the material
By applying the texture, the pattern is coloured. It should look like the shown below.
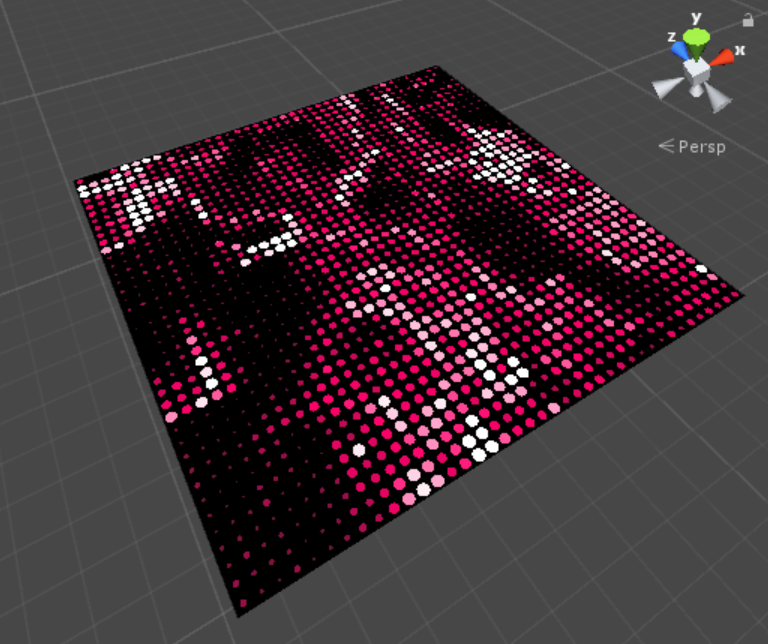
How it looks after applying a gradation texture
How is it coloured?
As shown below, this domain-warping shader applies the colour on the left to the larger dots and the colour on the right to the smaller dots.
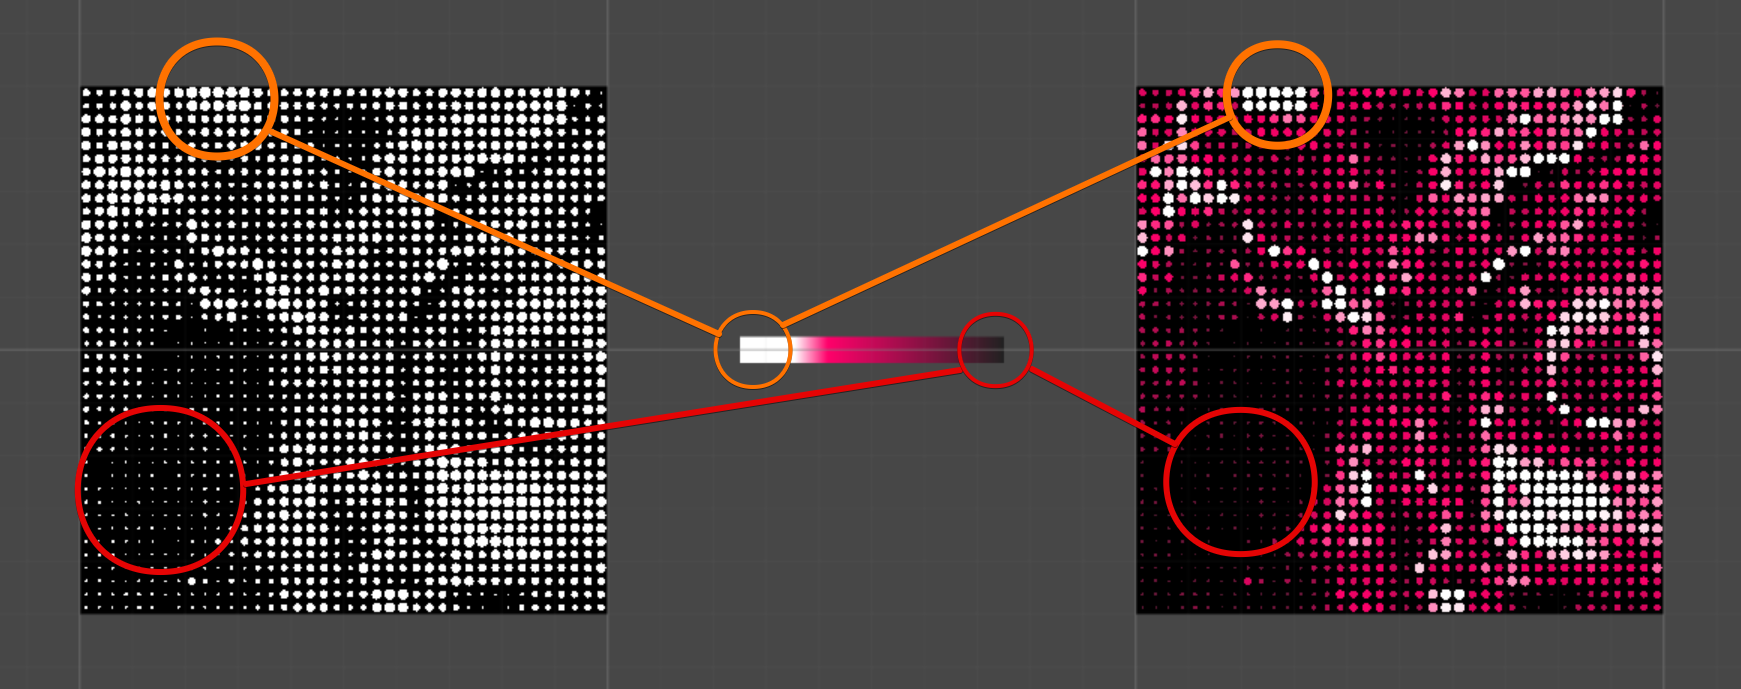
Colour the pattern by using a gradation texture.
How to upload an asset from Unity to STYLY
Please read the article below to learn how to upload an asset from Unity to STYLY. https://styly.cc/ja/manual/unity-asset-uploader/