The Asset Browser is a new feature in Blender 3.0. It allows you to manage and easily reuse various assets.
This article explains how to use the Asset Browser and how to work with it.
What is the Asset Browser?
The Asset Browser is a Blender feature that allows efficient use of frequently used models and other data.
It is a new feature in Blender 3.0.
It is similar in feel to Unity’s prefab feature, but facilitates modeling and the placement of objects in a scene.
Basic usage
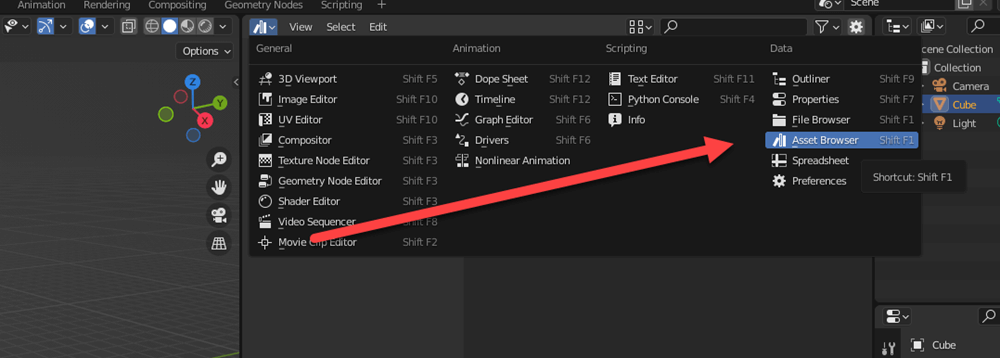
The Asset Browser is one of the editor types that can be selected in Blender, and can be toggled by selecting the Asset Browser in the “Data” section.
Switching between Asset Browsers
When you first open the file, it contains nothing, so you have to add assets.
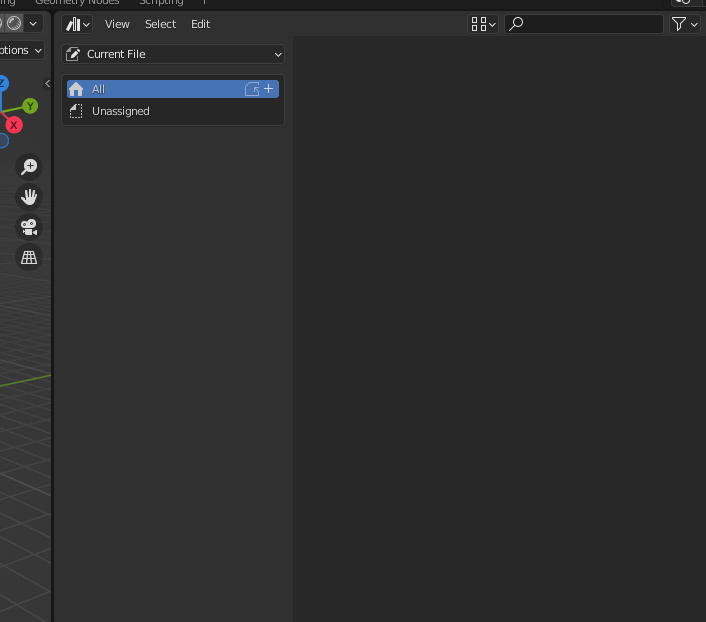
Initial state of the Asset Browser
Let’s add assets right away.
First, select an object in the scene from the Outliner.
Right-click on the object in the outliner and select “Mark as Asset” from the menu.
Adding an object to the Asset Browser
Assets added to the Asset Browser will have a special icon added when viewed in the Outliner.
The book-like icon on the left indicates that the asset in question is registered in the Asset Browser.
Objects already registered in the Asset Browser
When adding an object to the Asset Browser, if you add a geometry object such as a model, it will inherit material settings and so on.
In other words, if a material is assigned, the apparent object will be registered in the Asset Browser as is (the preview will be displayed in a single color).
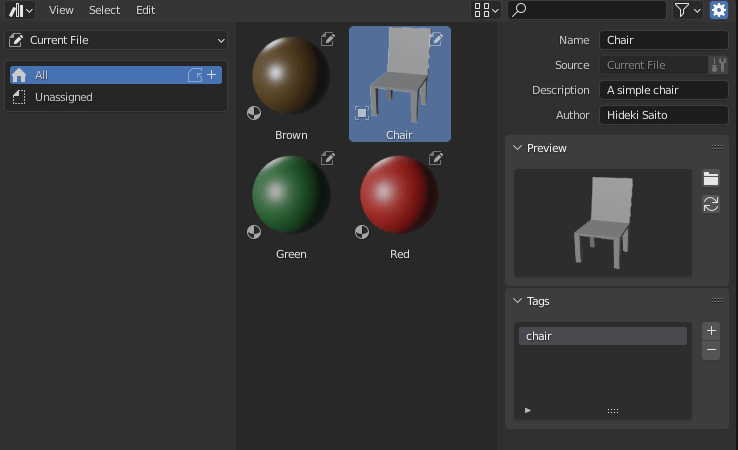
Asset Browser Screen
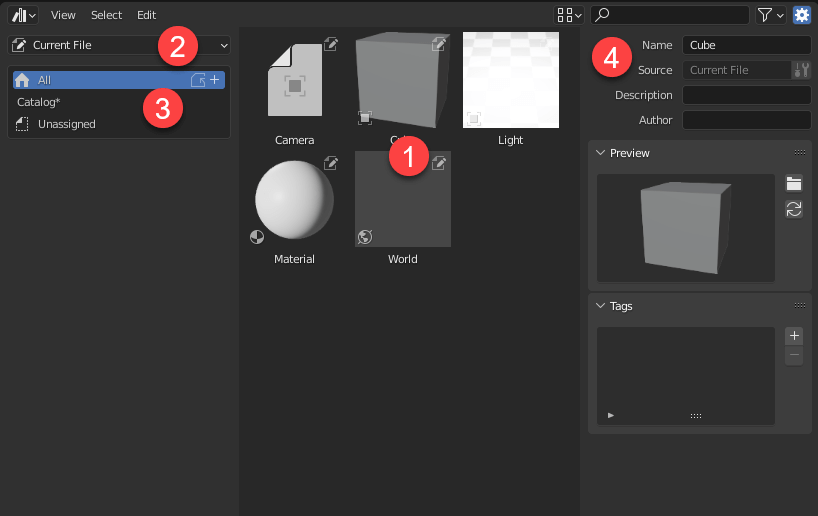
The following image shows the Asset Browser with data added.
Explanation of Asset Browser UI
The following is a description of each of the above screen configurations.
- This is the area where assets are displayed. A preview is displayed for each. Depending on the format, some previews are generated automatically and others are not.
- Select the location of the Asset Browser to browse. By default, “Current File” is selected. If the asset library – described below – is referenced, this choice will increase.
- Catalog Settings. Assets can be categorized and managed.
- Edit Metadata. If you do not see this, click on the gear button in the upper right corner. You can add a name, description, tags, etc., as well as set any image as a preview.
The assets specified in the current file will be saved in the blend file you are working on.
Categorization settings made in the catalog will not be included in the blend file.
Placing Assets from the Asset Browser in a Scene
Assets registered in the Asset Browser can be placed in a scene by drag & drop.
Placing Assets from the Asset Browser
When an asset such as a cube is dragged into the scene, it is placed so that it sticks to the selected surface.
A white grid will be displayed to show how the asset will be placed.
Materials, for example, can be dragged onto an object in the scene and will be placed on that object.
Direct Placement from the Outliner without the Asset Browser
In fact, it is possible to place items directly from the Outliner even if they are not registered in the Asset Browser.
Direct Placement from the Outliner
However, there are some disadvantages, such as the inability to use it as an asset library, which will be discussed later, and the lack of a function to organize it.
Since this is a convenient function for easily placing objects, it is useful to use this method as needed.
Deleting Assets from the Asset Browser
To remove an asset from the Asset Browser, right-click on the asset and select “Clear Asset.”

Clear Asset from Asset Browser
If you use the option below that, “Clear Asset (Set Fake User),” the data will remain in the blend file even if the asset is not in use.
Use Clear Asset unless you know you need it.
If you remove an object from the asset browser in this way, the objects placed in the scene will remain.
Use Clear Assets unless you have a good reason to do otherwise.
Also you should know that deleting an object marked as an asset from the scene in the Outliner will also delete the object from the Asset Browser.
Types of data that you can handle
In the Asset Browser, you can handle many forms of data that are handled within Blender.
As of Blender 3.0.1, the following formats can be registered as assets.
Large objects such as geometry, camera, and other settings information can be handled as assets.
- Primitives and models (single objects. If the asset is composed of multiple objects, it is necessary to “Join Geometry”)
- Materials (texture images cannot be registered by themselves, but will be in the future)
- Pose information
- Camera
- Light Source
- World settings
Using External Data as an Asset Library
In the previous examples, we have used the Asset Browser in a way that is complete with the file being edited, but it is also possible to load external data and use it as an asset library.
Create a file
First, create a blend file containing the assets.
Asset Browser Sample File
In this case, I created a file as “Chair.blend” that contains a simple chair and several color materials like this.
I saved this file in Documents/Blender Library (anywhere Blender can access it. (You can include multiple files, and assets in all blend files in a given location will be loaded).
Asset library path settings
Close the open blend file, open a new file, and open the settings screen.
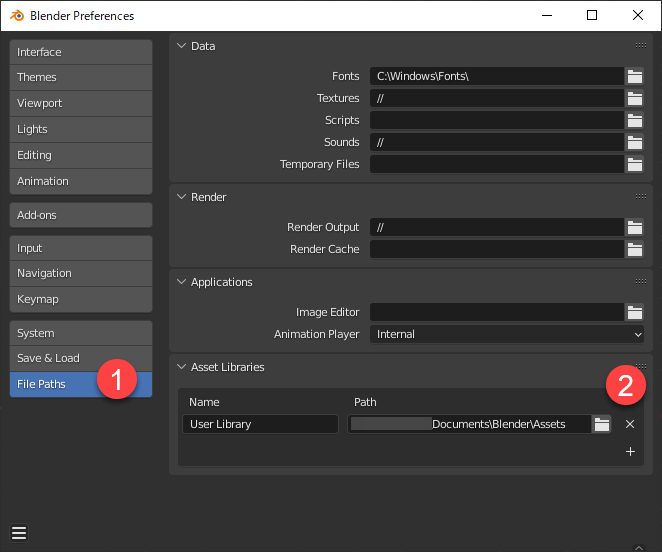
File path setting screen
Here, select “File Paths” (1 above) on the settings screen and press “+” at the bottom right of the “Asset Libraries” item.
You will be prompted to specify a location here, so specify the above location (“Documents/Blender Assets” in the example) and press the “Add Asset Library” button.
The location will then be added, but a red warning will appear because the name has not yet been set.
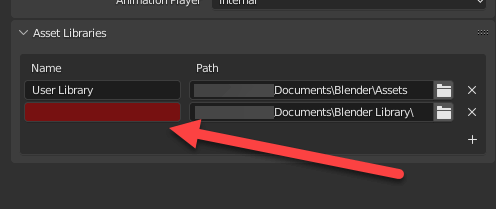
Unnamed asset library
Give this place a name of your choice. In this example, I chose “My Library” (this setting is set in the Blender user file, so once it is set, you do not have to re-set it when you open a new file).
Now let’s go back to the Asset Browser.
You will see that My Library has been added here.
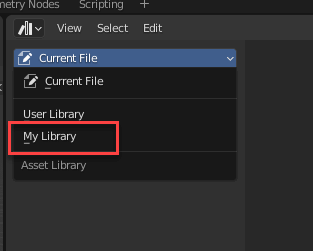
My Library has been added
Select My Library and you will see the chair and material you just created.
Three types of imports
When using external objects, additional options appear.
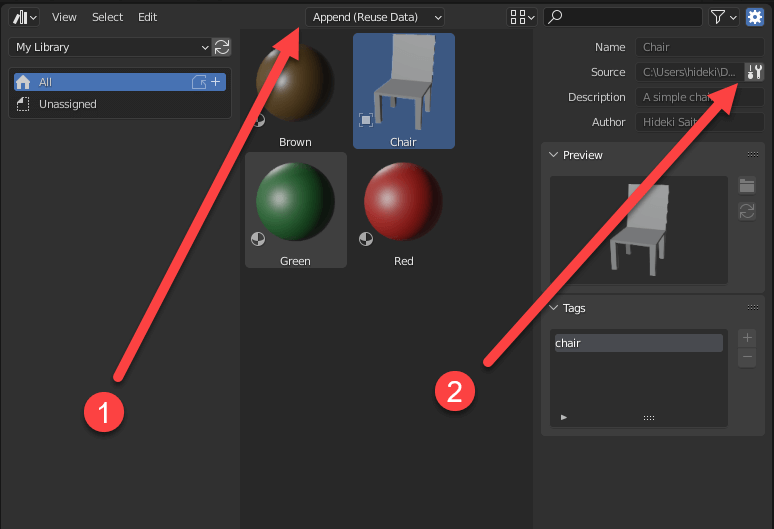
External Object Information
- Import type. Specifies how the file will be imported.
- Open the blend file containing the asset (Chair.blend in this example). Registering new assets and updating metadata cannot be done for assets via the asset library, so if you want to do that, you must press this button and edit the file containing the assets. The modification of information in the asset library will be supported in the future.
The import type specifies how the file is added.

Asset Browser Import Type
This can be specified in three ways.
They are “Link,” “Append,” and “Append (Reuse Data).
The default is Append (Reuse Data).
Link places objects as links without importing files.
It is used when you want to use a single object, but with some limitations such as not being able to place multiple identical objects and not being able to edit, etc.
This has the advantage that the blend file you are editing is not bloated, and if you edit the original file, the changes will be reflected.
The next two types of append are to import data into a blend file.
In this case, multiple identical objects can be placed and edited.
The difference between reusing data and not reusing data is whether the objects share instances with each other or not.
Differences in Data Reuse
Thus, if data reuse is set up, changing the color of one object will apply that change to other objects.
Without data reuse, it is created as a different instance, so if you change the color, you will only see it applied to a single object.
The former is suitable when you want to place many objects that are exactly the same.
Since they refer to the same instance, file size, etc., can be kept down even if the number of objects increases.
On the other hand, it is not possible to have variations.
Advantages of Asset Libraries
By using asset libraries, frequently used assets can be registered and easily reused, thereby increasing modeling efficiency.
Some ideas for use include
- Create an asset library of frequently used models (furniture data, etc.) and reuse them in various scenes.
- Register multiple materials and use them as a material library.
- Register preset data such as worlds so that they can be set up quickly.
- Compile assets and materials and distribute them for use by others.
The author also distributes size-matched human models for use in VR environments, as well as positioning frame data useful for creating general VR event booths.
Since multiple asset libraries can be set up, they can be divided in various ways, for example, by project, by client, by use, or by type.
It is convenient to register assets while working, and after the work is completed, simply copy the blend files to the asset library folder so that they can be easily reused in future projects.
Workflow Using the Asset Browser
Now, we would like to actually create a scene using the Asset Browser.
We will create the following deformed classroom.

Finished classroom
First, we wanted to take a hit on the size, so we used the positioning frame described in the previous section.
This time we will use a 4m x 4m x 5m frame.
We also set up a scale model to match the size of the person.
Frame and scale model installed
The floor and ceiling were then arranged in cubes.
As for the chairs and desks, we created them separately and registered the assets as blend files, so they are in the asset library.
Place desks and chairs
Create a fluorescent light in the scene and register this as an asset.
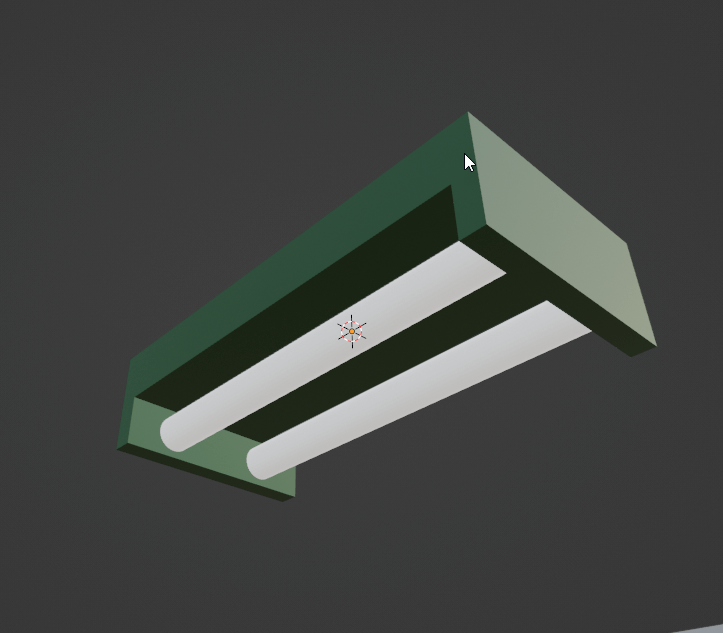
Fluorescent light
The registered items are placed.
Note that the model may be oriented incorrectly at this time.
In the case, adjust the model after placement or change the orientation of the asset model.
Fluorescent light placement
The blackboard and walls are also created, installed, and completed.
Of course, scenes created in this way can also be uploaded to STYLY.
How to upload to STYLY
Let’s upload your 3D model to STYLY.
How to create an account

How to upload to STYLY

How to upload from Unity to STYLY

You can use STYLY FORUM to solve the problem. STYLY FORUM is a place where people can discuss a service or technical issue on STYLY, or provide bug reports on STYLY.
https://en.forum.styly.cc/support/discussions
Using the Asset Browser in this way allows you to reuse assets you have created in the past, so you can grow your modeling environment.
Please try to create your own modeling environment.