In this article, we set HumanIK for the character with the skeleton and skin weight set already. Maya2016 is used here.
The mannequin model used here has been downloaded from TURBOSQUID for free.
Rigging
About FK/IK/Human IK
FK(Foward Kinematics): the way to pose a skeleton by rotating individual joints.
IK(Inverse Kinematics): the way to pose a skeleton by moving the last joint of a joint chain such as hand, foot, etc.
Human IK: The tool to set the IK, which is available in Maya2015 by default. You can access it by slecting ‘Skelton>Human IK’.
Set IK
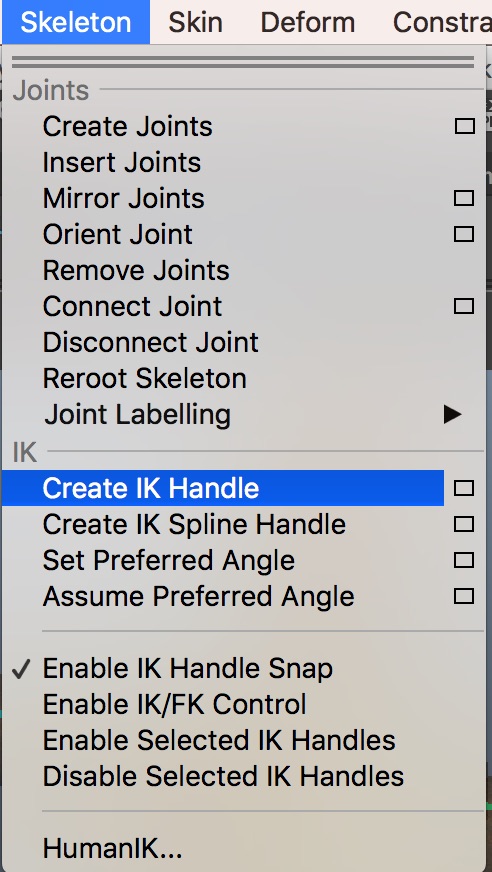
With nothing selected,
Skelton > Create IK Handle
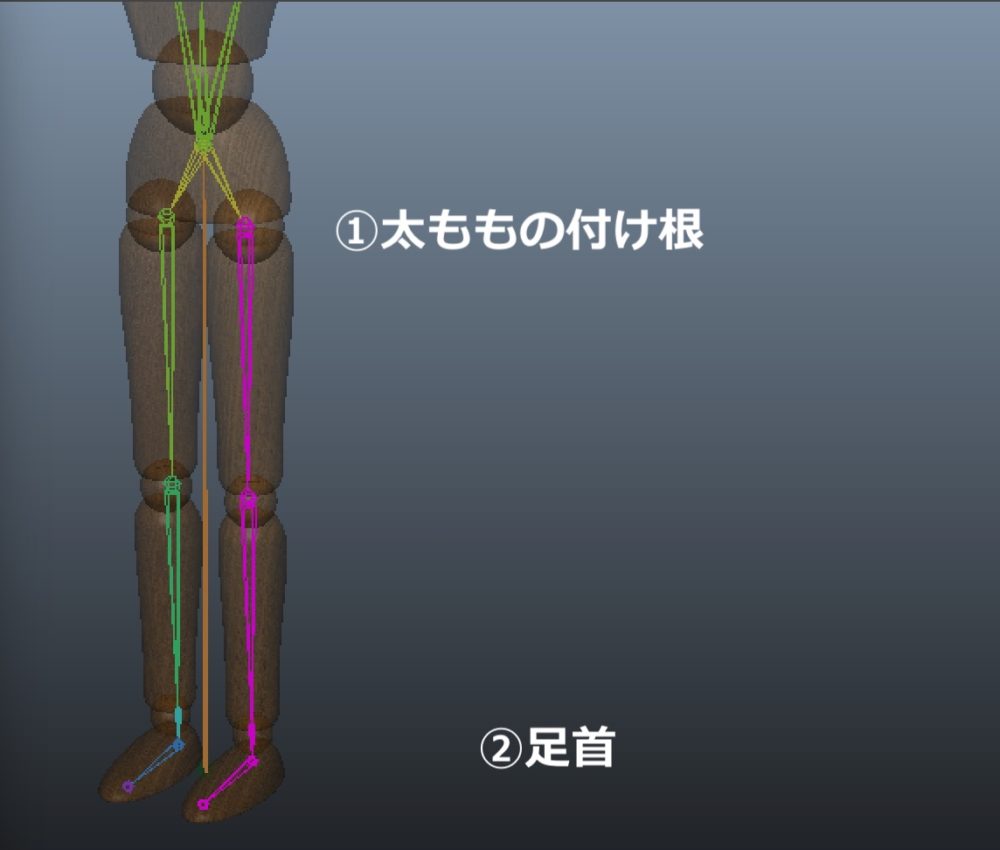
① The root of thigh
② Ankle
Click them in this order. No need to press ‘Enter’.
Then, ‘ikHandle1’ is created in the Outliner window. The joints bend automatically by moving the ‘ikHandle1’ with the Move Tool. It means the joints are adjusted so that the last joint reaches the target position by an inverse calculation.
In the same way, create an IK handle for the arm.
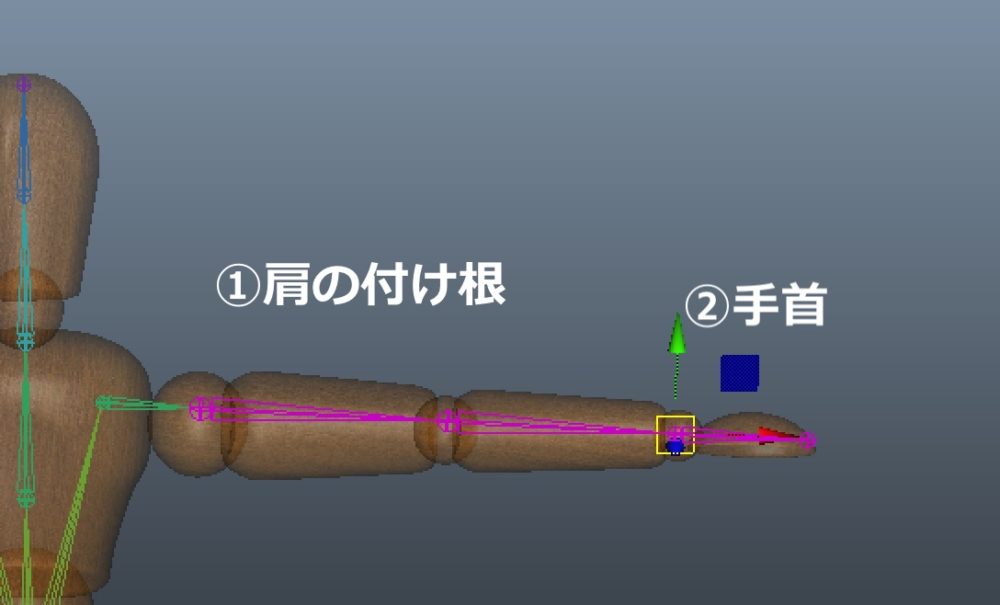
① the root of shoulder
②Wrist
Set Human IK
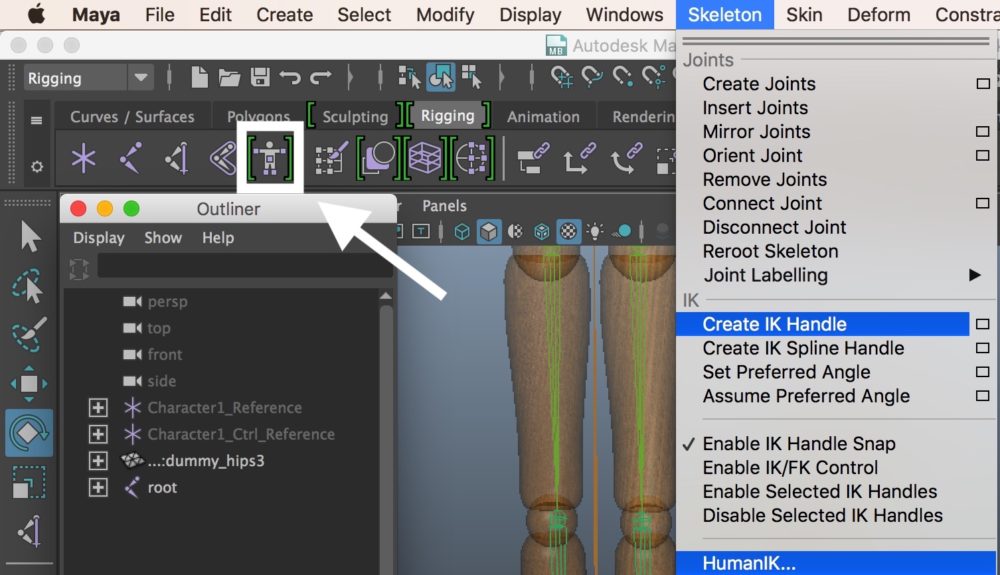
Skelton > Human IK (Alternatively, press the human icon on the top bar.)
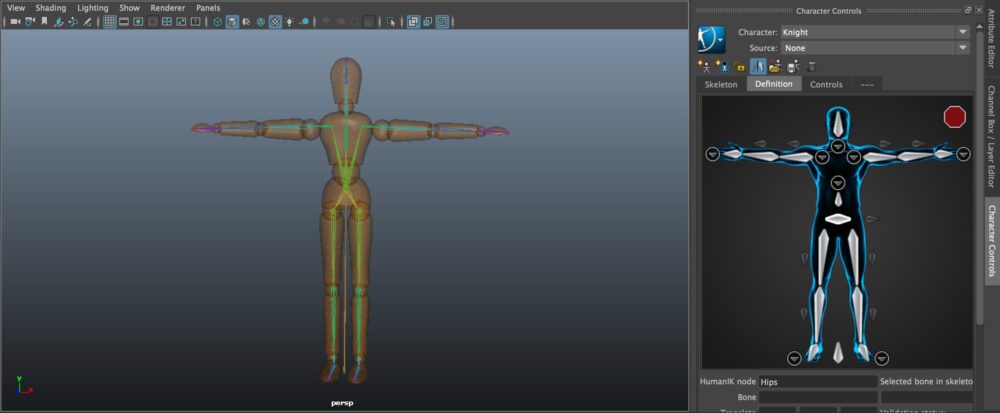
It opens the Character Control window on the right side of the screen. In that window, we set the IK on the ‘Definition’ tab. By the way, to set the ‘Human’ kinematics, it’s handy to change the skeleton to the ‘T’ pose as shown above if you have set the skeleton and the skin weight with the ‘A’ pose.
Rename the character by the Attribute Editor. I named it ‘Knight’ this time.
In Human IK, at least 15 bones are to be defined.
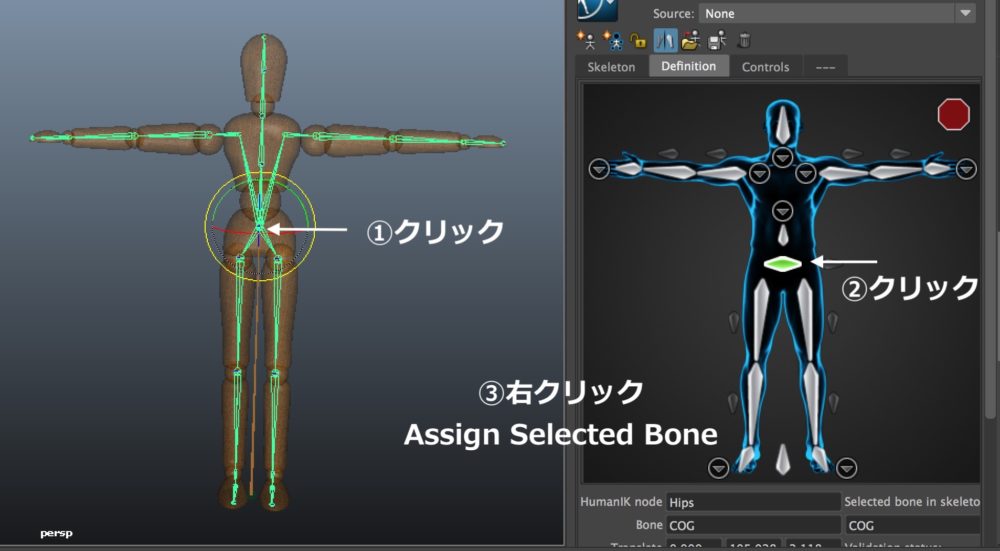
Link each position on the human model to the corresponding position of the HumanIK Skelton on the Definition tab.
① Click the centre of the waist of the model skeleton.
② Click the centre of the waist of the Human IK skeleton.
③ With ② selected, right-click on it and select ‘Assign Selected Bone’.
In this way, you can link the skeleton of the model to the HumanIK skeleton.
The parts mirrored when setting the skeleton and the skin weight will be linked to the Human IK skeleton automatically by linking just one side.
In this same way, you can set the fingers, the spine and so on. I recommend this way to ease the task.
By the way, you might have noticed a red ‘signal’ in the top-right corner of the Definition tab. There are three signals. The green means all the bones are linked successfully and the yellow means a bone is out of position. The red tells the definition of the skeleton is not valid.
If you still saw the red or yellow signal when you finished the definition, check the settings for the rotations or the skeleton.
Set a Control rig by Human IK
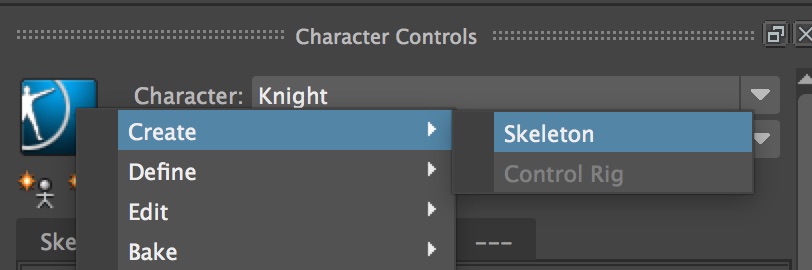
Right-click the blue icon on the Character Controls window, and select Create > Skeleton.
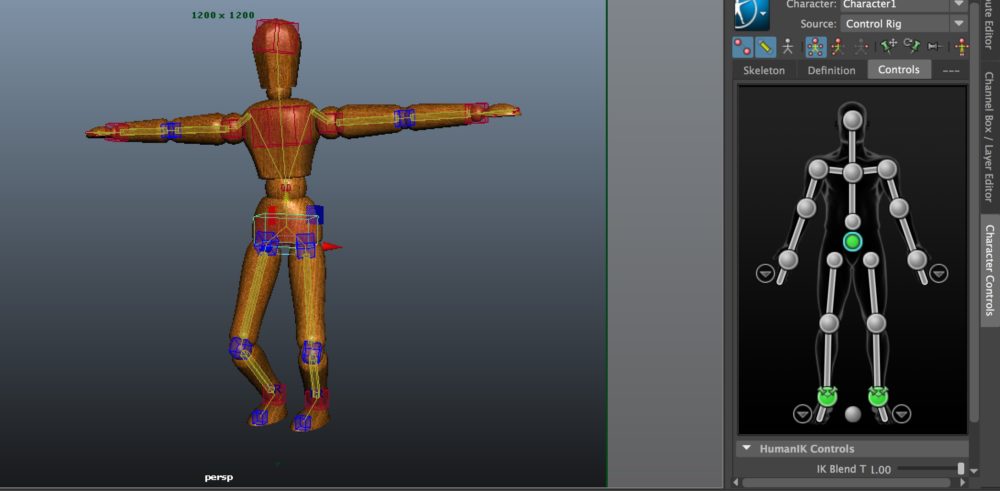 Then, Human IK creates a Control rig as seen in the screenshot above. You can see the model controlled by the effectors at the waist and other places.
 At the moment, the Control rig is shown by boxes. There are other two modes, ‘Wire’ or ‘Stick’. Choose your favourite one when setting the pose or the animation.
You can change the appearance of the Control rig by:
Right-click and select ‘Edit > Controls > Rig Look’.
That ends the introduction of IK/HumanIK.
Since the release of Maya2015, Human IK has made it very easy to rig a human model. Be aware that you still need to set the IK and Control rig manually to rig a general object, creature and etc.
Why not rig a character model by yourself?
It’s worth trying.
(Reference: AREA JAPAN Maya Learning Channel)