In this article, we will show you how to create irregular and abstract objects using Quick Smoke, one of Blender’s standard Quick Effects features.
For this example, we will be using Blender 3.1.
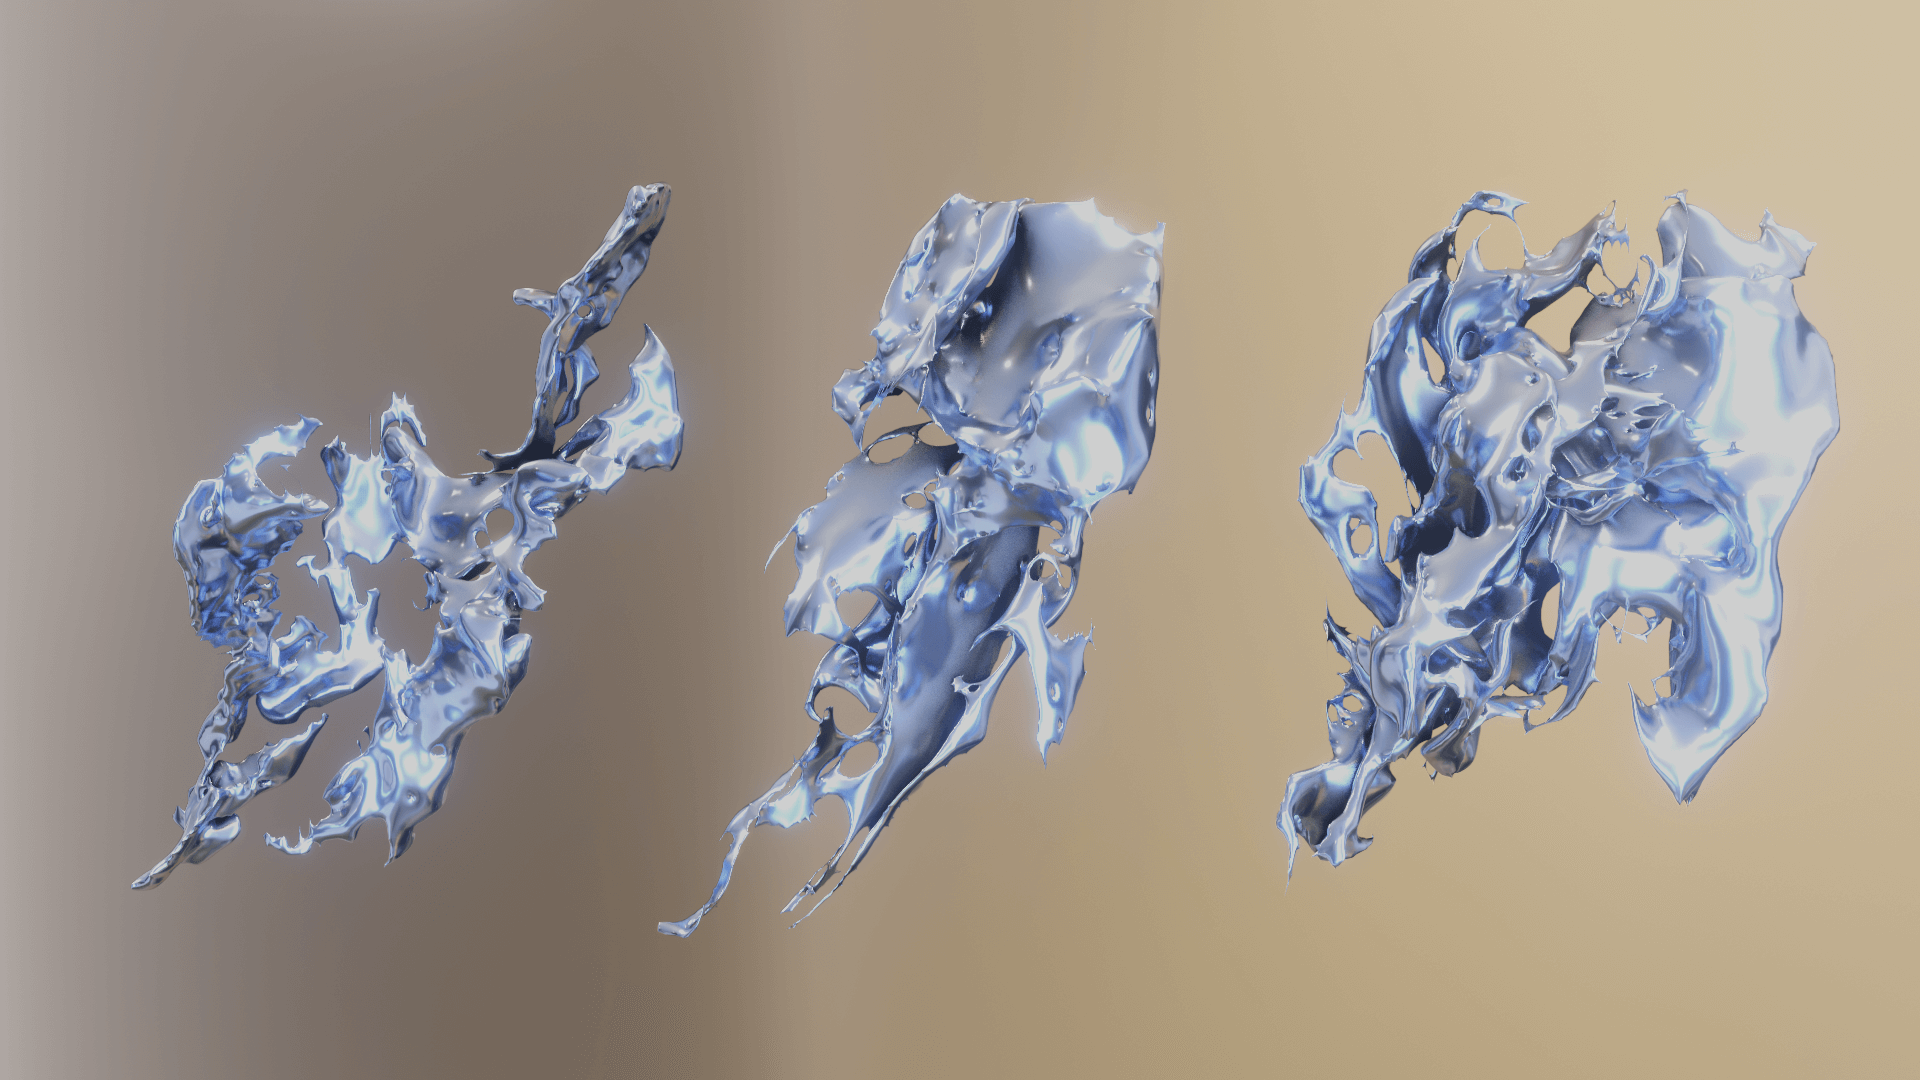
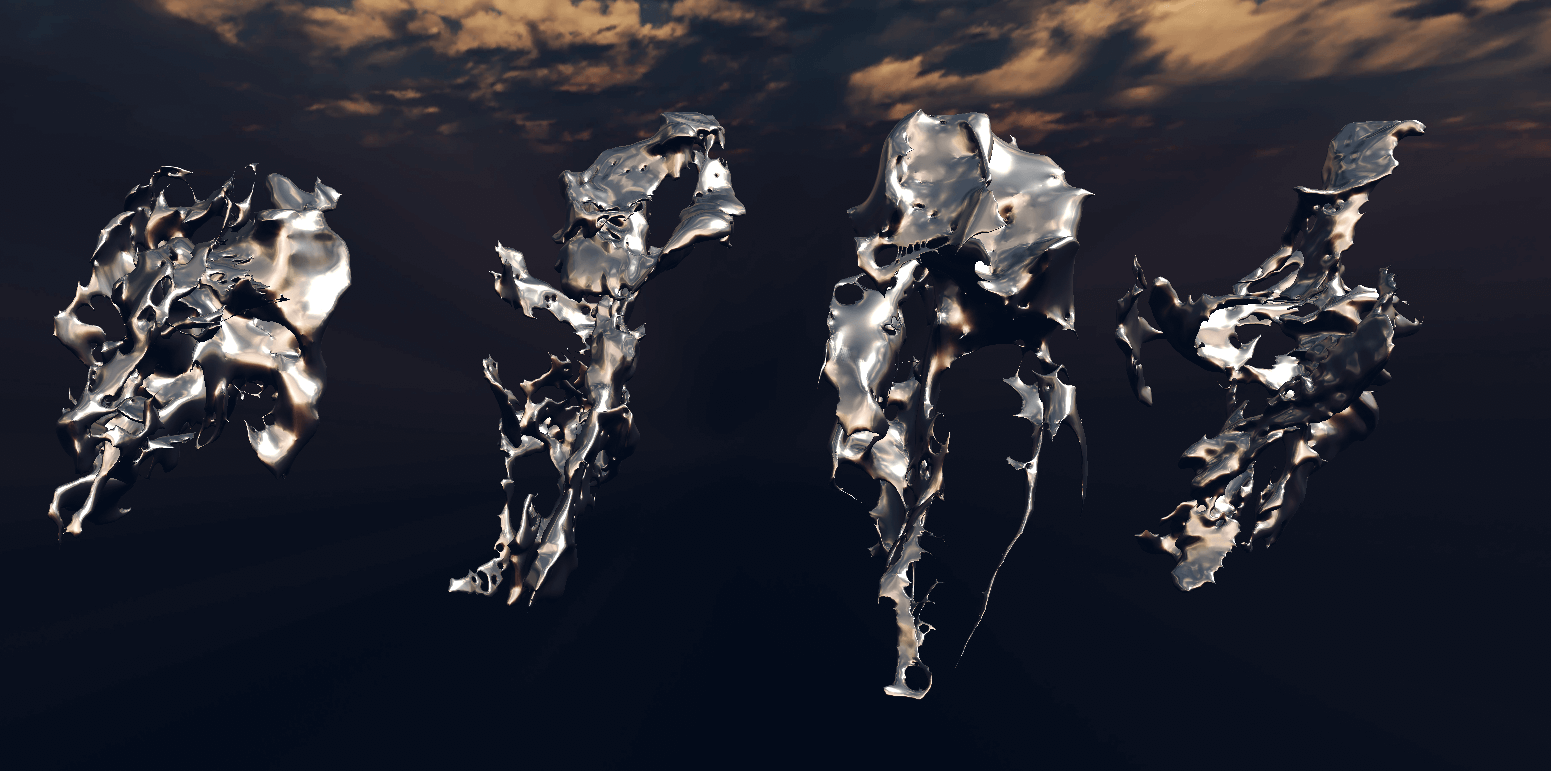
Objects Created Using Quick Smoke
Creating with Quick Smoke
As the name suggests, Quick Smoke generates and simulates smoke. The generated smoke can then be exported in VDB format and converted to a mesh.
To simulate smoke, you will need to create a Domain object and a Flow object.
First, on the startup screen, delete the default Cube and add a UV Sphere by pressing Shift+[A].
![Shift+[A]でUV Sphereを追加します](https://styly.cc/wp-content/uploads/2022/04/2.gif)
Press Shift+[A] to Add UV Sphere
Next, select UV Sphere and click on Object at the top of the screen. Then, select Quick Effects→ Quick Smoke.

Object→Quick Effects→Quick Smoke
After selecting Quick Smoke, a cube-shaped Domain will appear around the UV Sphere. Next, change the Scale of the UV Sphere to 0.05.

Change the Scale of the UV Sphere to 0.05
Next, select UV Sphere and open Physics Properties from the menu. Change the Initial Temperature value to 2 and the Surface Emission value of the Flow Source to 1.

Initial Tempature=2 Surface Emission=1
Then, select Smoke Domain (hereafter referred to as “Domain”) and open Physics Properties from the menu. Change the Resolution Divisions value to 128.
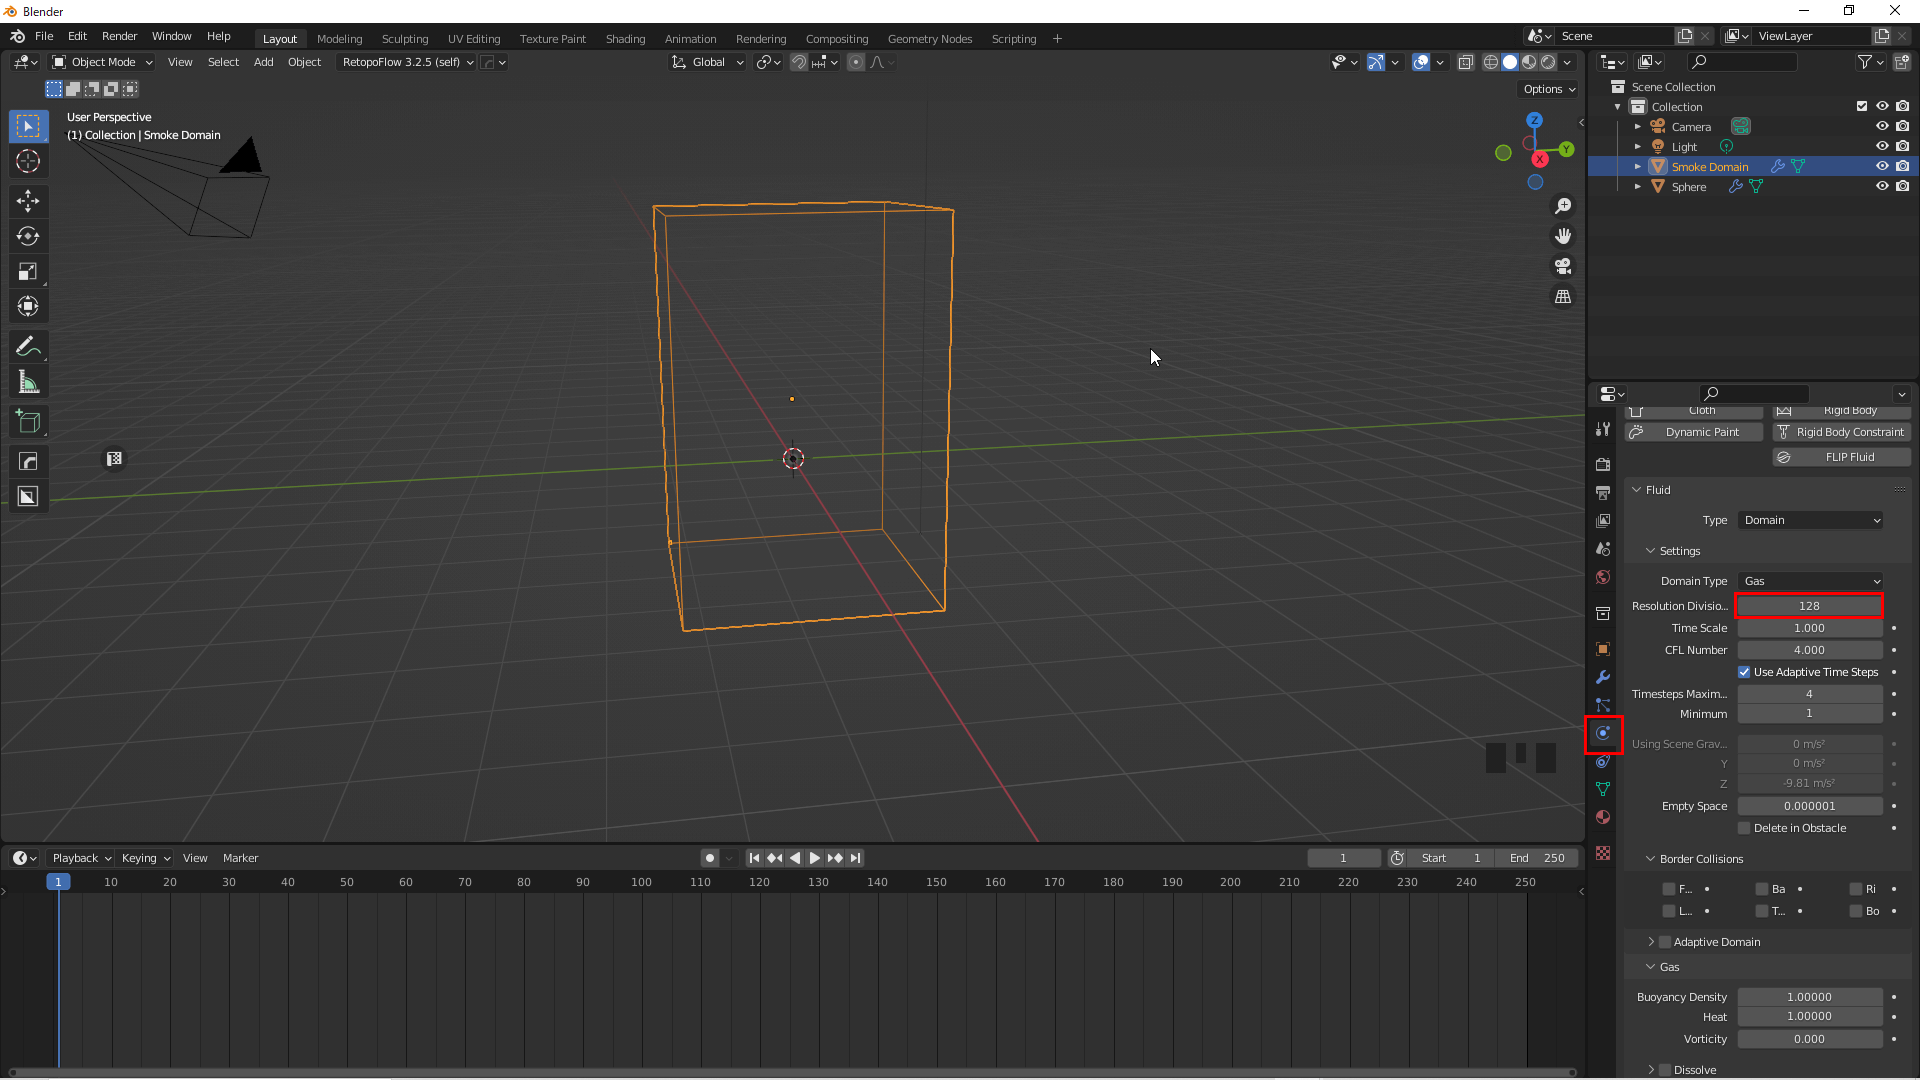
Resolution Divisions=128
Now, change the Type of Cache to Modular and, since we want the animation to play at 150 frames, change the End values for Cache and Timeline to 150. Next, click on the file symbol to select where you want to save the cache. The cache file can be hard to find by default, so we suggest saving it on the desktop.
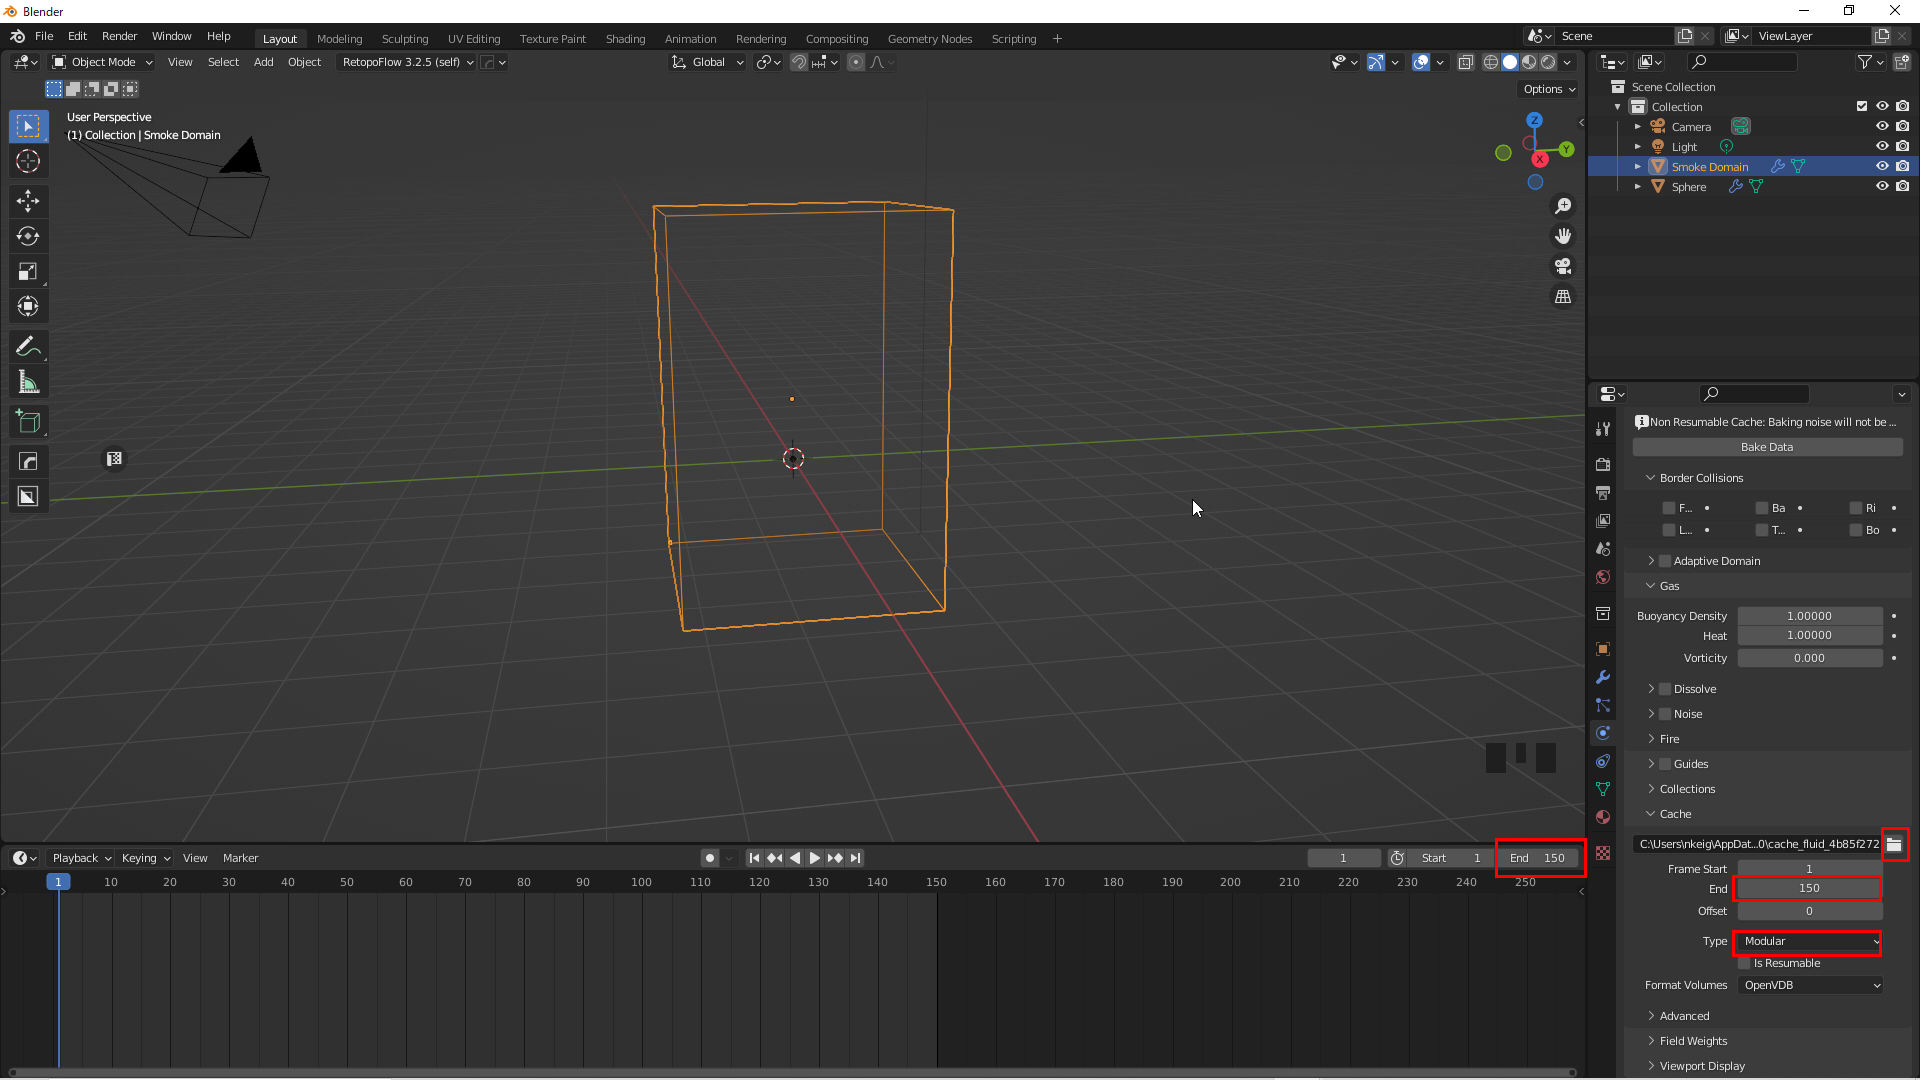
Change the End Values of Cache and Timeline to 150
Now that you have made it this far, let’s generate Smoke as a test. Note: Be sure to save the file frequently, as the process may slow down your system, depending on your PC. To continue, select Domain and click Bake Data; this step will “bake” Smoke’s animation.

Save Your Files Before Baking!

Animation Playing
Press the Play button to play the animation.
Add a Force Field
Now that we have generated Smoke, we will transform this Smoke using Force Field. First, change the size and location of the Domain, so that the Smoke will spread out nicely. Then, set the Transform value as shown in the image below.
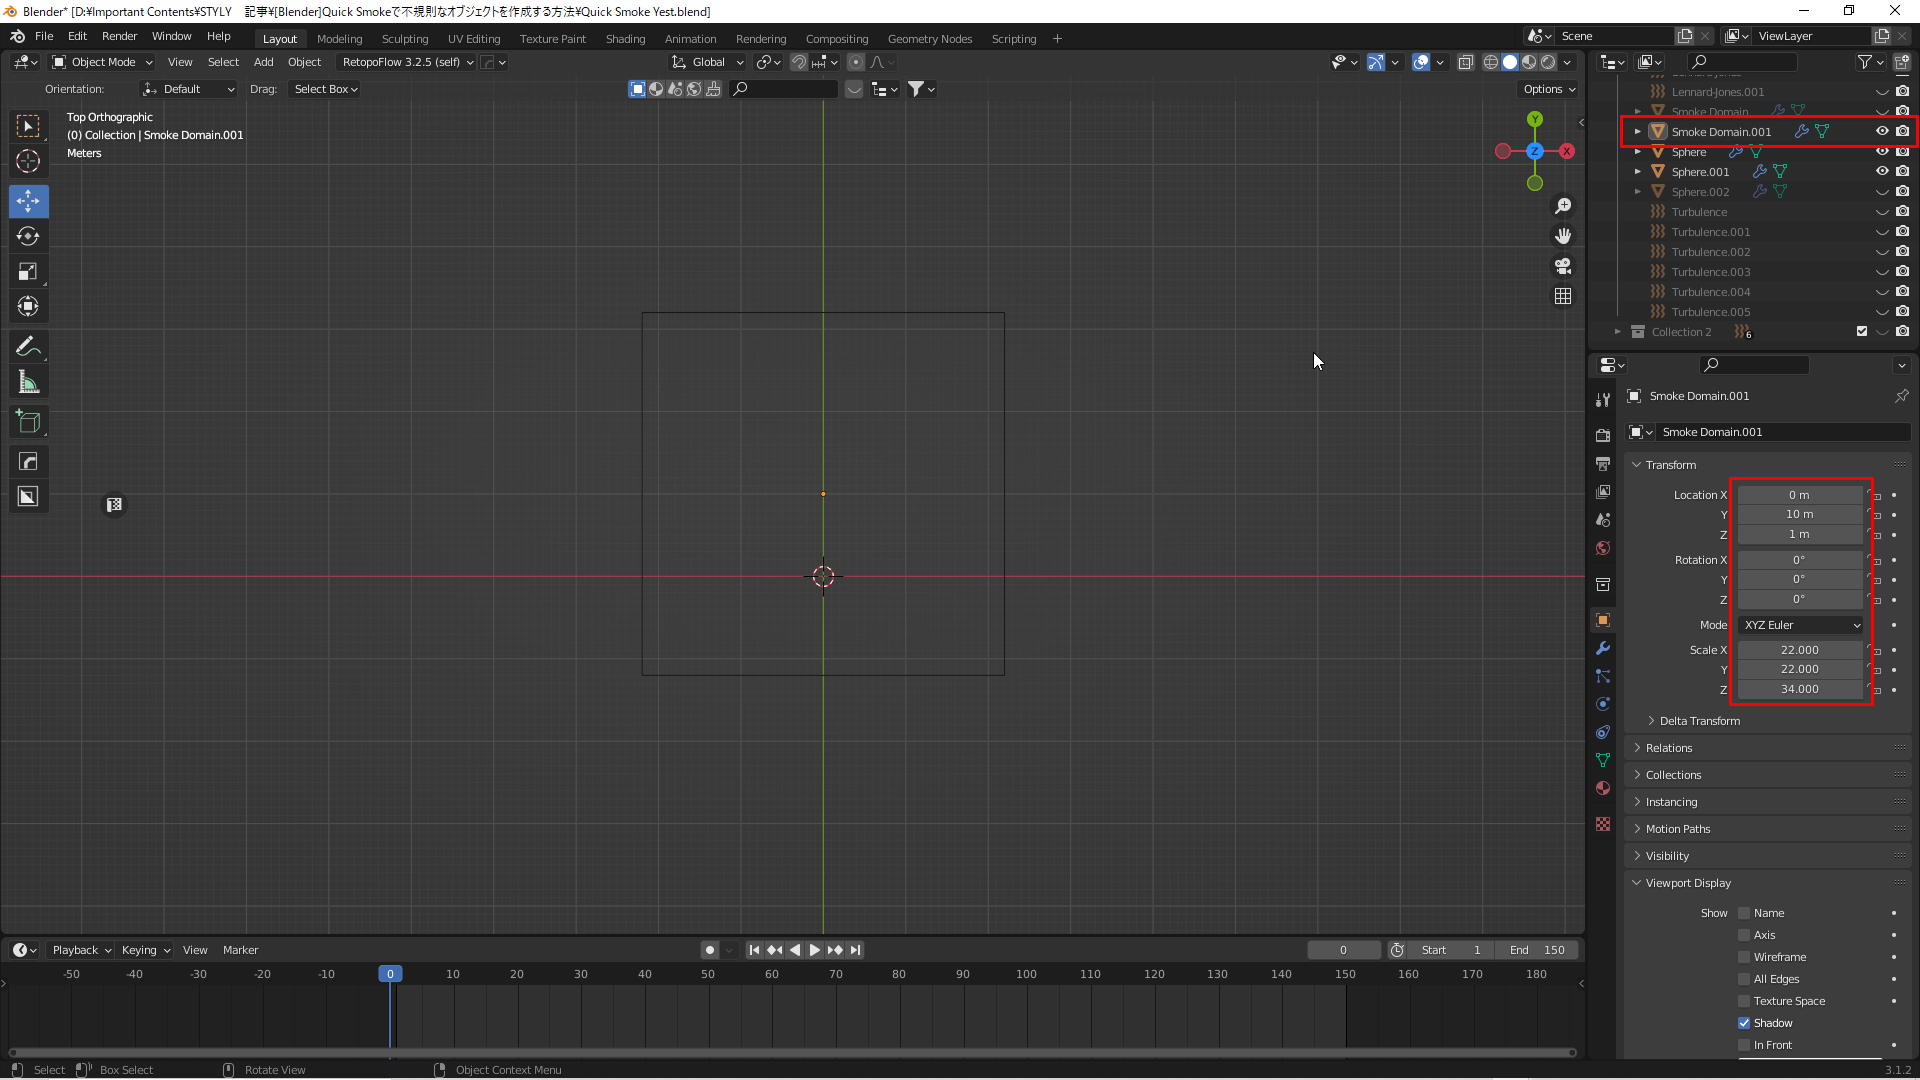
Set Transform Value
Press Shift+[A] to Add a Force Field.
Next, adjust the strength values in the Physics Properties menu.
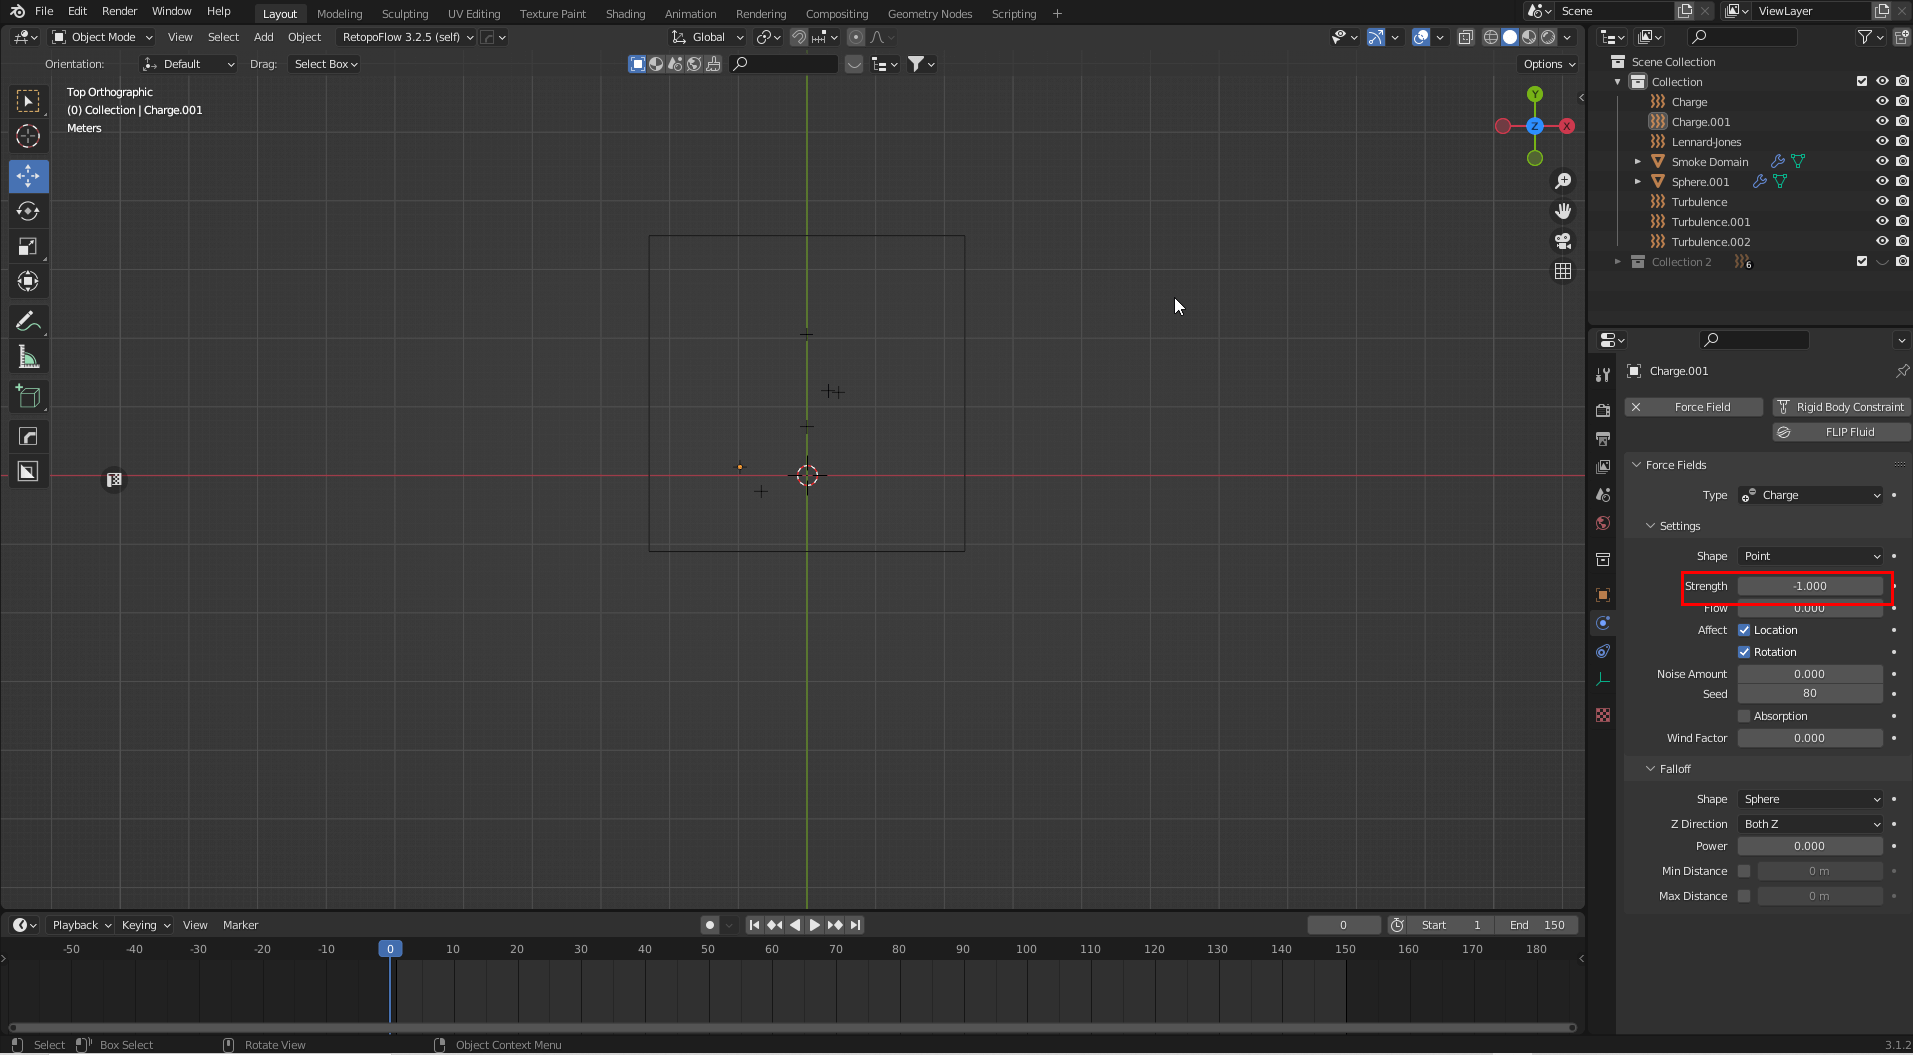
Physics Properties→Strength
After adding each Force Field, refer to the following image for placement.

Place Force Field
In this case, you can see how we placed our Force Fields in the images below; the three X-, Y-, and Z-Axis images show the viewpoint orientation, each Force Field type, and the Strength value.

Z-Axis Viewpoint
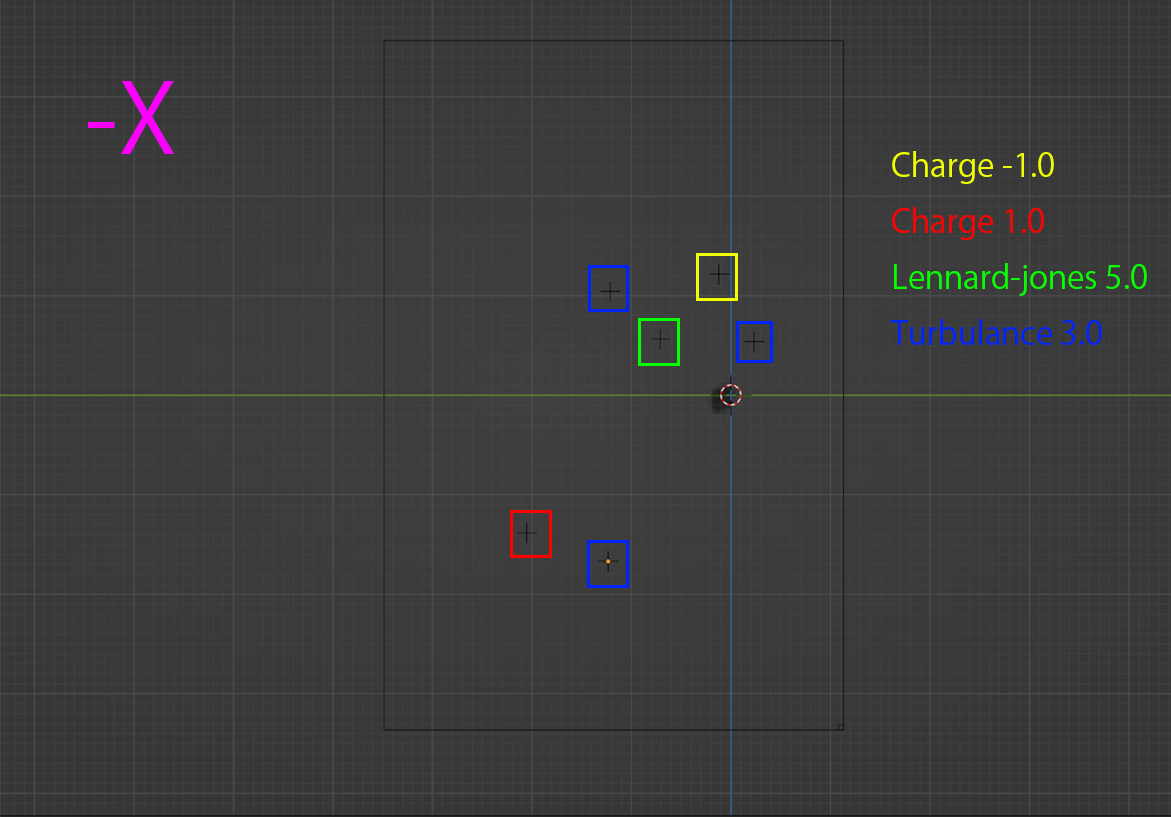
-X-Axis Viewpoint
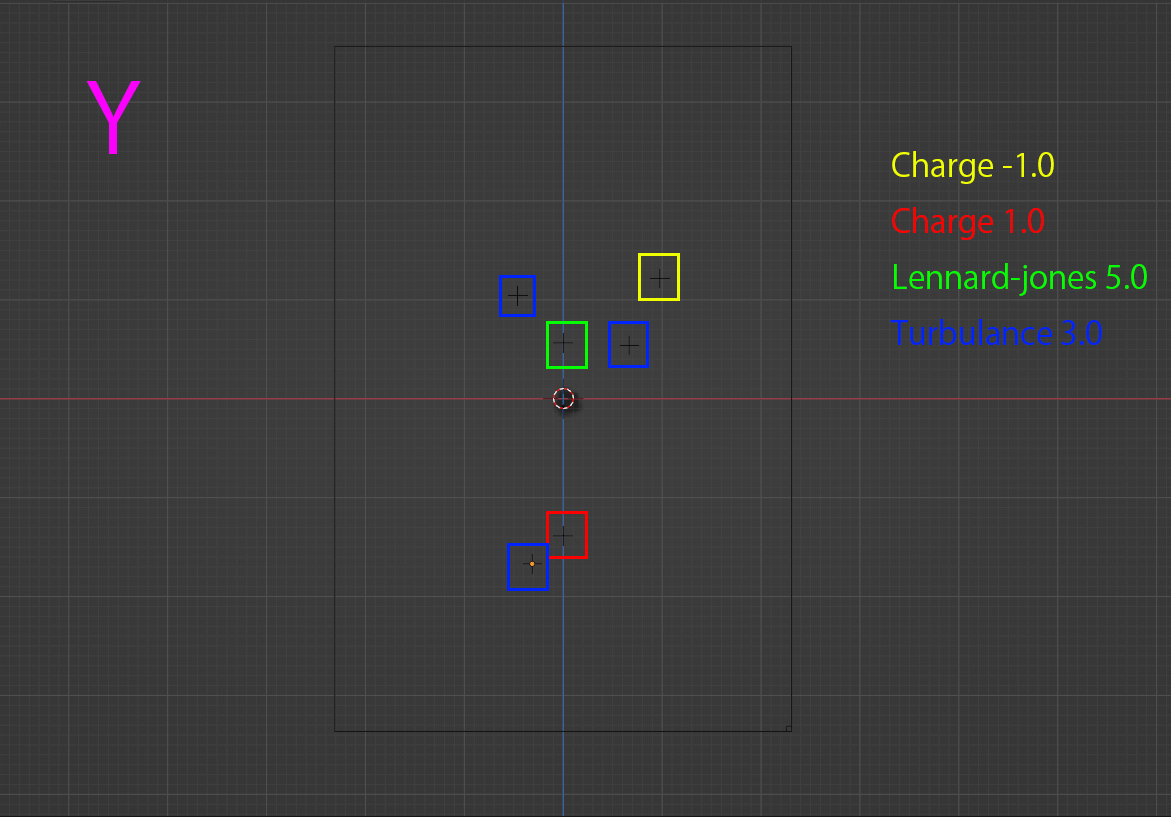
Y-Axis Viewpoint
There are countless combinations of Force Fields, so you can experiment with your favorite arrangement. Check the Blender Manual for the characteristics of each Force Field.
Note: If there is too much Smoke, fine details may be destroyed, so you can use a keyframe to adjust the amount of Smoke.
To use keyframe, go to frame 119 and click on the dot to the right of Use Flow. Then, move to frame 120, uncheck Use Flow, and click the right ◇ to complete.
Adjust the Amount of Smoke
Bake Your Animation
After placing the Force Field, click Bake Data to bake the animation.
Animation Baking
By clicking Bake Data, we created this random, irregularly shaped Smoke.

Irregularly Shaped Smoke Creation
You can adjust the Force Field to get the shape you want. To re-bake and create a new shape, click Free Data and then Bake Data again.
Free Data→Bake Data
Once you have the desired shape, save the file and open it in the Cache folder.
Under Cache, there are two files: Config and Data. The Smoke data is saved in the VDB file in the Data folder.
Note: Before baking, the VDB files of Smoke are overwritten, so if you want to create multiple Smokes, make a duplicate of the data folder and rename it.
Duplicate and Rename Data Folder for Backups
Import VDB Files
To import VDB files, start a new Blender and select Shift+[A]→ Volume→ Import Open VDB.
![Shift+[A]→Volume→Import Open VDB](https://styly.cc/wp-content/uploads/2022/04/19-1.png)
Shift+[A]→Volume→Import Open VDB
Next, select all VDB files that you just saved in the data folder. Then, click Volume and select Import Open VDB volume file.

Click Import Open VDB Volume File
This step will import the Smoke animation, which will be meshed.
Next, select the default Cube on the startup screen and add the Volume to Mesh modifier.
Now, select the Smoke you just added in Object; this step will display the Smoke with a mesh effect. Once the Smoke is meshed, hide the original volume object to make it easier to see.

Add Volume to Mesh Modifier
You can adjust how much Smoke is meshed by changing the Threshold value. Experiment with this process and adjust the mesh to your liking!
Adjust by Changing the Value of Threshold
Next, move the playhead around to find the desired shape. Then, select both Fluid_Data and Cube and duplicate these settings by pressing Shift+[D].
Press Shift+[D] to Duplicate
Once you have duplicated these settings, select the Cube and apply the Volume to Mesh modifier. Now, the Smoke is completely meshed. You can also apply the modifier by right-clicking and selecting Convert to Mesh.

Apply the Volume to Mesh Modifier
Shaping up
From here, we will start shaping. Select the entire mesh in Edit Mode and press the [P] key to select By Loose Parts.
Remove Minor Details
This option will separate the extra parts of the object, which should be removed.

Remove Extraneous Parts
Now, go to Sculpt Mode and open the Remesh tab in the upper right-hand corner to re-mesh. Note: Save your files frequently, as too fine a Remesh value will slow down the shaping operation.
Re-mesh Your Shape
Next, smooth out the entire area of the object with a Smooth brush.

Smooth the Whole Process
Since re-meshing increases the polygon count, we recommend reducing the polygon count with the Decimate modifier to be able to use the object with other software or STYLY.
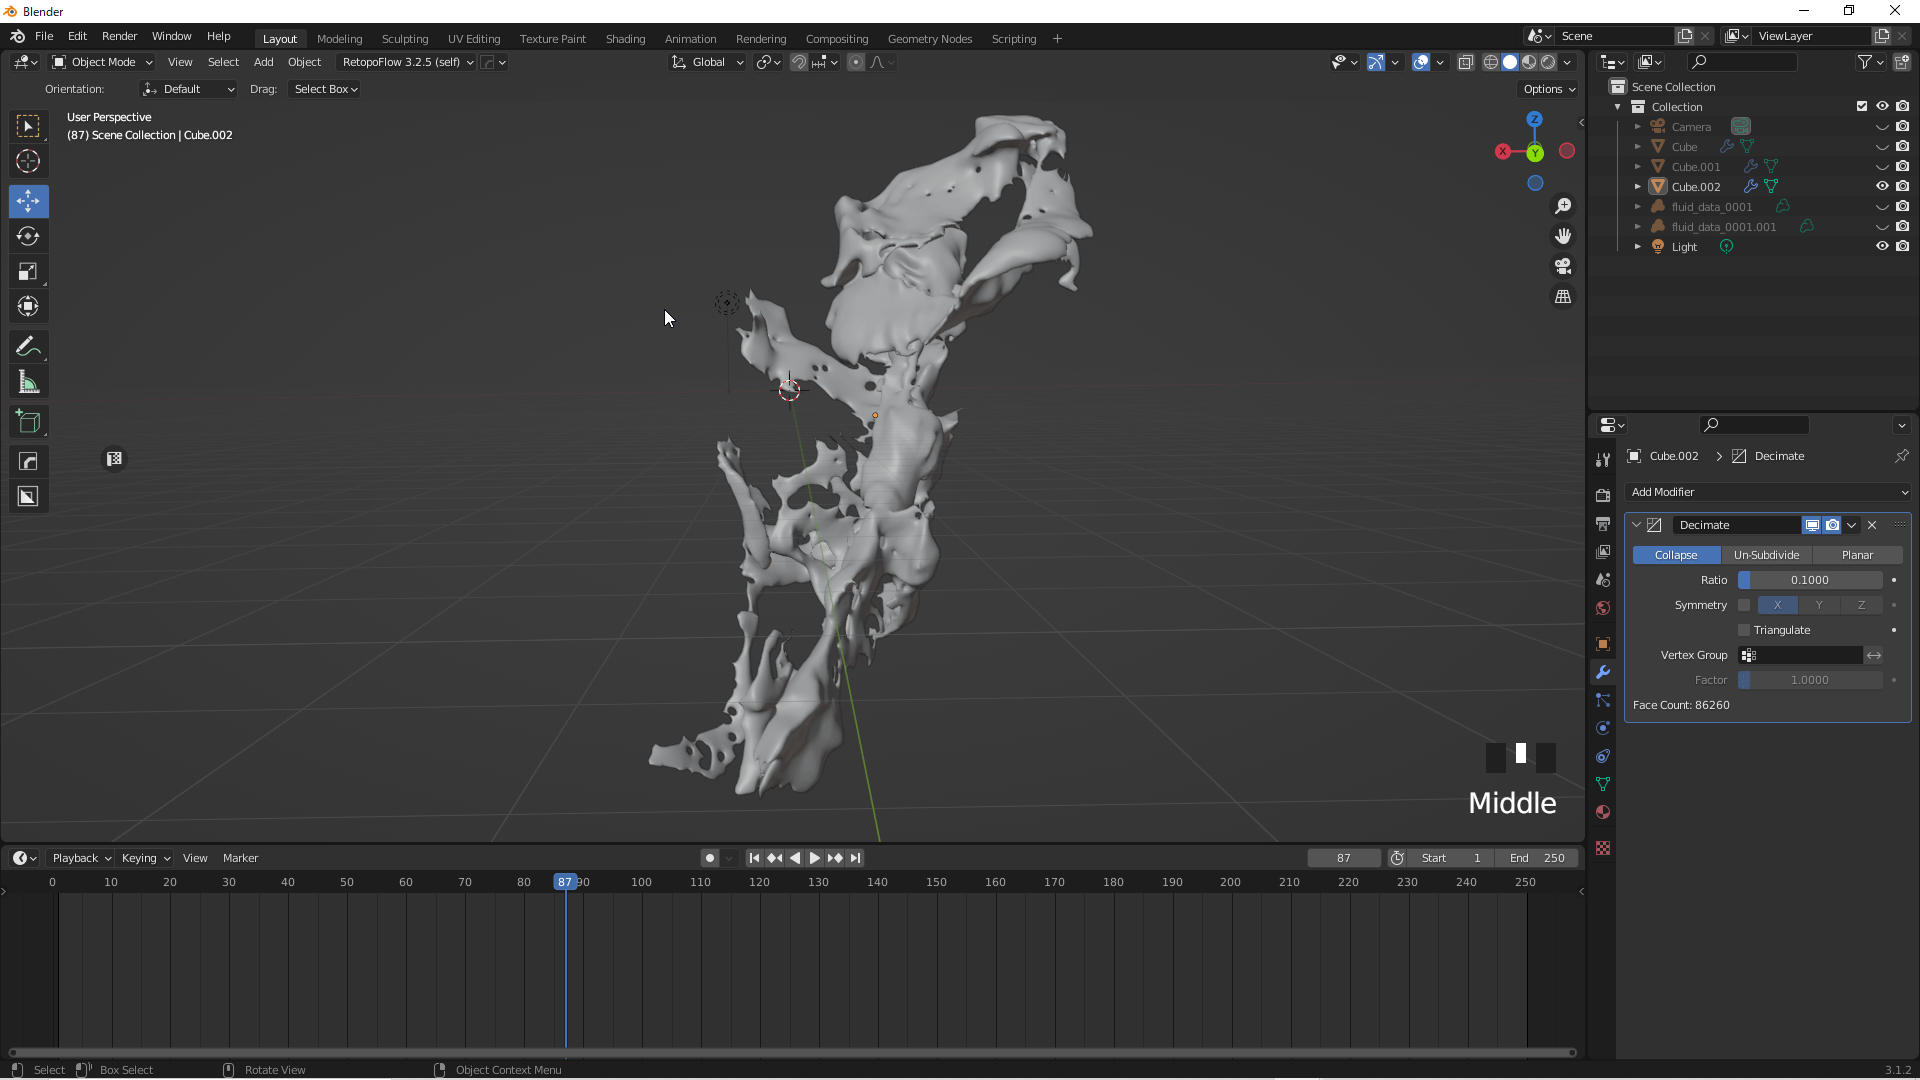
Use the Decimate Modifier to Reduce Polygon Count
Now, the object is complete.
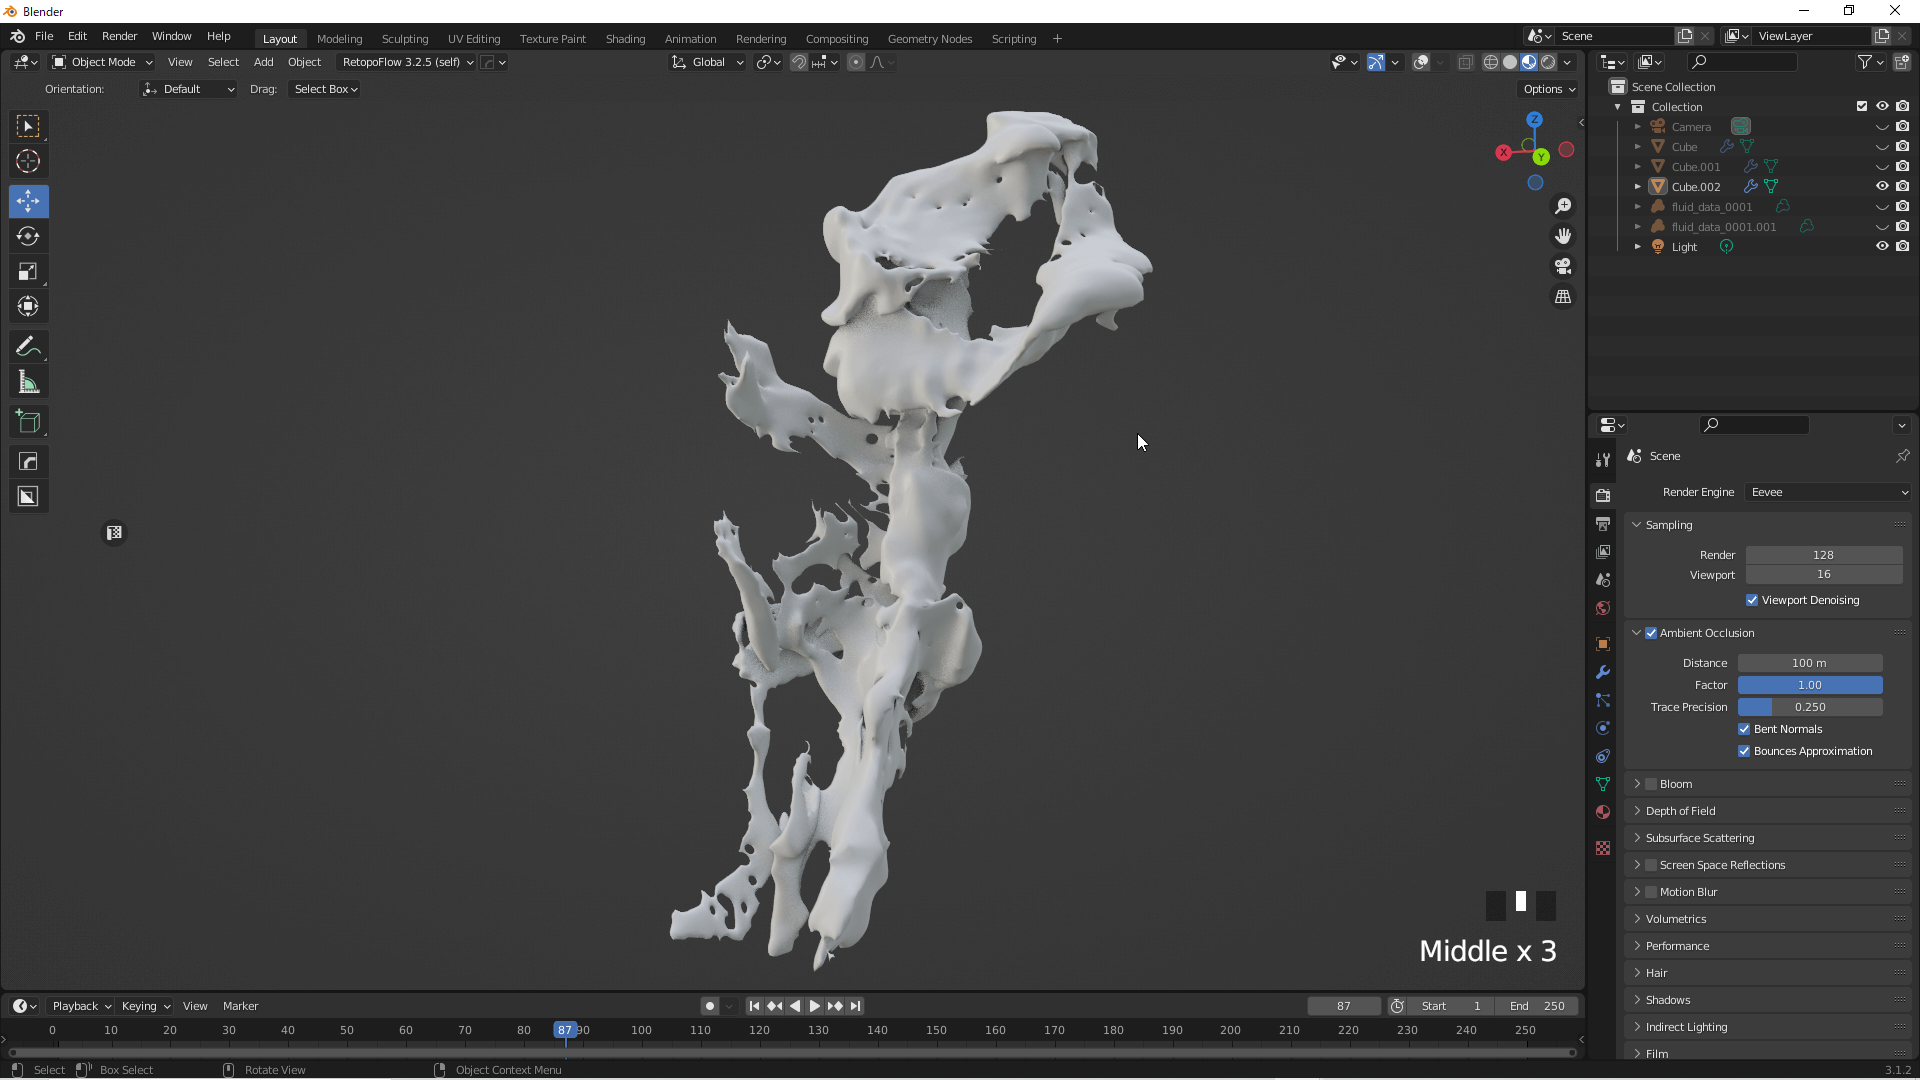
Completed!
Export Objects
Next, select the object you want to export and choose File→ Export→ FBX in the upper left-hand corner.
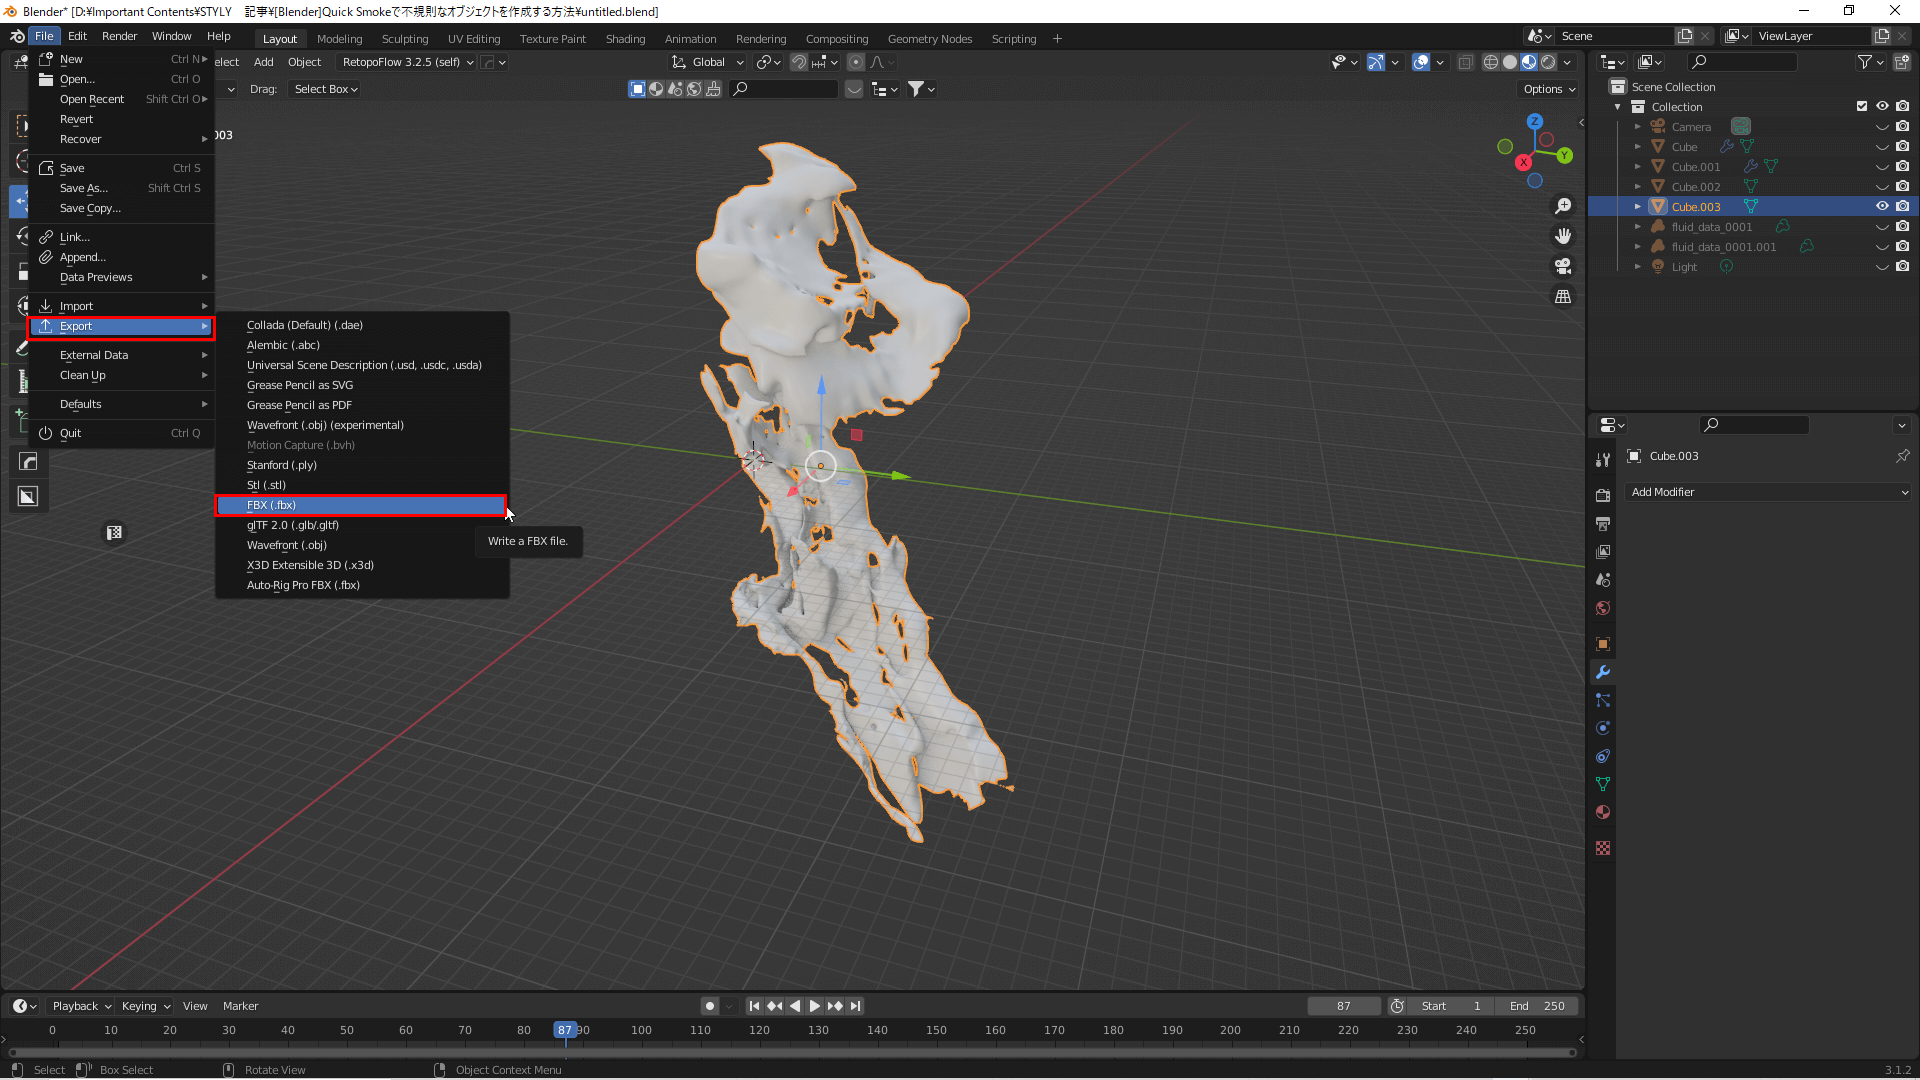
File→Export→FBX
Then, set the export settings as shown in the image below, select the destination folder, and click Export FBX.
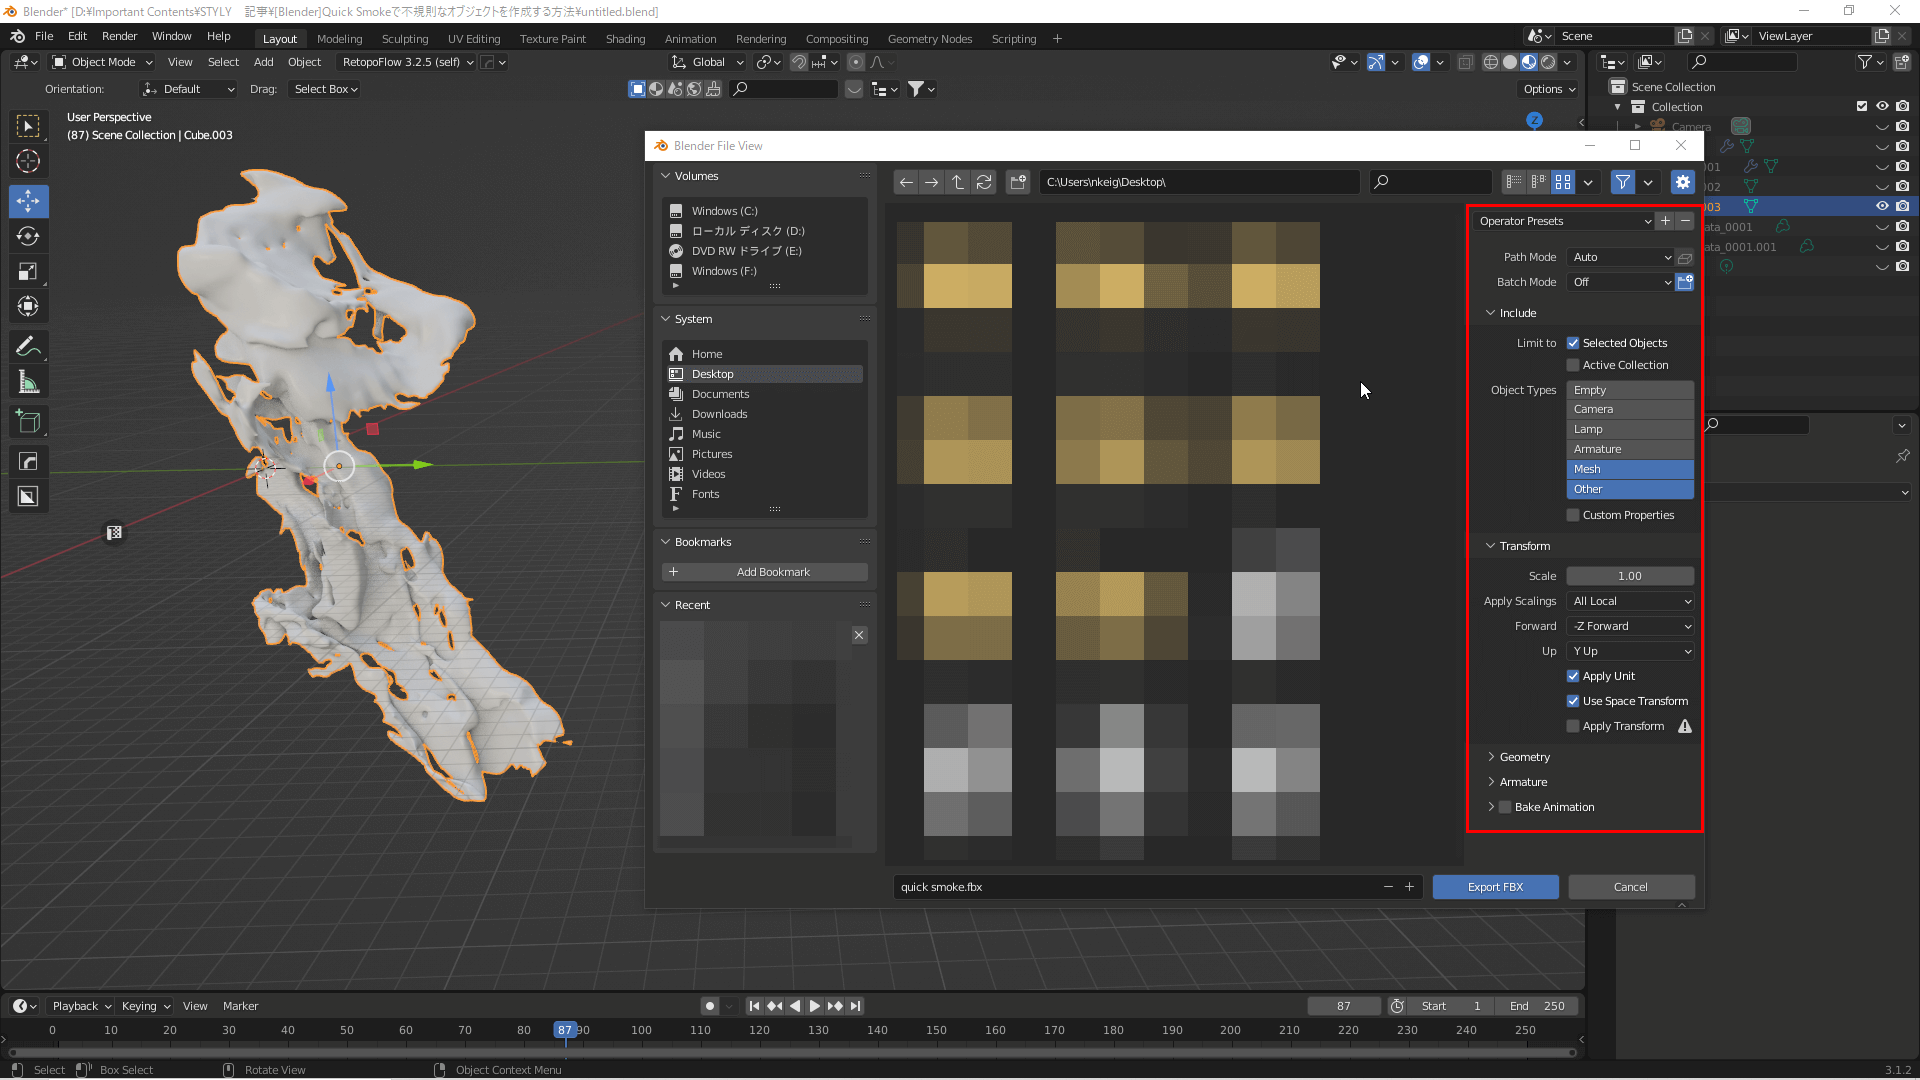
File Export Settings
The file export is complete.
How To Upload to STYLY
How to create an account:

How to upload to STYLY:

How to upload from Unity to STYLY:

Object Uploaded to STYLY