This article explains how to use a free add-on called “Animation Nodes” for creating complex node-based animations.
What is “Animation Nodes”?
Blender basically creates animations by mutually typing keyframe while with the free add-on “Animation Nodes”, more advanced node-based animations can be created.
If you watch the official video, you can see how versatile the add-on is.
Introduction
Download the add-on here. In this article, I’m using Animation Nodes 2.1 and Blender 2.83.
To install the downloaded file in Blender, refer to “3 Installing in Blender” in the following article.

After the installation, select “Animation Nodes” from the Editor Type in the upper left corner of the screen.
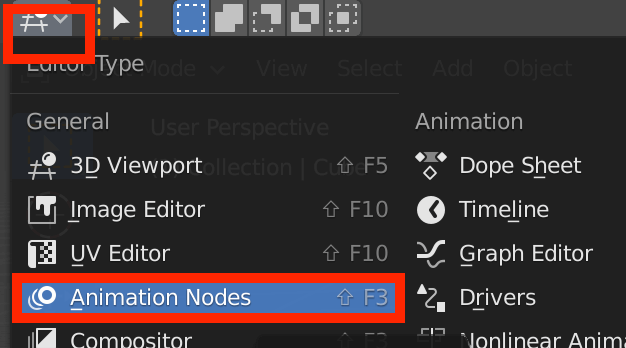
Select Animation Nodes
To make preview easier, divide the screen into two parts and set one side as Animation Nodes and the other as a 3D Viewport as shown below.
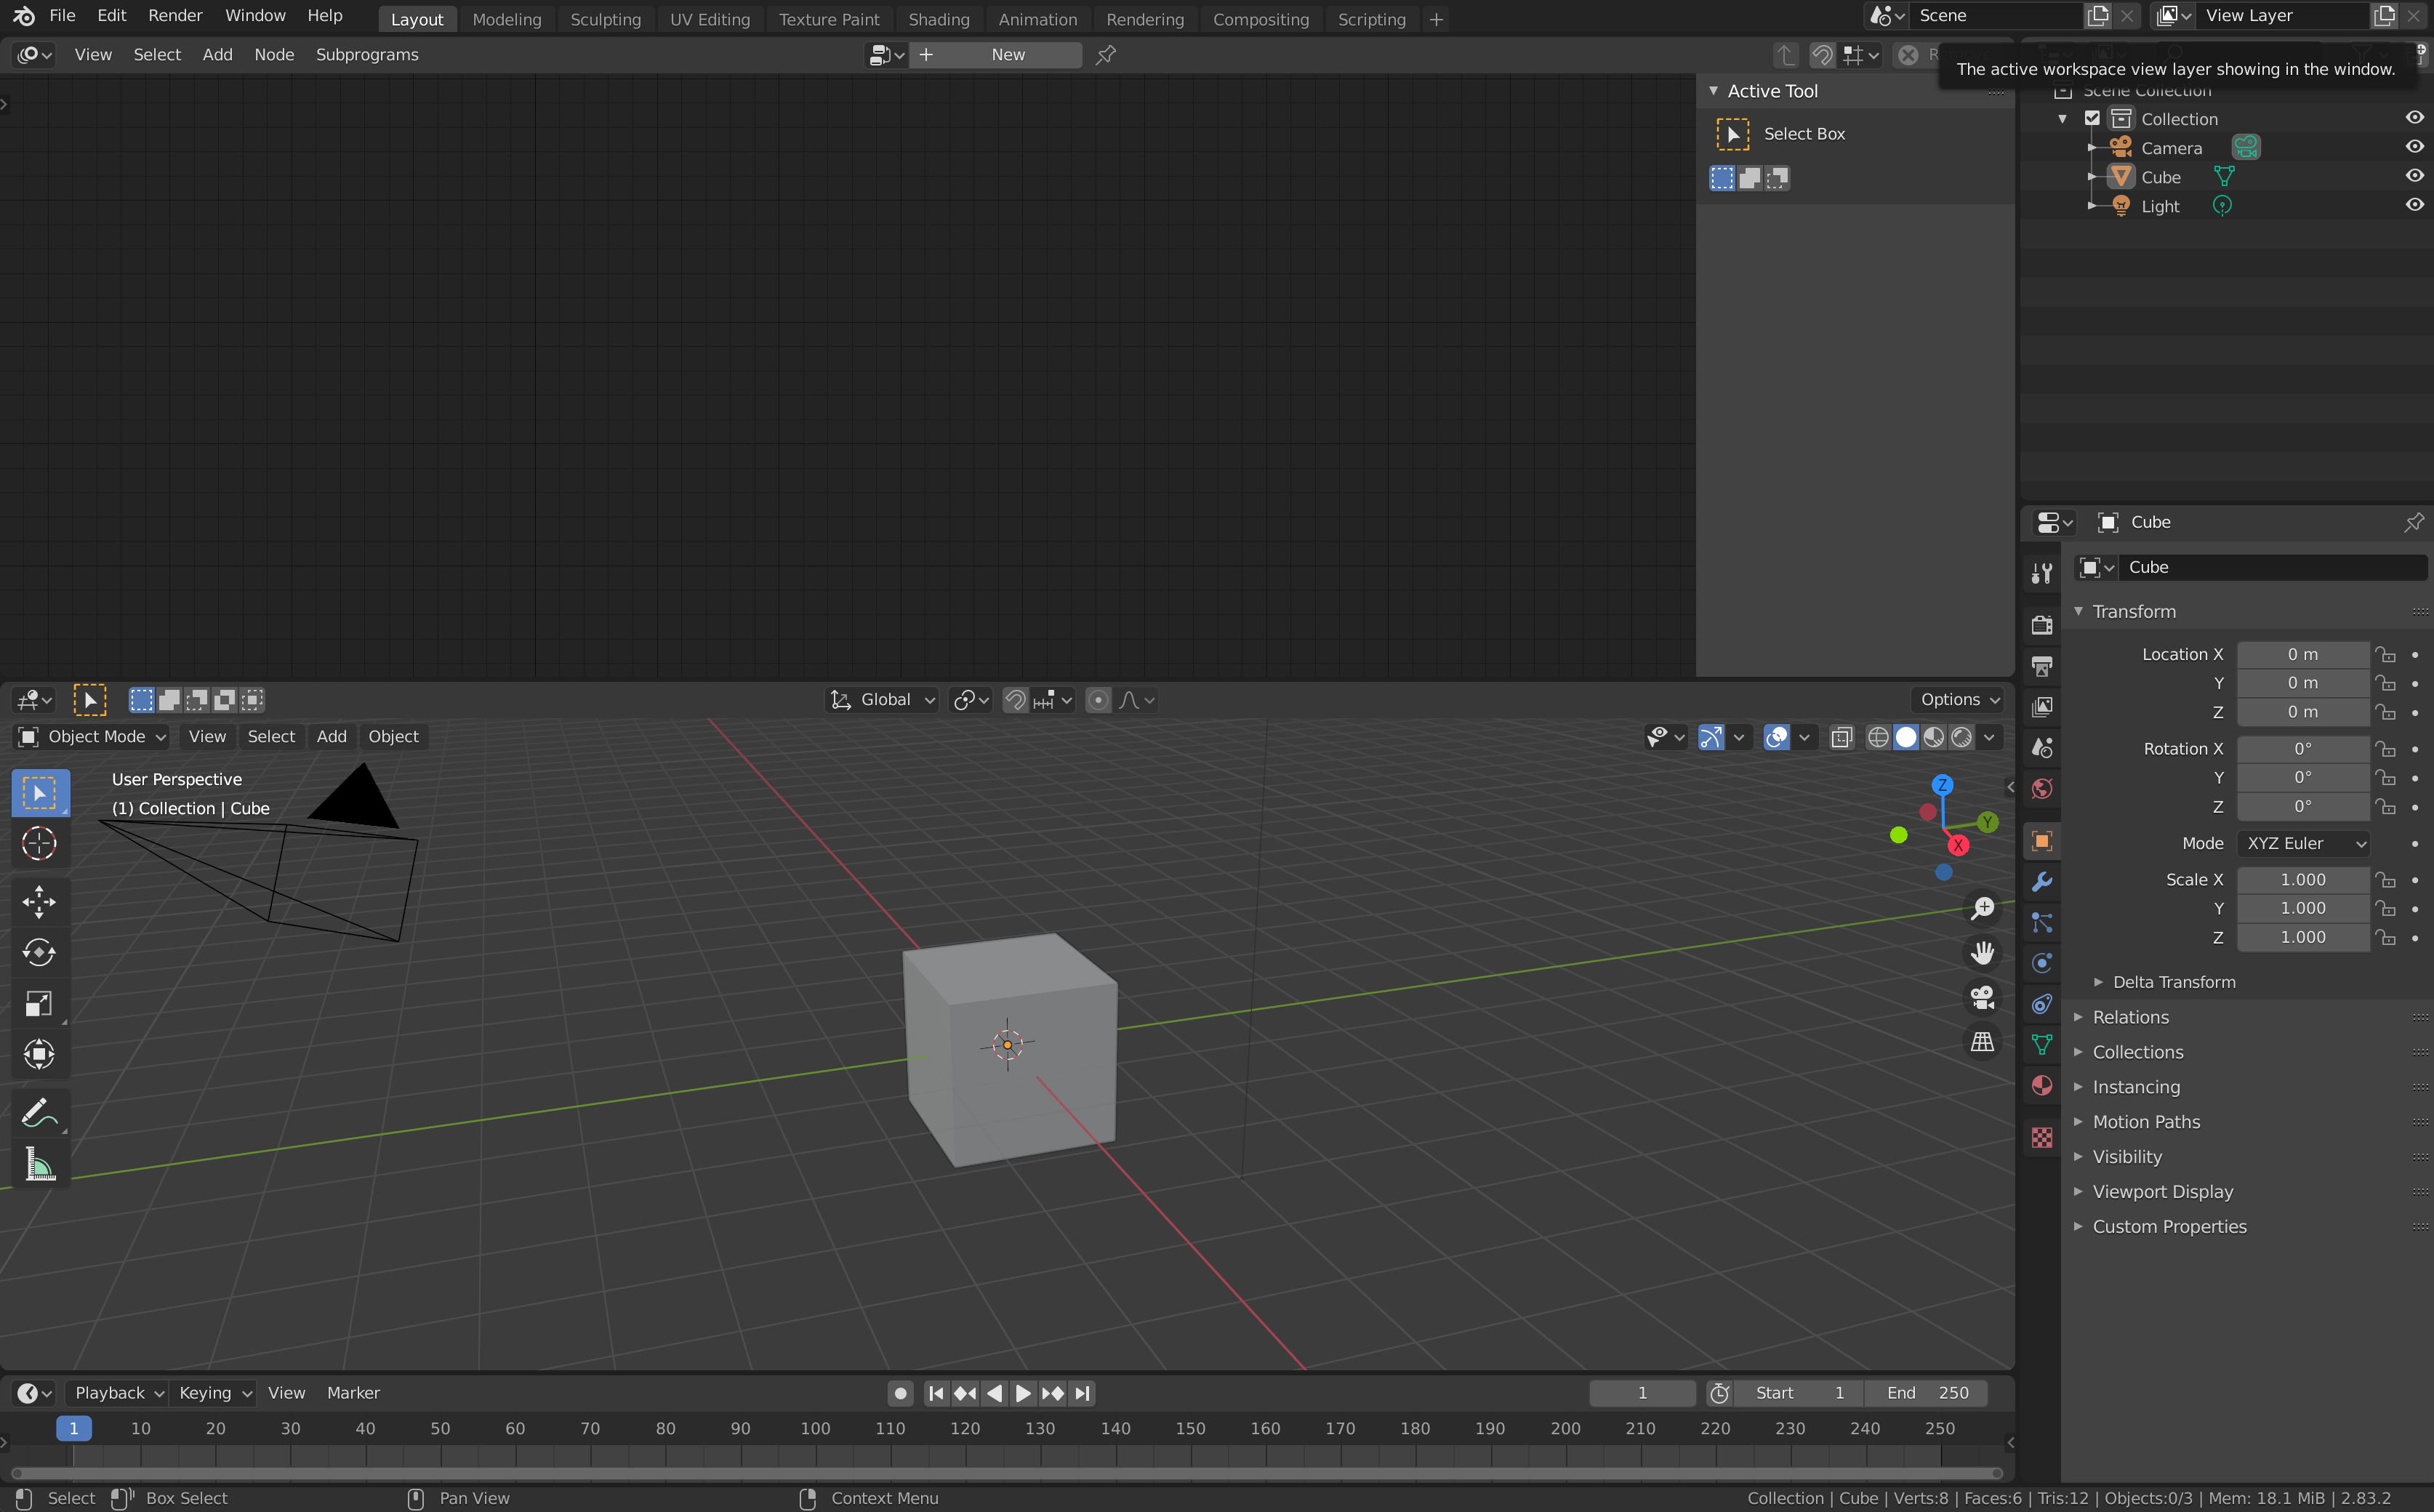
Top: Animation Nodes Bottom: 3D Viewport
Move, rotate, and scale objects
First, let’s create the basic movements of the object – moving, rotating, and scaling – in Animation Nodes.
Press [Shift]+[A] and click [New Node Tree].
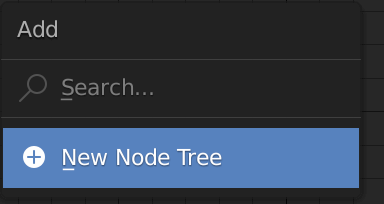
Select “New Node Tree”.
You can now add a node by pressing [Shift]+[A] just like in normal shader editor.
Select Object > Object to add a node called “Object Input”. Select the object you want to move (the Cube in this case).
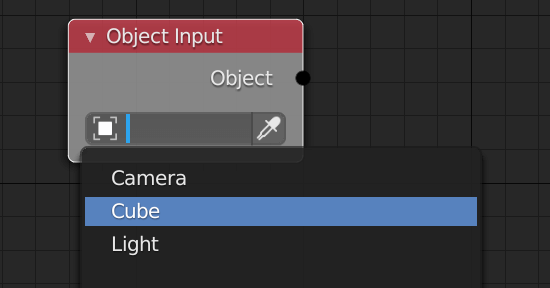
Select the Cube in the Object Input node
Move it along the x axis
Next, we add Object > Transform Output and connect it. Here we select the axis we want to move.
The “X” we are selecting means the x axis of the move.
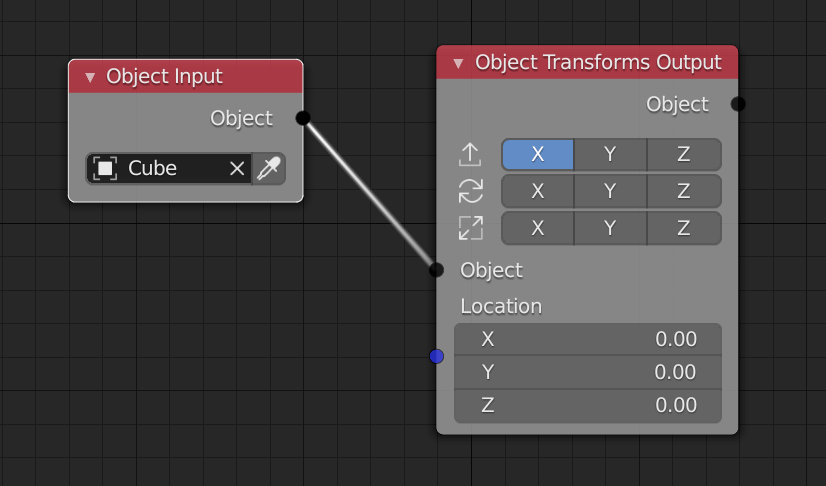
Connect to Transform Output
If you add Animation > Time Info and try to connect to the Location socket of the Transform Output node, a node called “Combine Vector” will be added automatically. In this way, the nodes needed for the connection will also be added automatically.
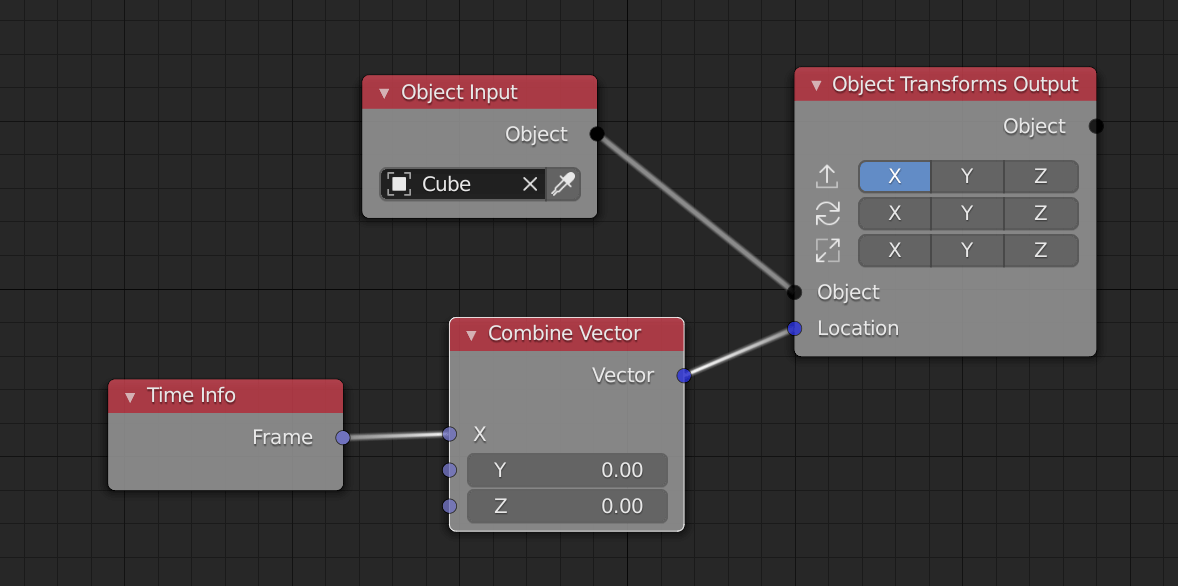
Connect to Time Info
Move swiftly along the a-axis
If you start the animation in this state, the object will start to move faster. This is a state where the object’s x coordinates are equal to the number of frames.
Connect Number > Math as shown below and adjust the value to make the object move slowly. In this example, we set the value to 0.03. The x coordinates of the object are equal to the number of frames x 0.03.
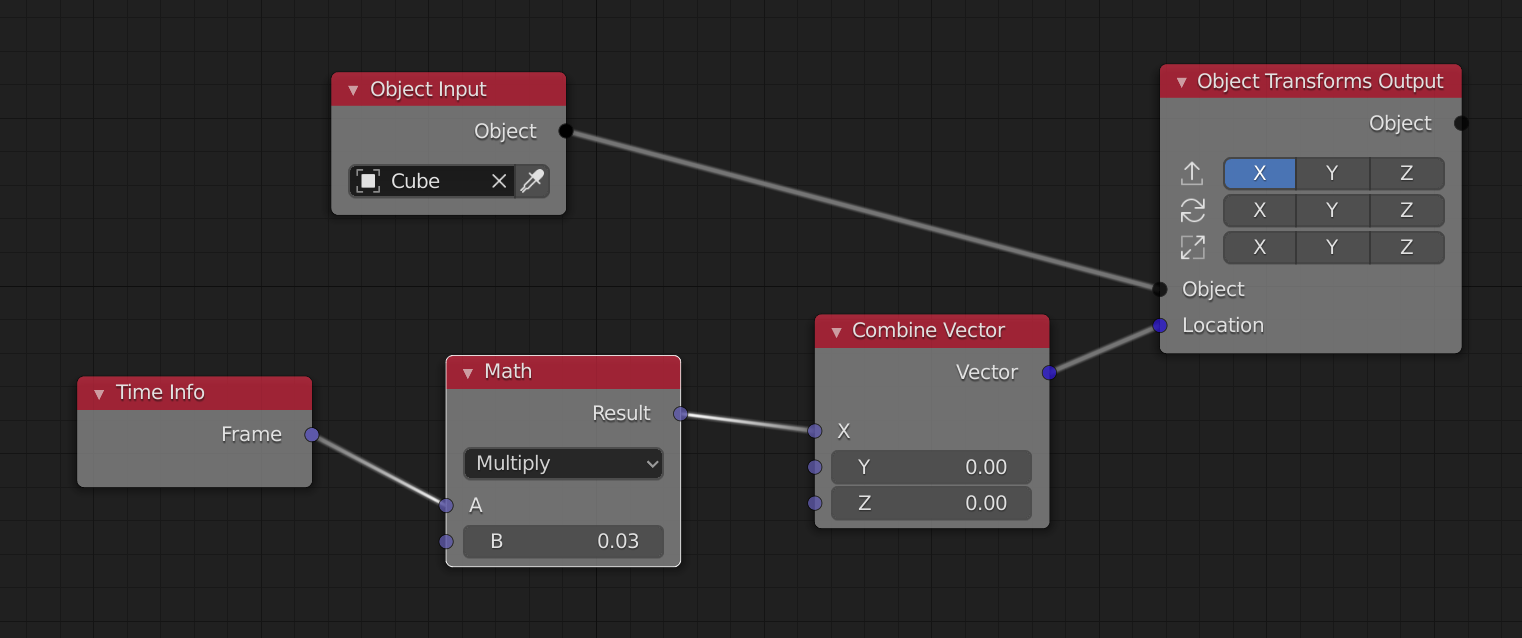
Connect Math Nodes
Move along the x axis
Rotate it in the y-axis direction
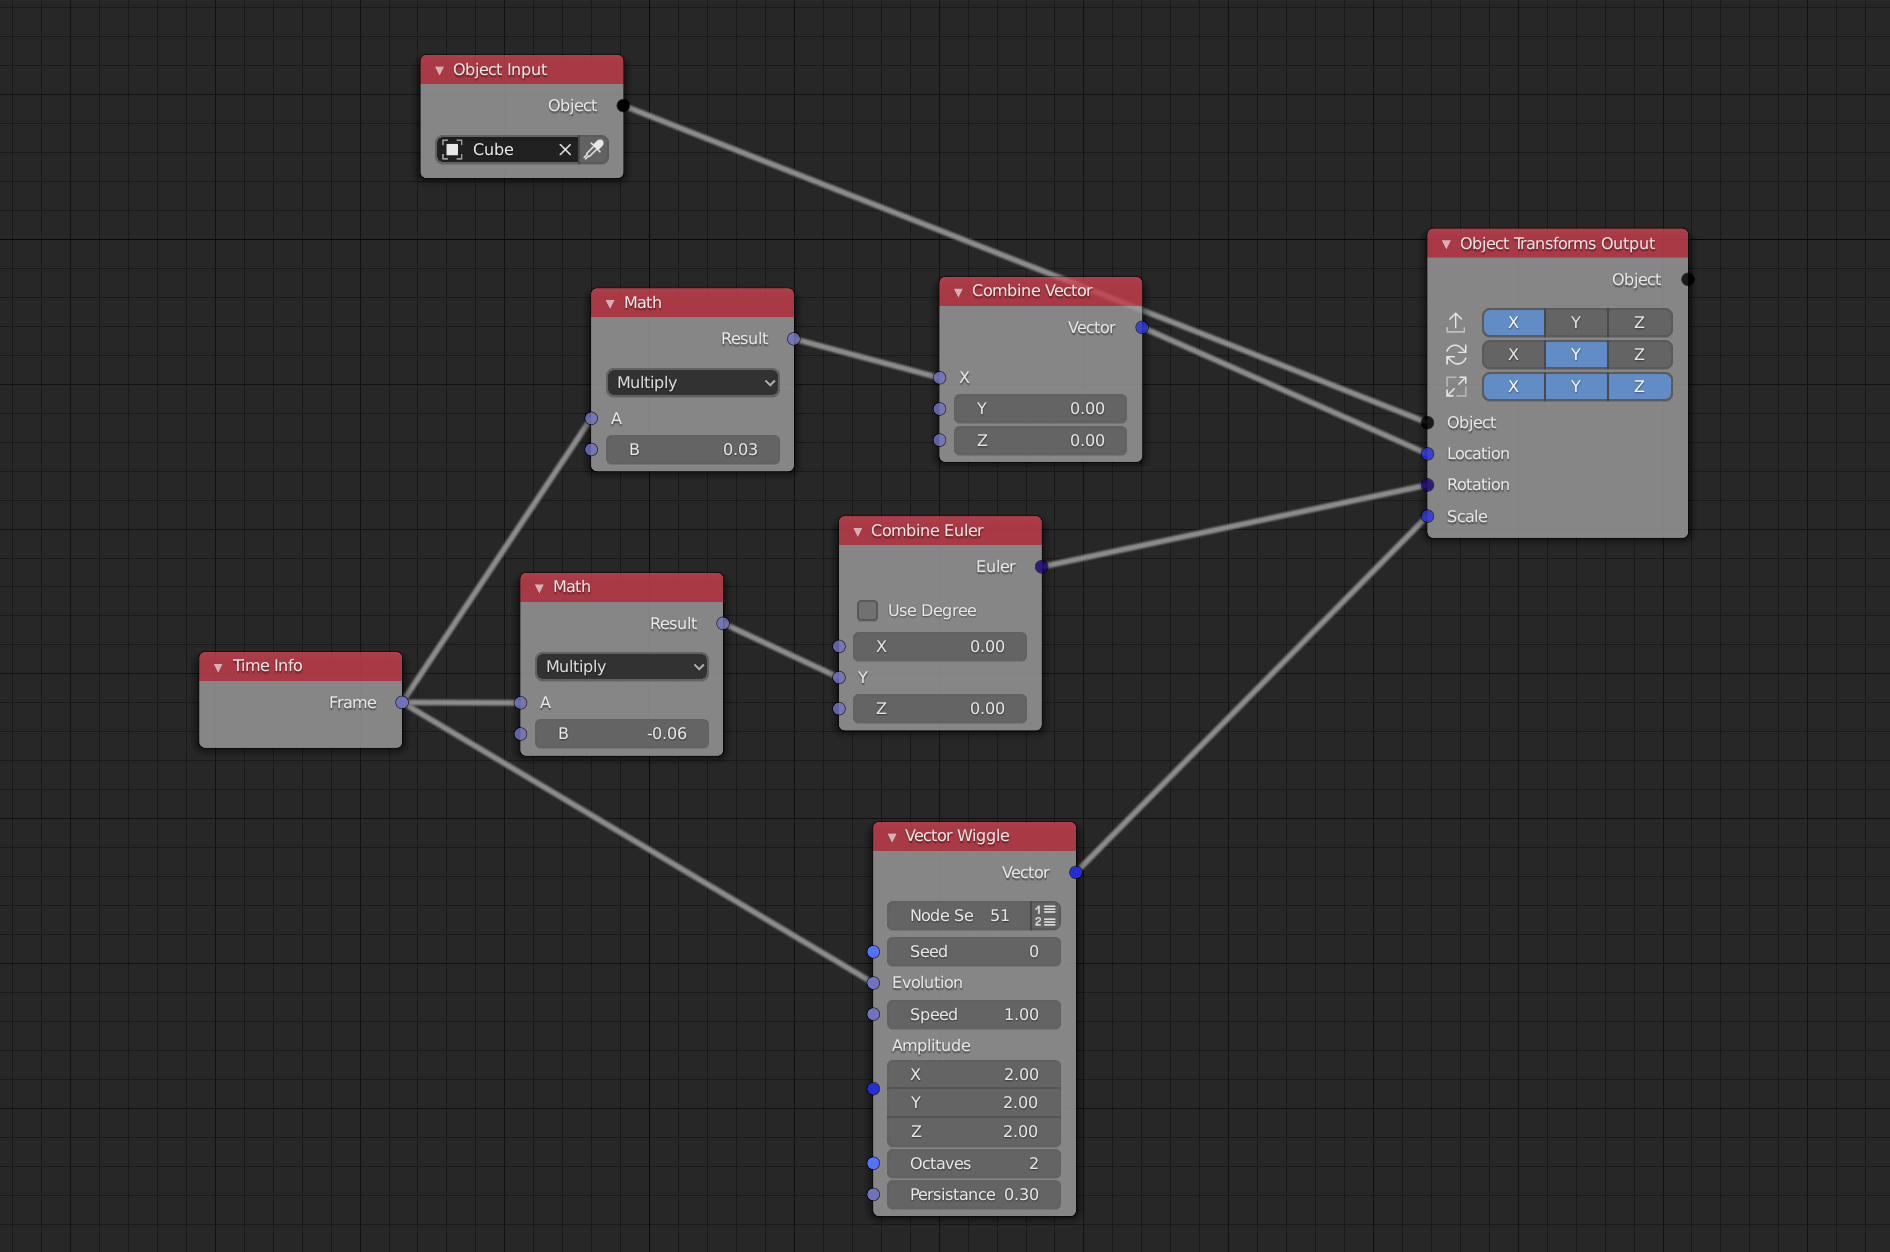
If you connect a node to the rotation of an Object Transforms Output node, you can also create a rotation and movement animation as shown below.
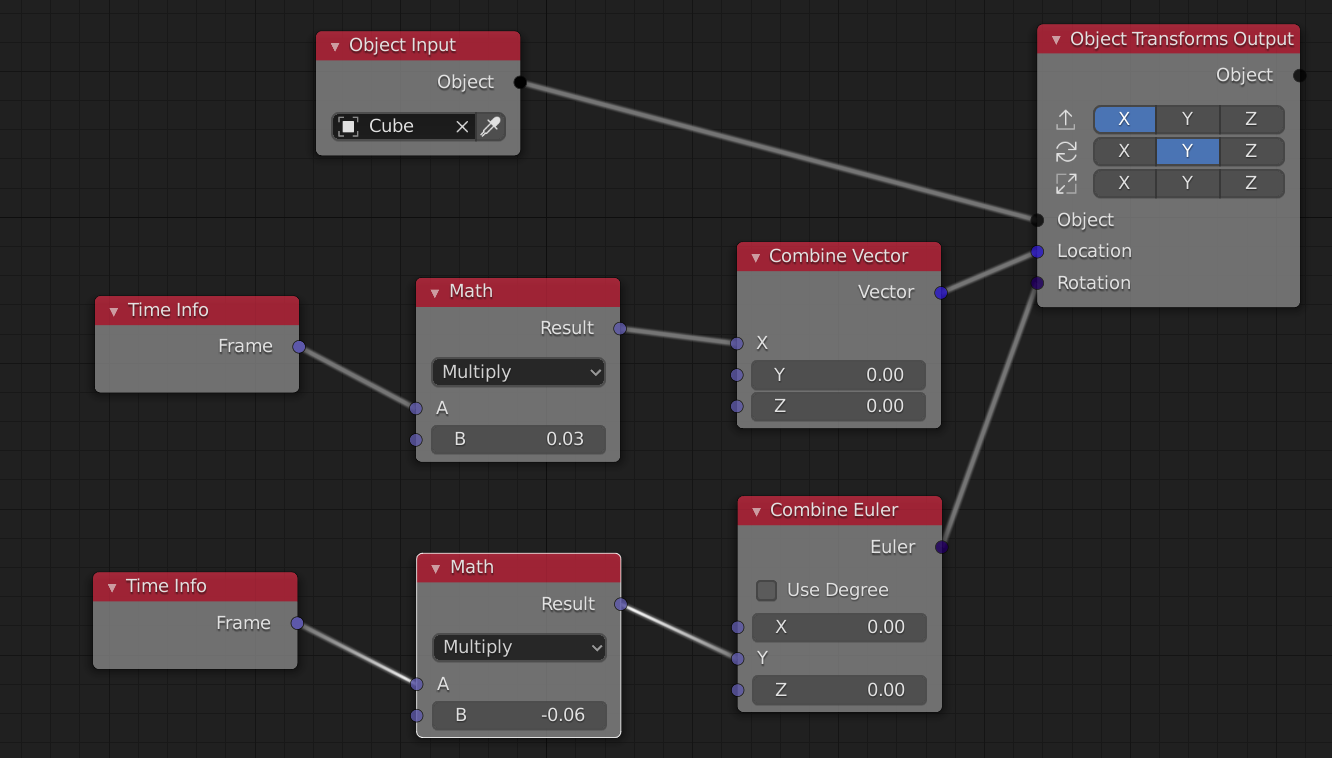
Connect Nodes as well as Transforms
Progression along the x and y axis
Scale randomly
We can use a node called “Wiggle” for any random values; there are several Wiggle nodes, but in this case we use the Vector Wiggle node from Vector > Wiggle.
Let’s connect the Time Info node to the Vector Wiggle node as the red line below.

Connect the Time Info and Vector Wiggle nodes to Scale
Then, the image will be scaled randomly between 0.0 and 2.0 per frame.
Random Scaling
Note that you can also combine nodes into a single node using the same node. In this case, three Time Info nodes were used, so I extended that from one Time Info node to three lines.
Combine the Time Info nodes
Upload to STYLY
Bake the animation
Animations created in Animation Nodes cannot be exported as-is. In order to export, the animation must be baked into a keyframe.
Once baked, you will not be able to edit the animation again, so make sure to save it as a separate file before working on it.
You can now bake by selecting the “Node Tree” tab on the right side of the Animation Nodes window, expanding the “Overview” section, and clicking “Bake to Keyframes”.
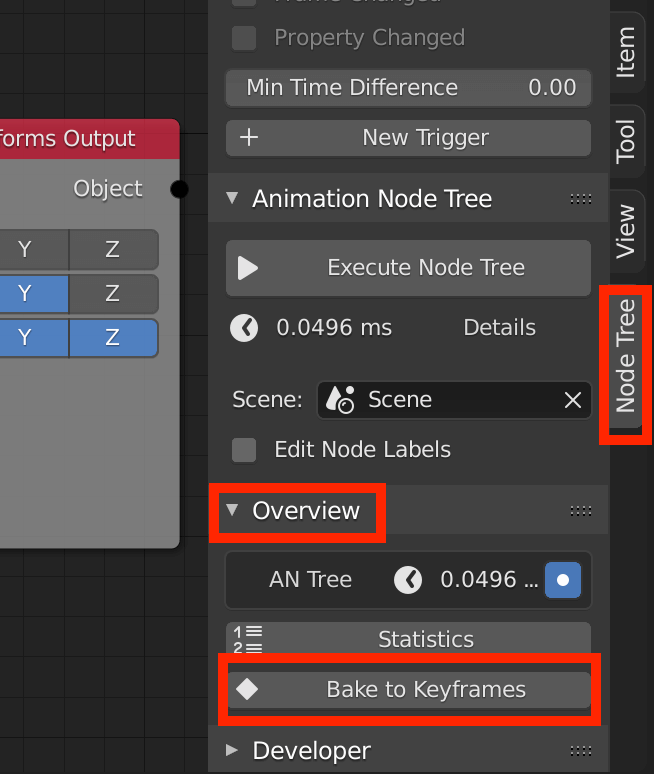
Bake to Keyframes
If you switch your workspace to “Dope Sheet” after baking, you’ll see that every frame keyframe is struck as below.
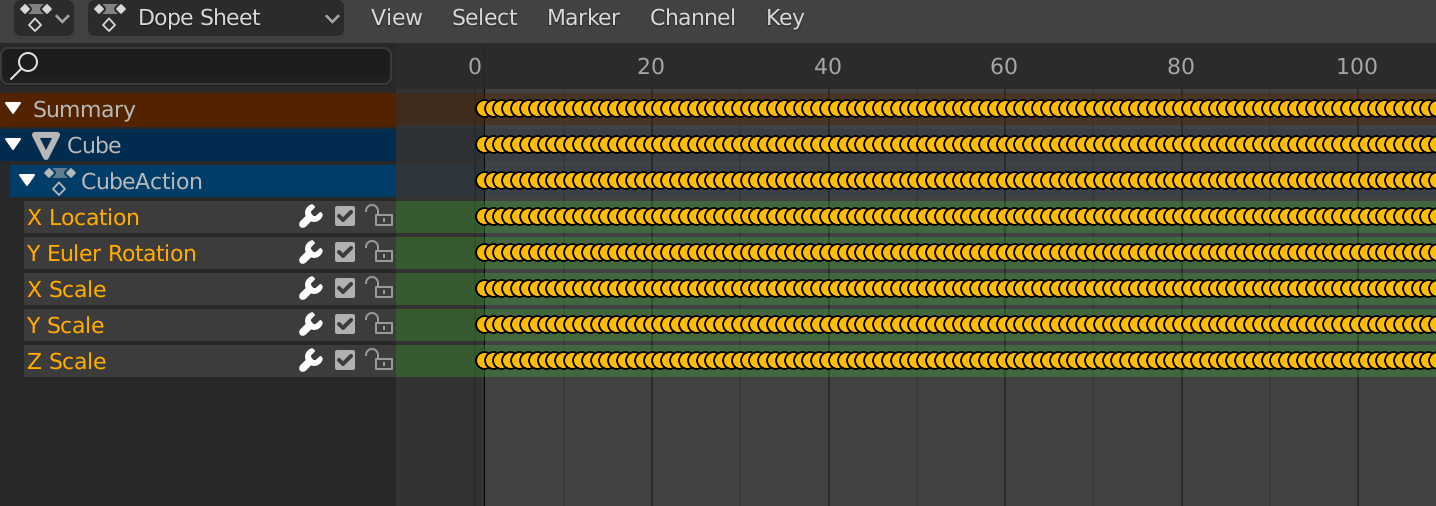
Dope Sheet
Export to glTF format
With the object selected, go to “Export” and select “glTF 2.0”.
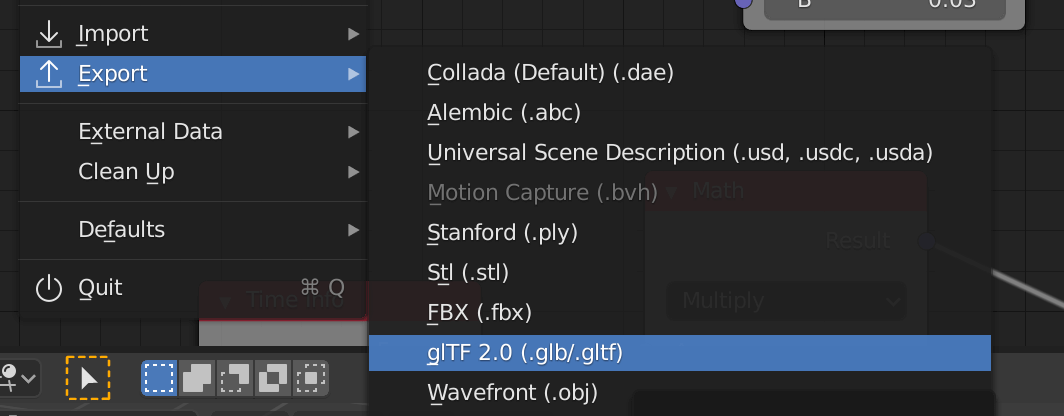
Export in glTF format
On the right side of the window that comes up, check the “Selected Objects” and “Animation” boxes and click “Export glTF”.
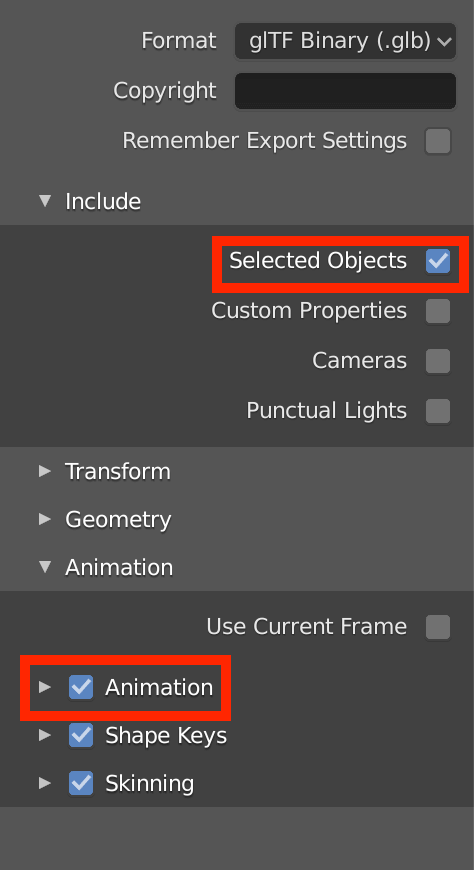
Export settings
Upload to STYLY
Upload your 3D model to STYLY.
Create a STYLY account
How to create an account

How to upload a glTF file to STYLY
