Sculpting in Blender
Sculpting is a method of creating 3D models, and it is characterized by the fact that it can be done like kneading clay.
The function is very easy to use, but it can also cause polygon clutter if you use sculpting to create a lot of deformation and organic models.
![[Introduction to Blender] Basic Sculpting Operations](https://styly.cc/wp-content/uploads/2022/02/eyecatch-160x160.png)
The add-on introduced in this article, “Volume Preserving Smoothing,” is useful in such cases.
This add-on was created by bartoszstyperek, whose add-on “Hair Tool” was previously introduced in STYLY MAGAZINE.
![[DAZ Studio] (3) Making hair with Hair Tool for Blender (first half)](https://styly.cc/wp-content/uploads/2021/02/eyecatch_Ht1-160x160.png)
![[DAZ Studio] (3) Making hair with Hair Tool for Blender (latter half)](https://styly.cc/wp-content/uploads/2021/02/eyecatch_Ht2-160x160.png)
Let’s take a look at how to use it in detail.
Download and install Volume Preserving Smoothing
You can download it from Gumroad.
Please refer to our past articles for download instructions.
![[Introduction to Blender] How to download and install add-ons & 3 recommended add-on articles](https://styly.cc/wp-content/uploads/2021/07/IMG_9201-2-160x160.png)
As of March 2022, the price is $8.00.
Set the price to $8 or more when you download.
After entering the required fields, a file called vps_smoothing_2.52.zip will be downloaded.
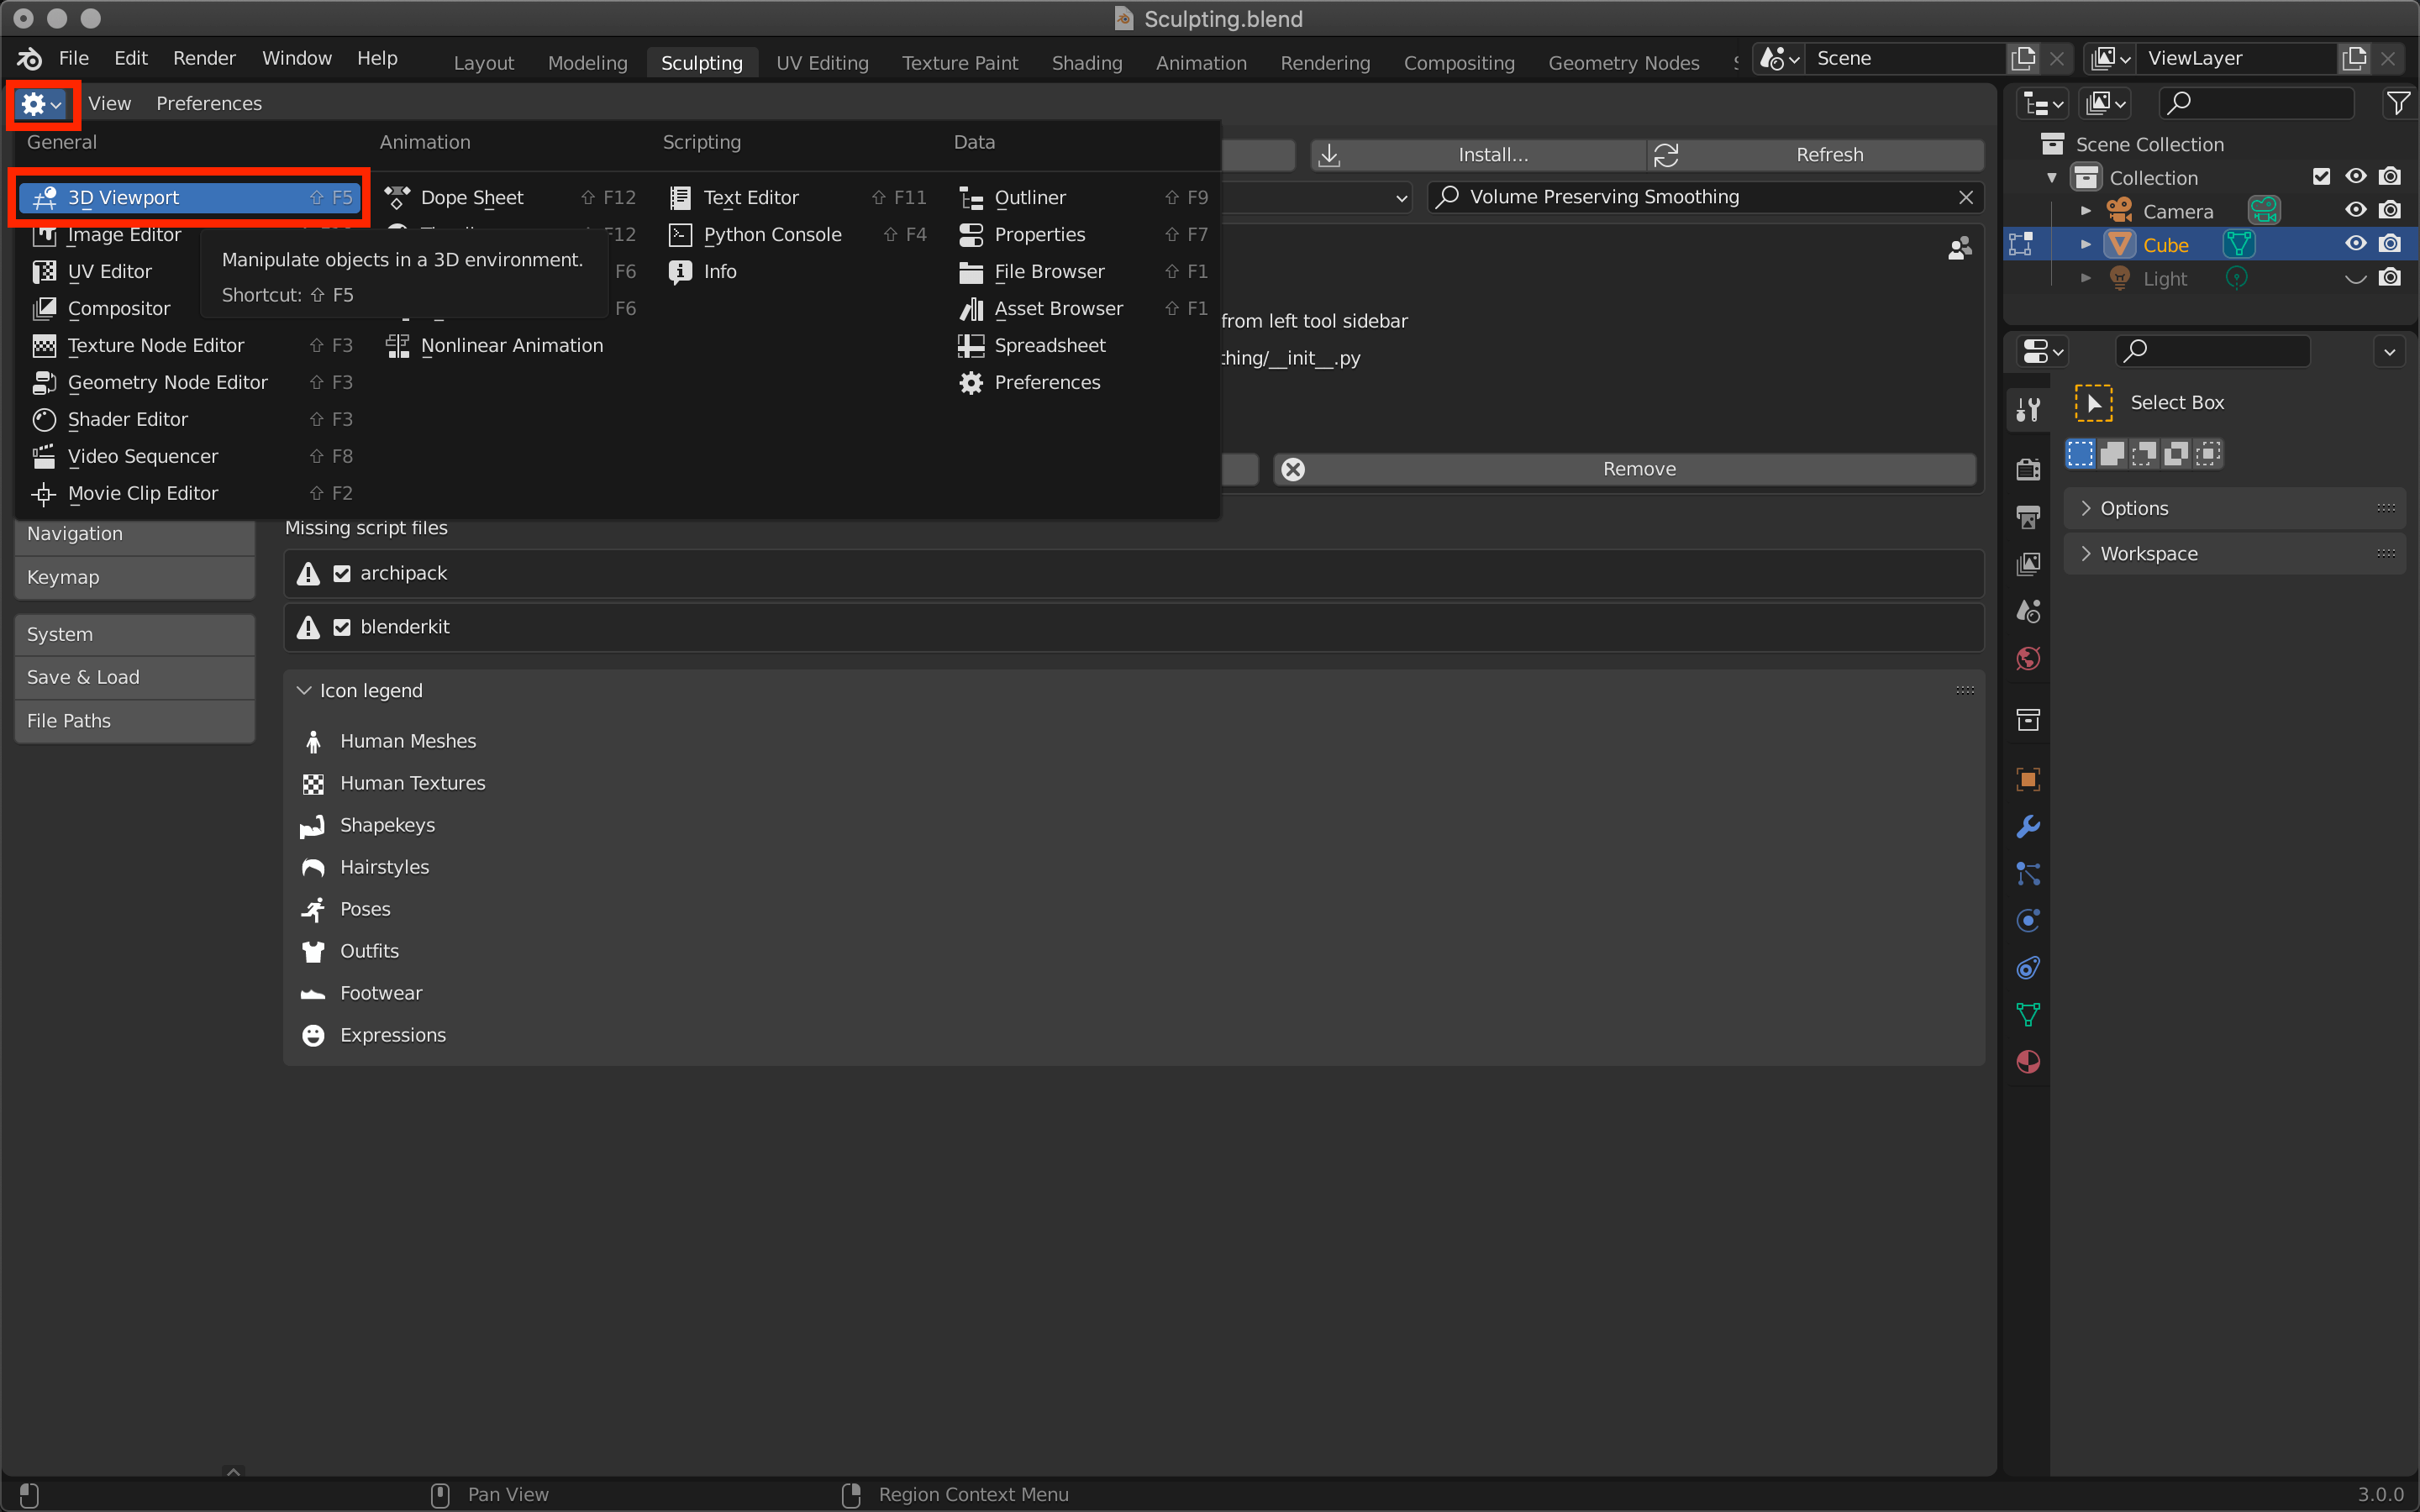
Then open Blender and click on Preferences from the icon in the upper left corner of the screen to go to the settings screen.
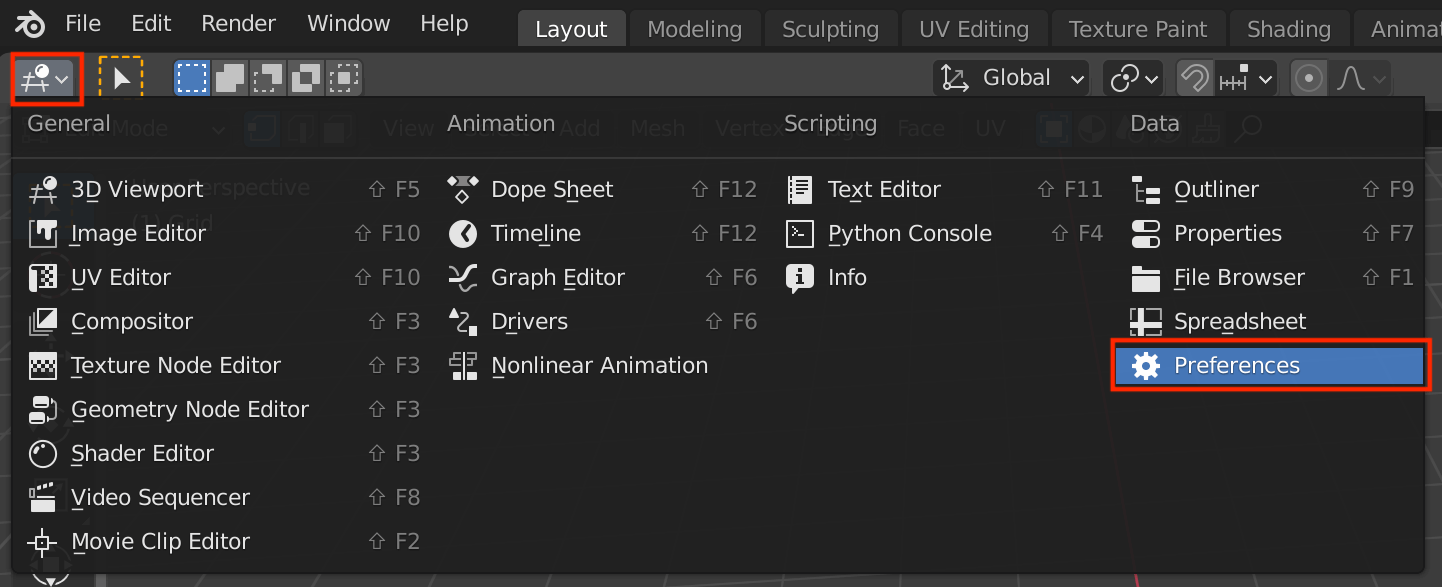
Preferences
Make sure the Add-on section is set and click the Install button.
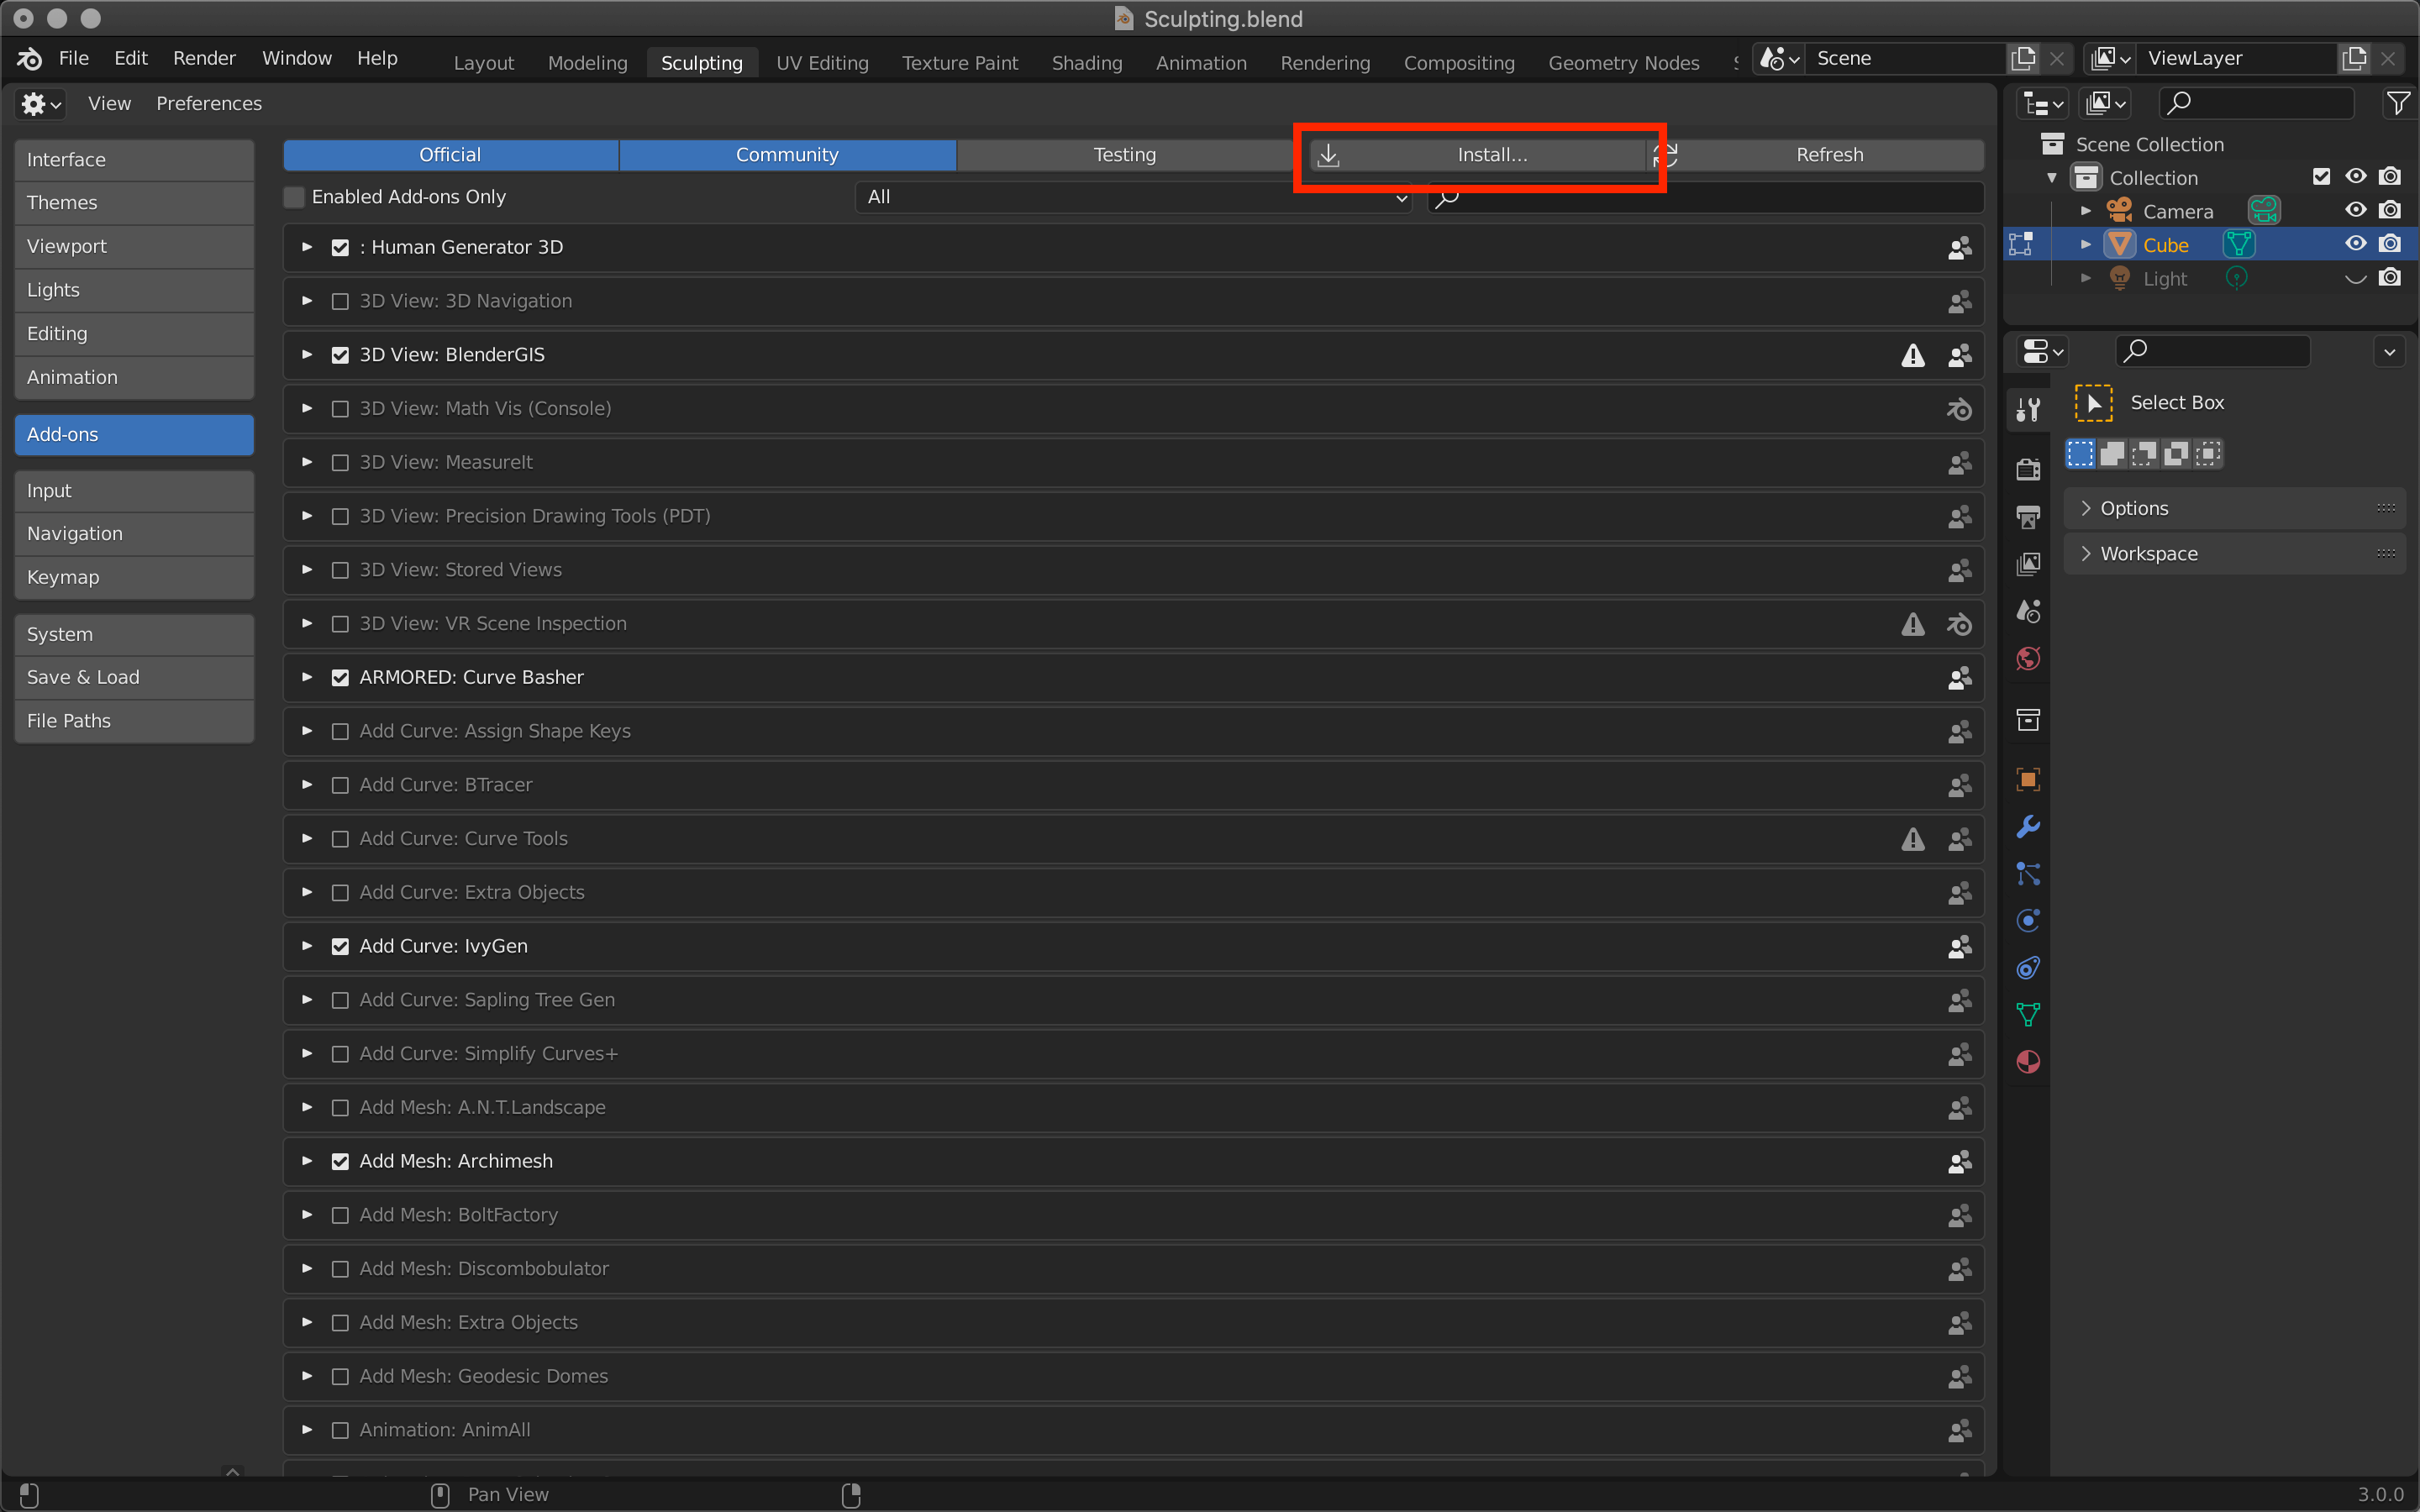
Click the Install button.
Select the downloaded ZIP and click Install Add-on to complete installation.
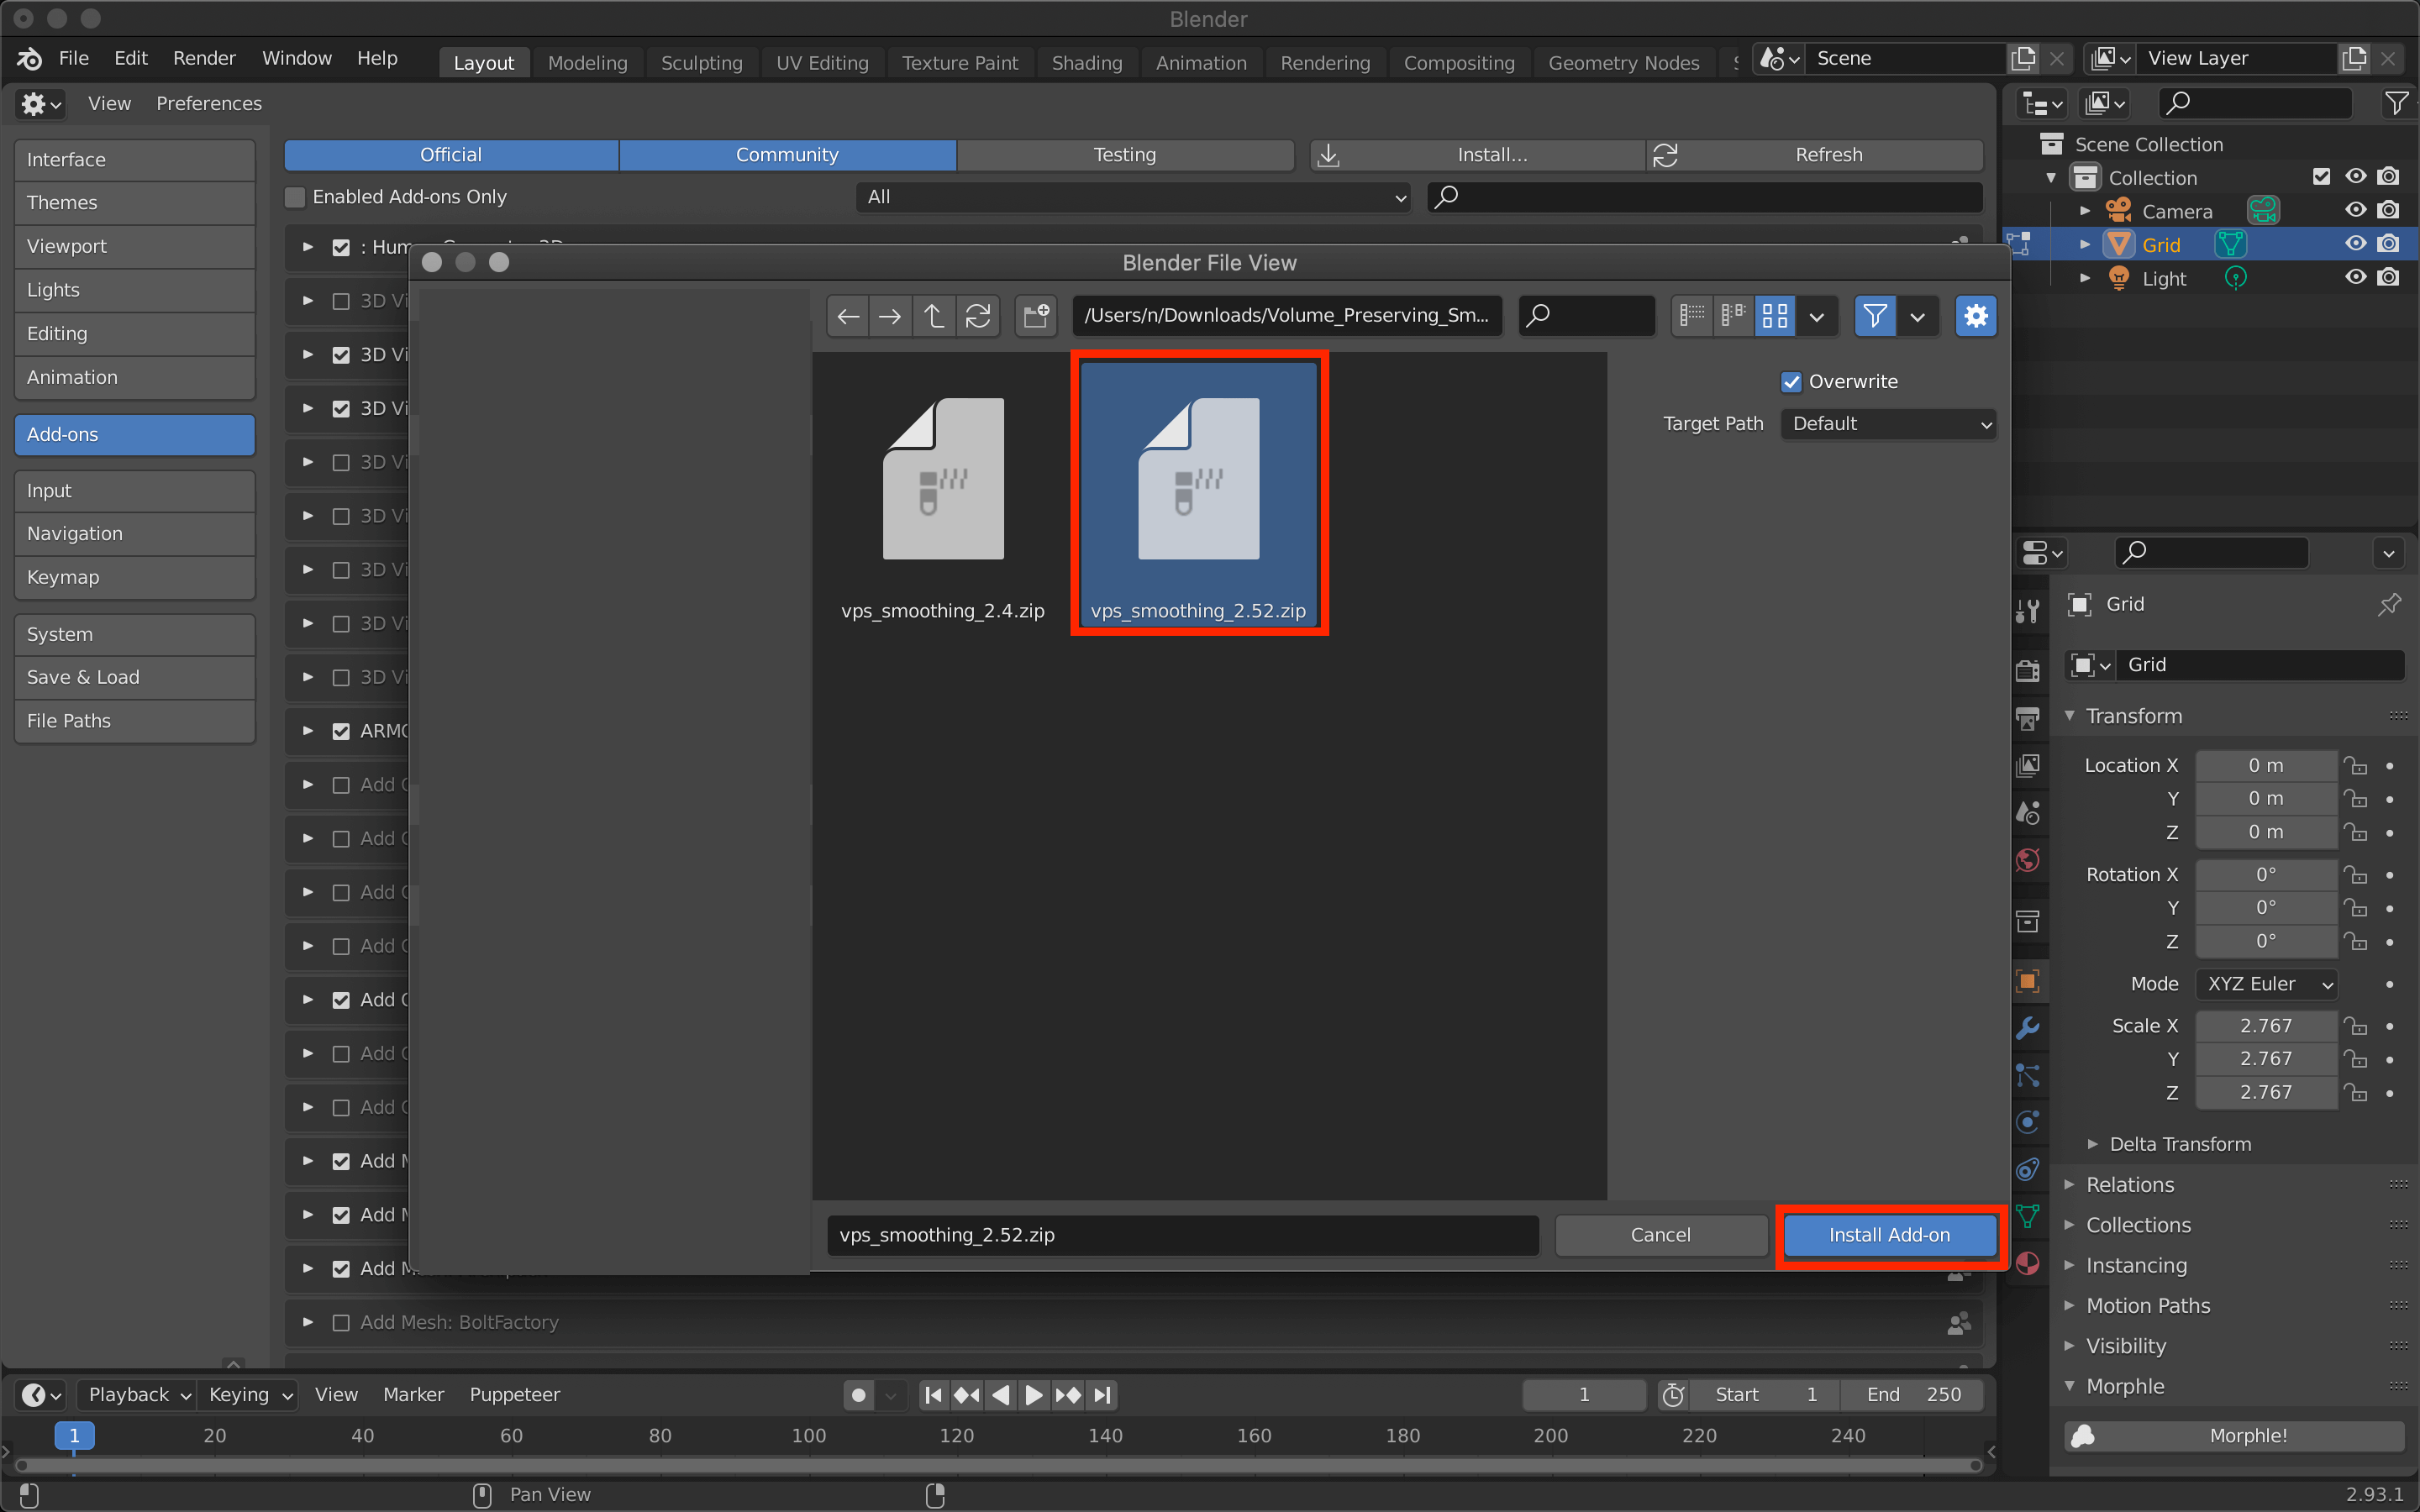
Click Install Add-on
The screen will automatically switch to show Volume Preserving Smoothing.
Please remember to check the checkbox and make sure it is activated.
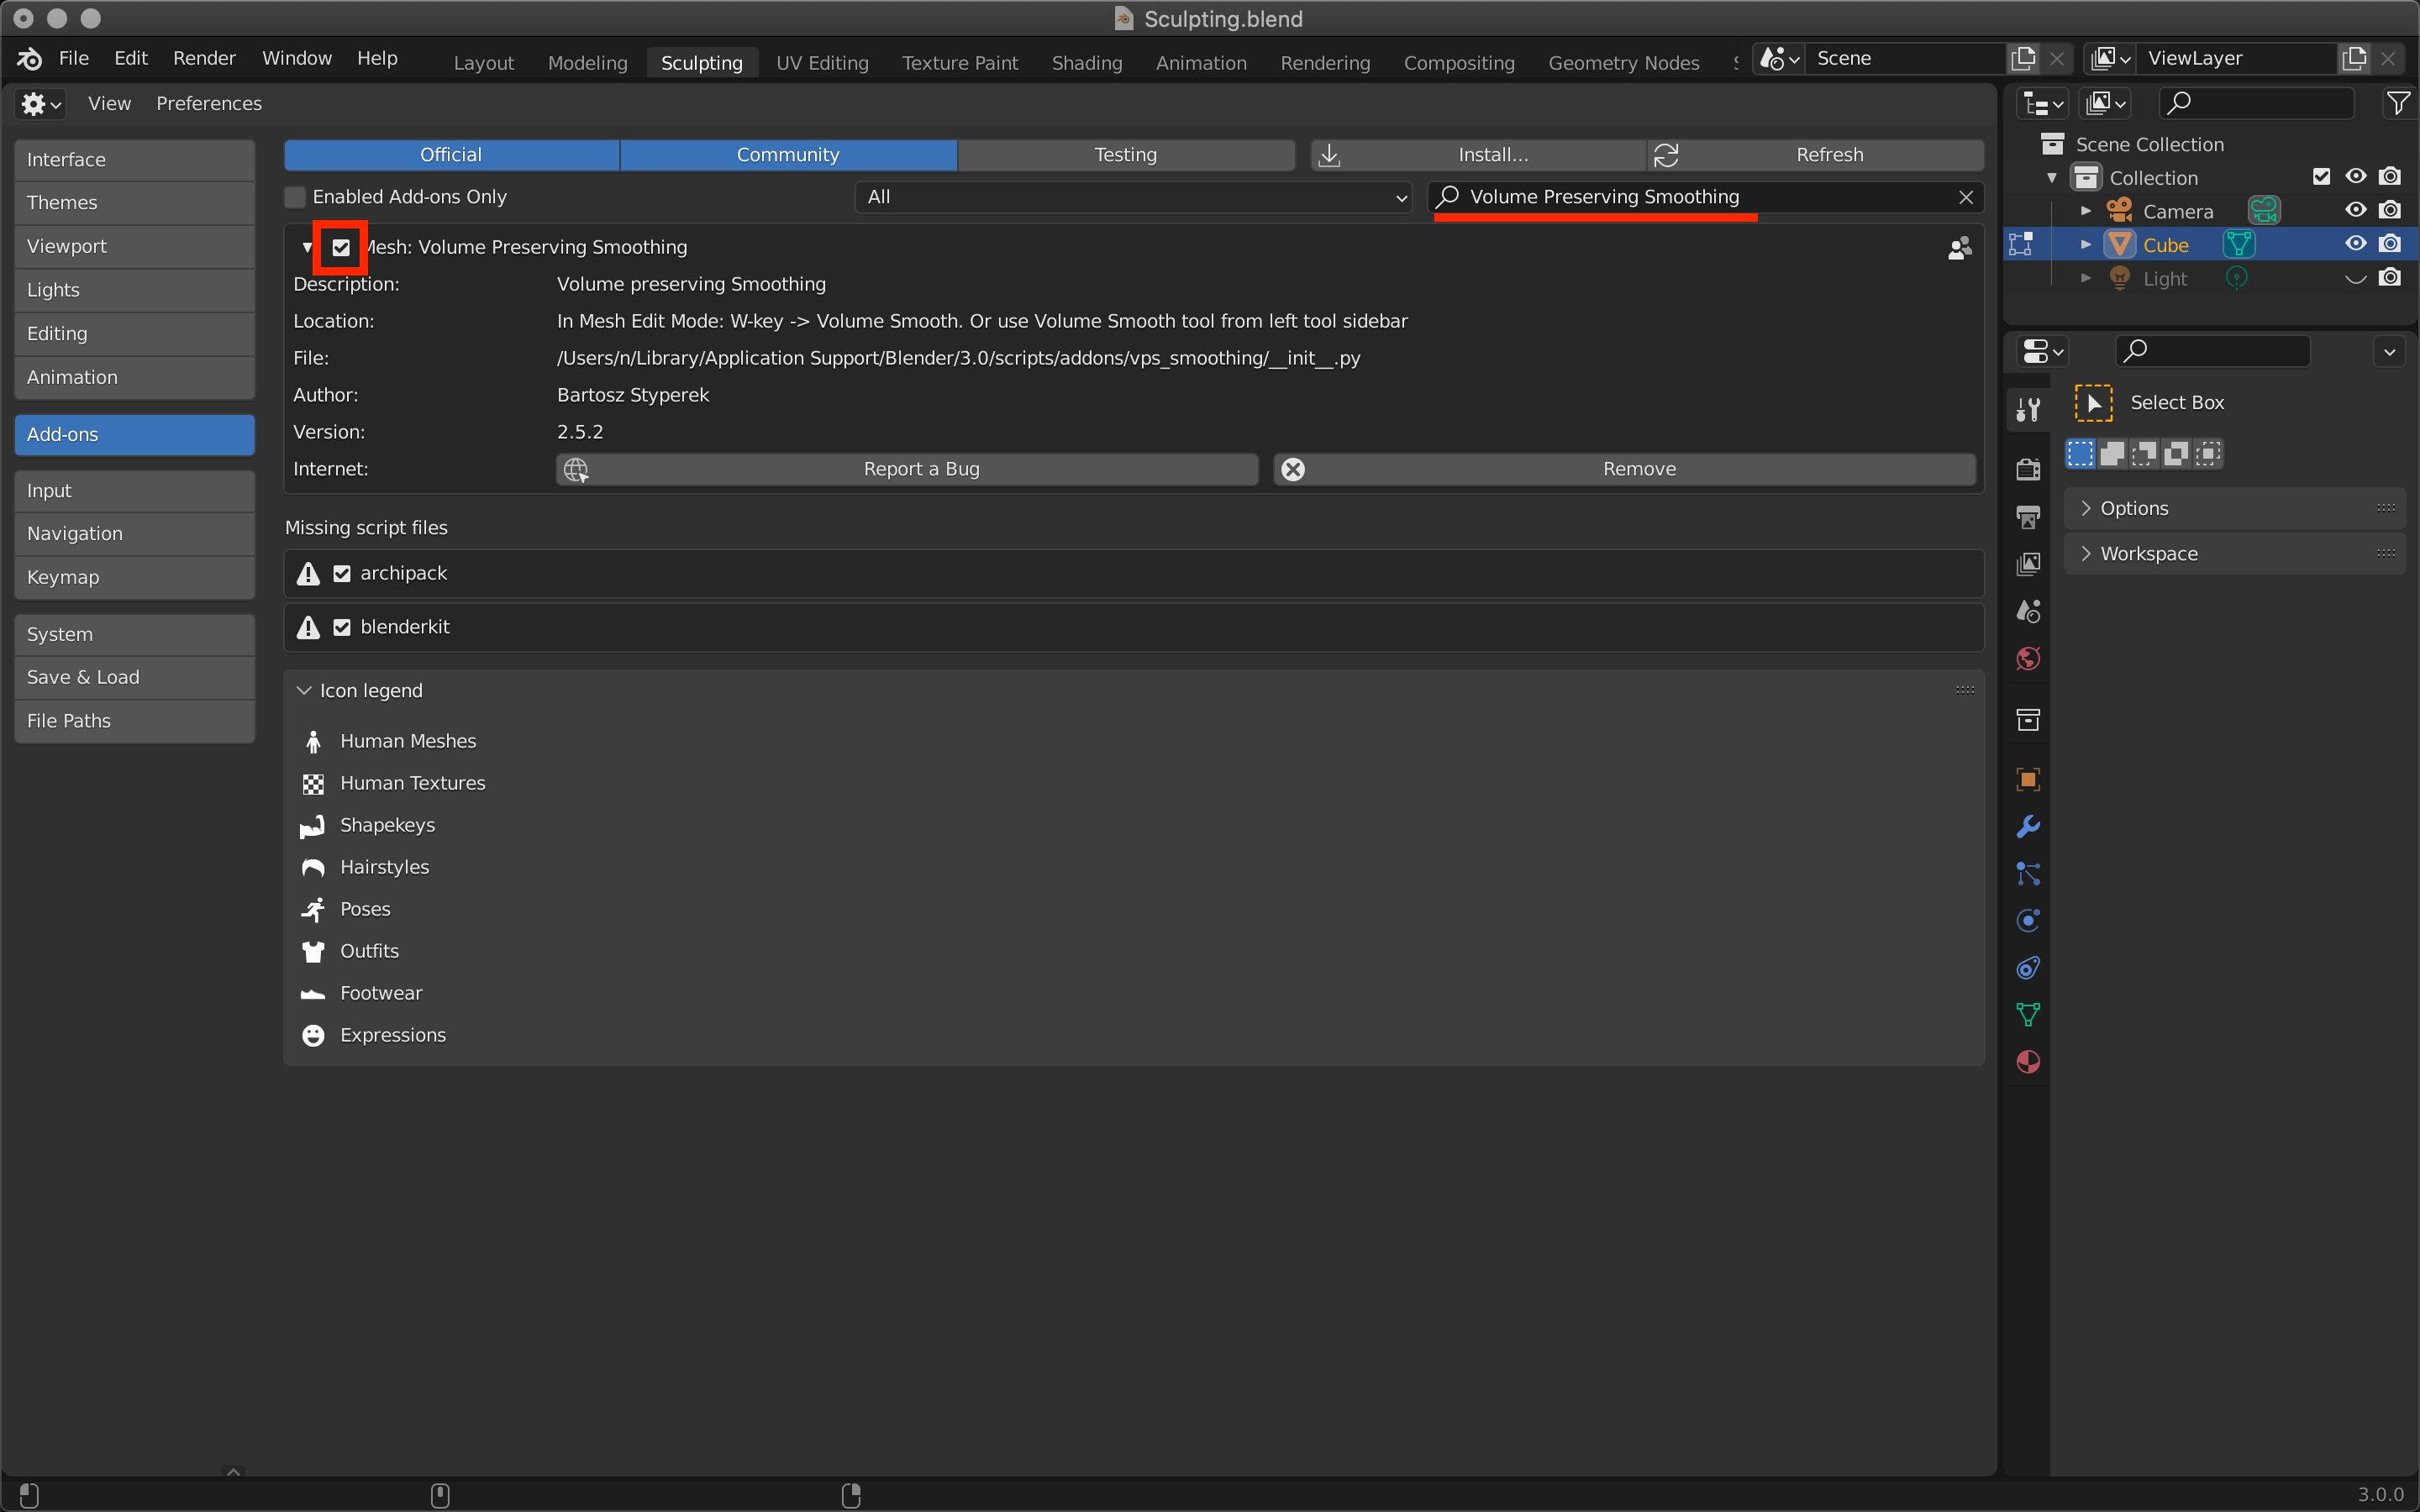
Make sure that it is activated.
Click the 3D Viewport button from the top left icon again to return to the screen
Let’s try Volume Preserving Smoothing!
It is easy to use.
First, prepare a model with disparate vertex positions.
Click the Object Mode button in the upper left corner of the screen to switch to Edit Mode.It is easy to use.
First, prepare a model with disparate vertex positions.
Click the Object Mode button in the upper left corner of the screen to switch to Edit Mode.

Edit Mode

Vertices are not in the correct position
Select multiple vertices to be fixed.
It is convenient to use the circle selection method.
Press the [C] key to display a circle around the cursor, and click and move the mouse to select all vertices in the circle at once.
The size of the circle can be changed with the mouse.
When all vertices are selected, right-click to cancel the circle selection function.

Circle Selection
Once selected, right-click and select the function you want to use from Mesh Smoothing at the bottom of the menu list.
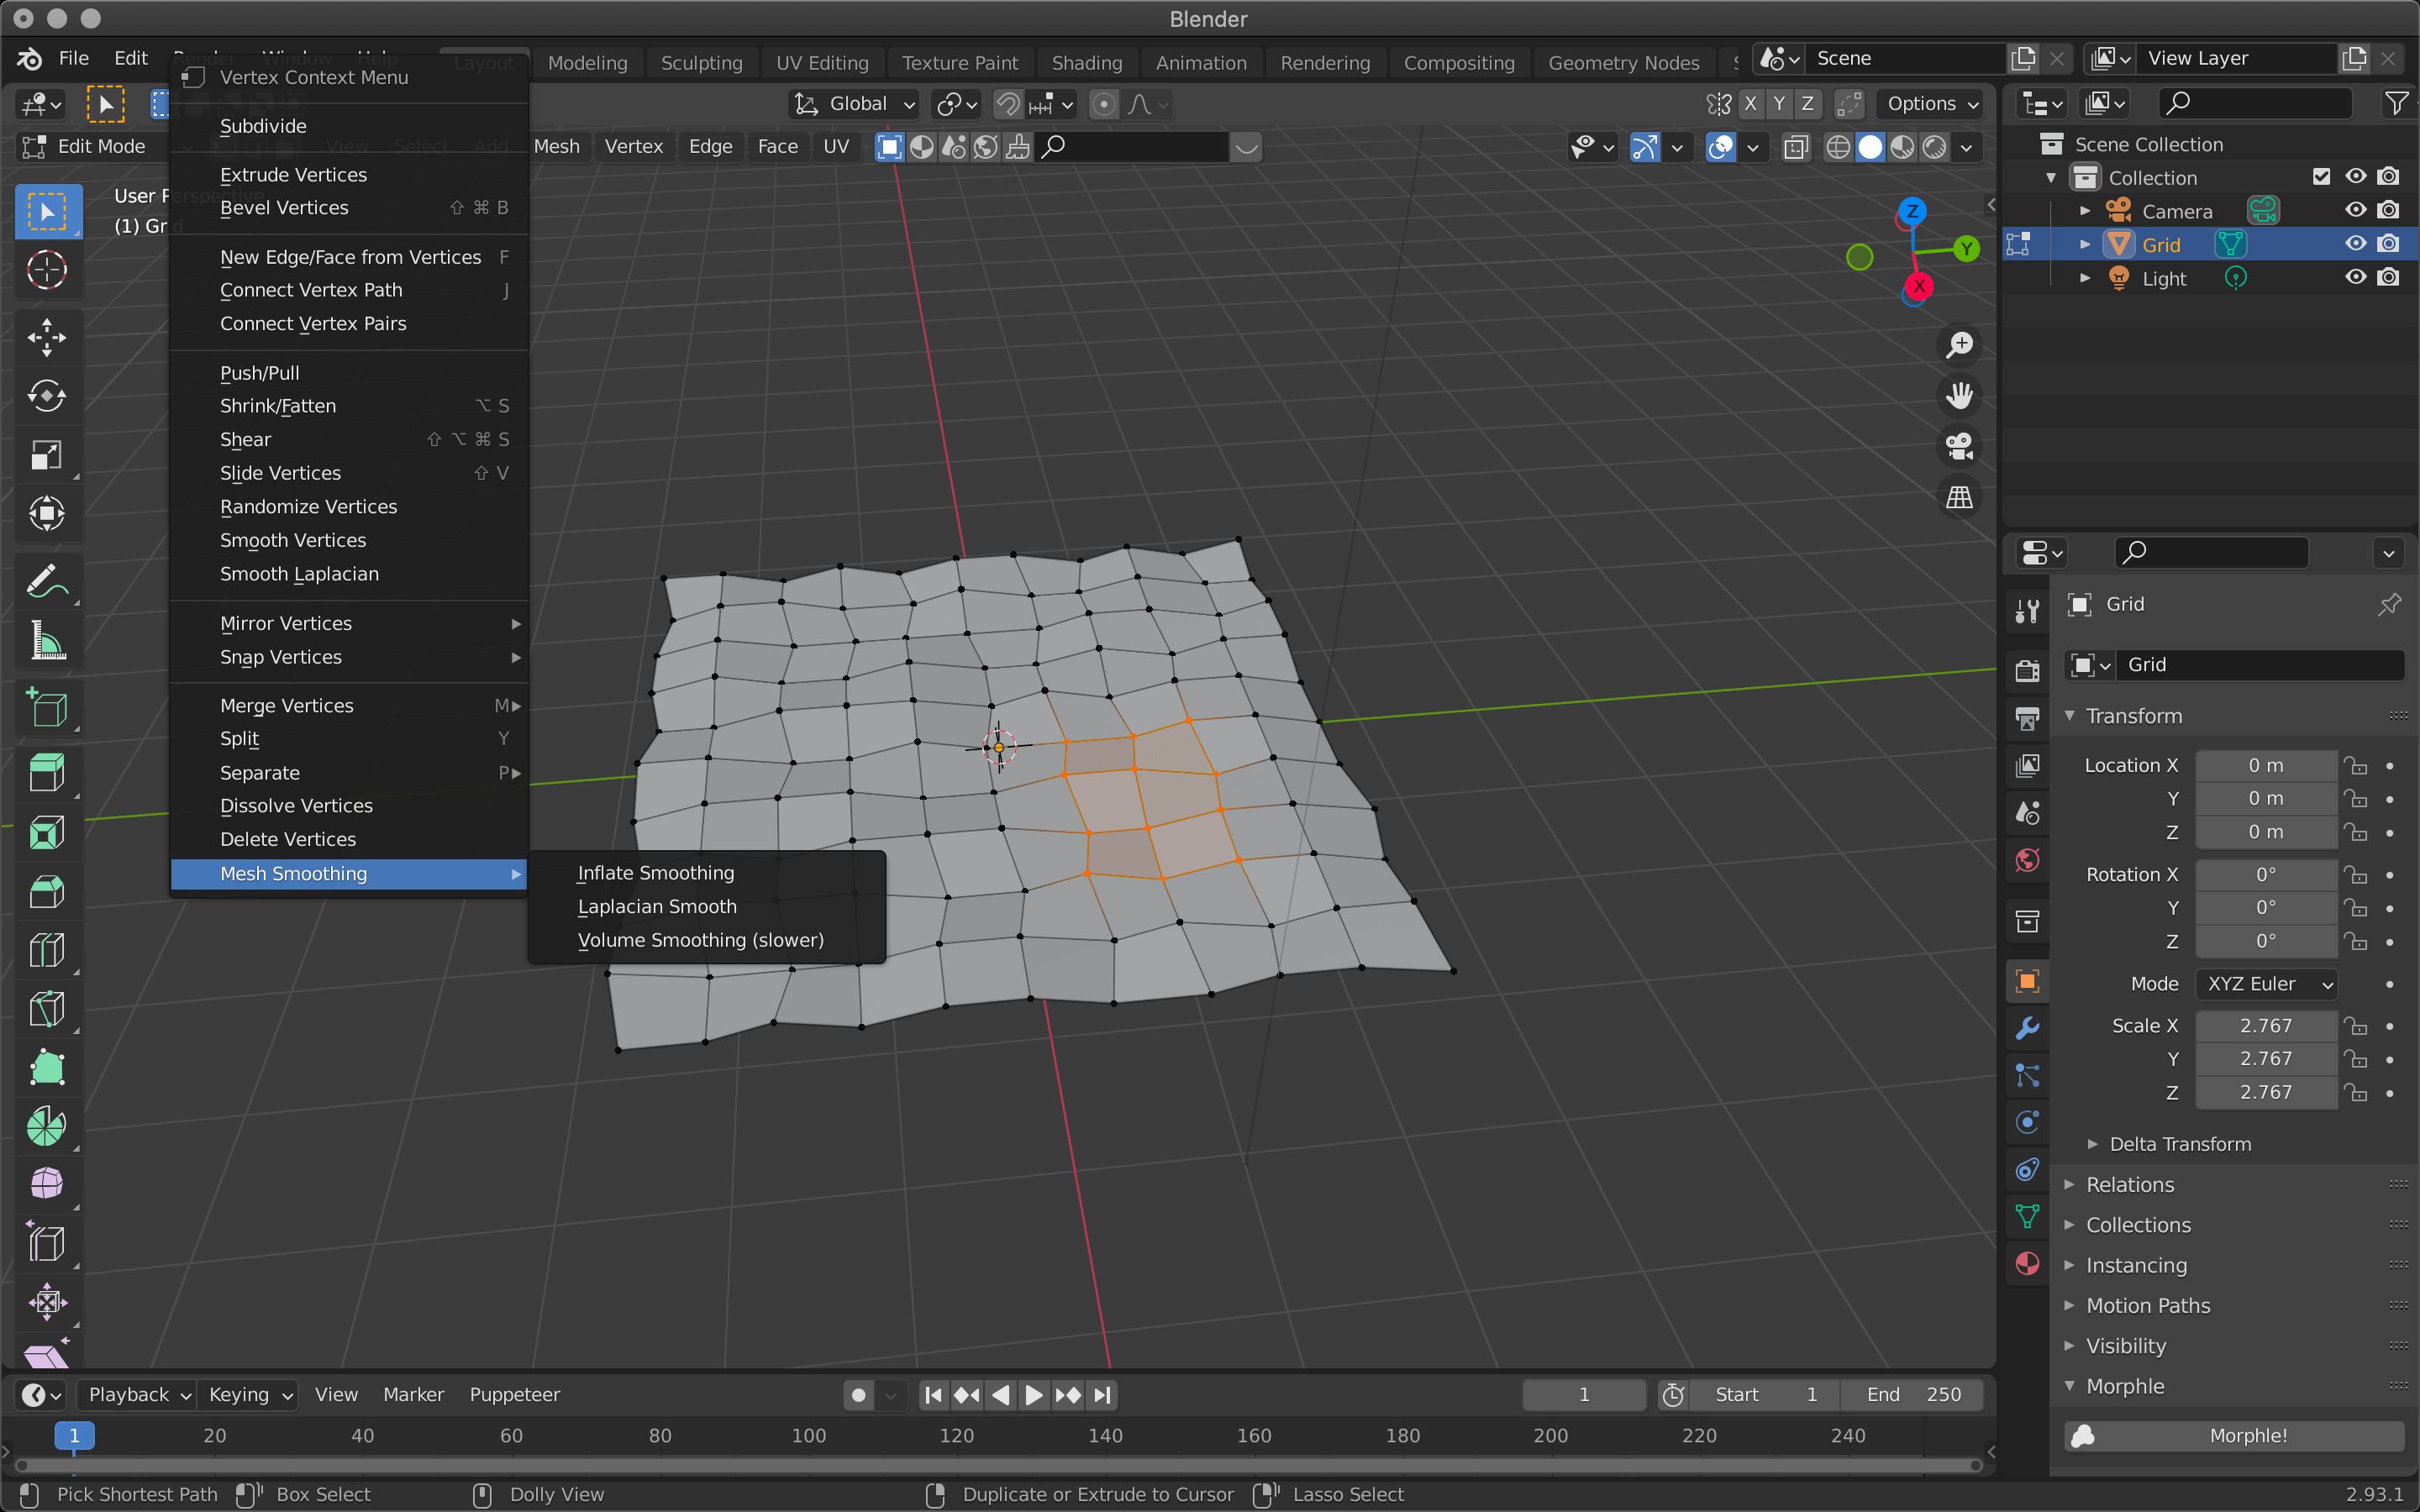
Mesh Smoothing
Mesh Smoothing Function List
Inflate Smoothing
| Smooth Amount | Amount of smooth applied |
| Iterations | Number of times the process is repeated |
| Inflate | Roughness of the surface |
| Normal Smooth | Normal Smooth |
| Tension ・Uniform ・ Inverse to edge length ・Proportional to edge length |
Tension ・Uniform ・Inverse to edge length ・Proportional to edge length |
| Sharp edge weight | Vertex repositioning |
| Freeze border | Do not apply to model edges |
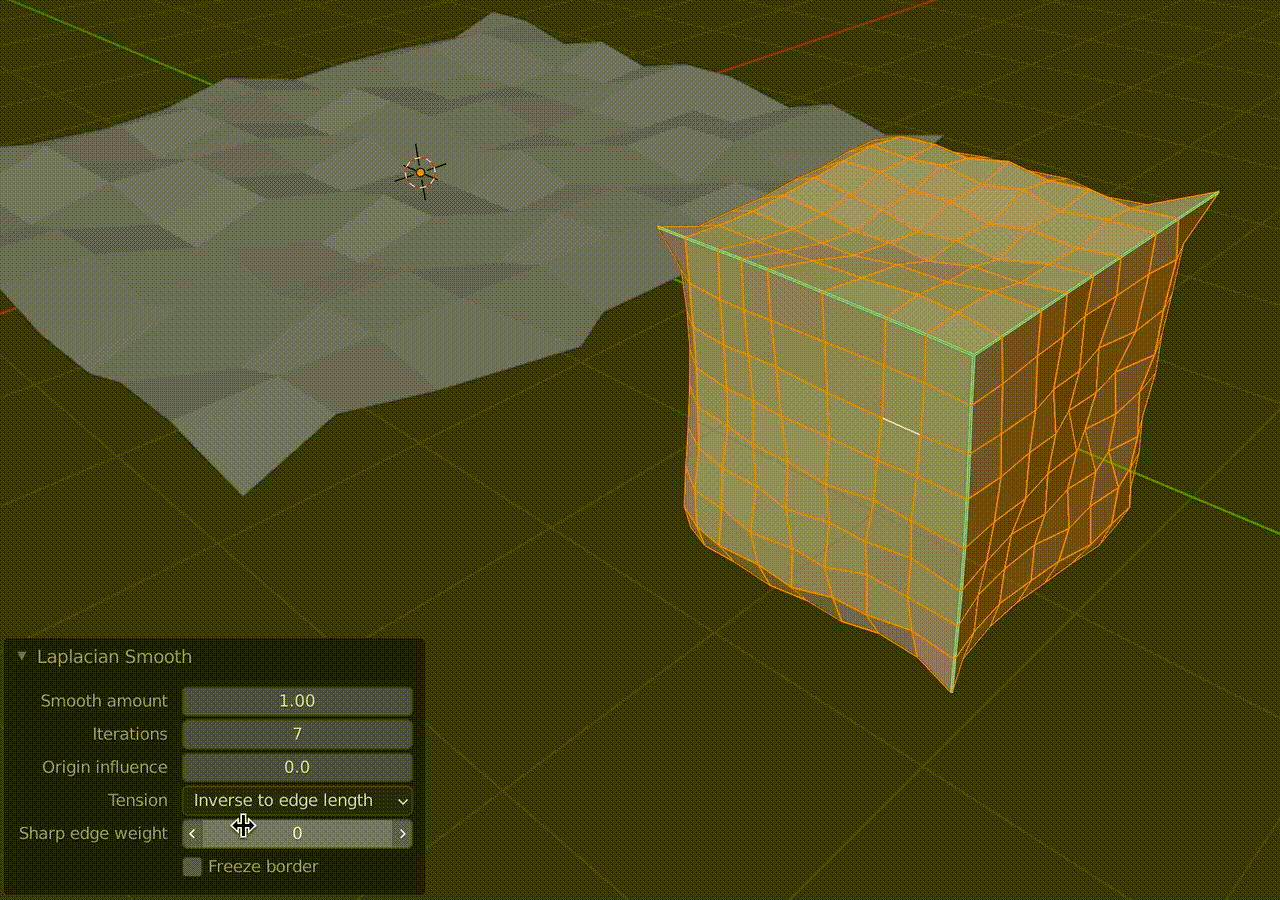
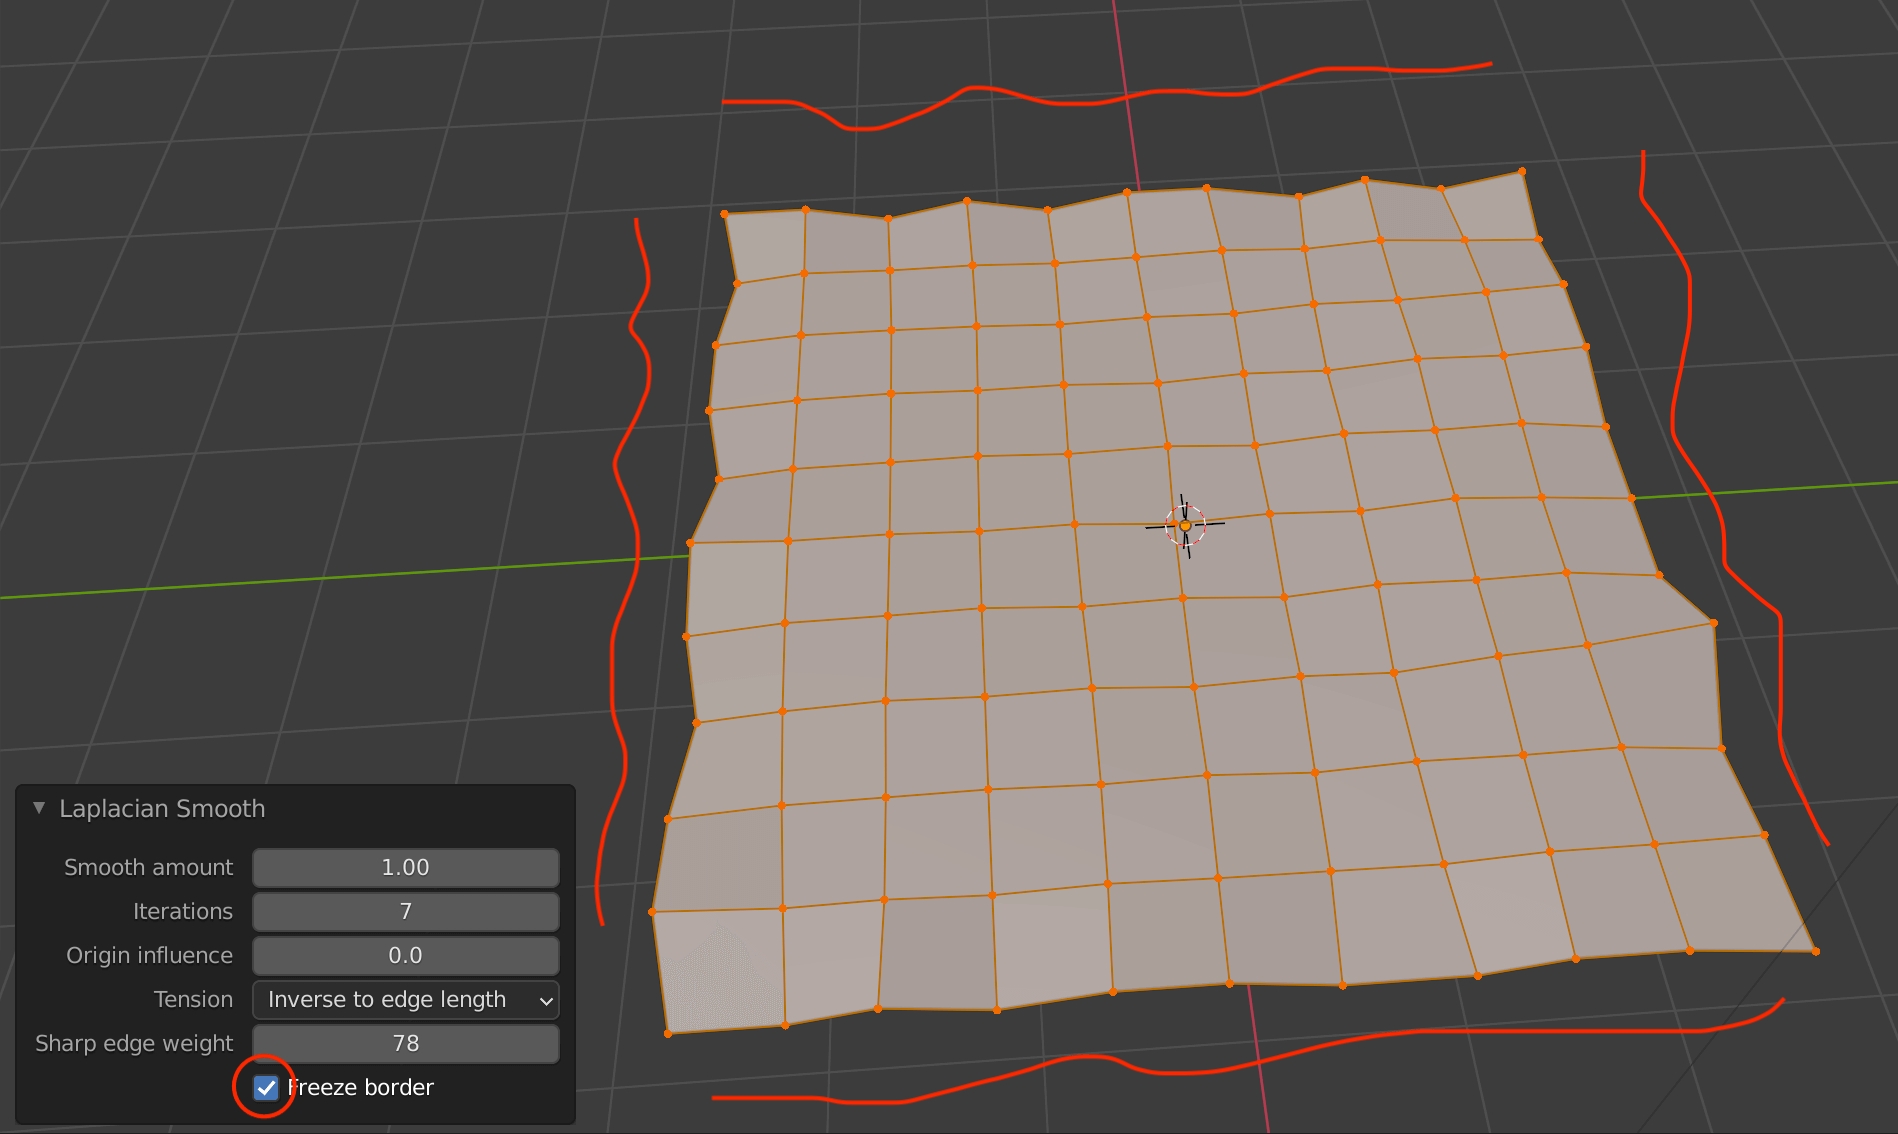
Laplacian Smooth
| Smooth Amount | Amount of smooth applied |
| Iterations | Number of process iterations |
| Origin Influence | Influence of the vertex position before processing |
| Tension ・Uniform ・ Inverse to edge length ・Proportional to edge length |
Tension ・Uniform ・Opposed to edge length ・Proportional to edge length |
| Sharp edge weight | Vertex repositioning |
| Freeze border | Do not apply to model edges |
Volume Smoothing (slower)
| Smooth Amount | Amount of smooth applied |
| Iterations | Number of iterations |
| Tension ・Uniform ・ Inverse to edge length ・Proportional to edge length |
Tension ・Uniform ・Opposed to edge length ・Proportional to edge length |
| Sharp edge weight | Vertex repositioning |
| Freeze border | Do not apply to model edges |
| Normal Smooth | Normal smooth |
| Inflate | Surface roughness |
Detailed description of functions
Iterations
After selecting one of the functions, you can apply smoothing by increasing the value of Iterations in the menu at the lower left of the screen.
As shown in the comparison below, with a value of 9, each vertex is moved to an equal position.

Iterations value of 1
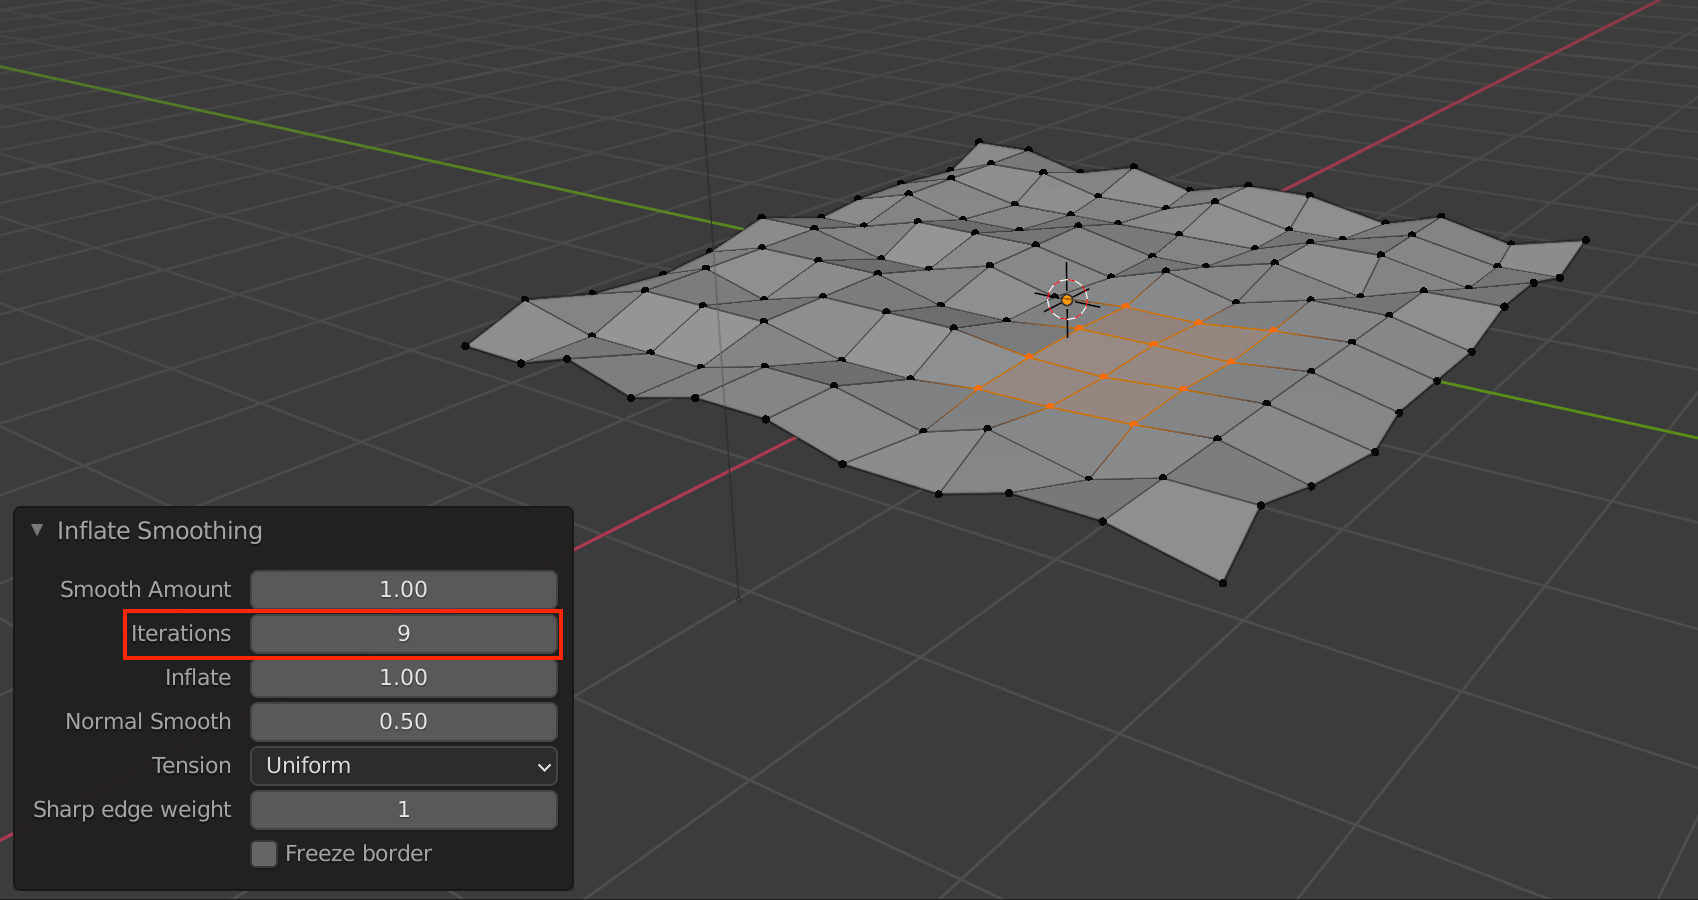
Iterations value of 9
Sharp edge weight
This function can be used when the edge of a three-dimensional object is determined by the Make Sharp function.
To use the Make Sharp function, first click the edge selection icon in the upper left corner of the screen, then select an edge of an object such as a cube.
Then right-click and select Make Shape from the menu to create the edges of the model.
![(You can loop-select adjacent edges by holding down the [Option] key ([Alt] key in Windows) and clicking on one edge at a time.](https://styly.cc/wp-content/uploads/2022/02/Sharp.gif)
(You can loop-select adjacent edges by holding down the [Option] key ([Alt] key in Windows) and clicking on one edge at a time.
In this state, use [A] key to select all → Mesh Smoothing and increase the value of Sharp edge weight to move the vertices located in the edge-like shape applied to the Shape.
If you look closely, you can see that the vertices are moving over the edge applied to the Shape.
Freese border
If this item is checked, it will not be applied to the edge of the model.

Smooth is applied to the edge (Freeze border off)
Edge edges are not moving (Freeze border on)