When creating a 3D model, in addition to extruding polygons, there is another method called sculpting.
In this article, I will sculpt a simple 3D model of a sheep using four commonly used brushes.
What is sculpting?
Sculpting is a feature that allows you to edit clay in Blender as if you were sculpting it with your own hands or using tools to make its surface uneven.
It can be used with various software other than Blender, such as other CG software and software dedicated to sculpting, and iPad and VR software that can be edited sensitively with a pen or controller as well as desktop software are appearing one after another.
Here is an article introducing ZBrush Core Mini, a free version of Zbrush.
This feature is ideal for modeling complex shapes with curves, such as animal bodies and human faces, and for creating fine details on organic objects.
Screen Switching
When you start Blender and select Sculpting from the menu at the very beginning, you will be presented with the most suitable screen for sculpting.
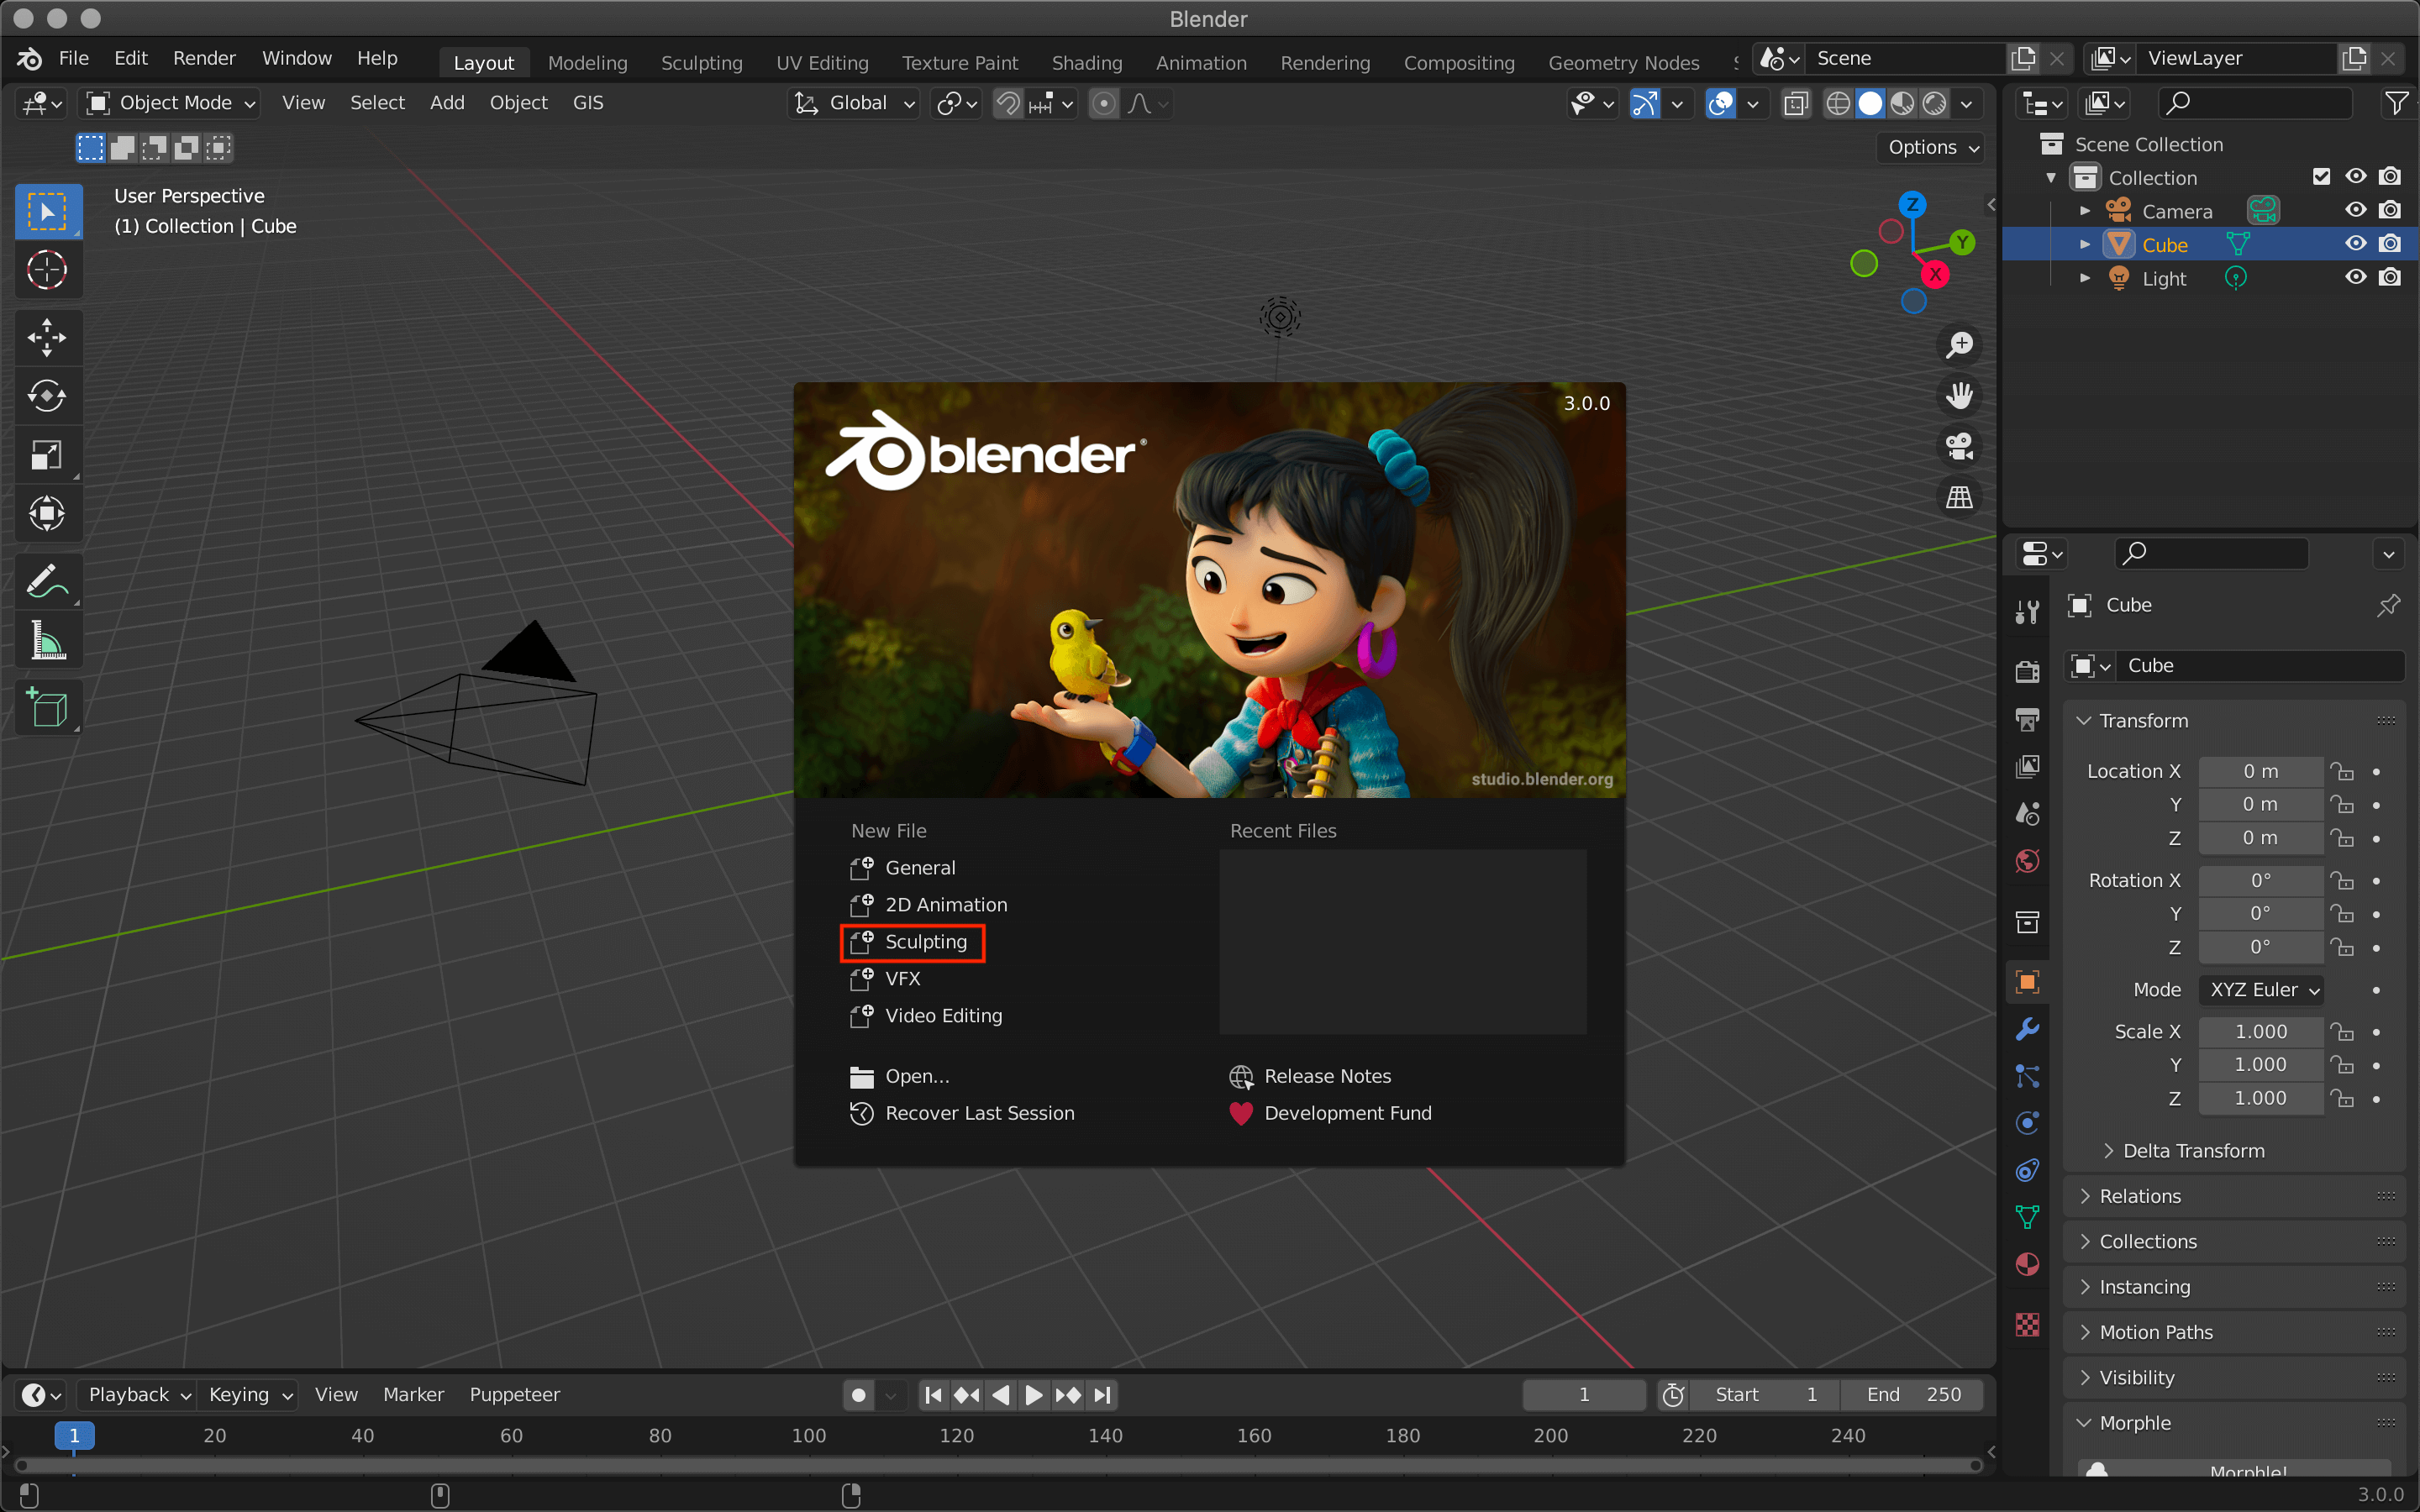
Sculpting
If you click on General, you can also use the sculpting feature from the tabs at the top.
Sculpting
Subdivision of the underlying object
When using the sculpting function, a basic foundation object is first required.
The sculpting function cannot be used without this process.
When modeling with clay, first knead a lump of clay to soften it and widen its movable range (≒ polygon subdivision of the object), and then shape it.
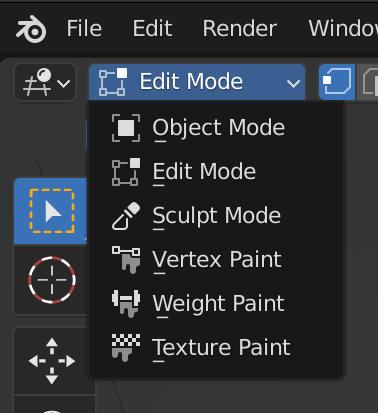
To subdivide an object, use the Tab key to switch to edit mode.
You can also use the buttons in the upper left corner of the screen.
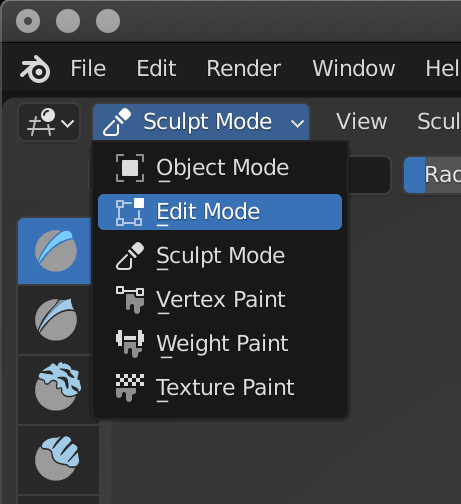
Switching between Edit Mode and Sculpt Mode
This time, the cube placed by default is used as the foundation object.
The object to be used as the foundation can be a sphere or cylinder for the face, or any other object depending on the final idea you want to create.
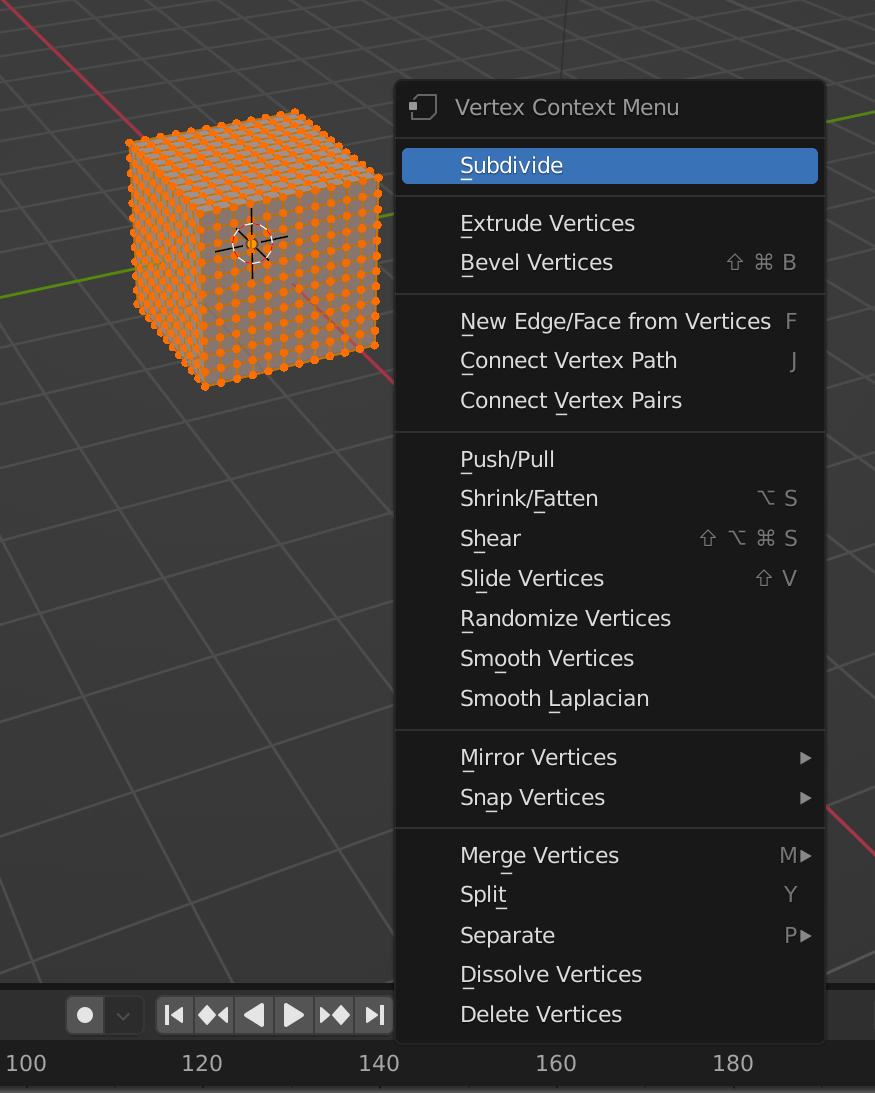
After switching to edit mode, with the cube still selected, right-click on it and select Subdivide.
Subdivide is a function to subdivide polygons.

Right-click→Subdivide
Change the value of “Number of Cuts” to 10 from the options menu in the lower left corner.
This parameter determines the degree of subdivision and can range from 1 to 10.

Number of Cuts

Change the value of Number of Cuts to 10
Once is not enough, so right-click again and select Subdivide.
Right click→Subdivide
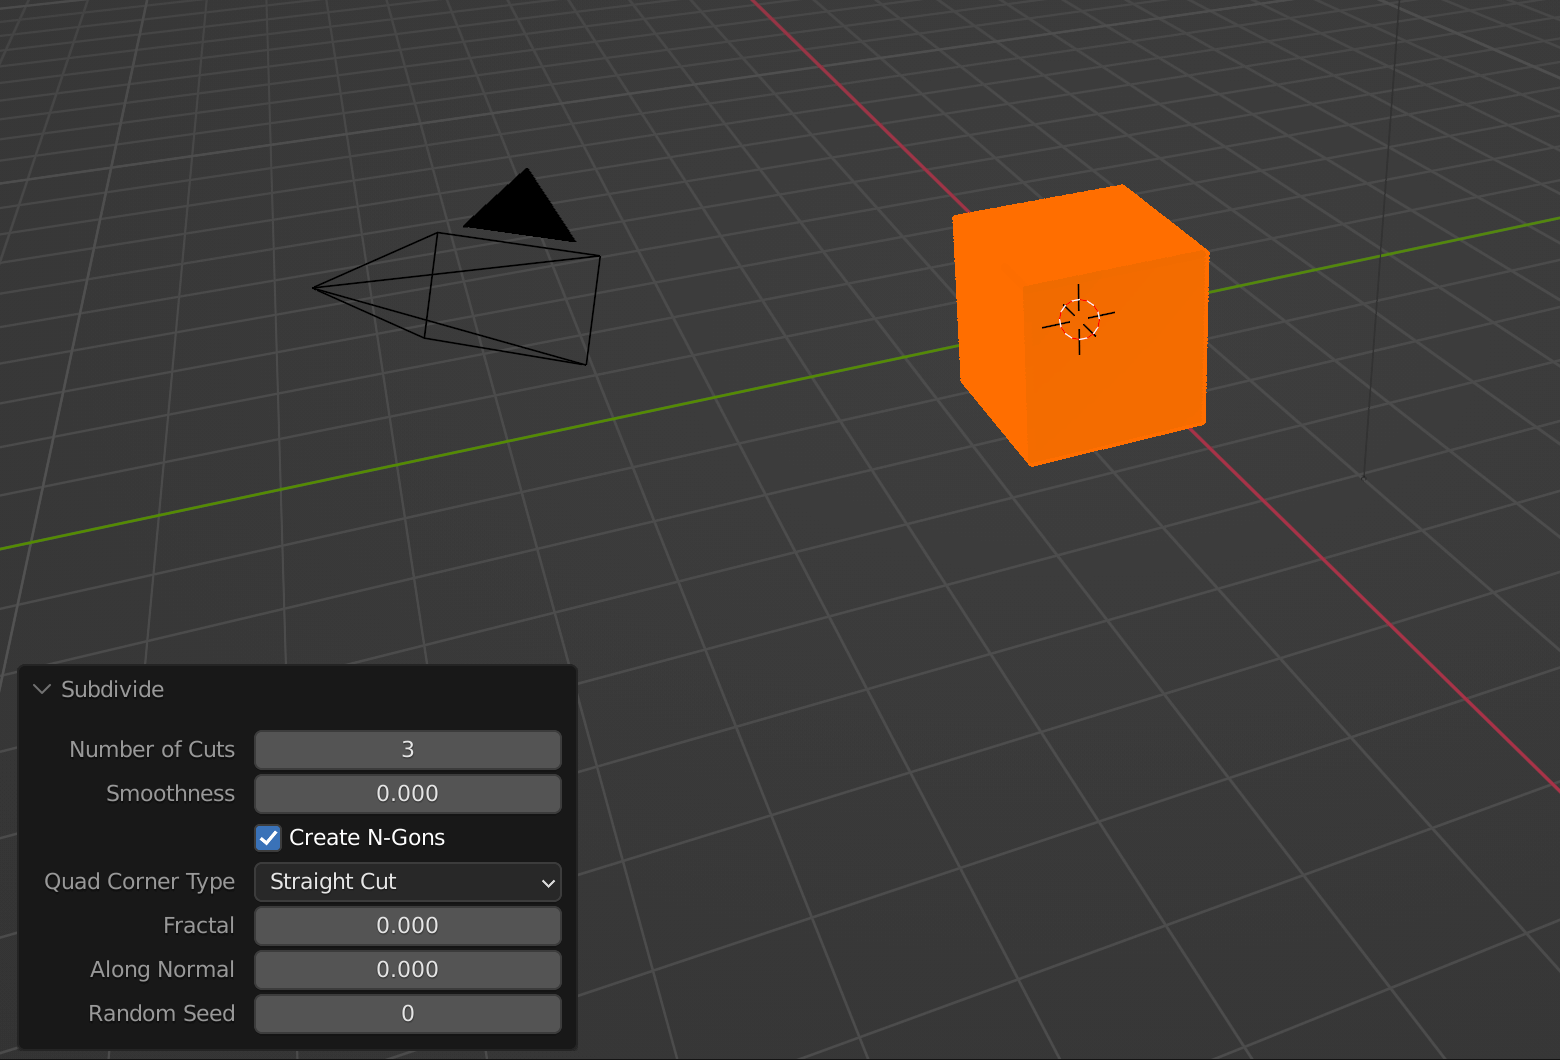
Number of Cuts set to 3
The more detailed the subdivision, the finer the detail sculpting can be, but be aware that this makes the data heavier and may cause it to freeze.
Now you are ready to go.
Sculpt mode screen explanation
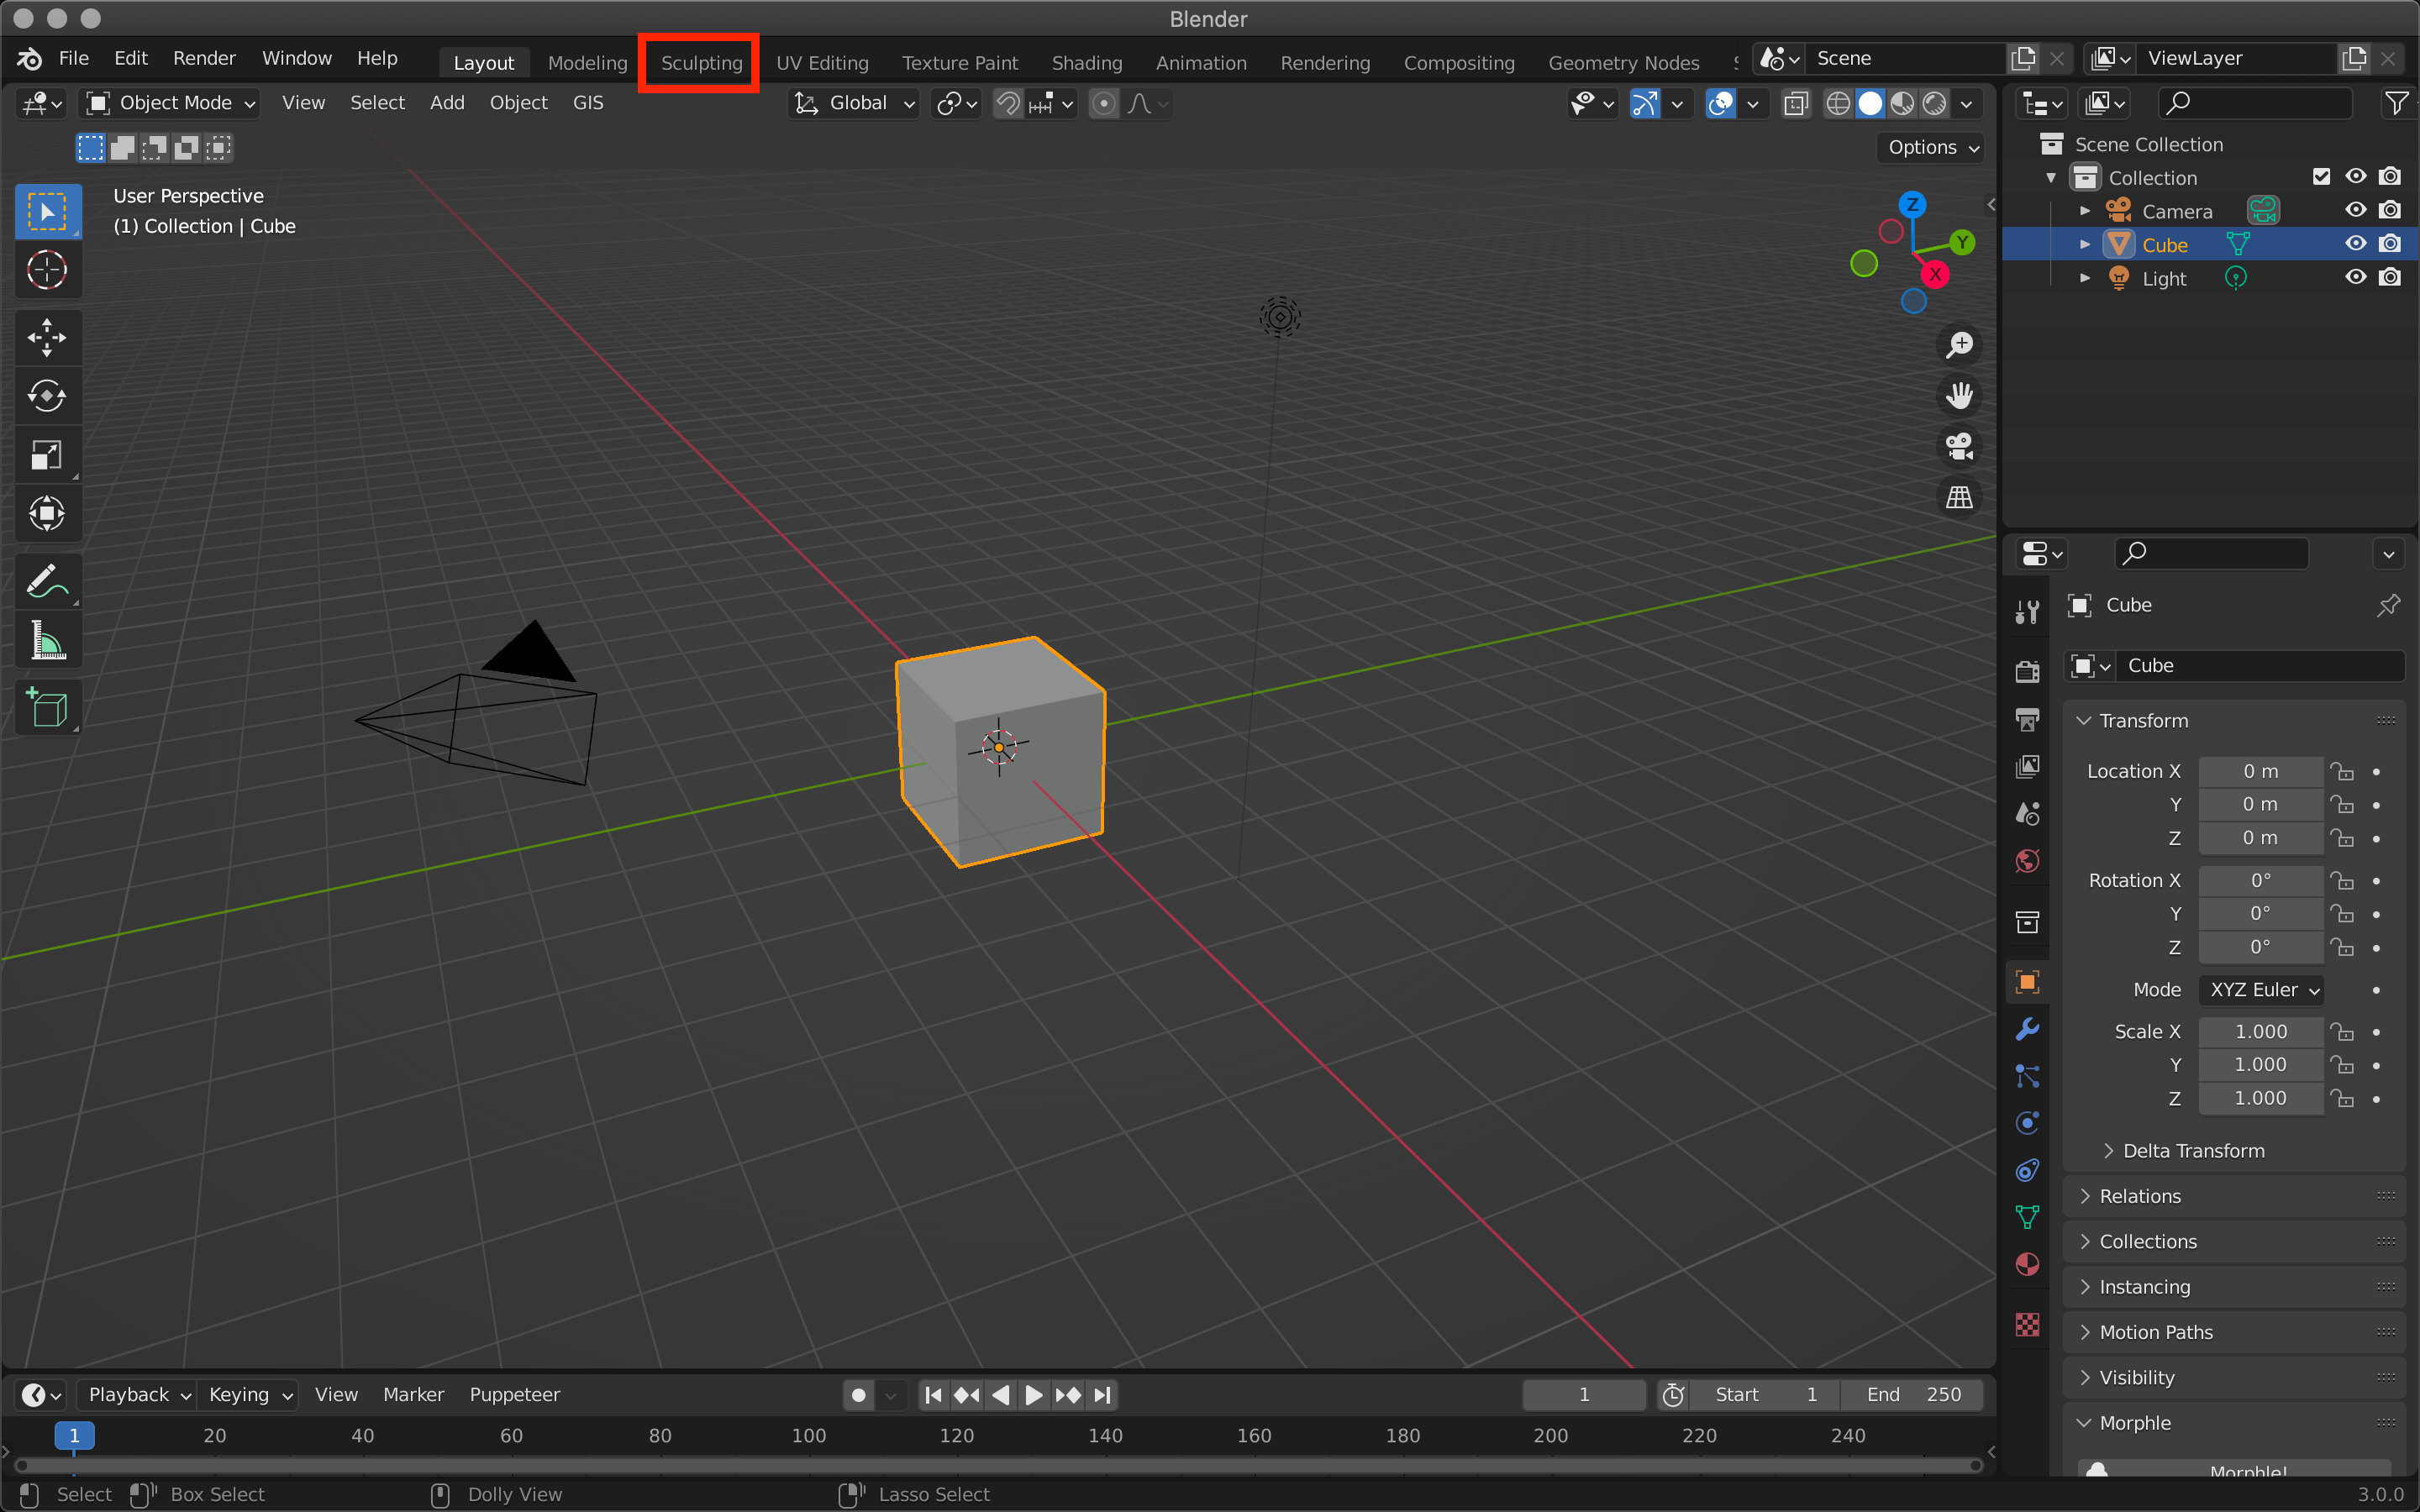
Switching to sculpt mode from the upper right corner of the screen, you will see a different set of icons and functions from the modeling and default screens.
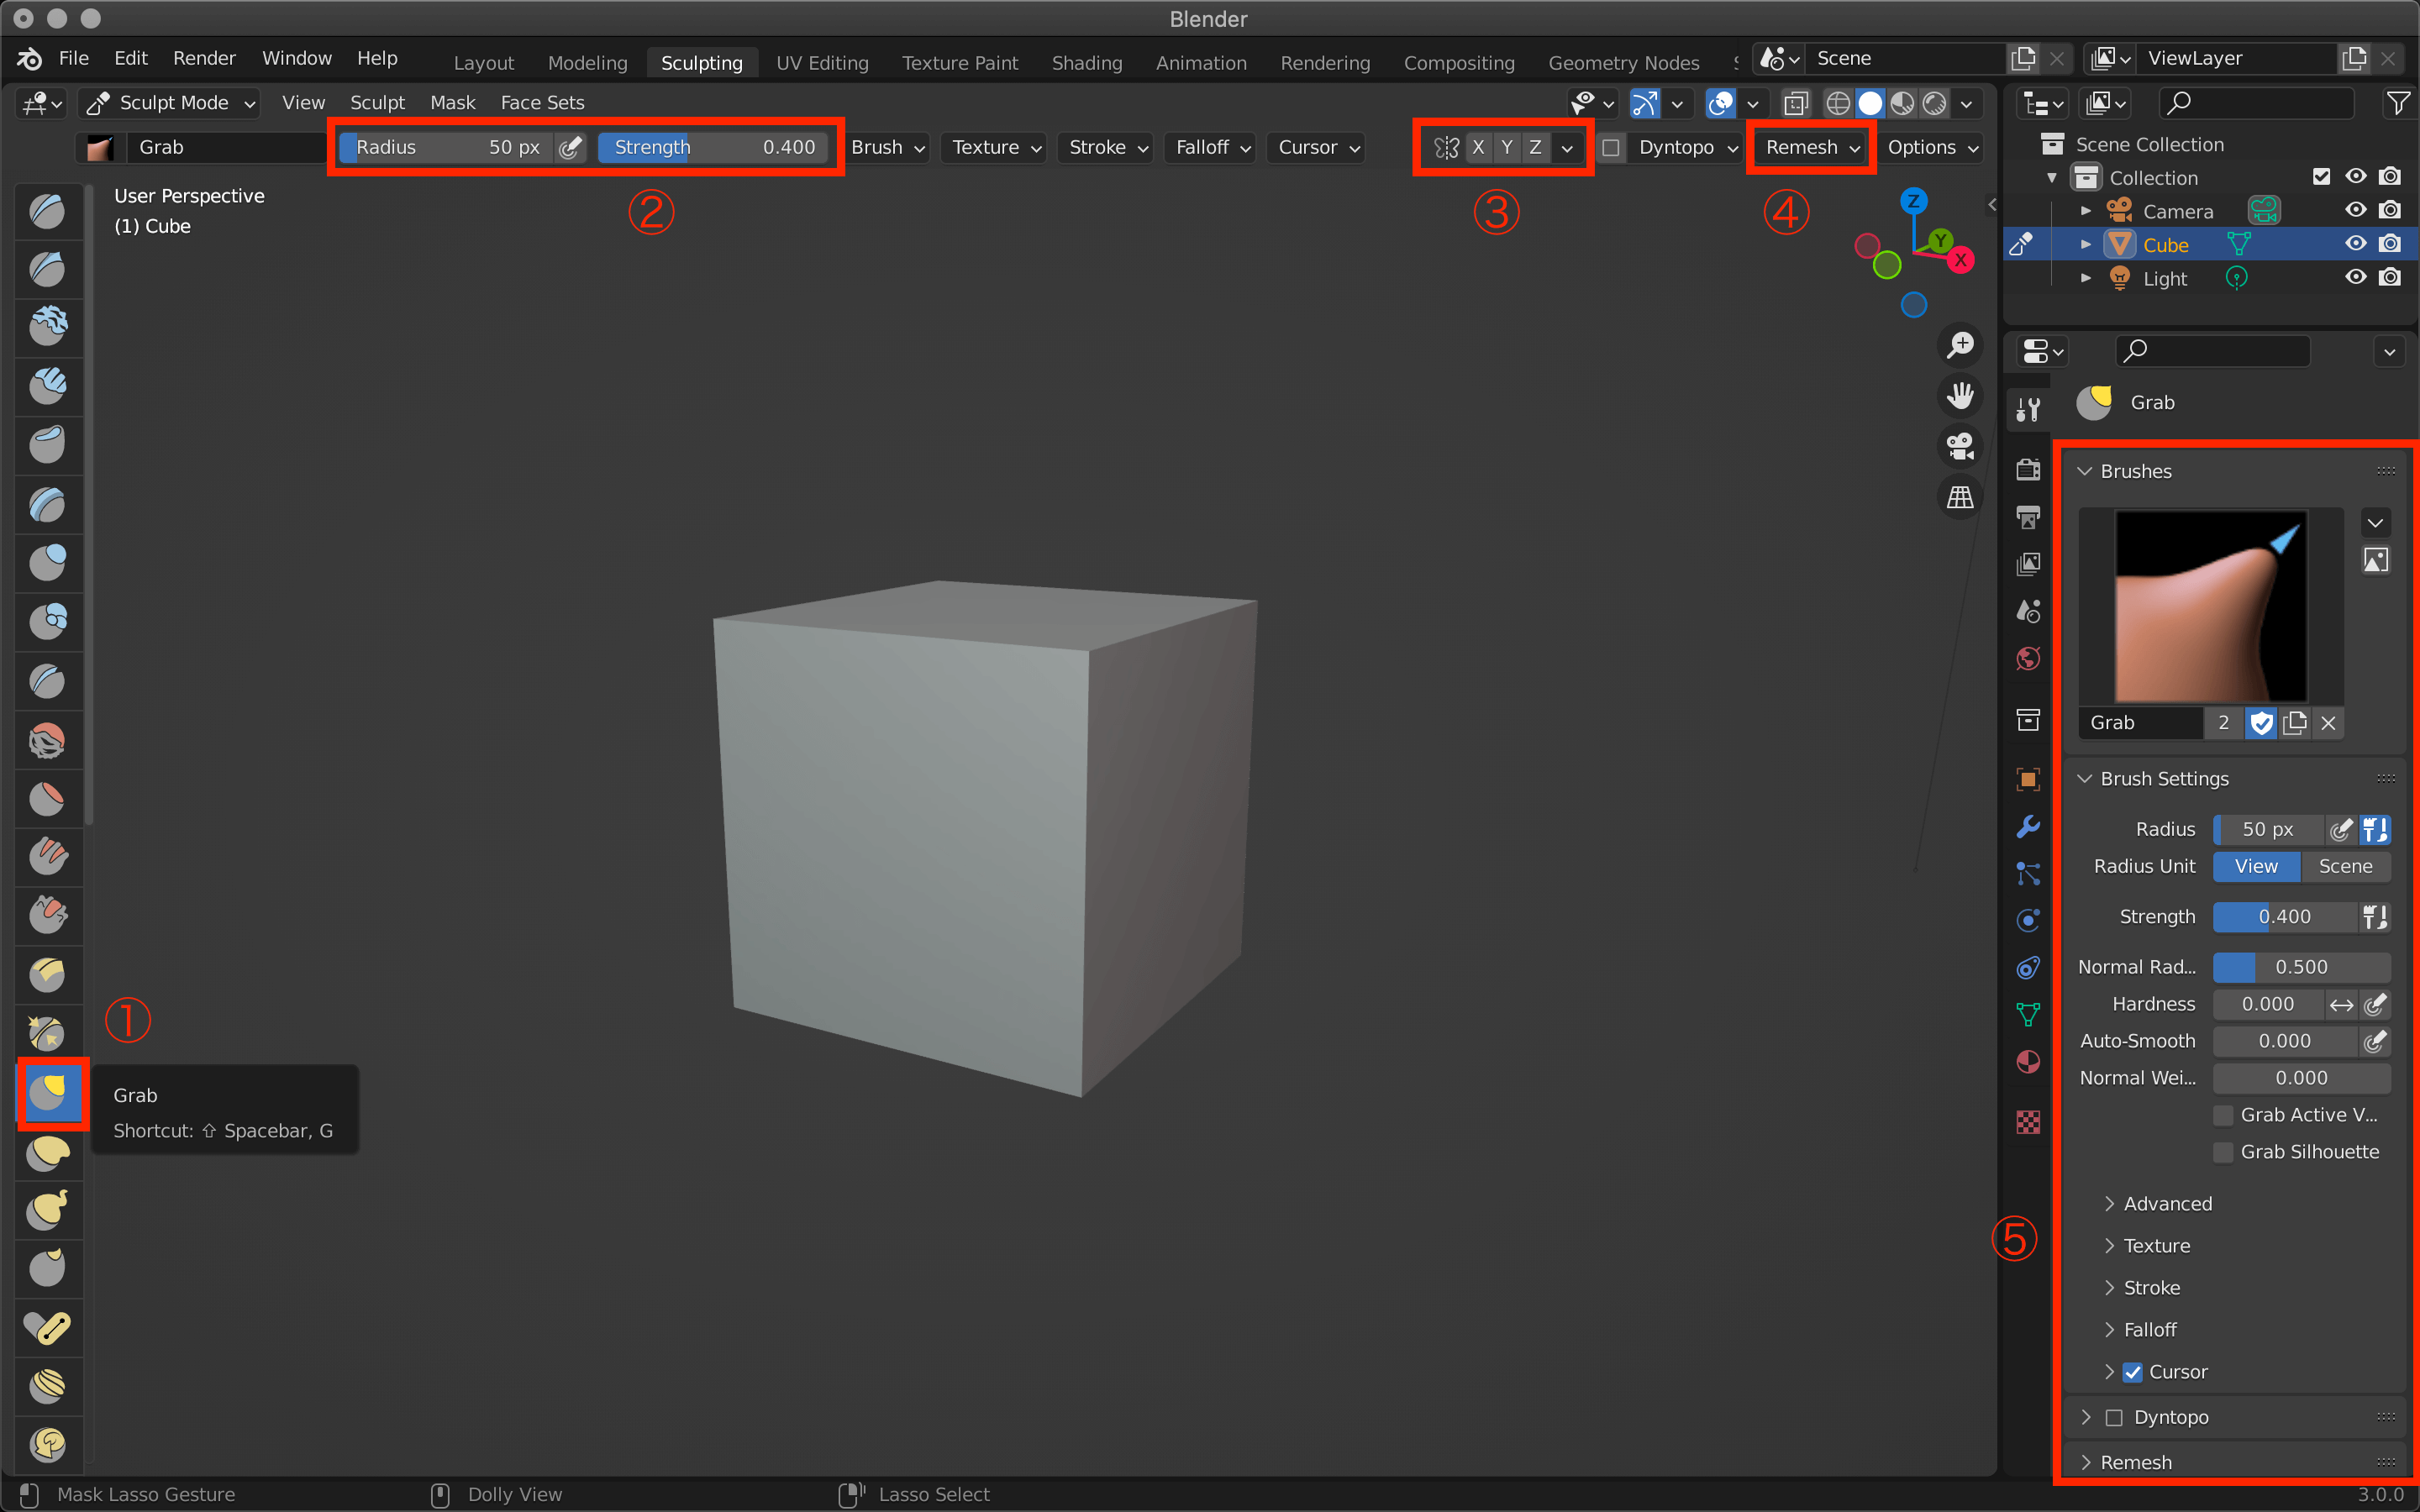
Sculpt mode
1. Brush
The icons lined up vertically on the left side of the screen are a list of brushes, with functions such as kneading, grabbing, pinching, and so on.
Select the brush that best suits your needs from this list.
Each function is explained in detail in the following paragraphs.
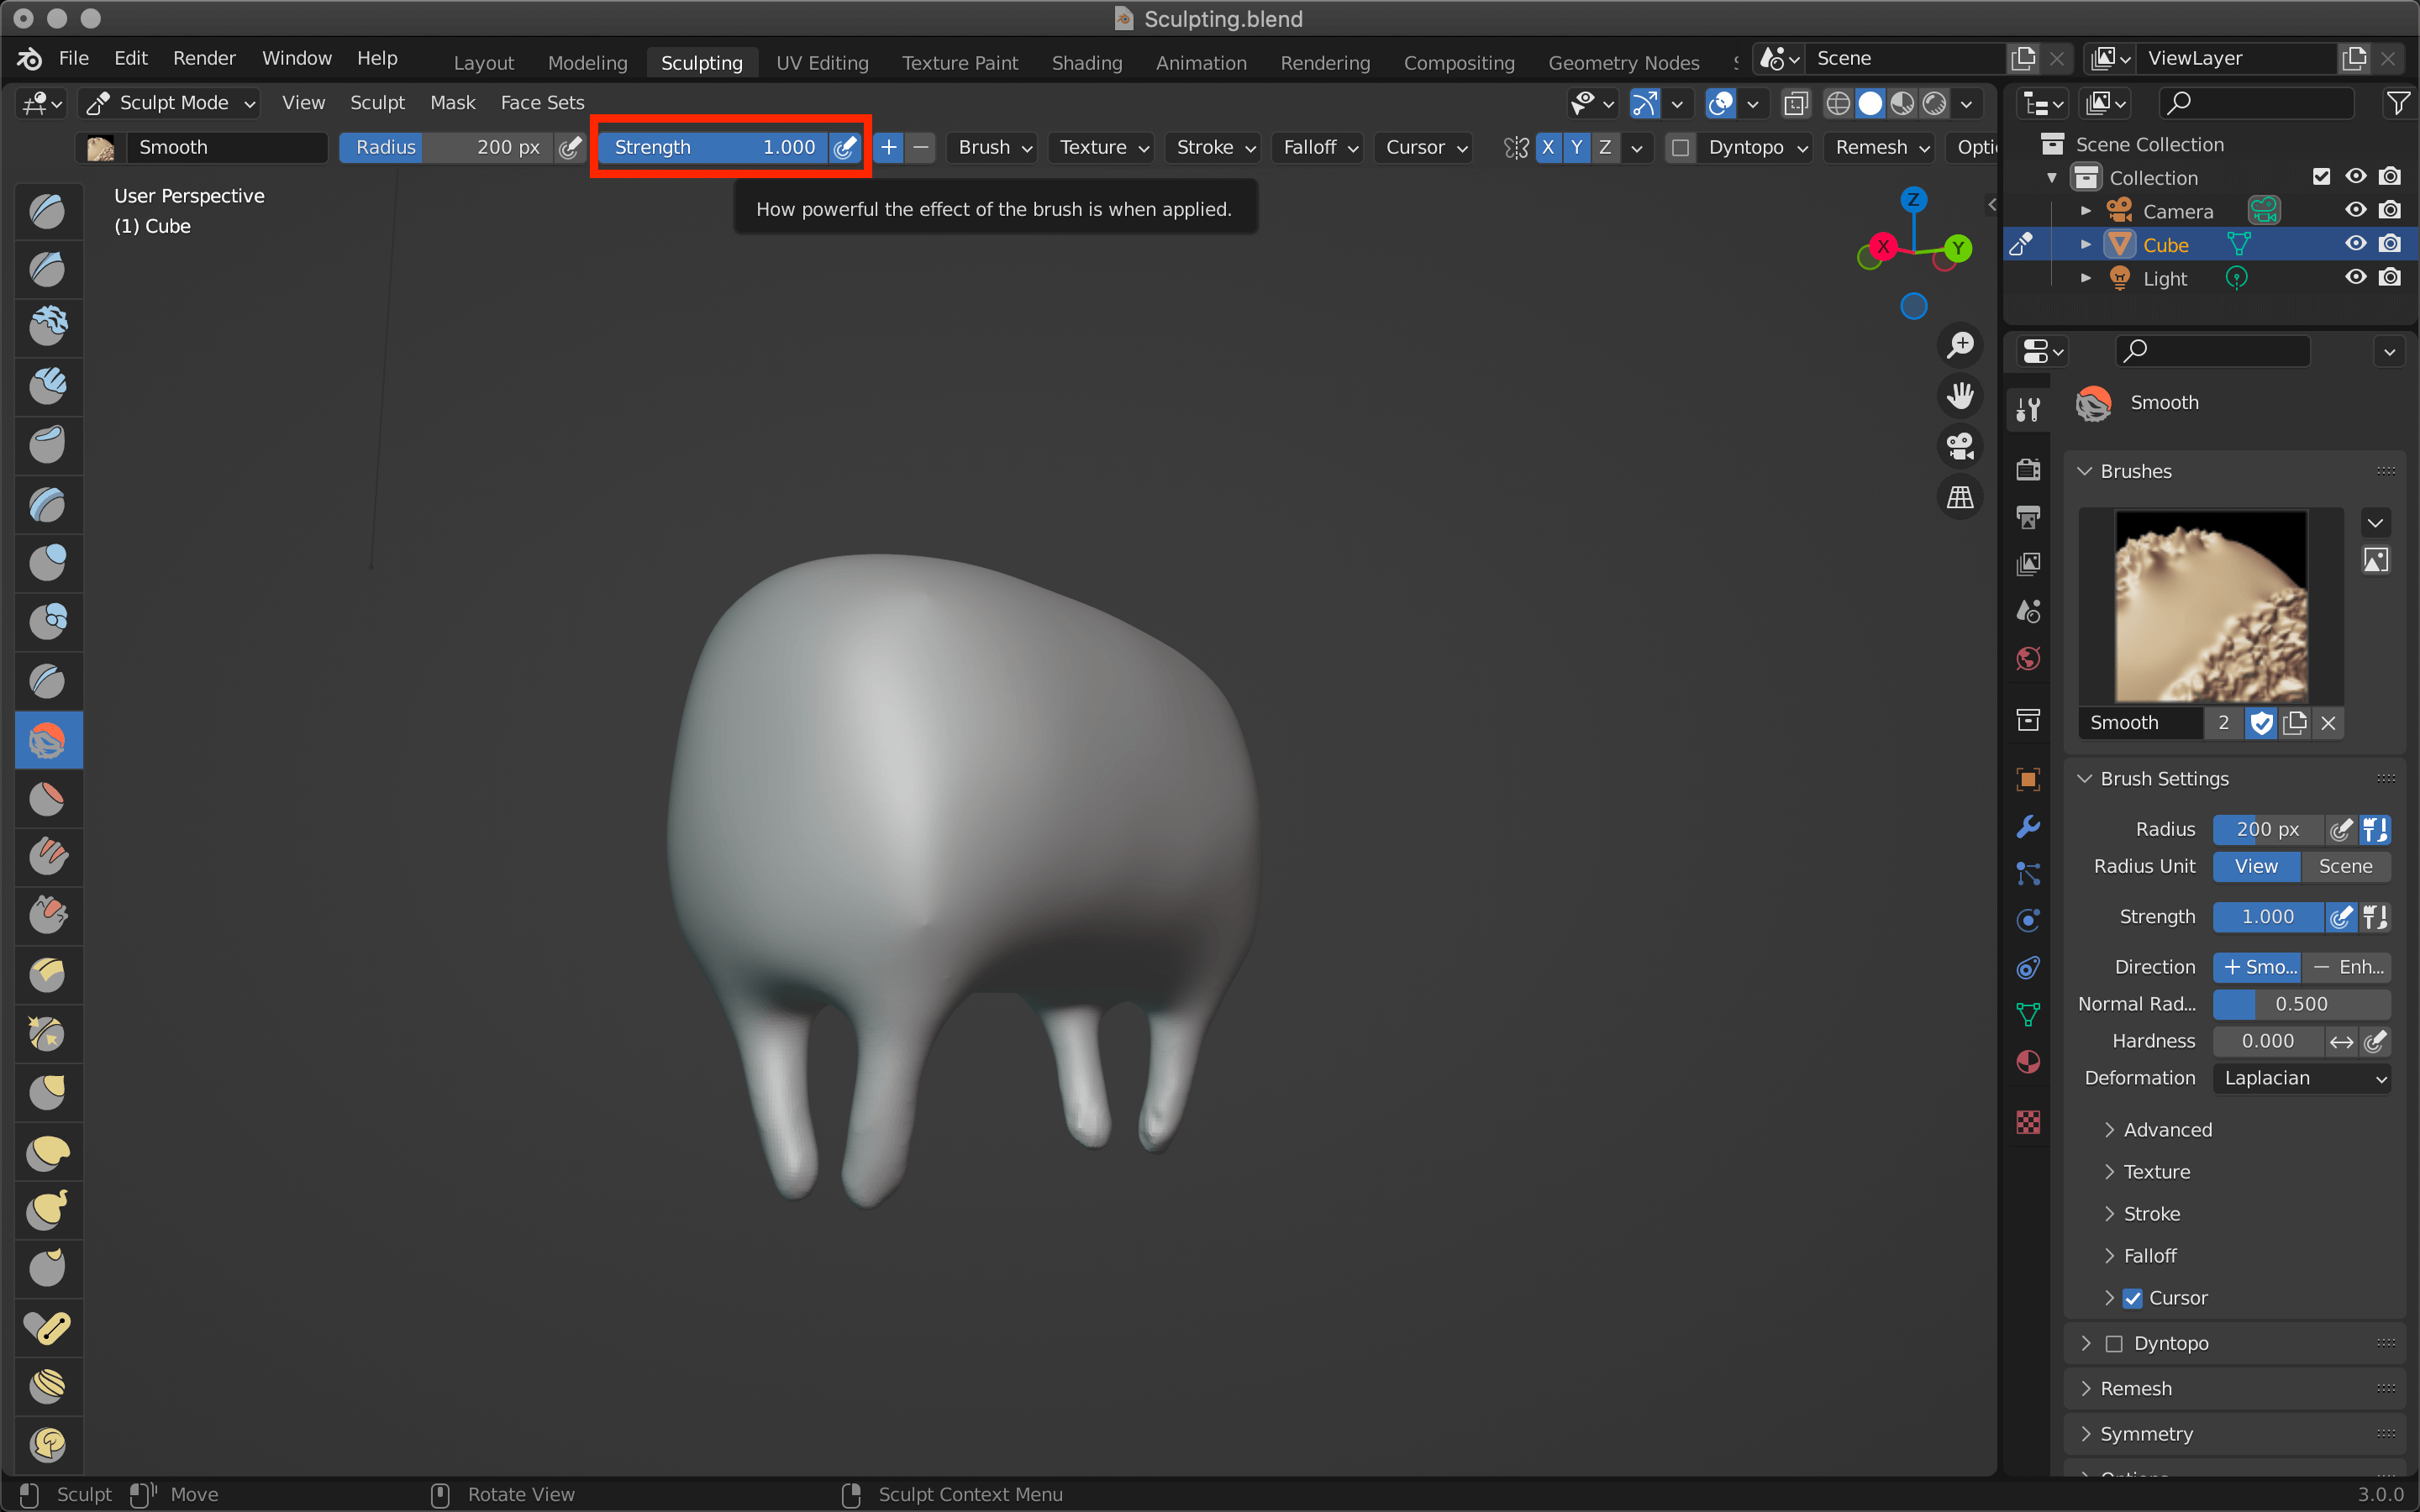
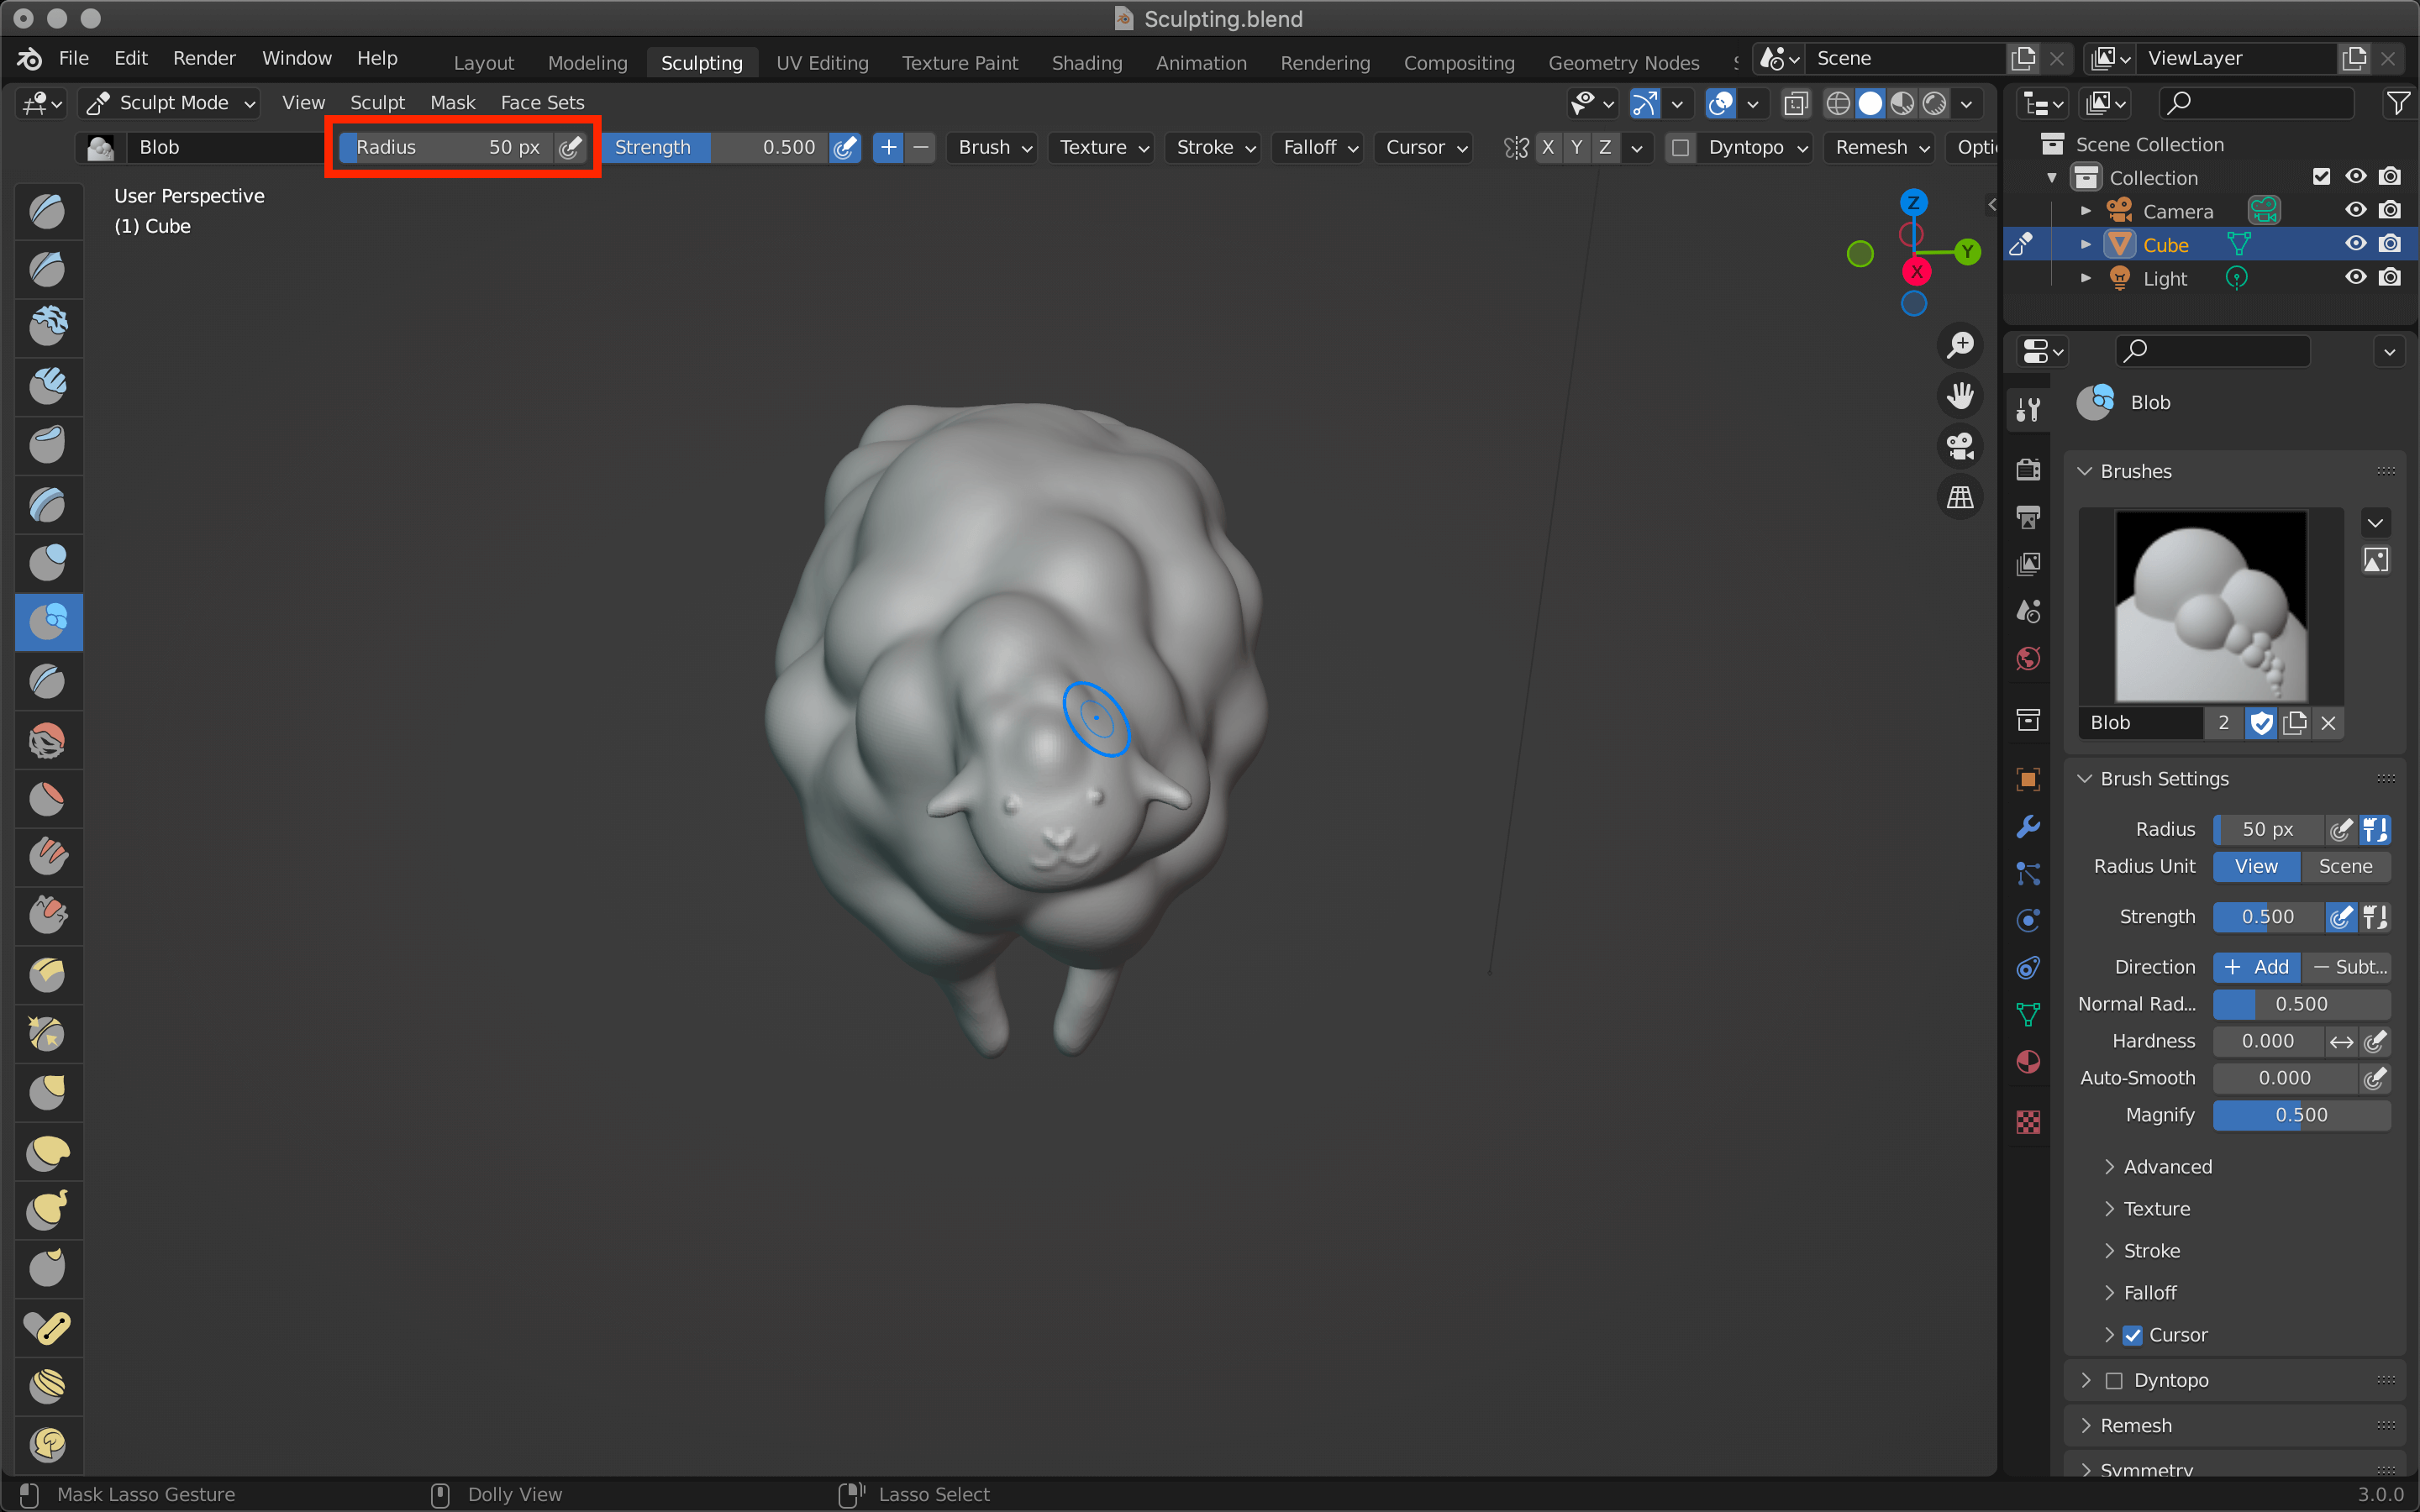
2. Radius/Strength
Radius at the top of the screen is the size of the brush.
To edit a large area at once, increase the value; to edit a small area, decrease the value.
If you click the symbol next to the Radius to ON, you can change the strength of the brush by the strength of the nib, such as with a pen tab.
Next to Radius, Strength is the strength of the brush.
Both can be edited from the detail menu on the right side of the screen.
3. Symmetry function
The butterfly symbol in the upper right corner of the screen is a setting that allows brushes to be used symmetrically.
Select the X, Y, or Z axis, and the brush will be applied symmetrically to the selected axis.
4. Remesh function
When editing with a brush over and over again, the mesh will collapse.
This is a convenient function that allows you to reconstruct and re-edit the mesh that has collapsed.
5. Selection brushes and detailed settings
Displays the brush icon currently selected.
2 to 4 and other detailed settings can be made here.
Let’s make a sheep!
Making the body
Use the Tab key or the upper left button to switch to edit mode.
Edit Mode
After selecting all the cubes with the [A] key, press the [S] key → [X] key to expand the cube in the [X] direction only.
![Select all the cubes with the [A] key, press the [S] key → [X] key to zoom in, move the cursor and press the Enter key to confirm.](https://styly.cc/wp-content/uploads/2022/02/Cube.gif)
Select all the cubes with the [A] key, press the [S] key → [X] key to zoom in, move the cursor and press the Enter key to confirm.
Create feet
Use the [Tab] key or the upper left button to return to sculpt mode.
Select the brush with the yellow icon called Grab from the list of brush icons on the left and click the X and Y on the butterfly symbol at the top.
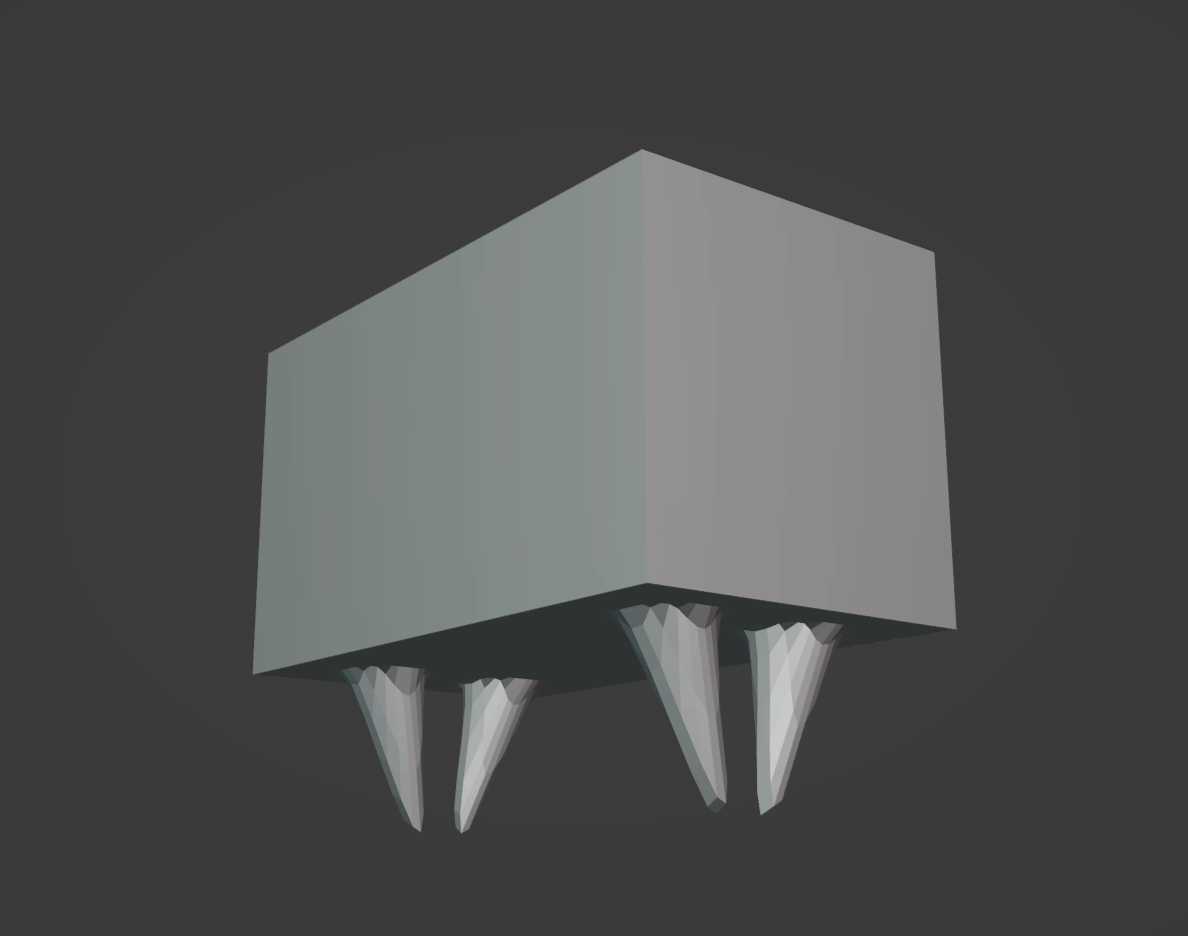
Click and drag the bottom of the cube and move the mouse down.
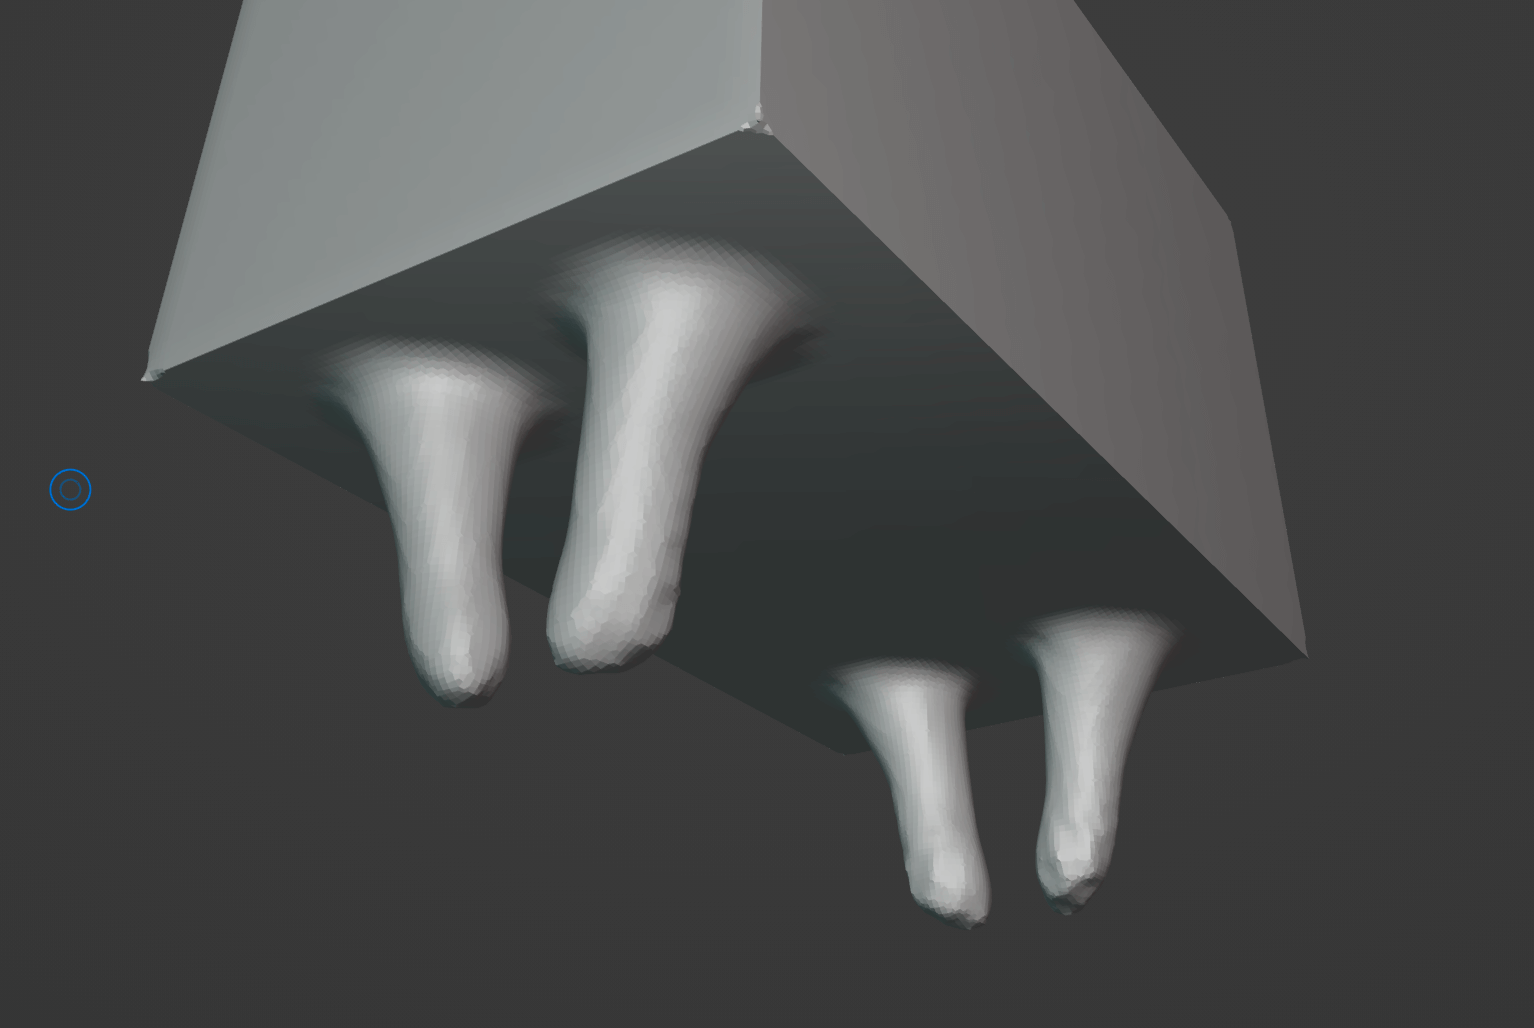
Then four legs have grown out of the cube.
Four legs can be sculpted at the same time by setting not only the X but also the Y axis to symmetry.
If you look closely at the model, only the feet look different.
Only the feet have a coarse mesh.
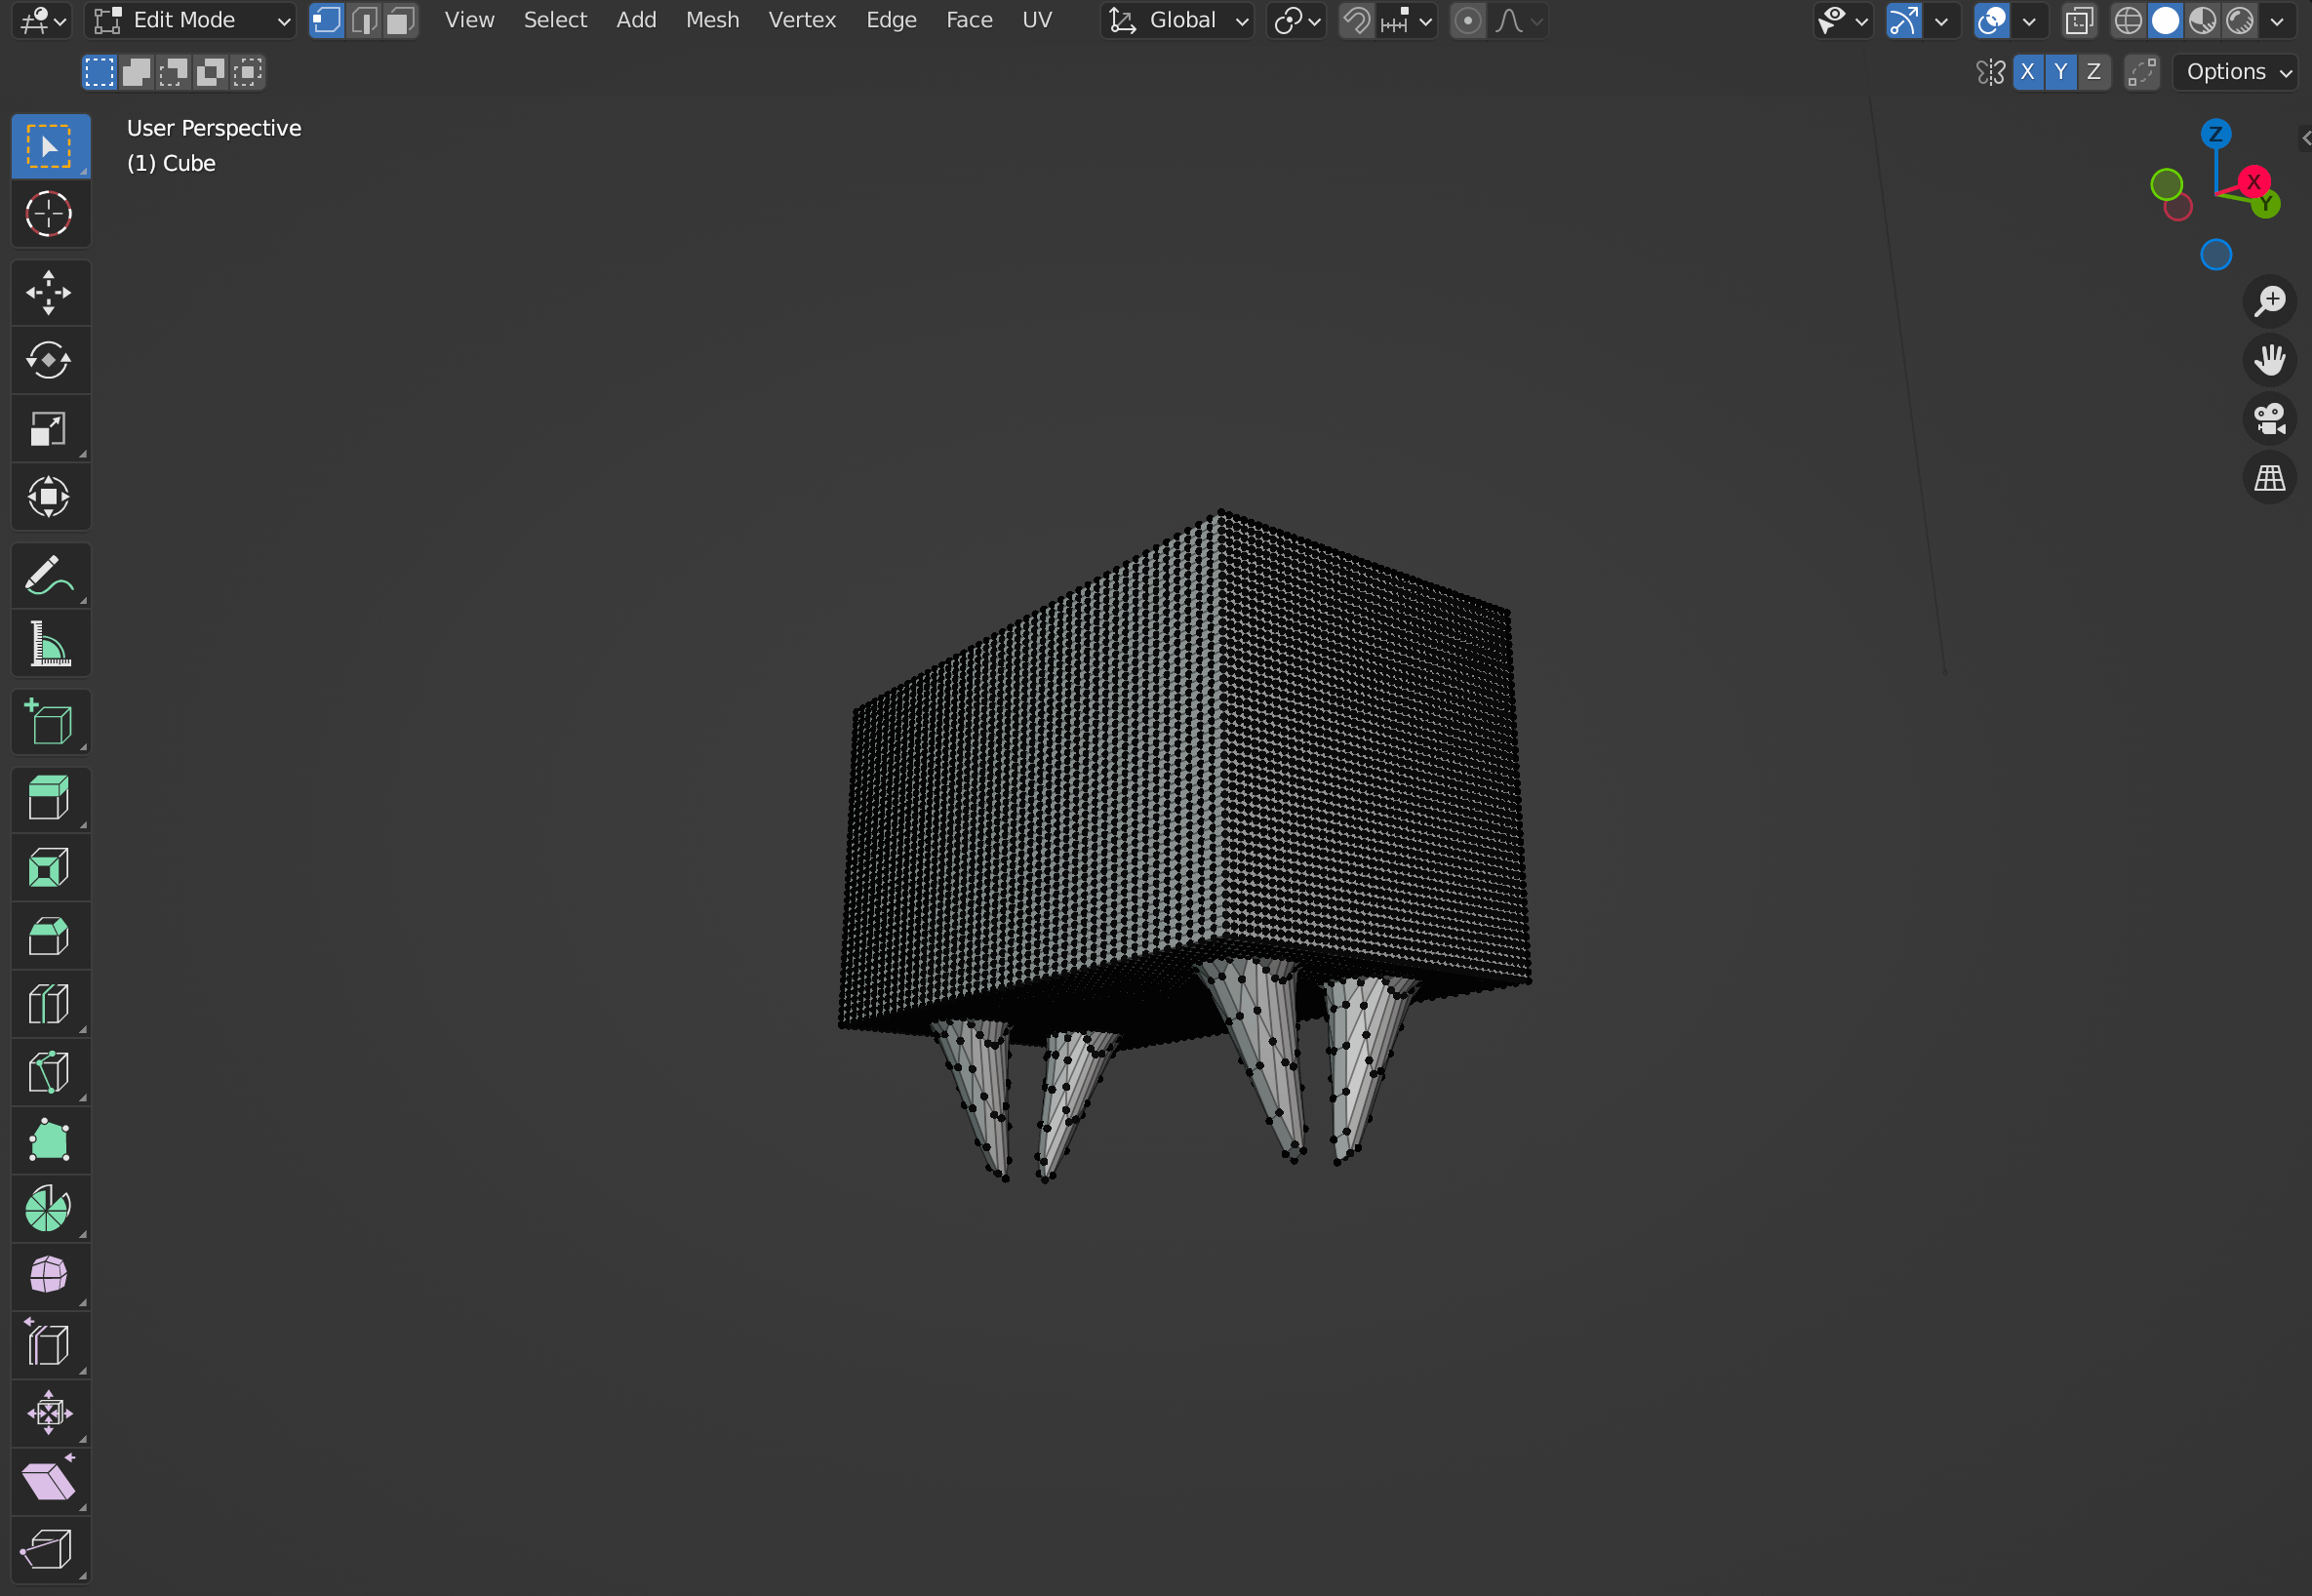
In edit mode (Tab key), it is obvious at a glance
In such cases, use Remesh from the menu at the top of the screen.
The Voxel size is set to 0.05, but you can use any size you prefer.
It is easier to work with a size that is neither too fine nor too large.

After setting the Voxel size to 0.05, click the Remesh button
Edit the toes with the blue icon brush called Inflate (inflate) because the toes are too sharp.
Unlike the previous Grab, use the brush as if you were stroking.

Edit the toe nails with Flate.
When the mesh is coarse, use Remesh again as before.
After remesh, the mesh may look lumpy even though it is fine.
This is where the Smooth brush comes in.
After Remesh
Remesh→Smooth brush
Create the torso
Smooth the entire area with the same Smooth brush.
Increase the Radius (brush diameter) and trace the angular part of the brush.

Smooth Brush
Increase the Strength value to make many changes at once.
Rounded to a certain degree.
Making a head
As in the previous step of creating the feet, use the Grab brush to stretch the model from the position of the neck.
Deactivate the symmetry function and reduce the Radius.
Click and drag to change the shape of the model.

Stretch the model by changing the angle and watching how it looks.
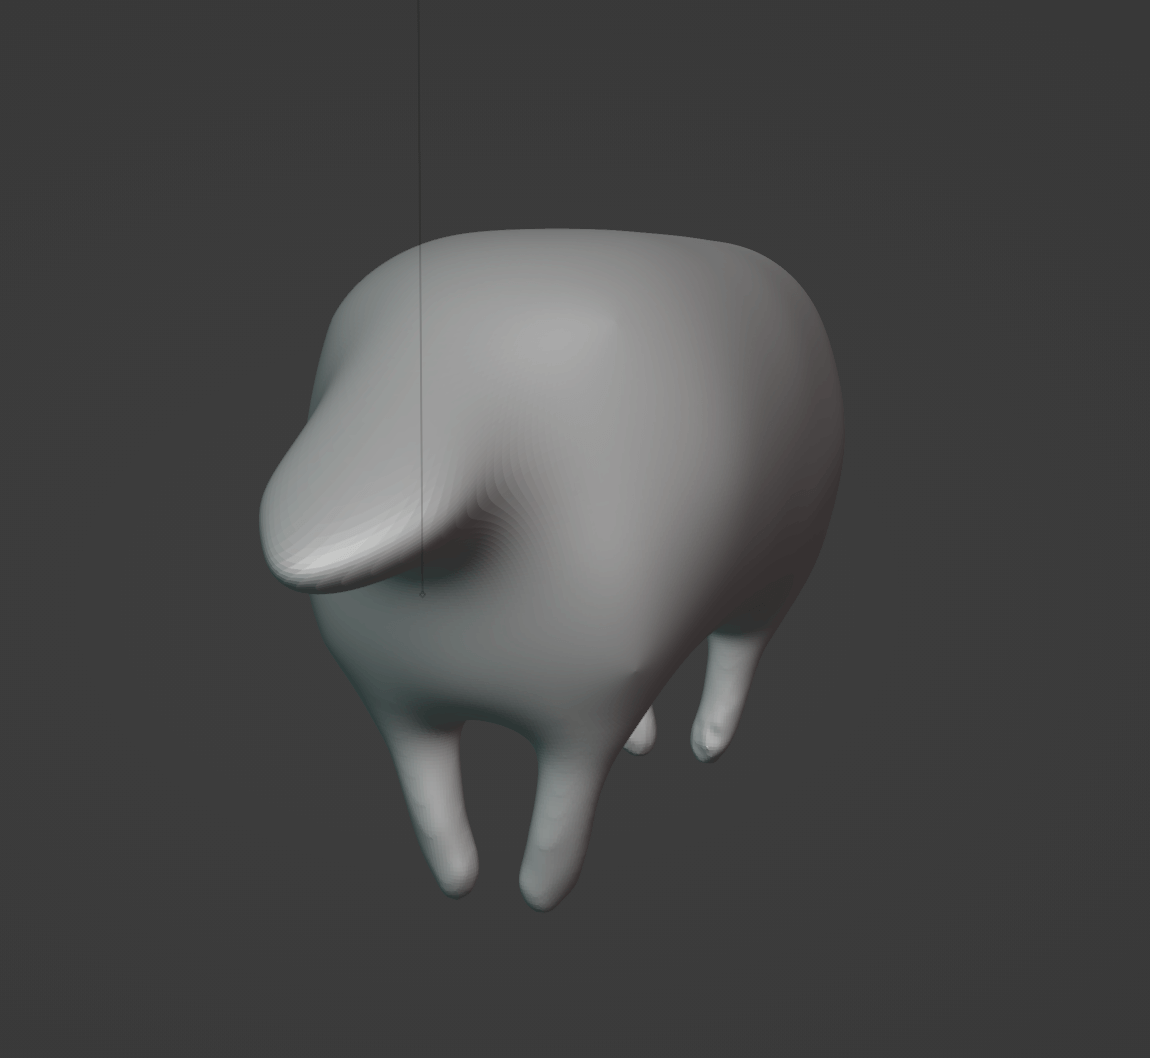
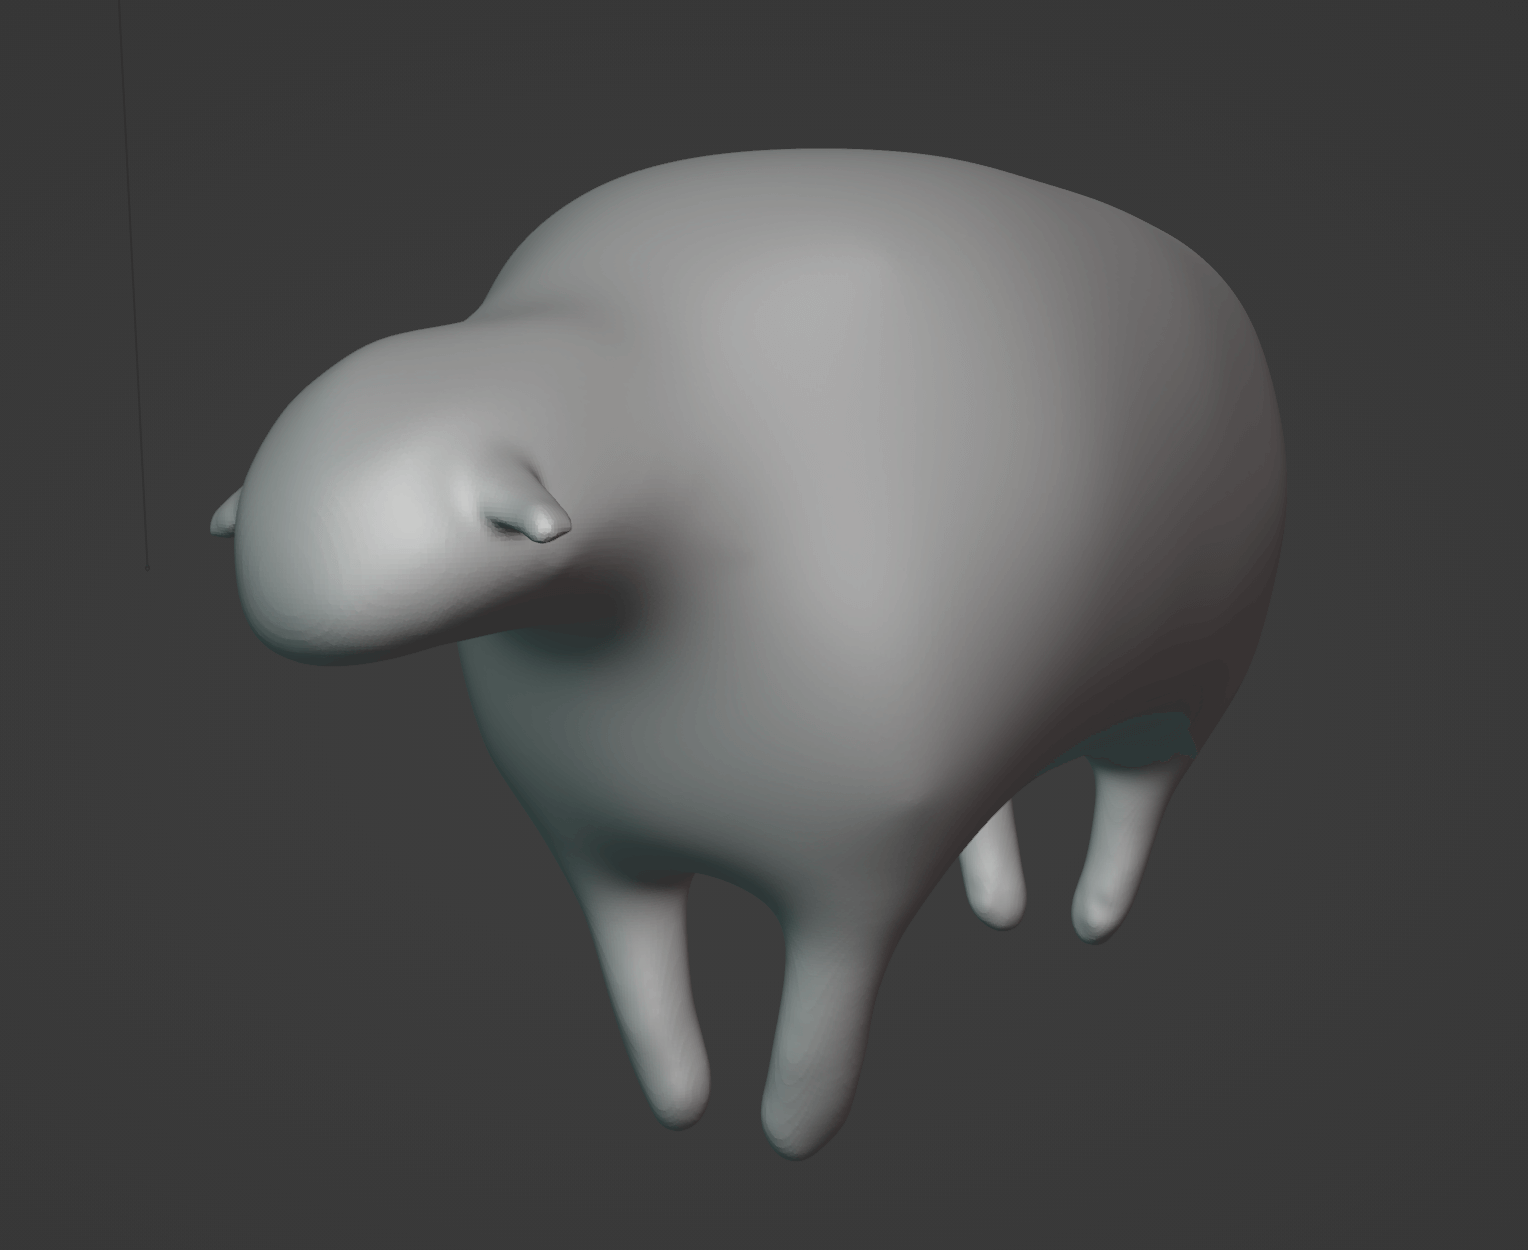
I sculpted it up to this level.
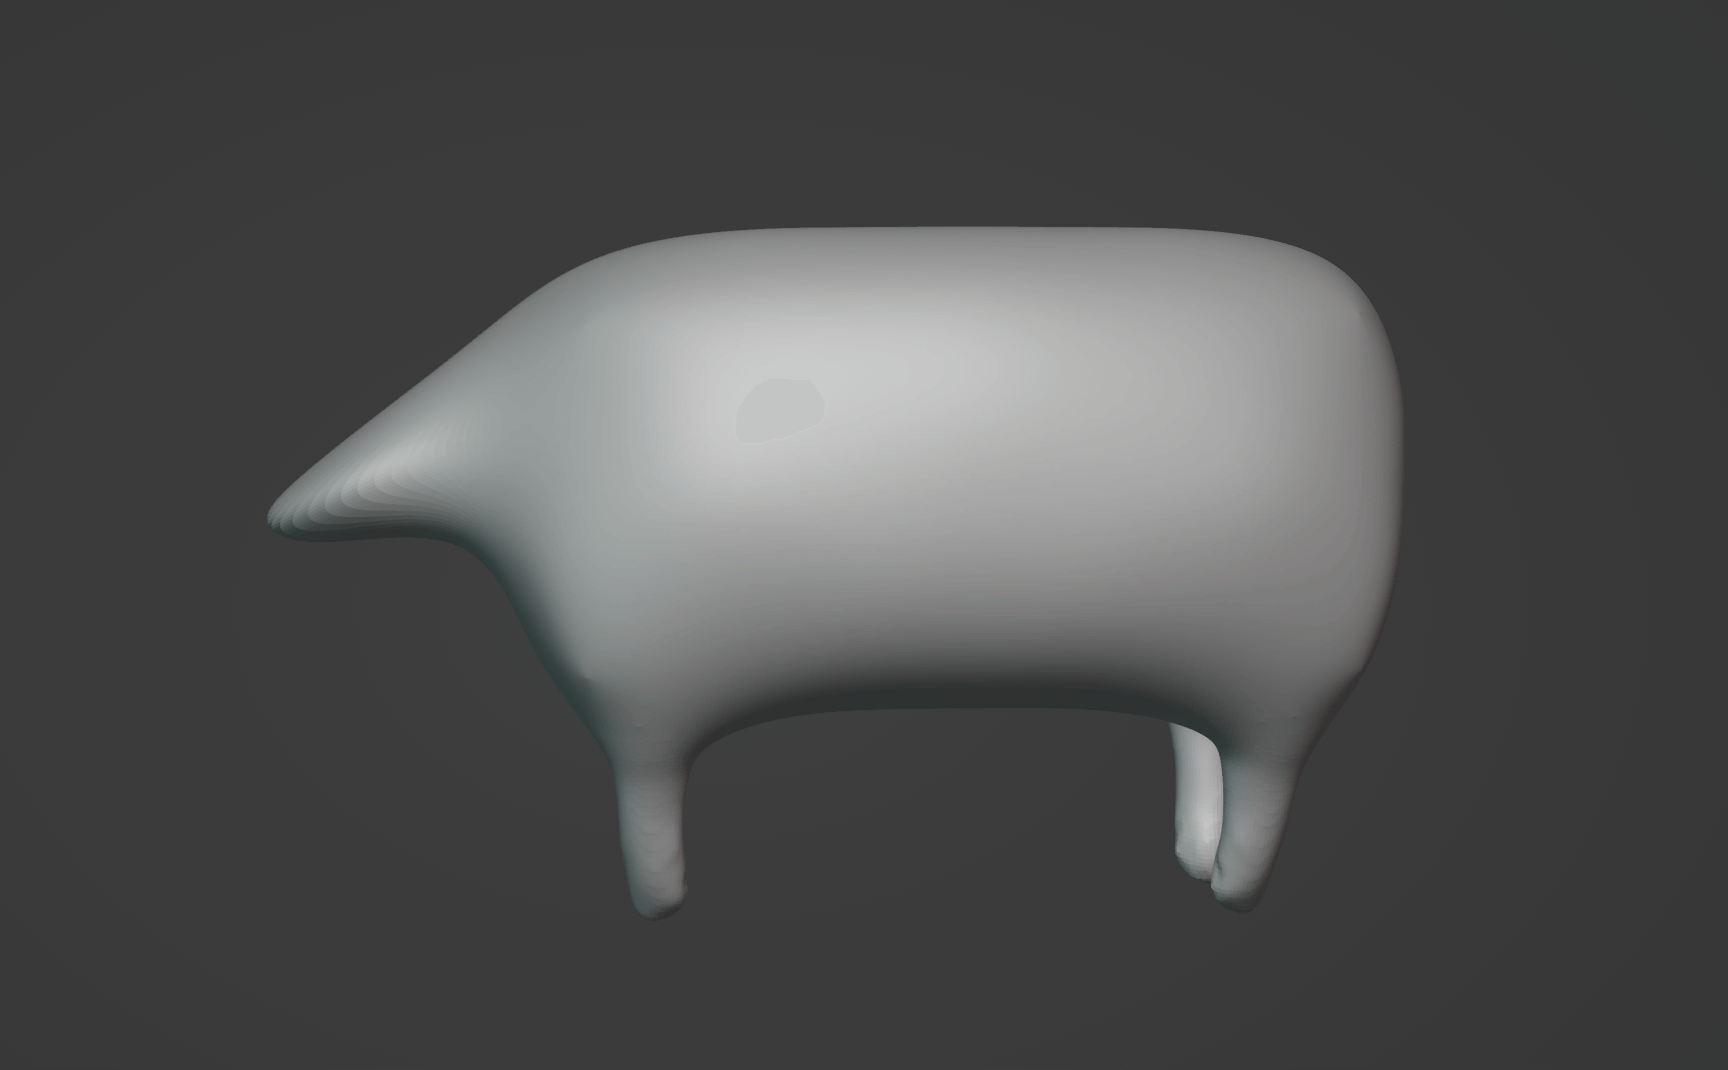
Viewed from the side
Use the Remesh function.
Click on the eyedropper icon next to the Voxel Size, then click on the area other than the head, then click on the Remesh button to set a Voxel of the same size as the area other than the head.
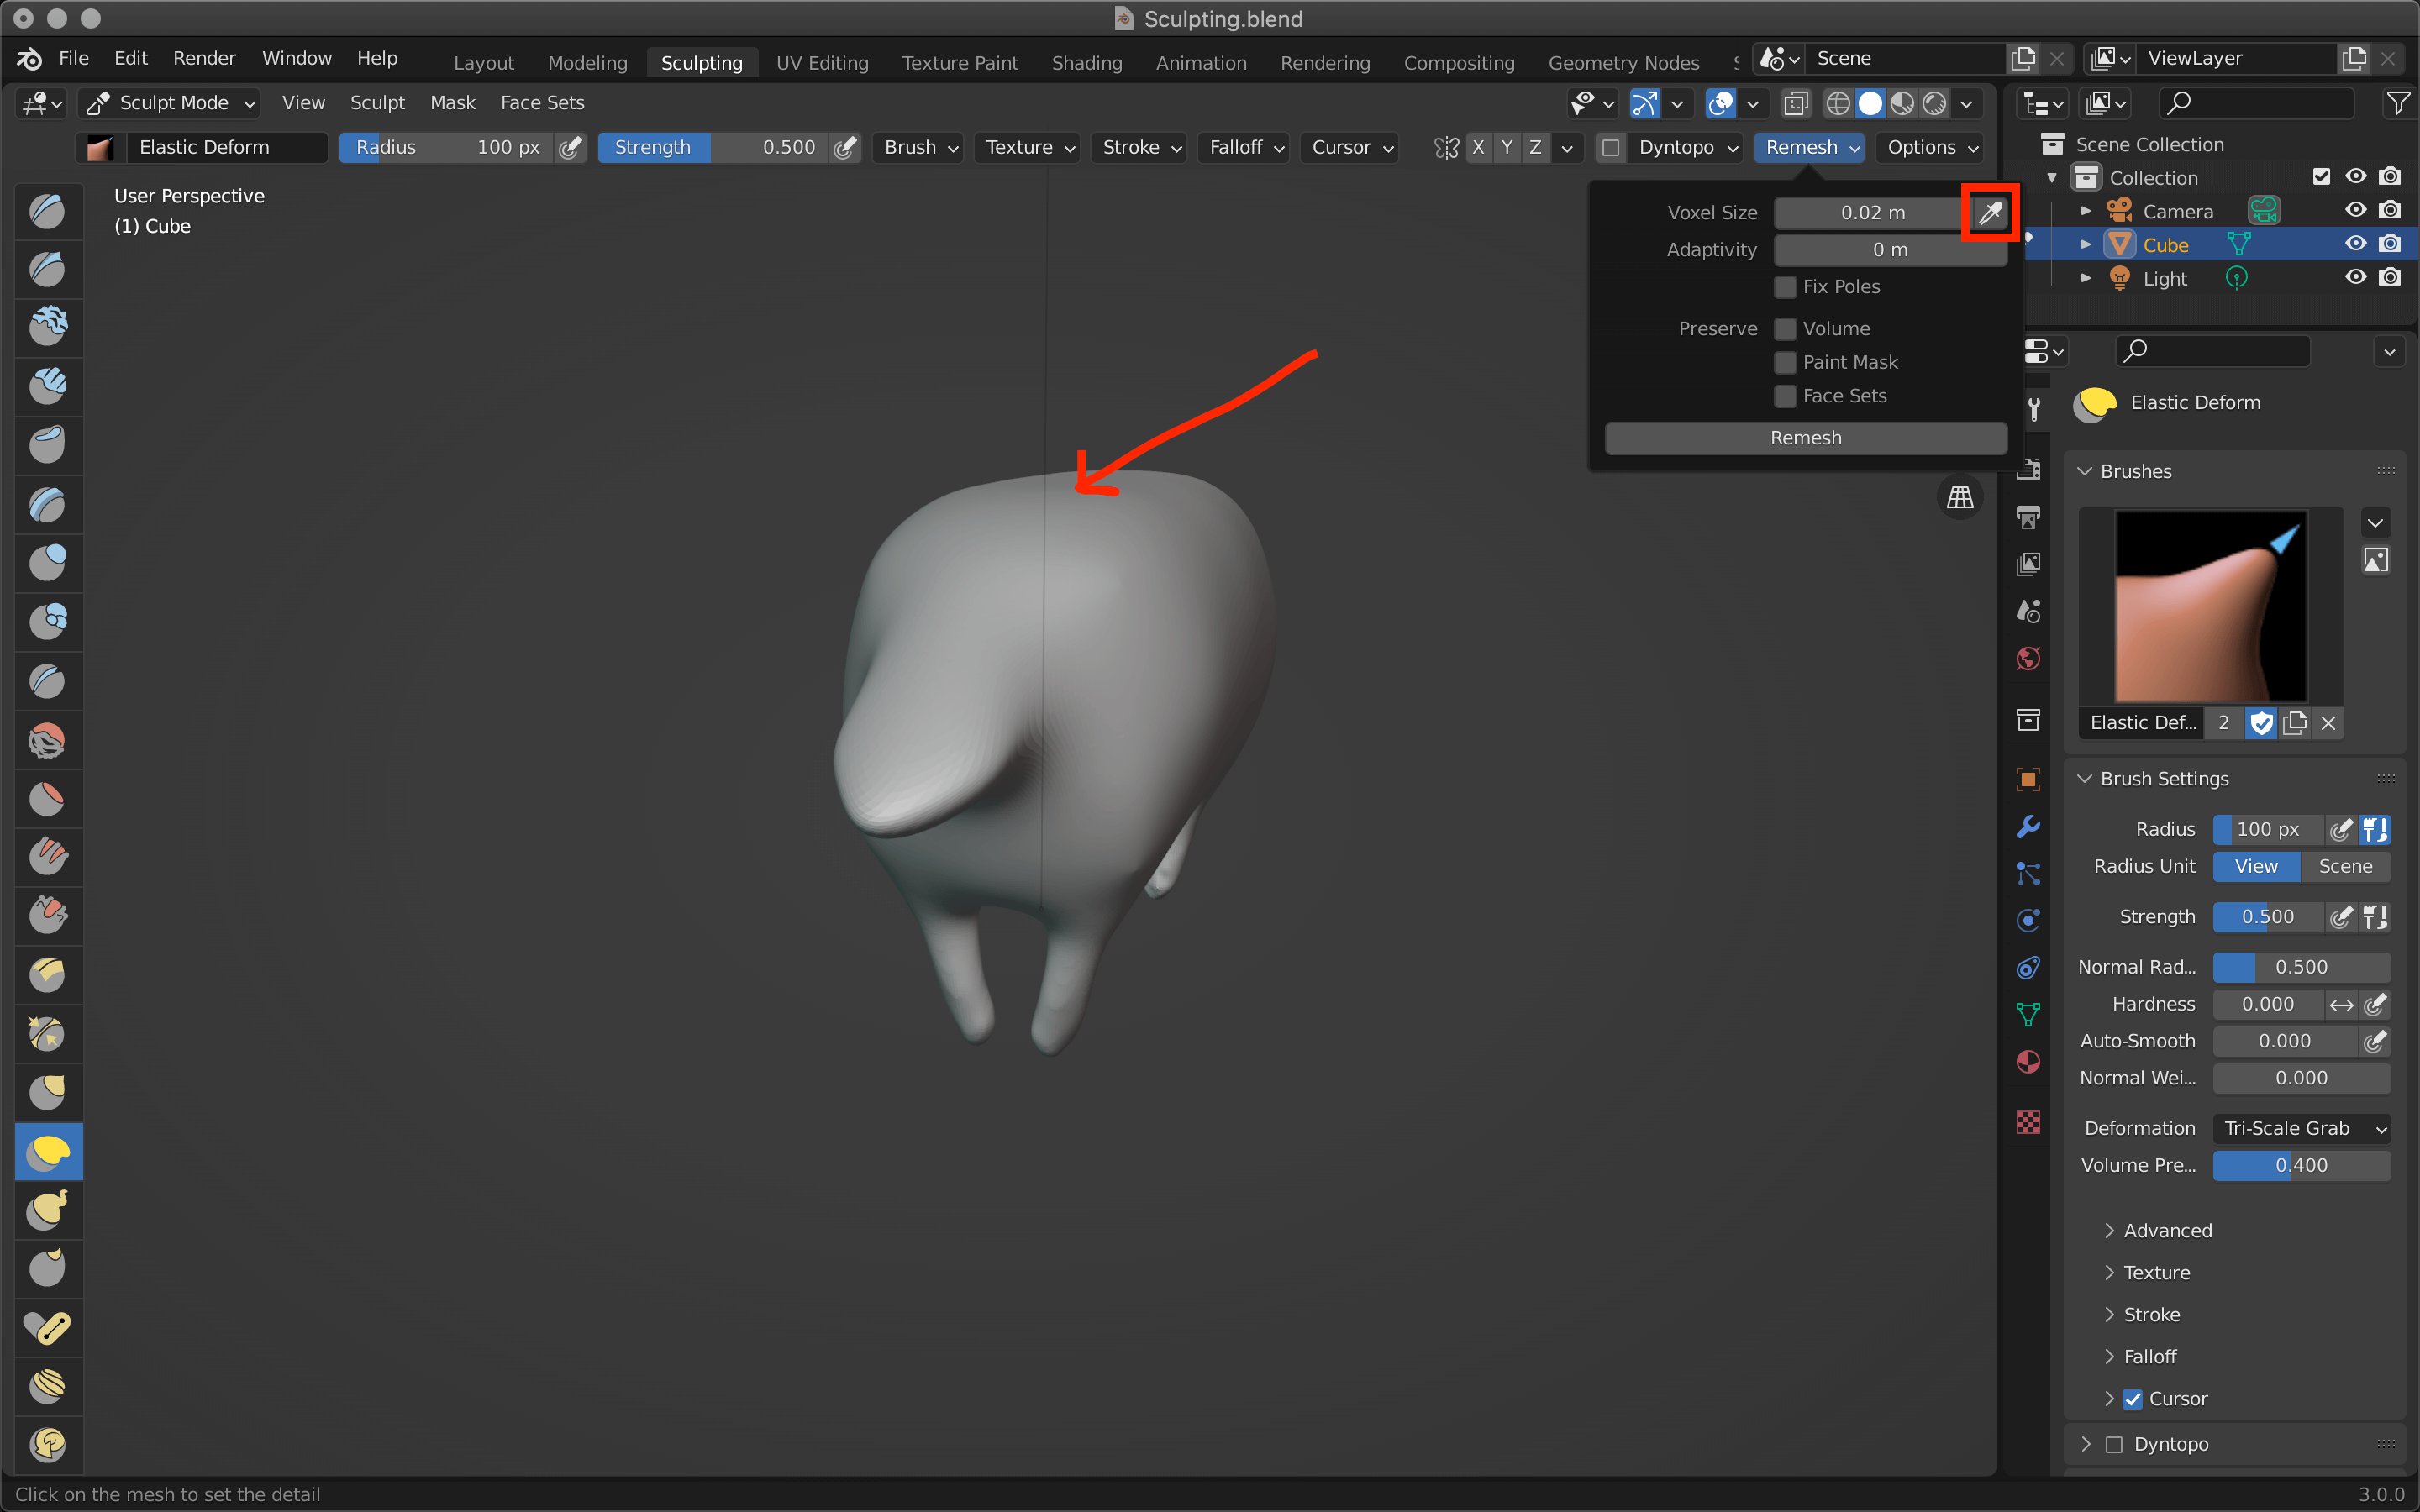
Remesh → eyedropper icon → click on the part other than the head → Remesh button
Since the head still lacks 3D effect, we will use the Inflate brush to inflate it.

Inflate brush
Then, use the Smooth brush to smooth the surface.

Smooth brush
Making Ears
Next, let’s sculpt the ears.
Just as we created the head and legs from the body, we will extend the ears from the head.
Since the two ears are in two different positions, activate the symmetry function at the top of the screen.

Grab Brush
As with the feet and head, once the mesh has been reconstructed with the Remesh function, use the Smooth brush to smooth out the surface irregularities.
Inflate to inflate the tips of the ears, and again use the Remesh function and the Smooth brush to clean up the shape.
Using the Smooth brush, Inflate brush, and Remesh
Making eyes, nose and mouth
Next, use the Draw brush to draw eyes, nose, and mouth.
As the name Draw suggests, this brush allows you to draw a figure or picture on the model.
Moment of tension
Don’t forget to do Remesh as well.
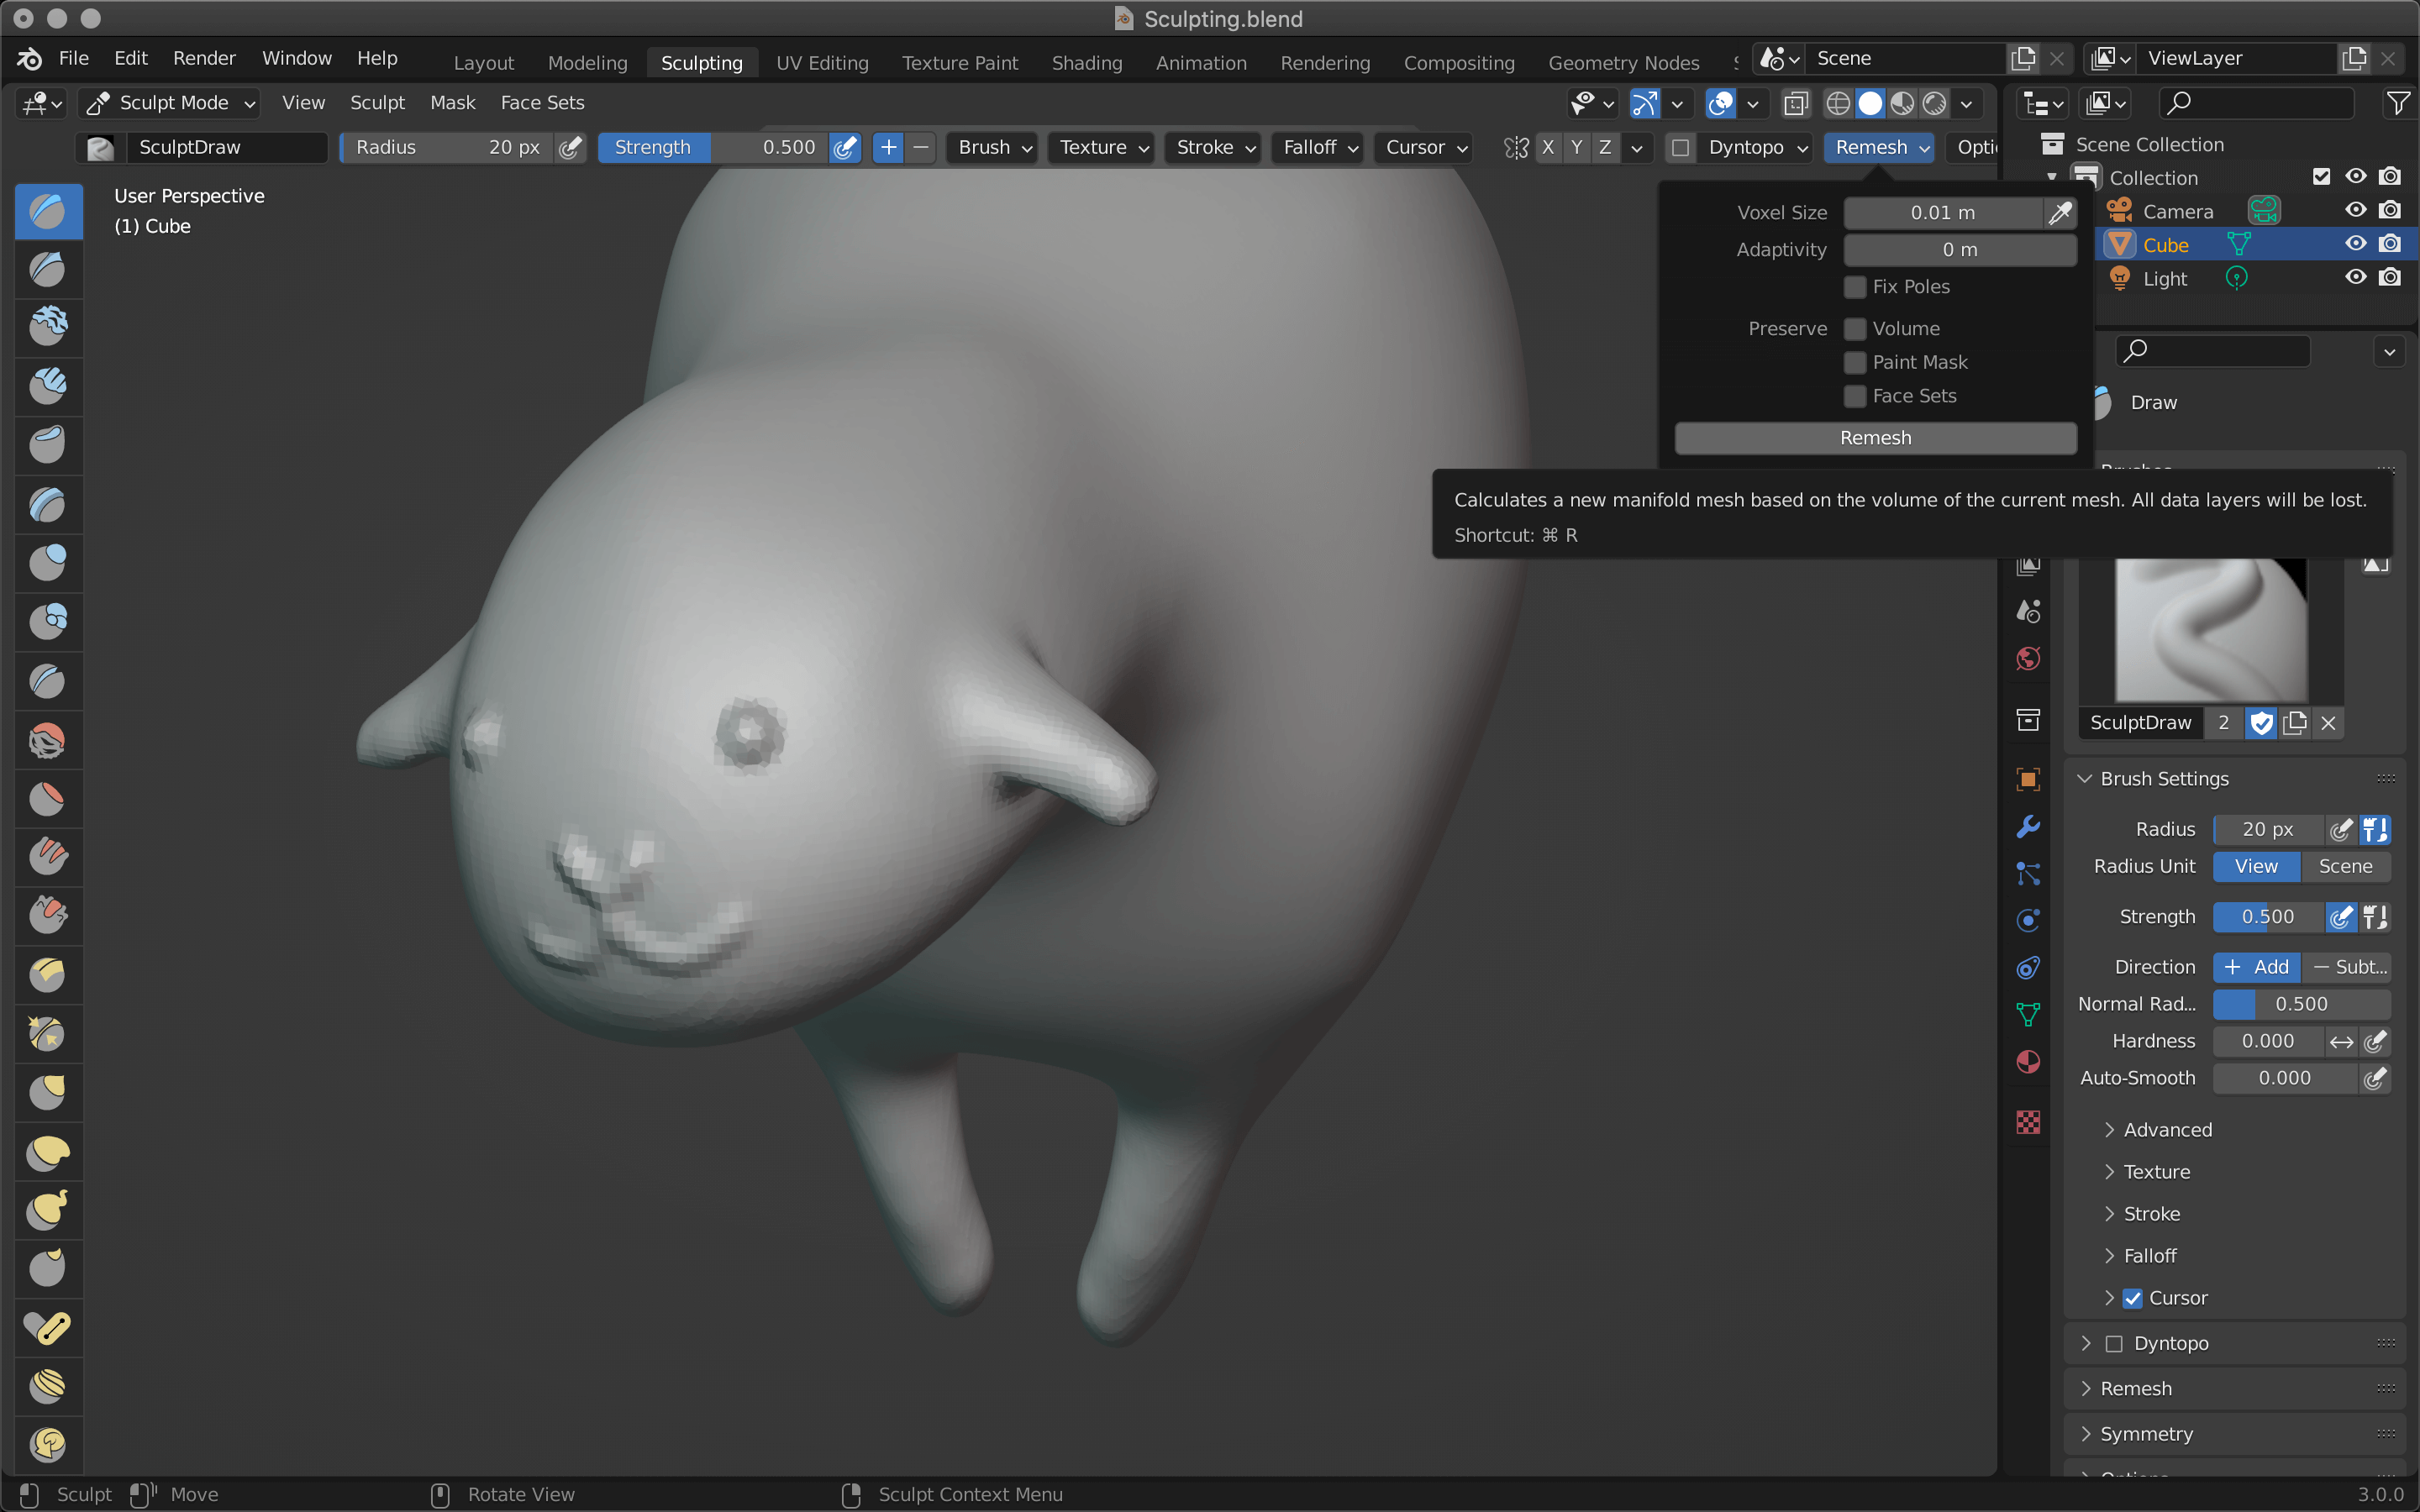
Remesh
Make fur
Finally, the Bubble brush is used to create fur.
Let’s start with the large area of fur on the body.
Click and drag the brush in a circular motion, then release it after each block to create a clean pattern.

Add more fur while keeping a good balance.
Smaller radius around the face is better for balance.

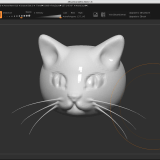
Completed
Functions other than the brushes used in this project will be explained in a separate article.
How to upload to STYLY
Let’s upload your 3D model to STYLY.
How to create a STYLY account

How to upload 3D models to STYLY

How to upload from Unity to STYLY

You can use STYLY FORUM to solve the problem. STYLY FORUM is a place where people can discuss a service or technical issue on STYLY, or provide bug reports on STYLY.
https://en.forum.styly.cc/support/discussions