This article is a continuation of the following article, covering how to edit and export molecular models using Molecular Nodes.
The following article explains in detail, how to install the Molecular Nodes Addon.
![[Blender] How to Handle Molecular Data with “Molecular Nodes” Addon (Part 1)](https://styly.cc/wp-content/uploads/2022/08/1-28-160x160.png)
The following article explains in detail, how to use Molecular Nodes after installing the add-on.
![[Blender] How to Handle Molecular Data with “Molecular Nodes” Addon (Part 2)](https://styly.cc/wp-content/uploads/2022/08/2-30-160x160.png)
How to Change the Appearance of the Molecular Model
The models in the Molecular Nodes add-on use the “space-filling model” display format, whereas most of the images in the Protein Data Bank use the “ribbon diagram” model.
The content itself is the same; however, the display format is different. Consequently, what you see in the Protein Data Bank website’s image will not be directly imported as a model into blender.
We will now explain, how to change the appearance of the molecular model with the Molecular Nodes add-on.
We will use the 6VSB model imported in the previous article’s “Import models by entering the PDB ID”.
Select the imported 6VSB, and go to the Geometry Nodes window at the top of the screen.
Press Shift+[A] in the Geometry Nodes window to bring up the Molecular Nodes section.
Select Molecular Nodes→Styling→Style Ribbon.
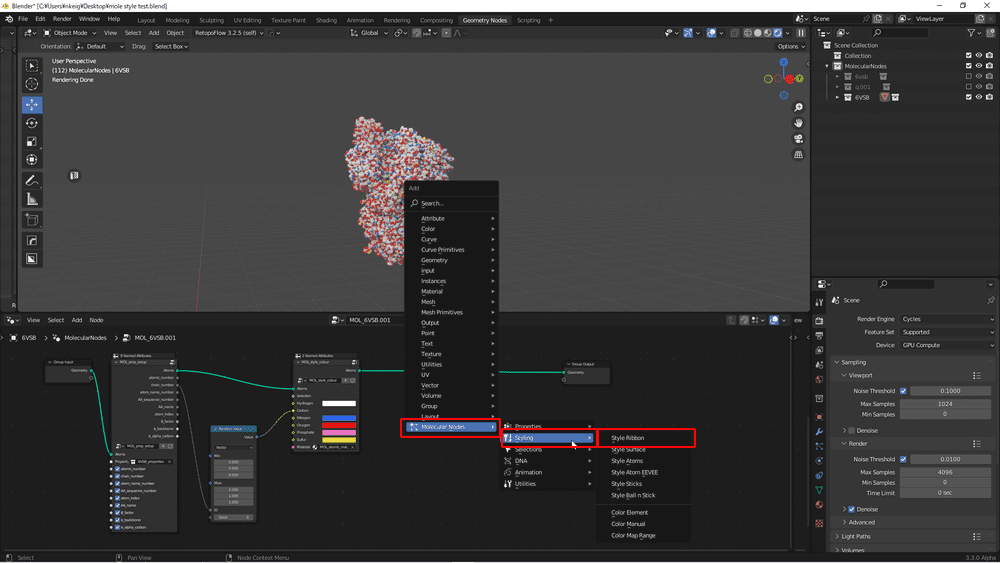
Molecular Nodes→Styling→Style Ribbon
Connecting a “Style Ribbon” node between “MOL_style_colour” and “Group Output” changes the appearance of the ribbon.
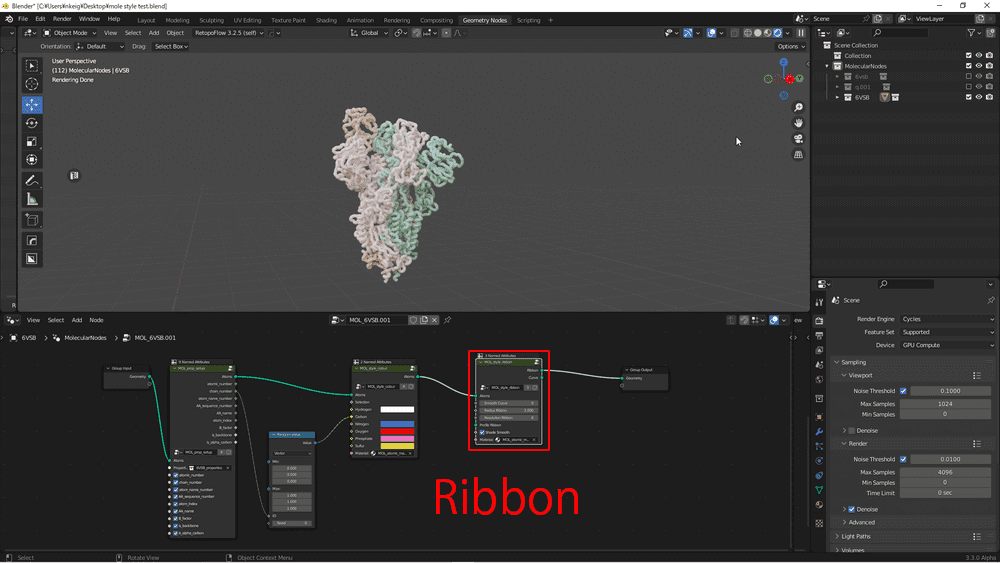
Changed appearance of a ribbon.
Other “Styling Nodes” have the following appearance:
| Style Ribbon | The geometry changes to a ribbon-like shape. |
| Style Surface | This generates a surface, changing its appearance into a solid one. |
| Style Atoms | The basic molecular model shape. |
| Style Atom Eevee | The basic molecular model geometry will be displayed in Eevee. |
| Style Sticks | The shape can be changed to a bar model (this requires prop find bone nodes as well). |
| Style Ball n Stick | The shape can be changed to a sphere bar model (upward compatible with Style Sticks) |
| Color Manual | The color of the molecular model can be changed. |
In the following, we will explain how to change the appearance of a piece of a model.
In the ”Geometry Nodes” screen, press Shift+[A] and add Molecular Nodes→Selections→SelectAtoms.

Molecular Nodes→Selections→SelectAtoms
Then, click on Molecular Nodes→Selections→Selection 6VSB Chains to add them (the “6VSB” part is the PBD ID, which varies in each model).
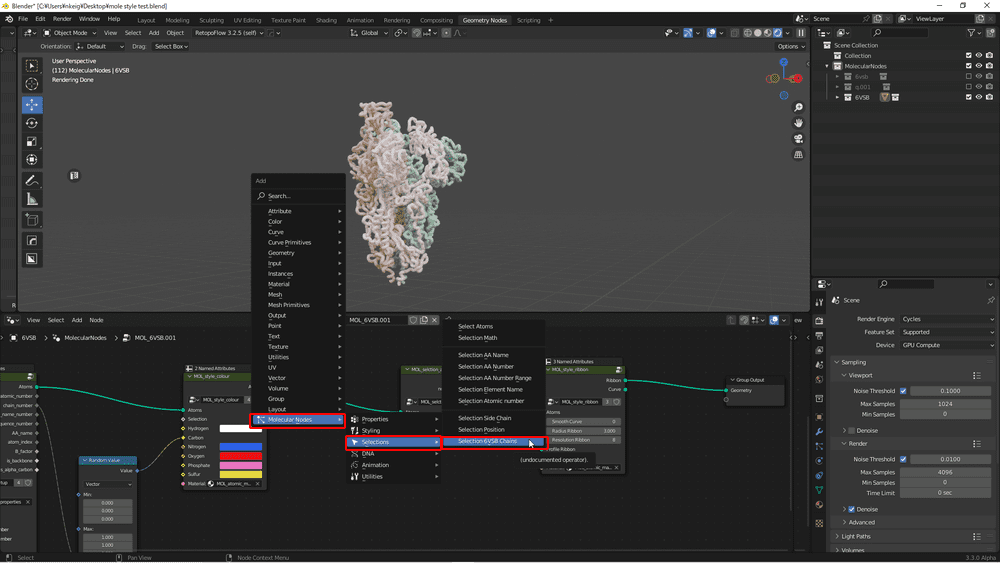
Molecular Nodes→Selections→Selection 6VSB Chains
When the nodes are connected like this, the model is not visible.
This happens, because the respective parts are not selected in the Selection 6VSB Chains node.
Selection 6VSB Chains

Nothing selected
As shown in the GIF below, by clicking on a Chain, the part corresponding to each Chain is displayed.

The corresponding part of each Chain will be displayed
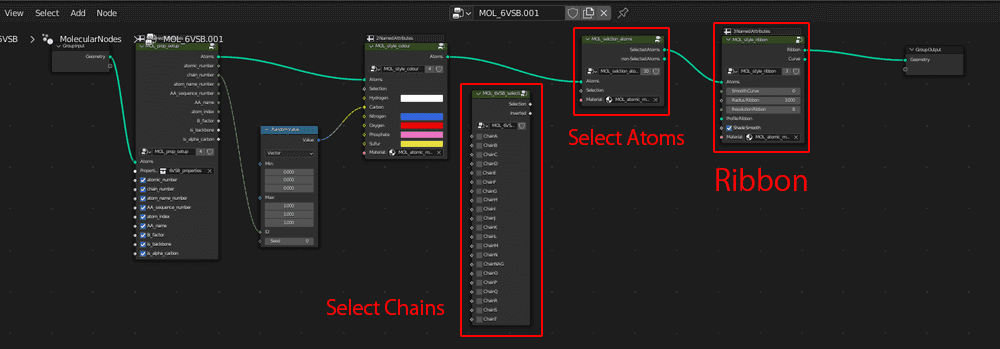
The SelectAtoms node and the Selection [???] Chains nodes can be considered as a set of two.
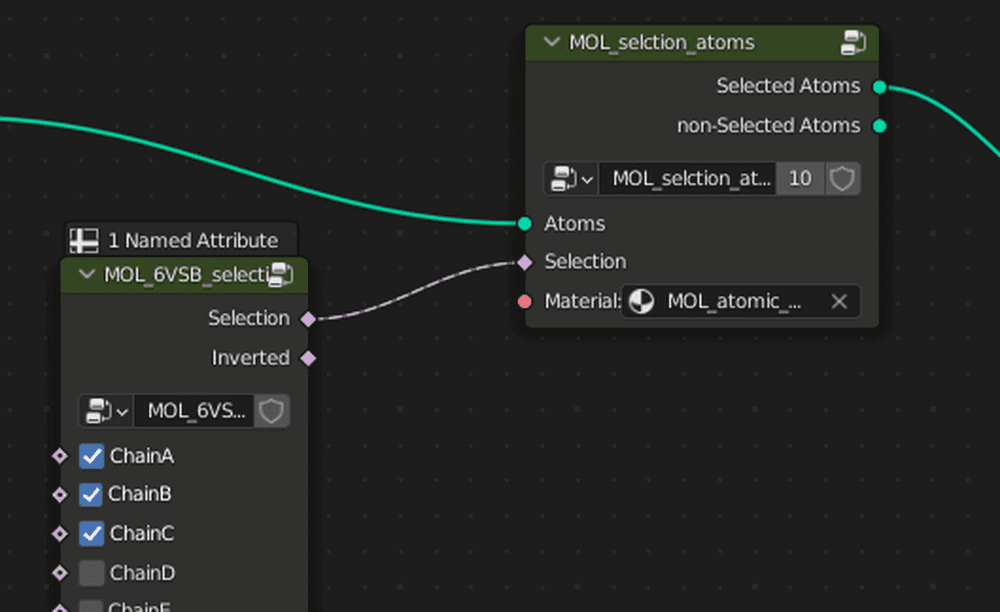
Select Atoms and Selection Chains
Here is an example.
In this 6VSB case, only ChainA, B, and C are used. We connected the nodes as shown in the image below. This makes it possible to change each separate part of the model individually.
The green node with multiple sockets of the model connected is the “Join Geometry” node.
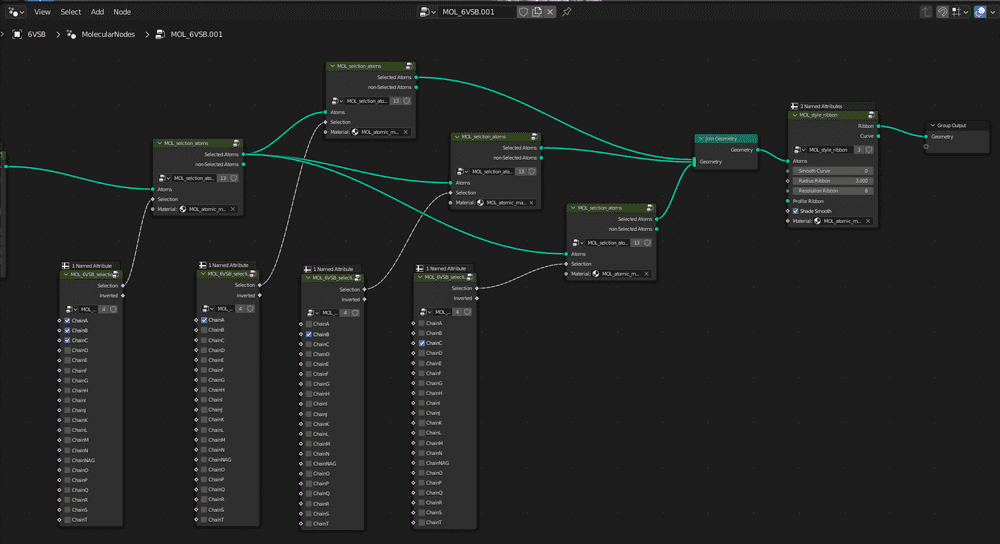
Allows to change each model individually
Next, we change each separate parts of the model.
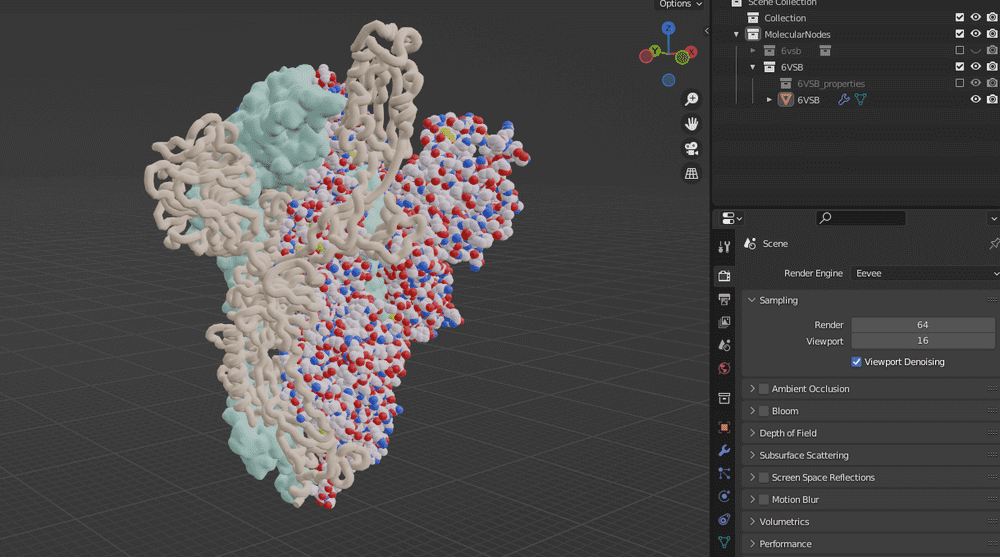
We added a “Style Ribbon” to ChainA, a “Style Atom Eevee” to ChainB, and a “Surface” node to ChainC.
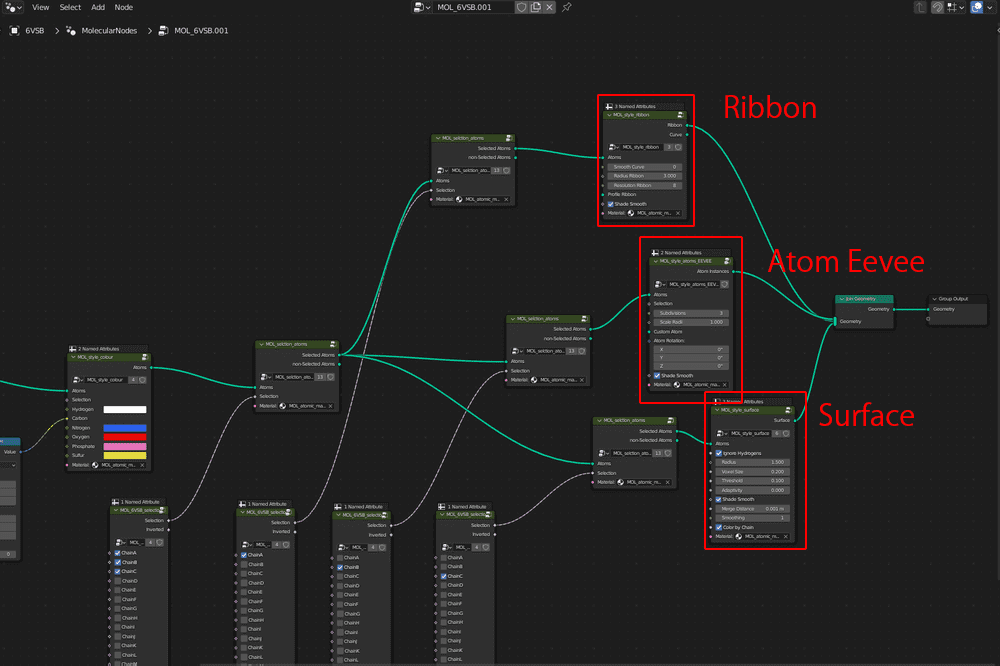
ChainA: Style Ribbon, ChainB: Style Atom Eevee, ChainC: Surface
The reason for using “Style Atom Eevee” is that the Atom is displayed only in Cycles and not in Eevee.
“Style Atom Eevee” allows the Atom to be displayed in Eevee.
Since Atom models cannot be converted to meshes, it is recommended that you do not use “Style Atoms”, if you would like to export your model.
Use “Style Atom Eevee” to display in Eevee style
Changing the material
This section aims to show you, how to change the material.
When a model is imported, a material is automatically assigned to it, based on the data at hand. However, if you change the original material to a different color, it may not work properly, when it is exported.
Therefore, we recommend creating a new material and replacing it, if the model is to be exported.
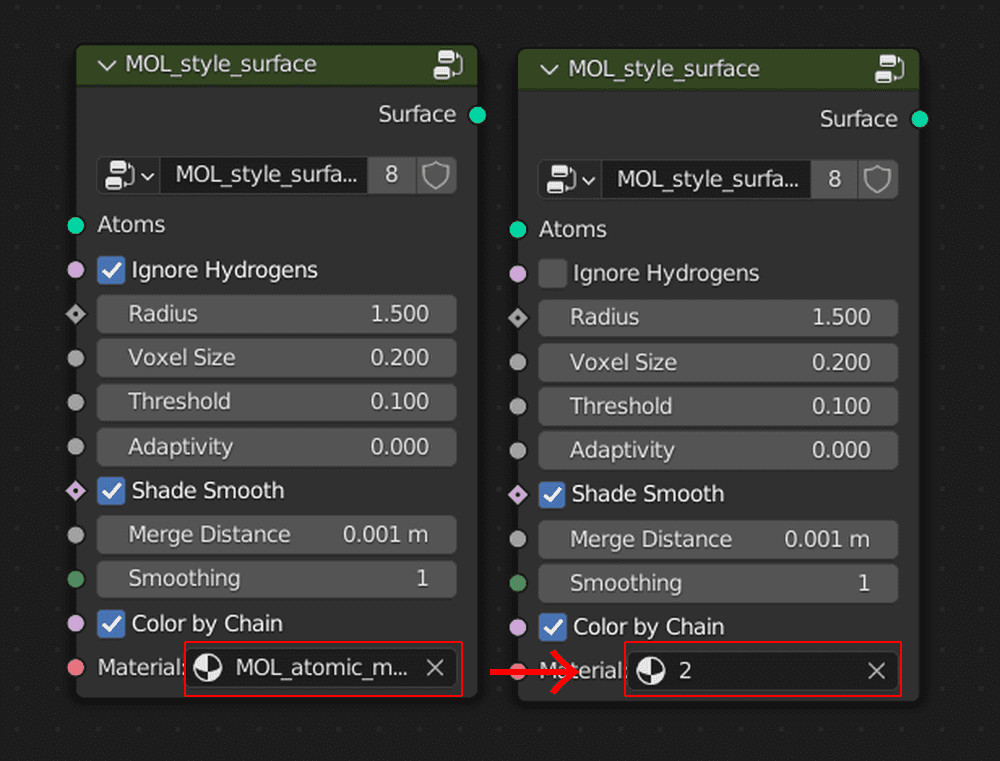
Replacing the original material with the new material
When you select a material, which is originally attached to a node, you can select a material, which exists in the current Blender file and replace it with the one you would like to use.
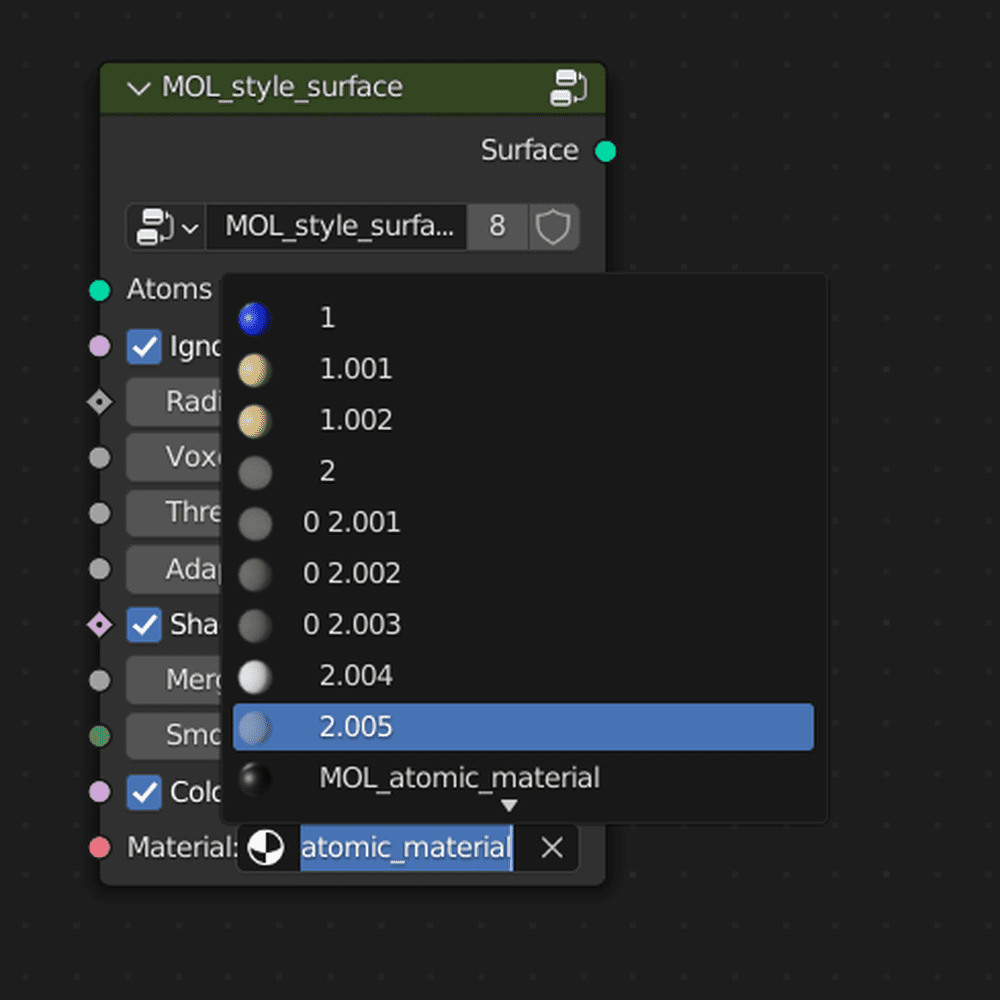
Clicking on the material slot
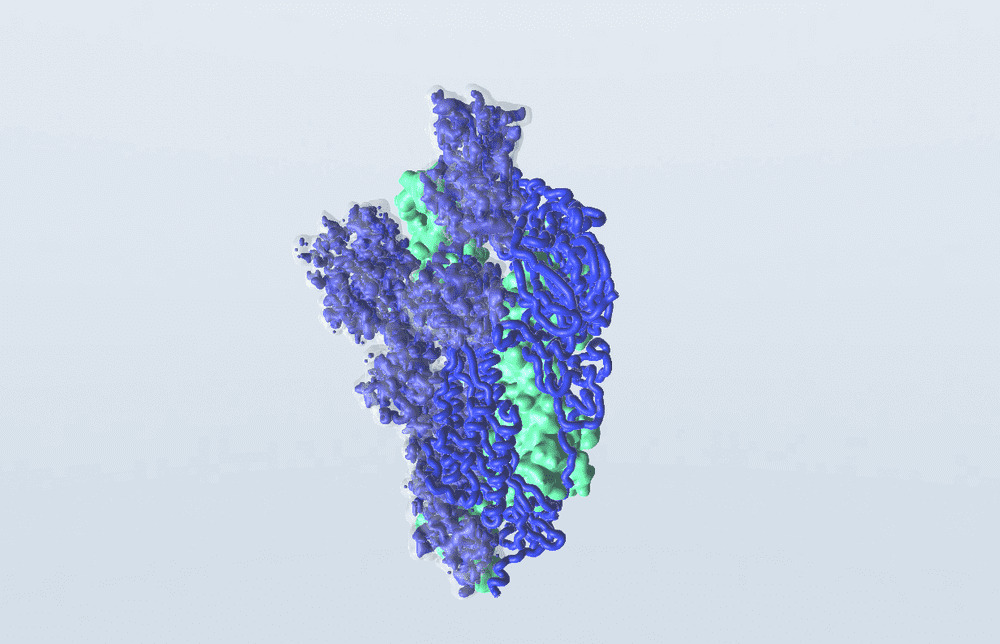
Next, we explain how to create a membrane-like material around the model, as shown in the image below.
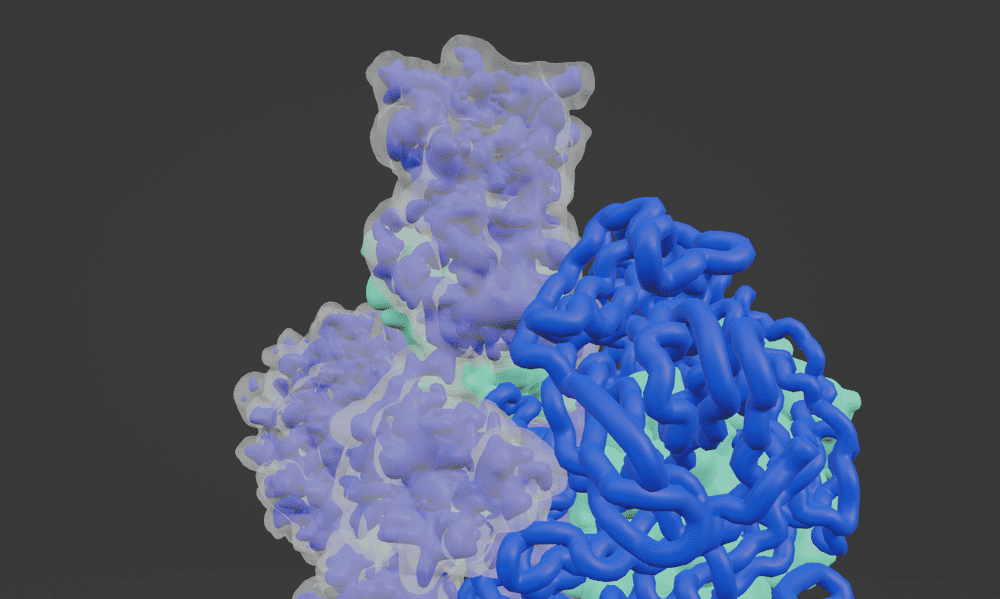
Translucent membrane covering the model
Add two Style Surfaces to the Geometry Nodes.
First, create the inner one by reducing the size of one of them a little bit, and change its color to the one you wish to have.
Next, select the other Style Surface and add a new material.

Changing the size on the outside and inside
A translucent film-like effect can be achieved by assigning a material and changing the Alpha value of that material.
Adjusting the Alpha value
How to export a model
Since Atom models cannot be converted to meshes, it is recommended that you do not use Style Atoms, if you would like to export your model.
Select the model and press Shift+[D] to duplicate it.
![Shiftl+[D]キーで複製](https://styly.cc/wp-content/uploads/2022/08/20.gif)
Pressing ShiftL+[D] to duplicate the selected model
Right-click on the duplicated model and select Convert To→Mesh to convert the model to a mesh.
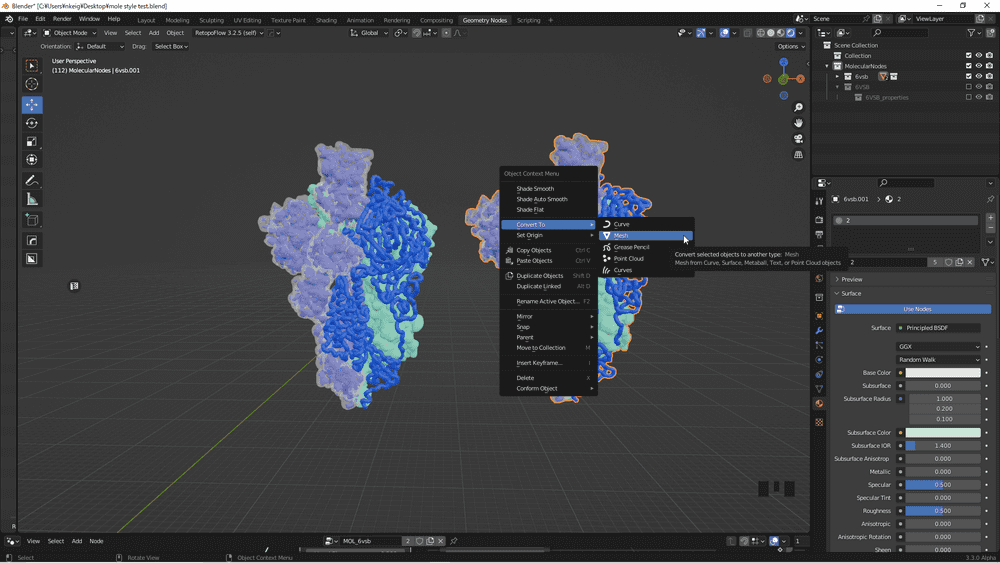
Convert To → Mesh
Select the model, which you converted to a mesh and click File→Export→glTF2.0(.glb/.gltf) in the upper left corner.
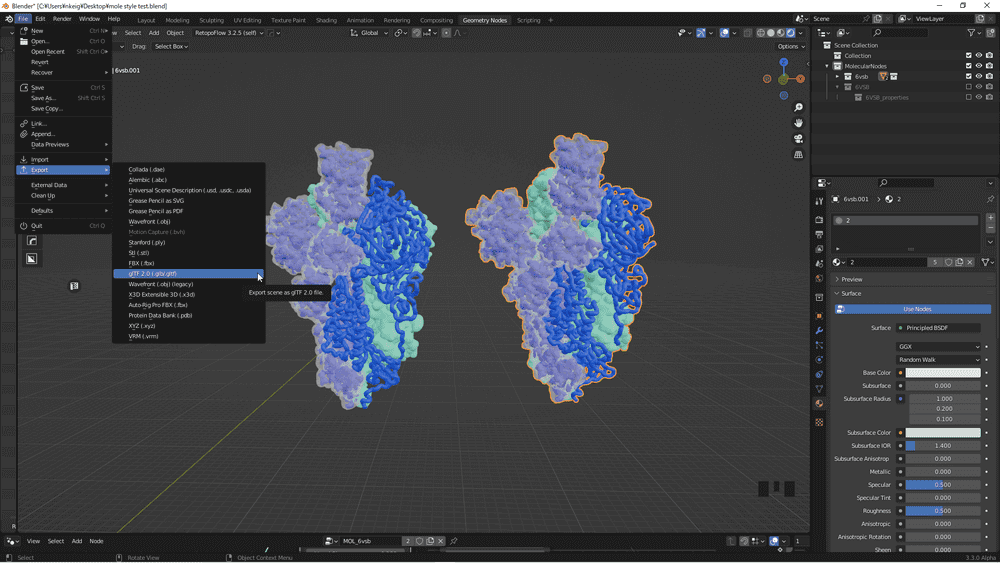
File→Export→glTF2.0(.glb/.gltf)
Change Format to “glTF Embedded(.gltf)”, put a check mark in “Selected Objects” under “Include” and click on “Export glTF2.0”.
The model is successfully imported in other Blender
This completes the export of the model.
Preparing to run glTF file in STYLY
Install Unity plug-ins
Unity does not support the glTF format by default. Therefore, you need to download a plug-in.
Download UniGLTF from this link.
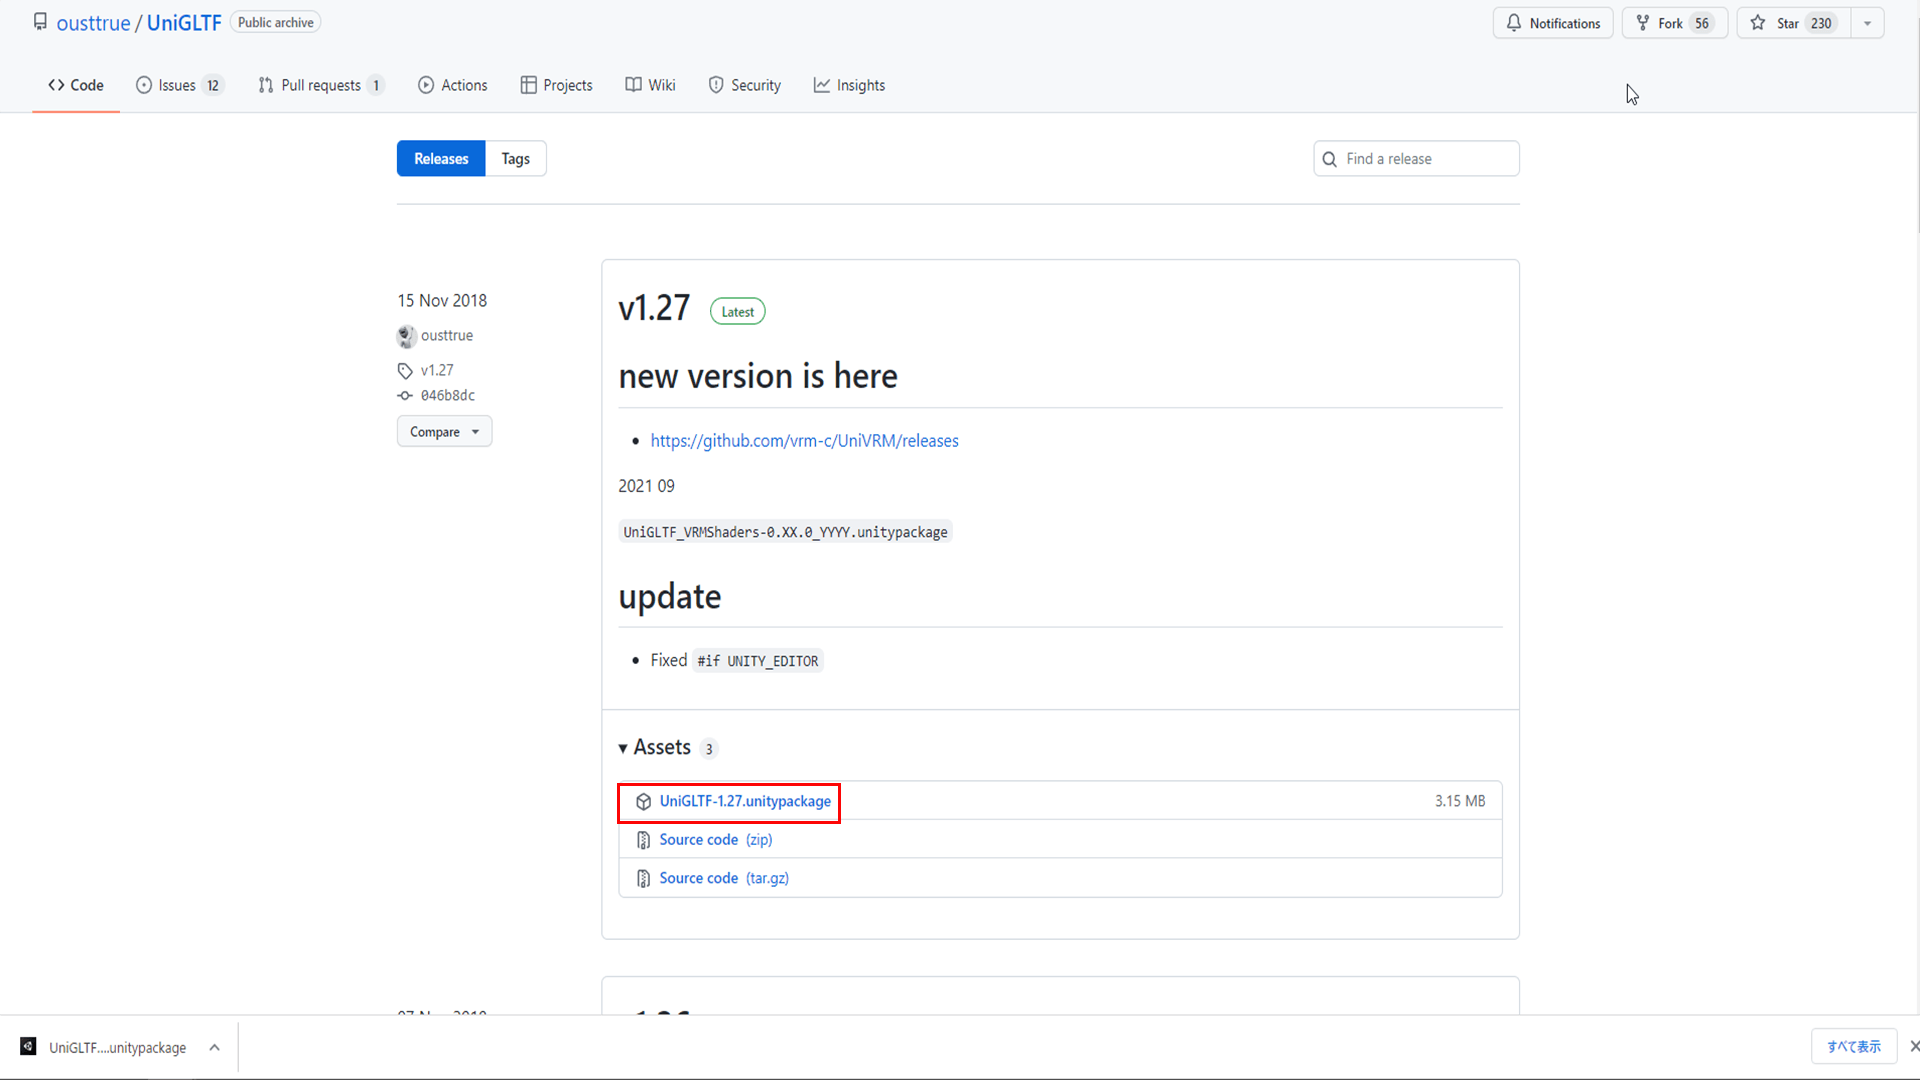
Download UniGLTF
Once downloaded, import the package. However, make sure to import STYLYPlugin first, because if you use STYLY, importing UniGLTF firstly may cause an error.
Open Unity, select Assets→Import Package→Custom Package and select the UniGLTF package.
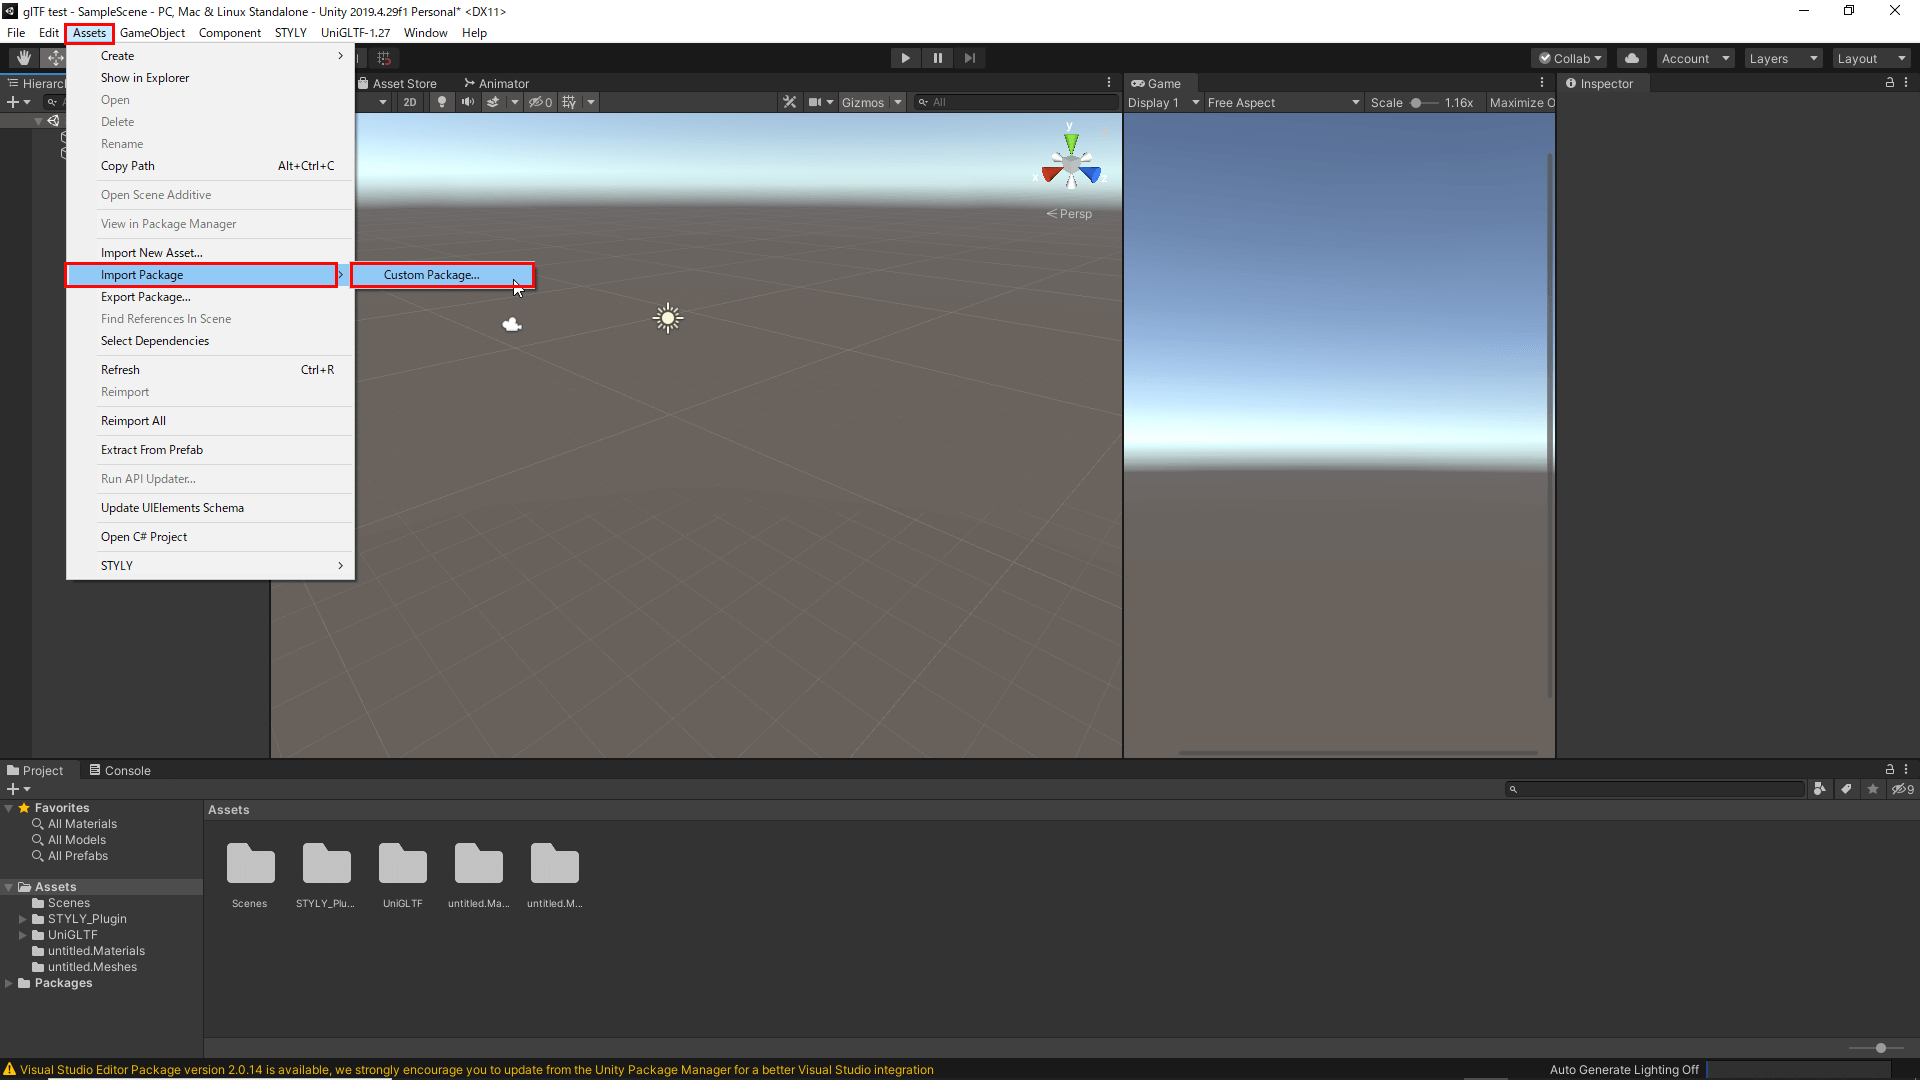
Assets→Import Package→Custom Package
Once the package is loaded, select Assets→Import Package→Custom Package.
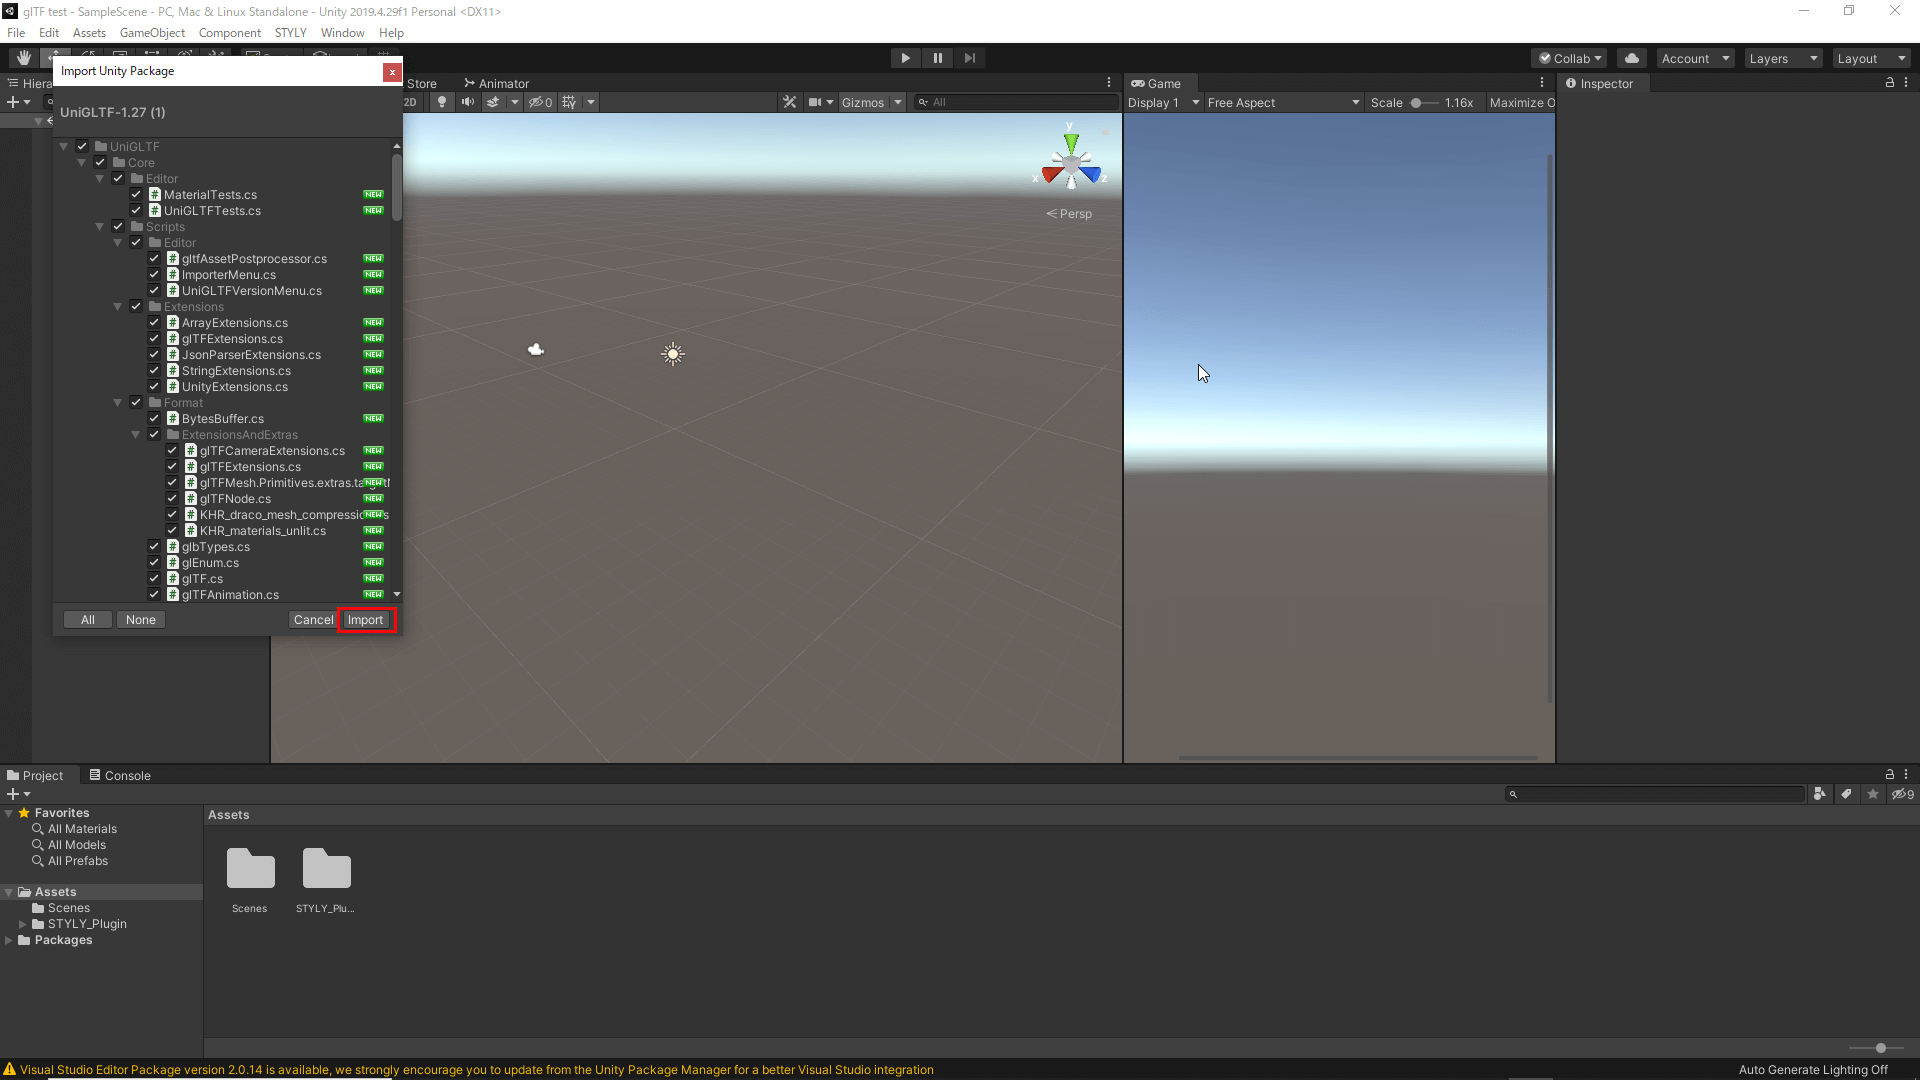
Assets→Import Package→Custom Package
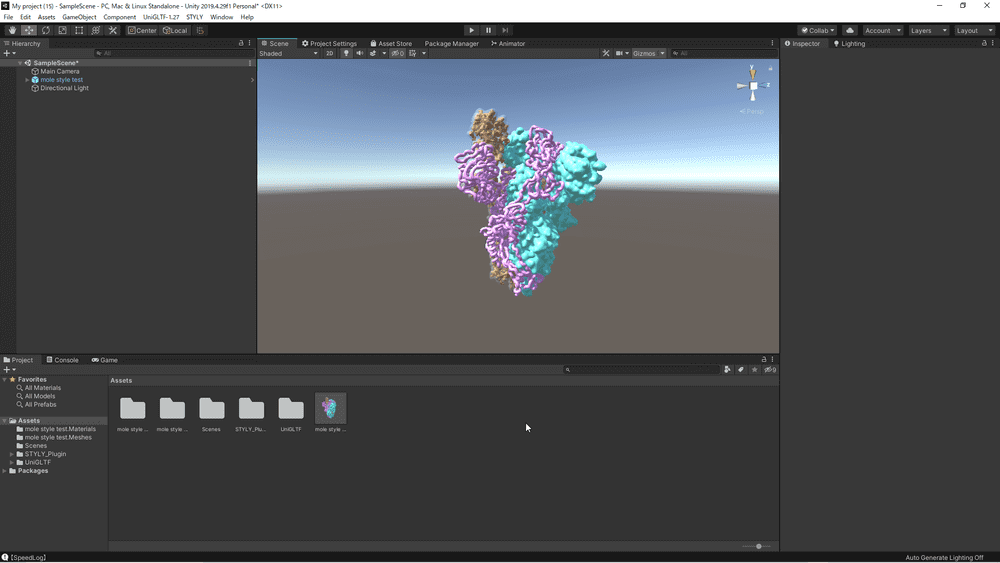
After the import is complete, a tab named UniGLTF-1.27 will appear at the top of the screen. Click on it, select import, and select the glTF file.
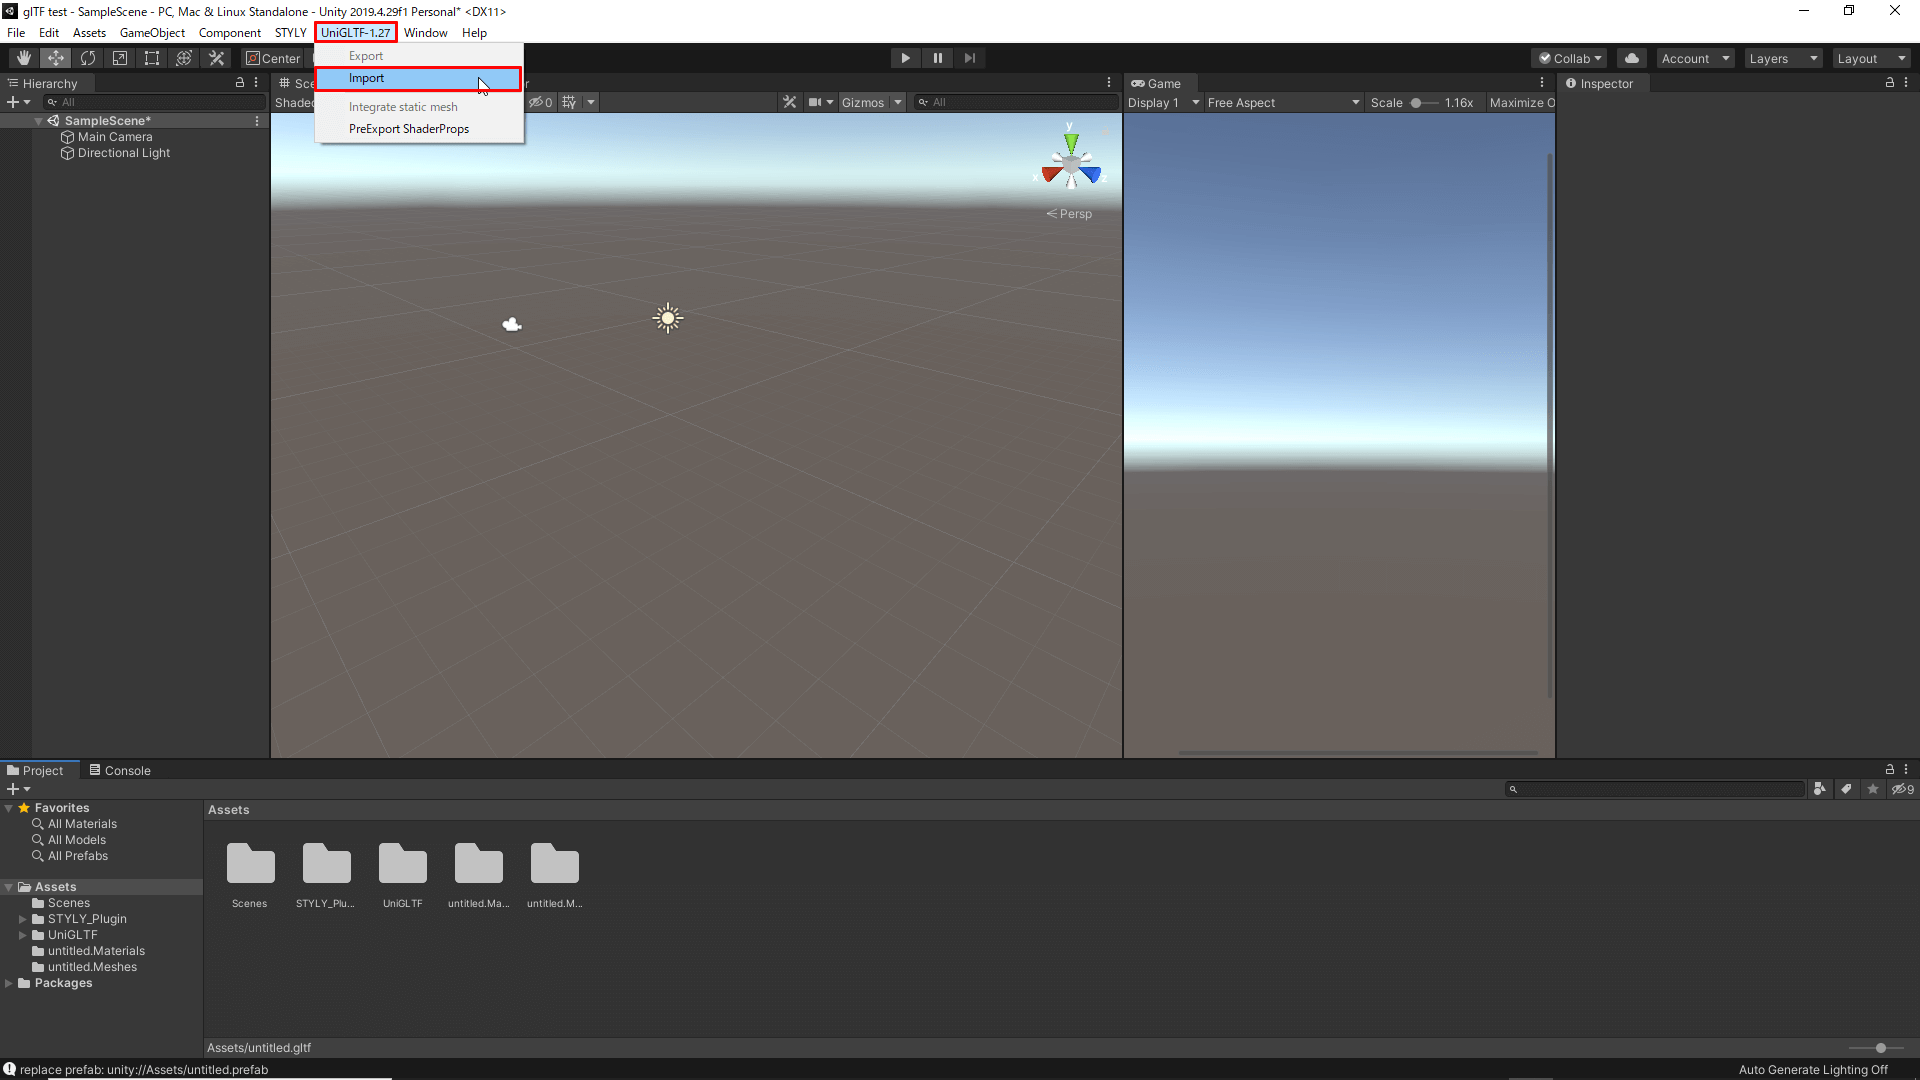
UniGLTF-1.27→Import, selecting the file
The file has been imported.
If you receive an error message on the first import, re-import the file, and it will be displayed correctly.
The following article explains in detail, how to reproduce transparent areas in Blender.
![[Unity] How to make an Object Transparent](https://styly.cc/wp-content/uploads/2022/09/Tomo_Tomei_eye-160x160.png)
Drag and drop objects in the hierarchy into the “Asset” folder to Prefab them.
Then right-click on the Prefab and click on STYLY→Upload prefab or scene to STYLY in order to upload it to STYLY.
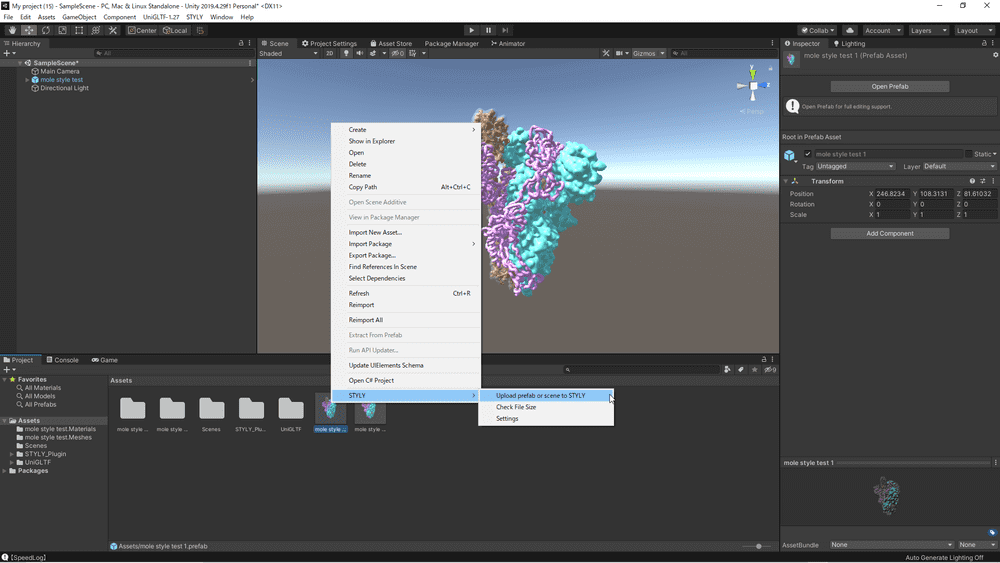
STYLY→Upload prefab or scene to STYLY
Detailed upload instructions can be found in the following article.
How to Upload to STYLY
Create a STYLY account:

How to upload to STYLY:

How to upload from Unity to STYLY:

Once the 3D model is placed as an object, it will appear as shown below.
This completes the upload to STYLY.
Placed in STYLY Studio
For questions about STYLY, bug reports, and improvement requests, please contact the STYLY FORUM
https://en.forum.styly.cc/support/discussions
Certified (QA) by Shota Shawn Yoshizawa
Edited by SASAnishiki
Translated by passerby1