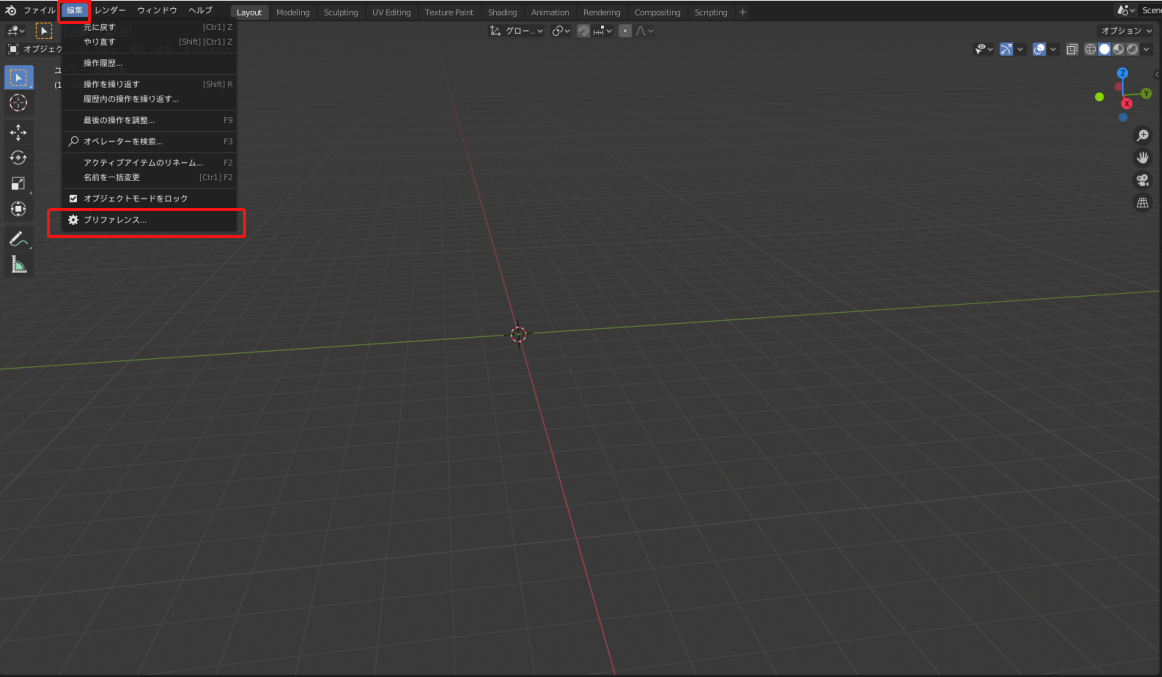
First of all, please watch this video.
You can easily create a cityscape in Blender.
This time, we will try to recreate this as STYLY as possible.
The finished product
Here is what I uploaded to STYLY.
Here are the specific steps to create it.
Importing the add-on “Blender GIS”
If you try to recreate the cityscape in the first video using only modeling, you will need a lot of work.
However, by using an add-on called “Blender GIS”, it is possible to “get a real-life cityscape from Google Maps and place it”.
https://t.co/ffnxs0UZhn pic.twitter.com/dRkbaCcFE9
— katsuyatsukui (@katsuya_tsukui) February 8, 2020
↑Blender GIS itself has been around for quite a while.
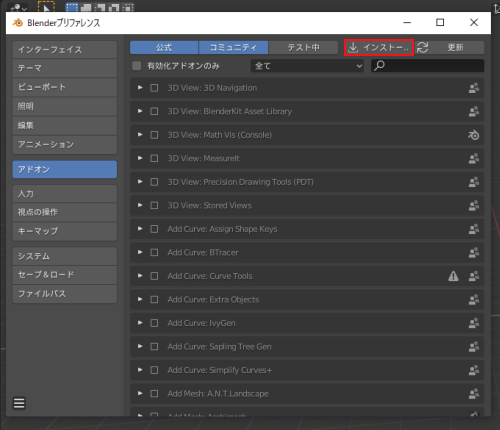
You can download the add-on from GitHub by selecting Download ZIP from Clone or Download.
https://github.com/domlysz/BlenderGIS
*According to the official documentation, it does not work properly with the Mac version of Blender.
If you are not sure where to save the file, go to the top left of the Blender screen, Edit -> Preferences -> Install, and select the add-on you downloaded.
There is one more thing to do on this preference screen: assign a folder somewhere on your PC to the Cache folder in Basemaps.
Press the file symbol on the right to open the menu, and choose an empty folder or create a new one.
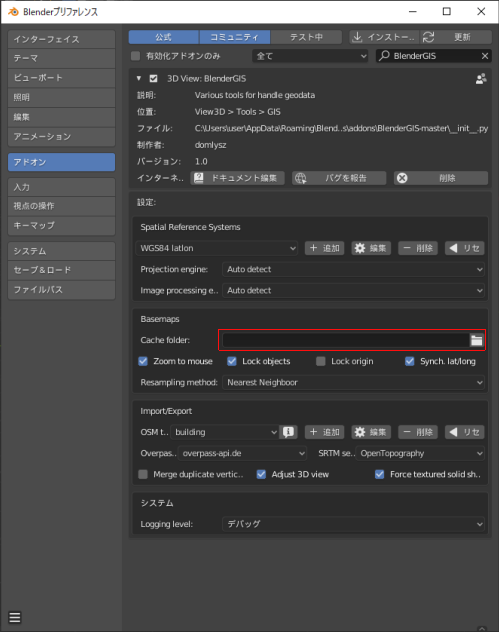
▲Red box. Be sure to fill it in
Once you’ve done that, your preparations are complete.
Actually Modeling from a Map
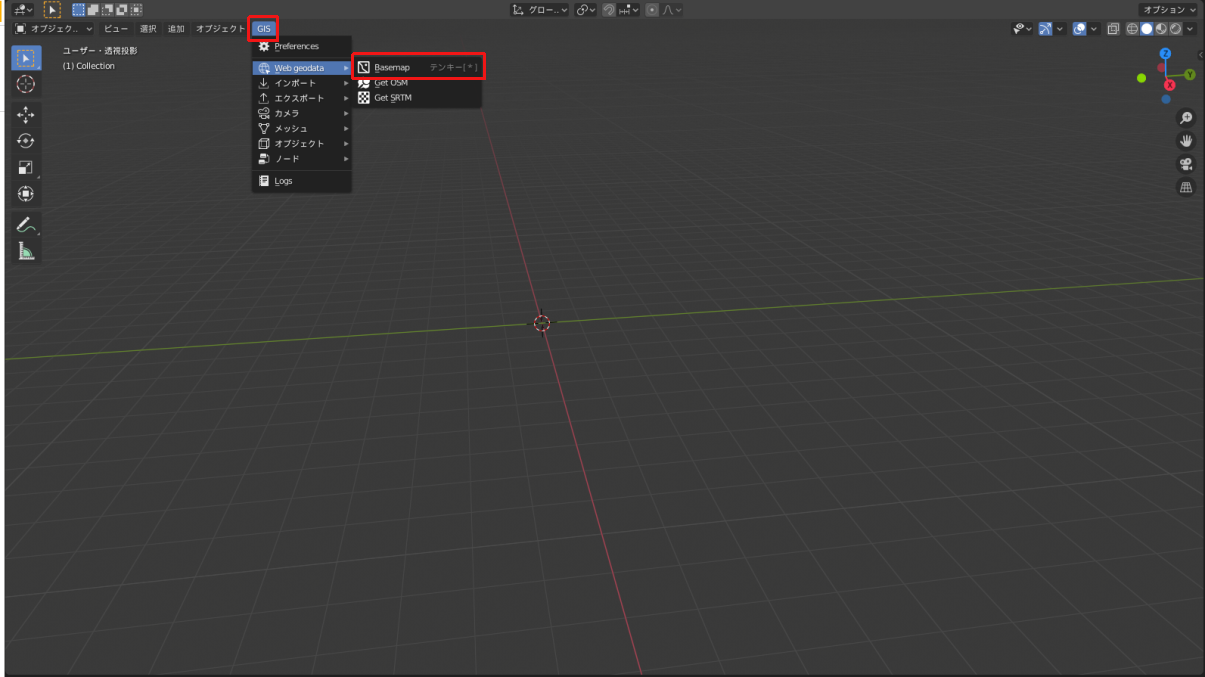
Now that the preparations are done, let’s get started with the modeling.
After activating the add-on, you should see an additional menu “GIS” in the object mode of Blender.
Select Web geodata -> Basemap from GIS.
Then you will see a screen like this.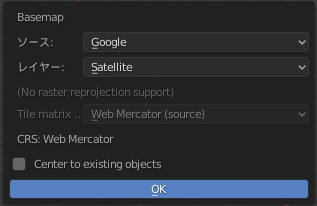
A quick explanation of the meaning of the items: Source means which company’s map you want to use, and Layer means whether you want to use a satellite photo or a map (the map that comes up when you use Googlemap).
You can change them according to your preference and use.
After selecting them, press OK. Then…
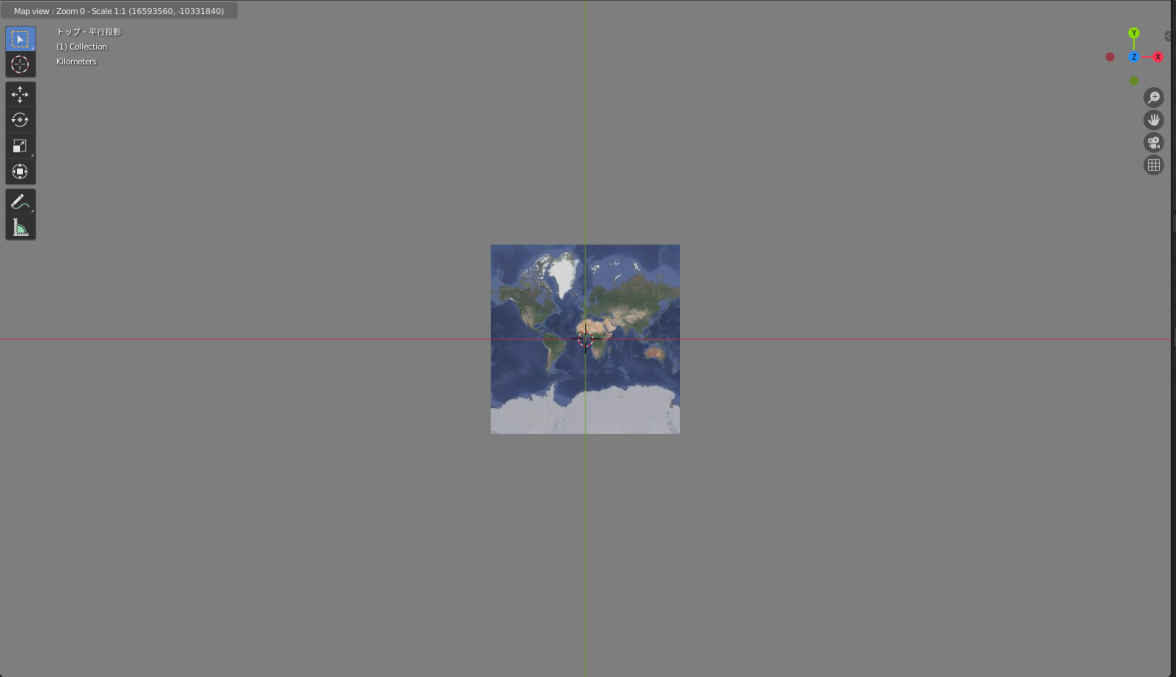
Suddenly, a world map will be generated.
In addition, the operation system will change completely. Don’t worry, it’s not that complicated to do.
Keys to use
- G… You can choose where to focus on the world map, and at what magnification. G…Select where on the world map to focus and at what magnification.
- Mouse scroll…Change the magnification.
- Ctrl + middle button…Move the map.
- E…Cut out the area you see on the screen as a mesh.
The key that is important is the E key. If you do not press it, the operation will not be completed.
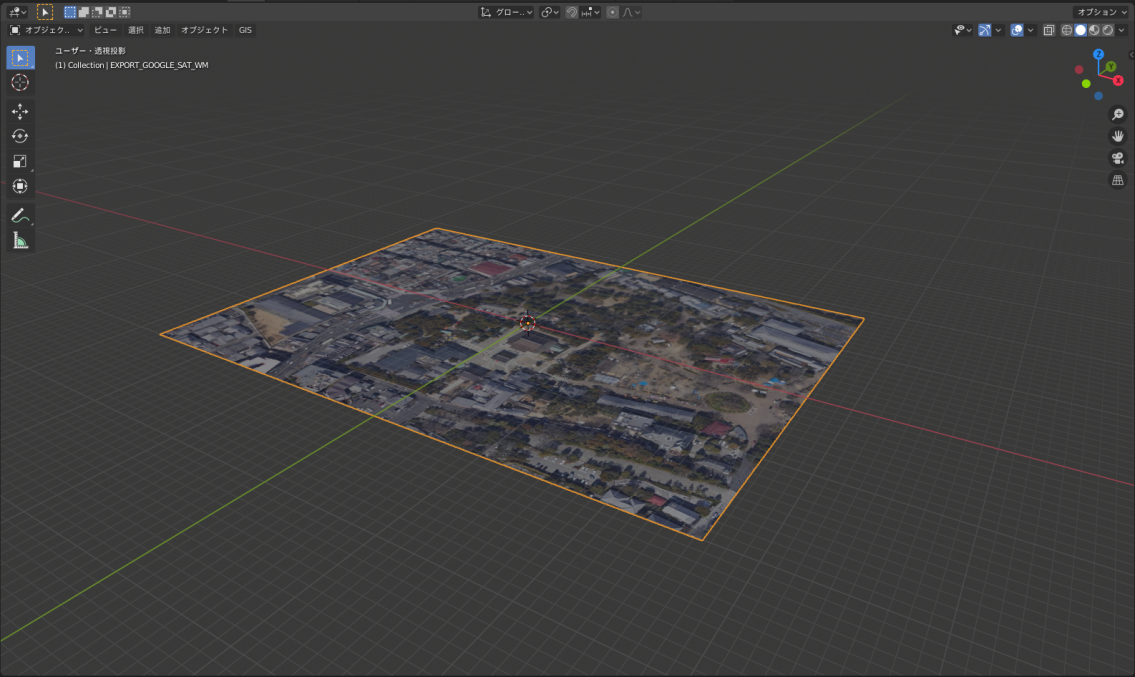
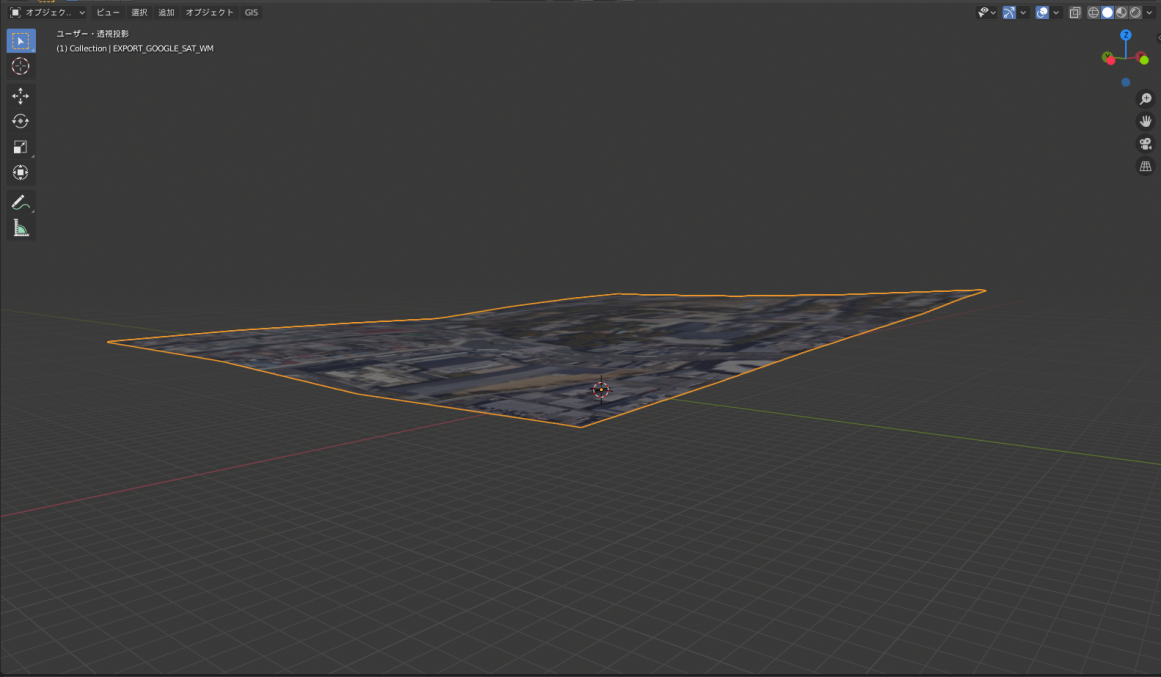
After cutting out the mesh. The area seen on the screen is cut out as a mesh. I chose Gion, Kyoto as the location for the photo.
The next step is to acquire information on the difference in elevation. Real terrain naturally has slopes, and the GIS will read that information.
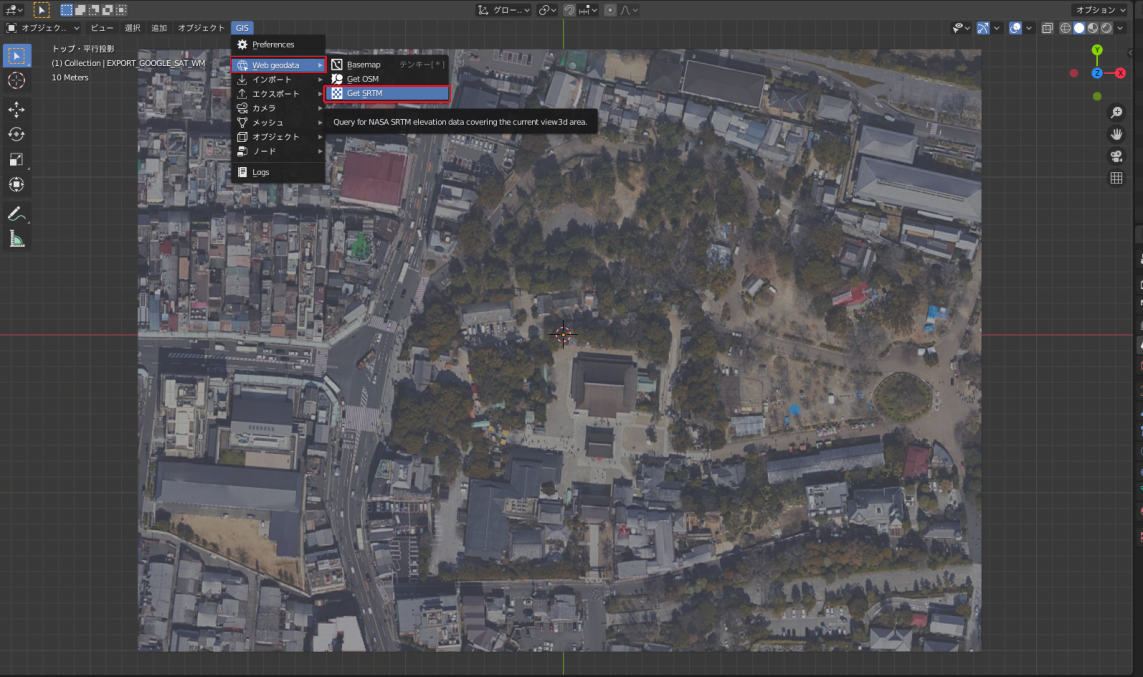
First of all, from the web geodata I mentioned earlier, I selected Get SRTM this time. That’s all you need to do to read in the height difference information and transform the mesh.
Like this
Next, let’s read in information about buildings, railroad tracks, rivers, etc. From Web geodata, select Get OSM.
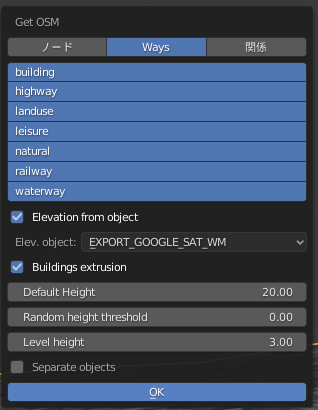
You will see a menu like this.
Elevation from object is a function to place objects according to the difference in elevation of the terrain that you have just acquired. Basically, you can leave it checked.
Separate objects at the bottom of the picture is a function to split the objects as they are.
If you wait until the process is finished, you will have an object that looks like this.
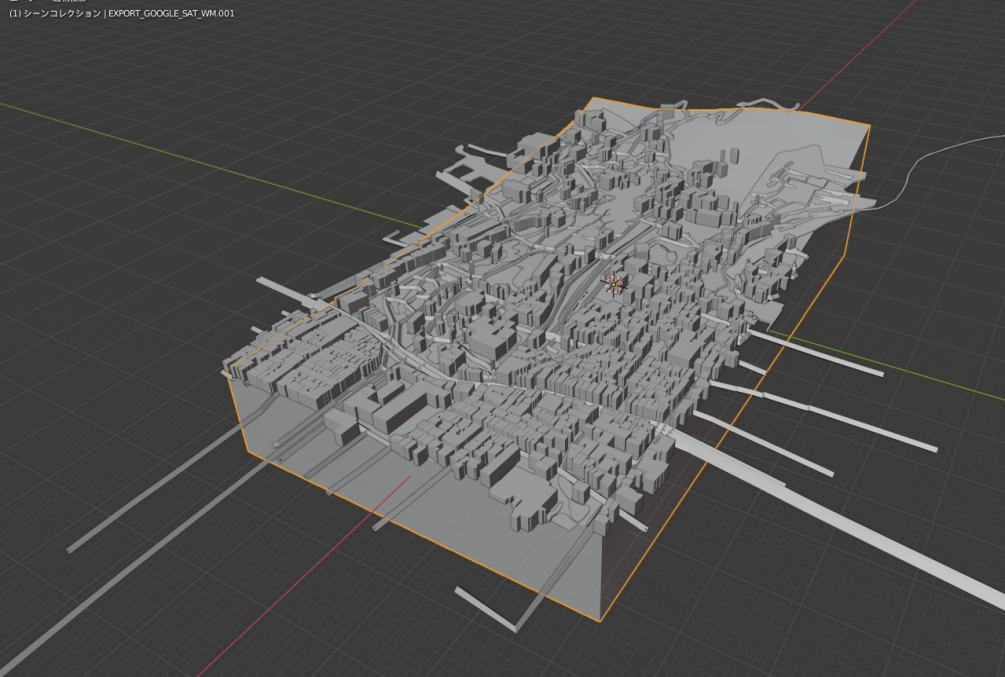
A city…
The picture has been slightly tweaked. However, it’s still pretty simple.
What I did
-
The tracks and roads in the generated object were mesh points, so I converted them to curves. Increase the depth from the bevel and make it bulge out.
In this case, we used a single object, so the thickness was uniformly the same, but you may want to change the thickness for each line. -
Set up a separate material for each object for color coding. Since we will edit them later in Unity, we will just separate them here.
-
The ground is a large single piece of wood, so I used E extrusion to give it height. (You can skip this step if you want, as it’s not very important except for ease of manipulation.
This is the end of the operation in Blender.
For more information on how to export 3D models from Blender, please refer to the following article.
If you export it as FBX, you can upload it directly to STYLY, but you can also import it to Unity, adjust the materials, and then upload it to STYLY as a prefab.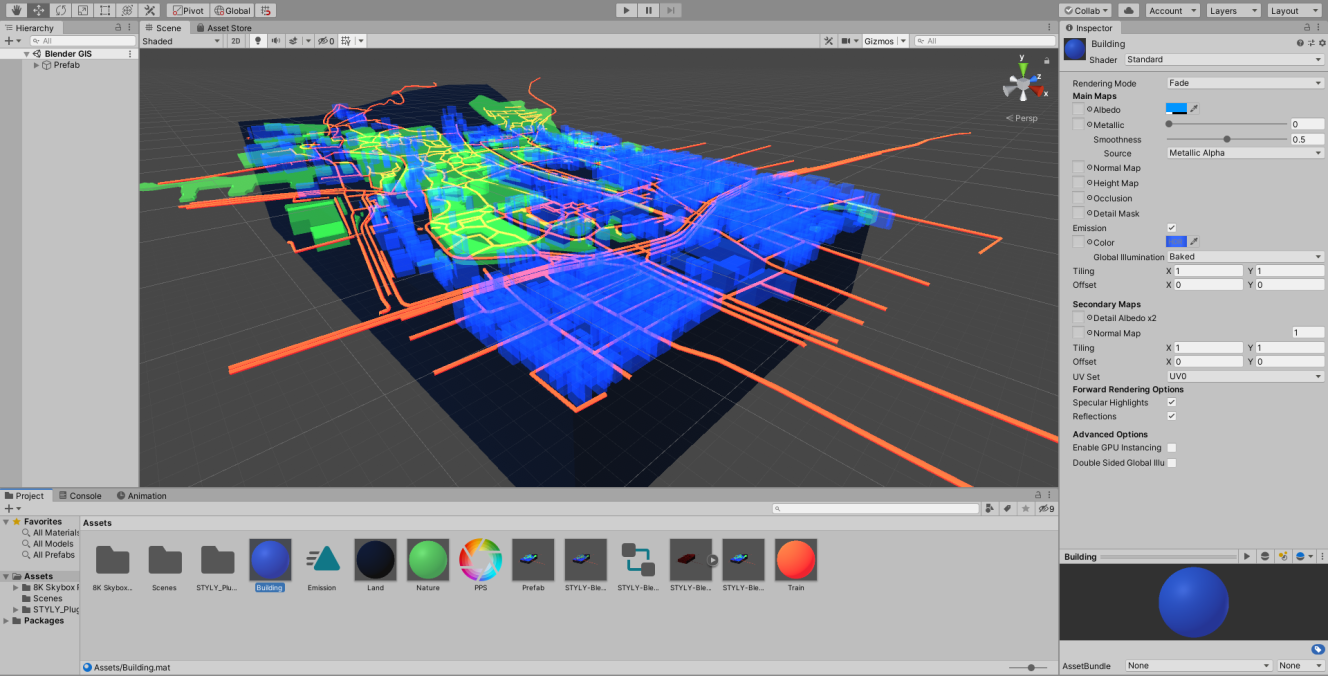
▲The finished product. Only Standard shaders were used. To make the railroad tracks buried in the ground visible, I used Opaque instead of Fade.
Once the Prefab is uploaded, you can add some effects to make it glow dimly.
How to upload assets from Unity to STYLY

Aside
This is how to create a cityscape using Blender GIS.
Personally, I’m a little disappointed that I can’t recreate the shape of the roofs, even though I chose Kyoto, but I can use it to generate a group of buildings without any problems.
If you follow the process in this video, you can add textures, and if you just use the slope of the ground, you can create realistic mountains.
The best part is that you can create a city in an instant, which saves a lot of labor.
We hope you will try to incorporate this into your own creations.