In this article, I introduce a simple animation of a ball modelled by using a Sphere in Autodesk Maya. Maya2016 is used here.
Animation of a ball
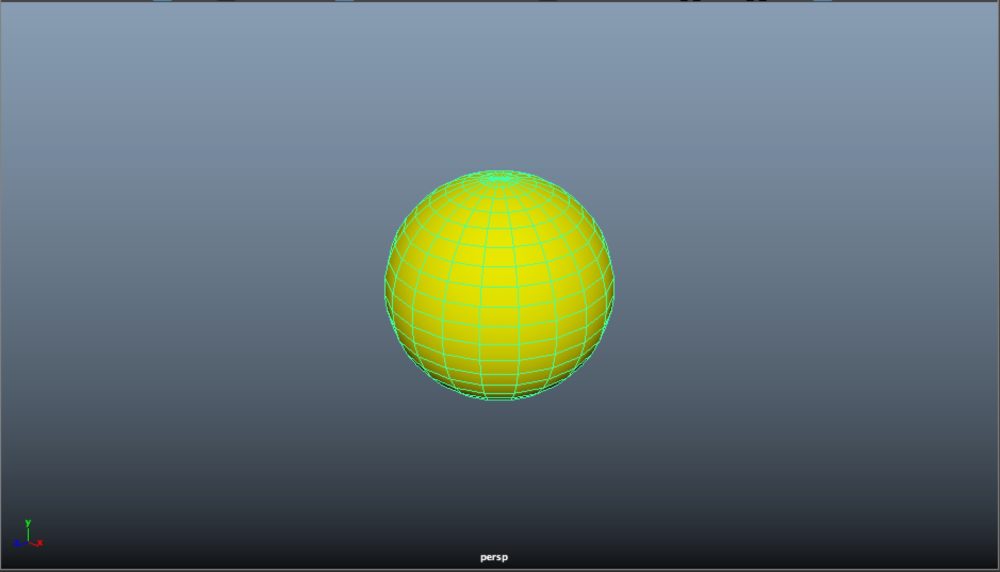
Create a Sphere to shape a ball. For better visibility, I coloured Lambert1 in yellow. You can colour and resize it as you like.
The initial setting for animation
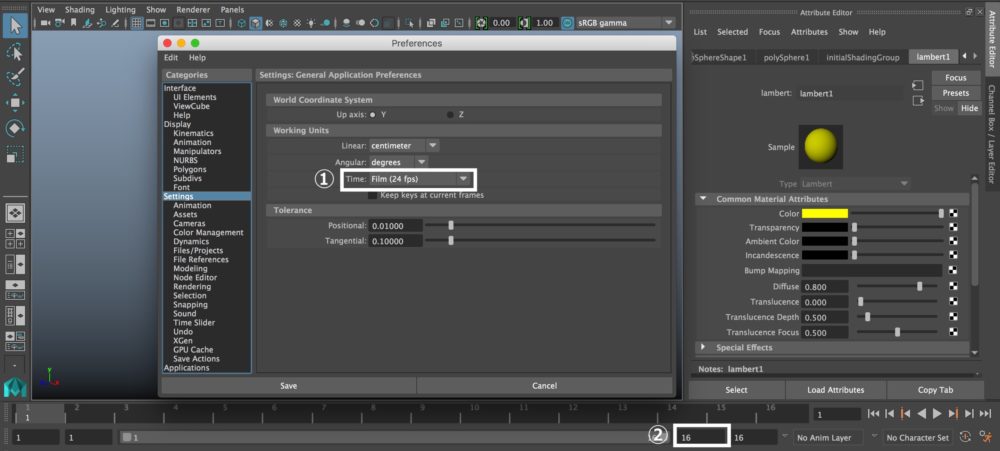
①Set the framerate to ‘Film 24fps’.
② In the Time Slider, the Playback End Time is set to 16.

With the sphere selected, set ‘Translate Y’ to 8.6. Confirm that the sphere has been moved upward a bit. We start the animation from that point.
As shown above, If you want to set a key just on the parameters specified (The parameters for Translate in this case),
select the parameters by the LMB with drag, and then press Shift+W.
It allows you to set a key on the parameters specified.
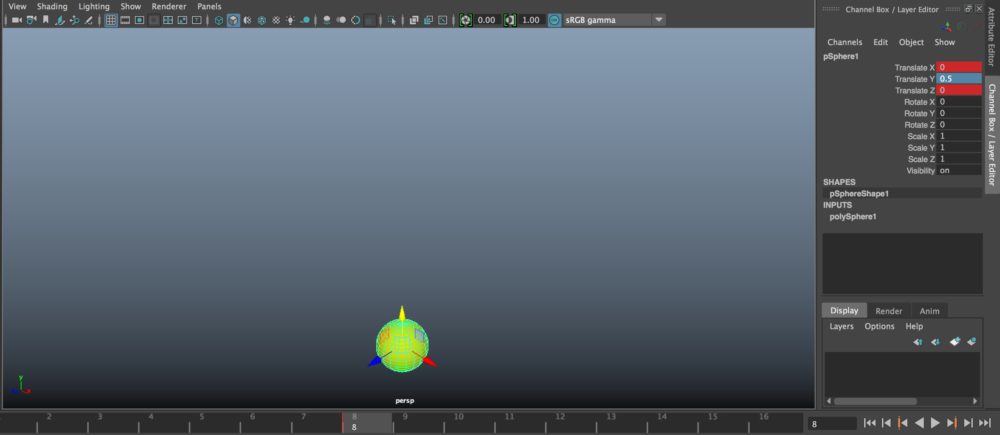
Set a key at the 8th frame by ‘Shift + W’. ‘Translate Y’ is set to 0.5.
Copy and paste a key on the Time Slider
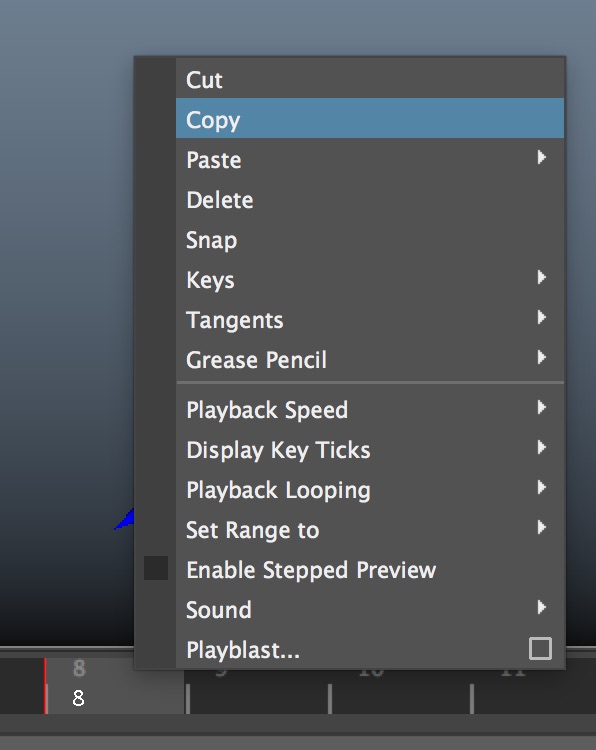
We copy the values of the 8th frame to the 9th frame.
Select the 8th frame and right-click to open the context menu. Select ‘Copy’ to copy the values.
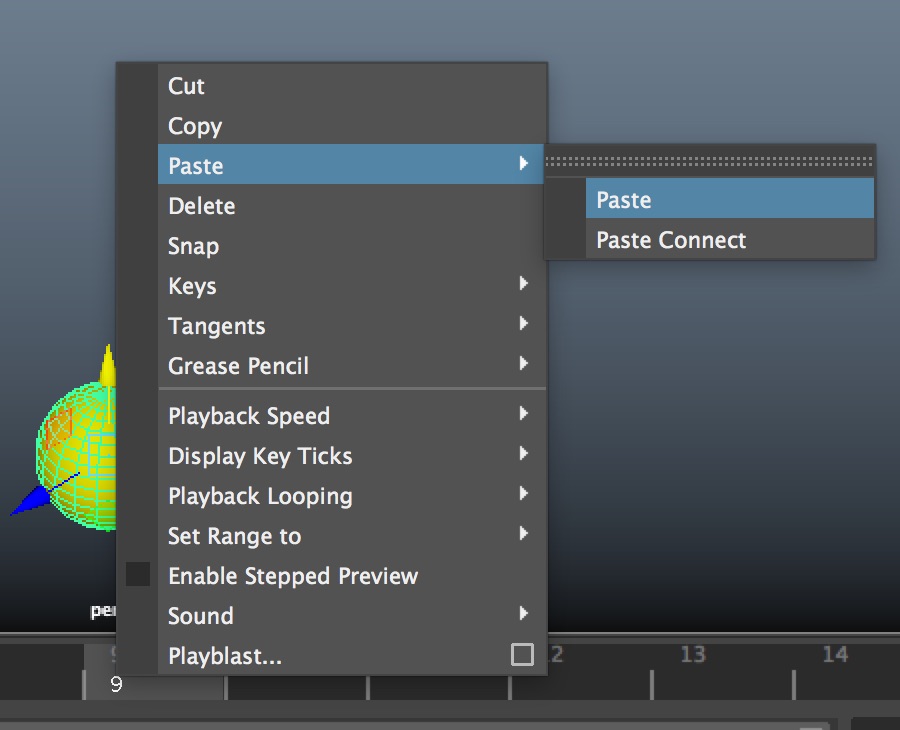
Select the 9th frame and right-click to open the context menu.
Paste > Paste
Then, the values of the 8th frame have been copied to the 9th frame.
In the same way, copy the values of the first frame to the 16th frame, and play the animation.
Adjust Animation by Graph Editor

Windows > Animation Editors > Graph Editor
It opens the Graph Editor. When the Graph Editor is opened, the graph might not look like the shown above, which can be corrected by pressing the ‘F’ key on the Graph Editor.
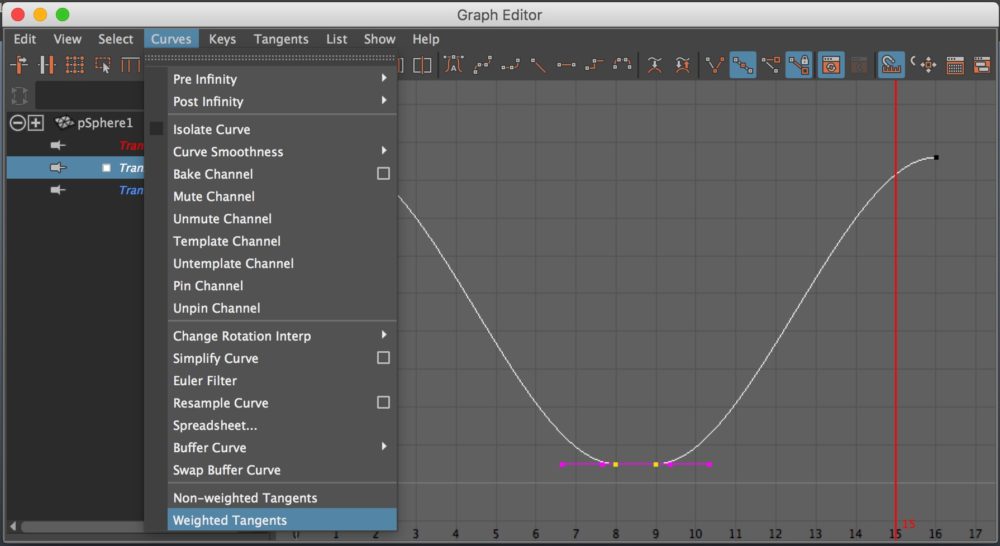
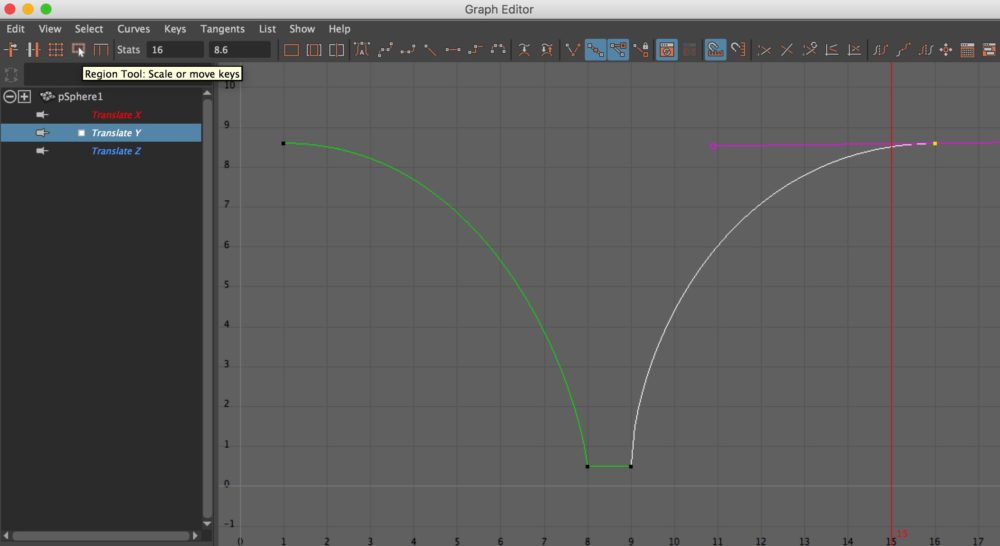
With ‘Translate Y’ on the Graph Editor selected, select the 8 and 9 frames by ‘LMB + drag’.
Curves > Weighted Tangents
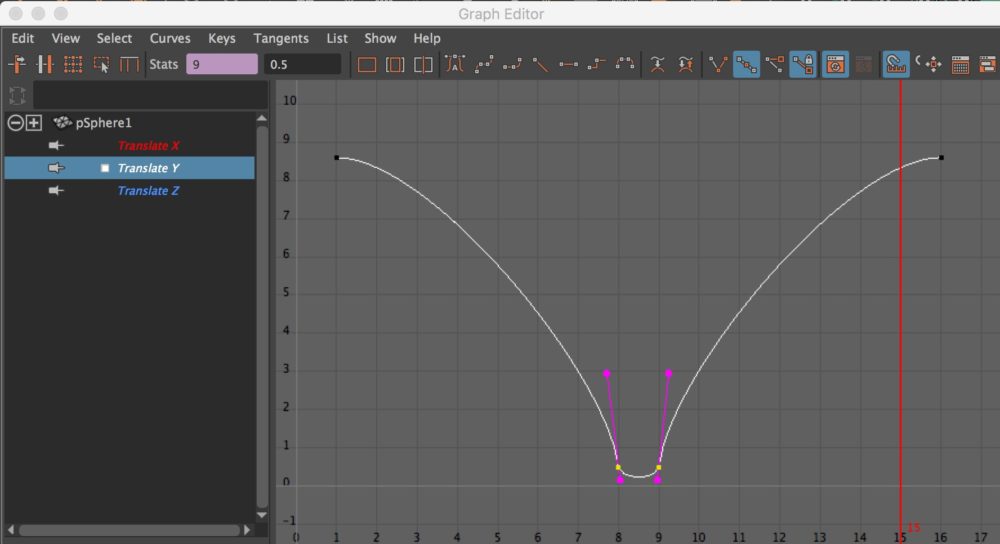
As shown above, move the handle upward.
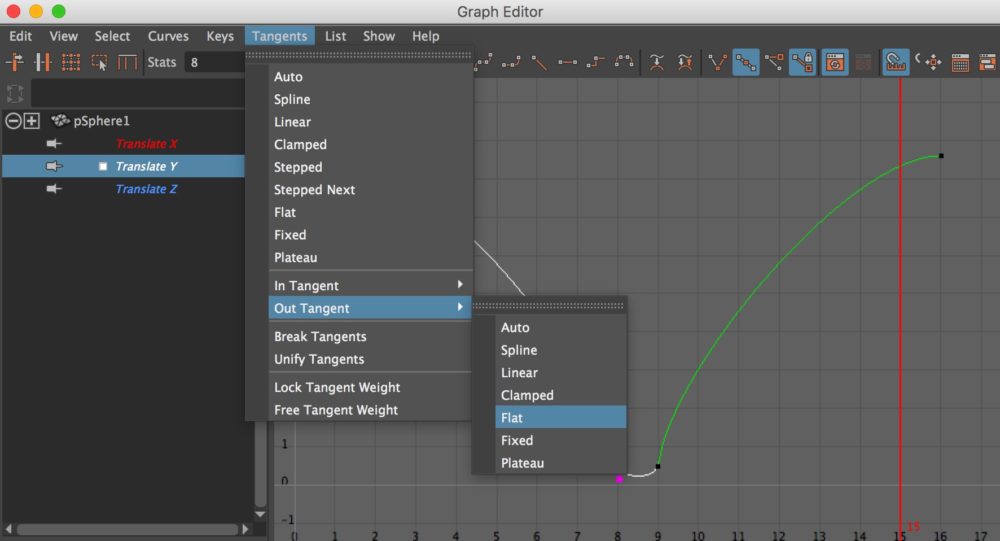
With the 8th frame selected,
Tangents > Out Tangent > Flat
Do the same for the 9th frame. The 8th and 9th frame should now look like the shown below.
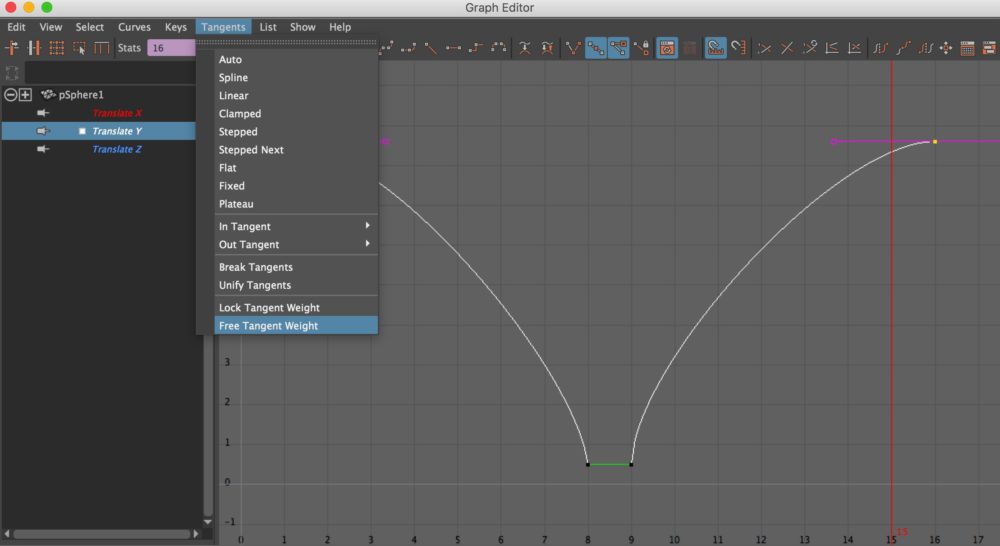
Next, select both the first and 16th frames.
Tangents > Free Tangents Weight
It allows you to adjust the tangent weight. You can keep the ball flying longer if you increase the tangent weight, and the flying time is shortened by decreasing it.
Increase the tangent weight to keep the ball flying a bit longer.
Adjust the bounce of the ball
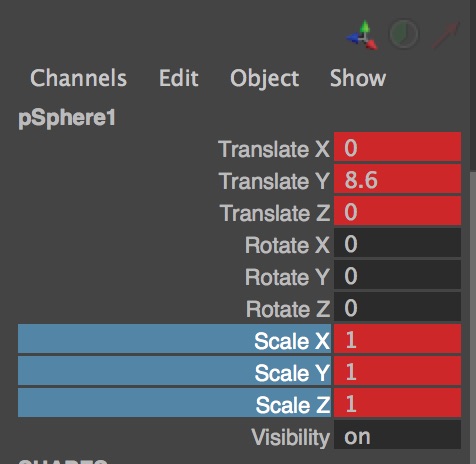
Set a key to the ‘Scale’ parameters of the first frame. If you cannot set a key by Shift+W, select the Scale parameters by ‘LMB + drag’ and right-click, then select ‘Key Selected’.
Set the parameters as shown below:
The first and 16th frame: Scale X: 1, Scale Y: 1, Scale Z: 1
The 7th and 11th frame: Scale X: 1, Scale Y: 1.5, Scale Z: 1
The 8th and 9th frame: Scale X: 1.5 Scale Y: 0.5 Scale Z: 1.5

Now, the Time Slider should look like the shown here. Check the animation by playing it.
Did you get a realistic motion of the ball?
At first, it’s easy to forget what number you set and where you set it. Instead of completing one frame before going to the next, I recommend finishing the animation for each axis (X, Y and Z) separately to manage it easily.
(Reference: AREA JAPAN Maya Learning Channel)