In this article, I will show how to bake a texture for the background object rendered with global illumination. I use Maya 2016, and Turtle as Renderer.
I downloaded the 3D object from TURBOSQUID for free.
Lightmap
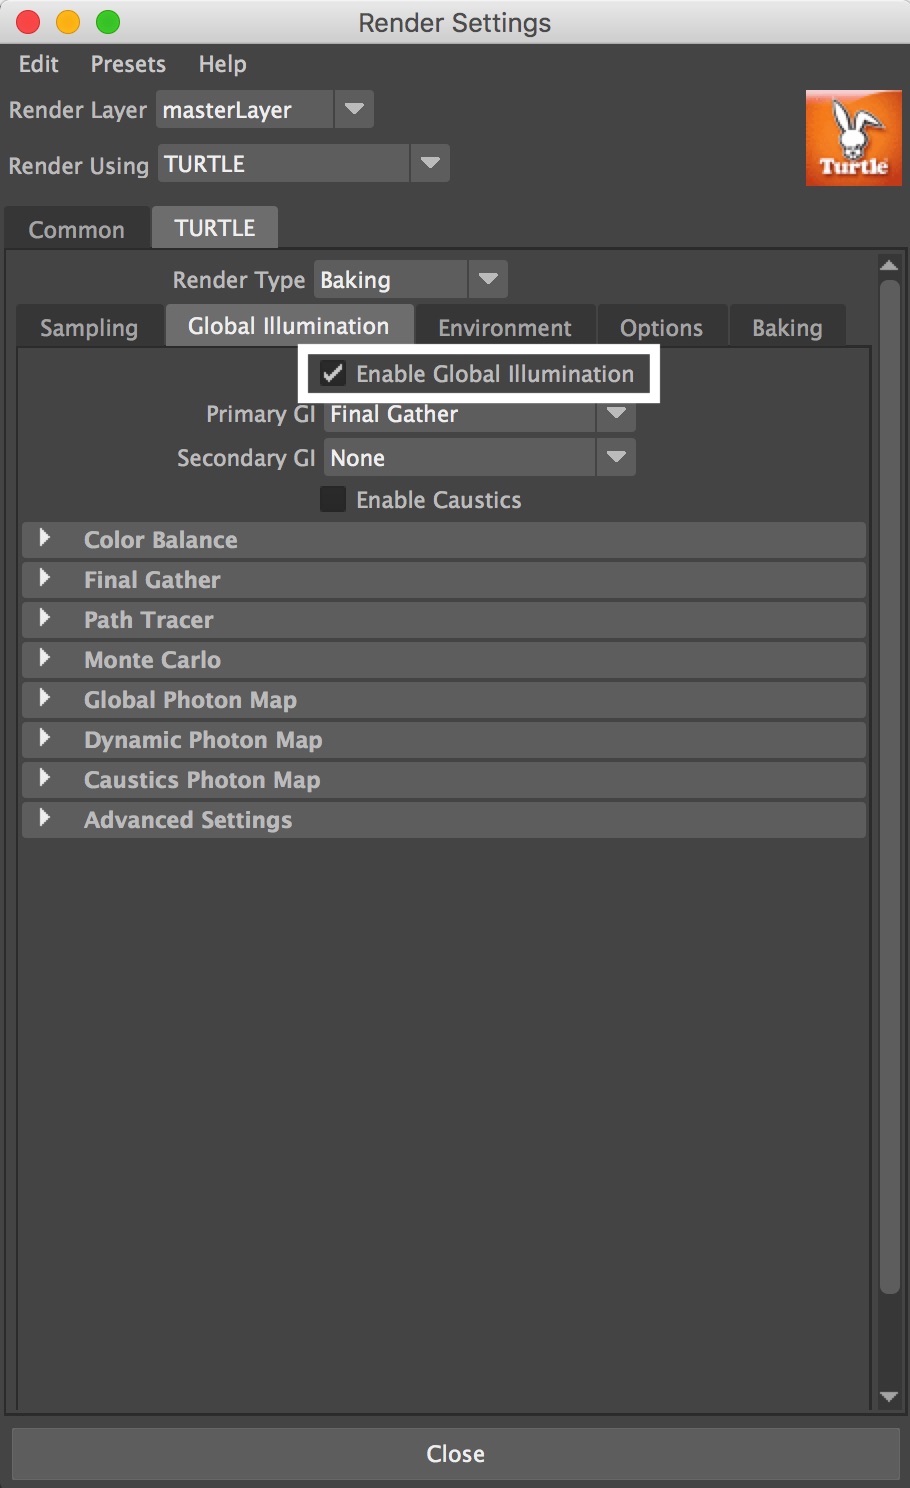
Render Settings
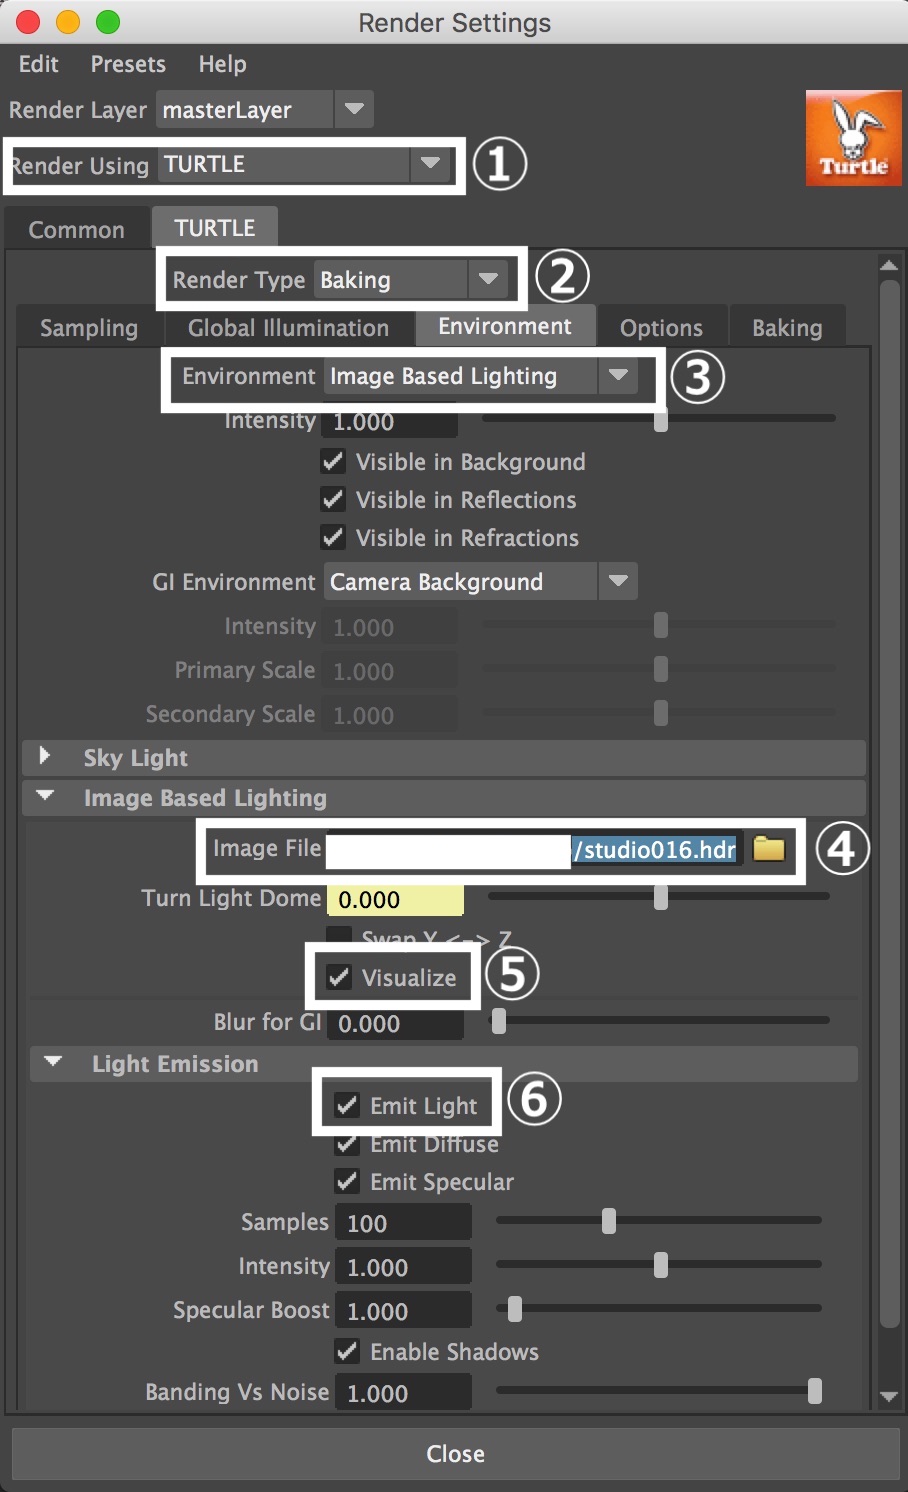
Set ① to ⑥ as shown above.
For ④, specify an HDR image file.
Check the Visualize box (⑤) to show the HDR image in the viewport on Maya.
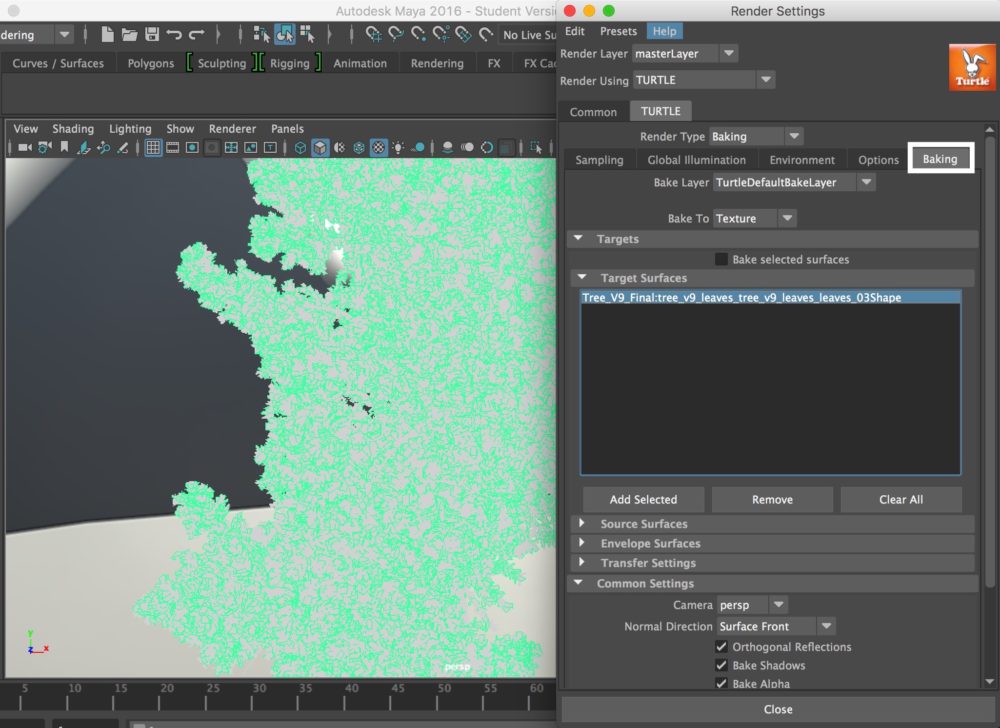
Next, in the Render Setting window, select the Baking tab.
Expand the ‘Target Surfaces’ section. Select the object to bake and then press ‘Add Selected’.
Now you can see the object added to the list in the ‘Target Surfaces’ section.
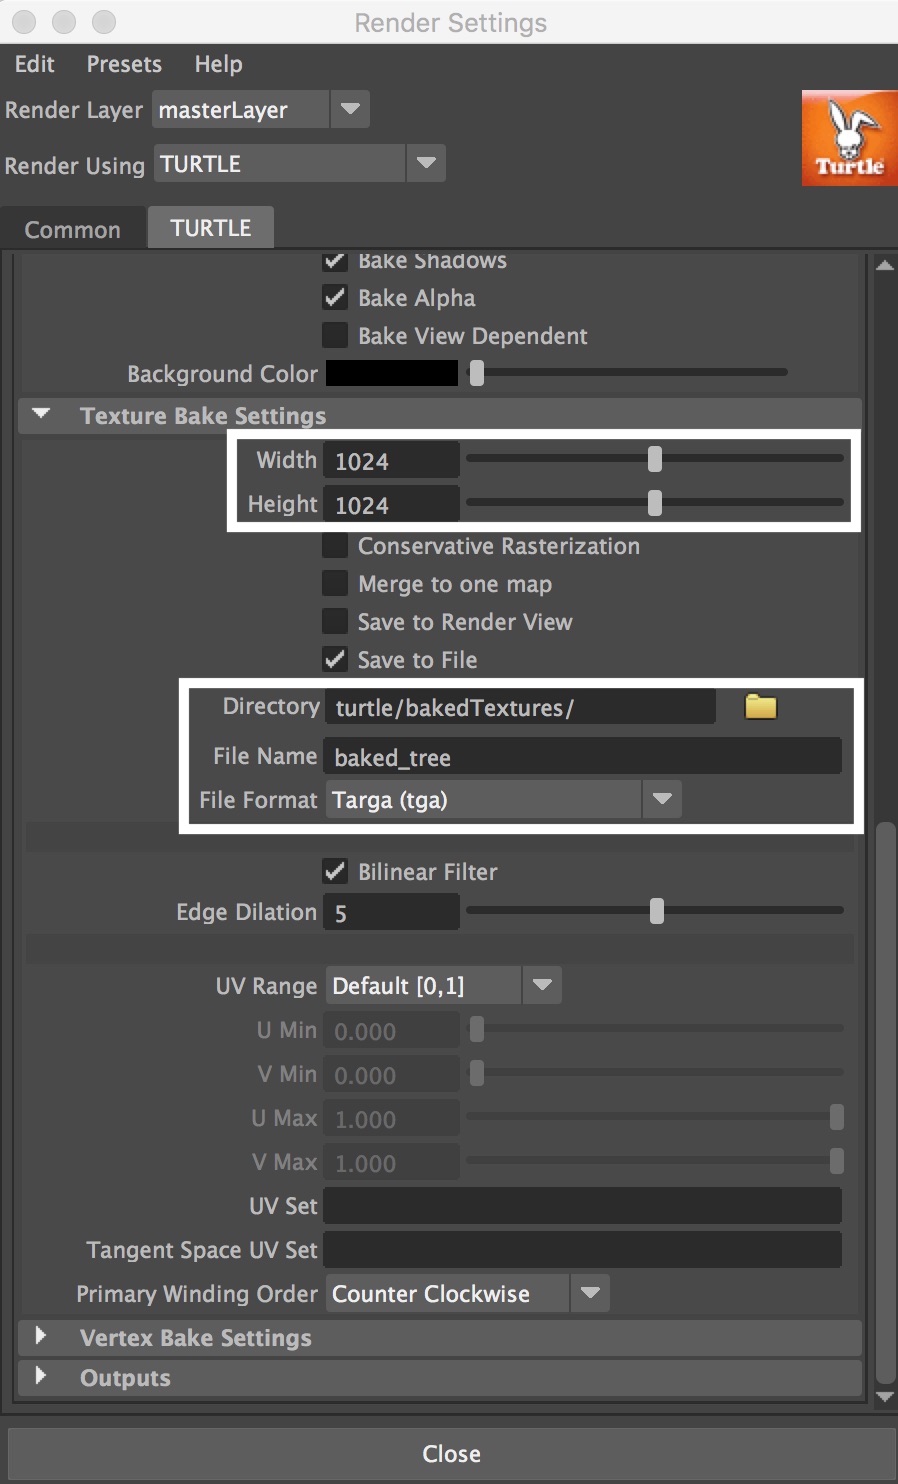
Scroll down the Render Setting window to show the ‘Texture Bake Settings’ section. Set both Width and Height to 1024.
And, set Directory, File Name and File Format suitably.
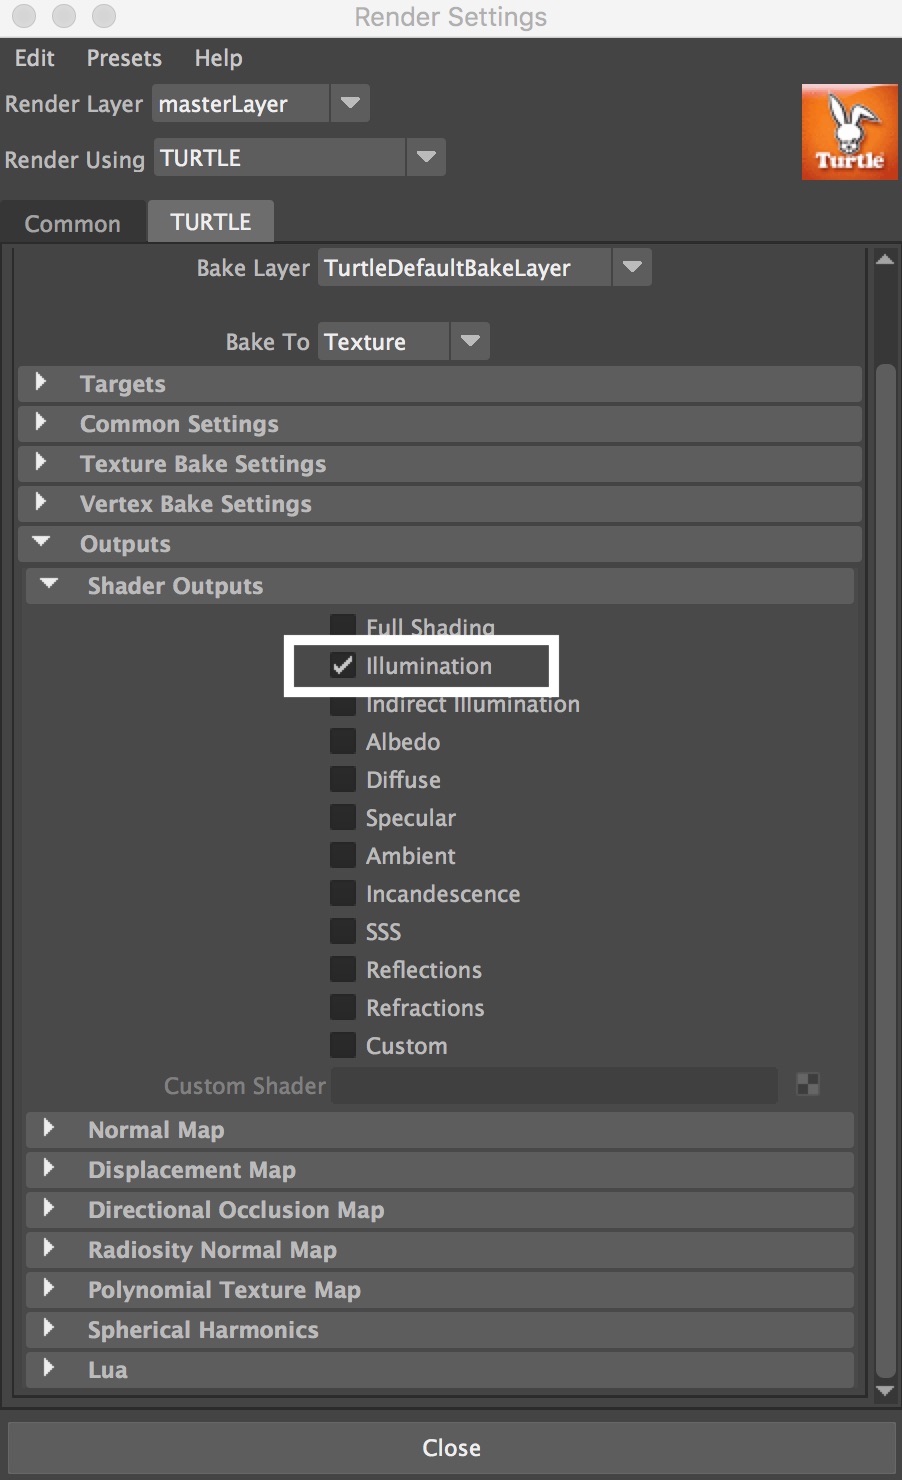
Scroll down further and find the Outputs section.
Click Outputs>Shader Outputs, and check the Illumination box.
That ends all settings on the Baking tab in the Render Setting window.
By the way, at first, you would often lose where you are when moving between the sections in the window to set the parameters because there are so many sections.
Although it’s OK to leave the sections expanded, collapsing them every time you used would help you to keep better visibility.
Once you finish up to here, let’s render the object.
Create a texture by Hypershade
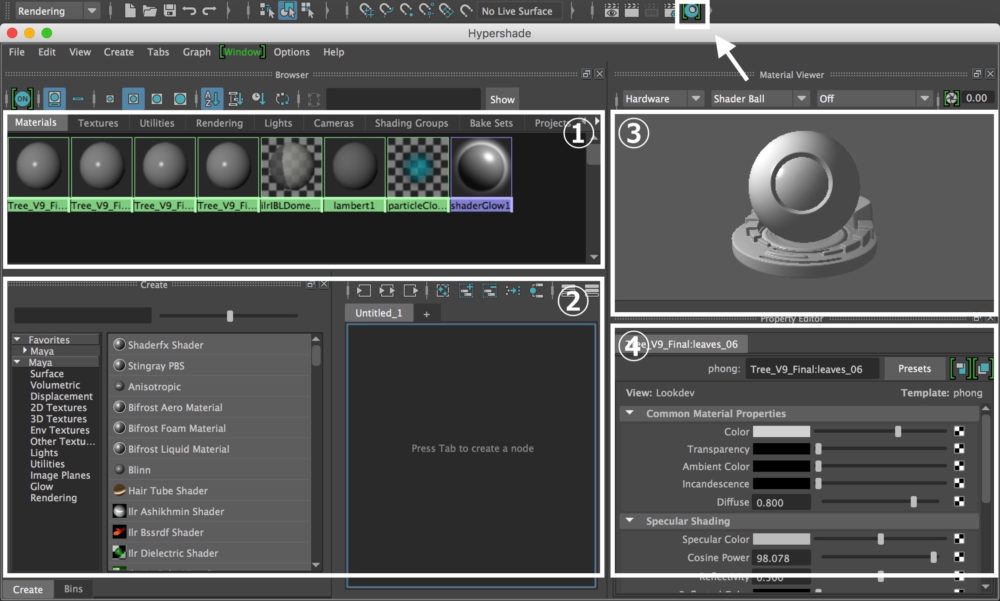
Open the Hyper shade window.
You can access it by the blue-green circle icon on the top of the screen. Firstly, I explain the UI.
① Browser
It lists materials, textures, cameras, renderings and lights. They are sorted by tabs.
②Work area
The area where you edit the node layout.
③Material Viewer
You can check the materials rendered while editing them.
④Propery Editor
Where you input numerical values to adjust materials.
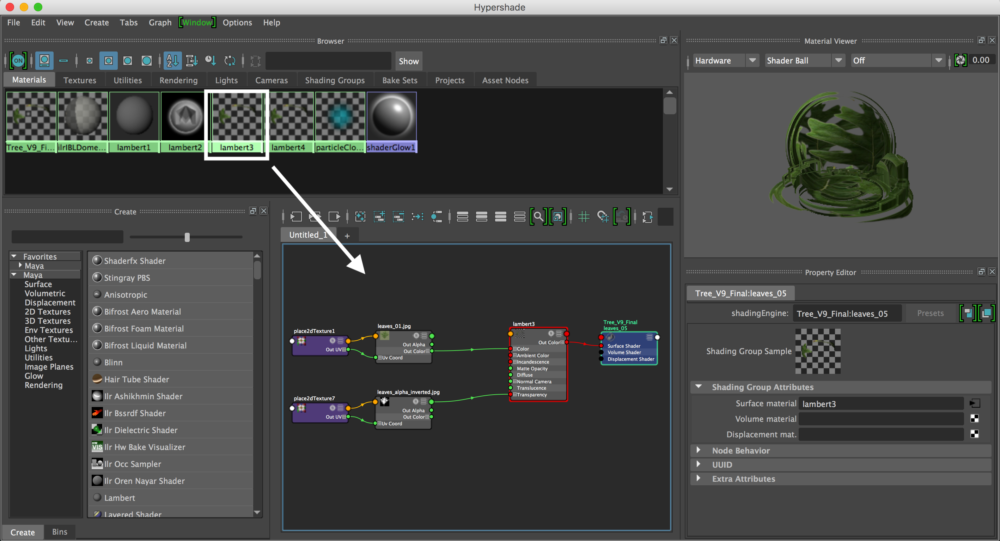
If you want to use a material from the Browser (①), you can drag a material onto the Work Area (②) by the middle mouse button.
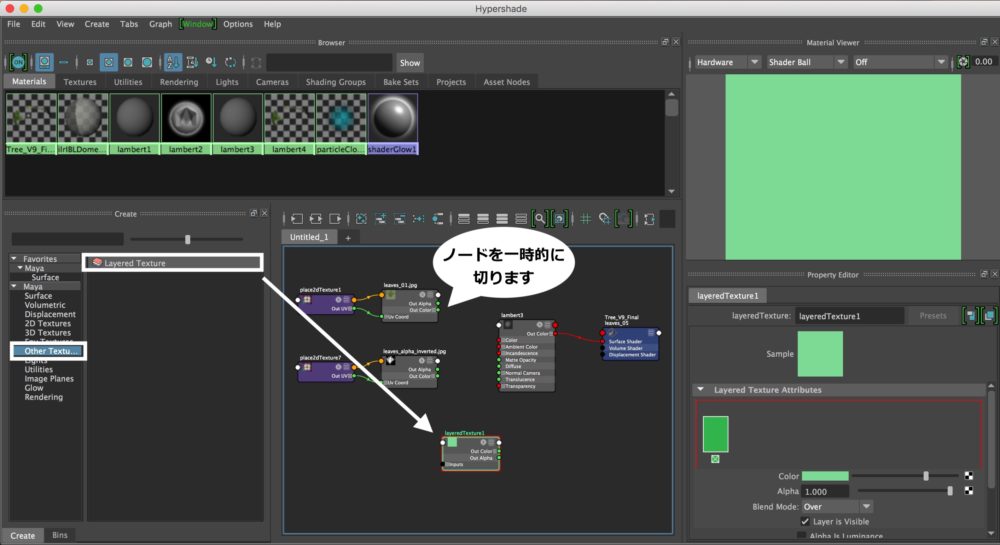
Firstly, we drag a texture from the list onto the Work area by the middle mouse button. Break the connection between the material node and the texture node temporarily.
From the left side of the Work area, drag the Layered Texture onto the main working area.
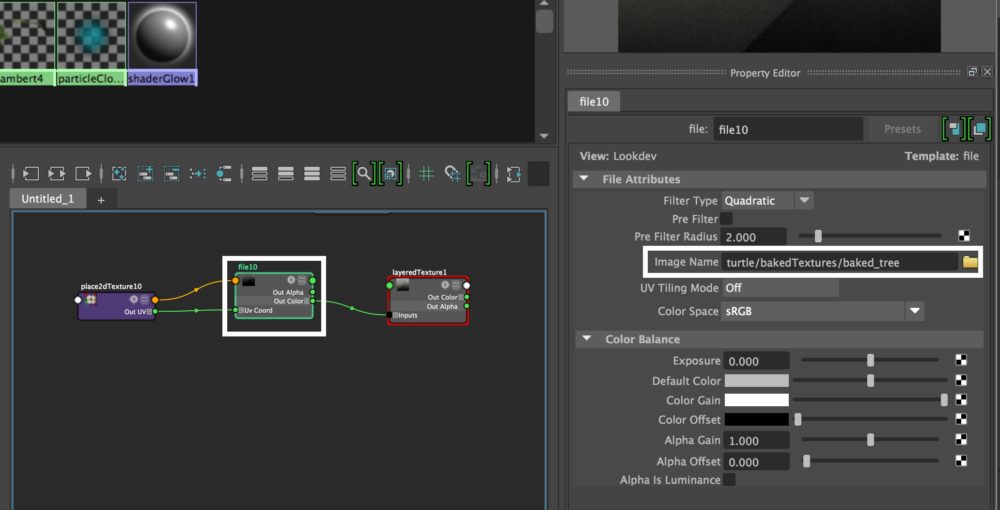
In the Color section of the Layered Texture, specify the lightmap-baked image file.
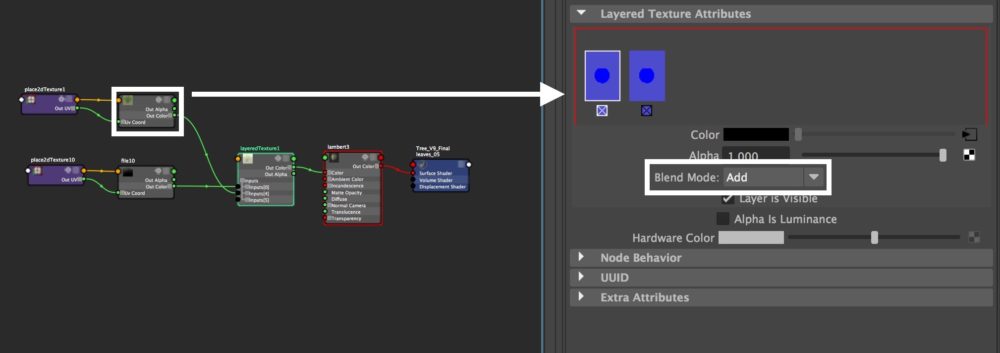
Next, drag the texture of the ground onto the Layered Texture Attributes by the middle mouse button. Set Blend Mode to Add (Multiply).
By the way, the black alpha channel is not used this time. So you can break the connection to it.
Finally, connect the Out Color of the Layered Texture to the Color input of the material node.
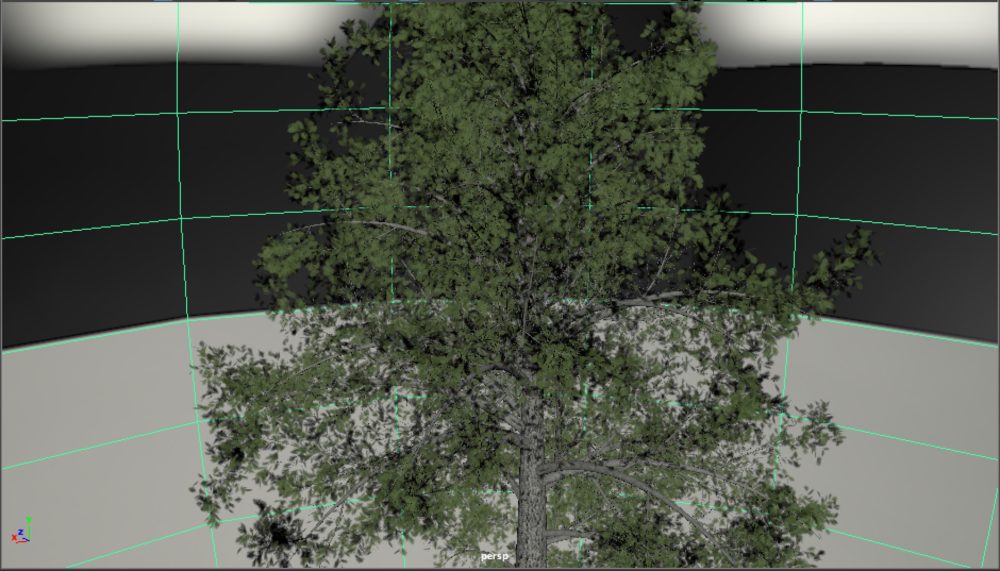
As shown above, the texture with the ambient-light effect has been created.
Creating a node layout is a bit tricky. However, please remember that you can check the result of your adjustment in real time by the viewport or the Material viewer. Let’s keep doing fine adjustment step by step.
(Reference: AREA JAPAN Maya Learning Channel)