This article explains how to use the paid add-on for Blender, “Physical Starlight And Atmosphere”, to add sun and fog to create a sense of atmosphere.
What is Physical Starlight And Atmosphere?
https://blendermarket.com/products/physical-starlight-and-atmosphere
Physical Starlight And Atmosphere is an add-on that allows you to simulate the atmosphere, and can reproduce the sun and sky more realistically than Sun Light, which is included in Blender by default.
It is available for a fee in the Blender Market, see the following article for information on how to purchase and install add-ons in the Blender Market.

How to use add-ons
There are two standard rendering engines in Blender, Cycles and Eevee.
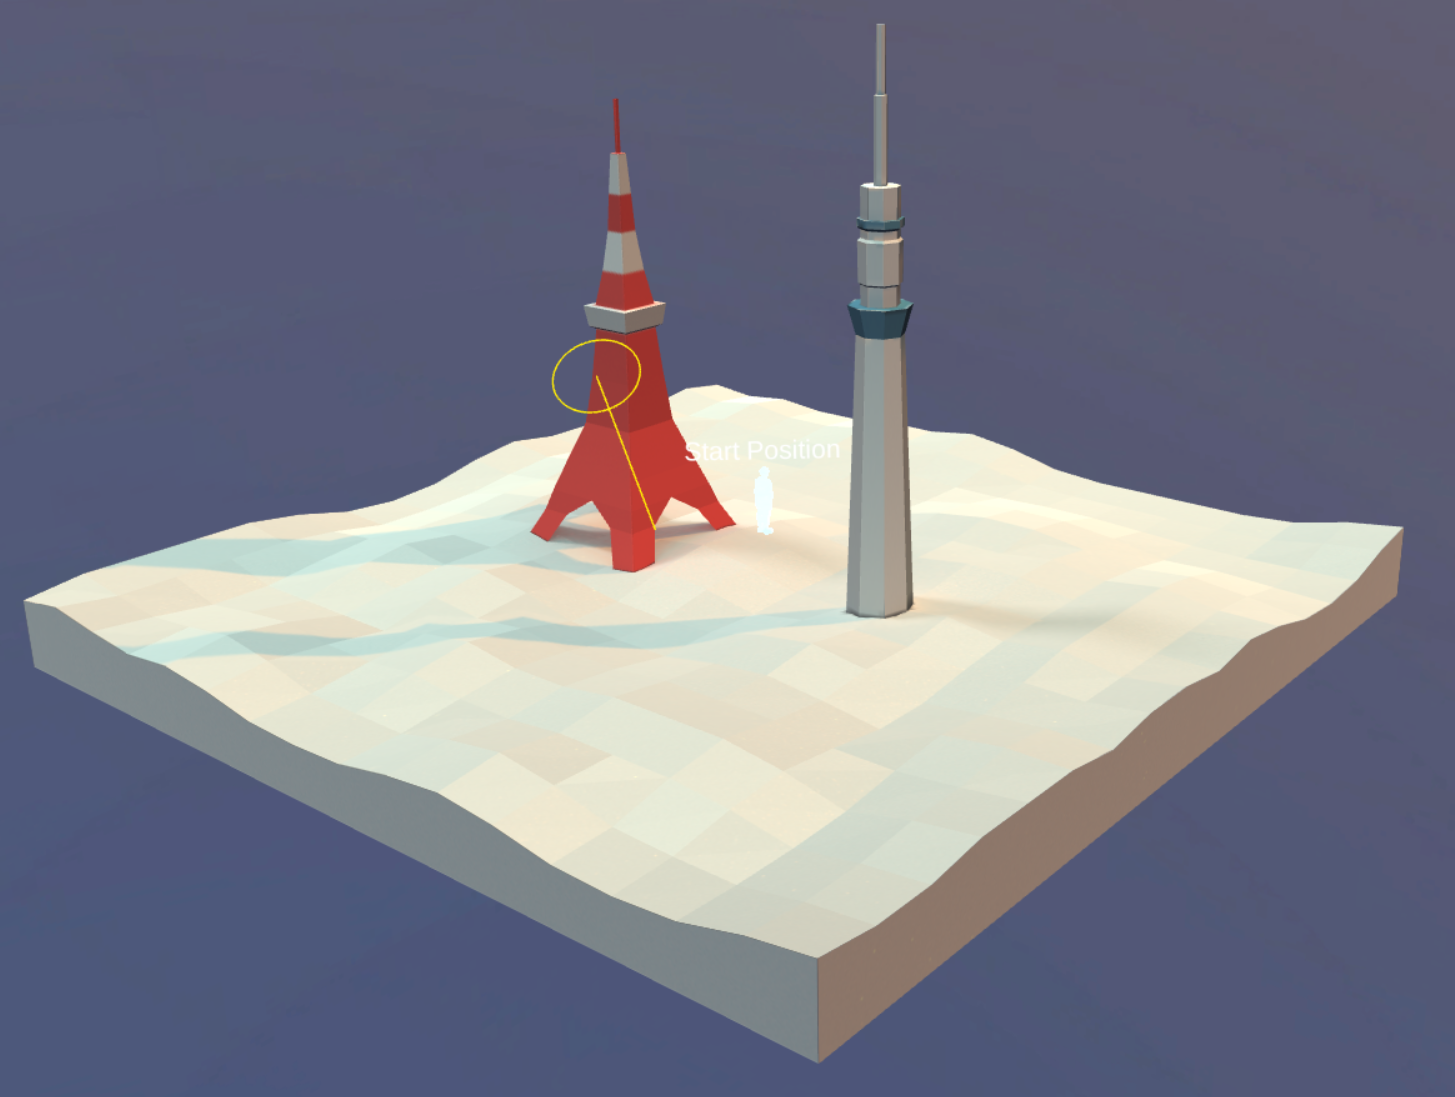
The model we are going to use in this project looks like this when displayed in Cycles without any add-ons. The lights are turned off.

Before applying the add-on (Cycles)
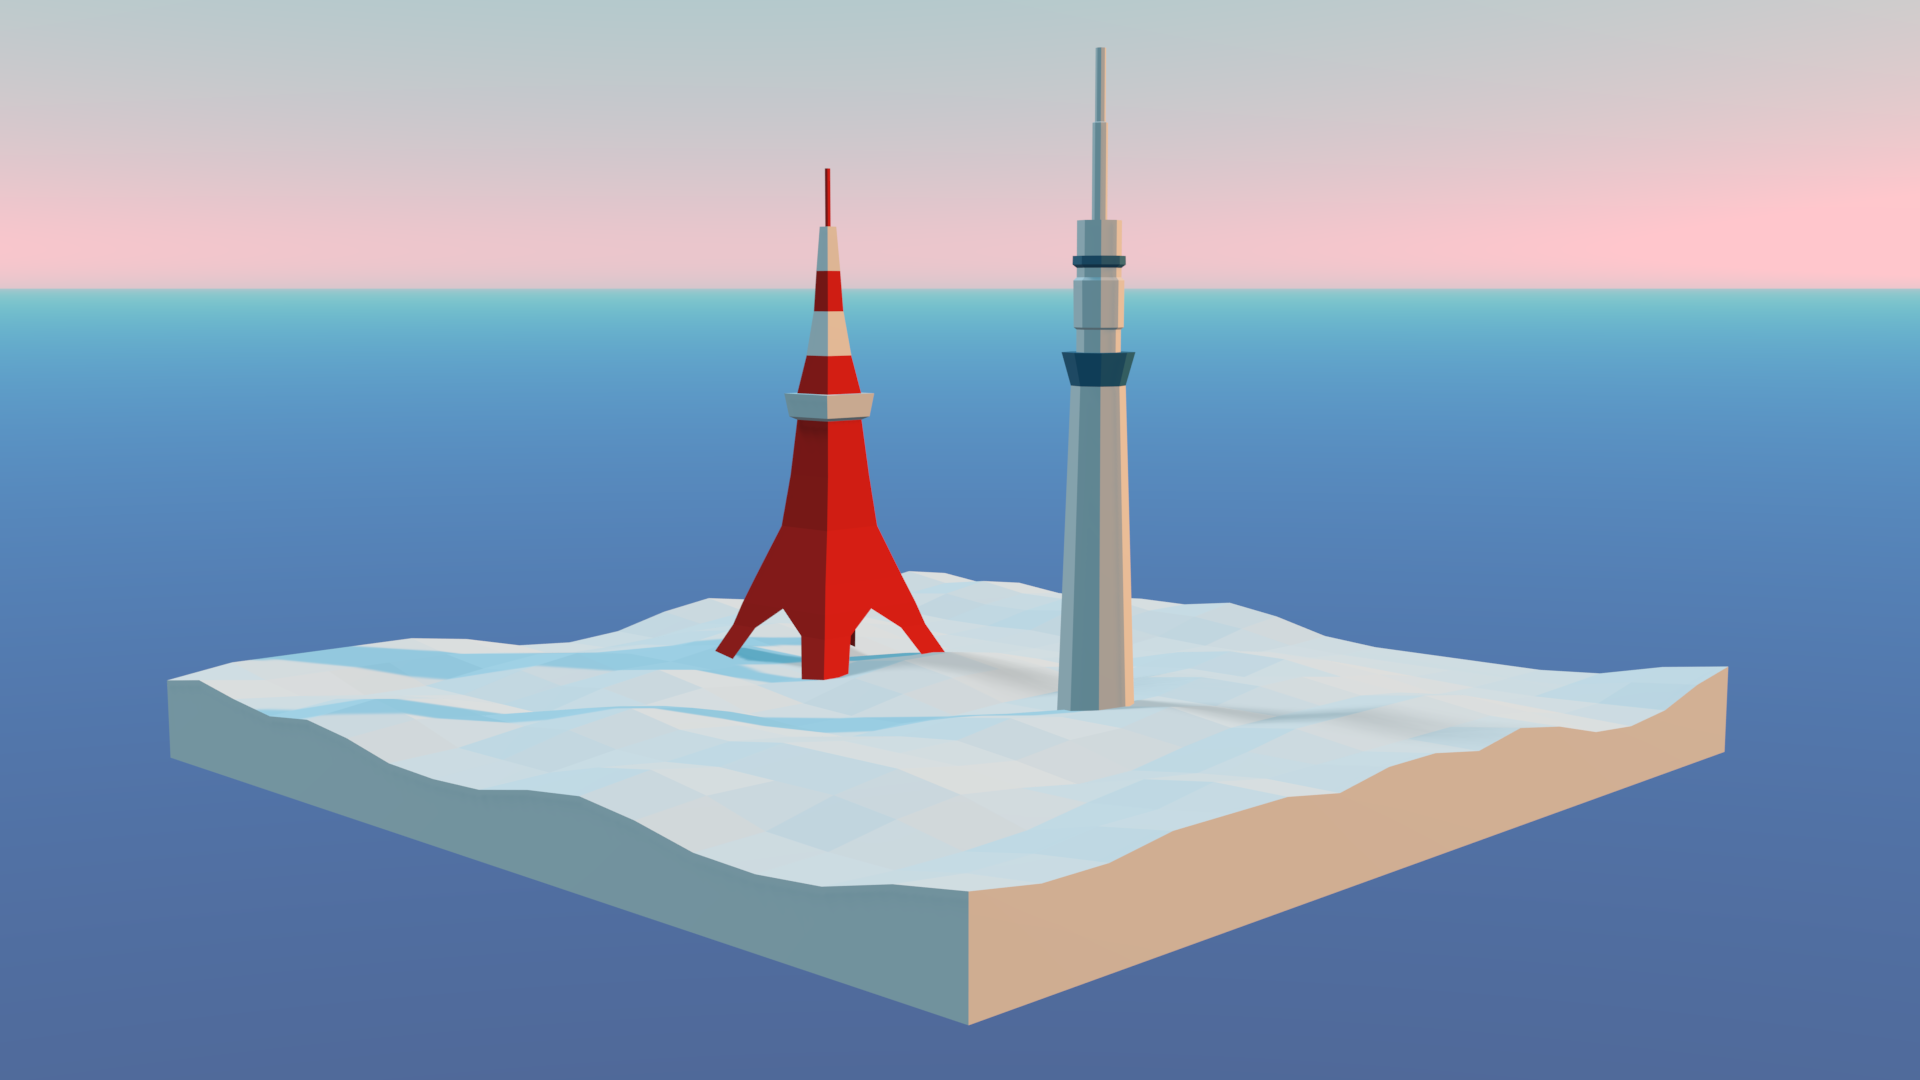
We will make this model look like the one below.
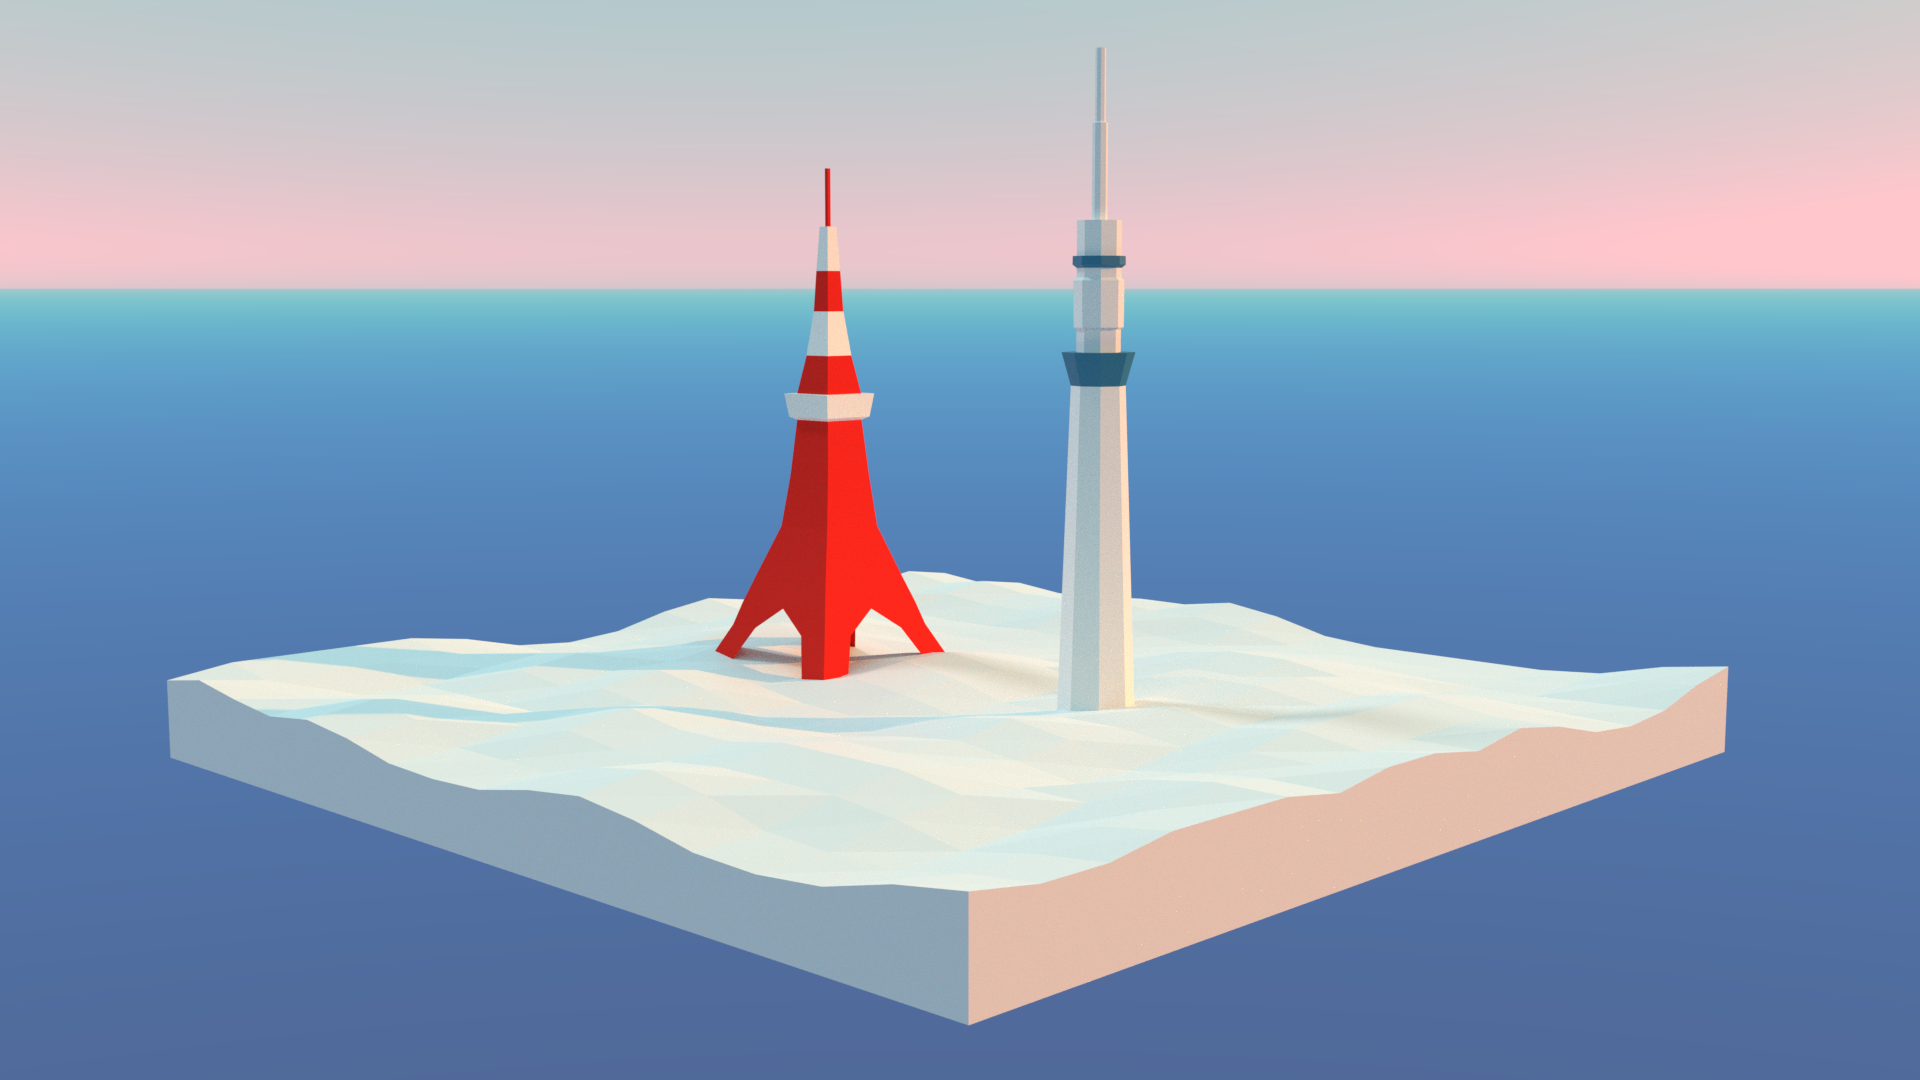
Completed (Cycles)
After installing the add-on, click the [N] key to display the properties shelf.
Click on the “Physical Atmosphere” tab and turn on the check mark to the left of “Atmosphere”.

This will change the entire scene to a pre-sunset atmosphere. The lights will be added automatically.

Immediately after checking the box (Cycles)
Now let’s take a closer look at the properties.
You can use either Cycles or Eevee as rendering engine, except for a few, and if you want to export to other software such as Unity or STYLY, use Cycles (more on exporting later).
Sun
The parameters for simulating the sun are as follows
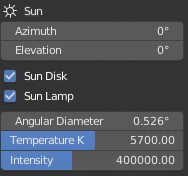
Sun parameters
- Azimuth: Azimuth angle
- Elevation: Elevation
- Angular Diameter: Angular Diameter
- Temperature: Color temperature (Kelvin)
- Intensity: Intensity of light
As you increase the value of Elevation, the light gradually becomes more like daylight. The direction of the sun is indicated by the direction of the lamp on the screen.

Elevation:23°(Cycles)
Then increase the value of Azimuth to adjust the direction of the shadows.

Azimuth:-137°(Cycles)
We lowered the Intensity to make the brightness a little more moderate.

Intensity:200000(Cycles)
Although we won’t use it in this case, lowering the value of Temperature K will make the color red to yellow, while raising it will make it closer to blue.
Atmosphere
In the case of Eevee, you can start with Fog, one section below.
The Atmosphere property allows you to adjust how the sunlight affects the object and the sky.
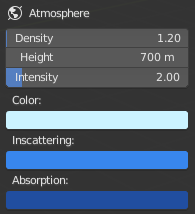
Upper part of the Atmosphere parameter
- Inscattering: Scattering color
- Absorption: Absorption color
When the Density value is increased, the color near the horizon line becomes blurred.

Density:5.0(Cycles)
Increasing the Intensity value increases the color (blue in this case) set for Inscattering below the Intensity value.

Intensity:3.5(Cycles)
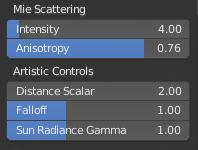
Lower part of the Atmosphere parameter
- Mie scattering (fog and smog appear white)
Increasing the value of Distance Scalar will make the ground and sky bluer.

Distance Scalar:13.0(Cycles)
Next, we reduced the value of Falloff.

Falloff:0.6(Cycles)
Switching to Eevee, we get a similar look.
Switch to Eevee
Fog(Eevee)
If you are in Eevee, you can amplify the fog effect by inserting a StarlightAtmosphere node between each material. (This is manual at the moment, but an update will allow you to automate it.
Open the Shader Editor, [Shift]+[A], and select “StarlightAtmosphere” under “Group”.

Add a new node

Put a node in between them
When the StarlightAtmosphere node appears, drag and drop it onto the line extending from the Material Output.
The entire object will then be covered with fog.

Immediately after connecting the nodes (Eevee)
If you adjust the Atmosphere Density, Distance Scalar, and Falloff parameters as mentioned in the previous section, the atmosphere will change drastically.
Note that if you switch to Cycles with the StarlightAtmosphere node connected, the base color of the material will not be visible, so it is recommended to remove the StarlightAtmosphere node when switching to Cycles.

Immediately after connecting the nodes (Cycles)
Baking and uploading to STYLY
If you want to upload the texture to STYLY with this tint applied, or use it in Unity, you need to “bake” the texture.
In Blender 2.82, Eevee does not have a bake function, so we will switch to Cycles to do this.
Go to the “UVEditing” tab and generate a new image from the bottom bar.
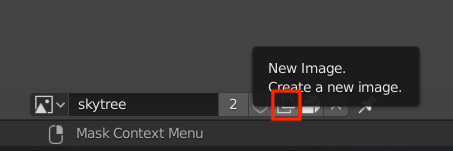
Generate a new image
Change the “Name”. In this case, I changed it to “tokyotower”.
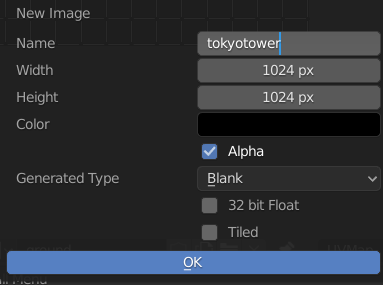
Generate a new image
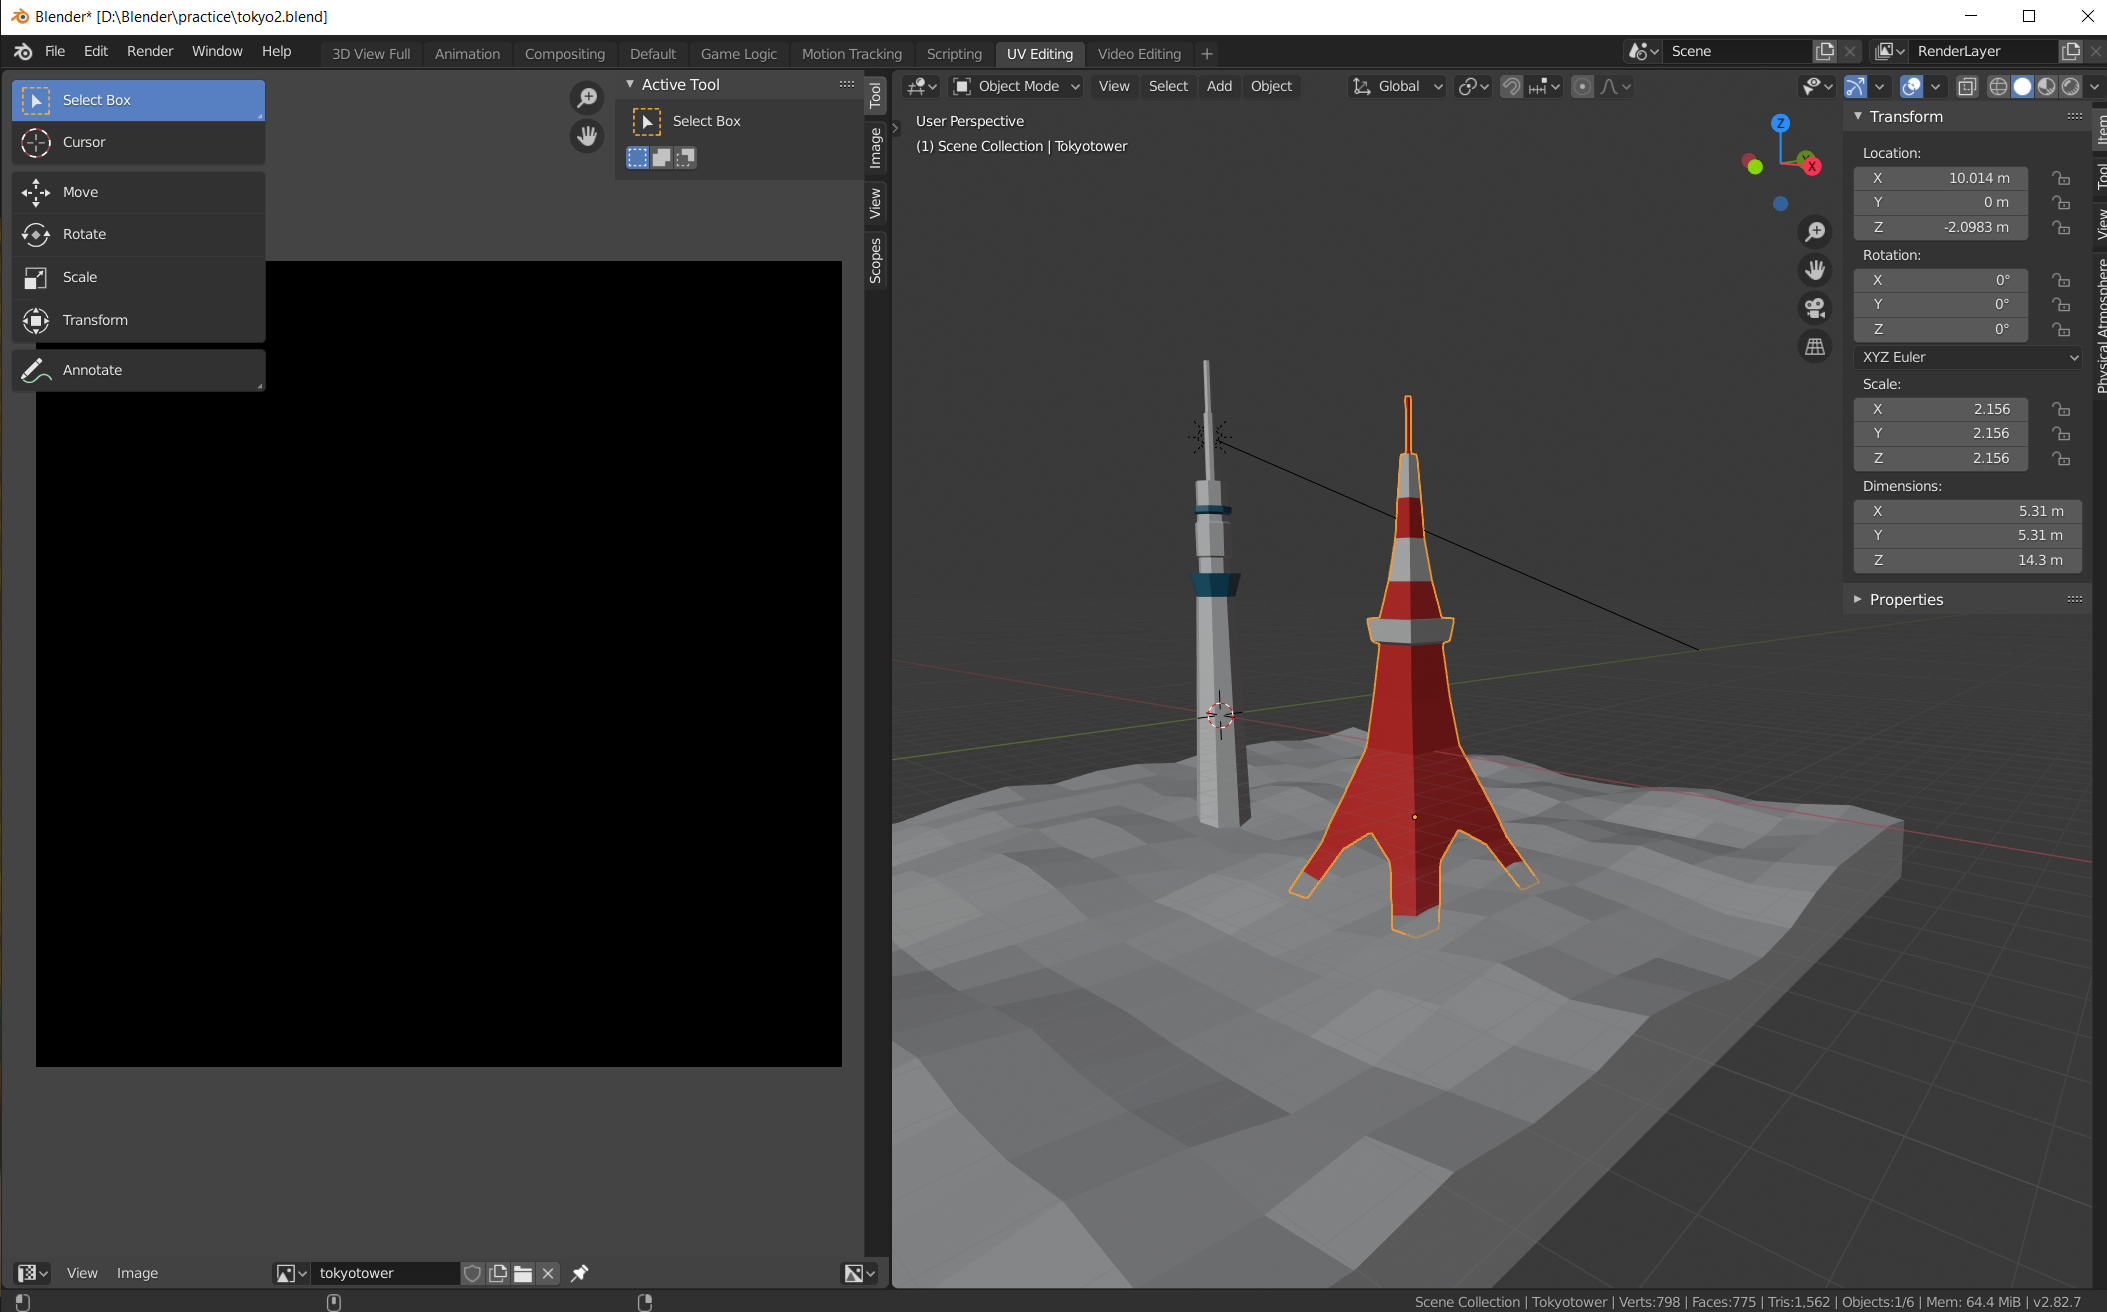
The image has been generated.
A black image has been generated on the left side of the screen.
Go to the edit mode on the right side of the screen, select all the vertices, and then press the [U] key to select “Unwrap” or “Smart UV Project”.
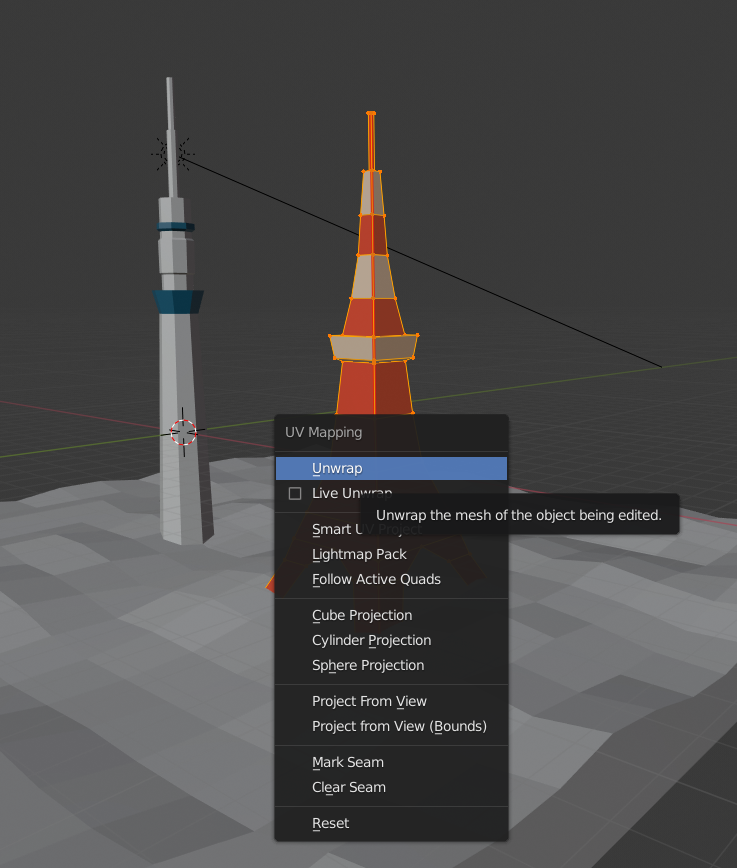
Select Unwrap
The UVs are now expanded on the left side.

The UVs have been expanded
Go back to the Default tab, and press [Shift]+[A] in the Node Editor to add the Image Texture node.
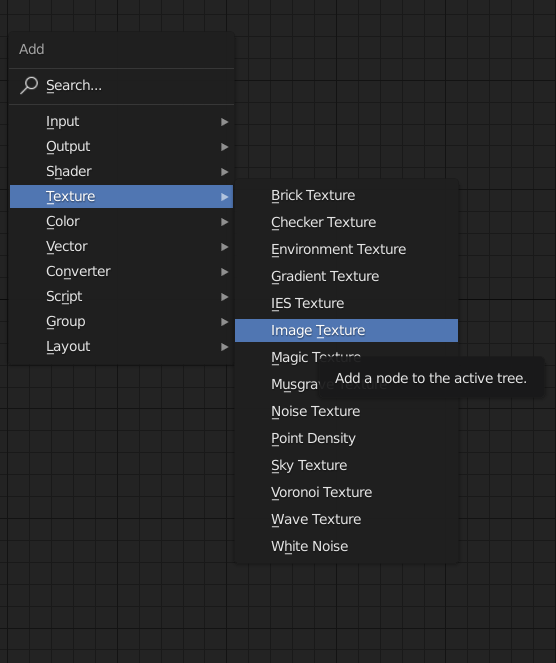
Adding an Image Texture node
Once the Image Texture node is added, select the image you just added from the button with the red border.
Since textures are assigned on a per-material basis, you will need to do this for all the materials used in the object.
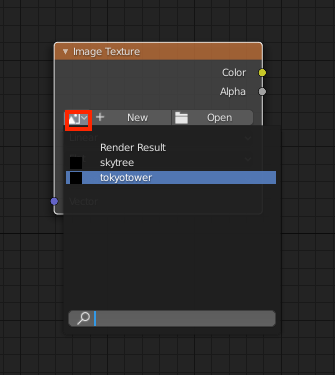
Select the image
Click “Bake” from the scene properties on the right.
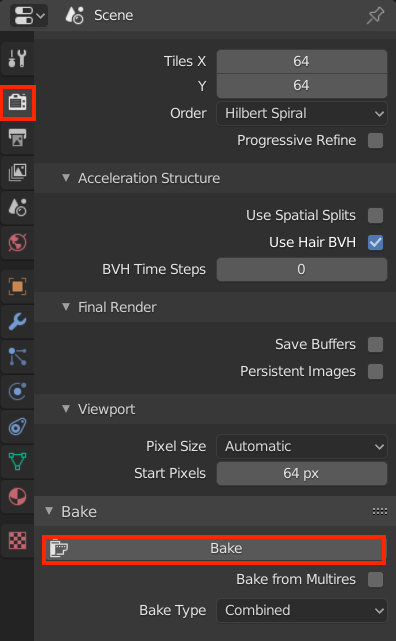
Click Bake
An indicator will appear at the bottom of the screen, wait until it reaches 100%.

Bake in progress
When you return to the UV Editing tab, you will see that the texture has been generated with shading.

The texture has been generated
Finally, we will connect the node where we specified the texture to the material.

Connecting the nodes
This completes the baking process.
Bake the other objects in the same way, and export them in glTF format from [Export] in [File].
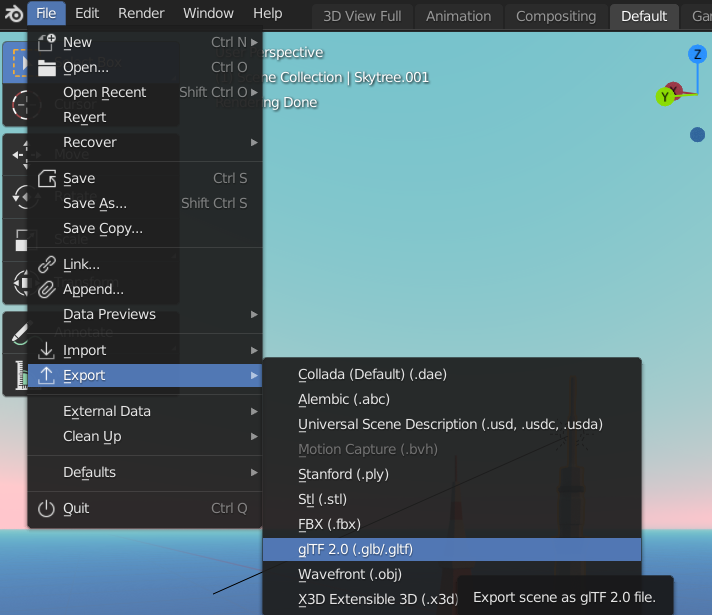
Exporting in glTF format
For how to upload the exported file to STYLY, please refer to the following article.

When I uploaded the file to STYLY, I was able to place it with a look similar to the one rendered in Blender.
Successful upload to STYLY