In this article, I’ll introduce some free and paid add-ons that can streamline your modeling and animation work in Blender.
It also summarizes add-ons that have been covered in previous tips articles.
How to install add-ons in Blender
I have introduced many add-ons other than Blender Market, but the following article explains how to purchase paid add-ons in Blender Market.
It also shows how to install them into Blender, whether free or paid.
In case of the site called “Gumroad” instead of Blender Market, you can purchase the product by putting the same or larger amount than the displayed number in the purchase amount.
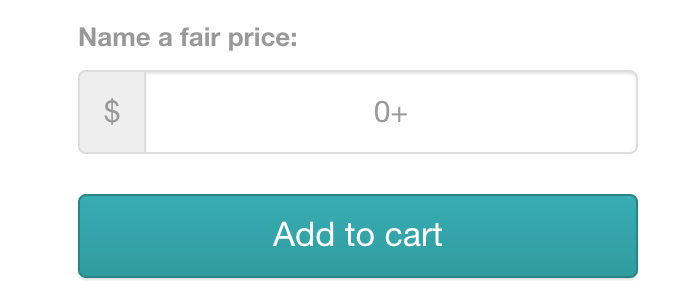
Purchase screen of Gumroad
If it says “0+” as above, you can get it for free by entering “0” and selecting “Add to cart”.
Free Add-ons
Radial Array and Instances
This is an add-on that allows you to perform duplicate rotations.
Download it here.
After installation, “Radial Tools” has been added to the Item column of the toolbar. (The toolbar can be opened by pressing the [N] key.
Now, click on “Radial Array” to add it to the modifier.
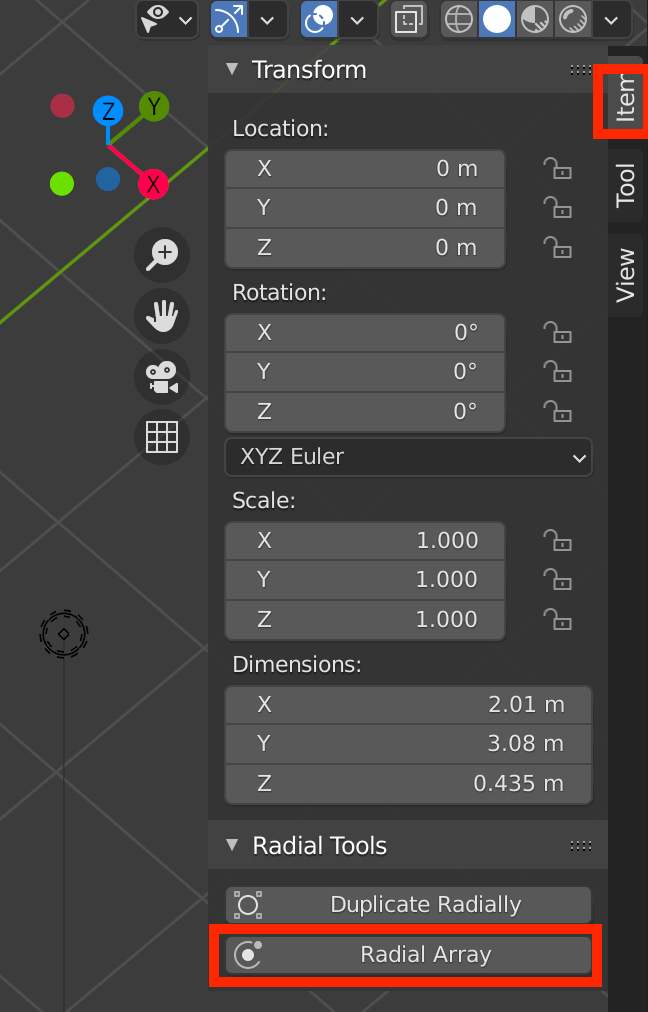
Click on Radial Array
Each property is as follows. If you increase the number of “Count” here, you can duplicate the object while rotating it from the center.
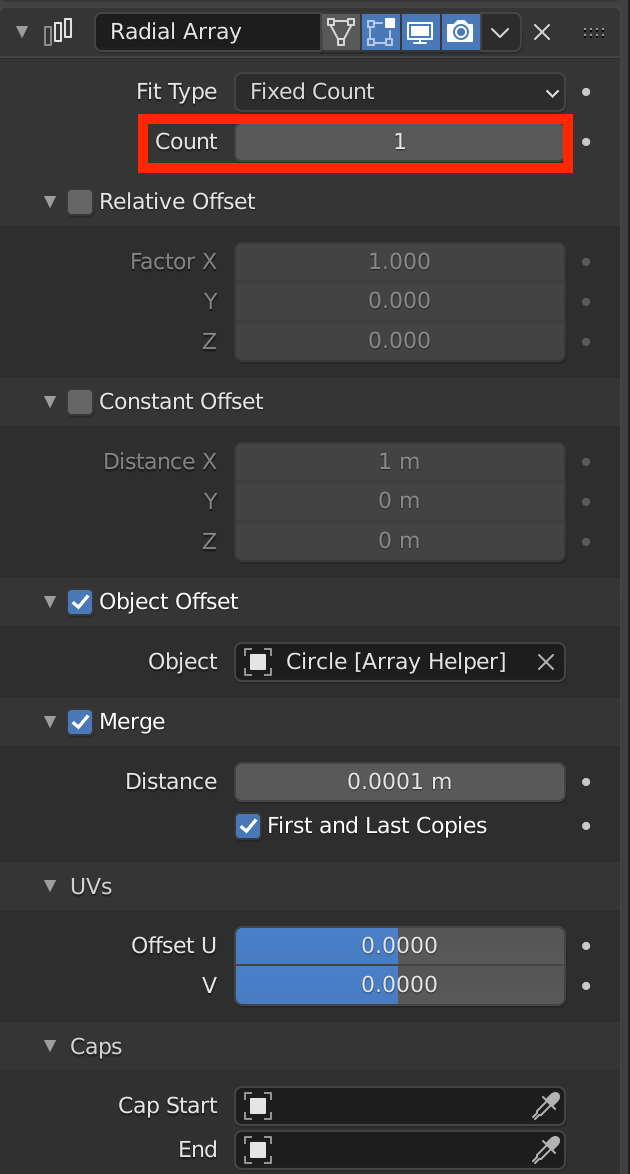
Increasing the number of Count
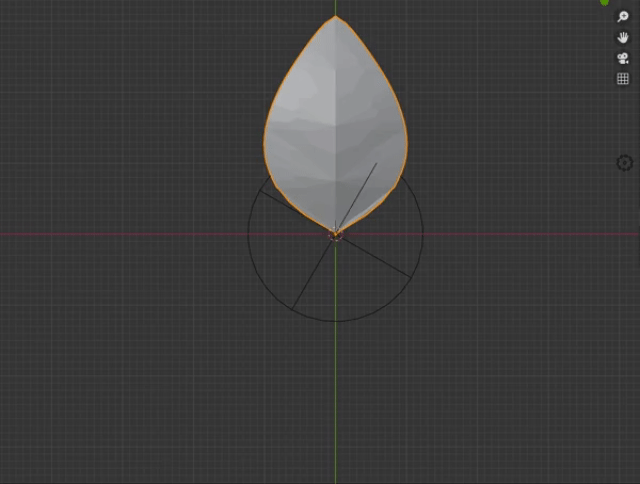
Rotated and duplicated
Drop It
This is an add-on that allows you to place an object in contact with the surface of an object directly below it, as if you had dropped the object on the spot.
Download here.
It’s easy to use. With an object selected, right click -> “Drop it”, and the object will drop right below it.
If there is an object directly below it, it will be placed so that it sticks to it.
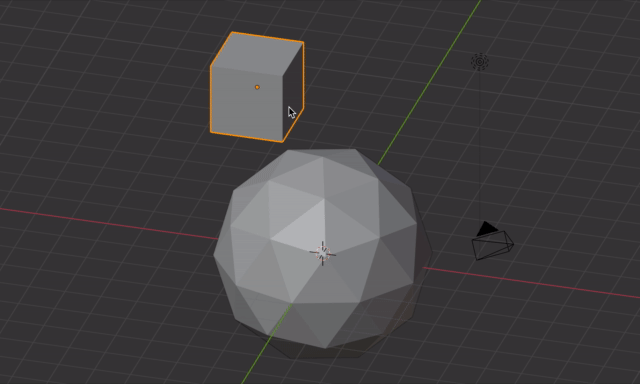
The cube is attached to the face of the ICO sphere
This is very useful for placing objects.
Attach Align
It is similar to Drop it above, but it is an add-on that allows you to place one object face and another object face so that they are attached.
Download it here.
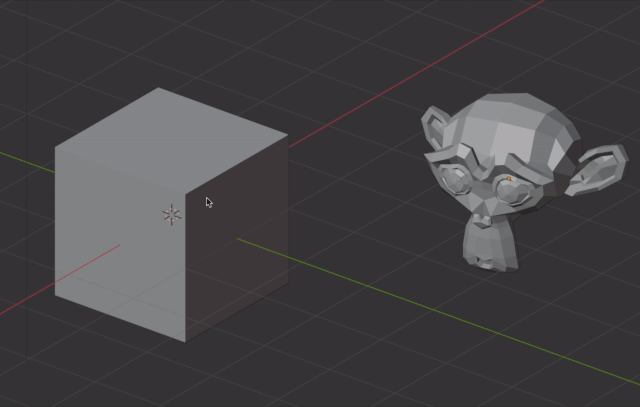
Attaching faces to each other
First select both objects in object mode, then switch to edit mode.
Select the face of the object to be moved (monkey), then the face of the object to be moved (cube), and select “Attach Align” from the right-click menu to attach the faces together.
You can also change the direction of attachment so that the sides face each other by selecting the sides and then clicking Attach Align again after attachment.
Note that in this state, the mesh is only attached visually, not actually attached.
After Attach Align is executed, the following window will appear in the lower left corner of the 3D view, and clicking on “Connect geometries” will automatically split the meshes and attach them geometrically.
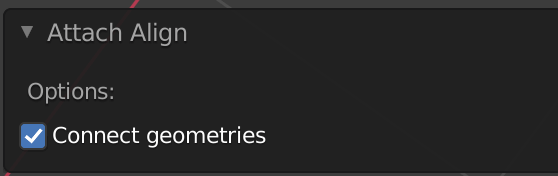
Connect geometries
Blender GIS
This is an add-on that can easily generate a cityscape by retrieving a real cityscape from Google Map and placing it.
It is explained in detail in the following article.
ArchiMesh
建築系のオブジェクトを簡単に生成するためのアドオンです。
以下の記事にて詳しく解説しています。
![[Blender 2.8] Using Archimesh as an Add-on for Architecture (1), “Let’s make a base room.”](https://styly.cc/wp-content/uploads/2020/06/Head-160x160.png)
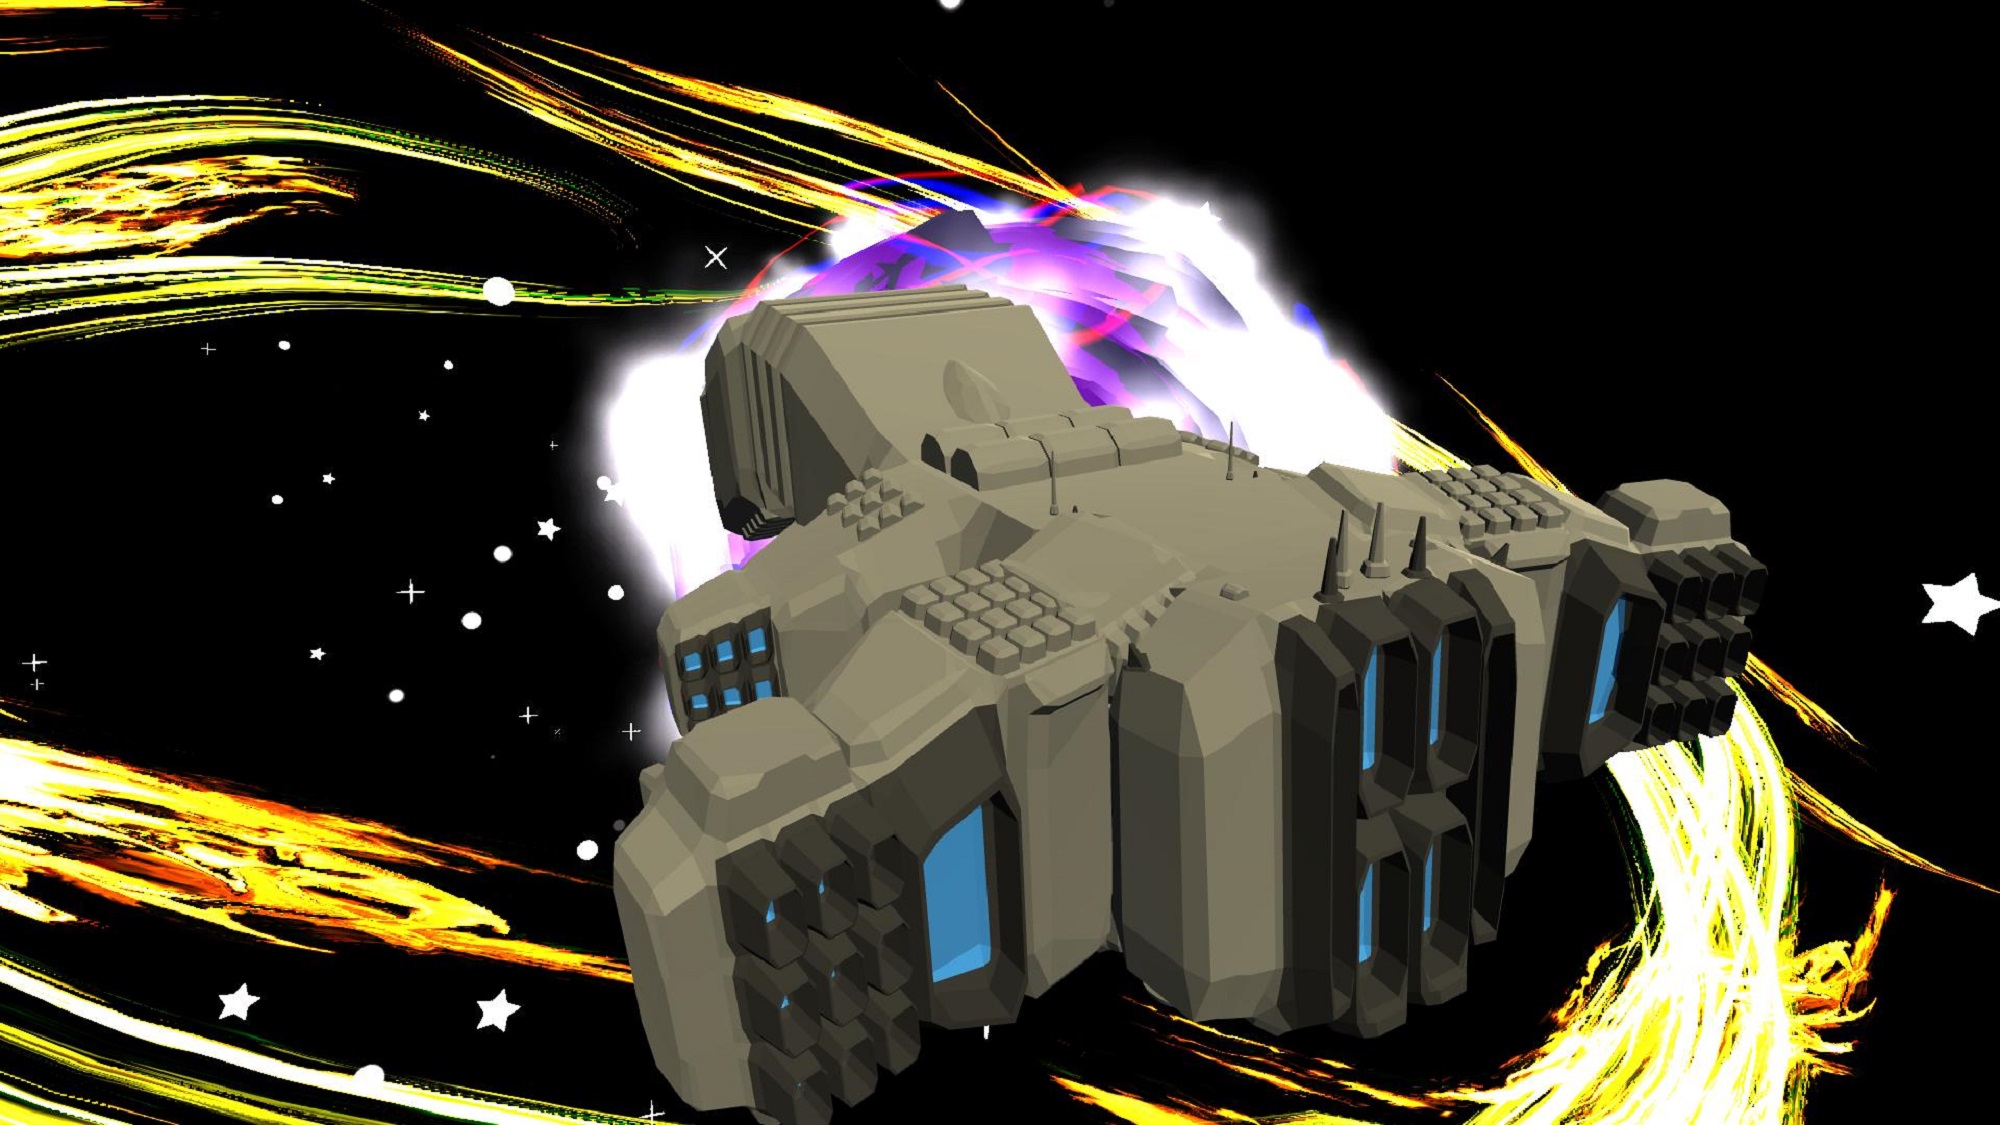
Spaceship Generator
This is an add-on to easily generate a spaceship-like model.
The following article explains it in detail.
Cameras Lister
An add-on that allows you to easily switch between multiple cameras.
Download here.
Press [Alt]+[C] to open the Cameras Lister window, and click on the checkboxes of the cameras to switch between them.

Switch between cameras by just checking
QuickRef
This add-on allows you to paste reference images into the viewport.
Click here to download.
After installation, the “QuickRef” tab will appear on the left side of the viewport, and click “Open”.
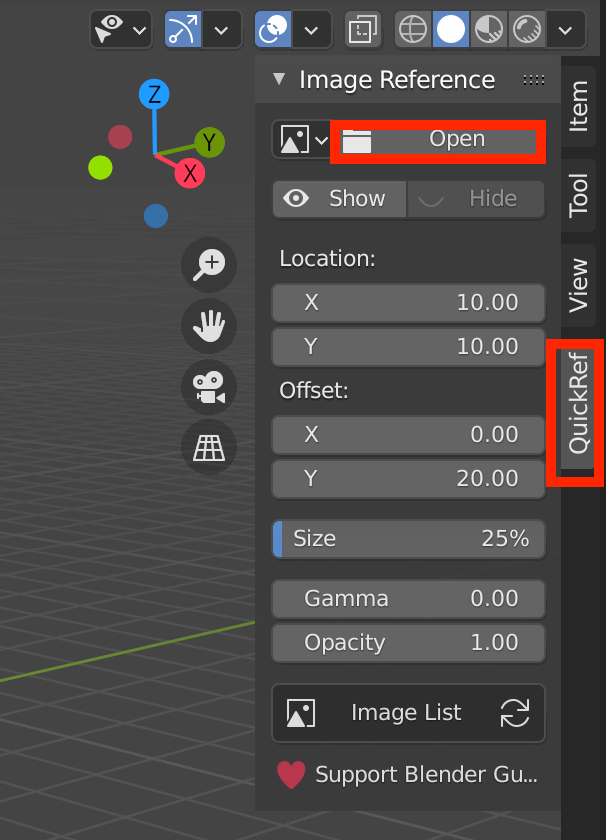
Click “Open” from the QuickRef tab
After selecting the file, click “Show” to display the image in the lower left corner of the viewport by default.

Image position is always fixed
Even if you move the screen, the position of the image is fixed.
If you open other images additionally, they will be registered in the “ImageList” and you can easily switch between them.
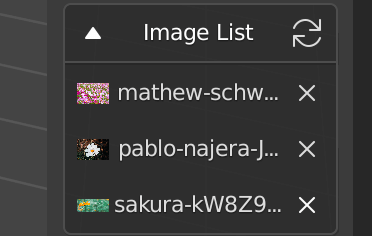
Example of registering 3 images
Plug-in to set outline in Blender
As the name suggests, this add-on allows you to easily check the display with outlines.
Download here.

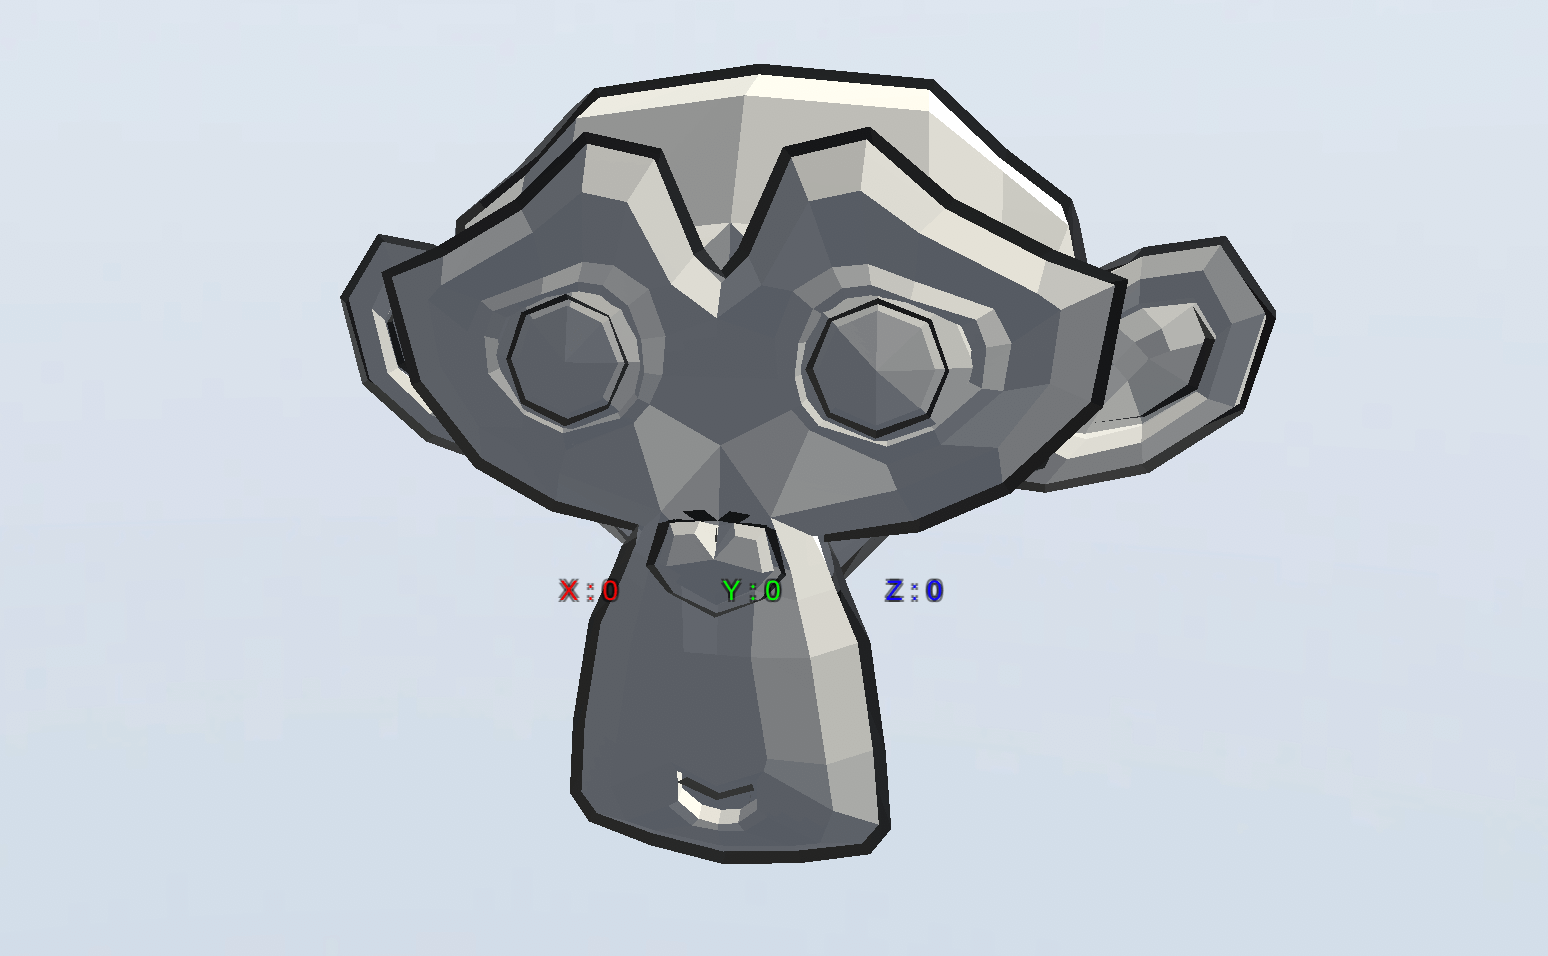
Outlines are displayed
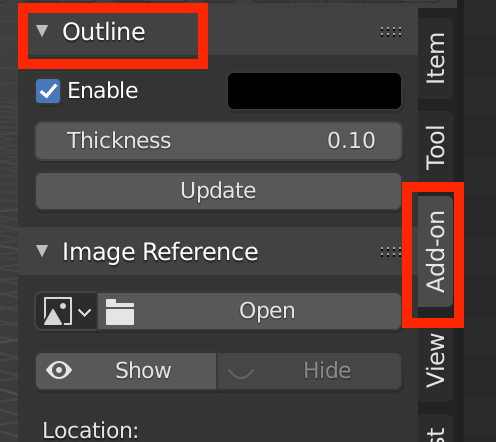
After installation, Outline tab will be added to the toolbar. Make sure Enable is checked with the object selected, and click “Update”.
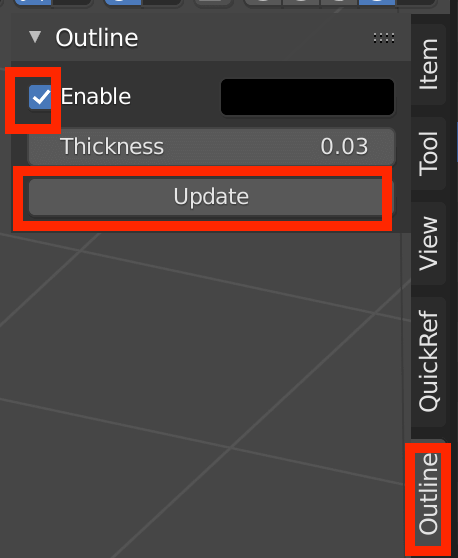
Outline tab
After that, switch to the render view and you will see the outline.
If you want to change the thickness of the line, change the Thickness property and click Update again to reflect the change.
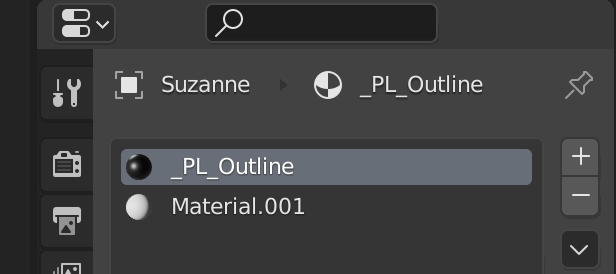
A material has been added
If you look at the material list, you will see that a material for outlines called _PL_Outline has been added.
You can also see the outline in STYLY
It is recommended to uncheck the Enable Outlines checkbox when importing to Unity, but when I exported to fbx format and placed in STYLY, the outlines were reflected.
Animation Nodes
In Blender, you can create animations by typing keyframes manually, but if you use a free add-on called Animation Nodes, you can create more advanced animations based on nodes.
The following article explains it in detail.
![[Blender 2.8] Introduction to Animation Nodes](https://styly.cc/wp-content/uploads/2020/07/Screen-Shot-2020-07-22-at-11.32.27-160x160.png)
SIMPLE TABS
As you add add-ons like the ones I have introduced so far, you will probably find that you have more tabs in your toolbar.
This is an add-on that can consolidate and organize the tabs in your toolbar in such cases.
Download it here.
(*Blende version 2.80 does not work properly, so it is recommended to use version 2.90 or higher)
Once installed, a red mark will be added to the top left corner of the 3D view.
(If nothing is listed when you click on it, click the Refresh button additionally.

On the right is the name of the tab
In the example above, the Plug-in for Setting Outlines in Blender is in a separate tab called Outline.
If you want to merge it with other add-ons into a tab called Add-on, change “Outline” to “Add-on” in the right column and click the check button.
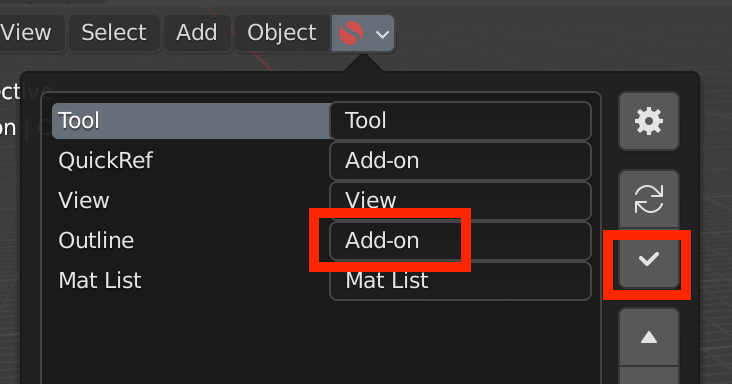
Rename Outline to Add-on tab
The Add-on tab is now filled with the Outline add-on.
It is now integrated into the tab
Paid Add-ons
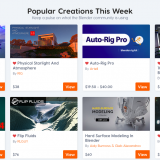
Physical Starlight And Atmosphere
Physical Starlight and Atmosphere is an add-on that allows you to simulate the atmosphere, making the sun and sky look more realistic than the default Sun Light in Blender.
The following article explains it in detail.
![[Blender2.82] Physical Starlight And Atmosphere to represent sun and fog](https://styly.cc/wp-content/uploads/2020/04/キャプチャ15-160x160.png)
Auto Rig Pro
Auto-Rig Pro is an add-on that automatically rigs your 3D model to make it easier to add movement to your 3D model.
It is explained in detail in the following article.
![[Blender 2.81] Moving a character with Auto-Rig Pro](https://styly.cc/wp-content/uploads/2020/01/スクリーンショット-2020-01-15-15.44.51-1-160x160.png)
Introduction to NEWVIEW SCHOOL ONLINE
We are now offering NEWVIEW SCHOOL ONLINE, where you can learn Unity and PlayMaker from basic to advanced, and learn the production process (and production techniques) of the attractive contents distributed on STYLY.
