Click here to check which Unity versions are compatible with STYLY.
https://document.styly.cc/doc/docs/en-US/creator/creator_plugin_intro/#about-the-corresponding-unity-version
In this article, I will explain the procedure for a STYLY scene created using Unity 2017 to work properly if there is a problem with STYLY 2.0.
[Updated on March 24, 2020] Added the STYLY local preview tool to the section “3.4 Upload from Unity 2019”.
Overview
The version of Unity supported by STYLY was the Unity 2017 lineage, but it has been upgraded to the Unity 2019 lineage.
With this upgrade, STYLY becomes STYLY 2.0.
Please check the article below for more details.
Please refer to the above article for various links of STYLY 2.0 mentioned in this article.
Prefabs and scenes created and uploaded in Unity 2017 should work out of the box with STYLY 2.0 in most cases, but some may be incompatible and may cause issues that behave and look different than before.
For the main contents, see the section “STYLY 2.0 incompatible” in the above reference article.
If you encounter any of these issues, you will need to re-upload your prefab or scene from Unity 2019.
The procedure is explained below.
!!Notes!!
Editing published STYLY scenes in STYLY Studio
If you do not want to change the STYLY scene URL of the work because the URL of the work is referenced from an external site (embedding in the site, etc.), you may edit the published scene as it is.
In this case, if you replace it with an asset uploaded from Unity 2019, it will be immediately reflected in the published scene and will not work in STYLY 2.0, so be careful.
Procedure for migrating to Unity 2019
The general flow is as follows.
“Advance preparation”
- Unity Hub、Installing Unity 2019.3.6f1
- Project backup
《Migration work》
1. Open the project used to create the STYLY scene in Unity 2019
※Some particles and shaders will be modified or replaced as appropriate
↓
2. Upload the target asset from Unity 2019
↓
3. Scene editing in STYLY Studio 2.0
↓
4. Operation check with STYLY 2.0
VR app, Gallery, web player
Install Unity 2019 (using Unity Hub)
First of all, you need to install Unity 2019, but here I would like to install it using a tool called Unity Hub, which is official Unity.
It is recommended to use this because it is convenient because it can be centrally managed when installing multiple Unity with different versions as in this case.
Install Unity Hub
Go to the download page below to download and run the Unity Hub installer.
https://unity3d.com/jp/get-unity/download

Download Unity Hub
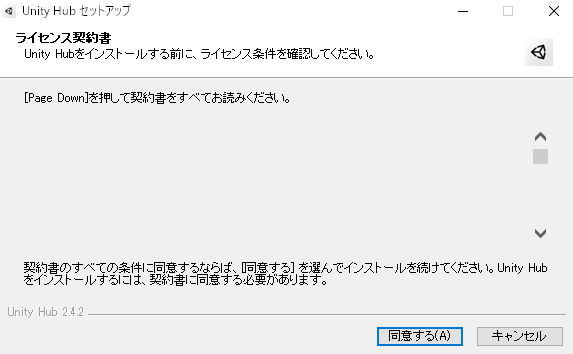
License agreement
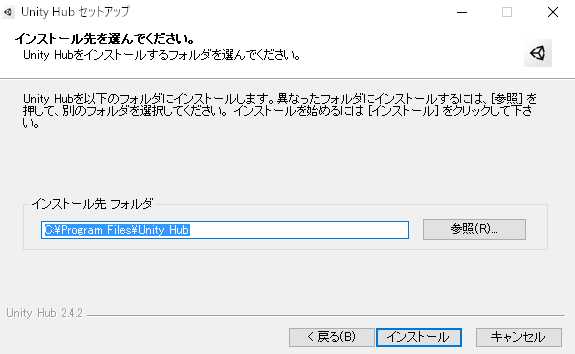
Folder specification
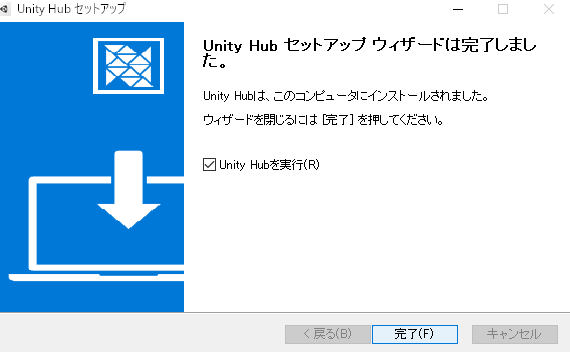
Installation completion screen
After proceeding and the installation is complete, when you start Unity Hub, the following window will appear.
Launch Unity Hub
Installing Unity 2019.3.6f1
When uploading a prefab or scene to STYLY, the recommended version of Unity to use is “Unity 2019.3.6f1”
Access the download site from here.
https://unity3d.com/jp/get-unity/download/archive
To install Unity 2019.3.6f1 on Unity Hub, you can download it by narrowing down the version to “Unity 2019.X” on the download page above, clicking Unity Hub in the line Unity 2019.3.6 and opening Unity Hub. I will.
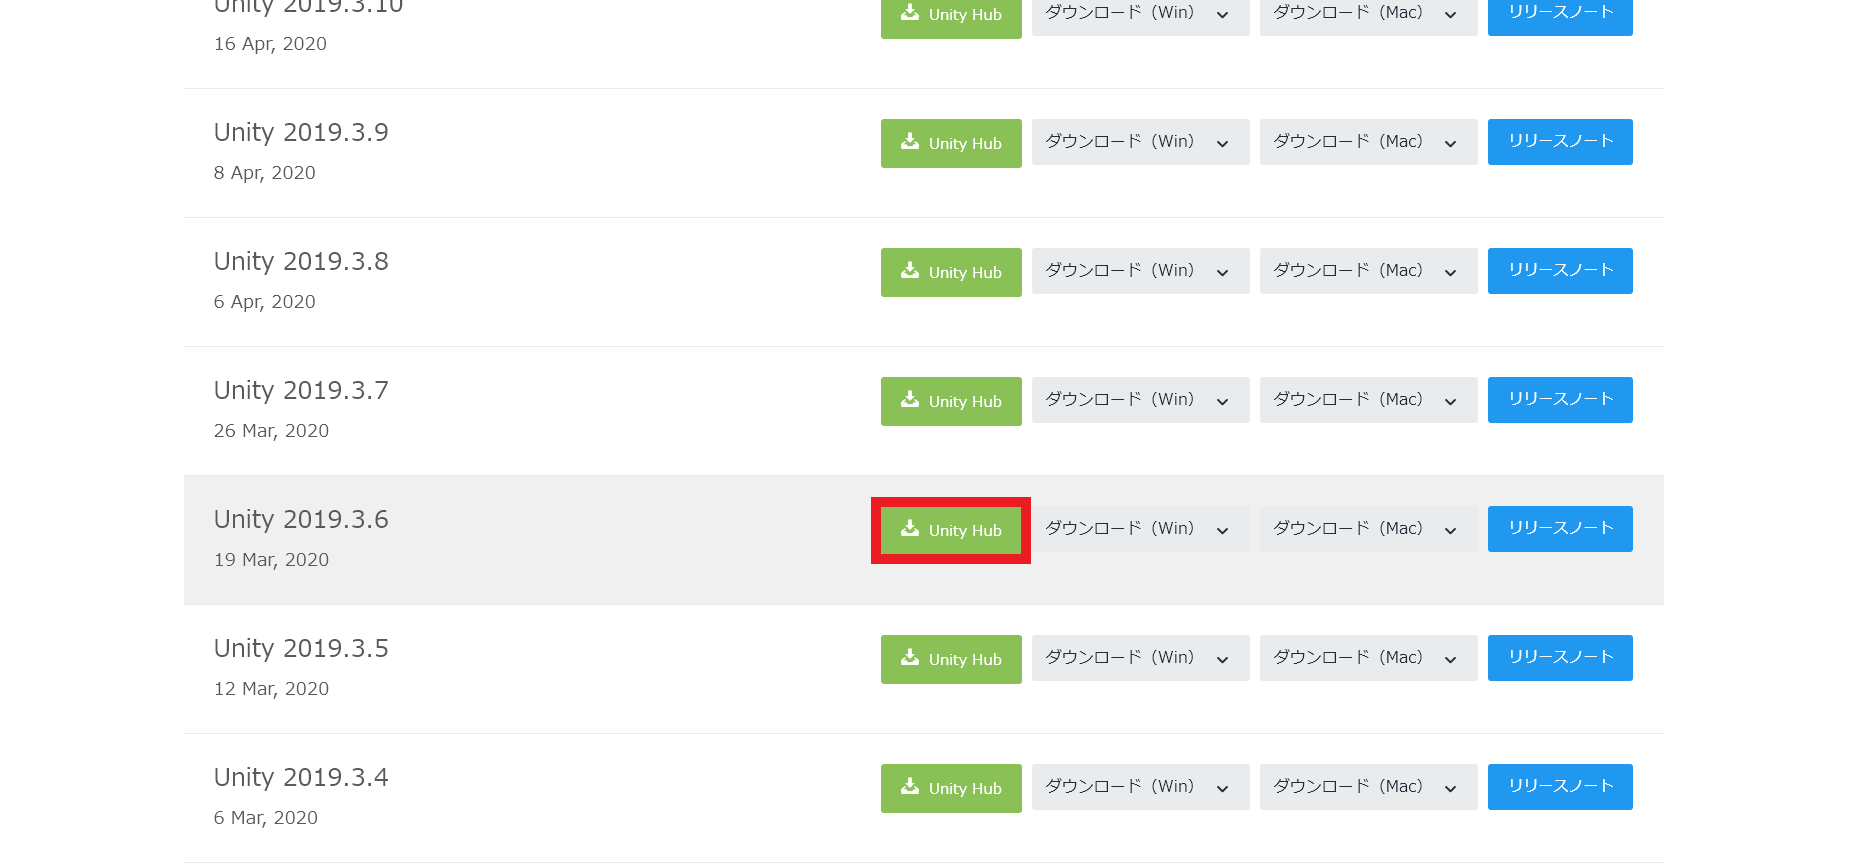
Select Unity Hub
Then you will be asked to select a module, select the required module.
The following modules must be installed to upload prefabs and scenes to STYLY.
- Windows Build Support (If you are using Windows, it will be installed by default.)
- Mac Build Support (If you are using a Mac, it will be installed by default.)
- Android Build Support
- WebGL Build Support
- iOS Build Support
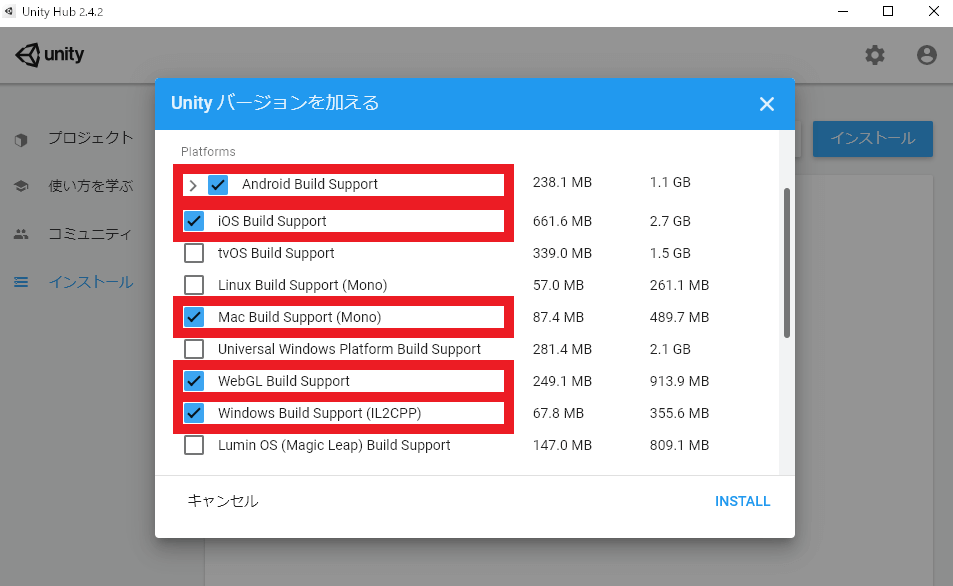
Select the required module
Other modules are not required for STYLY use, so it is okay to uncheck all of them, but there is no problem if you check and install them.
If these modules are not added, please refer to the following article.
After installation, the installed version will be displayed as below.

After installation
It will take some time as each module will be downloaded and installed.
You should see an icon for each installed module.
This completes the Unity 2019.3.6f1 installation.
Project backup
I’d like to open the project in Unity 2019 immediately, but just in case, back up the Unity project in the state when it was created with the old version.
The reason is that when you open a project created in an earlier version of Unity in a newer version of Unity, Unity will automatically convert the data for the new version.
In other words, the contents of the data will change.
Therefore, if you need to edit again with an older version of Unity, it is likely that you will not be able to open it correctly.
In other cases as well, if you make major changes to the data content, it is safe to make a habit of backing up so that you can restore the original state.
Backing up is not difficult, just copy the entire project folder.
Please note that the entire folder will be copied, so you need to have enough disk space on your PC.
※Just in case, please copy the folder with Unity closed
※If you manage your project with a version control system such as git, or if you think you don’t need it, skip this step as appropriate.
Open a project in Unity 2019
Now open the project in Unity 2019.
Open the “Projects” section of Unity Hub. I think there is nothing yet.
Click the Add to List button to open an existing project.
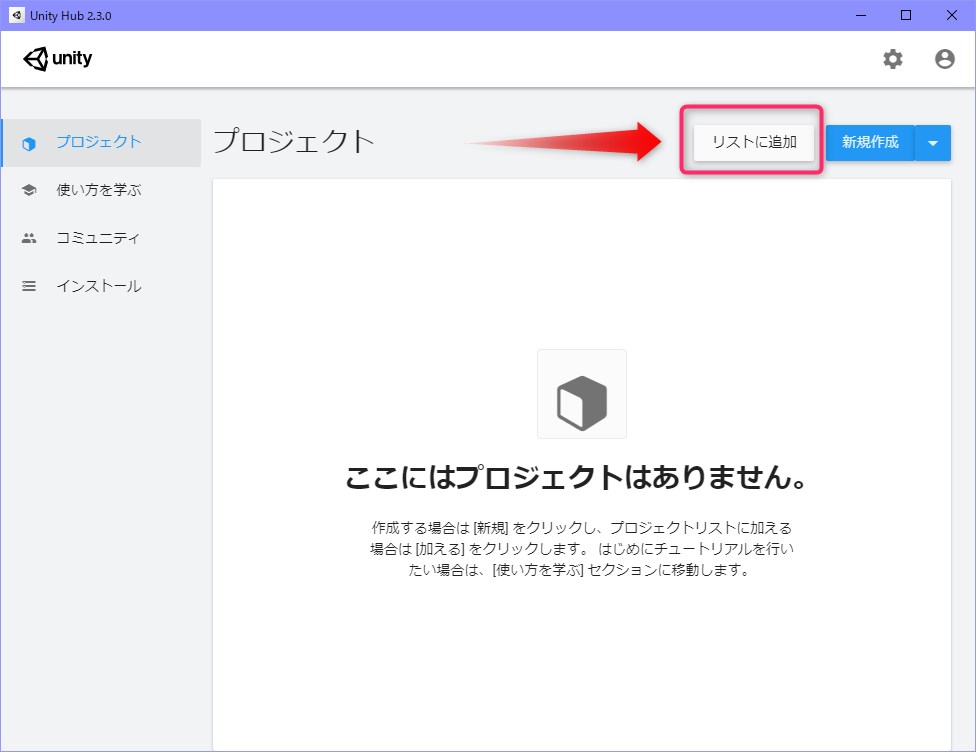
Add a project in Unity Hub
Select the Unity project folder in the dialog that opens to add the project.
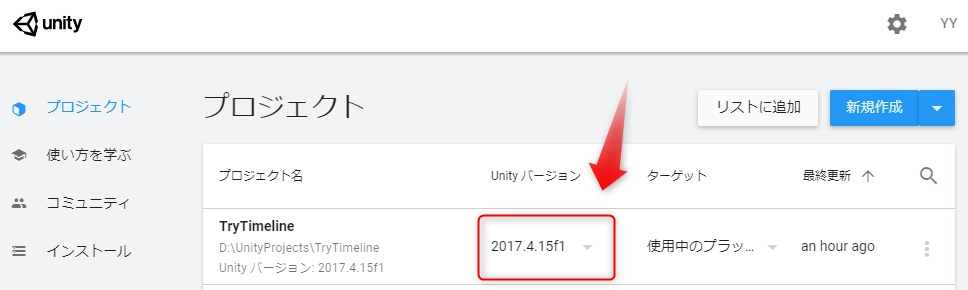
You can select the Unity version to open the project
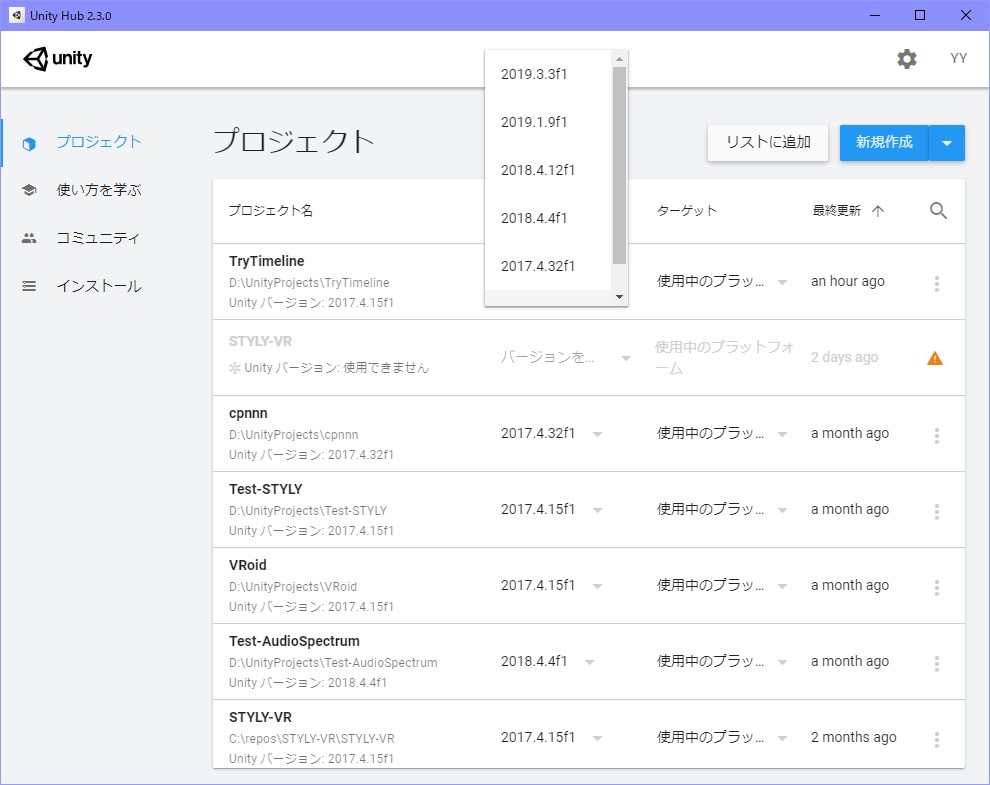
You can select the version of Unity that opens this project from “Unity version” of the added project, so select Unity 2019.3.6f1 from here.
Open the project Select the Unity version
When the Unity version changes, click the row for the Unity project you want to open.
Then the following warning will be displayed. Make sure you have a backup, and if you really like it, press the “Confirm” button to open it.
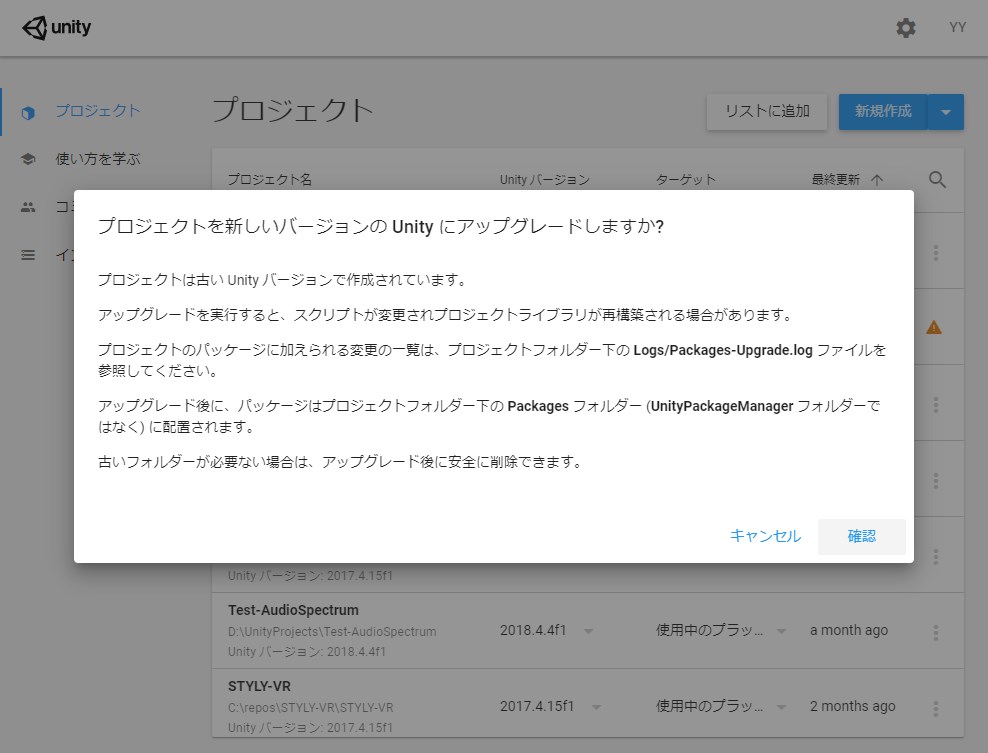
Unity Hub Warning
It should open in the modified version of Unity.
The project data will be converted accordingly, so it will take some time.
If you get a script error after opening in Unity 2019
If you open it in Unity2019, you may get a script error (compile error) and you may not be able to run the scene.
For example, if the error source is PlayMaker, you can eliminate the error by re-importing PlayMaker.
To re-import PlayMaker, close Unity, delete the [PlayMaker] folder and [Plugins]> [PlayMaker] folder from Explorer, open Unity, and then import PlayMaker again.
(Be careful when deleting the folder if you have saved the PlayMaker template in the PlayMaker folder)
Upload from Unity 2019
Once you’ve opened your project in Unity 2019, check for the prefab or scene you’re having problems with (uploading).
If you need to fix it in Unity 2019, please fix it accordingly.
There is also a version of the STYLY Plugin for uploading for Unity 2019.
The download link is provided in the article referred to in the “Overview” section, so download it from there and import it.
After that, upload it to STYLY in the same way as before.
As before, you can check the operation after uploading and placing it in the scene with STYLY Studio.
[Postscript on 2020/03/24 from here]
If the upload target is “scene”, how to check the operation without uploading
We have started to provide a tool that you can check with STYLY VR without uploading to STYLY!
Details are introduced in the following article. Please use all means.
[Updated on 2020/03/24 so far]
If you have forgotten how to upload, please refer to the following article.

Edit scenes with STYLY Studio 2.0
Delete the problematic STYLY asset and place the newly uploaded Unity 2019 compatible prefab and Unity scene.
If you need to publish, please publish as appropriate.
Confirmed operation with STYLY 2.0
The official version of the STYLY app (VR app) has also been released, so update it and check its operation.
Make sure that there is no problem with STYLY Gallery and Web player.
This is the end of the procedure for Unity 2019 migration.
Thank you for your support!