In this article, I will show the basic operations required for modelling the head of a character. We use Maya2016 this time.
Although the modelling with many curves looks complicated, stay on the basics and understand the workflow, which is a trick to enjoy the modelling work.
Model a character with reference images
Put an image plane
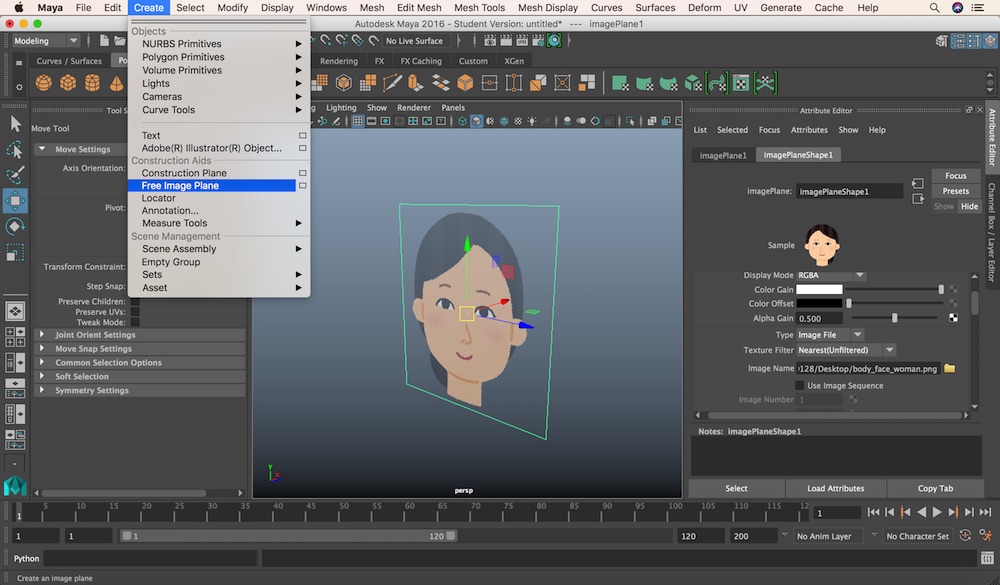
Select Create > Free Image Plane.
Display the image of the character you want to make as ‘reference’. The ‘imagePlaneShape’ tab is added to Attribute Editor by applying ‘Free Image Plane’.
And insert an image by ‘Image Name’ in the ‘imagePlaneShape’ tab. To make the modelling work easier, set ‘Alpha Gain’ to around 0.5, which adds transparency to the image.
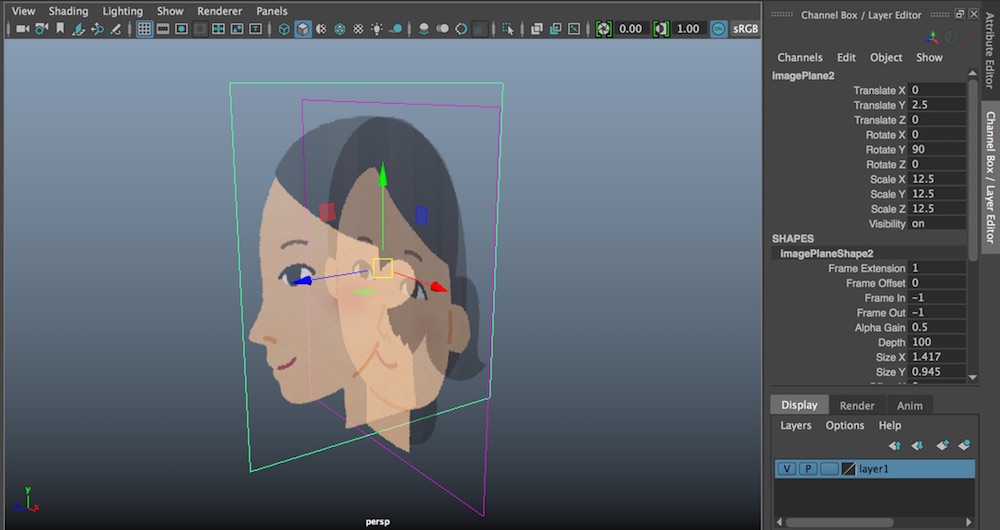
Duplicate (CTRL+D) the Image Plane created above and replace the image with the side-view image by Attribute Editor. Set Rotate Y to 90. It should look like the screenshot shown above.
Now you can model while checking the reference images of the front view and the side view.
Next, model the character further.
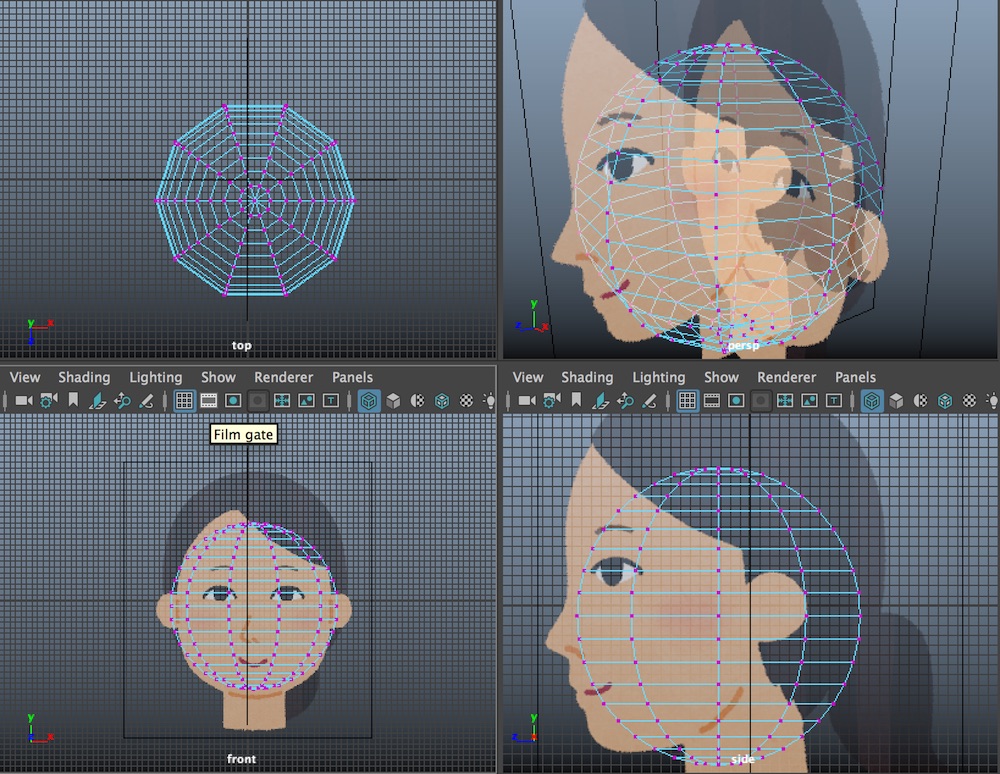
When modelling a character, the 4-screen view is handy.
In addition, switch the display mode to ‘Wireframe’ to make Image Planes transparent for better visibility.
The setting for ‘Symmetry’
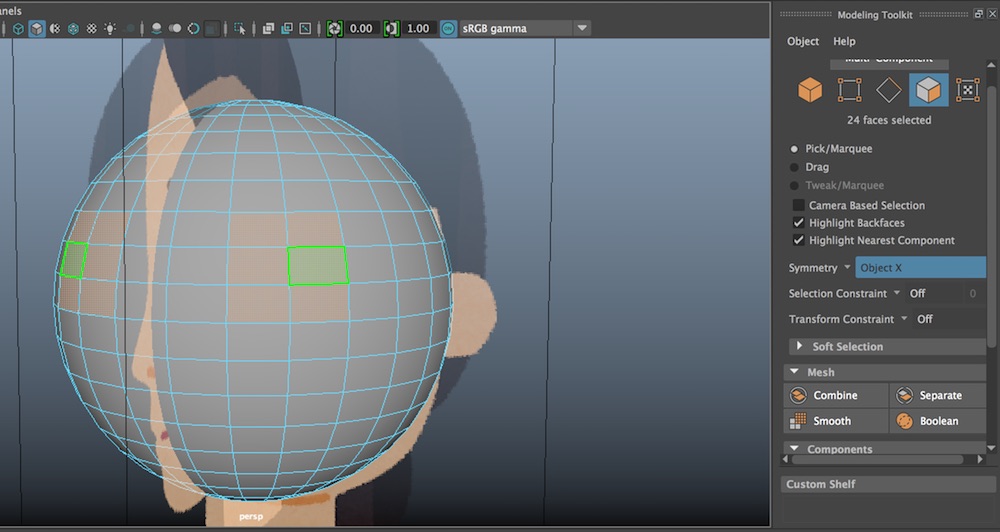
Mesh Tools > Show Modeling Tool Kit
Open the Modeling Toolkit. Although there are the same tools on the Top bar, this toolkit would be more convenient as the name of each tool is shown. In my case, I display it at the beginning.
You can specify the coordinate system to reflect the selection by ‘Symmetry’ in the Modeling Toolkit.
Once you set it, you will be able to model symmetrically while checking the whole balance of the object.
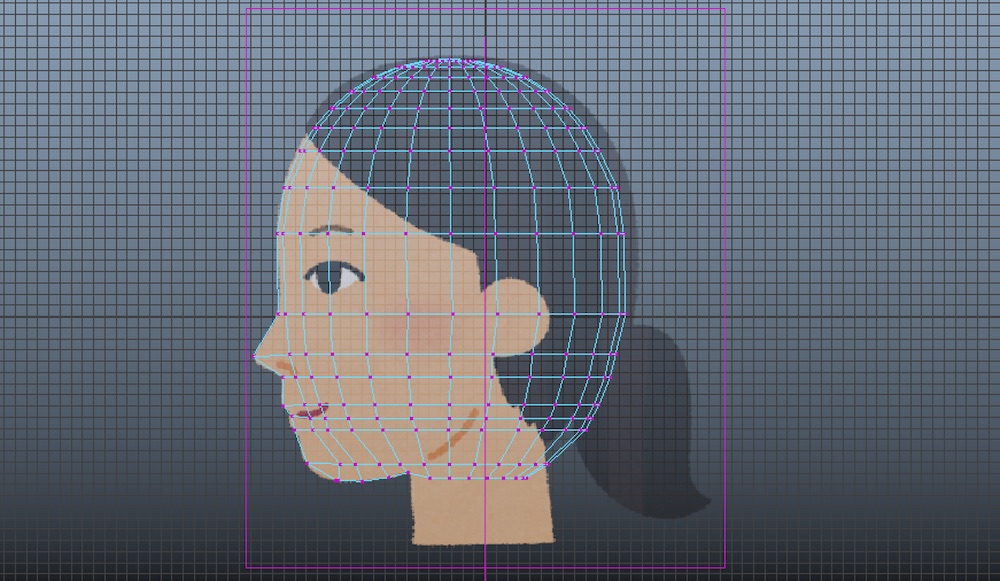
As shown in the screenshot above, you can shape a head by adjusting the positions of vertices. Don’t expect too much from me as I am not good at modelling a character very well.
Modelling by using curves
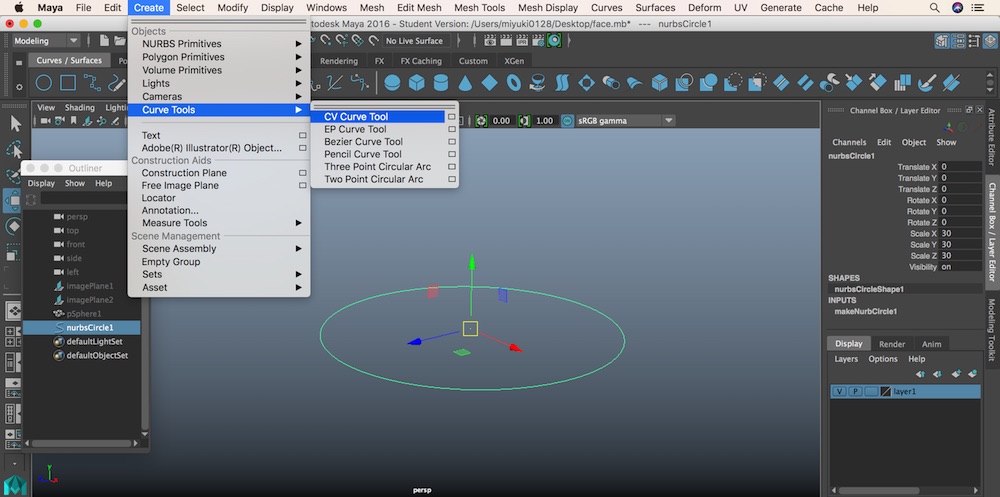
Select Create > Curve Tools > CV Curve Tool.
Or click the leftmost blue-circle icon in the Curves/Surface section on the Top bar.
Then, a curve is created. We create a face from this curve.
Delete Points on Curve
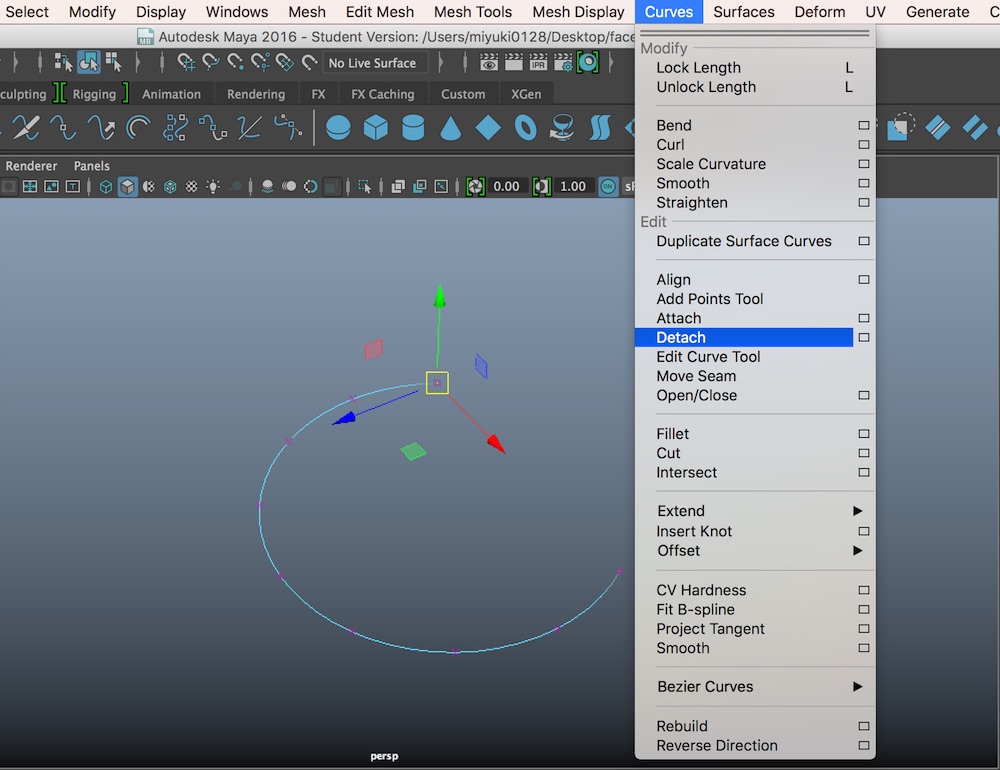
With the curve selected, right-click and select ‘Edit Point’. Then, the points on the curve turn into the ‘x’ shapes. Keeping this state, select the points.
Select Curves > Detach and press the ‘Delete’ key.
The Points on the Curve have been deleted.
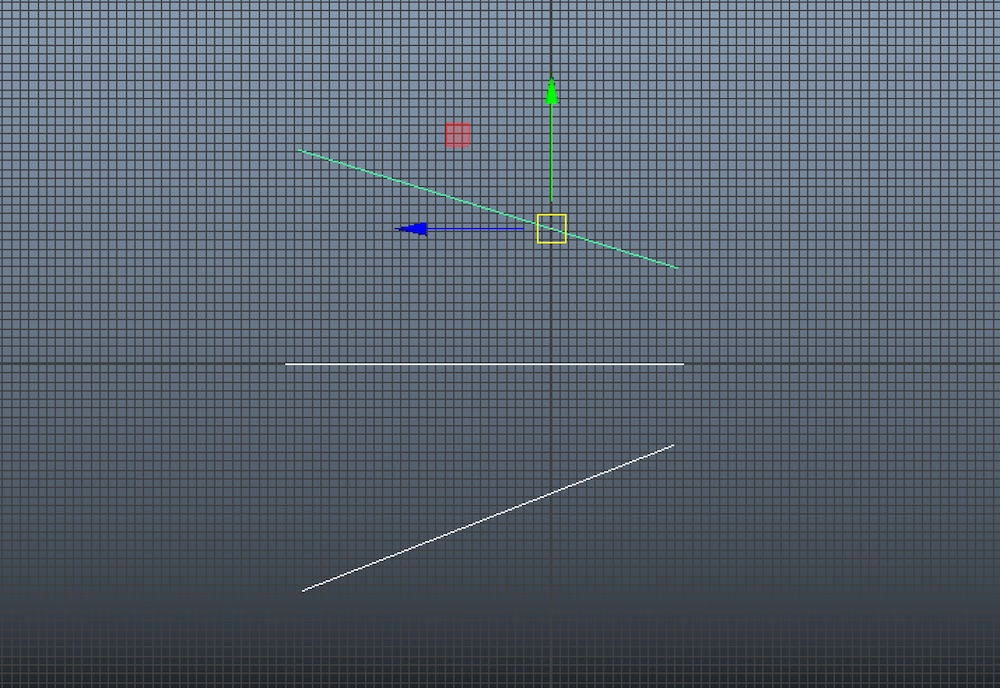
Duplicate the curve edited and arrange them.
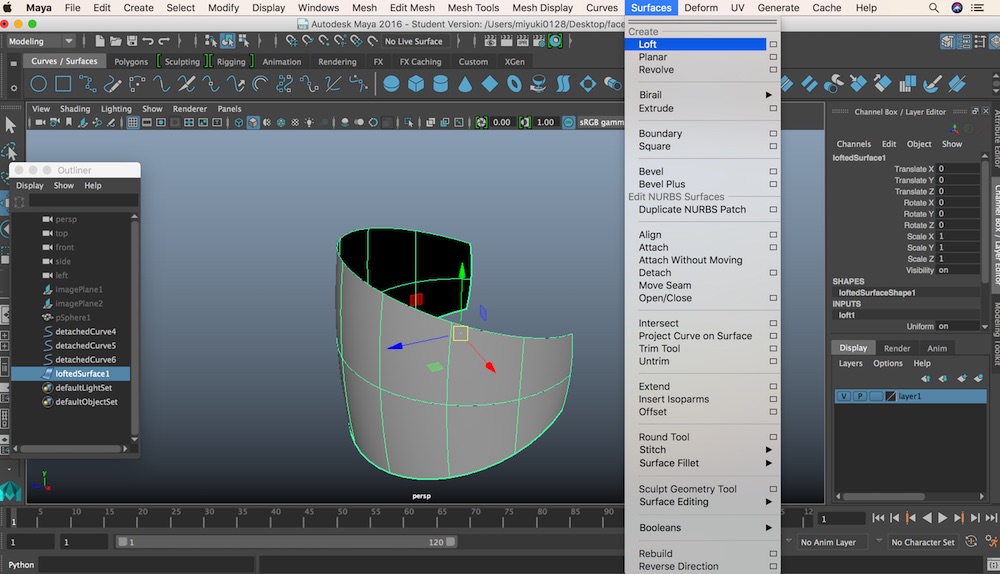
With all the curves selected,
Select Surfaces > Loft.
A face has been created from the curves. This function is very useful when you want to make a face with complicated profile curves.
Mirror geometry
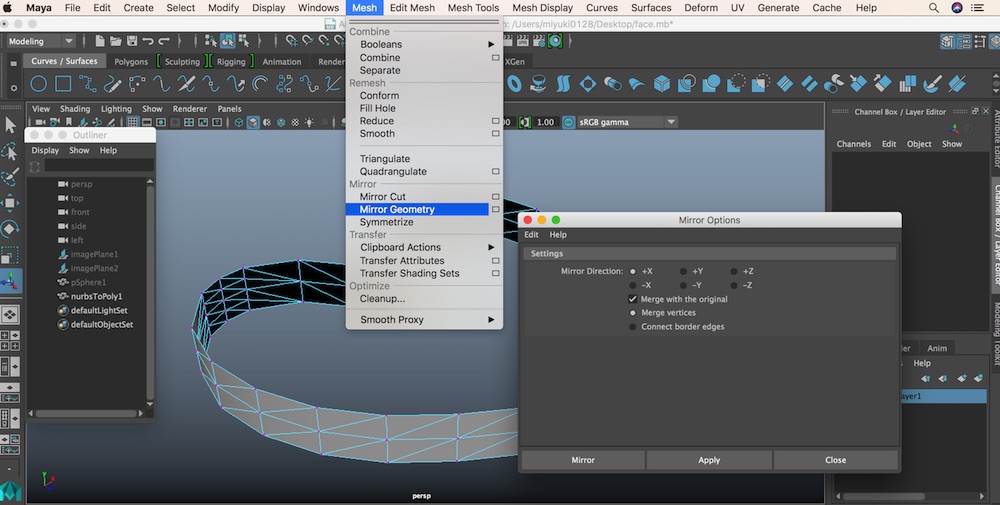
Select the object created from the curves above.
※ Note that this NURBS surface has been converted into the polygons by selecting ‘Modify > Convert > NURBS to Polygons’.
Click the box next to ‘Mesh/Mirror Geometry’ to set the options.
It brings up the ‘Mirror Options’ window. You can specify the direction to mirror at ‘Mirror Direction’. I checked ‘+X’ here.
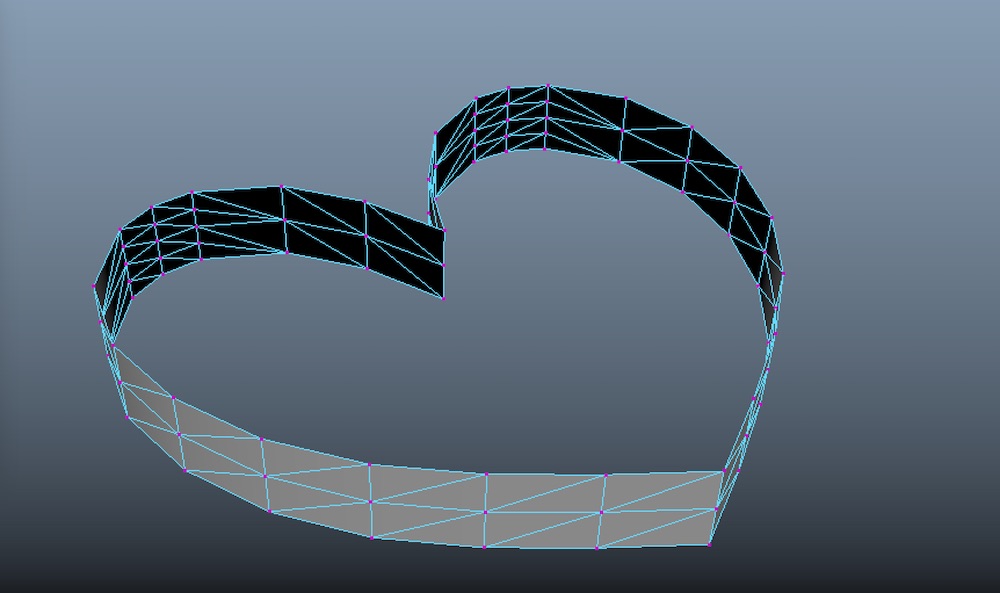
I created a heart-shaped object as shown above.
In this article I introduced the four tasks:
- How to insert the reference images by Free Image Plane
- How to model symmetrically
- How to edit a curve
- How to create a face from curves
By making good use of those functions, you could simplify some painful modelling tasks.
Please refer to this workflow when you model a character in future.
(Reference: AREA JAPAN Maya Learning Channel)