Basic operations of Blender
The article below explains how to install Blender and the basic operations.
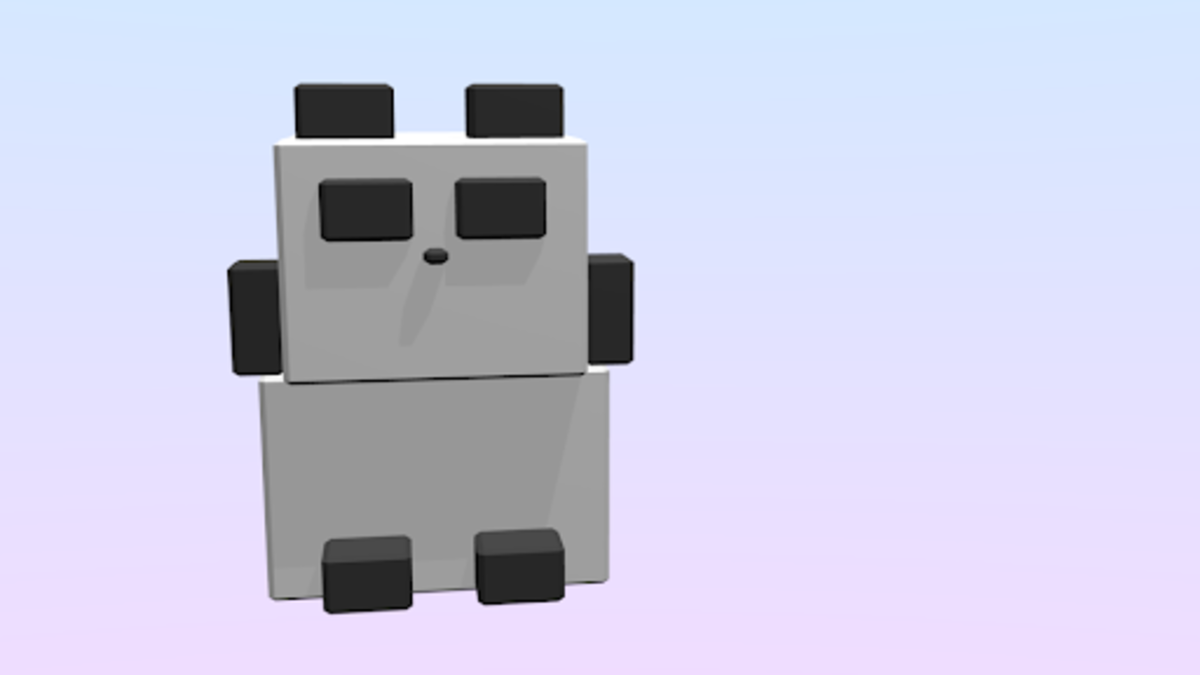
Since Blender is not so easy to use, we make just a simple model out of cubes only to get used to Blender.
You will be able to create primitives, select, move, scale and export models.
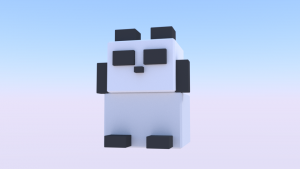
The completion image – Panda
How to make shapes
After getting used to the basic operations, let’s learn the operations to make the details of shapes.
You are going to learn an operation ‘Extrude’ to make a complicated shape.
You will learn how to use the Extrude function and be able to handle points, edges and faces in the Edit mode.
Once you learnt them, you can create various complicated models.
In the article, you learn the operations while making a ‘duck potty’.
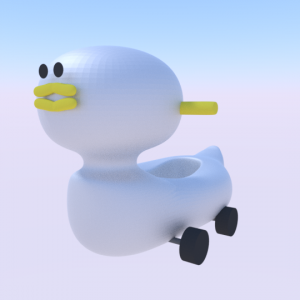
We make a ‘duck potty’.
Please read this article:
How to colour the model
We finish up the duck potty created in the previous section.
Now, you came to be able to make the details of shapes, so you also want to colour the model, don’t you?
You can learn how to set the material here.
Once you coloured the model, its quality looks improved significantly.
Please read this article:
![[Blender for Beginners] Let’s Start Modeling Part 3 – Adding Materials](https://styly.cc/wp-content/uploads/2018/09/46.png)
How to attach Textures
Even if you came to be able to colour the model, you still couldn’t draw patterns on it.
You need textures to make it possible.
When applying textures, you need to learn about UV layout.
UV layout is unwrapped faces of the 3d model, but it’s not so easy to understand until you get used to it.
This time, we just learn how to make a UV layout without any complicated operations by unwrapping a cube and attaching a texture to it.
We learn how to attach a texture
Please read this article:
![[Blender for Beginners] Let’s Start Modeling Part 4 – Creating Textures](https://styly.cc/wp-content/uploads/2018/10/test_.png)
Set up bones (Manually)
Once you learnt how to make a model, I am sure that you want to animate it.
You need to set up the bones to animate the model.
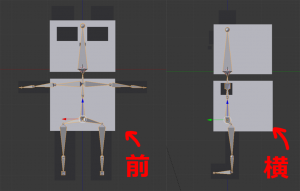
Learn how to set up bones
Following the article below, you will be able to set up bones for a humanoid model.
You learn how to set up bones, associate them with meshes and adjust the weightings.
Please read this to learn how to set up bones:
![[Blender for Beginners] Let’s start Modeling Part 5 – Adding Bones Manually](https://styly.cc/wp-content/uploads/2018/12/8-1.png)
Set up bones (An easy way)
It’s difficult to set up bones for a humanoid model, isn’t it?
You can set up bones easily by using the ‘Rigfiy’ add-on available in Blender.
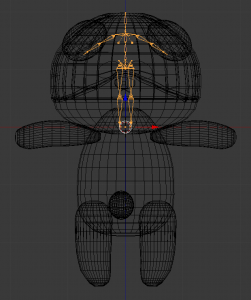
Set up bones by using ‘Rigify’
You learn how to use Rigify, associate bones to meshes and then adjust the weightings.
Please read this article:
![[Blender for Beginners] Let’s start Modeling Part 6 – How to Add Armatures (bones)](https://styly.cc/wp-content/uploads/2018/12/9-2-1.png)
How to add animation
After setting up bones, we finally add animation to the model.
By adding animations, the model can have more variations of the expression.
Firstly, we create a simple ‘walking’ animation.
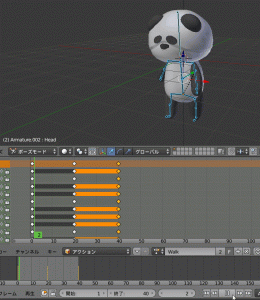
Create a ‘walking’ animation
You learn how to add animation, export the model with animation, import it into Unity and play the animation.
Please read this article:
![[Blender for Beginners] Let’s Start Modeling Part 7 – Animating Bones](https://styly.cc/wp-content/uploads/2019/01/27.png)