When you are working on a VR or AR project, there may be times when you need to change the quality of the content to match the processing power of the device.
Using the “LOD” method, you can reduce the weight of the scene without losing much of the quality of the data being rendered.
LOD is an abbreviation for Level of Detail.
It is a way to control the way 3DCG objects are rendered so that the scene does not become too heavy.
By drawing high-poly objects when they are close to the camera and low-poly objects when they are far away from the camera, it is possible to make close objects look clean and distant objects look blurry.
This is similar to the way the human eye works, and if you get it right, you can design an experience that is comfortable for the user.
For the official Unity explanation, please refer to here.
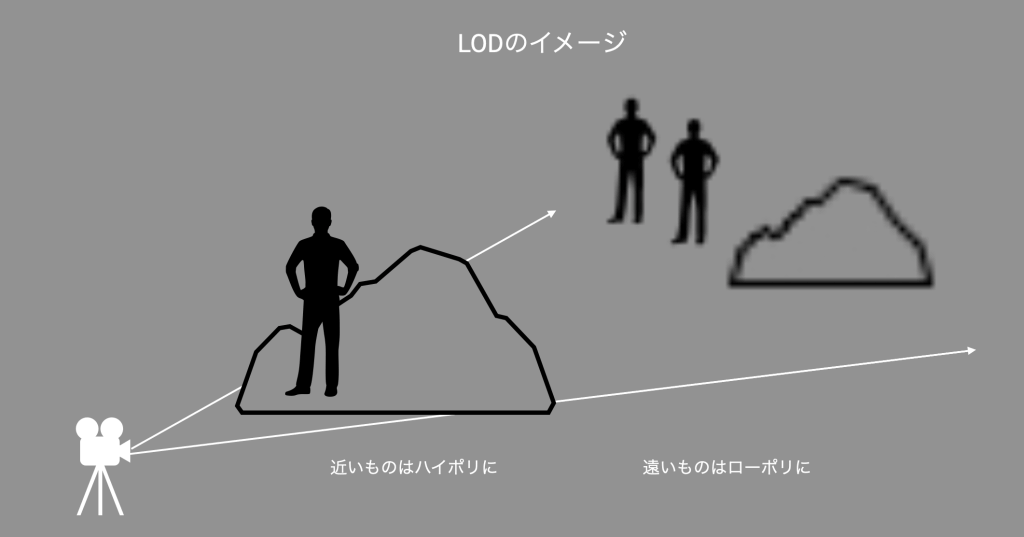
Image of LOD
Unity supports LOD as a standard feature, so it is easy to set up.
In this article, I will show you how to set up LOD in Unity as well as the items you should adjust when setting it up STYLY.
Let’s get ready to set up LOD
First of all, we need to prepare the objects with high and low polygon counts that we want to set the LOD.
Use 3DCG model editing software such as MAYA or Blender, or use an asset to change the polygon count in Unity such as MeshOptimizer in the following article.
![[Unity Assets] Using Mesh Optimizer to lower the polygon count of 3D models to lighten the scene.](https://styly.cc/wp-content/uploads/2021/09/スクリーンショット-0003-09-14-16.50.02-160x160.png)
The recommended object to set LOD is a high-poly object that you want to make look nice and close to the user.
This is because lowering the polygon count of high-poly objects will make them look more stable even if you display them with a reduced polygon count.
In this case, I prepared a female model with three levels of polygon count.

Same model with different polygon counts
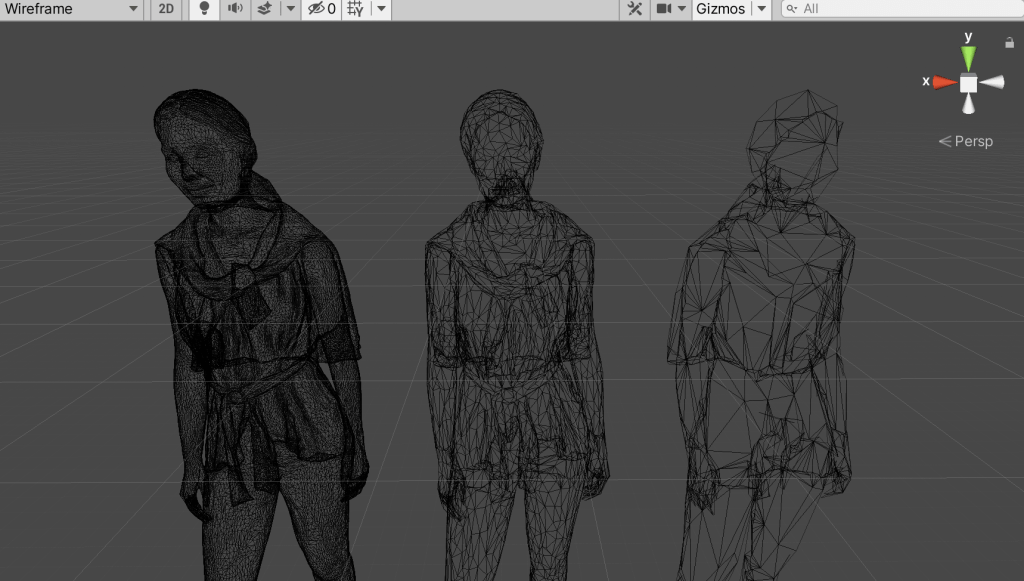
Difference in polygon count as seen in the wireframe display
At this time, the object to set the LOD should be a child object of an empty GameObject. For clarity, we have renamed the empty GameObject to “models”.
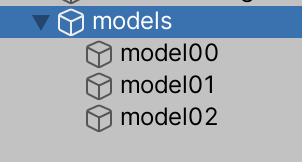
Image of the parent-child relationship
Make sure that the positions of these three objects are all equal so that they overlap.
This time, set the Transform Position value to the origin (0,0,0) in the Inspector.
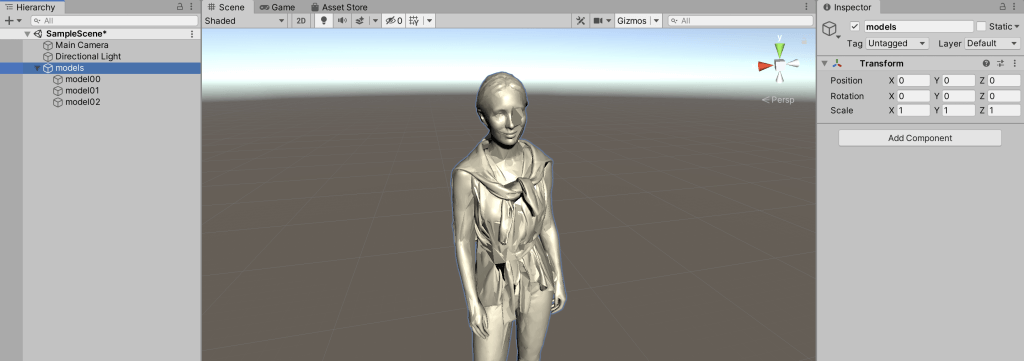
Overlapping object positions
Now we’re ready to set things up!
Let’s set up the LOD
Let’s start setting up the LOD.
Attach a component called “LOD Group” to the empty object that is the parent object, and click Add component to find and select the LOD Group.
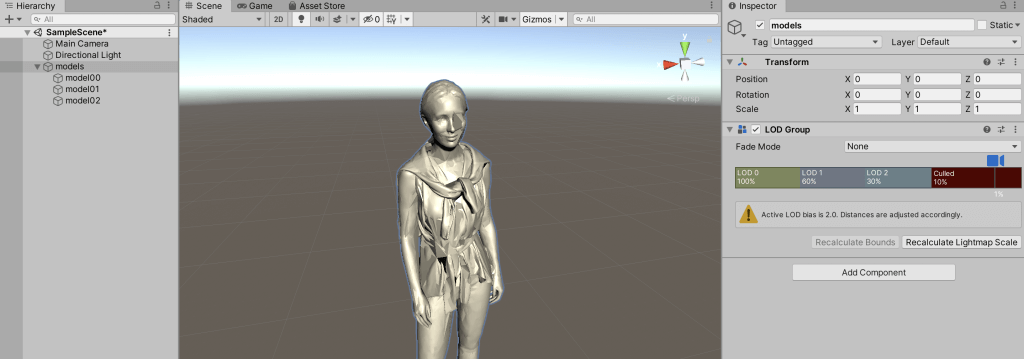
Stacking the three objects
Let’s add some settings to this LOD Group.
Select the green frame that says “LOD 0” in the LOD Group, and add model 0 to the “Add” field that appears under the “Renderers:” column.
In the same way, set the model for LOD 1 and LOD 2.
Note that when the camera is farther away from the LOD than the LOD, the object will be hidden when it reaches the Culled position.
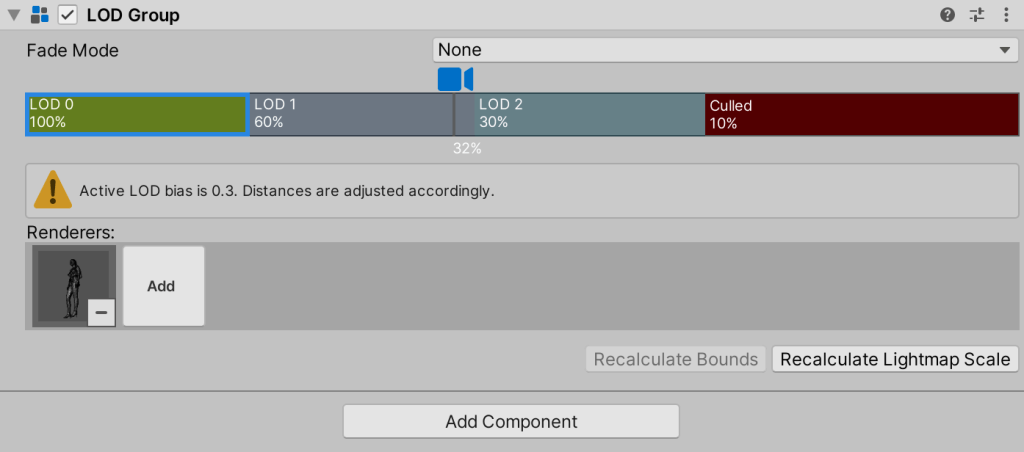
Set a high-poly object with the highest polygon count to LOD 0.
The LOD has now been set.
If you move the camera icon in the LOD Group component, you will see that the model will actually change its appearance depending on the distance of the camera.
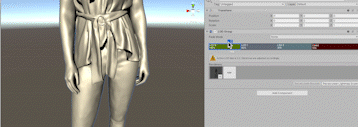
The display of the object changes as the camera moves.
You can set how far away you want the object to change as the camera moves by moving the line between LOD 0 and LOD 1 in the LOD Group.
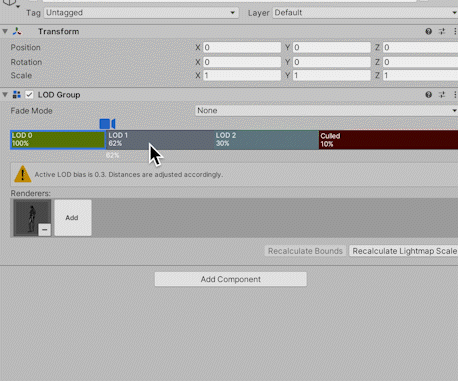
Camera Distance Settings
For a detailed explanation of the LOD Group component, please refer to the official Unity article here.
Let’s use LOD in STYLY to create VR
If you want to use LOD in STYLY, you need to change some settings of LOD.
In the Edit > Project Settings > Quality category of the toolbar, set the LOD Bias value to the following value according to the platform you are using.
A detailed explanation of the Quality category can be found on the official Unity website here.
LODBias values per platform
| Steam version | 1.5 |
| Vive Flow / Focus | 1.0 |
| GearVR (Quest) / Pico | 0.7 |
| Mobile app | 0.7 |
| WebGL (Studio / WebPlayer / WebClient) | 0.3 |
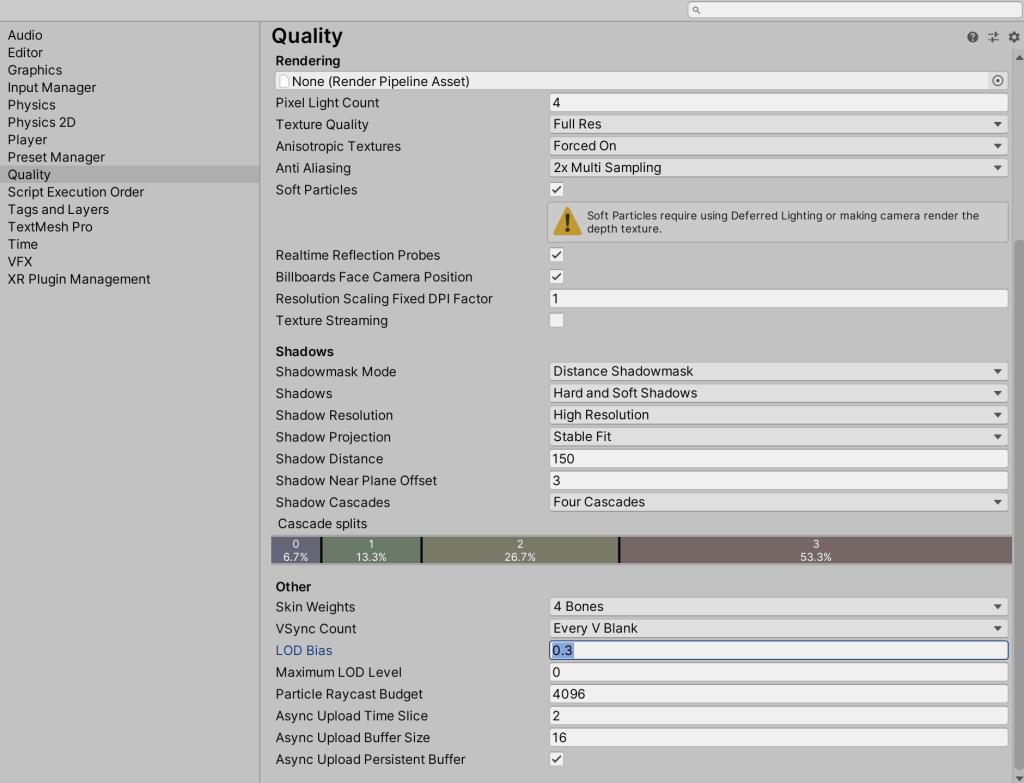
This time, set the LOD Bias value to 0.3
Now you are ready to set up the LOD for STYLY.
Let’s upload your prefab or scene to STYLY.
How to create a STYLY account

How to upload 3D models to STYLY

How to upload from Unity to STYLY

LOD allows you to render only nearby objects in real time, which makes it easier to lighten the scene, avoid choppy content that spoils the experience, and make the objects you want to show more beautiful.
I urge you to take advantage of LOD to create a good XR experience with rich models!
You can use STYLY FORUM to solve the problem. STYLY FORUM is a place where people can discuss a service or technical issue on STYLY, or provide bug reports on STYLY.
https://en.forum.styly.cc/support/discussions