This article explains how to do chroma-key a green background video for a scene in Unity or STYLY Studio.
Samples
You can do chroma-key a green background video as shown in the Gif image below.
Chroma-Keying in Unity
Chroma-Keying in STYLY Studio
How to do chroma-key on Unity
How to install it
First of all, you need to install the chroma-key shader on Unity.
Right-click on the right side of the Project window and select Create → Shader → Standard Surface Shader.
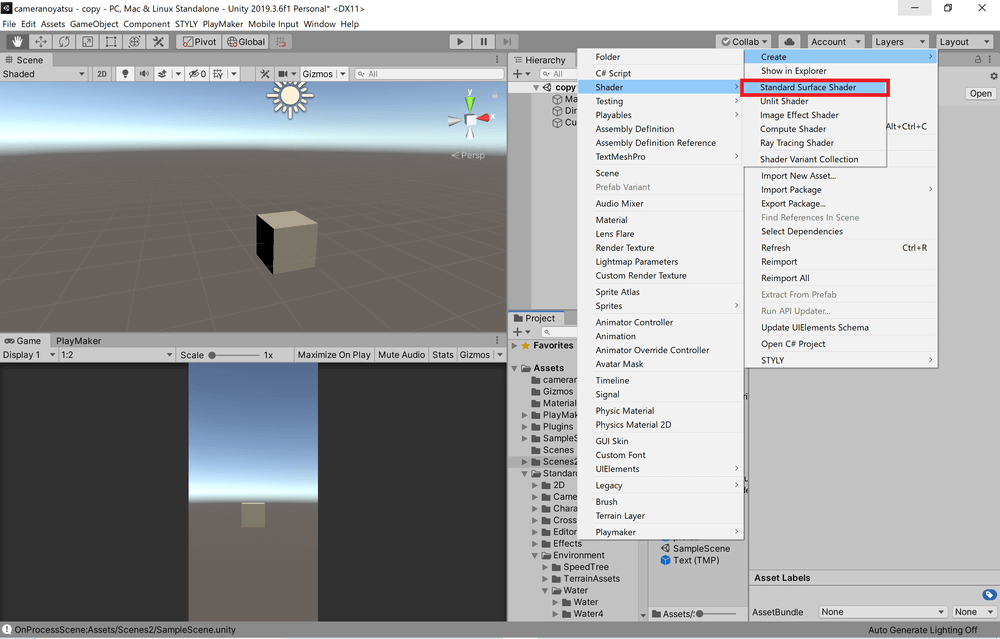
Select Create → Shader → Standard Surface Shader
Rename the shader you created to a name that is easy to understand.
Double-click the shader you created and open it in a code editor or Notepad.
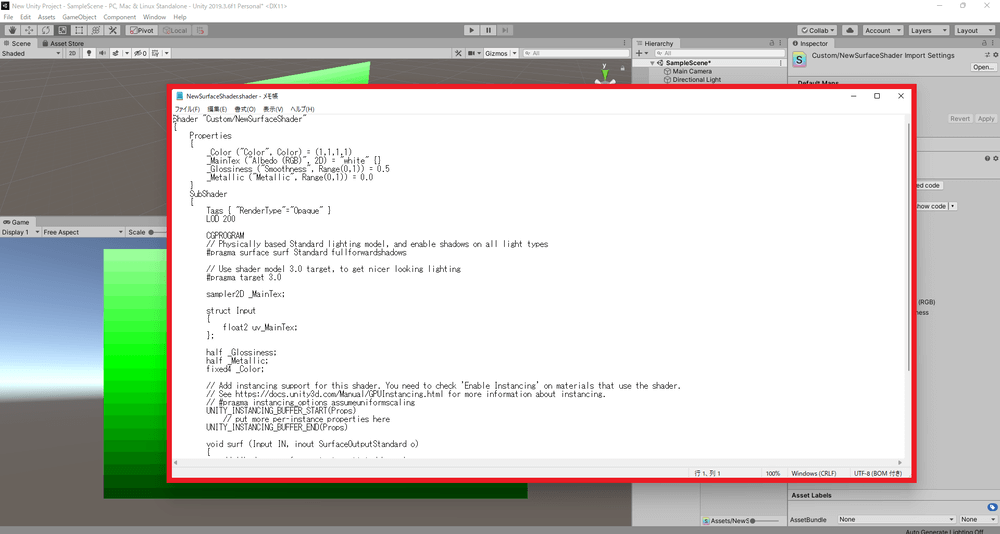
Open the shader in Notepad, etc.
Copy and paste the contents of the shader into the following code.
Shader "Unlit/ChromaKeyUnlit"
{
    Properties
    {
        _MainTex ("Texture", 2D) = "white" {}
        _Border("BorderSetting",Range(0,1000)) = 100
        _KeyColor("Key Color", Color) = (0,1,0)
        _Near("Near", Range(0, 2)) = 0.01
    }
    SubShader
    {
        Tags { "RenderType"="Opaque" }
        LOD 100
        Cull off
        Pass
        {
            CGPROGRAM
            #pragma vertex vert
            #pragma fragment frag
            // make fog work
            #pragma multi_compile_fog

            #include "UnityCG.cginc"
            struct appdata
            {
                float4 vertex : POSITION;
                float2 uv : TEXCOORD0;
            };
            struct v2f
            {
                float2 uv : TEXCOORD0;
                UNITY_FOG_COORDS(1)
                float4 vertex : SV_POSITION;
            };
            sampler2D _MainTex;
            float4 _MainTex_ST;
            half _Border;
            fixed4 _KeyColor;
            half _Near;
            fixed2 bound(fixed2 st, float i)
            {
                fixed2 p = floor(st) + i;
                return p;
            }

            v2f vert (appdata v)
            {
                v2f o;
                o.vertex = UnityObjectToClipPos(v.vertex);
                o.uv = TRANSFORM_TEX(v.uv, _MainTex);
                UNITY_TRANSFER_FOG(o,o.vertex);
                return o;
            }

            fixed4 frag (v2f i) : SV_Target
            {
                // sample the texture
                fixed4 col = tex2D(_MainTex, i.uv);
                // Chroma Key
                fixed4 c1 = tex2D (_MainTex, bound(i.uv * _Border, 1)/_Border);
                clip(distance(_KeyColor, c1) - _Near);
                fixed4 c2 = tex2D (_MainTex, bound(i.uv * _Border, 0)/_Border);
                clip(distance(_KeyColor, c2) - _Near);
                // apply fog
                UNITY_APPLY_FOG(i.fogCoord, col);
                return col;
            }
            ENDCG
        }
    }
}
Finally, save the changes and you are done.
How to do chroma-key a video
Right-click on the right side of the Project window and select Create → Render Texture.
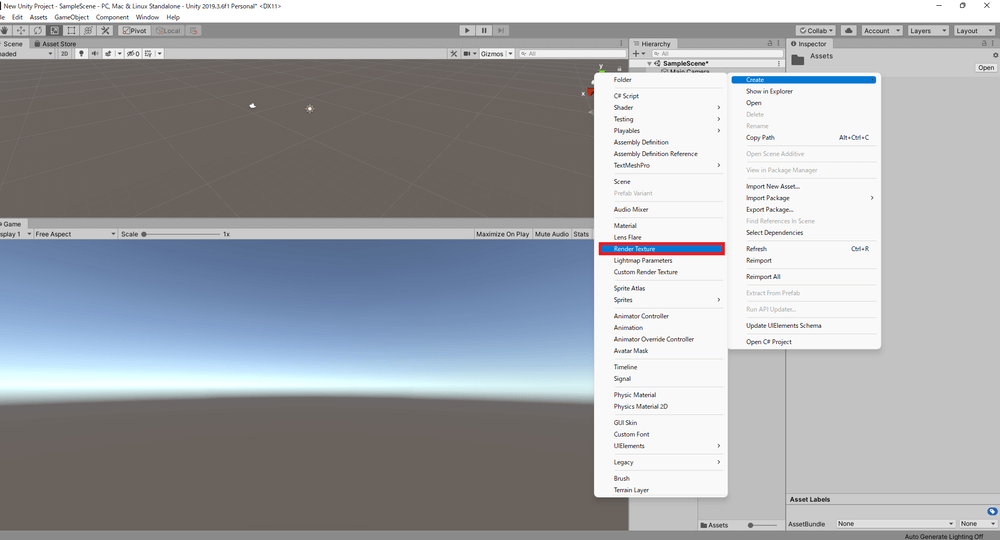
Select Create → Render Texture
Change the name of the Render Texture you created to something that is easier for you to understand.
Drag and drop the video you want to do chroma key to the right side of the Project window.
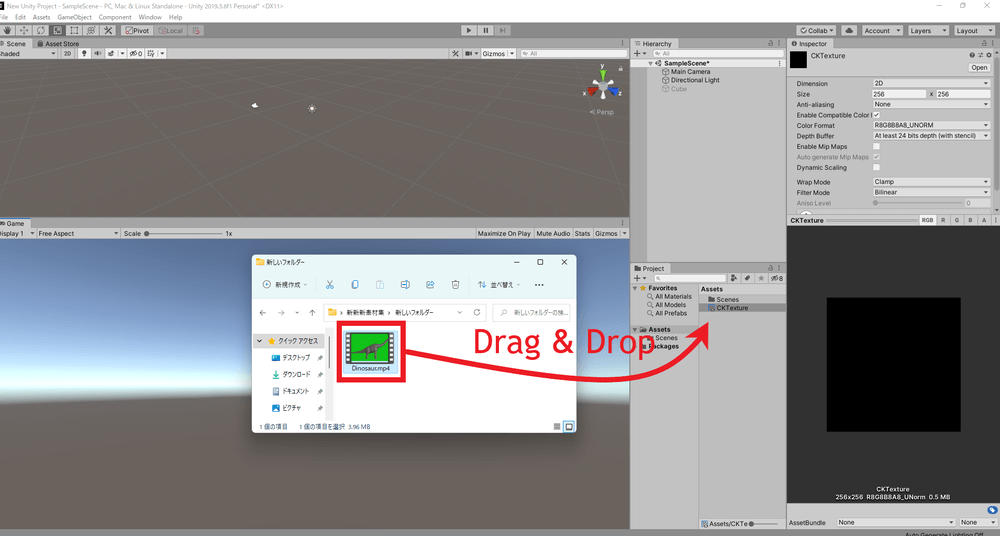
Drag and drop the video you want to chroma-key to the right side of the Project window
Select the object to which you want to apply the texture of the chroma-keyed video, and then left-click [Add Component] in the Inspector window.
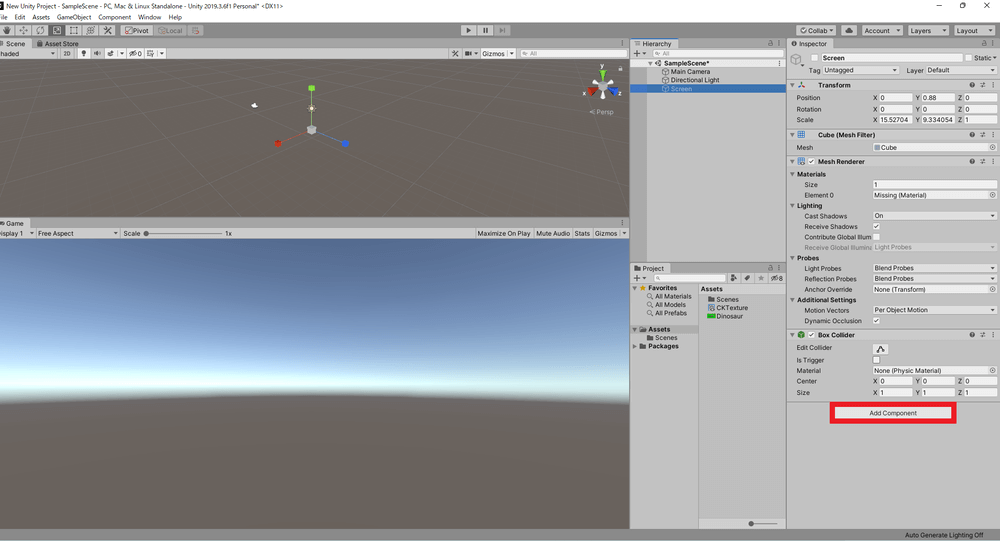
Left-click on Add Component
Type “Video” in the component search window and select “Video Player” from the search results.
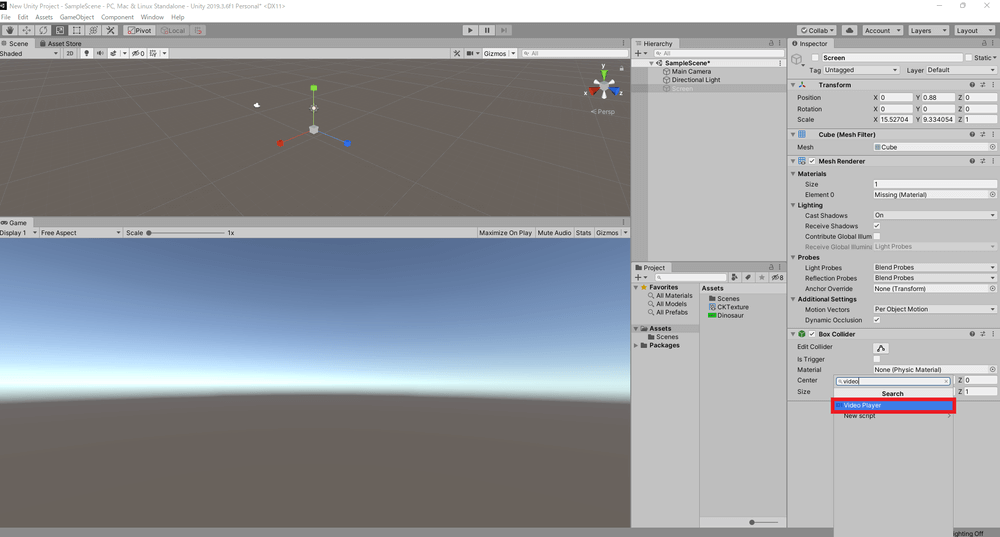
Add the Video Player
Set the Source value of the added Video Player component to “Video Clip” and drag and drop the video you want to do chroma key to Video Clip from the Project window.
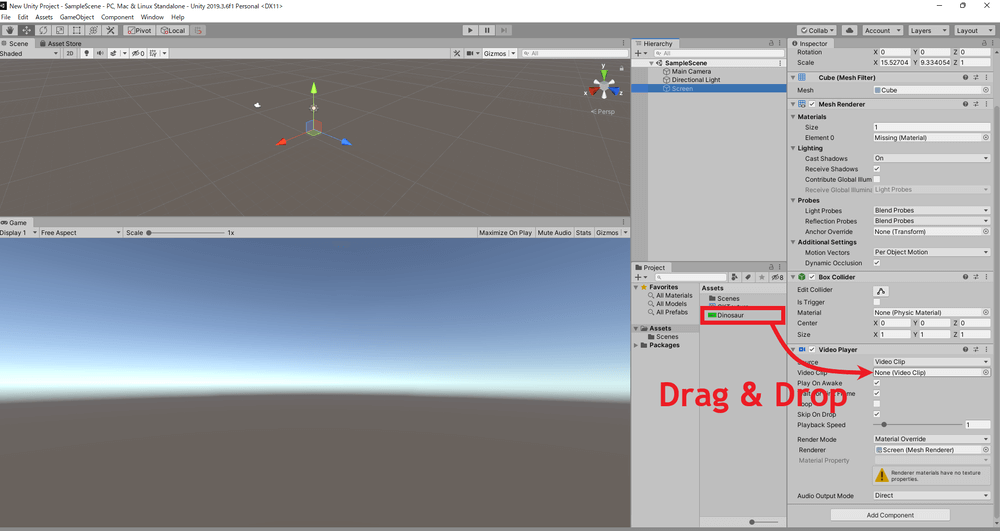
Drag and drop the video you want to chroma key to the Video Clip property from the Project window
In the Video Player component, set the Render Mode value to Render Texture, and drag and drop the first Render Texture you created to the Target Texture.
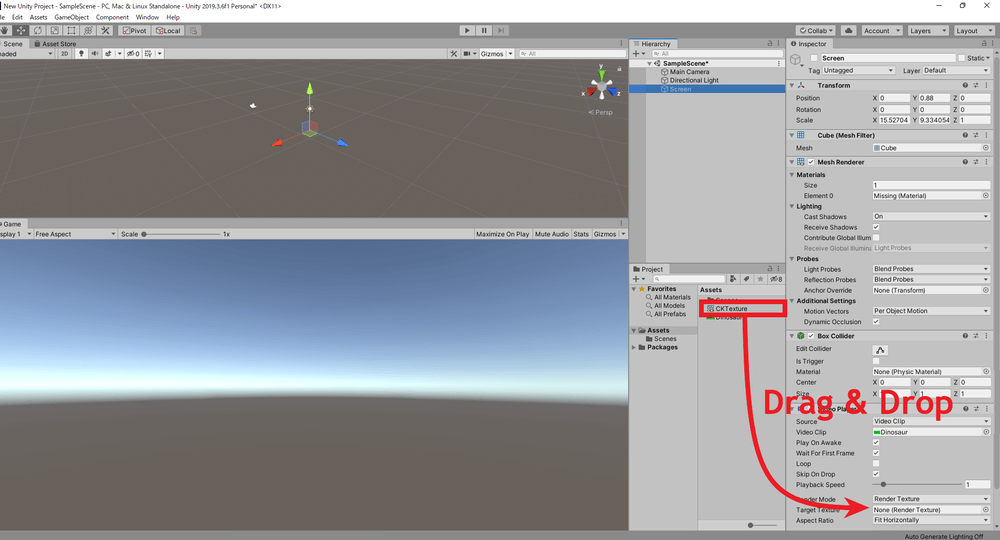
Drag and drop the Render Texture onto the Target Texture
Right-click on the right side of the project window and select Create → Material.
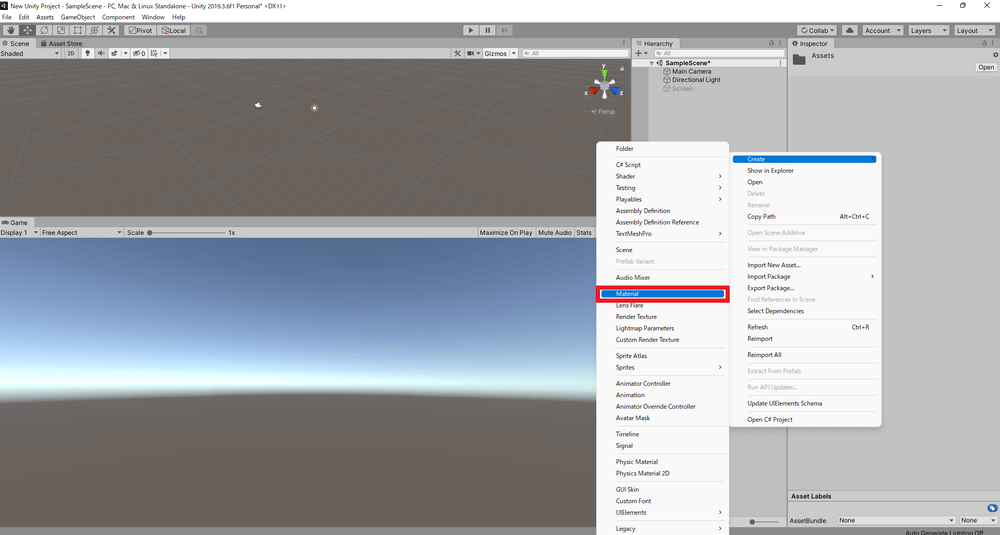
Select Create → Material
Change the name of the material you created to something that is easier for you to understand.
Select the Material you created and change the Shader at the top of the Inspector window from Standard to Unlit → ChromaKeyUnlit (the shader you created).
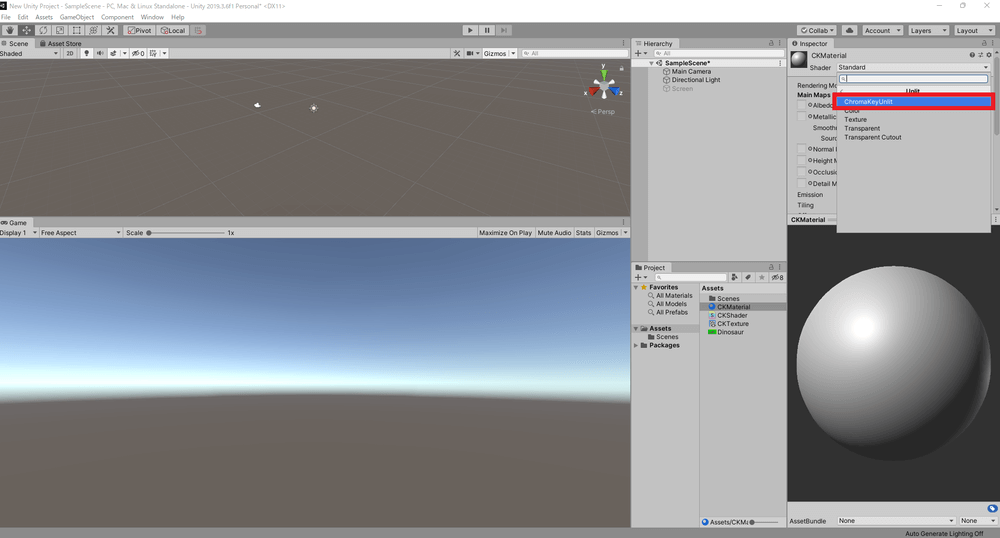
Change the Shader from Standard to Unlit → ChromaKeyUnlit
Drag and drop the first Render Texture you created onto the Texture in the Material’s Inspector window.
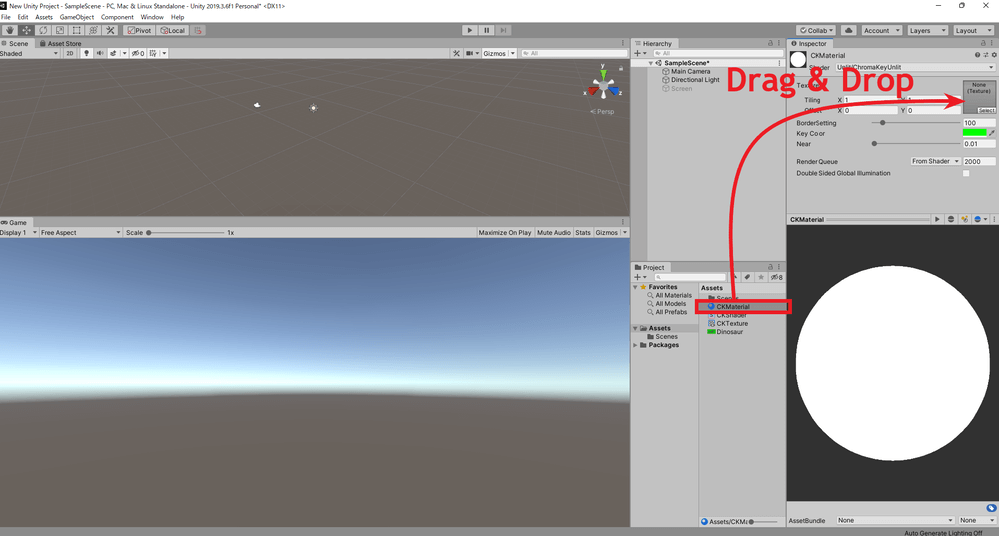
Drag and drop the Render Texture onto the Texture
Finally, drag and drop the Material onto the object where you want to paste the texture of the chroma-keyed video.
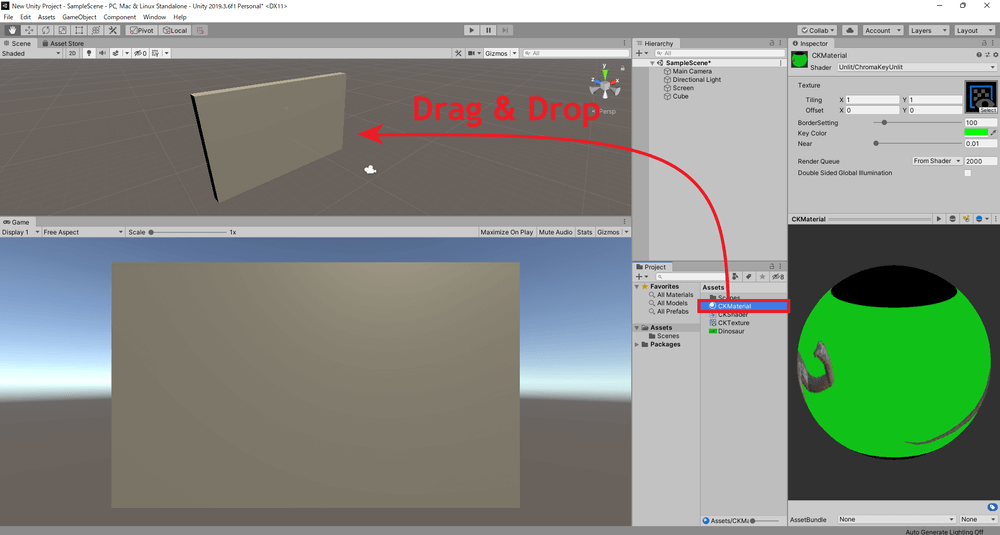
Dragging and dropping a Material onto an object
Setting up the Chroma Key Shader
The Material component with the chroma-key shader looks like this.
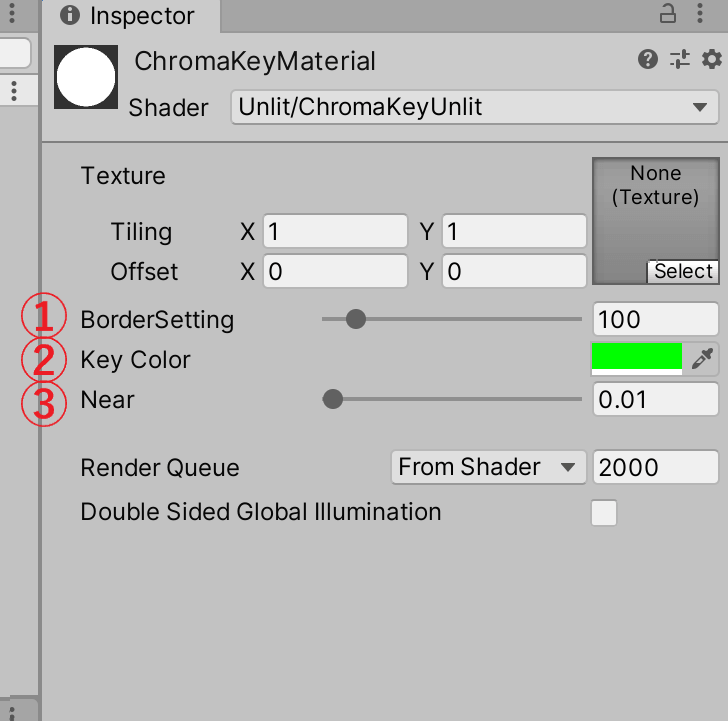
Material components reflecting the chroma-key shader
(1) BorderSettings should be set to 1000, which is basically the maximum value.
(2) “Key Color” allows you to set the color of the cutout.
For example, if you set this to blue, you can do chroma key a video with a blue background.

(3) “Near” allows you to set how close to the Key Color the color will be cropped.

These are the basic components of the chroma key shader.
I hope you’ll try chroma-keying your favorite green background video in Unity and use it to create your own scenes!
Extra: How to do chroma-key Camera footage
You can also do chroma-key Camera footage using the chroma-key shader.
Right-click on the Hierarchy window and select Camera.

Select Camera
Right-click on the right side of the Project window and select Create → Render Texture.
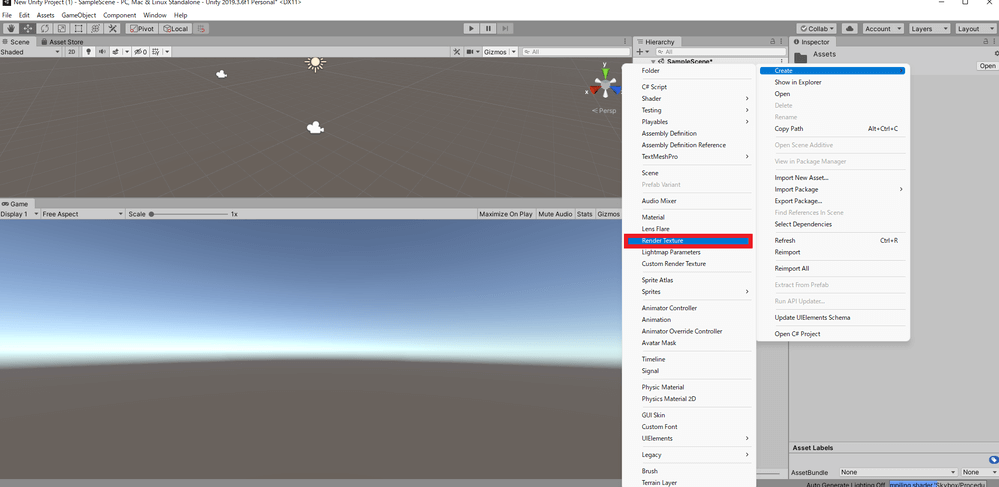
Select Create → Render Texture
Select the Camera you just created, and drag and drop the Render Texture you just created to the Target Texture in the Inspector.
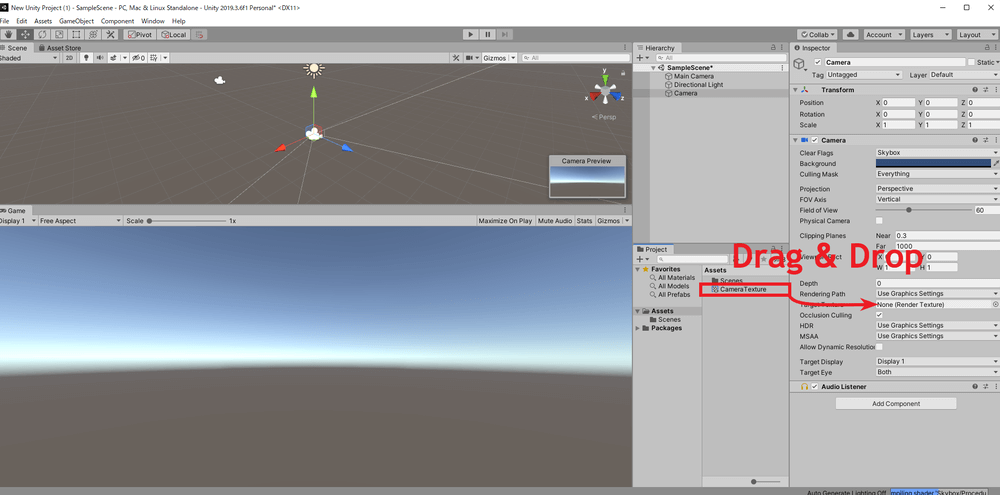
Drag and drop the Render Texture onto the Target Texture
Right-click on the right side of the project window and select Create → Material.
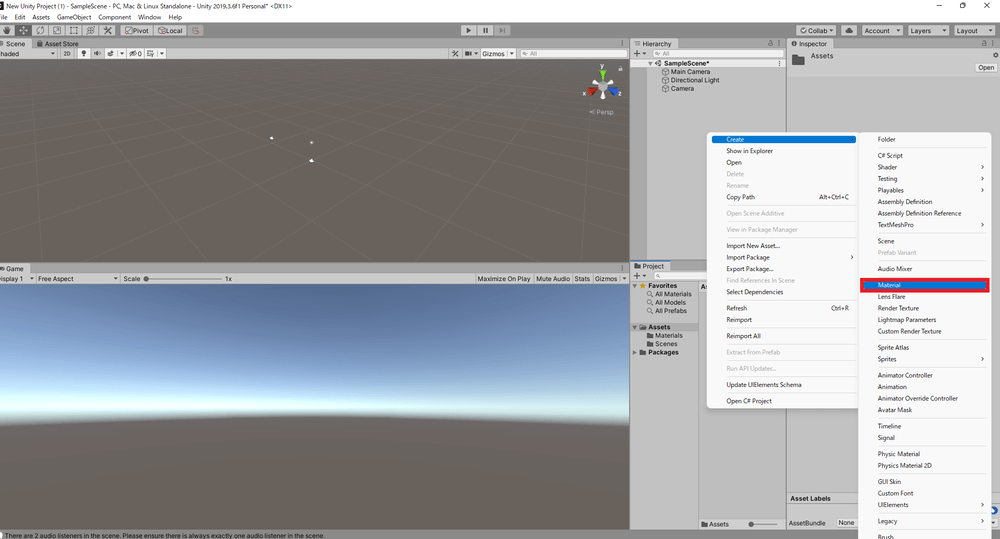
Select Create → Material
Change the name of the material you created to something that is easier for you to understand.
Select the Material you created and change the Shader at the top of the Inspector window from Standard to Unlit → ChromaKeyUnlit.
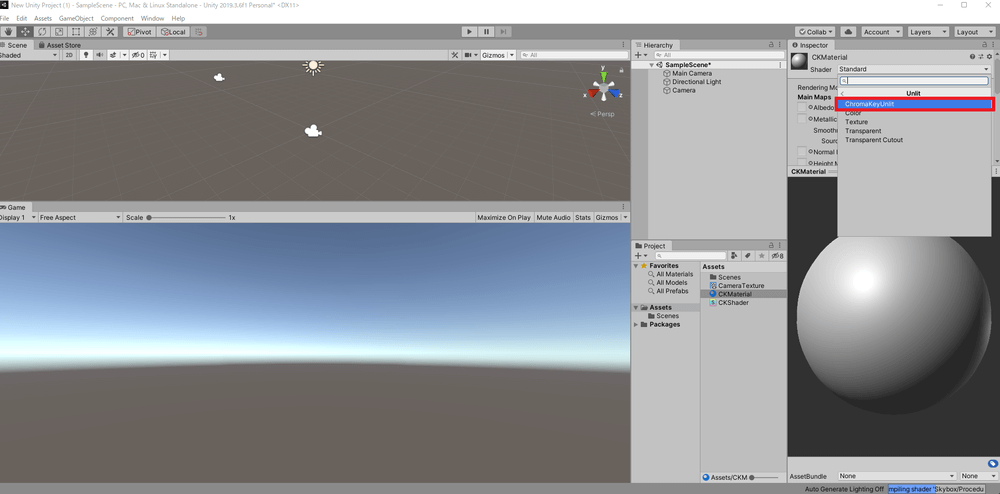
Change to Unlit → ChromaKeyUnlit
Drag and drop the Render Texture you just created onto the Texture in the Material’s Inspector window.
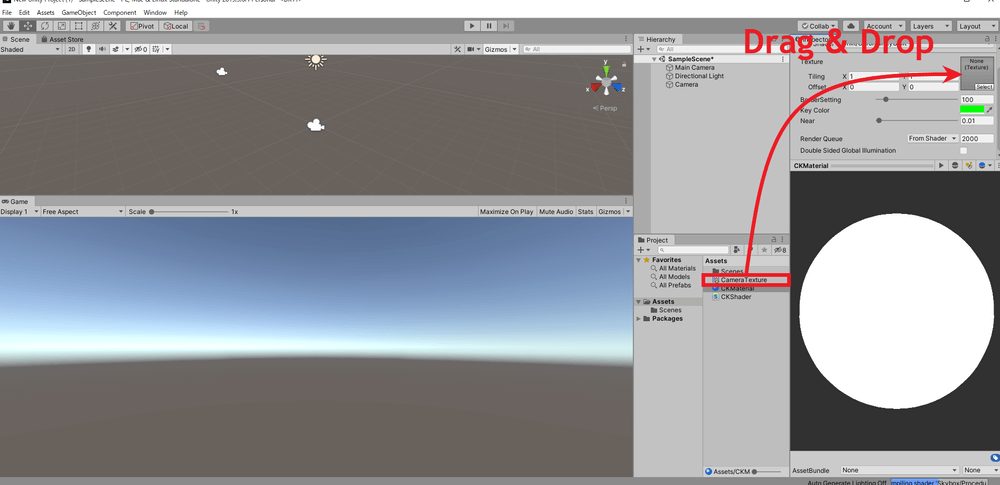
Drag and drop the Render Texture onto the Texture.
Finally, drag and drop the Material onto the object where you want to paste the texture of the chroma-keyed video.

Dragging and dropping a Material onto an object
Now you can use Camera’s video as a chroma-keyed video.
There are many other ways to use the chroma key shader than the two I’ve described here, so please try them out for yourself!
How to do chroma key on STYLY Studio
Click the Assets button in the upper left corner of the STYLY Studio screen.
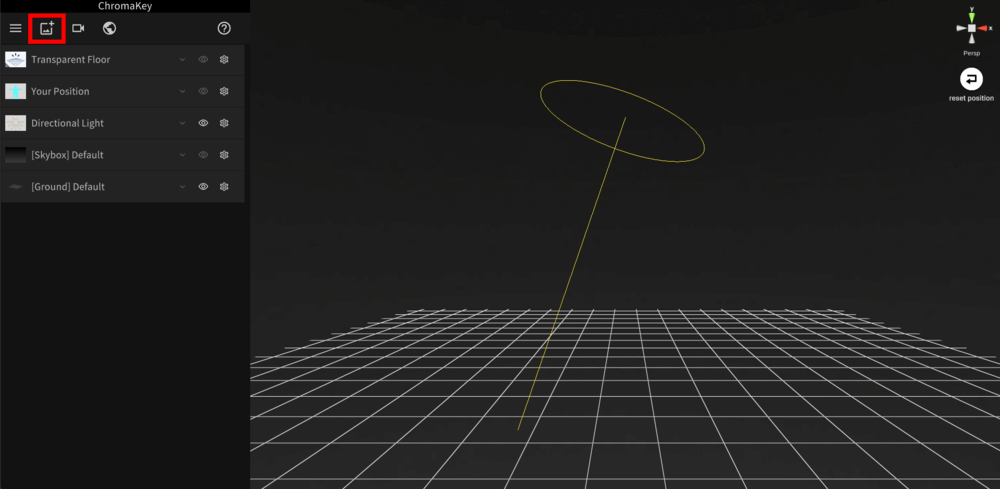
Click on the Assets button in the upper left corner of the screen
Select My uploads from the Assets menu.
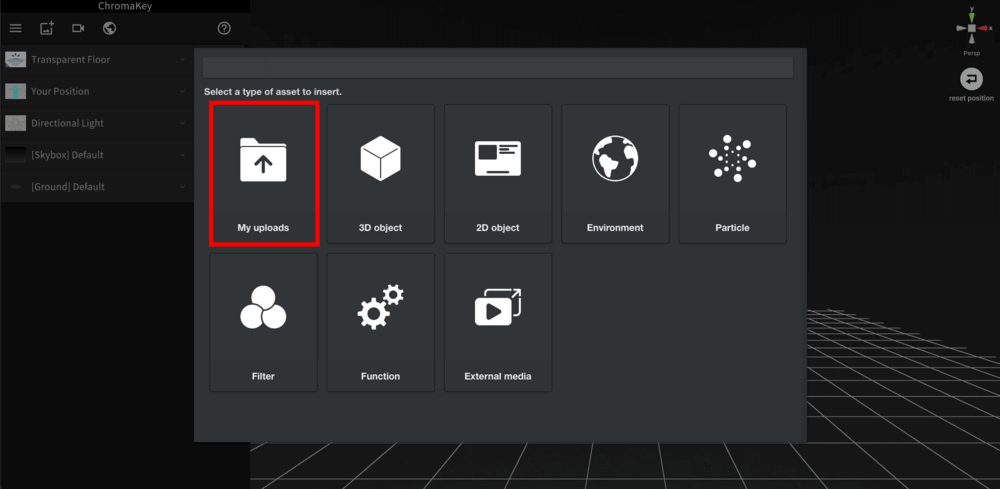
Select My uploads from the Assets menu.
Select Video.
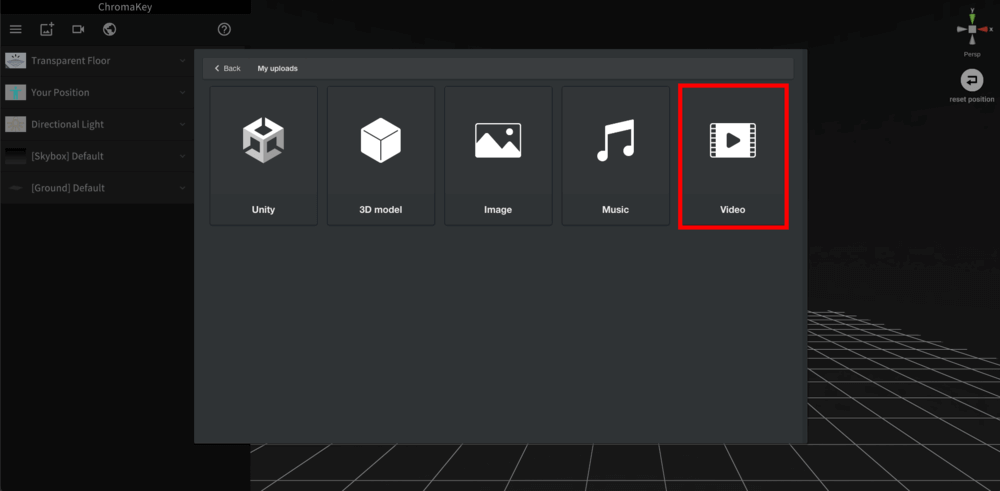
Select Video
Select Chroma Key Composite Video.
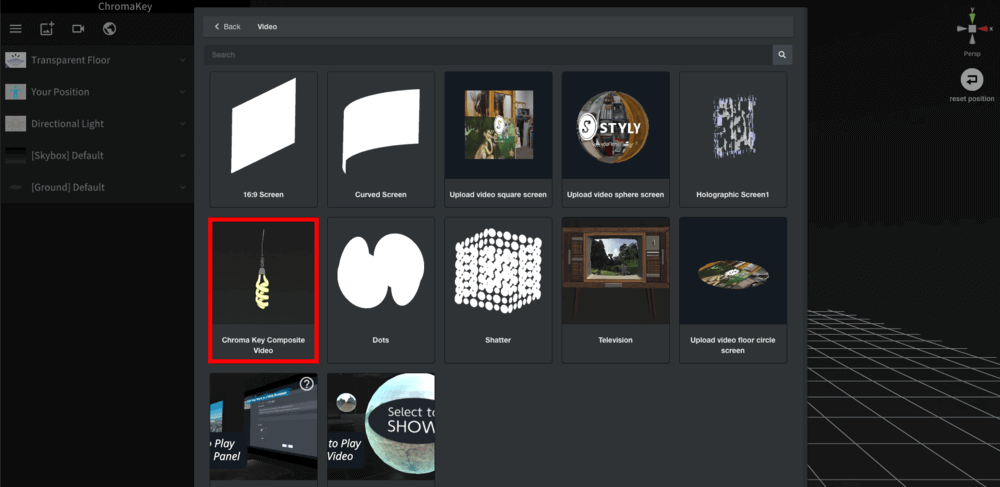
Select Chroma Key Composite Video
Upload the file you want to chroma key.
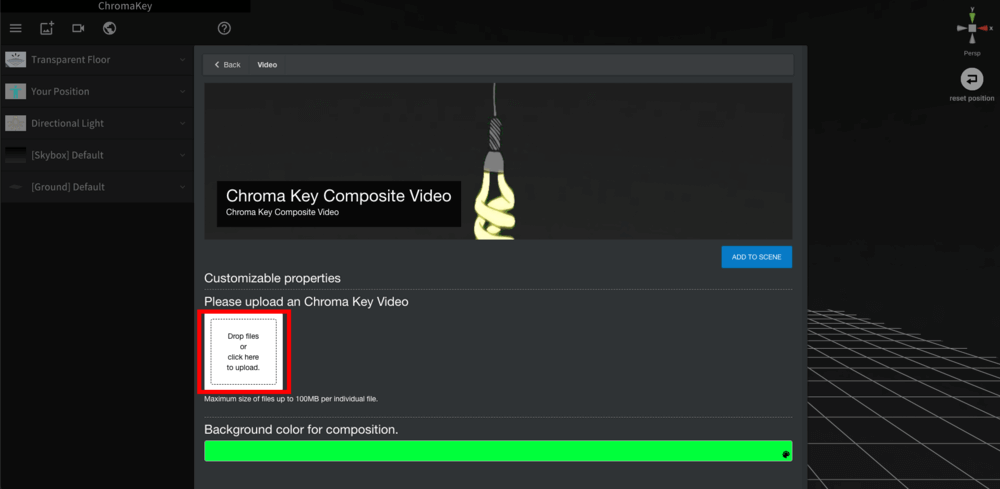
Upload the file you want to chroma key
Select the color you want to crop with chromakey.
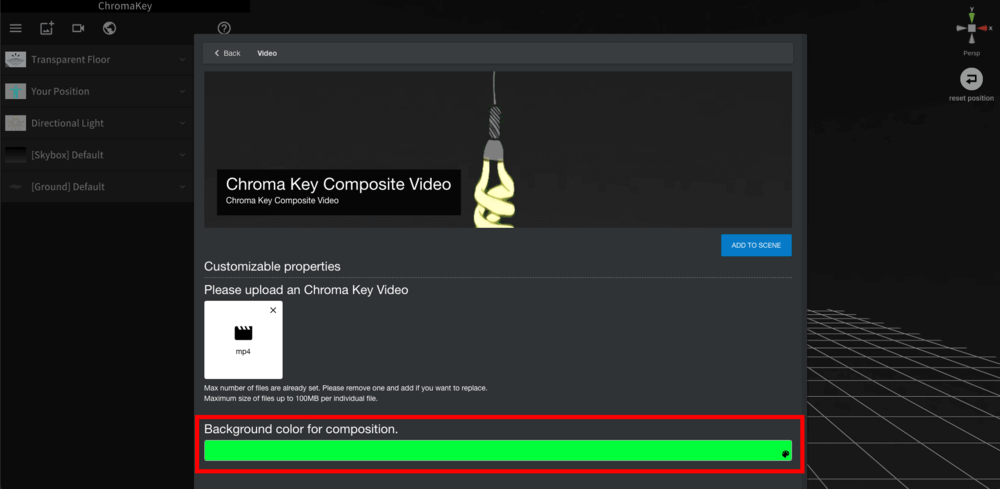
Select the color you want to crop with chromakey
*If you don’t select the exact color you want to crop, the image will not be cropped properly.
Finally, click [ADD TO SCENE].
![Click [ADD TO SCENE]](https://styly.cc/wp-content/uploads/2021/11/S_07.png)
Click [ADD TO SCENE]
Now you can do chroma key your video on STYLY Studio.
I hope you all find these assets useful in creating your own scenes on STYLY Studio!
How to upload to STYLY
Let’s upload what you have created in this article to STYLY.
How to create a STYLY account

How to upload 3D models to STYLY

How to upload to STYLY from Unity

You can use STYLY FORUM to solve the problem. STYLY FORUM is a place where people can discuss a service or technical issue on STYLY, or provide bug reports on STYLY.
https://en.forum.styly.cc/support/discussions