This article summarizes the steps to experience the STYLY scene for each VR/AR(Mobile) / Web Browser
Steps to experience the Scene in VR
If you have Oculus Rift, Rift S, HTC VIVE, Valve Index, or Windows MR
How to experience STYLY with a PC-connected VR headset is described in the following article.

Download page of STYLY VR APP for Steam
https://store.steampowered.com/app/693990/STYLYVR_PLATFORM_FOR_ULTRA_EXPERIENCE/
How to use STYLY VR APP
Please refer to the following article for the menu and usage of STYLY VR APP.
How to launch a Scene from STYLY Gallery
On a PC with the STYLY VR APP for Steam installed, you can launch the Scene of your choice from the STYLY Gallery page.
In the following article, you can learn how to experience VR from the Gallery page.

If you have Meta Quest / Quest2 (formerly : Oculus Quest / Quest2)
You can also experience STYLY with the standalone VR headset Meta Quest / Quest2 (formerly : Oculus Quest / Quest2).
The following article will show you how to experience STYLY on Meta Quest / Quest2 (formerly : Oculus Quest / Quest2).

For those who want to experience the Scene in a web browser
You can also experience STYLY on your web browser.
In addition, the recommended system requirements for experiencing it with a web browser are as follows.
- OS: Windows (64bit), MacOS
- GPU: discrete GPU (NVIDIA, AMD), Intel HD Graphics (4000 and above)
- Memory: 4GB or more, 8GB recommended
- Web browser: Google Chrome
Activate a scene
Select the scene you wish to experience from the STYLY Gallery.
On the screen after selecting, you can choose one of three experience methods (VR / AR=Mobile / Web browser).
To launch the scene in a web browser, click the play button “▷” in the center of the screen.
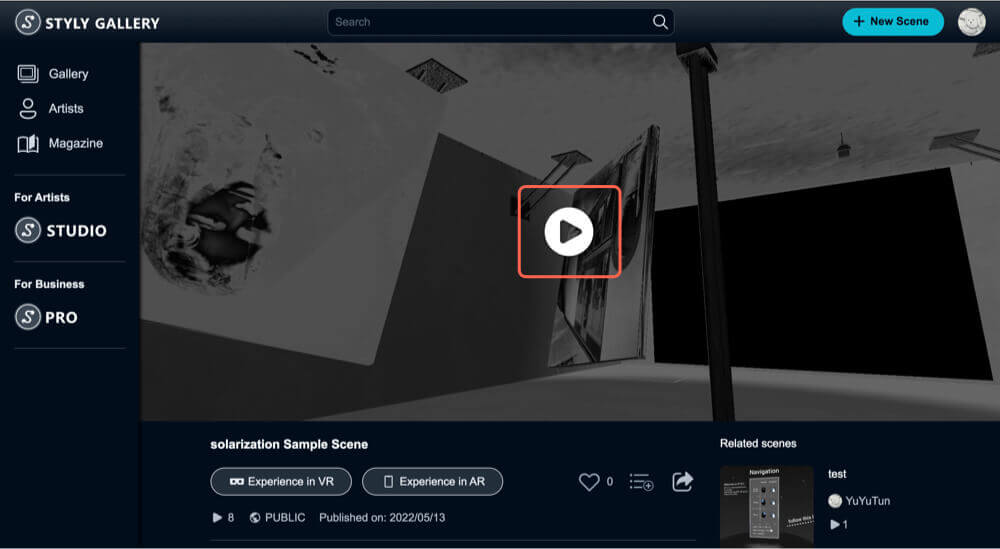
Click the playback button “▷” in the center of the screen
The operating instructions are displayed as the scene is loading. There are two types: keyboard and mouse.
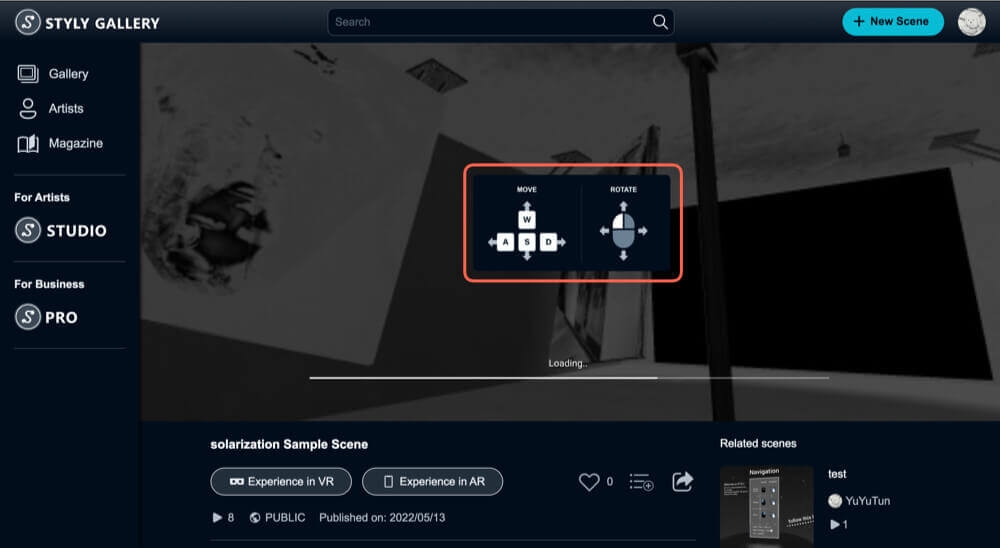
Operation Method
When all loading is complete, the scene is activated.
Operation Method
Mouse (left click + move, right click + move, scroll)
| Mouse | Action |
| Left click + mouse move | Camera rotation |
| Scroll | Zoom in/out |
Keyboard (W,A,S,D,Q,E,C,Z keys and cursor keys)
| Key | Action |
| [W] key / [↑] key | Move forward |
| [A] key / [←] key | Move left |
| [S] key / [↓] key | Move backward |
| [D] key / [→] key | Move right |
| [Q] key | Move down |
| [E] key | Move up |
Also, operating the above buttons while holding down shift will speed up the movement.
Explanation of other screens
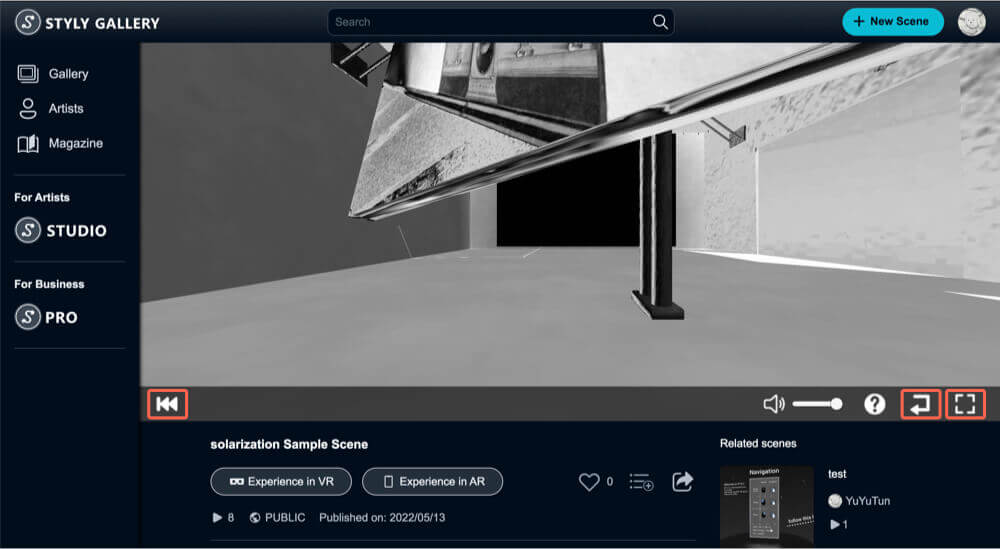
About each button
| Button at the bottom left of the screen | Allows you to reload the scene. |
| Square button at the bottom right of the screen | Full screen mode. |
| Arrow button at the bottom right of the screen | Returns to the position at which the scene was started. |
Those who want to experience VR / AR Scene on Mobile
From the STYLY Mobile app, you can experience STYLY.
In addition, the recommended system requirements for the Mobile app experience are as follows.
- Each AR compatible device = STYLY Mobile compatible device.
- iPhone, iPad: Please refer to the following for official Apple AR compatible devices
- Android devices: Please refer to the following for official Google AR compatible devices
Install STYLY Mobile
STYLY Mobile can be downloaded from AppStore and Google Play.

App Store![]()
Google Play
How to launch Scene in STYLY Mobile
There are three ways to launch Scene in STYLY Mobile.
- Launch it from STYLY Gallery on the app or in a web browser
- Load a STYLY marker
- Click the dedicated link on your phone
If STYLY Mobile is installed on your phone, you can launch the Scene using any of these methods.
If you don’t have STYLY Mobile installed, you will be redirected to the store (app installation page) to install it and launch the Scene using one of the methods.
Launch from STYLY Gallery on the app or in a web browser
STYLY Mobile allows you to search for Scenes within the app.
There are two types of scenes that can be experienced: VR and AR.
In the case of AR, however, after tapping the playback button, you will be taken to the plane detection screen.
In this article, we will describe the operations for experiencing the Scene as AR.
Then, check that the area circled in red in the image below is marked “AR.”

STYLY Mobile Gallery Screen
Tap the Play button at the top of the details screen of the Scene you wish to experience, and you will be taken to the plane detection screen.
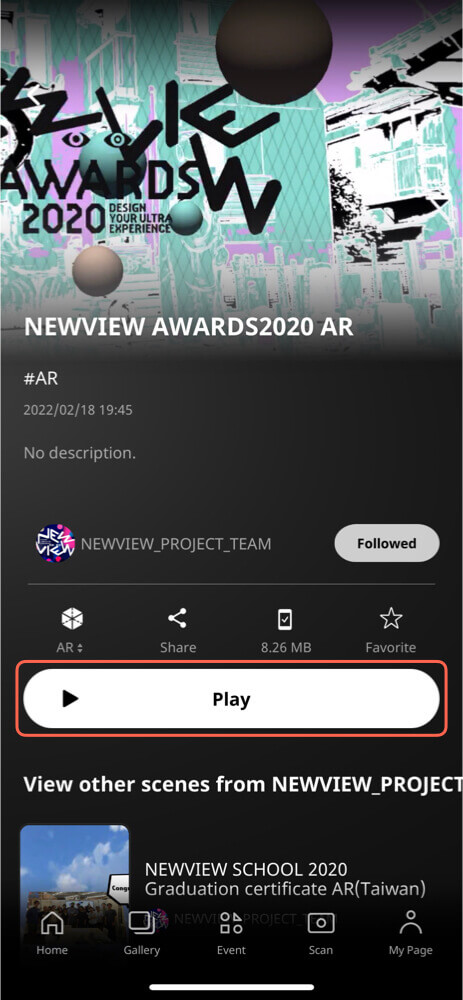
Tap the Play button
Instructions appear on the screen, and you move your smartphone accordingly.
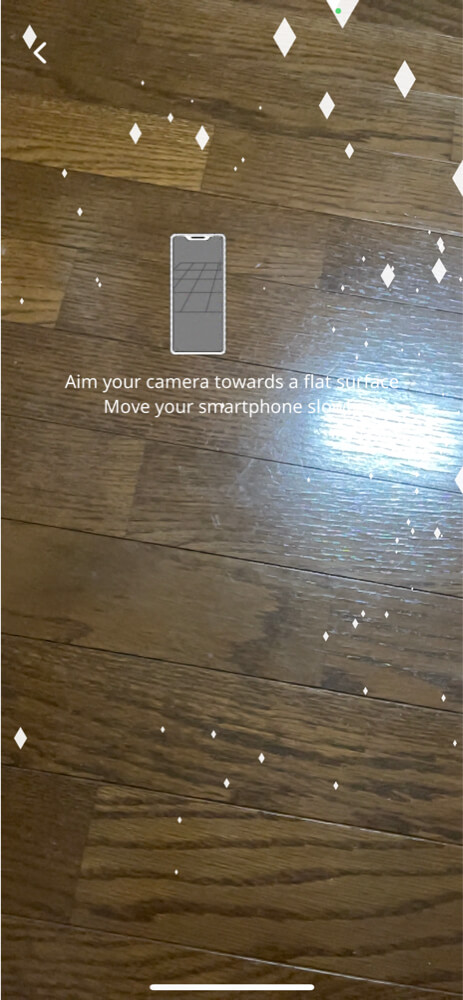
Instruction screen.1
Tap the screen at the location you would like to place the scene.
The scene may look different depending on whether it is displayed on a table or the floor.
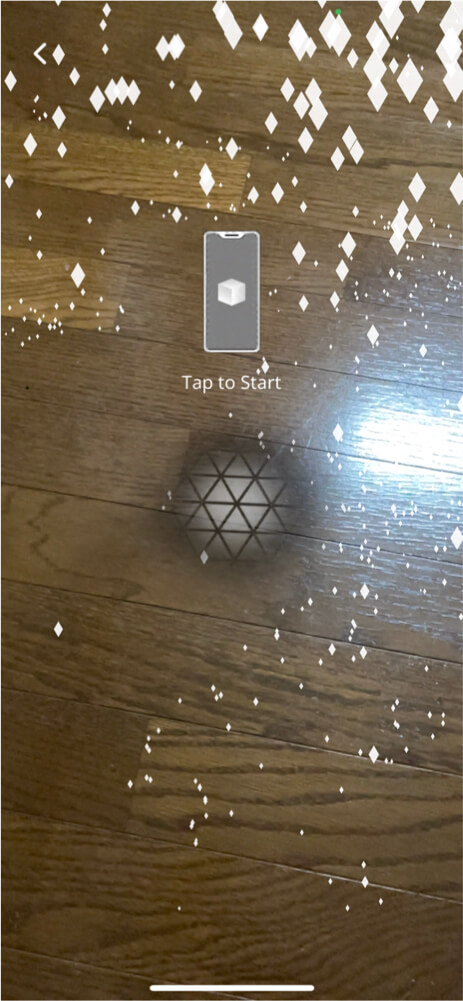
Instruction screen.2
Read STYLY markers
By tapping CAMERA at the bottom of the STYLY Mobile home screen, you can use the function to scan STYLY markers.
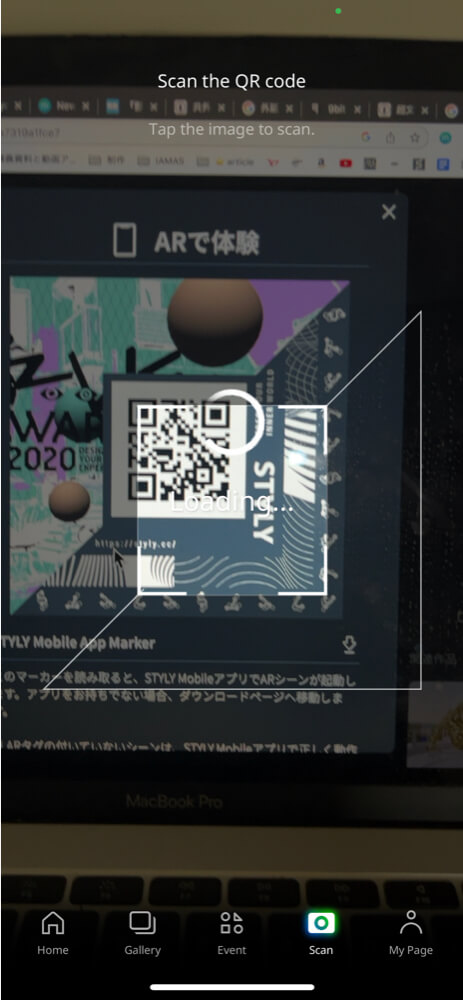
Scanning STYLY markers
If the scan is successful, you will see the following screen. Select “Yes.
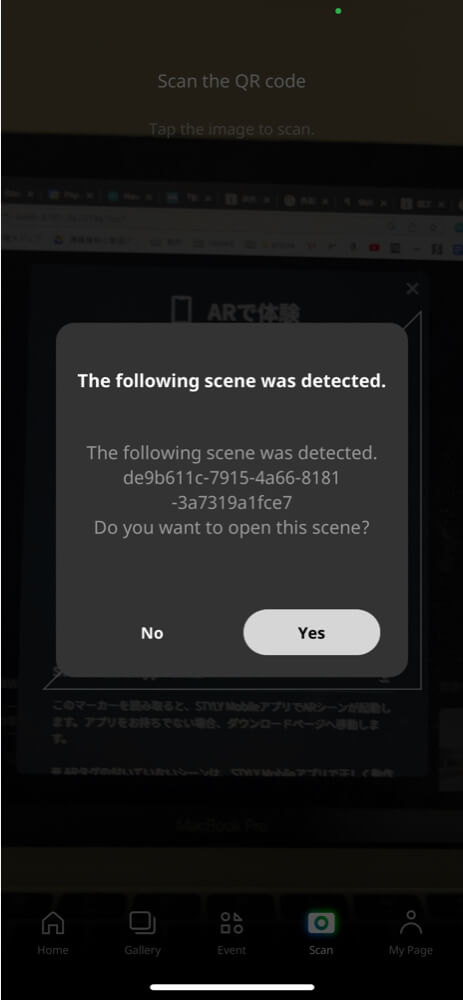
Confirmation screen displayed by scanning the QR code
The operation procedure from this point onward is the same as that described earlier up to plane detection.
Click on the dedicated link with your smartphone

Start from dedicated link
If a dedicated link is provided, click on it with your phone to launch STYLY Mobile and press the Start button to go to the plane detection screen.
How to operate STYLY Mobile’s VR Scene
For details on how to operate STYLY Mobile’s VR Scene, please refer to the following article.
![[STYLY Mobile App] How to Experience VR and AR Scenes on your Smartphone (iPhone/Android)](https://styly.cc/wp-content/uploads/2022/11/google_Feature_JP-160x160.jpg)