This is the second article in the “Creating a Game Using PlayMaker” series, which covers everything from an overview, the installation method, and how to use it, to making a simple game in Unity using PlayMaker.
In the last article, I explained how to install PlayMaker.
![[Unity Tutorial] Creating a Game Using Playmaker ① From Basic Introduction to Installing](https://styly.cc/wp-content/uploads/2019/06/1200px-160x160.jpg)
In this article, I will introduce the basic workflows in PlayMaker.
I will go over everything from workflows that everybody uses to nice-to-know tricks, so if you are a PlayMaker beginner, please refer to this page for more information on how to use it.
Before starting
If you haven’t installed PlayMaker, a plugin for Unity, please refer to the previous article and install it.
I think it will help you understand this article better if you read the following article in advance.
![[Unity] Starting Playmaker from Scratch](https://styly.cc/wp-content/uploads/2019/09/PlaymaerCoreConcept-160x160.png)
How to display the User Interface
You will not see any windows launched by just installing PlayMaker.
Let’s bring up the Editor and the Action Browser.
Show Editor
You can bring it up by selecting PlayMaker Editor from the PlayMaker tab at the top of the screen.
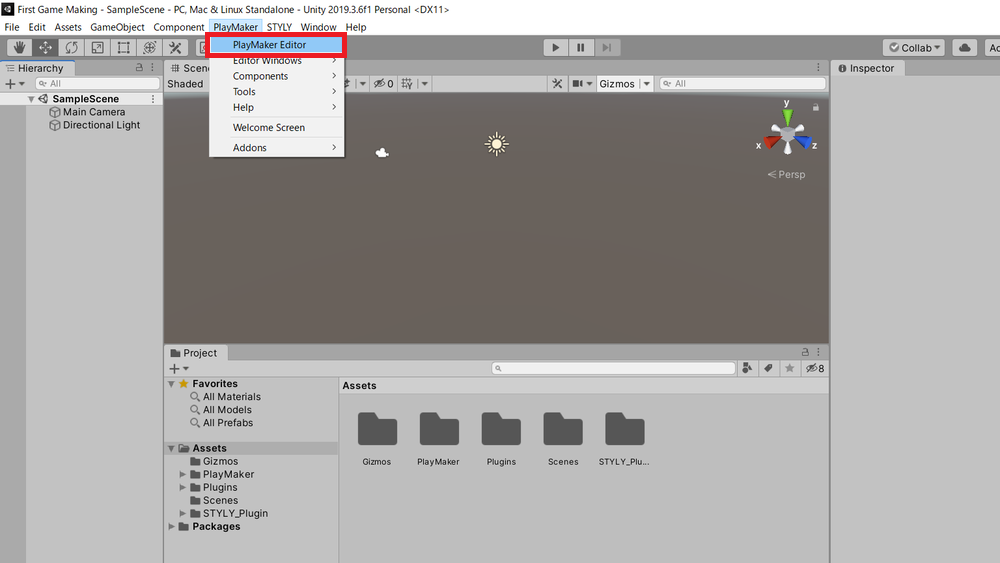
Select “PlayMaker Editor” from the “PlayMaker” tab.
Since it is a frequently used screen, let’s pin it in an easily accessible location.
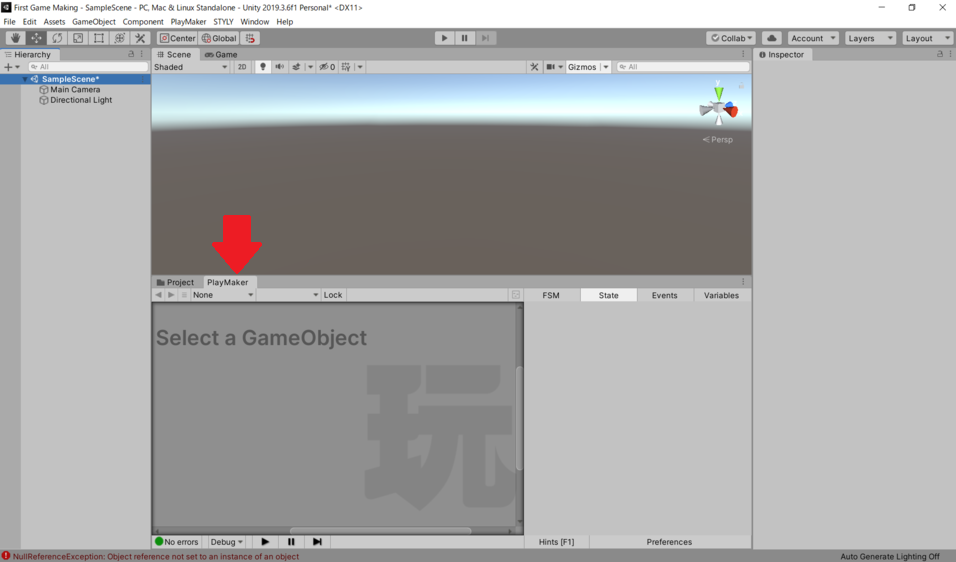
Pin the Editor
Show Action Browser
Select “Action Browser” from “Editor Windows” on the “PlayMaker” tab.
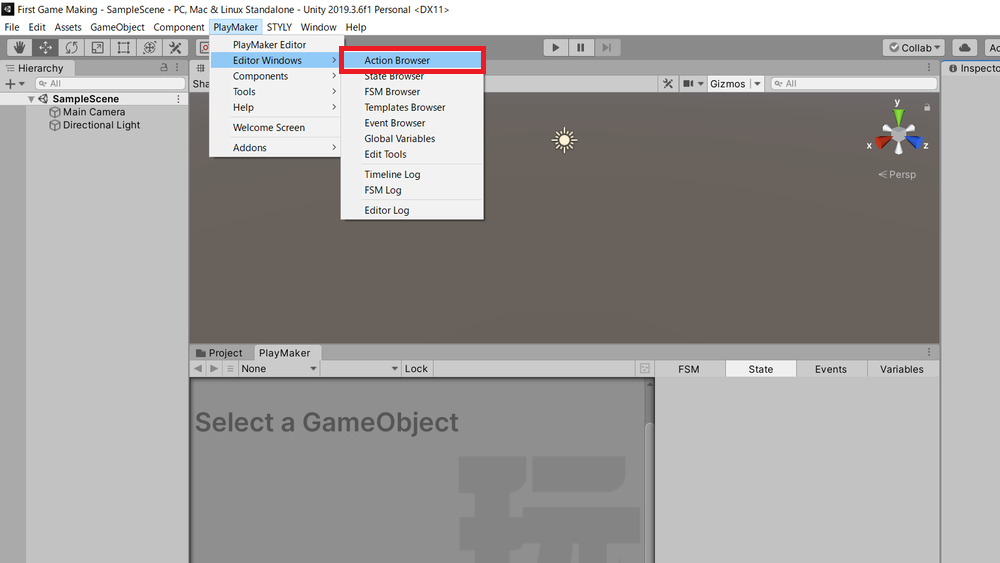
Add the Action Browser from “Editor Windows”
This is also used frequently, so it’s a good idea to also pin it in an easily accessible location.
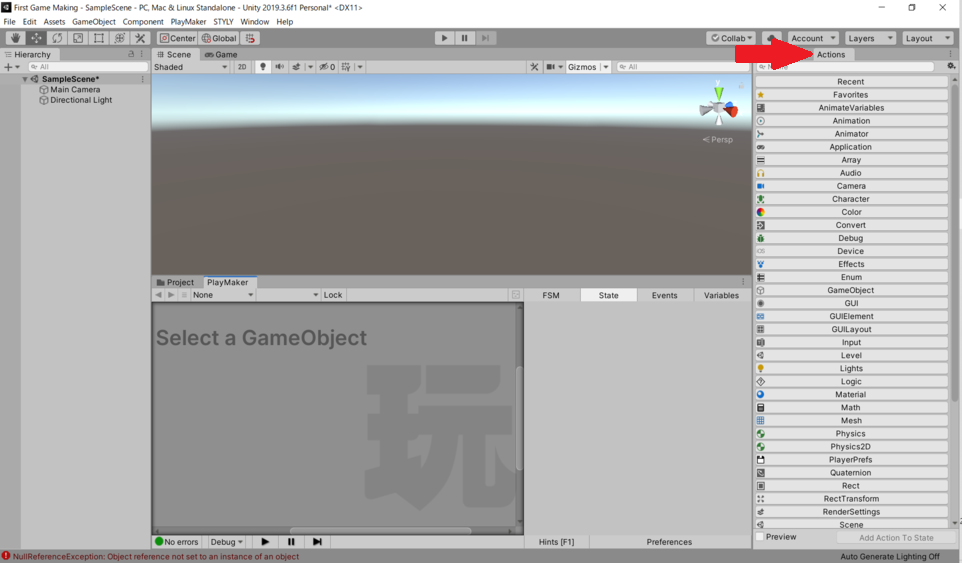
Pin the action window
Basic workflows
Adding a FSM
You can add an FSM by selecting an object and then right-clicking on it in the editor.
In the image, I added a FSM to the Cube.

Adding a FSM to the Cube
FSM deletion
You can remove it by right-clicking on the editor and selecting “Remove FSM Component”.
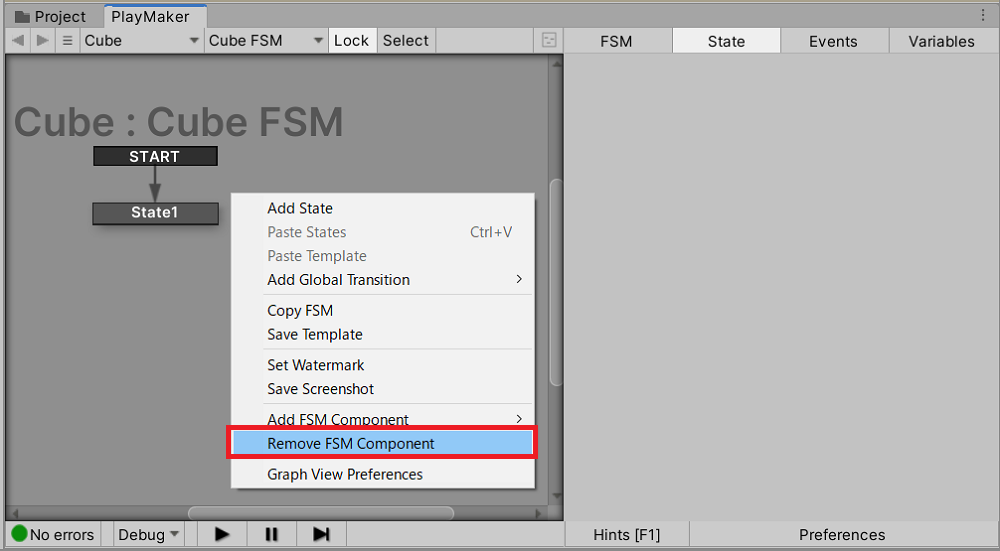
Removing the FSM from an object
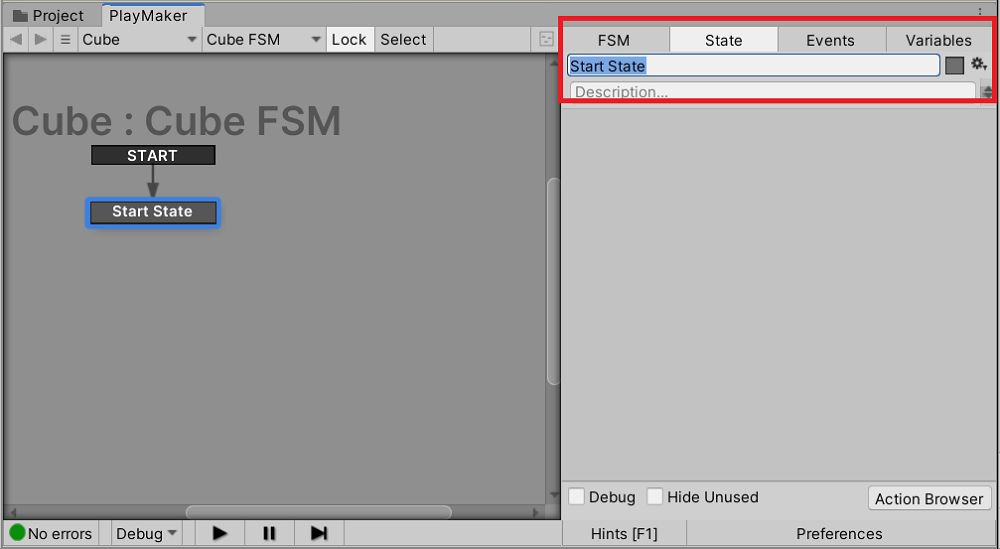
Changing the FSM name
ou can change the name from the “FSM” tab.
Changing the FSM name makes it easier to manage multiple FSMs.
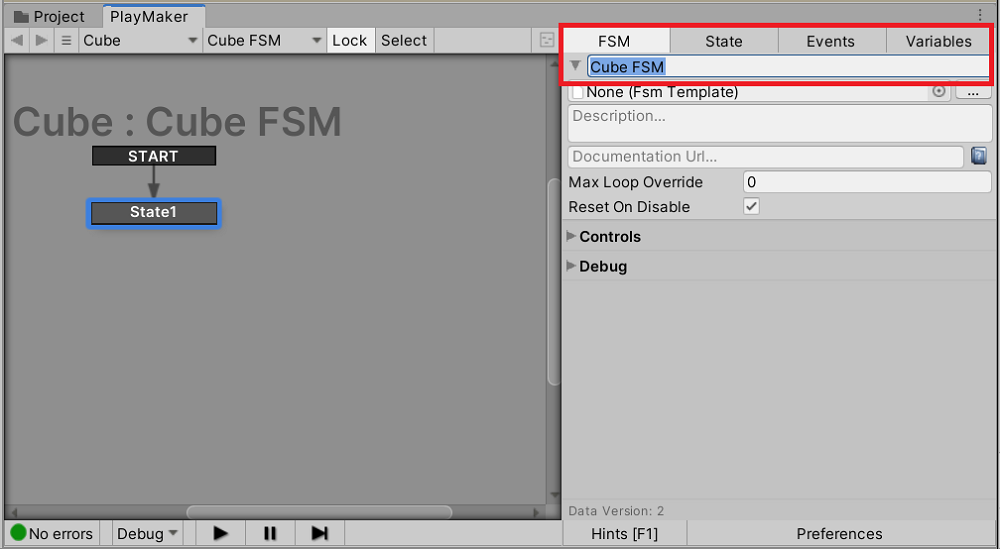
Changing the FSM name
Adding a state
You can add a new state by right-clicking on the editor and selecting “Add State”.
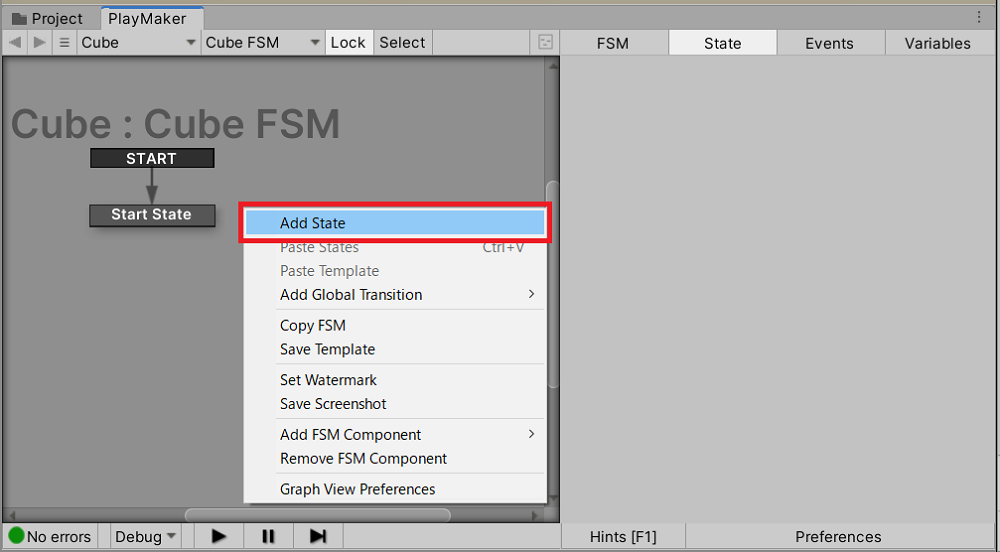
Adding a new state
State deletion
You can delete states by right-clicking on the editor and selecting “Delete States”.
Alternatively, you can also delete it by selecting a state and entering the Delete key.
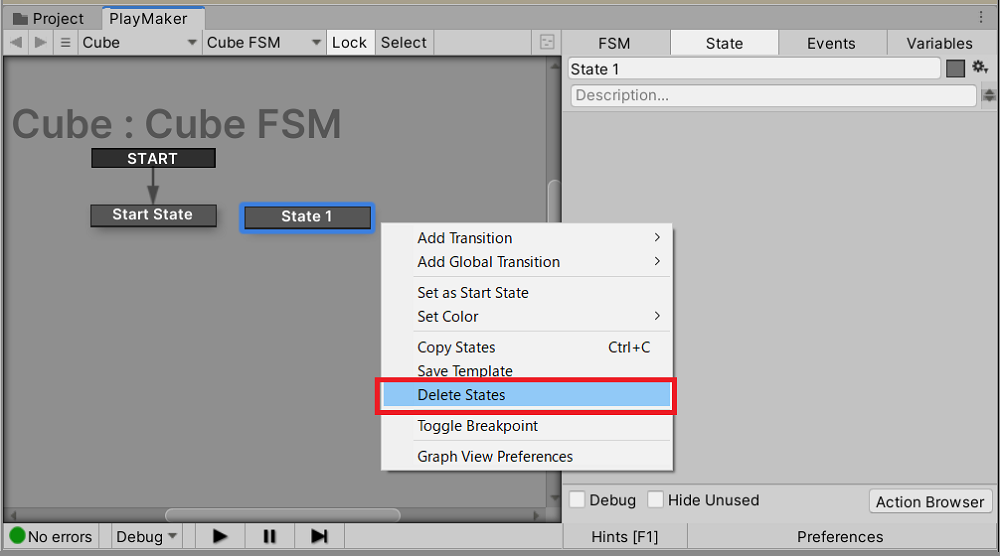
Deleting a state
Changing a state name
You can select a state and rename it from the “States” tab.
Change your state name to something appropriate.
Changing the state name
Copying a state
You can copy states by right-clicking on the editor and selecting “Copy States”.
Alternatively, you can also copy by selecting a state and pressing Ctrl+C.
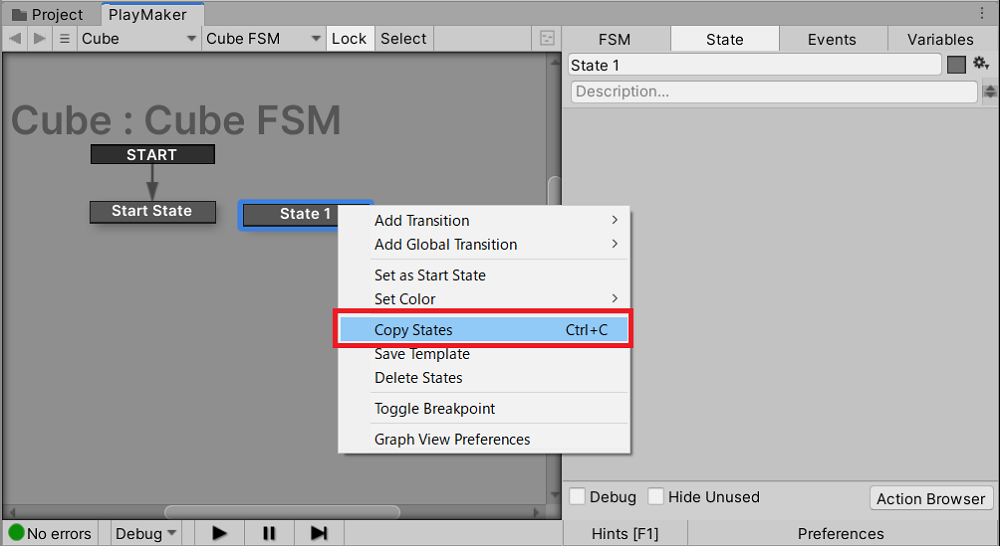
Copying a state
You can then use Ctrl+V to paste the state, which is useful if you want to reuse the state.
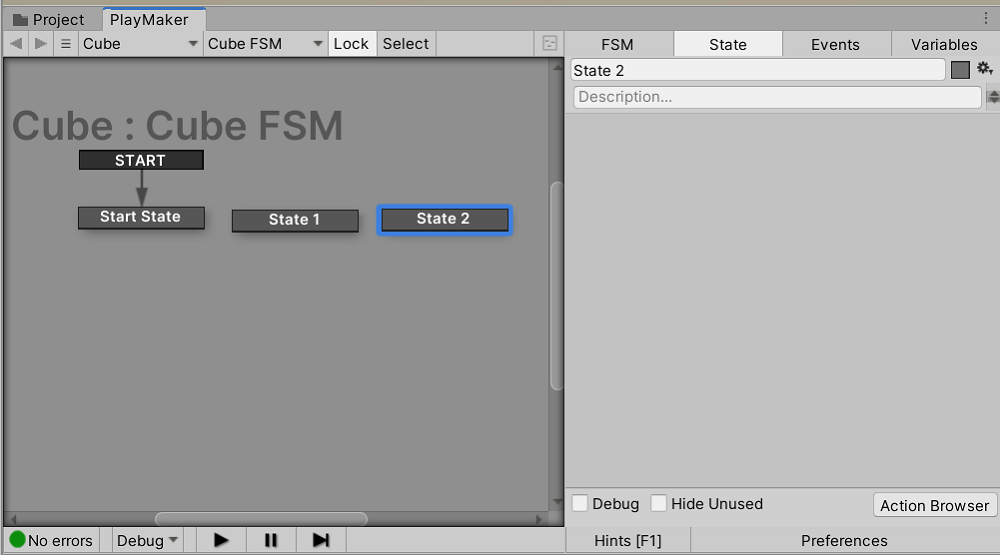
Pasting a state
Search for and add actions
To add an action, search for the action you want to add in this browser.
As shown in the image, the candidate actions will be narrowed down as you type in the action name.
You can read more about the types of actions in PlayMaker in this article.
If you don’t know the name of an action, try to find it here.
![[Playmaker Reference] Action Reverse Lookup List](https://styly.cc/wp-content/uploads/2019/09/df5ecbda-ba63-493c-9d22-5f07389e37a6-160x160.jpg)
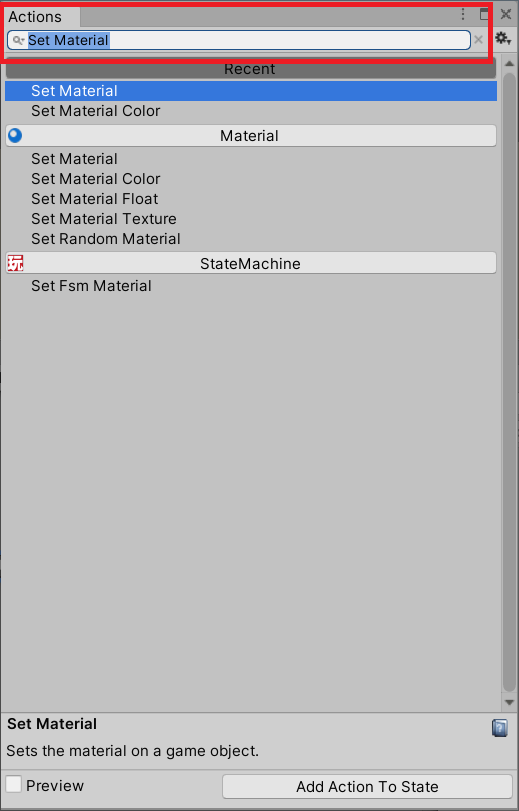
Typing into the Action Browser
You can add an action to the state by double-clicking it or dragging it from the Action Browser.
Drag to add an action
If you want to add actions in succession, it is convenient to deselect the action and then add again, because this way they will keep being added to the bottom.
A tip for adding actions in succession
Reordering of actions
If you want to reorder the actions, you can right-click on the action and select “Move Action To Top” to move it up, or “Move Action To Bottom” to move it down.
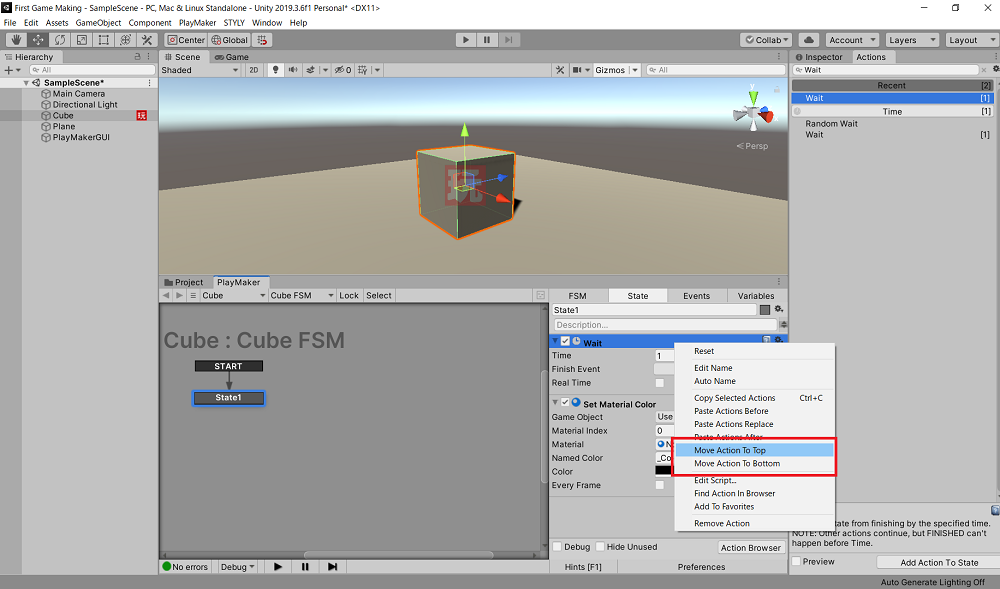
Moving the action up and down
Alternatively, you can drag actions to swap their positions.
Dragging and swapping actions
Deleting an action
If you don’t want an action, you can remove it by right-clicking on the action and selecting “Remove Action”.
Alternatively, you can also delete it by selecting an action and pressing the Delete key.
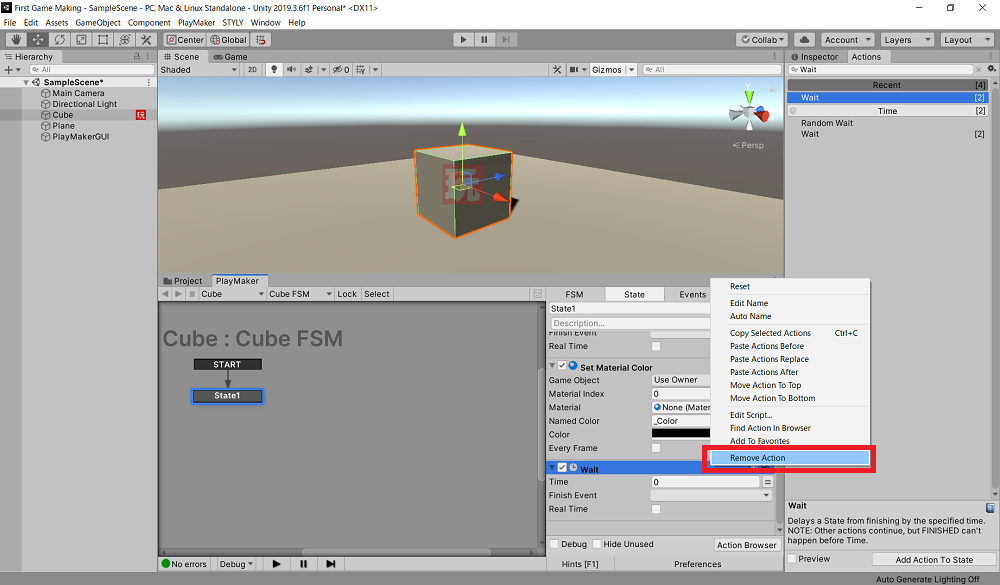
Deleting an action
Disabling an action
You can uncheck the checkbox to the left of the action name to disable it while the scene is playing.
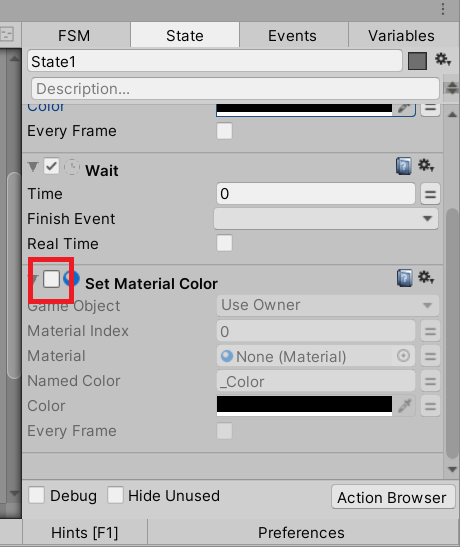
Unchecking the box disables the action
Copying an action
You can copy the action by right-clicking on the action and selecting “Copy Selected Actions”.
Alternatively, you can select an action and press Ctrl+C to copy it.
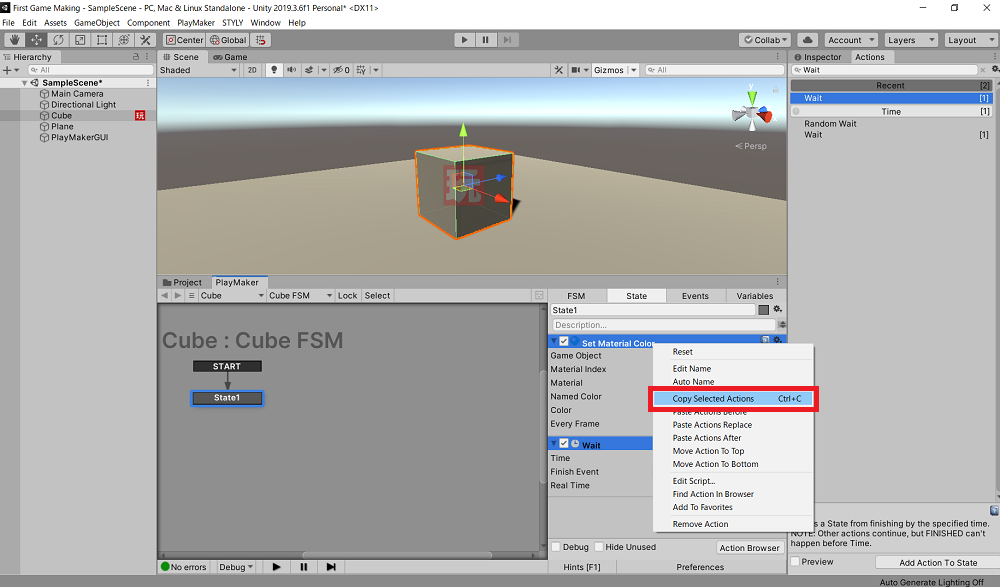
Copying the selected action
Adding an event
Right-click on the state and select Add Transition to select the event you want to add.
In the image, the FINISHED event is selected.
Note that the FINISHED event is an event that occurs when all actions in the state have been completed.
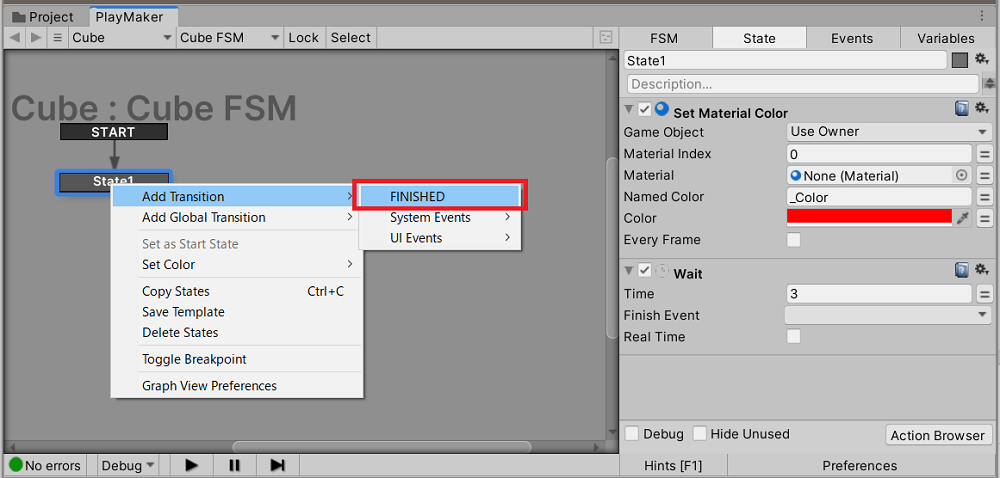
Setting an event to a state
Deleting an Event
If you have an unwanted event, you can remove it by right-clicking on it and selecting “Delete Transition”.
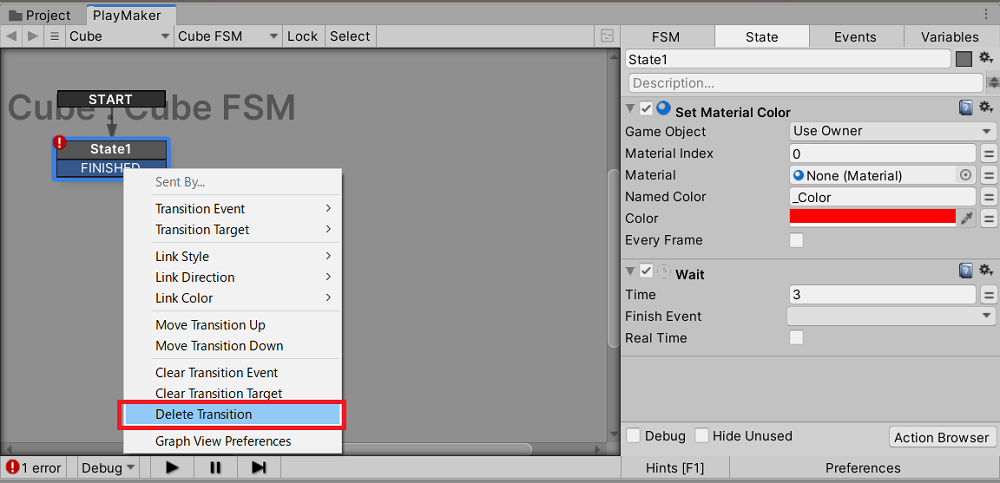
Deleting an event
How to connect transitions
Dragging from an event to another state will lead to a transition.

Dragging to connect transitions
Deleting transitions
If there are any unwanted transitions, you can remove them by right-clicking on the event and selecting “Clear Transition Target”.
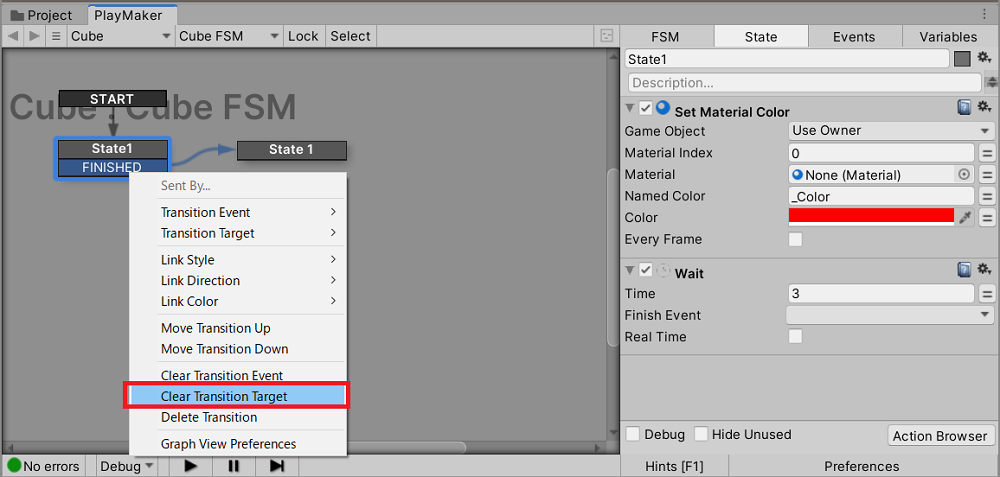
Deleting transitions
Other
Error Indicators
In PlayMaker, you will see a red “!” displayed where there is an error.
The number of errors is displayed at the bottom left of the editor, so refer to this when looking for errors.
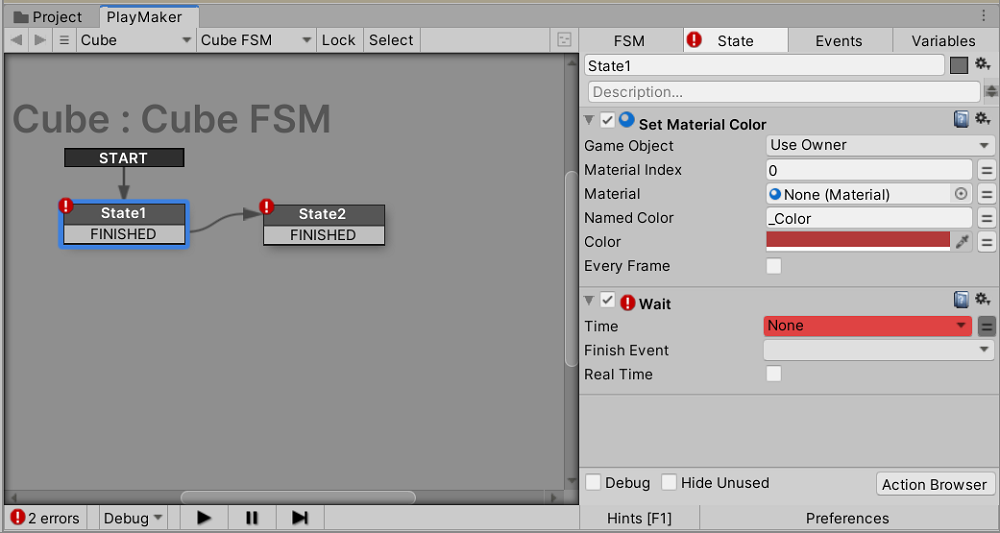
A red “!” indicates the location of the error
FSM confirmation during scene playback
If you view the editor while the scene is playing, the states and actions will turn green to match what is occurring in the scene.
It’s very useful because you can understand what is happening in the scene at the moment.
In the image, when the cube is red, State 1 changes to green, and when it is blue, State 2 changes to green.
The state changes to green according to the scene
Fixing the display of the FSM
When you select an object, the PlayMaker editor switches accordingly.
To stop it from switching, press the Lock button at the top of the editor.
This comes in handy when you have multiple objects.
Use the Lock button to lock the editor
Changing the Start State
The FSM has a state called the Start State.
To change this state later on, right-click on the state you want to make the Start State and select “Set as Start State”.
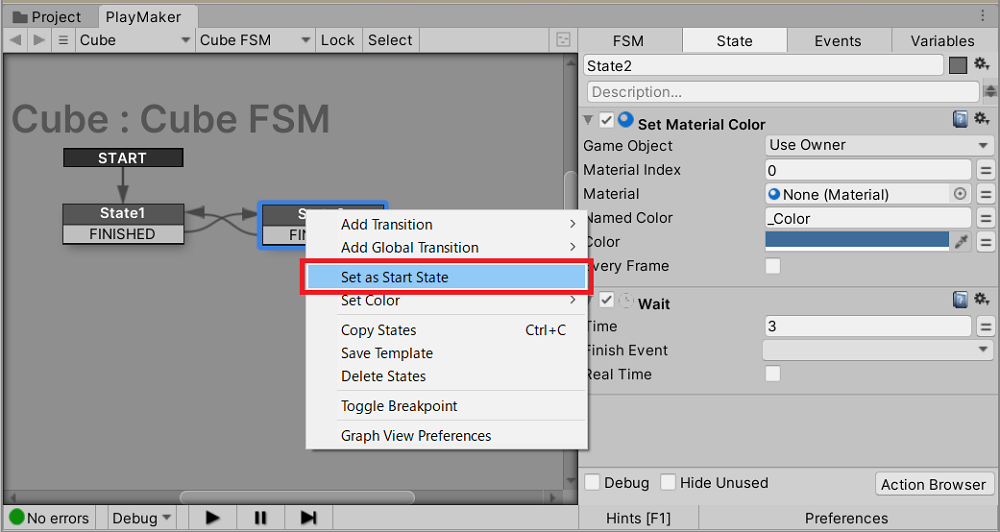
Changing the Start State
After selection, the Start State has been changed to State2.
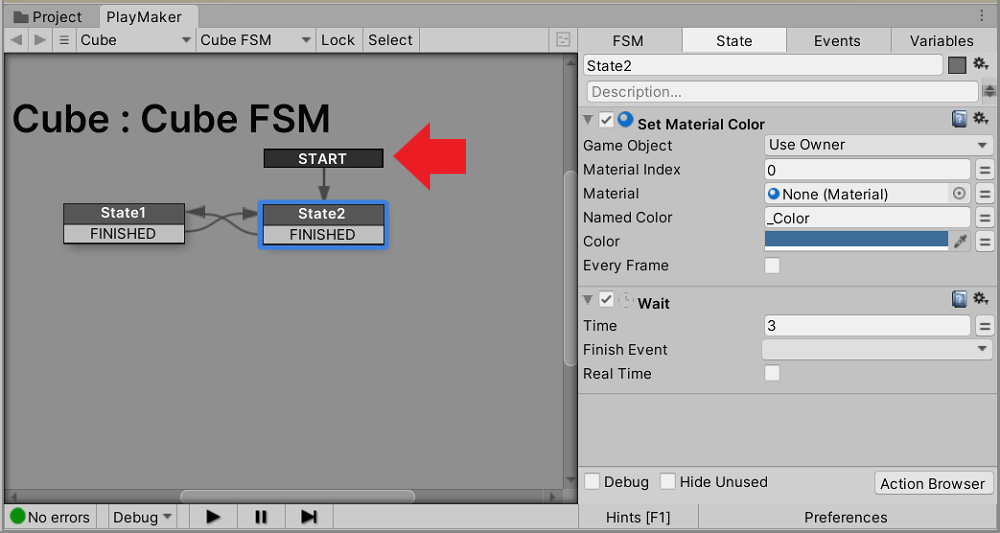
Start State has been changed to State2
Changing the look of the FSM
The color and shape of the states and the transition arrows can be changed.
Try changing them when the FSM gets complicated.
Changing the color of a state
Select the “State” tab and click on the square in the upper right corner of the screen to change the color.

Change the color by clicking the square in the upper right corner of the screen
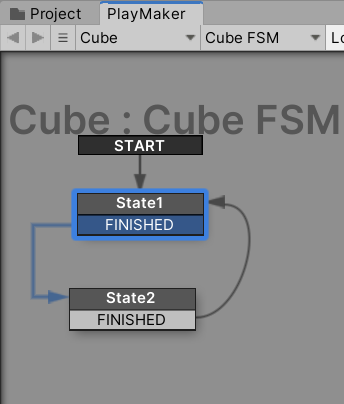
Changing the appearance of transitions
If you right-click on an event, you’ll find options for “Link Style”, “Link Direction”, and “Link Color”.
You can change the look of the transition from here. This article will present some of these options.
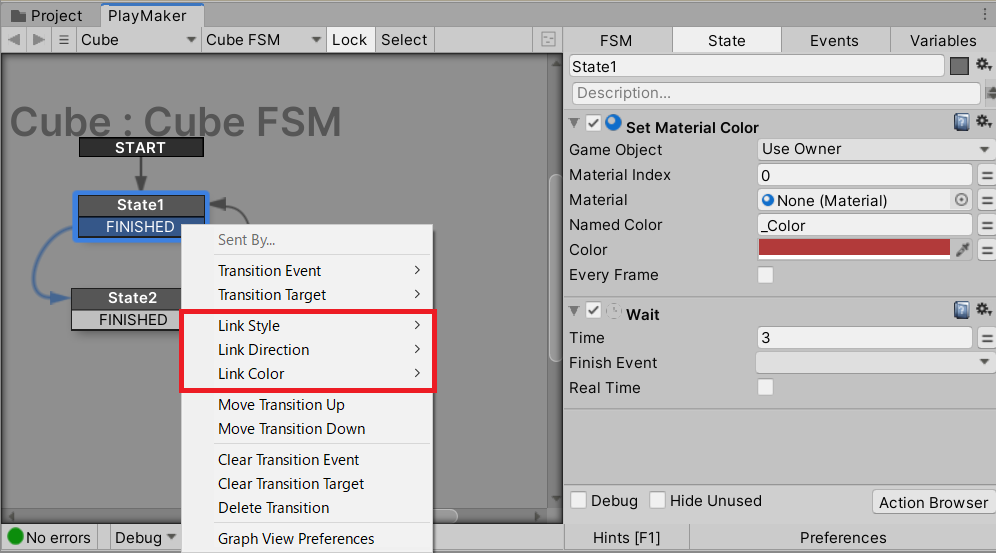
Right-click on an event to change the look of the transition
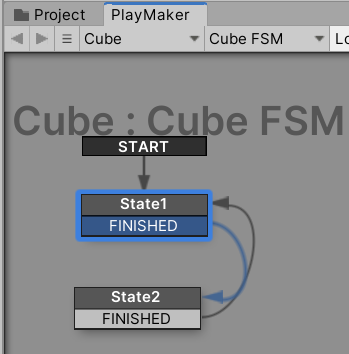
If you select “Link Style > Circuit”, the transition line changes from a curve into straight lines.
If you select “Link Direction > Lock to Right”, the transition arrow is locked to the right.
You may not use this option often, as it is usually auto-adjusted by the state position.
Changing the position of the transition
Select Link Color > Blue to change the color of the transition lines.
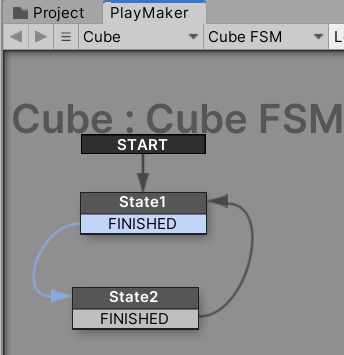
Changing the color of the transition line
In Conclusion
This covers the basic workflows of PlayMaker.
After you’ve learned the basics, next time let’s actually make a game using PlayMaker!
Related Articles
You can do a reverse look-up for an action based on the intended use case.
Here are some tips on how to use PlayMaker that we weren’t able to introduce this time.
This is a collection of articles related to PlayMaker that have appeared in STYLY Magazine.
